Modding Case Study: Grroott's Solitude (Part 1 - Getting Started, Mod Cleaning, Navmesh Repair)

Entry posted by gregaaz in Modding Case Study: Grroott's Solitude
1795 views
Hi everyone, and welcome to our second Modding Case Study (formerly known as "Mod Cleanup Case Studies"). I changed the name because the emphasis will be as much if not more on integration than on corrective action. This time we will be reviewing Grroott's Solitude, which adds additional streets and buildings to the city. When I pre-screened this mod, I was expecting a lot of problems integrating Legacy of the Dragonborn, but the author has subsequently produced a patch, which is good.
Basic Principles
If you followed my previous case study, you know I subscribe to a principle of zero trust when it comes to mods. What does this mean?
- Any time I introduce a mod into my load order, I assume the mod has problems with it until I've completely reviewed it. I don't "blind install" anything more complicated than simple texture replacers.
- I review all asset conflicts, including things like scripts. When scripts are in conflict, I patch them.
- I check every plugin for errors in xEdit, and if I find any I fix them before proceeding.
- I review every plugin for deletions or Identical-To-Master (ITM) records. I Undelete-and-Disable (UDR) any deletions I find, and unless I can see reason an ITM is in a file, I remove it. I do not put any credence in authors claims that ITMs are intentional unless they provide a clear explanation of why and I can verify it.
- I clean all navmesh edge links.
- I review every file for conflicts. With certain narrow exceptions, I manually patch all conflicts, including conflicts in navmesh data.
In general, I'm picky about what automated tools I use. I try to avoid "one size fits all" solutions like Wrye Bash, not because they are bad (in fact, they're dramatically better than not patching at all) but because it's impossible for their algorithms to assess every possible mod combination, and in my experience they either don't consistently patch things in the way that best promotes compatibility, or they contain logical assumptions that reflects their authors' preferences and biases. It's a bit more time consuming to do the conflict resolution manually, but it gives much more consistent results.
We'll be applying these principles to integrating Grroott's Solitude.
Getting Started
The first step is downloading the mod itself and its patch. We'll do this using the "Mod Manager Download" function on the Nexus to send the files to Mod Organizer 2. I'll be using MO2 throughout this series and I recommend it for large load order modding. I've tried Vortex, and while I'll happily concede that it's an acceptable product, it didn't meet my needs and I don't use it anymore.
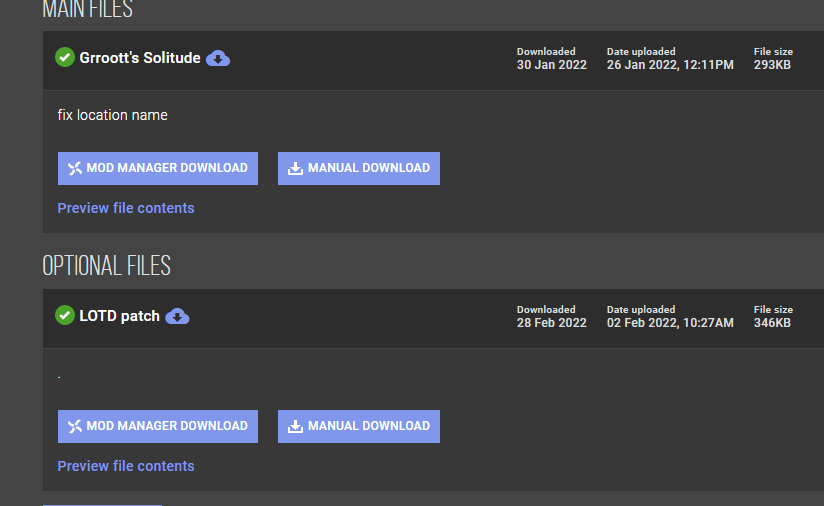
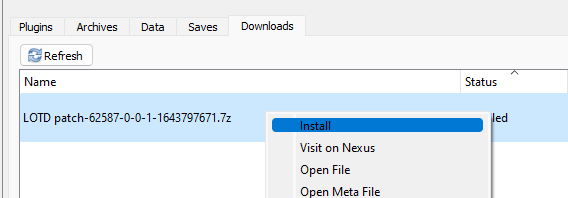
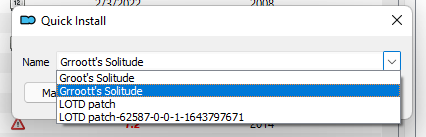
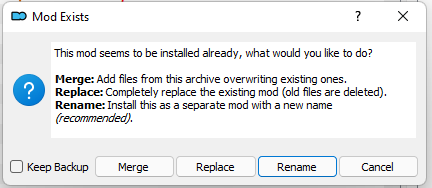
Once the files are downloaded, we'll go to the Downloads tab on the right side of the MO2 main window and install each file. The first thing to install is the main mod, followed by the patch. When installing the patch, either install it as a separate line item (use the drop-down menu and/or the data entry line to change its name) or merge it with the main Grroott's Skyrim line item. For a relatively circumscribed patch like this, either is fine. For larger patches or add-ons, it's usually better to give them their own line items for better version control.
Initial Conflict Resolution
The first thing we want to look at are any potential conflicts involving assets. To do this, we'll activate the mod in MO2 and look at the "information" menu.
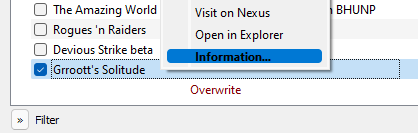
The information menu contains a number of useful data points, but today we are looking for the conflict tab. As you can see, this mod doesn't have any conflicting files. In fact, this mod only contains a single plugin - no other assets.
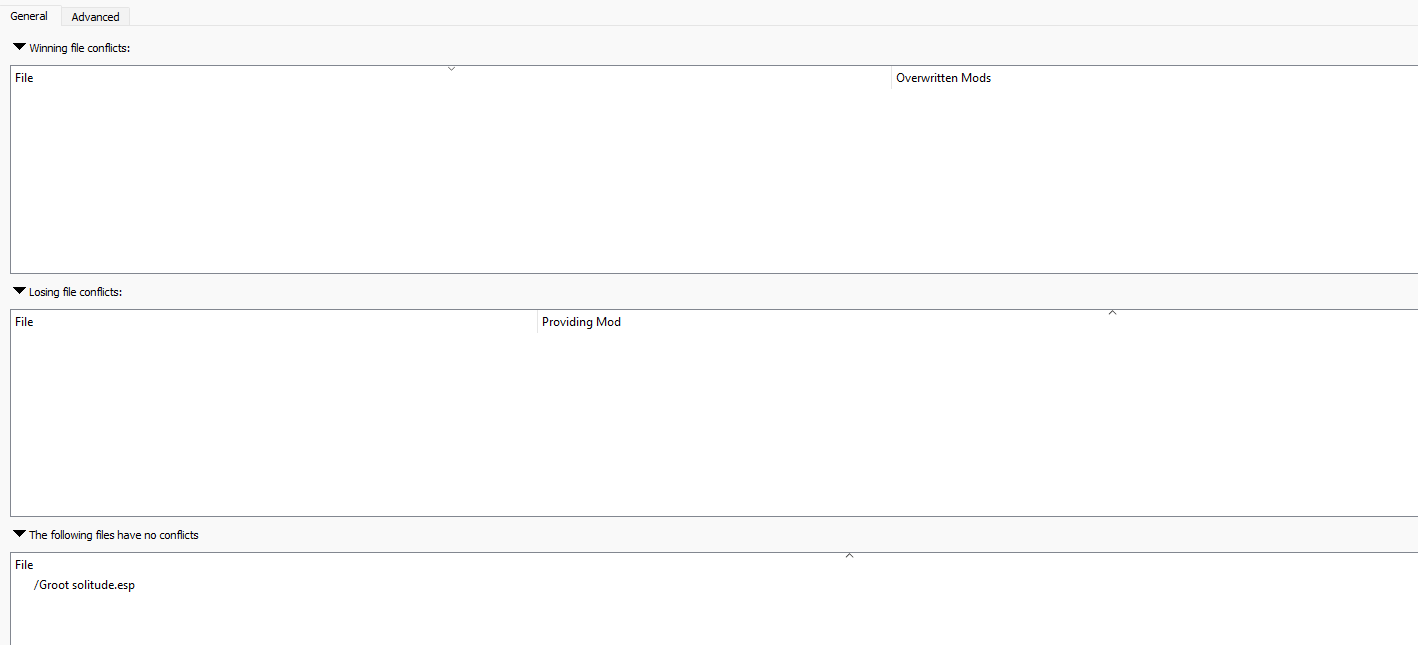
This is an interesting state of affairs that, ideally, should simplify our integration effort. However, we need to be aware that this means the mod relies entirely on vanilla assets. Consequently, mesh or texture replacers are going to be very relevant to what we see her. We should expect to see at least some small sizing or positional issues related to the presence of asset replacers. This of course isn't the author's fault - there's no way Grroott can predict what we have in our load order after all. Nevertheless, we now know we need to watch for these issues going forward.
Load Order
If you patch all your conflicts, load order only matters in a few specific situations:
- Plugins need to come after all their master files
- Plugins need to come before any conflict resolution patches
-
Plugins with a matching BSA archive rely on load order to decide conflict winners
- This only applies to situations where two or more BSA files are trying to supply the same file and there are no loose files competing for load priority. This is because loose files always win conflicts with archived files.
Since this mod does not contain a BSA archive, the only thing we need to do is put it after its masters and before the CR patches. We'll move the plugin to a position just before the CR stack.
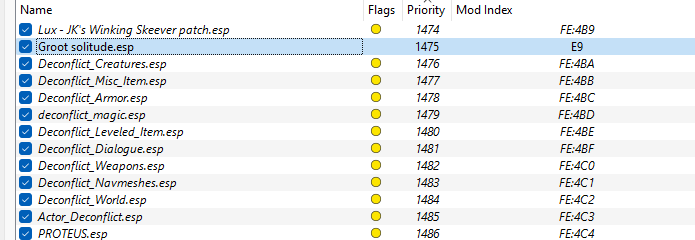
You might be wondering why I have so many conflict resolution patches. I've set things up this way to slow down how quickly the master register for the patches fills up. Each plugin can have up to 256 masters, and with 1400+ mods in my load order, it's possible to quickly approach this limit. Indeed, even broken up as you see here, I have some patches that are at 220 or more masters already. Eventually, you'll see this list grow as I find myself with no choice but to set up second and subsequent patches as I hit the limit.
First Look at the Plugin
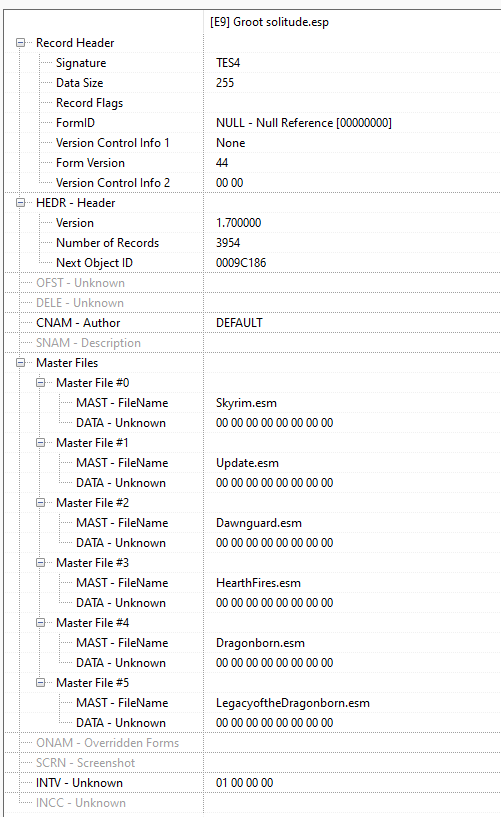
Now that we've checked for asset issues and put the mod in load order, we're going to open it up in SSEEdit (the SSE branch of xEdit) and look at the mod's internal structure. First we'll look at the file header and right away we can see some relevant data points: this is Form 44 ESP plugin with 3,954 records. Consequently, we know this mod isn't eligible for immediate ESL flagging, but it's small enough that we can probably break it into two different files and flag them. This will be more or less the last thing we do, so no need to do anything with that yet.
Next we want to check for errors. There's an automated function in xEdit that can deliver an error report, and we'll start with that.


As you can see, we do have some errors in the file. While it's problematic, the REFR error will sort itself out when we clean deletions in the next step. Tint layers, fortunately, are generally benign and its the kind of thing that we can ignore as long as we don't observe problems in game with these actors facegen. Fixing this would require figuring out which tint index the bad entry was supposed to reference, and that's a level of investigation that I only think is warranted if I find problems in game.
So we've reviewed the errors. Now let's look at the cleaning report. We know the mod has at least one dirty entry from that odd deletion with an editor ID. As an aside, if you want to follow this step you need to do a couple of things.
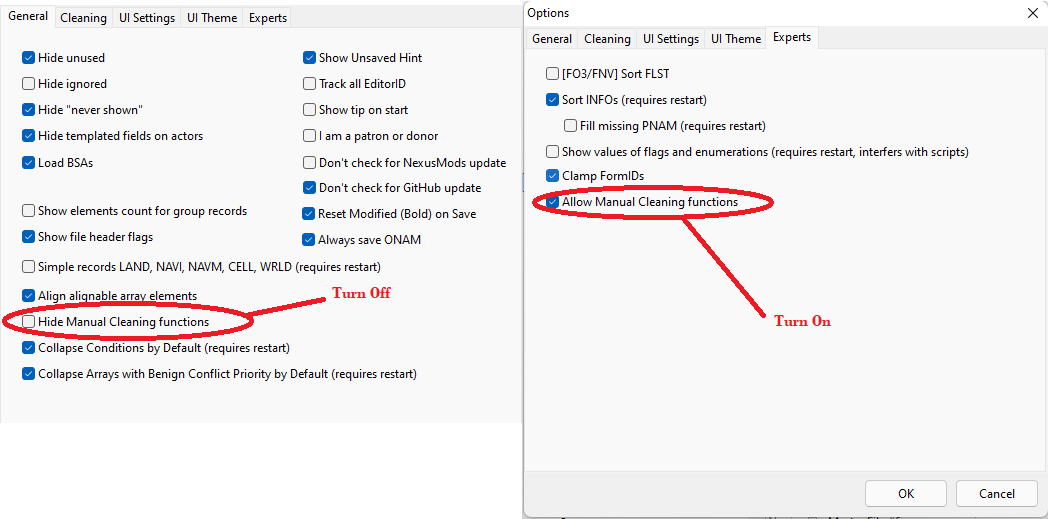
First, in MO2 you need to add a specific argument to the SSEEdit executable, as shown below:

This will enable some additional options in the SSE Edit menus. As illustrated below, two different settings need to be checked in order to enable manual cleaning.
With that done, let's prepare the file for cleaning. Since we have a large load order, we are going to choose the 'filter specific files only' version of the cleaning filter and in this case only choose Grroott's Soliude.

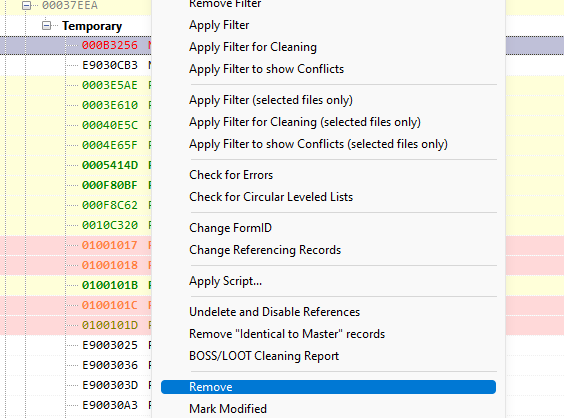
With that done, our view on the left side will compact down to just show our plugin, since all the other files were excluded. Once that's done, there are two functions we want to run from the context menu: Undelete and Disable References, Remove ITM Records.


Both of these functions are important for different reasons. The UDR function addresses a major engine level bug that can cause CTD when two different mods try to edit the same record. If the losing record is deleted, but the winning one is not, the game will crash while processing the record. ITM records can unwittingly undo changes made by other mods - this can be as harmless as minor visual issues all the way up to important records losing persistence flags, globals getting reset to vanilla values, or script properties breaking.
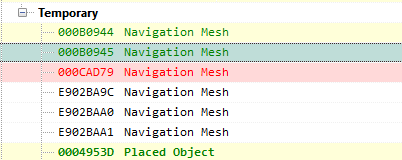
The cleaning report came back with significant findings. This file contains 198 deletions, 7 deleted navmeshes (a more significant issue), and 135 ITMs. We can fix the conventional deletions and the ITMs automatically, but the 7 deleted navmeshes are something we have to address manually.
Skipping: [NAVM:000B3256] (in GRUP Cell Temporary Children of SolitudeAvenues [CELL:00037EEA] (in SolitudeWorld "Solitude" [WRLD:00037EDF] at -14,26))
Skipping: [NAVM:000B0944] (in GRUP Cell Temporary Children of SolitudeOrigin [CELL:00037EE9] (in SolitudeWorld "Solitude" [WRLD:00037EDF] at -16,25))
Skipping: [NAVM:000B0945] (in GRUP Cell Temporary Children of SolitudeOrigin [CELL:00037EE9] (in SolitudeWorld "Solitude" [WRLD:00037EDF] at -16,25))
Skipping: [NAVM:000CAD79] (in GRUP Cell Temporary Children of SolitudeOrigin [CELL:00037EE9] (in SolitudeWorld "Solitude" [WRLD:00037EDF] at -16,25))
Skipping: [NAVM:000C34B8] (in GRUP Cell Temporary Children of SolitudeArch [CELL:00037EE7] (in SolitudeWorld "Solitude" [WRLD:00037EDF] at -15,25))
Skipping: [NAVM:000F7190] (in GRUP Cell Temporary Children of SolitudeArch [CELL:00037EE7] (in SolitudeWorld "Solitude" [WRLD:00037EDF] at -15,25))
Skipping: [NAVM:00105E9F] (in GRUP Cell Temporary Children of SolitudeExterior01 [CELL:0000927B] (in Tamriel "Skyrim" [WRLD:0000003C] at -17,25))
Navmesh Repair
Broken navmesh records are a major problem that can cause a wide variety of serious problems in the game and they require immediate attention. Unfortunately, the main source of these errors is the Creation Kit itself. In general, deleted navmeshes fall into two categories:
- The creation kit deletes a navmesh and puts edits the author made into a new almost-identical navmesh
- The mod author removed all the triangles in a navmesh and the creation kit marked it as deleted
Each of these situations has a different solution for fixing it. Let's see what we have in this mod.
The first navmesh appears to be the first type of deletion. You can see by looking at the door links that the new (E9 form ID) mesh is a replacement for the vanilla one.

To fix this problem, we need to remove the deleted navmesh record from Groot solitude.esp entirely, then change the form ID of the replacement to match.

The next three deletions are all the same scenario, and we'll fix them the same way.

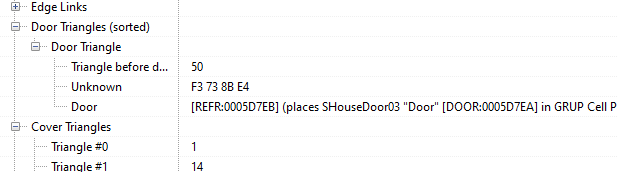
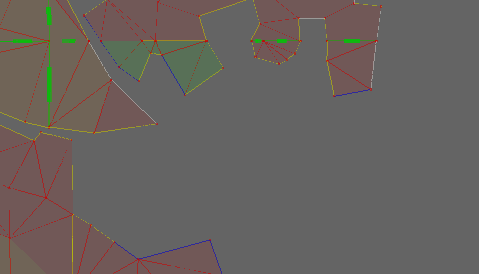
The last block of deletions is a little trickier because it's not exclusively replacements, so we need to look at the navmesh data a little more carefully - mostly just by comparing edge link data. For example, with F7190 we can see that we're expecting to see these linkages to and from B3252 below:
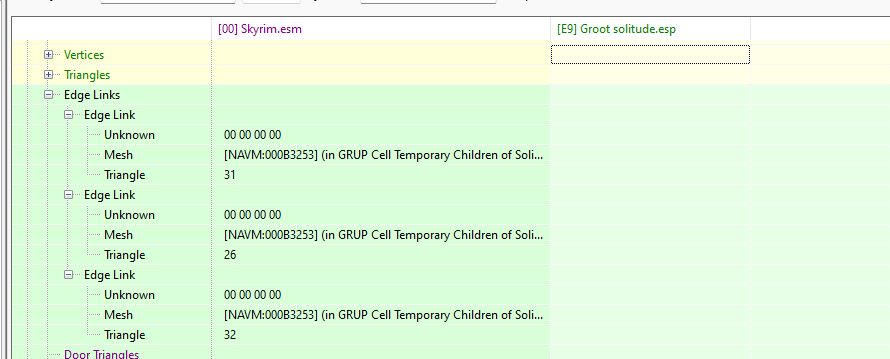
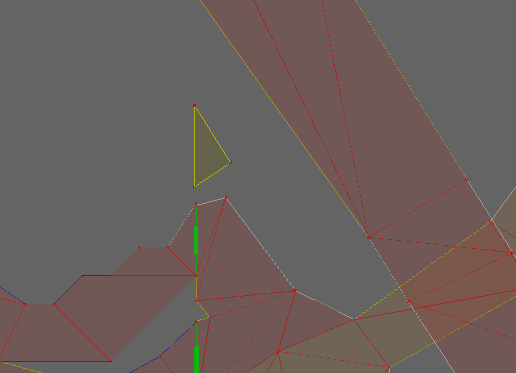
Curiously, these linkages have been removed from the matching mesh and not replaced with anything else. F7190 may in fact be one of the "type 2" deletions. Let's look at it in the CK. F7190 is the green section you can see below.

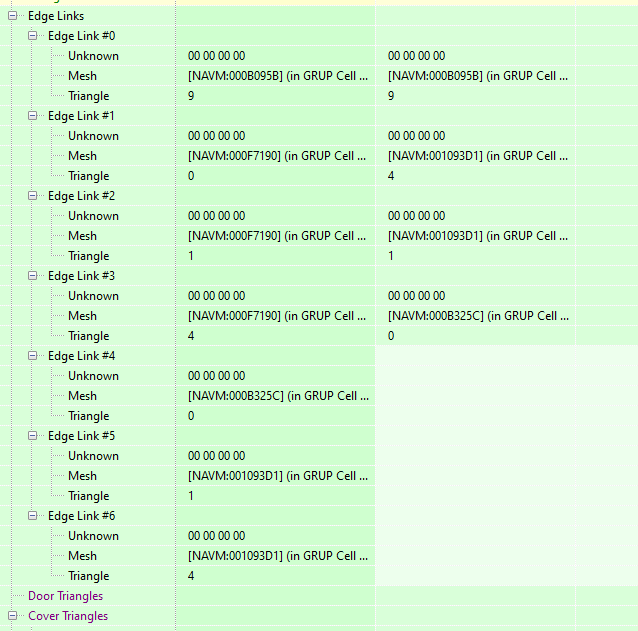
We need to compare this to the modded navmesh, but it does indeed look like this might be a type 2 deletion. Note that from left to right the other little islands are B325E, 1093d1, and B325C, none of which are deleted in the modded file - so we don't need to worry about those for now.
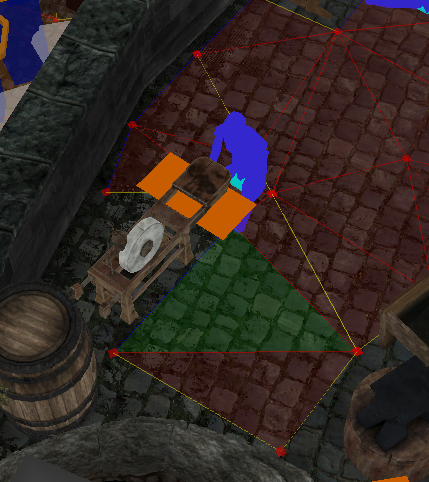
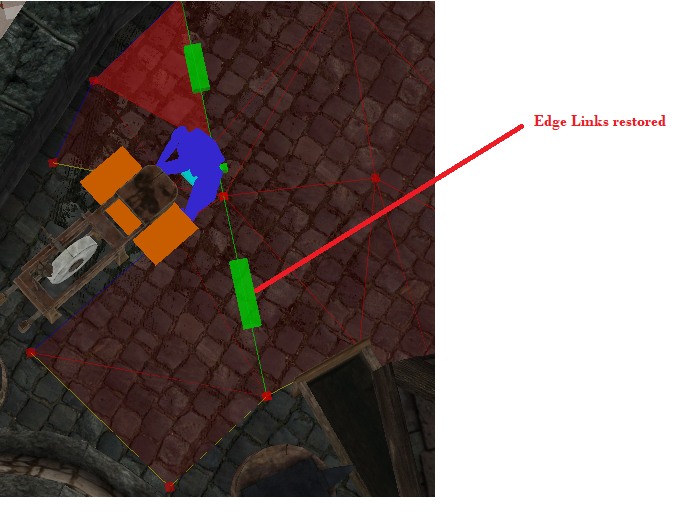
The highlighted navmesh is xx0789BB. So do you see the problem here? This is actually a type 1 deletion, but for unknown reason the navmesh edge links were removed. Adding insult to injury, this is an important piece of mesh - packages that tell an actor to try and use this station could crash out because of pathfinding faults. So we need to first re-finalizing this mesh in the CK, then we need to fix it as if it was a type 1 deletion.
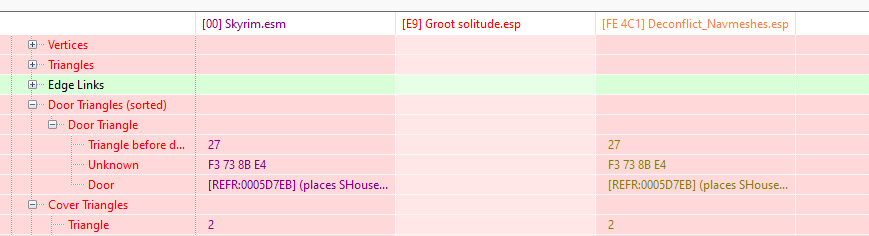
In the course of researching this one, I also determined that the C34B8 deletion was a type 1 and I found its replacement. That's been fixed. So all we have left to track down is 105E9F. This one deletes some door links, so let's backtrack them to their new pointers.
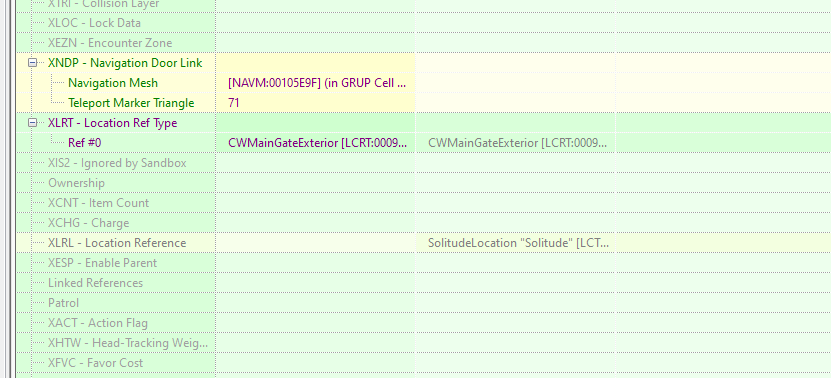
Well... that's interesting. And not great. But this may be an indicator that this is a type 1 with missing edge links. We'll have to go back into the CK to look at SolitudeExterior01 so we can find and fix the offender. This big avenue (basically the space between the outer and inner gates) is 105E9F.
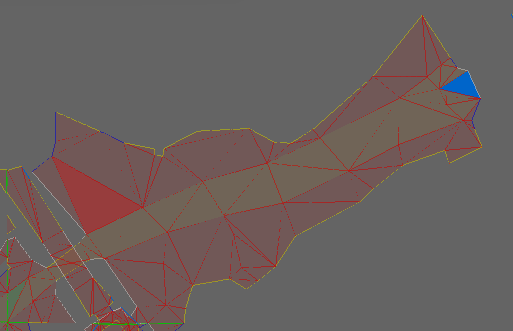
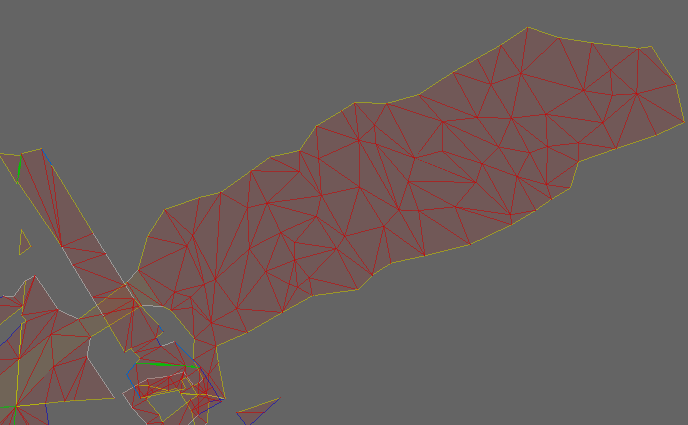
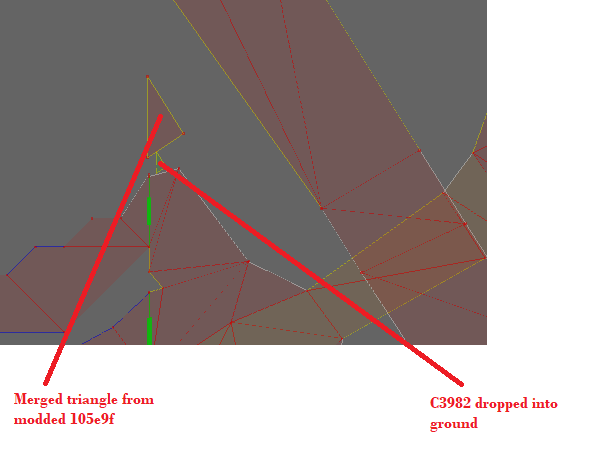
So here's something very interesting. The mesh on the causeway is a vanilla mesh - C3982. Before we dive back into the editor, let's go back to vanilla and look at C3982 in the unmodded game. Turns out, C3982 is a positively tiny, one triangle mesh that floats in midair in vanilla. So what we're going to do is rename modded C3982 to 105E9F just like any other type 1 repair. But first, we need to see what this little triangle is within Groot's mod, since it might be a hidden class 1, or it might be a hidden class 2. While we're investigating this we'll also finalize C3982 to try and get those door links to repopulate. However, if they don't, we aren't going to belabor the point much - we'll return to that mesh during the conflict resolution stage.
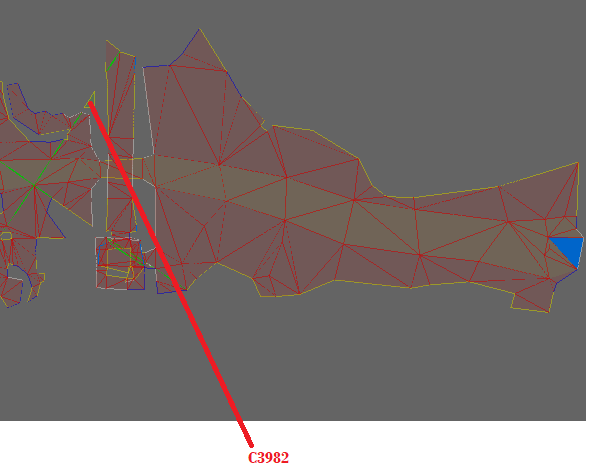
So after checking the CK, we can see that C3982 is in fact a hidden type 2 deletion - it was merged into 105E9F but for whatever reason the CK deleted the main mesh and added all its stuff to this tiny island. So here's what we are going to do:
- Re-finalize C3982 and save the plugin
- Go back to xEdit and rename C3982 to 105E9F
- Copy vanilla C3982 back into the Groot file
This will set the stage for the type 2 repair, which we need to go back into the CK to accomplish. Recapping our discussion above, Type 2 deletion is when the author merges a mesh - usually a small one - into a different mesh, causing one of the navmesh records to get deleted. It can also happen if geometry changes totally orphan a section of navmesh and it's deleted because all its triangles are no longer walkable areas. We don't want these orphan meshes to get deleted, because that can cause the CTD scenarios I talked about earlier, but we also don't want them to remain on map, getting edge links and even door links assigned and generally confusing NPCs.
What we are going to do is navigate to our restored vanilla C3982 in the CK. the mesh had had more than one triangle start with, we would have deleted everything except for triangle zero, but we don't have to do that here. So we'll go straight to the second step: we select the remaining triangle and, while holding the "Z" key to tell the CK we want to manage vertical position, drag the triange deep down into the ground.
With that done, we'll finalize C3982 and save. And with that, all our deletions are fixed!
Completing the Cleaning
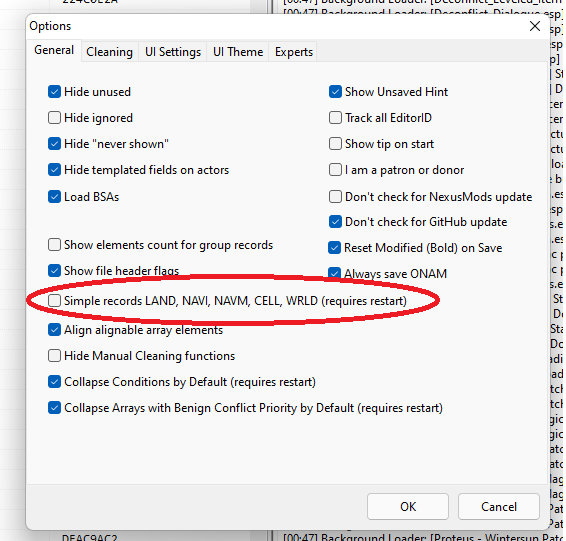
We're not quite done yet. Even if the edge links didn't have problems before, the CK has almost certainly scrambled them in the course of fixing the navmesh deletions. So the first thing we are going to do is run a script to clean those up. Note that the script we are going to use requires us to make a change from default settings in the options menu. Specifically, we need to turn off Simple Records.
Now that we've done that, let's right-click on Groot's Solitude.esp and choose "apply script." We're going to run "Skyrim - Clean Navmesh Edge Links". This compares navmesh data to their masters and makes sure the edge link data is sorted the same way. Not doing this can conceal ITMs and unneccessarily bloat files - to say nothing of creating conflicts that we subsequently have to fix when it isn't neccessary for the mod to work right.
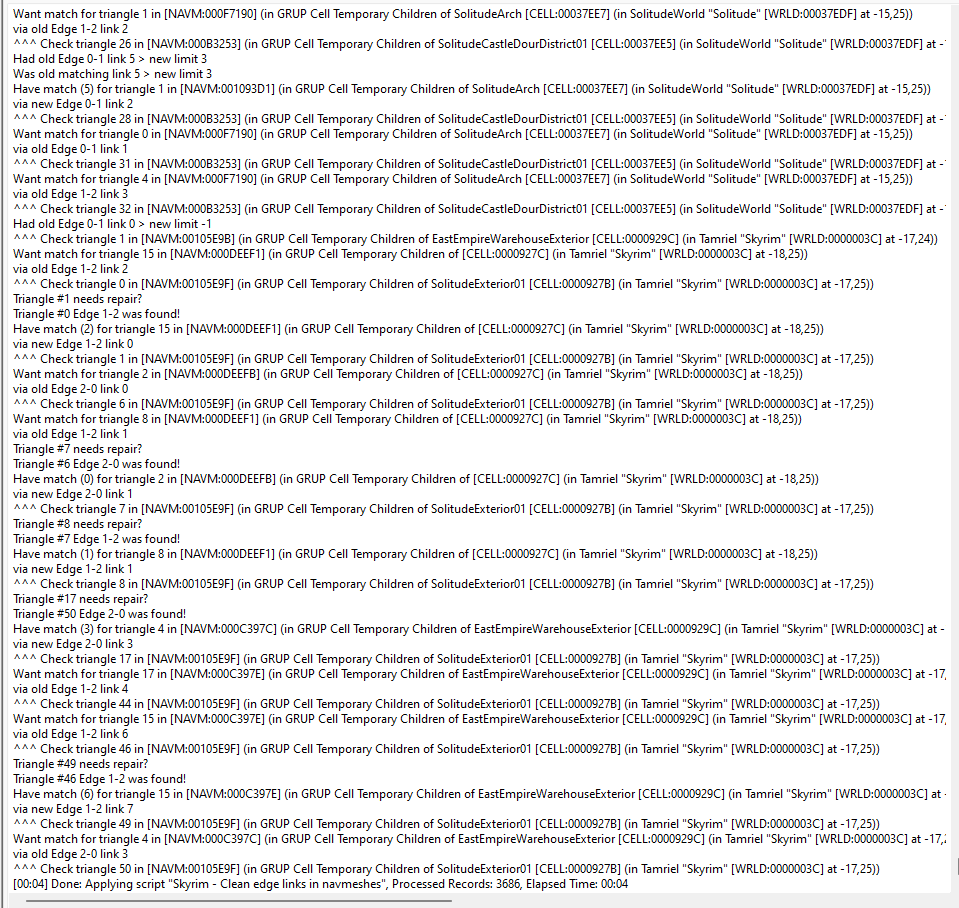
Now we're going to rerun the process we went through earlier with the error checking and the filtered cleaning. This revealed 50 more ITM records, which we removed. As you can see, many of the ITMs are navmeshes and others are references with navmesh links, such as doors. These were all added by the CK when I did the navmesh repairs, and we want to take them back out so they don't clutter the file.

Wrapping Up
With cleaning completed, that wraps up our first session of the case study. We'll return tomorrow with the start of conflict resolution, which is going to take up the bulk of our time. However, step by step we'll get this mod working seamlessly, and it when its all done it'll be a big enhancement to my game world!
Edited by gregaaz
0 Comments
Recommended Comments
There are no comments to display.