Search the Community
Showing results for tags 'FNV'.
Found 17 results
-
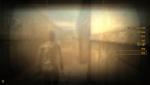
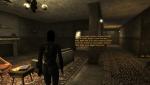
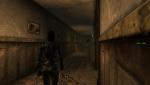
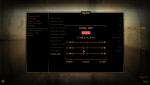
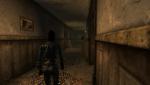
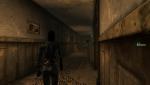
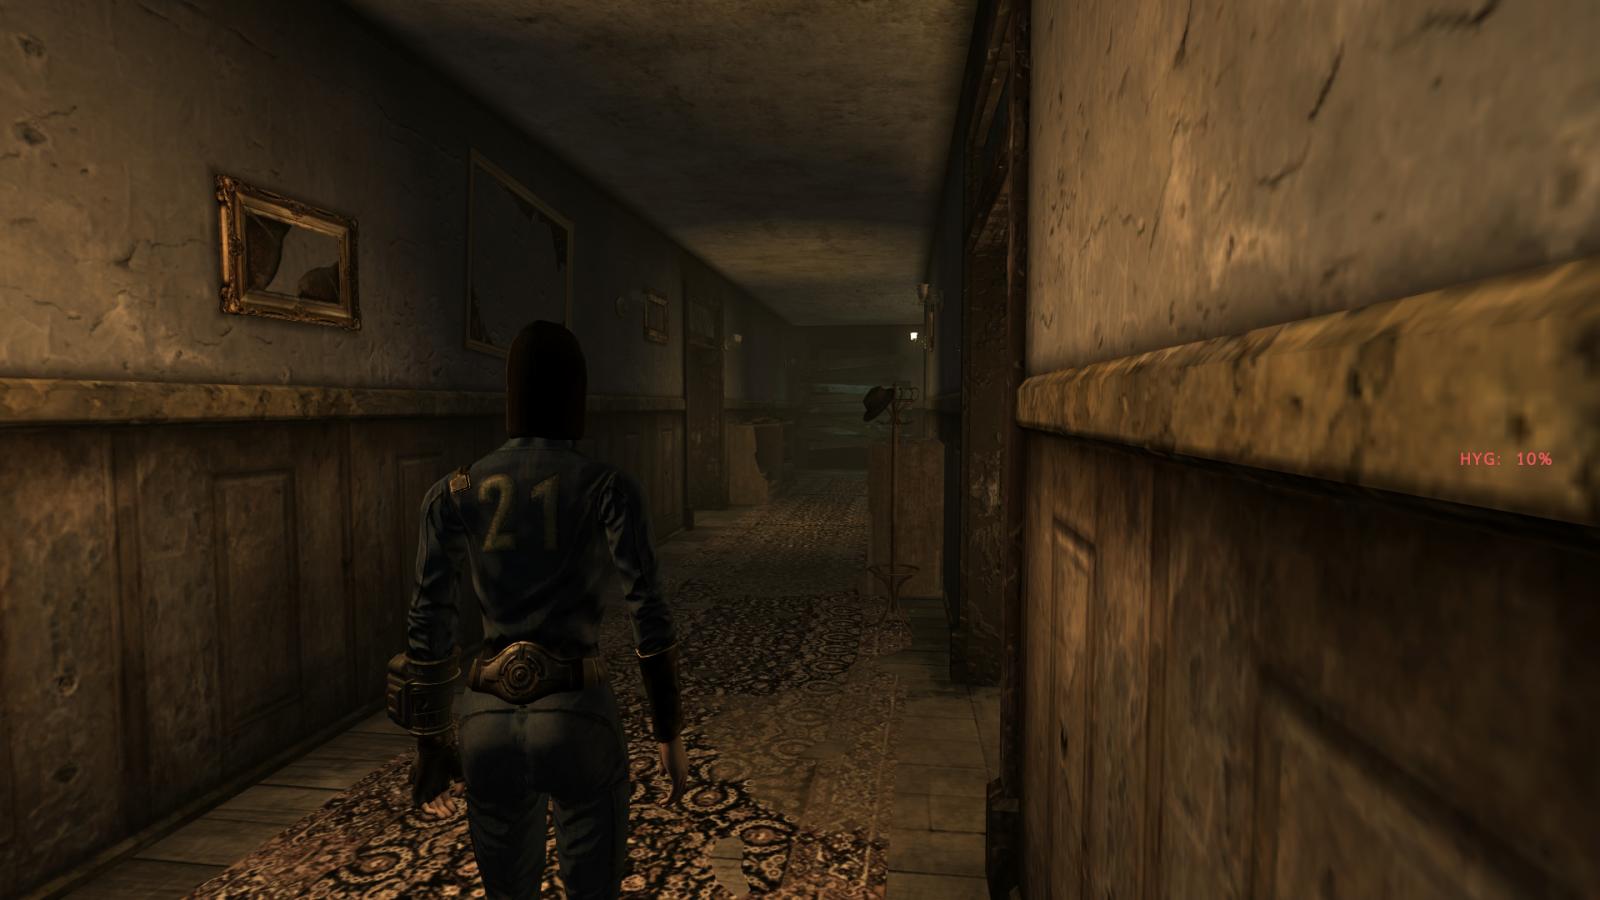
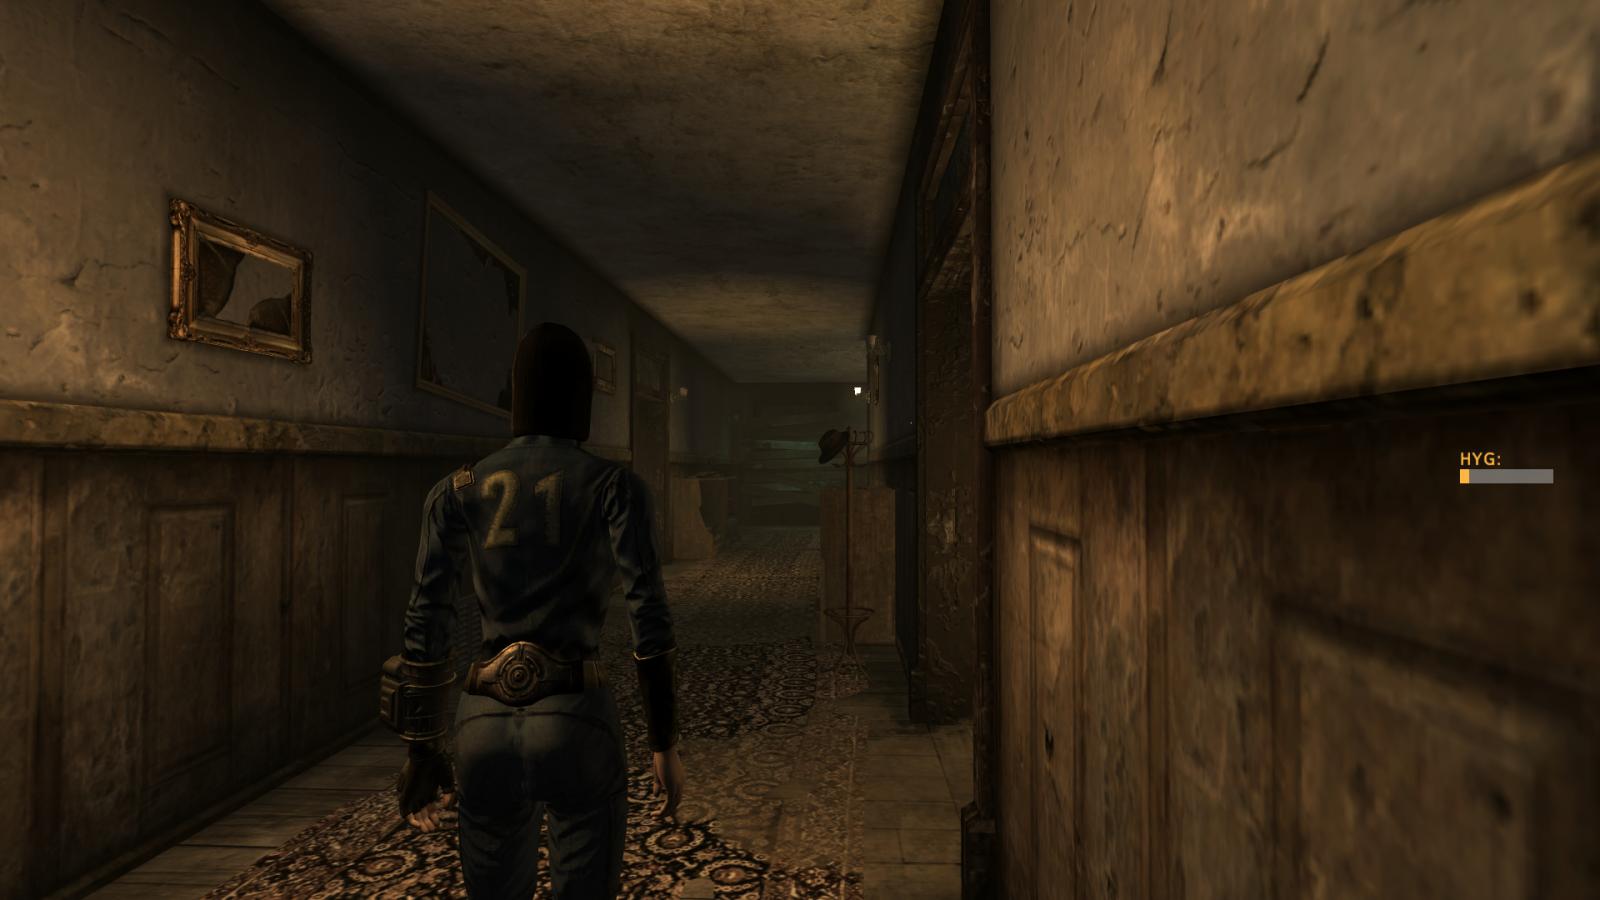
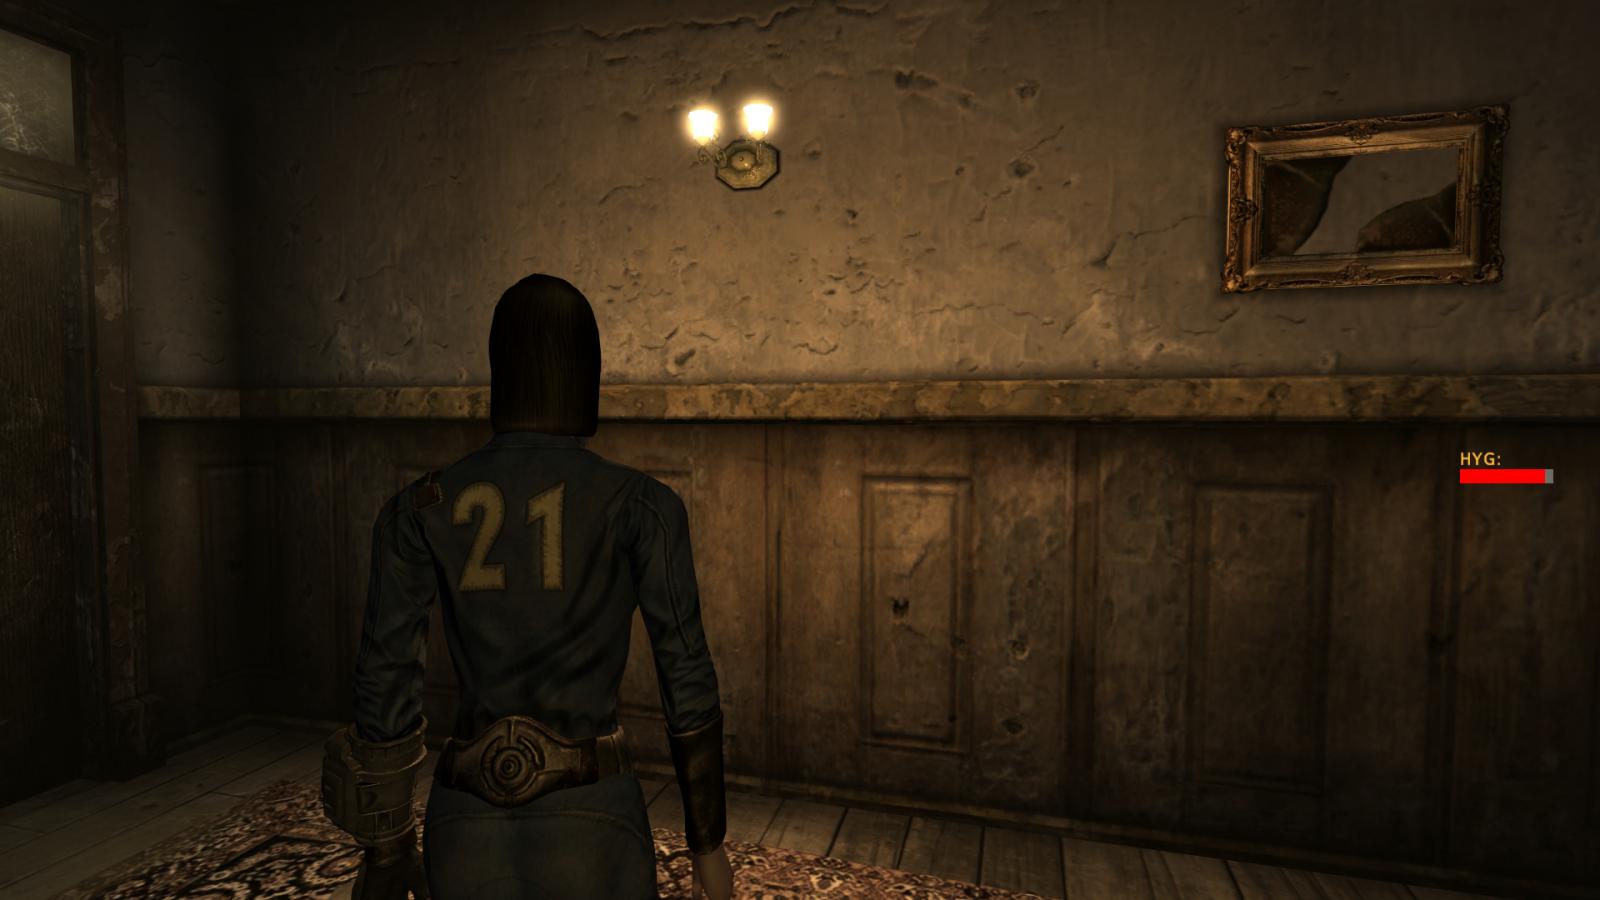
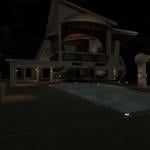
View File This Player home is located in Searchlight Airport, But to get there you use the helicopter next to the gas station in good springs. Raz mods are no longer needed and come with the Rar included in the download, I put it as a mirror cause apparently loverslab didn't want me uploading a giant file and ran into problems >_< Install this mod like you would install anything through NMM. The raz folders go directly in the right place. Also, bug fixes ha. Screenshots This mod is intended for LoversLab and Gunetwork. For use of my mod in other mods PM me Also dont go posting it on other places! Submitter Lovely Mercy Submitted 05/18/2015 Category Other Requires Fallout New Vegas, No DLC Needed
-
File Name: Extravagant Half Masks FNV File Submitter: t3589 File Submitted: 08 Jun 2014 File Category: Modders Resources Extravagant Half Masks modders resource ported to FNV. Usage: If you use these in your mod, be sure to credit the original authors. Credits and Thanks: Textures by demonizzer Meshes by Jquarl Click here to download this file
-
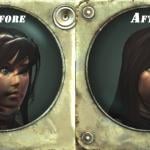
View File Description Makes the hairs from Ling's less shiny and/or adds specular detail where necessary. I made this fix primarily for myself, because several hairs didn't even have a proper specular map and have been left blank (white), which meant that the hairs were super-shiny. This archive only contains the normal/specular maps, so any other texture mods (if there are any) for ling's may still work. Requirements Requires Ling's Coiffure NV from earache42: www.moddb.com/mods/lings-coiffure-nv Installation Install with FOMM. Alternatively you can extract the .fomod archive with 7-zip and install the files manually into your textures/characters/hair folder. Credits All credit goes to earache42 and the respective authors of the hairs. Submitter BruceWayne Submitted 04/25/2014 Category Models & Textures Requires Ling's Coiffure NV
-
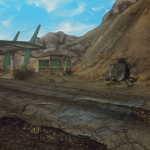
 File Name: Baja Island Home For Fallout NV - by Rez File Submitter: RezRayV12 File Submitted: 23 Apr 2014 File Category: Models & Textures Requires: Falllout New Vegas, Update: Just Uploaded a "World Of Pain" Patch for users of that mod (Optional File). This will change the Plane location to just outside Jean's Sky Diving, Also having a new Map Marker. There was only One Plane in the Vanilla Jeans Sky Diving area.. Now there is two. This Patch can also be used by Non World Of Pain users for just having a different Plane Location. Fireworks Plugin Video Rez's Baja Island Home BTW a couple have asked .. Baja is pronounced and defined (Bah - huh) as in Baja California a narrow peninsula in NW Mexico between the Gulf of California and the Pacific, forming two territories of Mexico. 1,434,000; 55,634 sq. mi. (144,090 sq. km). Capitals: Mexicali (Northern Territory) and La Paz (Southern Territory). Its where alot of the rich living in Vegas have summer homes. Most are Abstract style with cabana outrooms. This is a Player Home built on the Baja Islands south of California. Everything except 4 or 5 models "as listed in the credits" Are all New Custom Made models for this Mod. and are made by Myself. Figured with all the time and effort people put into making great looking NPCs that just sometimes don't look right in the Fallout world, well now you have a place they will fit right in. And Yes this mod is not lore friendly. Just a fun Mod to change things up. The Island Home has many new features, I will let you find them yourself. But every room has working light switches and the house looks GREAT at night. There is a plane just south of Goodsprings (has map marker) that will take you to the Island. There was alot more I wanted to do with this mod, but to short on time to do it all. I'm sure some of the talented modders out there will run with it. I built this mod in part to try and break into the Gaming Industry. I've been modding for along time but figured it was time to step it up. Always looking for side work in the D.C area of the US. Maybe this will bring some my way. Hope you all enjoy. REZ also Kudos for really good user pics. Here is a User Video Blackrose678 was nice enough to make. Install Just copy the Data folder included in this download into your FalloutNV Data Folder Activate the esp *it has its own weather and such built in, so you don't have to worry about it raining inside the home for those using weather mods. * Also I left the Mod in esp form for those wanting to customize it for themselves. But the game reads it as an ESM file due to me setting the ESM flag. This is for Navmesh reasons. This mod leaves Very Little to almost no footprint to your Fallout NV game, All new worldspace. So it can be safely installed and played during an existing game. No need for starting a new game. Credits Pinioncorp for Candle stick Modders Resource http://fallout3.nexu...s.com/mods/9349 ITOS for the Fridge and barstool model http://newvegas.nexu....com/mods/42835 Kirava2 for the Ceiling Fan model http://fallout3.nexu....com/mods/14276 odin_ml for the Light switch model http://fallout3.nexu....com/mods/12677 REZ for all other Custom models and mod development Permissions. All Models besides those listed in the credits are all new custom made models from scratch. This is now a Full modders resource.. just credit the authors in the credits if their content is used. . Updated to Version 5: Adds a missing Texture that was the culprit for the mirrored water issue. Water is now fixed with this update. Sorry bout that guys. Updated to Version 4: Fixes water conflicts with other mods. Update: Version 3 is now released, This fixes a Small navmesh issue people where having when using followers. I have uploaded a new Version 3 Full Version and also just an update file for those with version 2 or lower. I have also included a new World Of Pain Patch upgrade for version 3. those using version 2 or lower will need to upgrade. Update: Uploaded Version 2, This new version is the Full version including the missing meshes for the first release. If you already downloaded and installed version 1. Then just overwrite with this new version. ~ ReZ Click here to download this file
 -
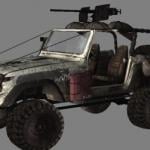
File Name: RE5 and Ravaged Vehicle Model Resource - by Rez File Submitter: RezRayV12 File Submitted: 23 Apr 2014 File Category: Modders Resources Requires: Falllout New Vegas, GECK RE5 and Ravaged Vehicle Models Resource This is not an esp or esm.. this is just models to add with Geck Also check out this great mod by A.J. using the buggy resource.. http://www.loverslab.com/topic/31813-remote-control-explosive-car-beta/ Permissions: I give full permission to use these as resources for anything you like, no permission needed. But Remember these are ports from other games and are not Nexus Safe. Click here to download this file
-
 View File What it is: This is a script template resource designed to help FNV modders create complicated MCM menus that don't stretch out over multiple, simultaneously running quest scripts. Its main feature is that it keeps the entering of the information entirely separate from the handling of it. This reduces the amount of code processed when the MCM menu is displayed or anything is adjusted, improves readability & navigation for the modder, allows for almost any aspect of your MCM menu to be adjusted in-game, and avoids silly mistakes on your part when it comes to specifying UI strings because you no longer have to. The handling of it is done in a compact handling script, which should really be all you'll ever need no matter how many options, submenus or even menus you have. It is entirely set-and-forget. (The standard script provided assumes you have your intel in quest variables, but the system can easily be adjusted to read from and write to any other type of variable storage, see the 'advanced use' folder.) The entering of it is done separately in a UDF and becomes a one-time deal, unless you change or add options in a mod update, in which case you simply run it once again. A few other aspects that don't need to run all the time, like adding the MCM items to the formlist and creating submenus, have been exported to UDFs as well. What it ain't: - a replacement of MCM: you still need MCM - a patch to or modification of MCM: it's just an alternate way of doing the scripting that you have to do in your own mod - an actual mod: don't try to install this package to your game folder with a mod manager Why I did it: - script size Rather complicated mods need lots and lots of different types of options for the player to manipulate in MCM. Creating MCM scripts isn't terribly difficult if you follow pelinor's manual & have some basic knowledge of scripting, but you soon run into problems with size and have to splice the code over multiple running scripts, several times in fact as your mod grows and you keep adding new options. This is mostly due to the fact that so far each and every bit of UI intel for every option needs to be entered in manually, using string parameters to the UI functions, and all of that takes up quite a bit of 'compiled script size'. - readability, ease of use If you have multiple types of options scattered over multiple submenus, keeping track of what everything does and stands for becomes a headache. Got distracted for a second, now I'm gawking at some intel pertaining to option 5, let me scroll back up - oh yes, submenu 3..., what was that again?, and what section am I in - default or defaultscale... Crap. Separating the handling of the intel from the entering of it drastically improves readability in itself. The only script you need to navigate is the map population script. - script overhead If you have multiple MCM scripts iterating over x elseif conditions, checking out in which submenu you are or what option you're manipulating for every section you're in, you're really always running chunks of code that are not applicable for the situation at hand. This system only ever processes code that is applicable to the current submenu (reset & default sections) or the current option (all other sections). Not that MCM scripting was ever considered a resource hog because it's in menumode 1013, but every little bit helps. - adaptability Because none of an option's parameters are manually entered in the handling script anymore, but kept in a map structure, it's now possible to change any of them on the fly from another script that adjusts the information in the map structure itself. Any option's title, type, the variable it refers to, a scale's min/max/incr/decimal parameters, or the strings associated with types 1 and 7 - it's all entirely adjustable. The same goes for the number or ordering of options per submenu, or display parameters like indentation, highlighting and coloring. This allows MCM to be used to create dynamic systems. - some extras The templates are set up to automatically set all your variables to the default values you stipulate in the maps when your mod first initializes, and do the same for any new options you add when you update if you mark them as being new. The system allows for the state switching of both options and submenus by consulting an optional UDF. For each option type associated with a single variable (1/2/2.5/4/5/6), the handling script will also call an optional UDF when the value changes, providing a lot of intel as its parameters. This is necessary for the state switching of submenus, but can be of use for any number of things (see 'adaptability'). Kudos: pelinor for MCM hlp for NVSE4+, as always Odessa for most of the 'start log' script and her work on the GECK wiki these past few years Needed: NVSE 4.6.3+, ideally 5.0.3 because you should always use the latest version MCM 1.5 Recommended: A sense of what UDFs are. A sense of what arrays are. Failing that, the ability to follow instructions and follow a template should at least set you on your way. Permissions stuff: public domain Submitter DoctaSax Submitted 01/20/2017 Category Modders Resources Requires NVSE 4.6.3+, MCM 1.5
 -
2065 downloads
Description Makes the hairs from Ling's less shiny and/or adds specular detail where necessary. I made this fix primarily for myself, because several hairs didn't even have a proper specular map and have been left blank (white), which meant that the hairs were super-shiny. This archive only contains the normal/specular maps, so any other texture mods (if there are any) for ling's may still work. Requirements Requires Ling's Coiffure NV from earache42: www.moddb.com/mods/lings-coiffure-nv Installation Install with FOMM. Alternatively you can extract the .fomod archive with 7-zip and install the files manually into your textures/characters/hair folder. Credits All credit goes to earache42 and the respective authors of the hairs. -
680 downloads
Update: Just Uploaded a "World Of Pain" Patch for users of that mod (Optional File). This will change the Plane location to just outside Jean's Sky Diving, Also having a new Map Marker. There was only One Plane in the Vanilla Jeans Sky Diving area.. Now there is two. This Patch can also be used by Non World Of Pain users for just having a different Plane Location. Fireworks Plugin Video Rez's Baja Island Home BTW a couple have asked .. Baja is pronounced and defined (Bah - huh) as in Baja California a narrow peninsula in NW Mexico between the Gulf of California and the Pacific, forming two territories of Mexico. 1,434,000; 55,634 sq. mi. (144,090 sq. km). Capitals: Mexicali (Northern Territory) and La Paz (Southern Territory). Its where alot of the rich living in Vegas have summer homes. Most are Abstract style with cabana outrooms. This is a Player Home built on the Baja Islands south of California. Everything except 4 or 5 models "as listed in the credits" Are all New Custom Made models for this Mod. and are made by Myself. Figured with all the time and effort people put into making great looking NPCs that just sometimes don't look right in the Fallout world, well now you have a place they will fit right in. And Yes this mod is not lore friendly. Just a fun Mod to change things up. The Island Home has many new features, I will let you find them yourself. But every room has working light switches and the house looks GREAT at night. There is a plane just south of Goodsprings (has map marker) that will take you to the Island. There was alot more I wanted to do with this mod, but to short on time to do it all. I'm sure some of the talented modders out there will run with it. I built this mod in part to try and break into the Gaming Industry. I've been modding for along time but figured it was time to step it up. Always looking for side work in the D.C area of the US. Maybe this will bring some my way. Hope you all enjoy. REZ also Kudos for really good user pics. Here is a User Video Blackrose678 was nice enough to make. Install Just copy the Data folder included in this download into your FalloutNV Data Folder Activate the esp *it has its own weather and such built in, so you don't have to worry about it raining inside the home for those using weather mods. * Also I left the Mod in esp form for those wanting to customize it for themselves. But the game reads it as an ESM file due to me setting the ESM flag. This is for Navmesh reasons. This mod leaves Very Little to almost no footprint to your Fallout NV game, All new worldspace. So it can be safely installed and played during an existing game. No need for starting a new game. Credits Pinioncorp for Candle stick Modders Resource http://fallout3.nexu...s.com/mods/9349 ITOS for the Fridge and barstool model http://newvegas.nexu....com/mods/42835 Kirava2 for the Ceiling Fan model http://fallout3.nexu....com/mods/14276 odin_ml for the Light switch model http://fallout3.nexu....com/mods/12677 REZ for all other Custom models and mod development Permissions. All Models besides those listed in the credits are all new custom made models from scratch. This is now a Full modders resource.. just credit the authors in the credits if their content is used. . Updated to Version 5: Adds a missing Texture that was the culprit for the mirrored water issue. Water is now fixed with this update. Sorry bout that guys. Updated to Version 4: Fixes water conflicts with other mods. Update: Version 3 is now released, This fixes a Small navmesh issue people where having when using followers. I have uploaded a new Version 3 Full Version and also just an update file for those with version 2 or lower. I have also included a new World Of Pain Patch upgrade for version 3. those using version 2 or lower will need to upgrade. Update: Uploaded Version 2, This new version is the Full version including the missing meshes for the first release. If you already downloaded and installed version 1. Then just overwrite with this new version. ~ ReZ -
-
482 downloads
RE5 and Ravaged Vehicle Models Resource This is not an esp or esm.. this is just models to add with Geck Also check out this great mod by A.J. using the buggy resource.. http://www.loverslab.com/topic/31813-remote-control-explosive-car-beta/ Permissions: I give full permission to use these as resources for anything you like, no permission needed. But Remember these are ports from other games and are not Nexus Safe. -
Version 1.21
354 downloads
What it is: This is a script template resource designed to help FNV modders create complicated MCM menus that don't stretch out over multiple, simultaneously running quest scripts. Its main feature is that it keeps the entering of the information entirely separate from the handling of it. This reduces the amount of code processed when the MCM menu is displayed or anything is adjusted, improves readability & navigation for the modder, allows for almost any aspect of your MCM menu to be adjusted in-game, and avoids silly mistakes on your part when it comes to specifying UI strings because you no longer have to. The handling of it is done in a compact handling script, which should really be all you'll ever need no matter how many options, submenus or even menus you have. It is entirely set-and-forget. (The standard script provided assumes you have your intel in quest variables, but the system can easily be adjusted to read from and write to any other type of variable storage, see the 'advanced use' folder.) The entering of it is done separately in a UDF and becomes a one-time deal, unless you change or add options in a mod update, in which case you simply run it once again. A few other aspects that don't need to run all the time, like adding the MCM items to the formlist and creating submenus, have been exported to UDFs as well. What it ain't: - a replacement of MCM: you still need MCM - a patch to or modification of MCM: it's just an alternate way of doing the scripting that you have to do in your own mod - an actual mod: don't try to install this package to your game folder with a mod manager Why I did it: - script size Rather complicated mods need lots and lots of different types of options for the player to manipulate in MCM. Creating MCM scripts isn't terribly difficult if you follow pelinor's manual & have some basic knowledge of scripting, but you soon run into problems with size and have to splice the code over multiple running scripts, several times in fact as your mod grows and you keep adding new options. This is mostly due to the fact that so far each and every bit of UI intel for every option needs to be entered in manually, using string parameters to the UI functions, and all of that takes up quite a bit of 'compiled script size'. - readability, ease of use If you have multiple types of options scattered over multiple submenus, keeping track of what everything does and stands for becomes a headache. Got distracted for a second, now I'm gawking at some intel pertaining to option 5, let me scroll back up - oh yes, submenu 3..., what was that again?, and what section am I in - default or defaultscale... Crap. Separating the handling of the intel from the entering of it drastically improves readability in itself. The only script you need to navigate is the map population script. - script overhead If you have multiple MCM scripts iterating over x elseif conditions, checking out in which submenu you are or what option you're manipulating for every section you're in, you're really always running chunks of code that are not applicable for the situation at hand. This system only ever processes code that is applicable to the current submenu (reset & default sections) or the current option (all other sections). Not that MCM scripting was ever considered a resource hog because it's in menumode 1013, but every little bit helps. - adaptability Because none of an option's parameters are manually entered in the handling script anymore, but kept in a map structure, it's now possible to change any of them on the fly from another script that adjusts the information in the map structure itself. Any option's title, type, the variable it refers to, a scale's min/max/incr/decimal parameters, or the strings associated with types 1 and 7 - it's all entirely adjustable. The same goes for the number or ordering of options per submenu, or display parameters like indentation, highlighting and coloring. This allows MCM to be used to create dynamic systems. - some extras The templates are set up to automatically set all your variables to the default values you stipulate in the maps when your mod first initializes, and do the same for any new options you add when you update if you mark them as being new. The system allows for the state switching of both options and submenus by consulting an optional UDF. For each option type associated with a single variable (1/2/2.5/4/5/6), the handling script will also call an optional UDF when the value changes, providing a lot of intel as its parameters. This is necessary for the state switching of submenus, but can be of use for any number of things (see 'adaptability'). Kudos: pelinor for MCM hlp for NVSE4+, as always Odessa for most of the 'start log' script and her work on the GECK wiki these past few years Needed: NVSE 4.6.3+, ideally 5.0.3 because you should always use the latest version MCM 1.5 Recommended: A sense of what UDFs are. A sense of what arrays are. Failing that, the ability to follow instructions and follow a template should at least set you on your way. Permissions stuff: public domain -
Version V4
311 downloads
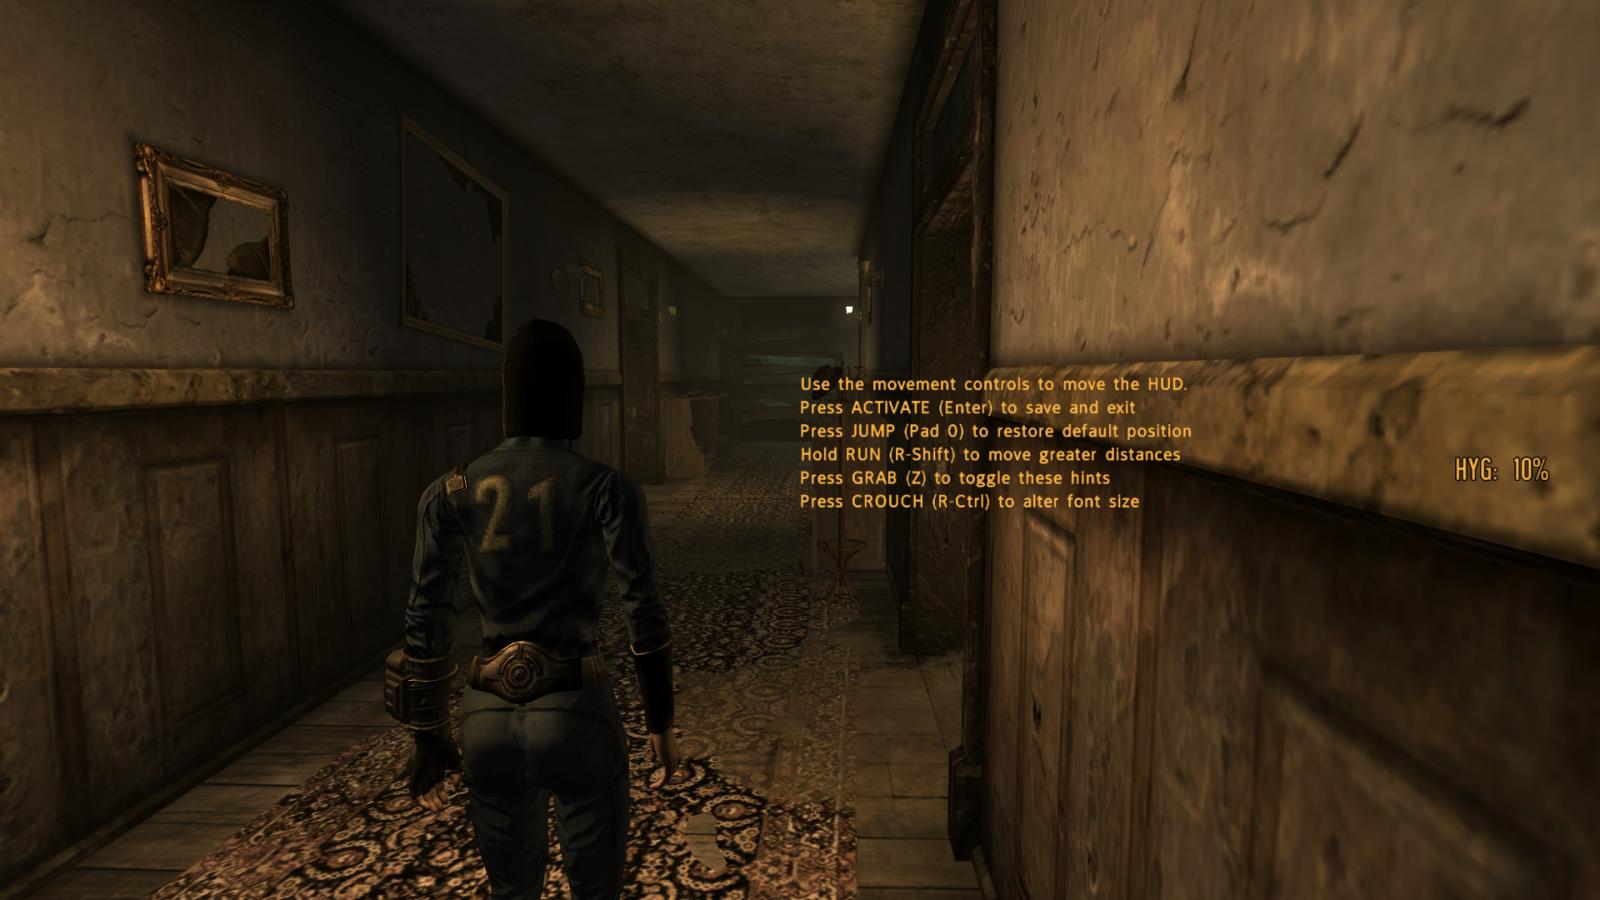
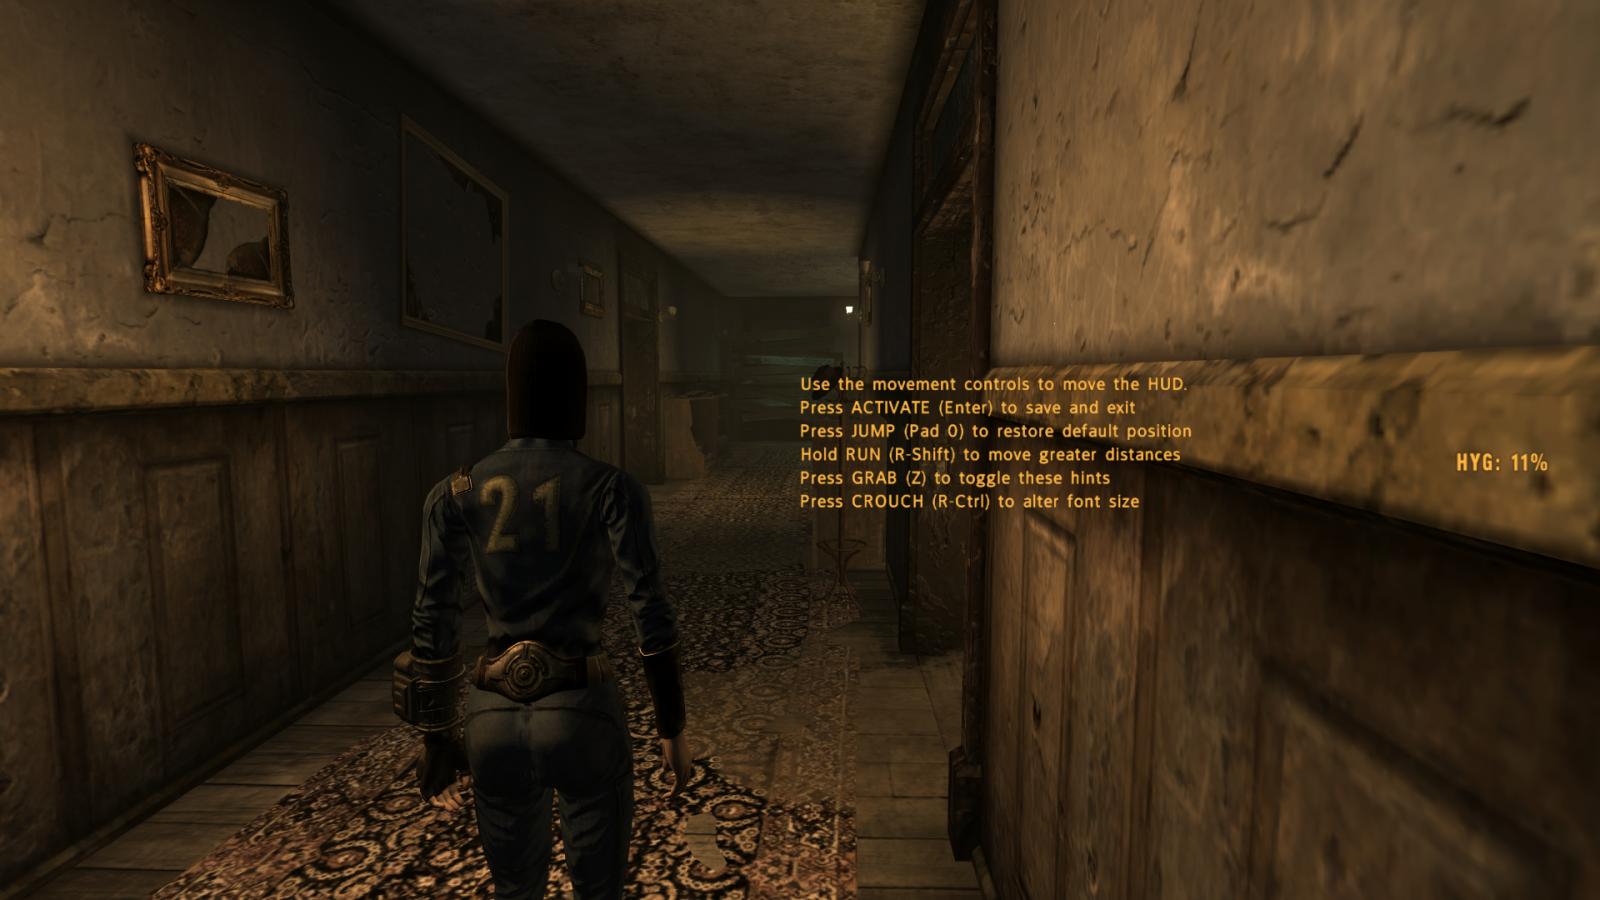
This Player home is located in Searchlight Airport, But to get there you use the helicopter next to the gas station in good springs. Raz mods are no longer needed and come with the Rar included in the download, I put it as a mirror cause apparently loverslab didn't want me uploading a giant file and ran into problems >_< Install this mod like you would install anything through NMM. The raz folders go directly in the right place. Also, bug fixes ha. Screenshots This mod is intended for LoversLab and Gunetwork. For use of my mod in other mods PM me Also dont go posting it on other places! -
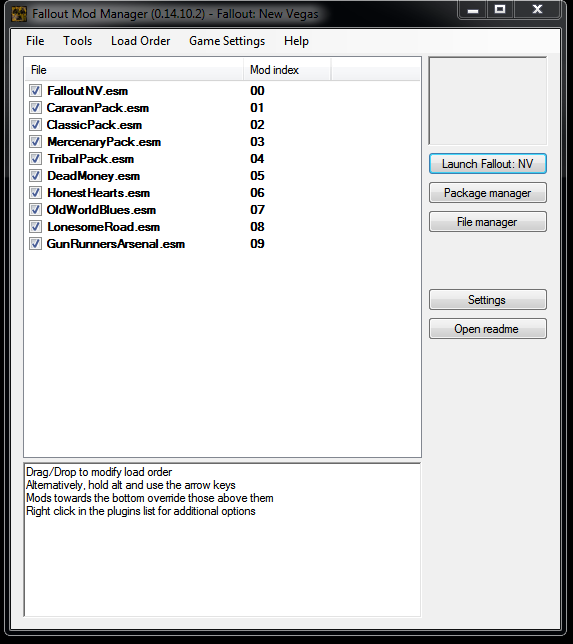
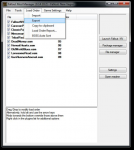
This tutorial is intended to cover the act of exporting the load order from FOMM. Please refrain from posting comments, questions, or other issues unless it directly related to the tutorial and exportation of load order from FOMM. Thank You. Requirements: FOMM Activated in FNV or FO3. Instructions will be the same. Instructions: Open FOMM from a short cut or from the folder created in the FOMM installation and First Activation Tutorial If you haven't installed FOMM yet please follow that tutorial. You will be prompted to choose a game. Choose the game you want to export a load order. For this tutorial we will use Fallout: New Vegas. If you get the "You have no Fallout INI File. Start the game once. Then return to this tutorial. You only need to wait for the game to load until you see the option to exit. After clicking OK and starting FOMM you can see the main Starting Panel. From there you see the task bar / tool bar on top. The one showing "File", "Tools", "Load Order", "Game Settings", and "Help". From there you will select the "Load Order" and a drop down will occur. There you will find the Export Load Order option. The above will export a load order text file and prompt you to indicate where you want to save it. It automatically chooses the Fallout game folder for ease. Just input the name you need. Perhaps use the characters name. As useful as the above is in many situations however if you are posting a load order here you might decide to use the "copy to clipboard" option below the Export option mentioned above. This will allow you to open a thread and Paste the load order (preferably in a spoiler) instead of attaching a .txt file. It is easier for those who will attempt to help you. There you go. You have just exported a load order from FOMM. That was easy! The same process is used to export load orders from Fallout 3.

-
i downloaded a crap ton of sexout related mods and i started up my Fallout: New vegas and it said "missing master, check load order" and i ran it through FNVEdit 3.2 and it says im missing SexoutTryout.esm i it searched it up and i cant seem to find it anywhere, could someone point me to where i can?
-
This project is at Halstroms request. It is is a project to make Maternity Clothes easier to maintain, grow and develop while giving the users a better choice of the files and resources that they need. I am only uploading the files that I have done so far. I am not the administrator of the changes. Ultimately Halstrom is the gatekeeper of this project. It will take quite some time to finish and reincorporate the changes into SCR. NOTE: Not to be used by individuals needing Maternity files. WILL NOT WORK. This is project to reorganized the material in a easier and more selective form that individuals can then download what the need instead of the whole zip file. The current work has moved to post 30
-
 Installation of Sexout Common Resources (SCR): Questions related to use of this tutorial: This tutorial covers the how to create the Resource folder and install it. Support will only cover any issues related to these two issues. Any questions related to issues downloading, extracting or obtaining these files should be directed to the threads host the resources. Please refrain to posting missing requirements here unless they have been added to Halstroms SCR thread. This tutorial is based off of his thread and any new or missing requirements need to be posted there first before being added to this tutorial. FYI: This is the brief tutorial, general instructions and such. For the full step by step instructions download the PDF. It is very large and complete with pictures. Do not PM me with questions on the tutorial. These PMs will be ignored. If it is valuable enough for you to take time to send a PM then it is valuable enough to actually post in the forum. There are others here that can answer many of the common questions I get in PMs. Installation of Sexout Common Resources (SCR): This tutorial is for those individuals that can use tools such as FOMM and 7zip. A Downloadable PDF for convenience. Step 1: Prerequirements Make sure you have all the SCR pre-requirements installed and setup properly. 7zip installed and configured. Required for this tutorial and useful for modding in general. FOMM installed. Preferably the version hosted here on LL. Fallout New Vegas Astymma’s BnB Body Extender FAFF NVG compatibility skeleton. New Vegas Script Extender (NVSE) Most current version available. NVSE Extender (Most current available) SexoutNG Sexout Common Resources (SCR) by Halstrom An Account with both Loverslab.com and Nexus.com to access the mods needed. Create a SCR Resources folder on the desktop or where you want to work. Create an SCR Archive folder to keep you from having to re-download the requirements again. There is an excellent tutorial by BruceWayne on Sexout installation and its requirements found here. Still have problems go here, here and here. Step 2: Installation Prep These requirements installed in this step aren't available in game without some mod accessing them. If you desire to access these outside of mods and gameplay my advice is to install SexoutStore so that you can access these armors and other items when you desire. Provided you have the caps. Keep in mind in order for SexoutStore or Halstrom’s Pregnancy mod to work properly you need all the resources installed. General Concept: Download all the requirements to the SCR Archive folder. Extract the requirements to a convenient location then drag the textures, meshes and sound to the SCR Resources folder. Finally delete the extracted folder and move on to the next requirement. It is advised to follow the list of requirements in order. Remove all esp's from these resources. There will be special instructions to rename files. This must be done in order to get a functional SCR Resource. If you do not follow the instructions properly many issues may occur. In some cases there will be two sets of records (clothes, toys etc) in the game which only one is controlled by SCR. Other cases the items won’t be available and giant red exclamation marks, pink skin, or floating head and hands will be the result. The worst effect of not following the instructions would be your game will crash when you start it. You have been warned! Base Non-SexoutStore/Pregnancy Requirements: [sCR] Spectrums Toy Pack by Spectrum Warrior. Refugee Outfits for Type 3 by Exter (Delete the esp(s) T6M CH Raider Armor by Izumiko Raider Chains Armor T6m – T6BB – TN – BerryK2 .2 by nagothm (Delete the esp(s) Sexout Clothing System by Evilrunner (Sexout Clothing Damage Updated with Combat Armour! Only) (Delete the esp(s) Nordlands Mesh & Texture pack for the Fertility Drugs by Norland GSB’s BDSM Files 20130227 by GSBmodder You now have all the base and specific resources installed. If you desire to have SexoutStore, or Halstrom’s Pregnancy installed continue with the tutorial. If not you can skip to Step 3. The Following are required if using SexoutStore, Halstrom’s Pregnancy, and/or Tryouts mod. The following are mod specific resources and are only required if using specific mods, SexoutStore, or Pregnancy. Sexout Tryout's Data Pack by Loogie: Sexout Maternity Clothes – Old by Evilrunner Mantis Zero Suit Samus and More - Type 3 for NV by Primantis. (Delete the esp(s) Reflex Armor S-07 for TYPE 3 a Mantis Retexture by static07 and Primantis (Delete the esp(s) Bunny Suit for Dimonized Type3 by Backsteppo (Delete the esp(s) Ghost Armor Conversion FNV Revamp by Ken1945 - Bunsaki – Rikai (Delete the esp(s) Vegas Chokers by adriant1978 (Delete the esp(s) You have to rename the BSA to SexoutCommonResources – VegasChokers Bouncing Breasts Type 3 Armors by revang. (Delete the esp(s) Requires Pack 1, 2, and BB Sexy Sleepwear. The Dragon Girl Dresses Do not use the one on this page. Use this one instead. Julia Chang Set by GSBmodder (Delete the esp(s) Ghost Variants by Brokencrash. (Delete the esp(s) Extravagant Half Masks FNV by t3589. T6M Competition Swimsuit NV by Shimaneko (Delete the esp(s) The following are mods that have been removed by the author. They are no longer publicly available for download. A Collection of Sexy Attire by Shadowtroop (Delete the esp) Step 3: Verification of Installation Check the SCR Resources folder and you should only have the following: Meshes Textures Sound SexoutCommonResources - VegasChokers If you have anything else you did something wrong go back and figure out where you went wrong. If your folder has only the files I mention above and you are completely satisfied that you have everything ready move to Step 4. If you think you made mistake go back and repeat any or all the individual steps for the requirements. Step 4: Installation Instructions Create an FMOD that can be used when installing SCR. Open FOMM and select Fallout New Vegas. Click on Package manager. Click on the arrow pointing down on the “Add FOMod” button. Select Create from Folder. A window opens up select the SCR Resources Folder and click OK. Wait until done. This will take quite some time. When done you will see SCR Resources entry in the Package Manager. Select that and click the Activate button and wait some more. When done you can close the package manager and move on to Step 5 if you desire to add some of the available options from the mods mentioned above, if not move to Step 6. Step 5: Optional Patches (Optional) SCR Resources Patch Used in case there are some options that are desired from the SCR Resources Tutorial above or files added in the future to SCR and SCR’s family of mods. You can also create a patch if you are concerned there might be a mistake or problem with your SCR Resources folder. Patches can be installed separately ( after the base SCR Resources folder of course) and the installation will prompt you for overwrite. After verification that it is what you desire you can later merge this into the SCR Resources folder and overwrite those files. Benefits to creating a patch: Flexibility and expandability without risking the core base folder created by the above instructions. Ability to make multiple patches and numbering them or giving them a brief name at the end. For example SCR Resources Patch – Ghost Armor. This can make it easier to figure out which patch is which in the future. This also allows you to make smaller changes. My suggestion is make a patch for each mod or resource used or added. Patches can be added, removed, altered, and tested until just right. When finalized and determined as “perfect” the folder then can be merged with the SCR Resources folder created in the tutorial above. More info further down under “Merging SCR Resources Patch with SCR Resources folder”. How to create the SCR Resources Patch: Create a folder named SCR Resources Patch Open up the mod desired and look for the Textures, Meshes, or Sounds desired. Might have to dig down onto the folders and move specific files over. Make sure you follow the instructions of the author on how to place these extra folders as some options means manually creating a file, placing a single file into a folder in a specific location etc. When finished return to Step 5 and import the new patch into the game and test. When reinstalling your mods remember that the SCR Resources folder needs to be installed before an SCR Resources Patches. Merging SCR Resources Patch with SCR Resources folder You have determined that the patches you have created are perfect and what you want to use going forward. You would desire to merge these together to easy the management of your mods in your manager. Grab the SCR Resources folder you created earlier. Make a copy. Might take a bit of time. Rename the old copy “SCR Resources Original” This is to designate it is what was started with. You might change your mind later and decide to go back and rework the files. It is always a good idea to have the same base files to start from that everybody else will have. Grab the files out of the SCR Resources Patch and drag and drop or copy paste depending on your preference over to the SCR Resources folder and click yes to all the prompts for overwrite. Return to Step 5 and re-import the SCR Resources folder into FOMM. Click yes to any prompts to overwrite. Step 6: Backup the folders SCR Archive, SCR Resources, and SCR Resources Original (if Step 5 was used) Installation of Sexout Common Resources (SCR)(PhotoPDF) 2017.08.06.pdf Credits: Halstrom DoctaSax BruceWayne
 -
Required knowledge: Passable skill in reading xml syntax and Bethesda's xml elements, see here. Some parts require some experience writing an MCM script. Introduction: what to expect What this guide will focus on is how to create your own HUD readout to reflect a number that you set in an esp, much like the primary needs readout that you'd expect from mods like oHUD and IMCNNV. The method I'll follow is to slowly build up a mod that I've made for this purpose, called Hygiene, so you can follow along. You'll find it attached, as well as a copy of all scripts inside. Building up from the simplest method and gradually adding functionalities, you'll learn to add both a percentage readout (text) and a visual meter/bar (image). Along the way you'll learn about subscribing UI components to UIO, passing information from geck script to xml, and writing a script to allow your users to manually adjust the positioning of your HUD component. 1. Baby steps: a bit of text 1.1. Objective: a HUD for Hygiene.esp Let's assume we have a little mod called Hygiene.esp that calculates and adjusts the player's hygiene levels as time passes. Actually, we do have it, I wrote it just to have something to refer to. Here's its main script, calculating a number that I wish to display in HUD eventually: In the good old Fallout tradition, we'll call the stat "Hygiene" but assume that the higher the value is, the worse off the player is. In the same way that "more H2O" means "thirstier", high Hygiene has you reaching critical values, going into the red, something like that. You may see from the script that it basically just adds up a number as time passes, depending on what the player's doing and how long it should take to reach 100 normally, all variables that are set in MCM. What I want to display, in the HUD, is simply a percentage, and a bit of text saying what it signifies, something like: HYG: 10% 1.2. Subscribing to UIO Let's get started. First off, in case you didn't know, when it comes to adding something to the HUD we can't just plunk a new file in some folder. There is only one .xml file that handles hud and it's called hud_main_menu.xml, located under menus\main. In the past, adding anything to it in a mod obviously invited conflicts with other mods trying to do the same. A workaround using the <include> element had the disadvantage of not being user-friendly, and the uHUD mod which automated that process required its author to update it whenever a new HUD mod was published. All a thing of the past now that with UIO the conflicts are resolved and it'll automatically recognize our hud component if: - we create an .xml file for it in a folder under menus\prefabs - we create a text file in a folder called uio\public that notifies UIO that we have an .XML file that needs to be appended to the main hud, with this bit of code in it: DSHyg\DSHygHUD.xml::HUDMainMenu true 1.3. Adding text elements With that out of the way, let's open our .xml file. We're going to split "HYG: 10%" into 3 bits: the label, the value, and the percent sign. After all, while HYG: (the label) and the percent sign are bits of text that won't change, the value is something we will expect to receive from the .esp. Now's also a good time to group those 3 elements in one element because we'll go a little crazy with repositioning and jacking into other hud mods in later chapters. Because we also still need a root element to contain everything that'll be in our xml we're looking at an overall structure like this, for the moment: a root, with our 'own hud' components grouped together underneath. <rect name="DSHygHUDROOT"> <rect name="DSHygOwnHUD" > <text name="DSHygLabel"> </text> <text name="DSHygPercentSign"> </text> <text name="DSHygValueDisplay"> </text> </rect> </rect> If you've read my guide on reading XML, you should realize that this main structure only contains object elements, adding 3 text components, grouped under one invisible rectangle. What's lacking is what text they should display, and where on our screen they should be positioned. Let's add some properties, starting with the strings. <text name="DSHygLabel"> <string>HYG:</string> </text> <text name="DSHygPercentSign"> <string>%</string> </text> The strings that aren't dynamic are simply put between <string> tags. The one that is, the actual value to display, will be phoned in by my main script in the .esp, where this line SetUIFloat "HUDMainMenu\_DSHygValue" fHyg sets a custom property element, _DSHygValue, to the value. What's left for us to do in the xml is read it from that element, using the <copy> operator with the "io()" src attribute: <text name="DSHygValueDisplay"> <copy src="io()" trait="_DSHygValue"/> </text> 2. Positioning Right now, this is what our xml looks like: <spoiler> <rect name="DSHygHUDROOT"> <rect name="DSHygOwnHUD" > <text name="DSHygLabel"> <string>HYG:</string> </text> <text name="DSHygPercentSign"> <string>%</string> </text> <text name="DSHygValueDisplay"> <copy src="io()" trait="_DSHygValue"/> </text> </rect> </rect> </spoiler> At present, in-game, all three text components would start displaying, except they'd all be stuck in the top-left corner, because we haven't entered positioning data yet. Let's handle that, by first setting a position for their parent rectangle: <rect name="DSHygOwnHUD" > <locus> &true; </locus> <x> <copy src="screen" trait="width" /> <sub> 150 </sub> </x> <y> <copy src="screen" trait="height" /> <div> 2 </div> </y> <!--our three text components are still here--> </rect> Copying the width of the screen and subtracting some pixels, I place it to the right of the screen, and in the middle in terms of height. Because we're going to fine-tune the positioning of the individual text elements in a minute, now's a good time to also toggle on the <locus> element, which'll treat x & y positioning of the children as relative to the parent rectangle, rather than to the screen. That's just my preference. With locus toggled on, I choose not to specify any positioning for the label's text component, so it just copies its x & y position from the parent. However, I do outline it to the left with the <justify> element: <text name="DSHygLabel"> <justify> &left; </justify> <string> HYG: </string> </text> I'll outline the other two to the right because I want the value to stay neatly close to the percent sign, and this is easier that way. The other elements share the same y-position, but I shift the percent sign more to the right (+ 100 x, relative to the parent), and do the same for the value display by copying the x-position of the percent sign, minus the width of the percent sign itself: <text name="DSHygPercentSign"> <x>100</x> <justify> &right; </justify> <string>%</string> </text> <text name="DSHygValueDisplay"> <x> <copy src="sibling(DSHygPercentSign)" trait="x" /> <sub src="sibling(DSHygPercentSign)" trait="width" /> </x> <y> <copy src="sibling(DSHygLabel)" trait="y" /> </y> <justify> &right; </justify> <string> <copy src="io()" trait="_DSHygValue" /> </string> </text> Which results in this, in-game: A good start. I could've achieved the same result in many other ways, really. You can position components relative to the screen or each other using a variety of formulas - what I used was just one of the simpler methods. 3. Toggling visibility We may've gotten our little percentage HUD to display in gamemode, as planned, but as you can see from the following picture, it also shows in menumode. I don't want that, it's going to detract from whatever I try to do there, so it's gotta go. There are also situations where we may not even want it to show in gamemode - in combat, for instancee. Handling that winds down to the same technique: toggling visibility using a custom property. Remember our rectangle parent that groups the three text components? In itself, it's invisible, but if we toggle its visibility, it toggles that of all its children. So let's do that, by making its visibility dependent on a custom property: <rect name="DSHygOwnHUD"> <visible> <copy src="io()" trait="_DSHygOwnHud" </visible> <locus> &true; </locus> <x> <copy src="screen" trait="width" /> <sub> 150 </sub> </x> <y> <copy src="screen" trait="height" /> <div> 2 </div> </y> <!--our three text components are still here--> </rect> while in our esp, I made a separate little quest script that just does this, for the moment: scn DSHygHUDQstScpt Begin GameMode SetUIFloat "HUDMainMenu\_DSHygOwnHud" 1 End Begin MenuMode SetUIFloat "HUDMainMenu\_DSHygOwnHud" 0 End You can easily add more conditions in the esp's script. For instance, to make our little HUD disappear during combat, you'd go: Begin GameMode if playerref.IsInCombat SetUIFloat "HUDMainMenu\_DSHygOwnHud" 0 else SetUIFloat "HUDMainMenu\_DSHygOwnHud" 1 endif End Finally, maybe we should toggle off our HUD in situations where vanilla HUD is also off, perhaps in some type of cutscene or other... Usually, this is done by simply making the visibility of the HUD dependent on the visibility of the "ActionPoints" HUD component: <rect name="DSHygOwnHUD"> <visible> <copy src="ActionPoints" trait="visible"/> <and src="io()" trait="_DSHygOwnHud" /> </visible> <!--everything else--> </rect> (Note that a mod like iHUD which makes the ActionPoints component visually disappear under certain conditions, doesn't touch the visibility state of it: it'll still be on. Conditions that really switch it off include situations that use DisablePlayerControls.) On the other hand, we may want to provide an option to force our HUD to stay on despite the usual HUD being off. In that case we toggle the state of a new custom property in our esp: <rect name="DSHygOwnHUD"> <visible> <copy src="ActionPoints" trait="visible"/> <or src="io()" trait="_DSHygForceHud" /> <and src="io()" trait="_DSHygOwnHud" /> </visible> <!--everything else--> </rect> scn DSHygHUDQstScpt int iForceHUD Begin GameMode SetUIFloat "HUDMainMenu\_DSHygOwnHud" 1 SetUIFloat "HUDMainMenu\_DSHygForceHud" iForceHUD End Begin MenuMode SetUIFloat "HUDMainMenu\_DSHygOwnHud" 0 End Forcing it on can then happen through script on special occasions, or as a player preference in MCM, which is what I'm adding in our little mod: a checkbox that toggles the iForceHUD variable there. 4. Letting the player adjust position In addition to not overriding vanilla menus, we obviously want to be good neighbors with other hud mods. The best way of doing that is to provide players with the option to manually reposition our HUD component themselves in case of conflict. Some mods let you do this in MCM's menumode; we'll do it in gamemode instead. 4.1 Adding custom properties for x and y offsets First off, we're in luck because we decided to group our components under one rectangle, so we really need to only be able to adjust that one's position. In fact, that was a major reason for doing that in the first place, or what did you think. We add new custom properties to our rectangle's existing x & y elements, conveniently called _DSHygX and _DSHygY: <rect name="DSHygOwnHud"> <!--visibility intel here> <locus> &true; </locus> <x> <copy src="screen" trait="width" /> <sub> 150 </sub> <add src="io()" trait="_DSHygX" /> </x> <y> <copy src="screen" trait="height" /> <div> 2 </div> <add src="io()" trait="_DSHygY" /> </y> <!-- everything else--> </rect> The idea is that both custom properties will reflect variables, now held in our regular HUD script, that are added to or subtracted from depending on keys that the player presses. scn DSHygHudQstScpt int iForceHud float fOffsetX float fOffsetY Begin GameMode SetUIFloat "HUDMainMenu\_DSHygOwnHud" 1 SetUIFloat "HUDMainMenu\_DSHygForceHud" iForceHud SetUIFloat "HudMainMenu\_DSHygX" fOffsetX SetUIFloat "HudMainMenu\_DSHygY" fOffsetY End Begin MenuMode SetUIFloat "HUDMainMenu\_DSHygOwnHud" 0 End In order to properly catch those key presses we need a rather fast-firing script, so let's make that separate from our others, toggle it on through MCM, and off when we're done. 4.2. Detecting and storing key presses There are two ways of accomplishing this. One is writing the adjustment script so that people can do it right in the MCM menu, but that itself can interfere with visibility and doesn't always show the other HUD components that may get in the way so you have to go in and out to adjust some more. The other is doing it in gamemode. The trouble there is that most keypresses already mean something, especially the movement controls which I'd like to use. Still, all things considered, option 2 is what we'll go with here - perfectly feasible if we tie up the player a little bit. First off, the entire quest needs toggled via MCM. Here's one way of doing that. In my MCM script: ; 'reset' block SetUIFloat "StartMenu/MCM/*:1/*:9/_enable" 1 SetUIString "StartMenu/MCM/*:1/*:9/_title" "Configure HUD position" SetUIFloat "StartMenu/MCM/*:1/*:9/_type" 5 SetUIFloat "StartMenu/MCM/*:1/*:9/_value" DSHygHud.iEditing ; 'default' block set DSHygHud.iEditing to 0 ; 'new value' block ; other stuff elseif iOption == 9 set DSHygHud.iEditing to fValue endif ; 'mouseover' block elseif iMouseover == 9 SetUIString "StartMenu/MCM/*:9/string" "Go back to gamemode to start moving the HUD around" endif In my DSHygHud quest script: int iEditing if iEditing set DSHygHudConfig.iStage to 0 startquest DSHygHudConfig if GetQuestRunning DSHygHudConfig set iEditing to 0 endif endif Since we want to be able to let players manipulate position using their usual movement controls, we need to - restrain the player character so that our keypresses don't move them around - capture the relevant keypresses and store them as offsets in local variables to the regular hud quest - broadcast the offsets to the xml, where our custom properties, _DSHygX and _DSHygY, are waiting to be read. The following quest script does that. Try to follow along. In stage 0, it forces the HUD on in case it was off for some reason, and restrains the player. In stage 1, it detects the pressing of controls and takes action accordingly, increasing and decreasing offsets that we broadcast as the custom properties _DSHygX and DSHygY to our xml. Stage 100 cleans up, setting the player free and stopping the script. scn DSHygHudConfigQstScpt int iGap int iStage int iWasForced Begin GameMode if playerref.IsInCombat set iStage to 100 endif if iStage == 0 if Playerref.GetRestrained set iStage to 1 SetUIFloat "HUDMainMenu\_DSHygOwnHud" 1 if 0 == GetQuestRunning DSHygHUD startquest DSHygHUD endif if DSHygHUD.iForceHUD == 0 set DSHygHUD.iForceHud to 1 set iWasForced to 1 endif else playerref.SetRestrained 1 return endif endif if iStage == 1 ; how much to move if IsControlPressed 9 ; 'run' control set iGap to 50 else set iGap to 5 endif ; forward = up if IsControlPressed 0 let DSHygHUD.fOffSetY -= iGap ; backward = down elseif IsControlPressed 1 let DSHygHud.fOffSetY += iGap endif SetUIFloat "HUDMainMenu\_DSHygY" DSHygHud.fOffsetY ; left = left if IsControlPressed 2 let DSHygHUD.fOffSetX -= iGap ; right = right elseif IsControlPressed 3 let DSHygHUD.fOffSetX += iGap endif SetUIFloat "HUDMainMenu\_DSHygX" DSHygHud.fOffsetX ; activate = save and exit if IsControlPressed 5 set iStage to 100 ; jump = restore defaults elseif IsControlPressed 12 set DSHygHUD.fOffSetX to 0 set DSHygHUD.fOffSetY to 0 set iStage to 0 endif endif ; quit if iStage == 100 if iWasForced set DSHygHud.iForceHud to 0 endif SetUIFloat "HUDMainMenu\_DSHygOwnHud" 0 if playerref.GetRestrained playerref.SetRestrained 0 else stopquest DSHygHudConfig endif endif End 4.3. Showing text hints on-screen One thing missing though is a little user-friendliness: people don't know which keys to press unless we tell them. A readme is fine and dandy but everybody knows people don't read them, so let's tell them which buttons to press in-game by adding some more text to our xml. First off, let's create a new rectangle, sibling to "DSHygOwnHUD", that'll group our new text elements and toggle the visibility of them all with a custom property. <rect name="DSHygPositionTips"> <visible> <copy src="io()" trait="_DSHygShowHints" /> </visible> <text name="DSHygTipsMove"> </text> <text name="DSHygTipsActivate"> </text> <text name="DSHygTipsJump"> </text> <text name="DSHygTipsRun"> </text> <!-- we'll add a new control to check as well: 'grab' will toggle the hints --> <text name="DSHygTipsGrab"> </text> </rect> We add a bit of code to toggle the hints when the grab control is pressed to our HudConfig script: if iStage == 1 ; the other stuff elseif IsControlPressed 27 if 0 == IsPressed set isPressed to 1 if 0 == GetUIFloat "HUDMainMenu\_DSHygShowHints" SetUIFloat "HUDMainMenu\_DSHygShowHints" 1 else SetUIFloat "HUDMainMenu\_DSHygShowHints" 0 endif endif else set isPressed to 0 endif We'll need a few textual elements to describe which keys to press. People know the movement ones, so they can go in a static string in the xml: <text name="DSHygTipsMove"> <string> Use the movement keys to move the HUD </string> </text> We'll construct the other strings in our HUD config quest script using GetControl to figure out which keys belong to which controls, broadcast them with SetUIStringEx and the %k format specifier, and turn on the visibility of the whole block by default: if iStage == 0 if playerref.GetRestrained ; other stuff set iKeyCode to GetControl 5 SetUIStringEX "HUDMainMenu\_DSHygTipActivate" "Press ACTIVATE (%k) to save and exit" iKeyCode set iKeyCode to GetControl 12 SetUIStringEX "HUDMainMenu\_DSHygTipJump" "Press JUMP (%k) to restore default position" iKeyCode set iKeyCode to GetControl 27 SetUIStringEx "HUDMainMenu\_DSHygTipGrab" "Press GRAB (%k) to toggle these hints" iKeyCode set iKeyCode to GetControl 9 SetUIStringEX "HUDMainMenu\_DSHygTipRun" "Hold RUN (%k) to move greater distances" iKeyCode SetUIFloat "HUDMainMenu\_DSHygShowHints" 1 ; other stuff and copy them in our xml, putting them underneath each other somewhere in the middle of the screen: <rect name="DSHygPositionTips"> <visible> <copy src="io()" trait="_DSHygShowHints" /> </visible> <locus> &true; </locus> <x> <copy src="screen()" trait="width"/> <div> 2 </div> </x> <y> 400 </y> <text name="DSHygTipsMove"> <string> Use the movement controls to move the HUD. </string> </text> <text name="DSHygTipsActivate"> <y> 25 </y> <string> <copy src="io()" trait="_DSHygTipActivate" /> </string> </text> <text name="DSHygTipsJump"> <y> 50 </y> <string> <copy src="io()" trait="_DSHygTipJump" /> </string> </text> <text name="DSHygTipsRun"> <y> 75 </y> <string> <copy src="io()" trait="_DSHygTipRun" /> </string> </text> <text name="DSHygTipsGrab"> <y> 100 </y> <string> <copy src="io()" trait="_DSHygTipGrab" /> </string> </text> </rect> which has this result: 5. Intermezzo: More layout 5.1 adjusting fonts It's entirely possible you think the standard font is too small, and you wish the HUD component to jump out a little bit more. It's also entirely possible that unlike me you don't use Darn's UI mod, which makes the fonts smaller, and I haven't really checked if the positioning data I used work equally well with vanilla's fonts. Being able to switch between whichever fonts you have in your game could help players out in both cases, if there's a readability problem. We're in luck because whether you have font overrides or not in your game, they're numbered 1-8, so all it really takes is to stipulate in the .xml, for each text component, that we'll copy that number from the esp, using another custom property: <font> <copy src="io()" trait="_DSHYGFont" /> </font> A simple solution, then, would be to broadcast this in our HUD quest script, tied to a variable: SetUIFloat "HUDMainMenu\_DSHygFont" iFont and let players set that variable with an MCM scale. Another option is to tack on this bit to our positioning config script to have players switch it in real time when they're positioning it: ; crouch key = change font size elseif IsControlPressed 8 if 0 == IsPressed let isPressed := 1 if DSHygHUD.iFont < 8 let DSHygHud.iFont += 1 else let DSHygHud.iFont := 1 endif endif as well as constructing the string: set iKeyCode to GetControl 8 SETUIStringEX "HUDMainMenu\_DSHygTipCrouch" "Press the Pipboy Key (%k) to alter font size" iKeycode and putting that in our xml: <text name="DSHygTipsCrouch"> <y> 100 </y> <string> <copy src="io()" trait="_DSHygTipCrouch" /> </string> </text> 5.2. adjusting opacity At the moment we don't yet have a way for players to disable our HUD if they want to make a screenshot or something. And perhaps, at full opacity, some may found our hud component to be just a little too intrusive. Let's kill two birds with one stone and provide a way to adjust the component's opacity. In this case, we opt for an MCM slider - it's just the more sensible thing to do. Opacity goes from 0 to 255, so that'll be the range for our MCM slider too, tied to yet another variable that we broadcast from our main HUD quest script to our xml: In our xml: <alpha> <copy src="io()" trait="_DSHygAlpha" /> </alpha> In our main hud quest: SetUIFloat "HUDMainMenu\_DSHygAlpha" iAlpha With these entries in our MCM menu: ; reset block SetUIFloat "StartMenu/MCM/*:1/*:10/_enable" 1 SetUIString "StartMenu/MCM/*:1/*:10/_title" "Set HUD opacity" SetUIFloat "StartMenu/MCM/*:1/*:10/_type" 2 SetUIFloat "StartMenu/MCM/*:1/*:10/_value" DSHygHud.iAlpha ; default block set DSHygHud.iAlpha to 255 ; new value block elseif iOption == 10 set DSHygHud.iAlpha to fValue ; show scale block elseif iOption == 10 SetUIFloat "StartMenu/MCM/_Value" DSHygHud.iAlpha SETUIFloat "StartMenu/MCM/_ValueDecimal" 3 SetUIFloat "StartMenu/MCM/_ValueIncrement" 5 SetUIFLoat "StartMenu/MCM/_ValueMax" 255 SetUIFloat "StartMenu/MCM/_ValueMin" 0 SetUIString "StartMenu/MCM/*:2/_title" "Hud opacity" ; default scale block elseif iOption == 10 SetUIFloat "StartMenu/MCM/_Value" 255 5.3. adjusting color FNV's amber is nice and dandy, but perhaps TTW players would prefer a shiny, sickly green, and maybe someone else a bright pink, and who are we to deny that to them, really? After all, we have <red>, <green> and <blue> property elements, and the four standard colors for HUD have the following RGB values: amber - 255, 182, 66 blue - 46, 207, 255 green - 26, 255, 128 white - 197, 255, 255 Something tells me we can create a 'list' in MCM that has those names, as well as a custom option, tied to a variable in our HUD quest script: int iColorOption int iRed int iGreen int iBlue if iColorOption == 1 ; amber SetUIFloat "HUDMainMenu\_DSHygRed" 255 SetUIFloat "HUDMainMenu\_DSHygGreen" 182 SetUIFloat "HUDMainMenu\_DSHygBlue" 66 elseif iColorOption == 2 ; blue values go under here elseif iColorOption == 3 ; green values here elseif iColorOption == 4 ; white values here elseif iColorOption == 5 ; custom SetUIFloat "HUDMainMenu\_DSHygRed" iRed SetUIFloat "HUDMainMenu\_DSHygGreen" iGreen SetUIFloat "HUDMainMenu\_DSHygBlue" iBlue endif In our xml, we detach our text elements from their usual color scheme by saying we don't want to use the regular system color, and we add <red>, <green> and <blue> property elements to each text element: <systemcolor> &nosystemcolor; </systemcolor> <red> <copy src="io()" trait="_DSHygRed" /> </red> <green> <copy src="io()" trait="_DSHygGreen" /> </green> <blue> <copy src="io()" trait="_DSHygBlue" /> </blue> Our MCM, meanwhile gets expanded with the following list code: ; reset block SetUIFloat "StartMenu/MCM/*:1/*:11/_enable" 1 SetUIString "StartMenu/MCM/*:1/*:11/_title" "Color options" SetUIFloat "StartMenu/MCM/*:1/*:11/_type" 1 SetUIFloat "StartMenu/MCM/*:1/*:11/_value" DSHygHud.iColorOption if DSHygHud.iColorOption == 1 SetUIString "StartMenu/MCM/*:1/*:11/value/*:1/string" "Amber" elseif DSHygHud.iColorOption == 2 SetUIString "StartMenu/MCM/*:1/*:11/value/*:1/string" "Blue" elseif DSHygHud.iColorOption == 3 SetUIString "StartMenu/MCM/*:1/*:11/value/*:1/string" "Green" elseif DSHygHud.iColorOption == 4 SetUIString "StartMenu/MCM/*:1/*:11/value/*:1/string" "White" elseif DSHygHud.iColorOption == 5 SetUIString "StartMenu/MCM/*:1/*:11/value/*:1/string" "Custom" endif ; default block set DSHygHud.iColorOption to 1 ; new value block elseif iOption == 11 set DSHygHud.iColorOption to fValue ; list block elseif iOption == 11 SetUIString "StartMenu/MCM/*:3/_title" "Color option" SetUIFloat "StartMenu/MCM/*:3/*:1/_enable" 1 SetUIFloat "StartMenu/MCM/*:3/*:2/_enable" 1 SetUIFloat "StartMenu/MCM/*:3/*:3/_enable" 1 SetUIFloat "StartMenu/MCM/*:3/*:4/_enable" 1 SetUIFloat "StartMenu/MCM/*:3/*:5/_enable" 1 SetUIString "StartMenu/MCM/*:3/*:1/text/string" "Amber" SetUIString "StartMenu/MCM/*:3/*:2/text/string" "Blue" SetUIString "StartMenu/MCM/*:3/*:3/text/string" "Green" SetUIString "StartMenu/MCM/*:3/*:4/text/string" "White" SetUIString "StartMenu/MCM/*:3/*:5/text/string" "Custom" Which gets me a nice sickly green when I choose that in-game: Of course, why stop there. We can also use MCM's handy type-9 option to let people enter any RGB value they like. When were you ever going to use it otherwise, honestly? Take care though that the MCM documentation has a mistake in it, where it says to use SetUIStringEX where you really should use SetUIFloat. Let's also make this option dependent on our 'custom' option in the list: ; reset block if DSHygHud.iColorOption == 5 SetUIFloat "StartMenu/MCM/*:1/*:12/_enable" 1 else SetUIFloat "StartMenu/MCM/*:1/*:12/_enable" 2 endif SetUIString "StartMenu/MCM/*:1/*:12/_title" "Custom color" SetUIFloat "StartMenu/MCM/*:1/*:12/_type" 9 SetUIFloat "StartMenu/MCM/*:1/*:12/_value1" DSHygHud.iRed SetUIFloat "StartMenu/MCM/*:1/*:12/_value2" DSHygHud.iGreen SetUIFloat "StartMenu/MCM/*:1/*:12/_value3" DSHygHud.iBlue ; default block set DSHygHud.iRed to 255 set DSHygHud.iGreen to 182 set DSHygHud.iBlue to 66 ; new value block: elseif iOption == 12 set DSHygHud.iRed to GetUIFloat "StartMenu/MCM/_Value1" set DSHygHud.iGreen to GetUIFloat "StartMenu/MCM/_Value2" set DSHygHud.iBlue to GetUIFloat "StartMenu/MCM/_Value3" ; showscale block: elseif iOption == 12 SetUIFloat "StartMenu/MCM/_Value1" DSHygHud.iRed SetUIFloat "StartMenu/MCM/_Value2" DSHygHud.iGreen SetUIFloat "StartMenu/MCM/_Value3" DSHygHud.iBlue SetUIString "StartMenu/MCM/*:2/_title" "Custom color" ; defaultscale block elseif iOption == 12 SetUIFloat "StartMenu/MCM/_Value1" 255 SetUIFloat "StartMenu/MCM/_Value2" 182 SetUIFloat "StartMenu/MCM/_Value3" 66 Which has me pick this gooey pink for our color: 6. Adding a meter or bar Instead of a dry percentage readout, maybe some would prefer a meter or bar displaying just how filthy we are. If we are to provide the option via another MCM toggle... ; reset block SetUIFloat "StartMenu/MCM/*:1/*:13/_enable" 1 SetUIString "StartMenu/MCM/*:1/*:13/_title" "Use a bar" SetUIFloat "StartMenu/MCM/*:1/*:13/_type" 5 SetUIFloat "StartMenu/MCM/*:1/*:13/_value" DSHygHud.iUseBar ; new value elseif iOption == 13 set DSHygHud.iUseBar to fValue and broadcast the option to xml with another custom property... if iUseBar SetUIFloat "HUDMainMenu\_DSHygBar" 1 else SetUIFloat "HUDMainMenu\_DSHygBar" 0 endif then we'll need to stop displaying the percentage if bars are on: <text name="DSHygPercentSign"> <!--other stuff--> <visible> <copy src="io()" trait="_DSHygValue" /> <gt>0</gt> <and> <copy src="io()" trait="_DSHygBar" /> <eq>0</eq> </and> </visible> <!--other stuff--> </text> <!-- also do the same for DSHygValueDisplay --> Next up, we write outselves 2 image elements, under the same rectangle where we placed our text components, one for the background and the other to fill that in: <rect name="DSHygOwnHUD"> <!-- the other stuff--> <image name="DSHygBarBack"> </image> <image name="DSHygBar"> </image> </rect> Their visibility will need to depend on the 'use bars' option, and we'll use a simple solid texture from vanilla to fill up their surface area: <image name="DSHygBarBack"> <visible> <copy src="io()" trait="_DSHygBar" /> </visible> <width>100</width> <height>15</height> <depth>2</depth> <y>20</y> <filename>Interface\Shared\solid.dds</filename> </image> You can tell from above that I gave the background image a maximum width of 100 pixels. (You could obviously go for more, but then you'll have to convert the hygiene value too.) The image that will fill in the background, DSHygBar, will take its width from the value of fHyg in our main quest: if iUseBar SetUIFloat "HUDMainMenu\_DSHygBar" 1 SetUIFloat "HUDMainMenu\_DSHygBarWidth" DSHyg.fHyg else SetUIFloat "HUDMainMenu\_DSHygBar" 0 endif <image name="DSHygBar" <visible> <copy src="io()" trait="_DSHygBar" /> </visible> <width> <copy src="io()" trait="_DSHygBarWidth" /> </width> <height>15</height> <depth>3</depth> <y>20</y> <filename>Interface\Shared\solid.dds</filename> </image> In order to provide contrast, I switch off the usual HUD color on the background and paint it grey, setting its opacity at half of whatever the opacity value we hooked up to a variable earlier is. Also note that the actual bar has a higher <depth> value than that of the background, making sure that it's painted on top of it. <image name="DSHygBarBack"> <visible> <copy src="io()" trait="_DSHygBar" /> </visible> <width>100</width> <height>15</height> <depth>2</depth> <y>20</y> <filename>Interface\Shared\solid.dds</filename> <systemcolor>&nosystemcolor;</systemcolor> <red>190</red> <green>190</green> <blue>190</blue> <alpha> <copy src="io()" trait="_DSHygAlpha" /> <div>2</div> </alpha> </image> Which gives us this result: Why stop there. Now that we know you can adjust the color of images as well as text with the red, green & blue elements, we might as well give the bar the same color that is selected for the text element: <image name="DSHygBar"> <!-- other stuff--> <systemcolor>&nosystemcolor;</systemcolor> <red> <copy src="io()" trait="_DSHygRed" /> </red> <green> <copy src="io()" trait="_DSHygGreen" /> </green> <blue> <copy src="io()" trait="_DSHygBlue" /> </blue> <!-- other stuff--> </image> And, why not, override it all with bright red if hygiene levels exceed a threshold value of 90: <image name="DSHygBarOverride"> <visible> <copy src="io()" trait="_DSHygBar" /> <and> <copy src="io()" trait="_DSHygBarWidth" /> <gt>90</gt> </and> </visible> <width> <copy src="io()" trait="_DSHygBarWidth" /> </width> <height>15</height> <depth>4</depth> <y>20</y> <systemcolor>&nosystemcolor;</systemcolor> <red>255</255> <green>0</green> <blue>0</blue> <alpha> 255 </alpha> <filename>Interface\Shared\solid.dds</filename> </image> By this time, maybe you can figure out how to make it flash then too, using the visibility block and another custom property element turned on and off in our .esp somewhere? Epilogue, credits There are always different ways to achieve the same results we've booked by following this little guide, so do mess around with it once you're familiar with the basics. I've kept to the more straightforward approaches, relying heavily on setting custom properties in my esp, given that I'm no expert at all in this and am much more at home with geck script than Beth xml. In the end parting advice is, as always, that if you're going to write some code like this, read what others have written first. I've based this on code I've seen in vanilla, what's explained in the Oblivion wiki, mods by Gopher, Impoftheperverse and JIP, and a small mod that Fallout2AM once made for me to explain some things. hygiene mod.7z Hygiene source.7z