Search the Community
Showing results for tags 'tutorial'.
-
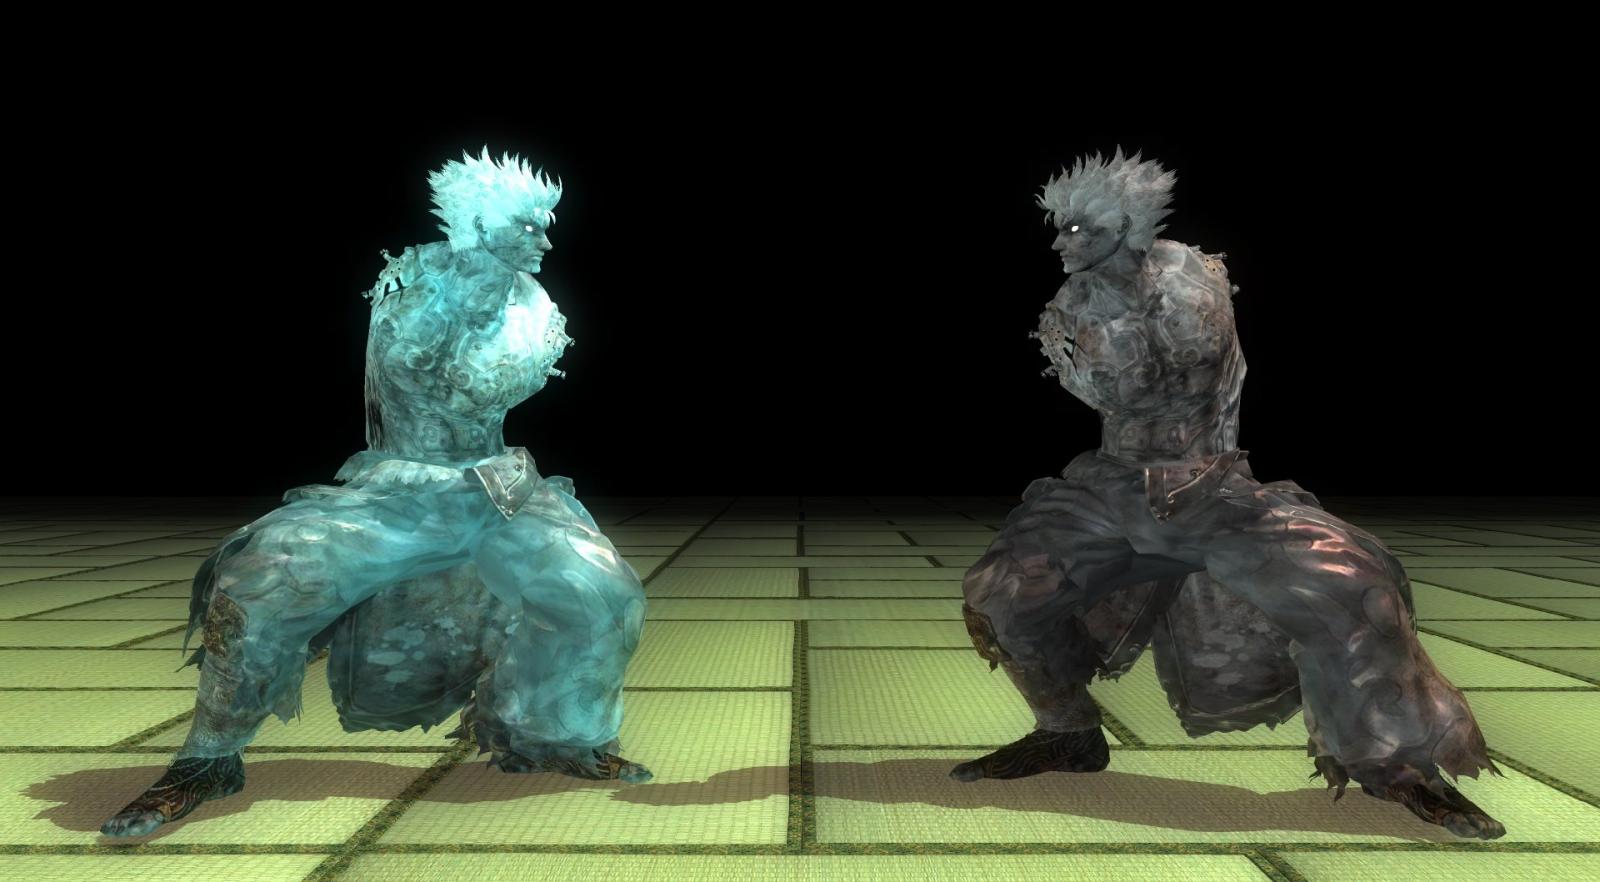
 Have you ever wished you could use more than one version of the same schlong simultaneously? Maybe you want one that uses SOSmale.hkx and one to use SOSfemale.hkx. Maybe you installed my ERF Horse Penis Redux mashups and want to use more than one version at the same time. Well, I'm going to show the way I do it. Do note though that as the title says, this is the quick and dirty way, which means we are only duplicating and changing the absolute minimum amount of things necessary to get a separate schlong addon to show in the MCM and for it to use its own mesh and textures. All the other things that make up a schlong addon, such as potions and code related to gender and race probabilities will be left untouched and shared with the parent schlong. Presumably this will fuck with SOS mechanics that distribute schlongs to NPCs, but since I do not use those mechanics, I don't care. If you DO care about such things, you are welcome to duplicate, rename and then painstakingly reassign EVERYTHING in the addon. Anyway, we'll be using XEdit. Hope you have it installed (google for information on how to do so.) For this example, I'll be using the .esp from TRX Futanari Addon. Once you load the esp, it should look like this: What we need to do is duplicate the correct records to get a separate schlong addon with its own mesh and textures, I will start with the textures: If we were being thorough, we would duplicate each of these records. But since we're all about doing things as quickly and lazily as possible, I will only duplicate the "Default" Texture Set since I only play as human characters anyway. If you play as other races, you might want to duplicate the texture sets relevant to you. Regardless, right click on a texture set you want to duplicate and select "Copy as new record into" XEdit will ask you to change the EditorId. I am making a schlong addon for a character named Ayirah, so I will simply replace "Default" with "Ayirah". Next you will be asked which of the loaded files you want to add this new record into. We will choose the schlong addon we have been working on. Congratulations! You have made a new texture set. Now to change the texture paths- my character will only need separate diffuse and normal maps from the regular addon, so those are the ones I will be editing. I'm going to place her textures in a folder named "Ayirah" inside the regular texture folder. You will notice that I'll do the same with the meshes too. Next, we will go take a look at the Armor Addon records. Much like before, if we were being thorough, we would duplicate all 9 AA records, but again, I'll only need to duplicate the Default one for my purposes. (Your situation may be different) Duplicate and rename the record(s) you need the same way you did with the Texture Sets before. Then change the "Female world model" record (if this is a male addon, you will obviously need to change the male one instead) to point to the location you have chosen for the new mesh. Like I said, I'm just placing new folders inside the ones already existing in the mod and keeping the existing .nif name. The reason for this is that this way you don't need to rename the schlong .nifs once you have built them in BodySlide, just build them into the overwrite folder and place them inside the new folder you made. You will also need to alter the Female Skin Texture record and select the Texture Set you made previously. Next up is the Armor Record. Just like before, copy the record and rename it. Then in the Armature section, select the Addon(s) you made in the previous step. Now, we move on to the Faction record. This is what gives the addon the name it will be listed under in the SOS MCM. Once again, copy and rename the record. Afterwards, alter the text field next to Full - Name and give your new addon whatever name you wish. Finally, we can tackle duplicating the SOS Addon quest. After you've done so, find the SOS_Addon_Faction and SOS_Addon_Genitals properties and change them to the Faction and Armor (Note: Armor, not ArmorAddon! Make sure it has the ARMO prefix) you made in previous steps. Finally, give the quest a new name, save the .esp and exit XEdit. You're done! Now to check if our new addon works in game... success!
 -
View File Installation of Sexout Common Resources (SCR): Questions related to use of this tutorial: This tutorial covers the how to create the Resource folder and install it. Support will only cover any issues related to these two issues. Any questions related to issues downloading, extracting or obtaining these files should be directed to the threads host the resources. Please refrain to posting missing requirements here unless they have been added to Halstroms SCR thread. This tutorial is based off of his thread and any new or missing requirements need to be posted there first before being added to this tutorial. FYI: This is the brief tutorial, general instructions and such. For the full step by step instructions download the PDF. It is very large and complete with pictures. Do not PM me with questions on the tutorial. These PMs will be ignored. If it is valuable enough for you to take time to send a PM then it is valuable enough to actually post in the forum. There are others here that can answer many of the common questions I get in PMs. Anybody that wishes to make translations of my tutorial is welcome to do so. Please cite your source (this tutorial) appropriately. However keep in mind if you translate you will be expected to provide support for that language. Please also let me know you have done this. I will be happy to post a link for your language version to help those people with a native language speaker support for SCR Resources. Installation of Sexout Common Resources (SCR): This tutorial is for those individuals that can use tools such as FOMM and 7zip. A Downloadable PDF for convenience. Step 1: Prerequirements Make sure you have all the SCR pre-requirements installed and setup properly. 7zip installed and configured. Required for this tutorial and useful for modding in general. FOMM installed. Preferably the version hosted here on LL. Fallout New Vegas Astymma’s BnB Body Extender FAFF NVG compatibility skeleton. New Vegas Script Extender (NVSE) Most current version available. NVSE Extender (Most current available) SexoutNG Sexout Common Resources (SCR) by Halstrom An Account with both Loverslab.com and Nexus.com to access the mods needed. Create a SCR Resources folder on the desktop or where you want to work. Create an SCR Archive folder to keep you from having to re-download the requirements again. There is an excellent tutorial by BruceWayne on Sexout installation and its requirements found here. Still have problems go here, here and here. Step 2: Installation Prep These requirements installed in this step aren't available in game without some mod accessing them. If you desire to access these outside of mods and gameplay my advice is to install SexoutStore so that you can access these armors and other items when you desire. Provided you have the caps. Keep in mind in order for SexoutStore or Halstrom’s Pregnancy mod to work properly you need all the resources installed. General Concept: Download all the requirements to the SCR Archive folder. Extract the requirements to a convenient location then drag the textures, meshes and sound to the SCR Resources folder. Finally delete the extracted folder and move on to the next requirement. It is advised to follow the list of requirements in order. Remove all esp's from these resources. There will be special instructions to rename files. This must be done in order to get a functional SCR Resource. If you do not follow the instructions properly many issues may occur. In some cases there will be two sets of records (clothes, toys etc) in the game which only one is controlled by SCR. Other cases the items won’t be available and giant red exclamation marks, pink skin, or floating head and hands will be the result. The worst effect of not following the instructions would be your game will crash when you start it. You have been warned! Base Non-SexoutStore/Pregnancy Requirements: [SCR] Spectrums Toy Pack by Spectrum Warrior. Refugee Outfits for Type 3 by Exter (Delete the esp(s) T6 M CH Raider Armor by Izumiko (Delete the esps) Raider Chains Armor T6m – T6BB – TN – BerryK2 .2 by nagothm (Delete the esp(s) Sexout Clothing System by Evilrunner (Sexout Clothing Damage Updated with Combat Armour! Only) (Delete the esp(s) Nordlands Mesh & Texture pack for the Fertility Drugs by Norland GSB’s BDSM Files 20130227 by GSBmodder You now have all the base and specific resources installed. If you desire to have SexoutStore, or Halstrom’s Pregnancy installed continue with the tutorial. If not you can skip to Step 3. The Following are required if using SexoutStore, Halstrom’s Pregnancy, and/or Tryouts mod. The following are mod specific resources and are only required if using specific mods, SexoutStore, or Pregnancy. Tryout's Meshes, Textures and TryoutAudio by Loogie: Sexout Maternity Clothes – Old by Evilrunner Mantis Zero Suit Samus and More - Type 3 for NV by Primantis. (Delete the esp(s) Reflex Armor S-07 for TYPE 3 a Mantis Retexture by static07 and Primantis (Delete the esp(s) Bunny Suit for Dimonized Type3 by Backsteppo (Delete the esp(s) Ghost Armor Conversion FNV Revamp by Ken1945 - Bunsaki – Rikai (Delete the esp(s) Vegas Chokers by adriant1978 (Delete the esp(s) You have to rename the BSA to SexoutCommonResources – VegasChokers Bouncing Breasts Type 3 Armors by revang. (Delete the esp(s) Requires Pack 1, 2, and BB Sexy Sleepwear. The Dragon Girl Dresses Do not use the one on this page. Use this one instead. Julia Chang Set by GSBmodder (Delete the esp(s) Ghost Variants by Brokencrash. (Delete the esp(s) Extravagant Half Masks FNV by t3589. T6M Competition Swimsuit NV by Shimaneko (Delete the esp(s) The following are mods that have been removed by the author. They are no longer publicly available for download. A Collection of Sexy Attire by Shadowtroop (Delete the esp) Step 3: Verification of Installation Check the SCR Resources folder and you should only have the following: Meshes Textures Sound SexoutCommonResources - VegasChokers If you have anything else you did something wrong go back and figure out where you went wrong. If your folder has only the files I mention above and you are completely satisfied that you have everything ready move to Step 4. If you think you made mistake go back and repeat any or all the individual steps for the requirements. Step 4: Installation Instructions Create an FMOD that can be used when installing SCR. Open FOMM and select Fallout New Vegas. Click on Package manager. Click on the arrow pointing down on the “Add FOMod” button. Select Create from Folder. A window opens up select the SCR Resources Folder and click OK. Wait until done. This will take quite some time. When done you will see SCR Resources entry in the Package Manager. Select that and click the Activate button and wait some more. When done you can close the package manager and move on to Step 5 if you desire to add some of the available options from the mods mentioned above. Step 5: Optional Patches (Optional) SCR Resources Patch Used in case there are some options that are desired from the SCR Resources Tutorial above or files added in the future to SCR and SCR’s family of mods. You can also create a patch if you are concerned there might be a mistake or problem with your SCR Resources folder. Patches can be installed separately ( after the base SCR Resources folder of course) and the installation will prompt you for overwrite. After verification that it is what you desire you can later merge this into the SCR Resources folder and overwrite those files. Benefits to creating a patch: Flexibility and expandability without risking the core base folder created by the above instructions. Ability to make multiple patches and numbering them or giving them a brief name at the end. For example SCR Resources Patch – Ghost Armor. This can make it easier to figure out which patch is which in the future. This also allows you to make smaller changes. My suggestion is make a patch for each mod or resource used or added. Patches can be added, removed, altered, and tested until just right. When finalized and determined as “perfect” the folder then can be merged with the SCR Resources folder created in the tutorial above. More info further down under “Merging SCR Resources Patch with SCR Resources folder”. How to create the SCR Resources Patch: Create a folder named SCR Resources Patch Open up the mod desired and look for the Textures, Meshes, or Sounds desired. Might have to dig down onto the folders and move specific files over. Make sure you follow the instructions of the author on how to place these extra folders as some options means manually creating a file, placing a single file into a folder in a specific location etc. When finished return to Step 5 and import the new patch into the game and test. When reinstalling your mods remember that the SCR Resources folder needs to be installed before an SCR Resources Patches. Merging SCR Resources Patch with SCR Resources folder You have determined that the patches you have created are perfect and what you want to use going forward. You would desire to merge these together to easy the management of your mods in your manager. Grab the SCR Resources folder you created earlier. Make a copy. Might take a bit of time. Rename the old copy “SCR Resources Original” This is to designate it is what was started with. You might change your mind later and decide to go back and rework the files. It is always a good idea to have the same base files to start from that everybody else will have. Grab the files out of the SCR Resources Patch Step 6: Backup the folders SCR Archive, SCR Resources, and SCR Resources Original (if Step 5 was used) Submitter RitualClarity Submitted 10/21/2013 Category Other Requires FNV, FOMM, Sexout, SCR, NVSE Extender, NVSE View File
-
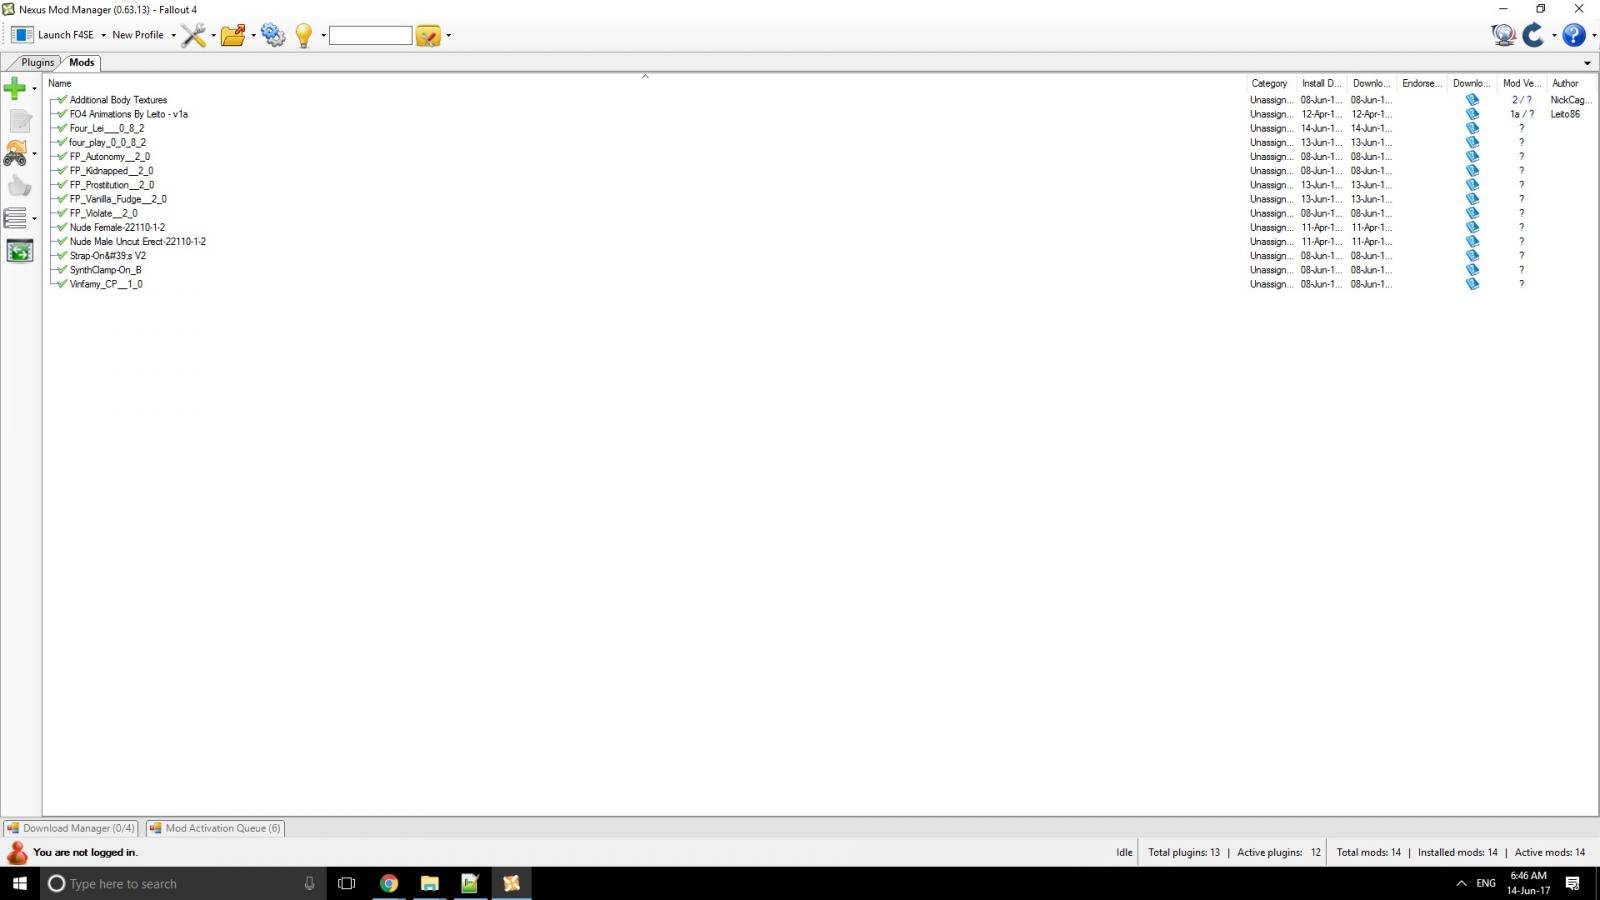
 This guide assumes no previous knowledge of modding to make it accessible to everyone, so some details may appear trivial to you. Some of the steps are 'to be on a safe side'/ 'just in case' and might not be entirely necessary. Last updated: 28 Oct 2017 Step 1 - Buy and Install Fallout 4 There is no need to install any DLCs for Four-Play to work. Make sure you have the latest version of the game (1.9 - released 6 Feb 17). Steam should automatically keep your game up-to-date. Run the game at least once to generate the ini's needed for Step 2 Step 2 - Enable Modding and Papyrus Logging Navigate to Documents/My Games/Fallout 4 Right click on Fallout4Prefs.ini, select Properties, untick Read-only if it's currently ticked and click OK. Repeat for Fallout4Custom.ini. Open Fallout4Prefs.ini Find [Launcher] section, under it, make sure that bEnableFileSelection=1 If [Launcher] or bEnableFileSelection doesn't exist, add them It should look like this: Save Fallout4Prefs.ini Still in the same folder, open Fallout4Custom.ini If Fallout4Custom.ini doesn't exist, create a new text document and name it Fallout4Custom.ini Find/ Create [Archive] section and make sure it looks like this: (Optional but Recommended) Still in Fallout4Custom.ini, find/ Create [Papyrus] section and make sure it looks like this: (Optional but Recommended) Still in Fallout4Custom.ini, navigate to the [General] section (or create one) and add the following: Save Fallout4Custom.ini Right click on Fallout4Prefs.ini, select Properties, tick Read-only and click OK. Repeat for Fallout4Custom.ini. Step 3 - Download and Install the latest F4SE Download the latest F4SE here. Double-click the file you just downloaded, follow the installation wizard, remember to double-check whether it finds the correct installation directory for your FO4. Let the installation wizard install F4SE for you. Step 4 - Pick a mod manager: NMM, MO or Manual I don't recommend manual installation at all. Things will get hectic very quickly. Nexus Mod Manager is more stable but wastes a bit more HDD space, Mod Organizer causes CTDs at game startups occasionally. Download a mod manager and use its respective installation wizard to install it. Step 5 to 12 are tailored to which mod manager you use. They are very similar in principal though. Mod Organizer Nexus Mod Manager The final two steps are universal for MO and NMM. Step 13 - Load a Clean Save, Initialize Four-Play Framework and Leito's Animation Pack Load any save without Four-Play installed on before. All the better if it's an unmodded save (without the [M]). While in game, wait a few seconds. You should now get a popup asking which animation packs to load, select the appropriate option depending on which animation packs you have installed (I recommend installing all). On the top left corner of your screen, you should see the notification ""Vinfamy: Registered Leito's animations and intialized Four-Play with Supermutant support.". Followed by a bunch of "Vinfamy: Thanks for installing xyz" if you use my plugins. These indicate that both Four-Play and Leito's animation pack has been installed correctly. If they don't show up or if you get "Four-Play Framework has not been installed correctly. Animations won't start.", something went wrong and please double-check that you haven't missed any of the steps above. Step 14 - Enjoy! All your Four-Play plugins should now work as described. Leito's animations should now play, with sounds. Actors involved in sex scenes should strip and redress (redressing may fail sometimes for leveled actors - known issue) correctly. Read the plugins' respective download pages to know how each plug-in works. In attachments are what the two tabs of NMM look like in my very light set-up. Don't worry too much if your set-up doesn't match: load order of the Four-Play mods don't really matter and you don't have to install all the plugins or the control panel.
-
 SCake Guide : How to set up animating and import animations for Project Sugar Cake (This guide is originally available on our Discord via GDrive and on my site at https://www.michaelpstanich.com/article/SCake_HowToMakeAnimsGuide.html - all sources have the same general information but updates will push to the Discord GDrive version first. Just easiest to update.) Last Guide Update : 2024-04-08 Update : 2024-04-08 : Updated Step 4 and 5 in “Setting up our UE5 Project” to include a failsafe setting which may be required in some instances. Added a note to “Exporting our New Animation” Step 3 about excluding keyframes to allow in-game physics and animation blending. Current Project Sugar Cake Thread - https://www.loverslab.com/topic/225549-project-sugar-cake-sex-and-stat-framework-gameplay-mod ----- If you’re unfamiliar with Project Sugar Cake, SCake is an animation framework for Palworld focused on erotic animations. The framework has a lot of options for animators and users that allow the framework to be used for animations ranging from simple to complex with adjustable .json files. This is meant to be a ‘complete’ guide getting you from no knowledge of palworld into making animations for SCake and releasing Animation Packs! Many sections of this tutorial are either extra information are alternate methods and can be skipped entirely, don’t be intimidated by the length! Nearly everything is explain in detail, so if you’re new to Palworld modding this will help catch you up on terms and methods, but if you’re already familiar with modding Palworld you can follow the simple steps outlined without needing to follow every section. Social Links : Our Discord – The Broken Chatbox – https://discord.gg/h3vB7S4FEw -v- Donations! -v- =^-^= SubscribeStar - https://subscribestar.adult/michaelpstanich If you need any additional help or have questions regarding the guide, don’t be afraid to join our discord (linked above)! We’re a creative community and directly endorse SCake, so we are the best equipped to help with SCake directly. You can also ask the Palworld Modding Discord for help with general things, however make sure you follow their rules and content guidelines when asking for help! ~ (_) ~ Sections ~ (_) ~ -1. TLDR Version 0. What is this tutorial/guide for? 1. Understanding the Tools and Formats (Palworld with UE5) 2. Understanding and Planning for SCake 3. Extracting the Skeleton/Model 4. Importing into Blender and Animating 5. Exporting our New Animation 6. Setting up our UE5 Project 7. Importing Animations and Configuring for SCake 8. Exporting our Animation Pack and Configuring the JSON 9. Setting up our Animation Pack for Public Release 10. Final Notes Disclaimers : (0) I’m writing this tutorial for ‘the current state of things’ and there may be better or more fluid workflows for all of this, don’t consider this guide to be the end-all be-all of guides! (1) I will be linking to the Palworld Modding Wiki ( https://pwmodding.wiki/ ) through-out this guide as a source for other basic guides. This does not mean all the information supplied will be complete or up-to-date. I am not directly affiliated with the palworld modding wiki. (2) The tools linked here are not affiliated with myself or SCake, nor is their inclusion an endorsement of SCake and its contents. When reaching out for help regarding SCake make sure the parties involved are interested in helping (such as our own community). -1. TLDR Version This section just lists the steps without any explanations, check each section for more information. This TLDR will help you find where you may want to read more into and what you can skip. 0. This guide is for making SCake animation packs 1. Links and Details for the tools we’ll be using 2. SCake registers animations then plays those animations through events which are lists of animations with various parameters, there are also climax variants that can be defined for each animation which plays back dynamically 3. If you already have a model with the appropriate rig to animate, skip this step. If not, find the model you want to animate in FModel and export it. 4. Import into Blender using the io_scene_psk_psa plugin for Blender 4.0 (When using Blender 4.0) with default settings 5. Once done with your animations, export each animation individually into a .fbx file with the displayed settings linked in this section 6. Create a UE5 project for your mod and import Fixed Bone Index Assets for the models you are animating for then create your animation pack’s folder and set-up 7. Import the animations targeting the correct fixed skeleton, create a montage from each asset and set the looping section in the animation if it should loop 8. Export your animation pack as a .pak using UE5’s packaging function, then set up the .json file following the templates provided (section details settings) 9. Test your animation(s) to ensure they work properly in-game, if they do then package up and publish your mod wherever you please! 0. What is this tutorial/guide for? This tutorial is for people wanting to make animations for the Palworld mod ‘Project Sugar Cake’ (SCake), allowing the animation to play in-game through the SCake API. This guide will have a lot of general information about modding Palworld and importing for UE5 mods, however we will be focused on SCake in this guide specifically, linking to other resources to learn about certain aspects that are better handled elsewhere. If you’re already familiar with Palworld modding then this won’t be a problem, but if not I recommend following through each section at your own pace and try not to skip around! By the end of this tutorial you will hopefully have a good starting point for getting Animations into Palworld with full integration with SCake! 1. Understanding the Tools and Formats (Palworld with UE5) Palworld uses UE5 as its engine and the modding community uses general modding tools for UE5 games along with a modkit (Tutorial for its installation here - https://pwmodding.wiki/docs/category/palworld-modding-kit ) created by a community member (localcc), remember to thank them for all their hard work! Palworld using UE5 is actually really beneficial to us since it allows us a lot of power with modding, but it also has some limitations and we have to work with very specific formats in a not always typical fashion. Let’s break down the software and formats we’ll be using. Creation Tools : Unreal Engine 5.1.1 (Yes, the whole actual engine!) Resource Link : https://www.unrealengine.com/ This one you’ll install through the Epic Games Launcher, it’s legit just the normal UE5 you’d typically use in game development or CG work. Technically there are packaging methods without using the engine itself, but since we will need to convert imported Animation Sequences into Animation Montages we want the full engine, and specifically we want to get version UE5.1.1 which is the engine version Palworld uses. If you use a different version it may not work as intended or cause issues if you try compiling other types of mods. Palworld Modkit : Resource Link : https://github.com/localcc/PalworldModdingKit/tree/main Setup Guide : https://pwmodding.wiki/docs/category/palworld-modding-kit When doing just animation imports for SCake, the modkit is optional, however if you’re looking to make any Blueprint mods or integrations with SCake it’s required. I will cover both with and without the mod-kit when setting up a project for SCake animation imports, but when we get to integrations or BP methods I will assume you installed the ModKit. (I also find using the modkit to be easier than setting up a project every time I want to import animations, I’ll cover why when we get there) FModel : Resource Link : https://github.com/4sval/FModel Guides : https://pwmodding.wiki/docs/asset-swapping/Home > https://pwmodding.wiki/docs/asset-swapping/StartingOut > https://pwmodding.wiki/docs/asset-swapping/ExportingModifying3DAssets This is a general Unreal Engine asset extraction tool, it’s extremely powerful but has a lot of limitations. For our use case we’ll be interested in extracting the model and skeleton for pals (and maybe textures if that’s something you would also want). If you’re only using models/rigs provided externally and not from the game files, or you already made some yourself, then you may not need Fmodel, but I do recommend it for Bone Index Fixing, which we’ll cover much later in the guide. Blender (4.0+) : Resource Link : https://www.blender.org/ Blender is a (free and open source) 3D modeling and animation tool. Technically you can use other software but I will be showing blender specifically in this tutorial and guide and we’ll be using a plugin for Blender for imports/exports. io_scene_psk_psa (Blender Plugin v6.2+) : Resource Link : https://github.com/DarklightGames/io_scene_psk_psa This is a plugin for Blender that allows us to import Unreal Engine .psk model and .psa animation files. Since we only need this for importing (we export using .fbx which should work by default in Blender 4.0) if you’re not using assets extracted from the game this will be an optional (similar to FModel requirement). UE4SS : Resource Link : https://github.com/UE4SS-RE/RE-UE4SS Unreal Engine mod-injection and replacer pak loader. This is required to get SCake running in-game as well as any other script/blueprint mod. Formats : .psk/.psa These are the native formats Unreal Engine uses for Models and Animations. We only deal with these formats if we extract assets directly from the game like when using FModel and we’ll convert them into .blend and .fbx files using Blender. .pak Packaged assets format for Unreal Engine and what we’ll distribute as the mod so that it can load in-game. .blend Blender Project Files, we’ll keep a source so we can easily return to fix/change/re-export/ect. .fbx An open standard for model and animation files, we’ll be exporting .fbx for models and animations then using UE5’s fbx importer to get models/animations into our mod. .uasset These are the raw unreal asset files. These assets come in 2 forms but are named the same, cooked and uncooked. Uncooked assets are the same as those you save in the editor without any packing or compression, cooked assets are packed and compressed by propitiatory methods and can not be undone or loaded outside of run-time. The SCake API distributes Uncooked .uasset files which you can load in the editor. .json A simple text file with a specific format specialized in storing data with an easy to edit and read format. SCake as a JSON loader for importing animations (which is the recommended method) and we’ll want to configure a .json file and distribute it with the corresponding animation pack. Additional Resources CharacterID list Resource Link : https://pwmodding.wiki/docs/game-data/monster-table To properly reference various Pals we need the Character ID, this ID is used to reference things not just in-game but is also used in the file structure so having this list is crucial for setting things up properly! Bone Index Corrected Skeletons Resource Link : https://drive.google.com/drive/folders/1-RwOyqXaZql01ALr5ymq7l23MKpGPmmN?usp=drive_link We’ll be using these assets for importing animations with the correct Bone Index order. Why and how will be described later in the tutorial. (A tutorial on how to create these assets on your own is in the works) 2. Understanding and Planning for SCake Before we actually get into animating it’s a good idea to quickly cover how SCake works and plays animations so you can appropriately plan your animation to best work with the framework. SCake is fairly flexible, but it is designed around some simple concepts that are expected for Erotic animations specifically. SCake works by registering individual sets of animations where each actor involved in the animations has an associated Animation Montage, these montages are synced up and played at the same time whenever the animation is called. However when actually calling animations to play SCake uses what’s called Animation Events, these events are a configure-able list of those previously mentioned individual animation sets that play in order according to if they are looping and playback time settings. To give a quick example, you may have an scene where a character pets a pal, then gives the pal a hug, then returns to the same ‘petting the pal’ animation. This would be an Animation Event with 3 stages and 2 animations, you would create 1 petting animations, then a hug animation and register those with SCake as Animations, then you would register an Animation Event where you create 3 stages with stage 1 and 3 referencing the petting animation and stage 2 referencing the hugging animation. “Register” in this case would just be configuring the .json file and having it installed correctly (details on this included with SCake). You can also use Stage Order, an advanced setting available for Animation Events where you would just register 2 stages, 1 with the petting animation and 2 with the hugging animation, then just playback stages like “0,1,0” (SCake counts things starting at base 0, this is a technical thing). This will playback the same animation as setting 3 stages, but you only need to register with 2 stages. Additionally since SCake was specifically created with erotic animations in mind it also offers the ability to register orgasm variants of different animations, called “Climax Variants” (or Climax Var for short). If these variants are registered with the animation, when the designated characters orgasm during the animation then it will switch to playing these variants allowing animators to create custom motions and effects based on which animation is playing. This feature is technically optional, but I do encourage animators to give it a shot! If you only feel like making one Climax Variant you can always just reference the same animation for each (You can mix and match however you want). These can also be configured in Animation Events, so users are able to fully customize which animations play. Now with these systems in mind we can move to actually making animations! 3. Extracting the Skeleton/Model If you already have the Skeleton and Model to start animating then you can skip this step! For the rest of us (or just for those curious) for this step we’re going to be using FModel to extract game assets to use as our basis for animating. Setting up FModel 1 ) First you’ll need to get FModel, head to their GitHub page - https://github.com/4sval/FModel and click on “Releases” (usually on the right side of the page) and download the latest version labeled “FModel.zip”. 2 ) Extract that file and put it wherever you want it (I have dedicated folders for my mod developments), inside the extracted folder you should have FModel.exe, imgui.ini, and a dll file (most likely oo2core_9_win64.dll). 3 ) Now you can open the FModel.exe to start up FModel and you should be created with a Directory Selector (if not, go to “Directory” in the top left and click on “selector”), if 2 additional options “Name” and “Directory” are not showing in the lower half, go ahead and click on the double arrow under “ADD UNDETECTED GAME” to open the add game options, from there you’ll want to set the name to something you’ll recognize (I just named my entry as “Palworld”) then find then click the … next to the “Directory” text field and find your palworld installation. If you installed through Steam it should be in your steam library directory (you can right click the game in your Steam library, go to “Manage” then click the “Browse Local Files” button and it will open a file browser to where your game is installed, you can then just copy the address in the top bar to the selector window for FModel. Once you have the Name and Directory set, click the + icon in the bottom right to add it to your Detected Game List. From there change the Detected Game to Palworld and change the UE Versions to “Game_UE5_1 (536870928)” then click “OK” to confirm and select. 4 ) We’re not quite done with set-up yet because in order to actually pull data from the game we need what’s called a mappings file. This mapping file effectively just tells us how the data is sorted inside the pal, which can then be used by programs like FModel to pull the data properly. I won’t cover how to create your own mappings file (UE4SS is the easiest way if you’re interested in looking it up), instead I’ll link to this specific step in the Asset Swapping guide on the Palworld Modding wiki, which povides a direct download for a mappings file, https://pwmodding.wiki/docs/asset-swapping/Home , should be labeled as “Palworld Mapping File” and will give you the file “Mappings.usmap”. 5 ) Next, we’ll go into the “Settings” by clicking the option at the top of FModel, then ensure you’re on the “General” tab. Under “ADVANCED” make sure the Local Mapping File is enabled and then set the “Mapping File Path” to wherever you put the Mappings.usmap file we downloaded in the previous step. (Optionally while here you can also set an Output Directory for where you want exported files to go which can be handy. I just made an Output folder within the FModel folder itself and use that as my Output Directory.) 6 ) (Technically Optional) Next we’ll set things up so we can extract the full skeleton, under the “Models” tab in the settings, near the bottom enable “Handle Skeletons as Empty Meshes”. This option will allow us to extract the full skeleton asset as a single Armature without the mesh and this can then be morphed and weighted on to custom models if the need arises. 7 ) Once you’ve got your settings set up, go ahead and click “OK” at the bottom right to confirm all your changes. If you set up a new Export Directory then you’ll also want to close and start FModel back up so that the new output directory takes effect. Finding/Extracting the assets Now that we have all the settings configured we can return to the main screen of FModel, you should see various .pak files listed on the left side under “GAME ARCHIVES”. These are the packs loaded into your current install of Palworld, which will also include any mods you have put into the content folder (This will be relevant later when making custom Animation Events for SCake). What we’re interested in is “Pal-Windows.pak” which is the pak file for Palworld’s main assets, go ahead and double click that entry to enter into the pak and see the full file structure. This will now turn the left side into a file/directory tree where we can see everything included in the selected .pak file. Now let’s go grab the model we wish to animation and optionally we can also grab the corresponding skeleton asset. 1 ) First navigate to the appropriate folder. All the character models and skeletons are stored in “Pal/Content/Pal/Model/Character” with “Monster” being the folder for pals, “NPC” being the human characters and some boss characters, and “Player” being the playable character assets. All full skeleton assets are stored in the “Skeleton” folder. 2 ) For this example I will be grabbing the Lamball assets, which internally the game calls “SheepBall” and associates with its CharacterID, so I navigate into the “Monsters” folder, find “SheepBall” then click the “Packages” tab at the top left which should show 9 assets for this particular folder. This will change the display to showing the assets in that folder and we want to ensure the asset named “SK_[CharacterID].uasset” (would read “SK_SheepBall.uasset” this the Lamball example) is in this folder, otherwise we got the wrong folder and need to find the correct one. This SK asset is the model and associated bones used for this particular character and it’s all we need to start animating. Keep note of the file path as this will be important later when we start importing animations! 3 ) So now that we’ve found it, let’s extract it! Right click the appropriate asset and select “Save Model (.psk)”. This will extract the model as a .psk file in the Output folder we optionally set up from before, by default the output folder will also keep the same file path. To navigate quickly to your newly extracted asset you can go to the bottom of FModel where it shows the report log and just click the extracted asset text and it should open a file explorer window where the asset resides. Optionally here you can also extract all the materials/textures if you had any desire to do so but we won’t be bothering with that in this tutorial. (Check tutorials on the Palworld Modding Wiki like the asset swapping tutorial - https://pwmodding.wiki/docs/category/asset-swapping – for more details on that. Textures/Materials are not required to get animations made and imported.) 4 ) Optionally you can do the same thing for the Skeleton asset from the “Skeleton” folder, these assets will have the lable “_Skeleton” appended onto the end of the name used for the model. You will only need this asset if you are trying to create a completely custom model or intend to create your own import assets which we’ll touch on later, if you plan to do this or just want it just-in-case you can right-click and also save this as a .psk file. If the settings were set up correctly it should output a .psk with an armature and an empty mesh, which we can then re-parent to new models. 5 ) You can technically do this for animations as well which are in the “Pal/ContentPal/Animations/Character” folder instead. For these you would want to find the animation with the prefix “AS_” which stands for “Animation Sequence” then select the right-click option “Save Animation (.psa)” which will extract the animation as a .psa file we can import into Blender. You would only want to do this if you intended to make an alternative version of the base game’s animation but be aware that extracting .psa files has a lot of issues and things may not extract how you’d think it would. (For most animations you can also extract the AM_ prefixed files instead, which are Animation Montage files, however some have blend profiles and this will cause the export to have distortions and won’t be usable with our current tools.) 4. Importing into Blender and Animating Once we have models to animation we can import them into Blender and get things moving! This section will be relatively brief, this won’t be a full Blender animation tutorial as there are a ton of great resources for that. Instead I’ll be focusing on just getting the model into Blender and covering some simple quirks with the models/rigs that we should be aware of. Setting up the import Plugin If you already have a model/rig properly set up for animating then you can skip this step, otherwise, if you haven’t already, we need to install the io_scene_psk_psa plugin for blender linked in the resources portion so that we can import the .psk model file we exported from FModel. 1 ) Head to the github repository ( https://github.com/DarklightGames/io_scene_psk_psa ) and download the latest release compatible with Blender 4.0 (at the time of writing that is Release 6.2.0), you can find releases on the right side of the page under “Releases”. You’ll want the .zip file and DO NOT extract it! To make things easier we want to keep the plugin as a .zip so that Blender can automatically install it for us by just selecting the .zip. 2 ) Go ahead and start up Blender 4.0 if you haven’t already and head to the top bar, select “Edit” and then the sub-option “Preferences…”. In the Preferences panel in the left side tabs select “Add-ons” then use the “Install…” button in the top right of the panel and find the .zip file for the plugin we just downloaded in the last step. Once you click and install the Zip it should automatically enter the name in the search field and we just need to click the checkbox to enable it. Import the Model 1 ) Go ahead and open up Blender if you hadn’t already and create a new empty scene, ensure you stick to defaults for the scene set-up to remove any potential variables messing with the importer. 2 ) Next we need to import the model we’re looking to animate with the relevant rig. Click “File” in the top bar and select “Import” then the “Unreal PSK (.psk/pskx)” option, this is the plugin we installed and enabled for importing Unreal .psk/.psa files. In the import window navigate to the model you exported from FModel you with to animate and then import it with the default settings. (Most importantly leave scale at 1.00! Some guides will incorrectly tell you to change this, but this will screw things up! Those guides export the FBX incorrectly!) 3 ) Now you have the model and all relevant bones you can animate for it! Just continue like normal! However, I will note that later we will be renaming the armature to “Armature” for importing into UE5, which is a critical step so you may do that now if you wanted. (Optionally this is when you would also import any animation you wanted to, you would click the Armature and then use File > Import > Unreal PSA (.psa) and then navigate to and import the animation you exported with default settings. This will add the animation to the actions list, then it can be altered just like any other animation.) Animation Quirks There’s a couple of quirks we should touch on here before we continue which will be relevant to animating characters for palworld. - ) When exporting the skeleton FModel includes the sockets from UE5’s socket system as bones, however these are not actually bones and can safely be deleted. All the sockets will have the prefix “socket_” on them which makes them easy to find. (They don’t even have weights so it’s not like animating them will do anything to the model anyways, and a fixed bone index asset won’t have them) -) When animating the default models you may notice some strange or sharp weights, this is normal and won’t look nearly as deformed in-game (usually). This is because FModel doesn’t do a perfect job at extracting all the weights correctly so some things will stretch to far or be much sharper than it actually is. Focus on the general shape/motion of the animation and don’t worry too much about trying to fix small deformations, as long as you are animating correctly these shouldn’t look too bad in-game. - ) In most models the “root” and “pelvis” behave exactly the same, moving/animating the pelvis will move the entire model. You can use some of Blender’s bone/rig locking/limiting tools to help make this less of an issue but remember to apply those modifiers before exporting the animation or else it may not look correctly in-game. - ) When translating the entire model by shifting the root (or pelvis in most model’s cases) the hit-box of characters will follow the mesh, however the capsule (what’s used for ground and gravity calculations) generally will not. SCake has an option for moving characters but to ensure multi-character animations line up properly we generally want to move the bones in the animation (moving the root/pelvis to where we want the character to be offset) so that they line up and not rely on trying to adjust them in-game, this will help the capsule components line up and apply the same ground position to all actors in the animation. (of course you can play around with this to find whatever works best for your animations ^-^) 5. Exporting our New Animation Ok, got something animated? (Or at least some test animation? I always recommend doing some sort of simple animation first like a waving arm test to get a workflow going!) Now we can take the next technical step, exporting our animation so that Unreal will be able to import it in a way that works in-game and with SCake. There’s a couple of things we need to keep in mind, the Armature must be named exactly “Armature” so that it imports properly, otherwise UE5 messes up the root bone and doesn’t animate in-game. Additionally we want to export each animation as it’s own .fbx so we can adjust and re-import each animation on its own while also being able to import additional animations if needed (in unreal if you re-import an FBX it will just update any animation already imported but won’t add new ones, so we save them individually). 1 ) First things first, let’s check and ensure a couple things are set properly. Ensure your armature is named “Armature” (When we import into UE5 the armature must be named exactly “Armature” or else it won’t map to the bones correctly) and your animation is selected in the actions editor (We will be exporting each animation as its own file so we need to select the right animation to export). The currently selected action should show up under the armature in Blender. (For my example I just used the SheepBall petting animation from in-game) 2 ) Next ensure you’re in “Object Mode” in the top left, then we need to select the Armature and the associated mesh we are going to export (Use ctrl+click) and click on File in the top left, and under the “Export” Submenu select “FBX (.fbx)”. We will be using the FBX format to import our meshes/animations into UE5. 3 ) While exporting we need to set some very specific settings to ensure things import correctly, I’ll provide an image of these exact images, but for those that prefer text the settings that diverge from default are… Under “Include, in “Limit to” enable “Selected Objects” and select only the “Armature” and “Mesh” options to prevent garbage data interfering. Under Transform set “Apply Scaling” to “FBX Units Scale”, In the Geometry section set “Smoothing” to “Face” to prevent some strange UE5 errors on import (which can cause shader issues), for “Armature” settings you want to disable “Add Leaf Bones” so it doesn’t add any extra bones or weights, and with “Bake Animation” enabled, disable “NLA Strips” and “All Actions” so we export proper data and only the single animation. (If for some reason you wish to go against the advice of exporting 1 animation per .fbx, you can leave “All Actions” enabled and it will export all animations in the Actions list for that Armature into the FBX, however this can cause issues later down the road in UE5 if you ever try to update them.) Note : Some of these settings and still be used like your typical workflow shortcuts, stuff like “Apply Transform” and such if you animated with it specifically in mind, however it’s best practice here to apply any modifiers before an export. Personally I create a collection for animating and then a second collection for exporting where I apply any modifiers and rename for export, but you would want to find a workflow that works best for you! Updated : 2024-04-08 Note ) “Key All Bones” and “Force Start/End Keyframes” are technically optional but recommended unless you know exactly what you’re doing. SCake works by overriding animations in-game, to ensure every bone’s animation is overwritten we enable these settings to ensure every bone is keyframed in the animation. However, if there is a bone you don’t want keyframed, either to allow in-game jiggle or allow the character’s head to still move with the camera for example, you can disable this setting and keyframe all the bones you don’t want moving with the in-game animation handling. I only recommend doing this if you know what you’re doing, since not enabling these settings and not keyframeing your animation correctly can result in broken animations. 4 ) Once you got everything set, save the file with whatever recognizable name you want, however keep in mind that UE5 does have a path limit so I recommend making your file names recognizable but abbreviated to prevent having import errors or issues with the animation causing crashes in-game! (My current name structure is Actor Count, Abbreviated CharacterIDs, AnimName_Stage with _Cli appended for climax variants, for example “2_FplaMshpball_PetRecreation_0”. This keeps things sorted and easy to link together while being short enough to directly use in UE5) 5 ) Now you would repeat this process for every character and stage of the animation you are making, it sounds like it’s a lot but once you get it down things actually go rather quickly. I recommend making a preset for your export settings up at the top where it says “Operator Presets” so you can just select the preset you’ve made and have your settings quickly set-up (also prevents you forgetting what settings are required, which I TOTALLY haven’t done before...). 6. Setting up our UE5 Project Now we get to the more intimidating part of the tutorial, importing the animations into UE5 so that they work in Palworld! But don’t worry! It’s not nearly as complex as it seems and there’s some shortcuts and assets in the works to help make this process quicker with some of these steps becoming redundant as we fill out our modders resource collection, but the methods will still be outlined here for completions sake (and in-case someone needs to make assets not included in our modder assets collection). Setting up the Palworld Modding Kit If you plan to just import animations and don’t plan on using any of the SCake SDK, then you don’t need to install the full modding kit if you don’t want to; If you choose to do so later you can always move your project assets over into the modding kit and they should work just fine as well. If you DO plan to use the SCake SDK and would like to access more features for animations then you can follow the guide over on the Palworld Modding Wiki (https://pwmodding.wiki/docs/category/palworld-modding-kit) which is a very thorough tutorial that wouldn’t fit within this one. If you’re choosing not to use the modding kit then check the next immediate section. Setting up Without the Modding Kit Technically you don’t need the modding kit when just importing animations, however not using the modding kit and the SCake SDK will limit you on some features you may want for your animations. Regardless, if you’re not wanting to use the modding kit you can set up your own project. There’s a guide that covers this for Model Swaps (which also don’t need the modding kit) located here https://pwmodding.wiki/docs/asset-swapping/PackagingInUE5 which should work perfectly fine, though I’ll cover setting up the project here as well. 1 ) Acquire and start up the Epic Games Launcher, then select the “Unreal Engine” tab on the left side to enter the engine portion of the launcher. 2 ) Once here you want to either click the version number in gray letters under “ENGINE VERSIONS” or click the yellow “+” icon next to it, then add and install Unreal Engine 5.1.1 (UE5.1.1), this is the version used by Palworld and we need it for packaging / compiling correctly. 3 ) Next we want to click the “Launch” button in the 5.1.1 box to start up the Unreal Editor, once you get to the intro screen create a new project using the “Blank” preset, set your project location near the bottom, set project details to “BLUEPRINT” and “Desktop” for target platform, then name your project “Pal” so it creates the correct file paths. (If you don’t name it Pal then paths may fail to compile properly) 4 ) It may take a moment to start up as it sets up the initial project, but once it does you can click “Platforms” in the top bar of the editor and select “Packaging Settings…”, this should open up the project settings. Ensure the only options selected for the first few are “Use Pak File” and “Generate Chunks” with the surrounding options disabled (Which boxes are checked by default can change between installs, check the below screenshot for what this should look like), leave any setting below “Build Http Chunk Install Data” on default. (The model swap tutorial will enable cook everything, we will be including assets we do NOT want to cook or include with the mod, so we don’t enable this. We’ll use an asset label to force cooking instead.) Updated : 2024-04-08 5 ) In theory this next setting should be optional, however in some instances UE5 doesn’t properly package files without this setting enabled so we’ll just enable it here to avoid any issues later. On the same settings panel as before, scroll down and enable the “Cook everything in the project content directory”. This setting means it will always check all assets in the content directory and set things to cook if not otherwise specified, this causes the packaging process to take a bit longer if you have a lot of assets in the content directory but ensures our mod pak will package and avoid an engine bug. 6 ) Now your project should be set up and ready to start the import process! Installing the SCake SDK If you installed the Palworld Modding Kit, now is a good time to install the SCake SDK, though you can also install it later if you wanted to. If you don’t already have the SDK, you can download it from the SCake mod folder (https://drive.google.com/drive/folders/1vYfgMom7UJs2OmJ5B4FGQTMYEOR0n9Vr?usp=drive_link). Next you want to extract the “mod” folder contained within the SCake SDK into your modding kit’s “Content” folder, and… that’s it, SDK installed! The SDK comes with a preset dummy blueprint for calling the SCake API via Blueprints, ensure you don’t include these files with your mod! Instead, the SDK has an additional folder with a preset ModActor and an asset label already set up to separate the 2 folders in the packaging process. If you’re just importing animations you can delete the ModActor in the preset folder and rename the folder to your animation pack mod name, or just create a new folder for your animation mod which we’ll cover a bit later. The Bone Index Order Issue This one requires a brief explanation, however if you’re interested you can check out my write-up blog post about the issue here (https://subscribestar.adult/posts/1160698) but you don’t need to know all the details to fix the issue. In short, UE5 compresses animation and skeleton data so that it references each bone and weight by an index instead of by name when used in-game. This means when we create assets we need to import our animation and bind it to a skeleton with the correct Bone Index Order. Unfortunately FModel does not export the skeleton with the correct bone index order, so to fix this we have to create a new asset that has the correct bone index order before we import our animation, but after we have the correct skeleton to import on-to we can just target that asset for any subsequent animations we wish to add. Fixed Bone Index Order Assets Thankfully, we do have some assets which will already be set up to fix the bone index issue for you without much manual work. As we work through things and Palworld gets updates there may not always be an asset available, but if you’re patient you can always ask in our community and we can get one made for you to use! I distribute fixed bone index assets through the GDrive folder under “Modder Resources (https://drive.google.com/drive/folders/1vYfgMom7UJs2OmJ5B4FGQTMYEOR0n9Vr?usp=drive_link). At the time of writing there are 2 types of fixes, uasset and dummybone, uasset is the easiest to implement and is just an uncooked asset with the fixed bone index asset with the correct file path already set up, while the dummybone is a forced bone index order asset which you would need to manually import and place in the correct place. (I recommend only using the dummybone assets if you know what you’re doing or have been asked to do so when asking for help). You can also get fixed assets from the community however I can’t personally provide validate those assets or how to use them properly. Fixed Bone Index Asset – uasset If you’re downloading from the BoneIndexCorrect_uasset folder, these are set up assets for you to drop directly into your mod project and require minimal work. Download the .7z for the CharacterID of the models you are looking to import, extract the folder, then head to your UE5 project inside the Content Folder and copy over the “Pal” folder to the “Content Folder”. If you did this correctly then when you open your project you should have a new folder in the browser with a path leading down to “Pal/Model/Character/Skeleton/[CharacterID]” with the skeleton asset you’ll be targeting your animation to. (Note : This method won’t work if your animation targets a fully costume rig made for a new model that doesn’t use the base game’s corresponding bone structure) DO NOT include these assets with your mod! Make sure you package your animation pak without these assets or else it will break compatibility and cause other issues, like overwriting model replacers! Fixed Bone Index Asset – dummybone If you’re using the manual DummyBone assets, these are simple and quick .fbx files set up to have the correct Bone Index Order but may look broken in the editor (these are made by quickly creating a ‘fake’ skeleton with the correct Bone Index Order simply for importing, but does not have the actual positioning or hierarchy of the original skeleton). To use these you need to import the mesh and skeleton like a normal .fbx import (use default import settings with Mesh and Skeleton import enabled), then place the skeleton in the corresponding folder for the model you are trying to import animations for, this location should be in the “Pal/Model/Character/Skeleton/[CharacterID]” folder. When importing animations with these dummy skeletons don’t expect the in-engine animation preview to look correct, but if done properly the animation should playback just fine once you’re in-game. DO NOT include these assets with your mod! Make sure you package your animation package without these assets or else it will break the in-game skeleton and model! Note : If you want to use a custom model for preview, you will want to use the BoneIndexCorrect_uasset option, then when importing the mesh target this skeleton instead of the included one. If you’re using a resource provided from another source, make sure to read up on what exactly their asset is and how to use it properly as other methods may be available! Fixing the Bone Index Order Manually If you’re already using a fixed bone index asset you can skip this section and move to “Set-Up Project for Animation Importing”! Fixing the bone index order isn’t a ‘difficult’ process, but is a tedious one. I highly recommend just using a fixed bone index asset that’s already made and provided by the links from before, however there may be assets that either haven’t been added yet or you may want to just try the method. So to get animations importing properly I’ll give a very brief explanation on how to make your own DummyBone asset and how to get it set-up and imported properly. I’ll also cover the proper method for creating an uncooked asset (fixed bone index uasset method) at the end if you wanted to try doing that as well. Note : The Human Skeleton is a completely different beast than the pal skeletons because of the sheer number of bones included, which requires a few additional considerations caused by limitations. Because of this I recommend using the SK_PalHuman skeleton provided in the modder resource folders. (Making a dummybone asset for humans isn’t an easy task, unlike for pals) 1 ) First we need the model extracted using FModel like we did earlier in this tutorial, then we import that into Blender just like before as well. (I recommend not importing it into the same file that has your animation work, save your animations and close Blender, then start from a fresh instance to prevent accidentally breaking your animation file!) Don’t forget to rename the Armature to “Armature” exactly! 2 ) Now we need to go back into FModel and find the corresponding Compressed Skeleton Asset for that model which should be in “Pal/Model/Character/Skeleton/[CharacterID]”. We’ll want to inspect this element by double clicking on it and having the JSON data load in the main panel. (If a preview of the skeleton pops up, you can just close that additional panel pop-up) 3 ) Inside the JSON data we need to find the section “FinalNameToIndexMap” which should be near the bottom. This is the Bone Index Order we need the skeleton to match exactly when importing the animation. 4 ) Now we can keep this info up while we go back to blender with our imported model and entering “Edit Mode” in the top left. The next step is to check the hierarchy and delete any “Socket_” prefix bones that don’t appear in the bone index shown in FModel, and then re-parent everything so that it will import with the exact order shown in FModel following alphabetical sorting. For my example I’ve been using SheepBall (Lamball) which does have several socket bones applied we will want to re-parent to the end for the dummybone asset (Or just out-right delete, sockets are added dynamically by UE5 and normally can’t be animated but in-case someone figures this out later re-parenting them to the end would allow animations to import with those sockets animated. Unfortunately there isn’t a way I know of currently to check the order of sockets, so that part would be experimentation). Shortcut Notes : ctrl+P is the re-parent shortcut in Blender by default, keep offset when re-parenting to maintain easier previewing, just select the bone you want to re-parent, then the last bone you select is the bone you want to parent to. Example of the sockets in the bone tree, these would be re-parented to the end or deleted (Left : original exported skeleton, Right : DummyBone Asset) Example of the full SheepBall bone tree re-parented to ensure the correct Bone Index Order with every bone in the exact order required to match. We just start from the top and work our way down, looking for anything that would be out of order, then re-parent them to fix anything that would be out of order following alphabetical sorting (ABCDEFG...). 5 ) Once you have everything sorted correctly you can now export a .fbx file just like we did before when exporting the animation, and that’s the DummyBone asset! Keep in mind this is only for importing animations and should not be included in any mod, it’s only purpose is to ensure the bone index order is correct when importing. For a proper uncooked uasset asset, we would need to use UE5 or use hex edits with internal knowledge of the compressed skeleton asset. For this it’s important to understand just how UE5 adds additional bones, when adding new bones not seen by the project before, instead of re-sorting the full bone index order UE5 just adds the new bones to the end of the index. So to create a proper uasset you would need to do the same sort of sorting we did for the DummyBone asset, but instead of just re-parenting when finding an inconsistency, you would instead need to import an asset into UE5 with all lower index bones removed, then continue the process re-importing the skeleton any time you hit an inconsistency. This means that UE5 would be adding the new bones of each step onto the end and ensure they are placed in the correct bone index order. For sockets you would also need to not just append them to the end or delete them like we did in the DummyBone asset, instead we would need to re-add them in UE5 through the UI with the appropriate offset. Once complete this would give you a fully working asset that can import animations while also being fully preview-able in the editor! (Also, once one of these uasset versions are made, we don’t have to worry about importing any skeletons, just copy over the uasset in the right spot and it’ll work!) As you can probably tell, this is why I recommend using the DummyBone method if you’re trying to make these assets yourself, since a proper uasset is time consuming and a bit complicated compared to the DummyBone method. Setting up the Mod Folder Finally for our project set-up, let’s configure your animation pack’s mod folder so it’s ready to export after we get animations imported. 1 ) You’ll want to start with creating your mod folders to import your animations into. If you installed the SCake SDK you can rename the preset folder or create a new folder under the “Mods” folder in your project, otherwise if you have a blank project create a “Mods” folder under “Content” then a folder for your animation pack. (I’m renaming the “YourModHere” folder to my animation pack name, “TutAnimationPak”) 2 ) If you used the mod kit you should already have a PrimaryAssetLable in the folder, but if you made your own folder instead of renaming or didn’t use the SCake SDK create a new “Primary Asset Lable” by right clicking within the file browser under your pack’s folder, and select “Miscellaneous” then “Data Asset”. In the popup that shows up type in “PrimaryAssetLabel” and you should get a single option, that’s the one we want to add if you don’t already have it. (In my sample image I used the SCake SDK, which already has this asset added) 3 ) Next lets open up our Primary Asset Lable real quick. For this you want to set a “Chunk ID” that doesn’t match any other mods in our project (SCake SDK uses 666, so use a different one!), this Chunk ID is the .pak file our mod will pack into when we run the packaging process. Next we want to set the “Cook Rule” to “Always Cook”, “Label Assets in My Directory” toggled on, and then save the asset and we’re done with that aspect! 4 ) If you wanted to use the SCake API but didn’t use the preset folder, you’ll need to create an “Actor” called “ModActor” exactly so that UE4SS can find and hook your mod for calling the API. If you didn’t plan on calling the API then you don’t need to worry about it. 7. Importing Animations and Configuring for SCake Finally, the good bit, actually getting animations in-engine and ready for gameplay! For this we need to import the animation .fbx file we exported earlier targeting the fixed Bone Index Order Asset we set up with the project, then create the animation montage assets using those imported animations to configure with SCake. 1 ) First let’s get our animation imported, ensure you got the corrected Bone Index Order Asset imported and set in the file structure correctly as we covered earlier. Next just drag the animation .fbx file for your animation that we exported earlier into the file browser space in your animation pack’s folder within the editor. This should bring up the import FBX settings. 2 ) In the FBX settings we only want to import the actual animation. Start by setting the “Skeleton” to the corresponding corrected skeleton asset we imported to the Pal folder earlier, then disable importing the mesh, everything else should be left on default with animations importing (some settings may be changed if you know exactly what you’re doing). (You must select a skeleton first or else when Mesh is untoggled it hides the Skeleton target option.) 3 ) Once set up, hit the “import all” and it should import the single animation if everything was set up correctly. You may get an error that reads like “the skeleton transform was different” but this error can be ignored as it has no effect once we’re in-game, if you got a red error however something got messed up in the pipeline and I’d try following the exporting the animation part of the tutorial again. Also, if you used a DummyBone asset as your skeleton to import with you may notice the preview of the animation is broken, DON’T PANIC! That’s just how the Dummy Bone assets work and, as long as everything else was done correctly, it should look fine in-game! 4 ) The animation is imported as an Animation Sequence, but SCake uses Animation Montages to playback animations, so we need to make a montage out of our imported asset. Simply right-click the imported Animation Sequence, then at the top of the pop-up menu select “Create” then “Animation Montage. This will create an Animation Montage out of that asset, feel free to call these assets anything you like but we will be referencing the Animation Montage later when configuring the JSON file so make it something you will remember or can easily reference! 5 ) If your animation isn’t looping and is only intended to play through once, that’s all we ‘need’ to do, but if your animation is intended to loop you will need to open your new Animation Montage asset by double clicking on it. It should open up the animation with a green bar and the anim playing, to make it loop correctly in-game we need to go into the bottom right section into the “Montage Sections” tab, and click the checkbox for “Default”, then select “Default” under that option to have it loop back to the start. (It should display a little circular arrow next to “Default” when set correctly to display a loop-back) 6 ) At this point we’re done with the basic import, you would repeat these steps for each actor in your animation with their corresponding animation. I strongly recommend following a naming scheme that matches actors up based on what animation they are playing together. However there are a lot of really advanced things you can do with Animation Montages, like creating custom loop patterns, trigger sounds and visual effects, implement blending between different animations, and much more! I do recommend not going too crazy and trying to use Stages within Animation Events for most transition type stuffs, that way things stay modular and customizable. 7 ) Before we set up things to package it may be a good idea to get the paths for your animations so we can reference them in the JSON file we’re going to configure in the next few steps. If you hover over your animation in the editor it will show the “Path:”, we will want to save this path with the file name appended to the end like “/Game/Mods/TutAnimationPak/TutPetAnim_SheepBall_Mon” and this will be what we directly reference in the JSON file configuration! It’s also a good time to mention the file path limit. UE5 has a limit of 260 characters for a file path, this isn’t a huge deal and provides a lot of freedom however if you get close to the limit with your file name and mod folder structure it may cause issues or even in-game crashes, as such I recommend abbreviating what you can within your asset names to prevent issues. The value to look at is the “Cooking Filepath Length:” which counts the additional stuff it adds in-game, if exceeded it will cause issues and UE5 most likely won’t allow you to package your project. 8. Exporting our Animation Pack and Configuring the JSON Alright, almost there! Now we just need to export the animation pack and configure the JSON to have usable in-game animations with SCake! If the previous steps were followed correctly this should go relatively smoothly! Exporting the Animation Pak 1 ) Ensure all your assets are saved and ready to be exported, double check your PrimaryAssetLabel settings are correct, then we should be ready to package! Up in the top bar click the “Platforms” option like we did setting up the project, then hover “Windows” then click “Package Project” and select an output folder. The first time you package it will take some time as it sorts out all the engine compiling and baking processes, but after the first time it’s much quicker. (Note : there is a method of packaging mods individually but I won’t be covering that method here) 2 ) Once packaging is complete navigate to the output folder you selected, enter into the “Windows/Pal/Content/Paks” folder, and there you should see multiple files labeled “pakchunk##-Windows.pak” with ## being the ChunkID you set for your packs. With the SCake SDK the default Chunk ID that’s set is 10, so you would want “pakchunk10-Windows.pak”, otherwise if you didn’t use the SDK just pull the Chunk ID you used. Go ahead and rename that .pak to what you called your mod folder within the editor, in my case I used “TutAnimationPak”. 3 ) Now you can move+copy that .pak file wherever you need for saving/distribution as well as install it into SCake. To touch briefly on installing animations, you would place the animation pack into “[Your palworld install location]/Pal/Content/Paks/~mods” unless the mod uses the SCake API or has Blueprints attached, which would go in “LogicMods” instead of “~mods”. Then we’d move the .json file into the “AnimJSON” folder in the ~mods folder then add the file name of the .json to our _LoadList.json, but we haven’t made that .json yet, so let’s do that! Making a Simple JSON Animation File SCake comes with a few templates in the AnimJSON folder ready for animators and users to use as a basis for configuring new animations and events. The “_SCake_TemplateWithExplainations.json” will include explanation for every setting as well as examples of how to format the file, however we’re going to keep things super simple and use the “_SCake_SimpleTemplate.json” and use that for our base. You can always use whatever template you feel suites your needs best! (The explanations template is very helpful to open along-side your own .json file so you can reference it for what each parameter does.) The first time through may be a bit confusing, but once you get use to things configuring should go a lot smoother. 1 ) Create a copy of the “_SCake_SimpleTemplate.json” template .json file and rename it to your animation pack’s name (technically you can call it whatever, but it will be easiest if it matches your animation pack’s name from the .pak file), then open it in any text editor though I do recommend using one with JSON syntax checking and highlights (you can use https://jsoneditoronline.org/ for an editor that works in the browser and has error checking, custom colors, simplified view, and more, it’s a pretty handy tool). If you only want to do the absolute bare minimum to get your animation playing in-game as a test (or just because you can’t be bothered to set up the .json, I get it.) then all that is required is the UniqueAnimID, AnimByPath, and Compatibility for each Animation you’re registering, then in Animation Events you just need the UniqueEventID and Stages defined with AnimIDs. While everything else is ‘technically’ optional, I do recommend filling out the json before distributing the animation officially. NOTE : When inputting information, avoid using special characters like slashes and punctuation marks as these may not parse correctly and cause the animations/events to fail to register! Underscores and spaces should be fine but I personally replace all spaces with underscores unless it’s a filepath where it needs to be exact. NOTE 2 : Any section you’re not using in the .json file you can remove, for example if you have no aggressors instead of leaving it blank you can simply remove the entire section. It’s recommended to remove anything you’re not using or need defined differently than default to help prevent errors and keep the most compatibility. 2 ) Now let’s just go down the settings in order and configure the animation with minimal information, we can always come back and add stuff later! You can safely delete the DevNote at the top explaining what the template is, and the PackName is purely for readability and ease of use though I recommend filling out your pak name here. 3 ) Next let’s set some basic metadata, for each animation you are registering you’ll want to copy the entire “Anim0” section and make a new section with an incrementing number for each animation you are registering, naming subsequent sections “Anim1” “Anim2” “Anim3” and so on, each entry that has another one following needs to have a “ , “ at the end to designate another entry follows. This allows us to register multiple animations in a single .json file. Similarly do this with the “Event0” section, were you copy the entire section with how many Animation Events you wish to register in-game. 4 ) Starting at the top of for Animations, you’ll need to set a UniqueAnimID for SCake to reference that specific animation, any duplicate UniqueAnimIDs will overwrite each other based on load order and AnimVersion so make sure it’s actually unique! (I recommend some unique identifier to you like a screen name, followed by the animation type and stage/variant. Try not to make these IDs too long as there is a limit and performance considerations) 5 ) The next few settings are optional, AnimVersion is just for version controlling animations and handling duplicates, AnimName is a display name for your animation (use something human readable), and AnimAuthor is for inputing the author of the animation. 6 ) AnimByPath is required as this is where we define our animations! Remember earlier when I said to write down or remember the file paths to the montage assets? This is where we use them. The first value is going to be the “slot” in the animation (each slot will reference the same character through-out the animation and should be kept consistent through-out all the animations you register that are intended to be in the same event, to prevent strange issues), think of slots like a pointer to which character you are referencing from the animation, then the second value will be the file path to the animation montage we imported into UE5 for that character. The slot order is sort of arbitrary, as long as you keep it consistent then it shouldn’t matter. 7 ) NonErotic toggle is next, by default SCake assumes all animations are erotic and will trigger sexual pleasure and desires, however if you set “NonErotic” to “true” the animation will not be considered erotic so that it won’t trigger sexual effects. 8 ) IsLooping just toggles whether your animation should be considered a looping animation or not. When importing your animations montage and you set up the looping animation you should set this to “true”, otherwise if it should play through once set it to “false”. (If your animation is not set to loop properly a failsafe in SCake will still progress animations when the animation finishes, which means it will only play a single loop then move to the next stage in the Animation Event) 9 ) Aggressors is a list of slots this animation should consider aggressive actors, if the list is empty or all slots are defined then the animation is considered consensual, otherwise the listed slots are aggressors. 10 ) Tags are a list of optional (but recommended to fill) keywords for positions, sexual orientation, climax location, ect. Fill these so that your animation is easier to find and sort in SCake as well as help automated systems try to fill in any blanks you leave in the .json / metadata. 11 ) ActTypes define what kind of act is in the animation, you should create counting entries (copying the full section like when we copied the “Anim0” section and counted them up) which define each type being represented. The template will have your default options listed though modules/updates may add more in the future. (An example from a solo female player masturbation animation) 12 ) REQUIRED : Compatibility is extremely important and required for SCake to find compatible animations with different characters! For this section you need to define the type of sex equipment that is required for each slot, so under “SexEquipReq” the first value is the slot and the following value is the sex equip. You can keep this aspect simple as ‘none’ so no equips are required, ‘female’ where a vaginal and breasts are required or ‘male’ where a penis is required, other options are for more advanced animation paring (read into the docs to learn more about them). Next we would define what character can actually play the animation in each slot under the “ByID” section, this section has the slot first then followed by the CharacterID we used earlier when extracting models, such as the finding the folder names (reminder that there is a list of CharacterIDs on the modding wiki - https://pwmodding.wiki/docs/game-data/monster-table which should be accurate). The templates should have your equip options listed for ease of use, fill in for each slot available in the animation. 13 ) LinkClimaxAnims is where you define the orgasm variants for the animation (if it has one). You can create multiple entries for this section to create multiple variants for what actors are currently climaxing, meaning for a 2 character animation you could define 3 different climaxes, 2 where one or the other is having an orgasm and 1 where both are having an orgasm. You don’t have to fill every possibility, instead it will use the first listed one if the exact combination isn’t found so use define the ‘default’ climax animation first, then the rest. In AnimByPath you define the path to your climax variants which would be imported like any other animation and you’d get the path the exact same way after converting to an Animation Montage. If you’d like to register multiple climax variants to a single animation but with the same combination you can copy your registration data for the animation, define a new uniqueID, and then define the different climax animations you want effectively registering 2 animations to use for Events. (Note : It’s recommended to keep climax variants similar to the animation being played, a good example is a missionary position could have the character humping, then for the climax have them press in and stay with a bit of shiver, this can help climax animations feel more dynamic and immersive. Animation Events can also define their own climax variants by referencing other animations as well) (Example from a solo female player masturbation animation) 14 ) One section worth mentioning that isn’t included with the simple template (but is in the other templates) is the optional “ActorAdjust” parameters. These parameters allow you to adjust the positioning of characters in the animation by slot. I’ll be using this in my example pet animation since I didn’t adjust the Lamball’s position within the animation itself. This feature is mostly for making small adjustments to make animations line up if things don’t quite behave the way you expect and can be a handy tool to configure different variants of characters such as those of different sizes. (Check the template with descriptions or read the documentation to learn more, I won’t be covering it in this tutorial as it’s a bit more advanced) 15 ) Next we get into registering the Animation Events so we can actually call and play animations in-game! Events are just a set order of animations to play, though there are more advanced settings we’ll just cover the basic few with only “UniqueEventID” and “Stages” being required. UniqueEventID is just like the UniqueAnimID, this should be a Unique ID used to call the Animation Event with SCake. EventVersion, same as AnimVersion, EventName is the name of the Animation Event, and EventAuthor would be the author who made the event! 16 ) Stages are just a list of animations to play as part of the event, by default it will play in order starting from 0, however you can define a custom order or more advanced loops using StageOrder (a parameter we won’t cover here). Make sure to increment each stage section by 1 in the list so it applies the correct order (otherwise stages may register out of order or bug out). StageName is just a display name for the stage, but AnimID is the UnqiueAnimID for the register animation you would like to playback during this stage of the Animation Event, these would match up with the UniqueAnimID we set up when making the Animation portion of the .json file. You can also reference external animations as well, however for .json files directly related to animation packs I recommend keeping all the used animations from your own animation pack then provide an optional .json that uses external animations to avoid requiring other animation packs to use. Optionally here you could configure post-climax animations but we won’t be covering those in this tutorial. (Example from a solo female player masturbation animation) 17 ) Once you got that all configured, your .json file is ready to go and register in-game! There are a lot of advanced features I didn’t cover in this section, but these basics are more than enough for an animator to set up. It seems like a lot at first but once you understand what each setting does it becomes quite easy to modify, change, and create new .json animation files. Users will also be able to edit and exchange .json files to allow completely custom events, modified animations, or just extend upon the original .json file such as adding missing information, so don’t fret too much over missing something if you don’t have the time or understanding to fix it! 9. Setting up our Animation Pack for Public Release Once you’re satisfied (enough) with your animation pack, you should set it up for public release! This is the final stretch to embracing the world of SCake an the community, so let’s do this! 1 ) First, make sure to actually install your animation pack and related .json file(s) to ensure it works in-game. It’s always possible an error was made somewhere and if you find it’s not working don’t be afraid to ask the community for help! (You can find instructions on how to install and use animation packs in the ReadMe for SCake) 2 ) Next we want to set up the proper file path and create a simple ReadMe file letting people know how to install the animation pack in-case they forgot or lost their SCake ReadMe (or, let’s be honest, they didn’t read the ReadMe at all, it happens!). First create a folder for your mod and create a simple .txt file labeled ReadMe with instructions on how to install the mod, then make the correct file path for the animation pack to make things easy, so start with a ~mods folder, place your .pak in there, then inside the ~mods folder create an AnimJSON folder and place your .json in there (matching the install directory you would use to install into your own game). DO NOT include the _LoadList.json in your mod unless you are distributing a server mod pak! Each individual will have their own list of animations and they will have the responsibility of maintaining their own LoadList, if you distribute one with your mod pack it could lead to users overwriting their own on accident! 3 ) Once the path is set up, you can zip up your mod and distribute though your desired platforms! (Don’t forget to share over on our Discord!) (Example file paths for distribution from SCake_BasicsAnimPack) 10. Final Notes SCake is a very versatile and customizable framework for animated scene in Palworld and has many advanced features so it’s possible that many of these things could improve or change over time so it’s worth keeping up with updates if your interest holds! At the time of writing, some features listed in the templates are not currently functional or may not function correctly. We primarily use Discord as our form of communication around the mod but you can also ask for help in any SCake thread and people are likely to try and help! I don’t know what other “Final Notes” to put here so… just hope you have a wonderful day! See ya laters! =^-^=
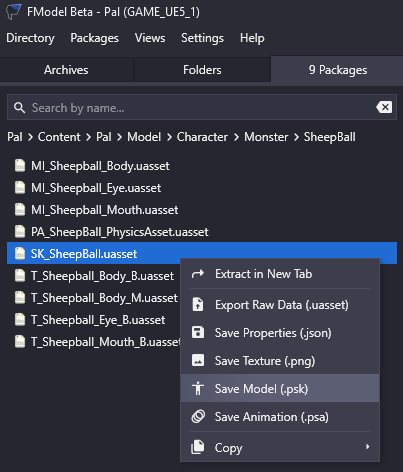
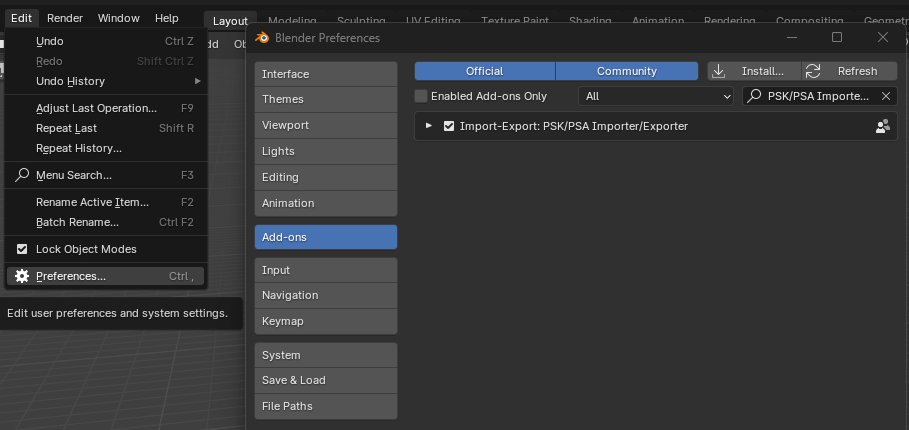
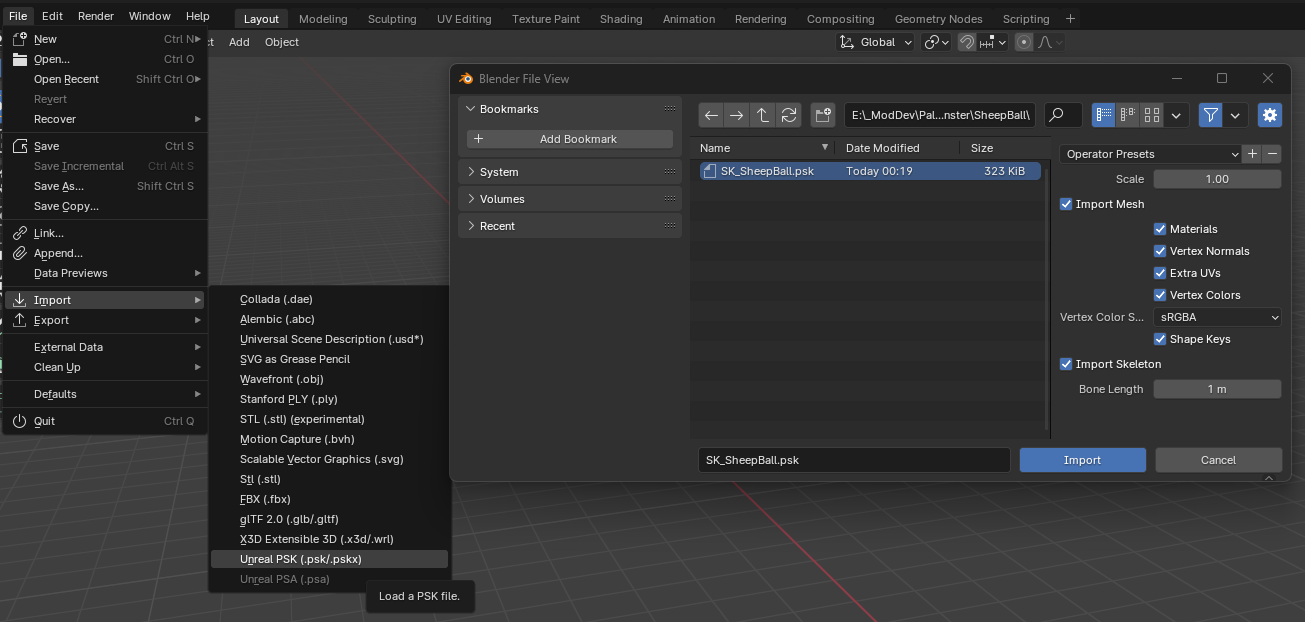

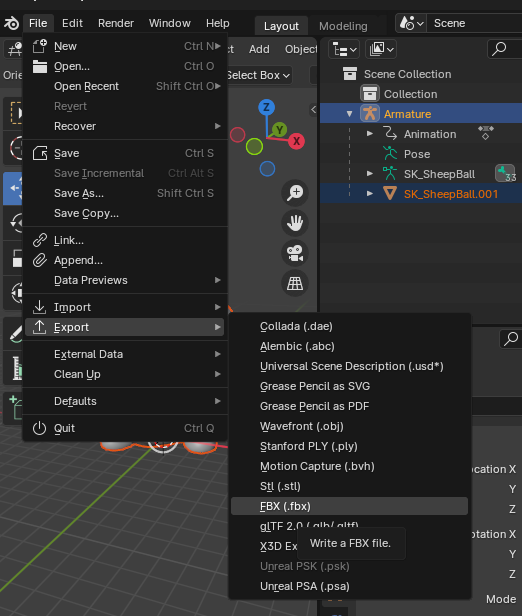
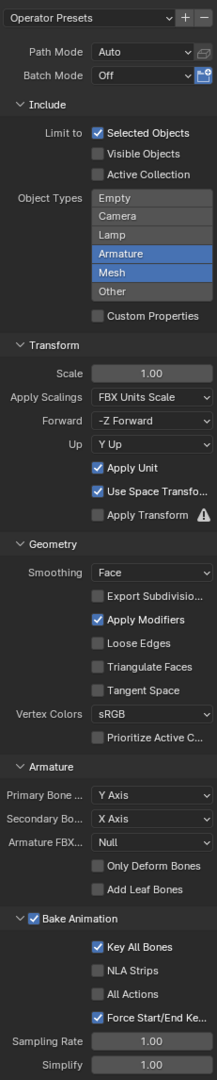
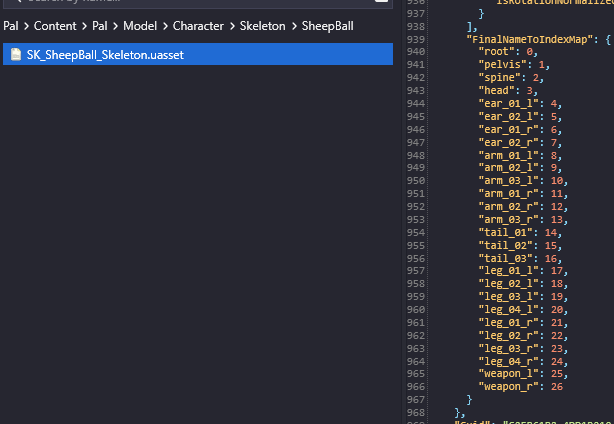
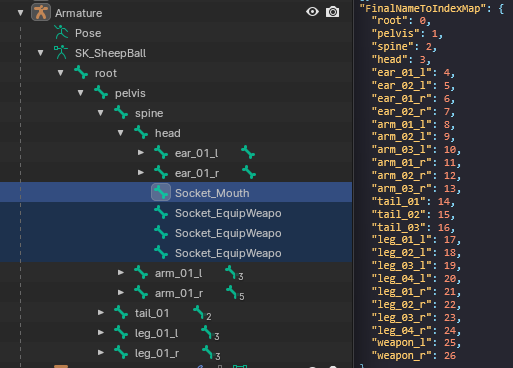
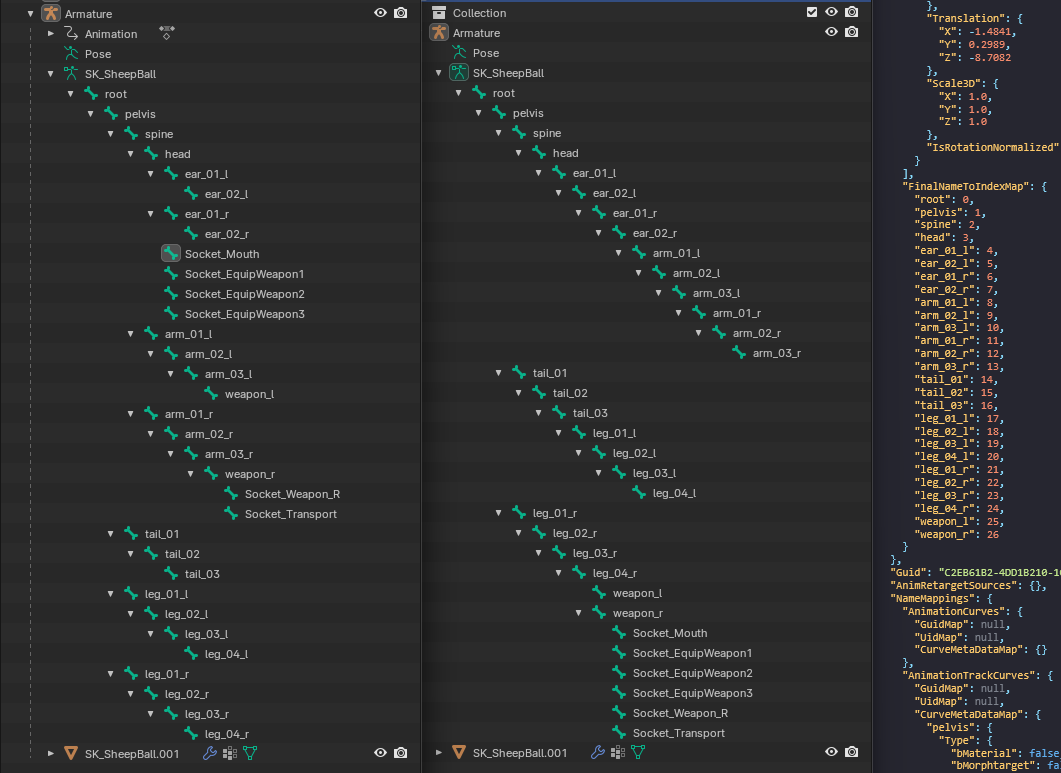


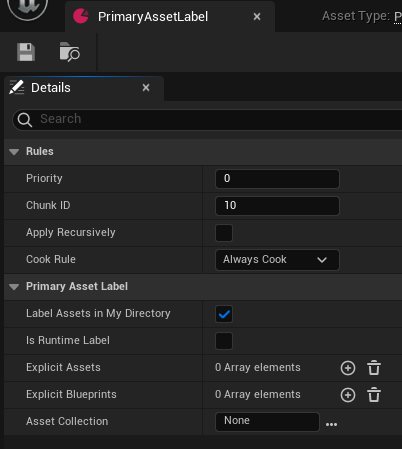
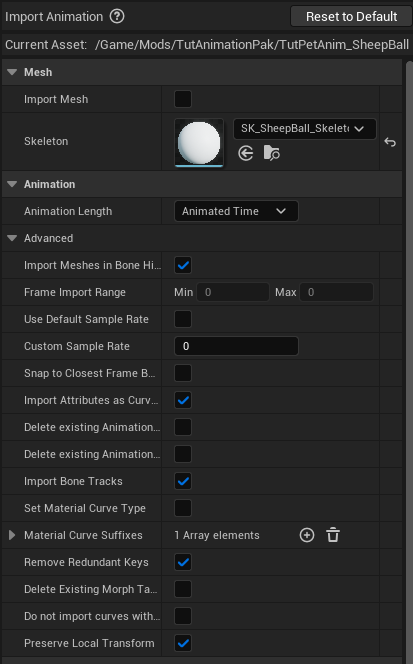
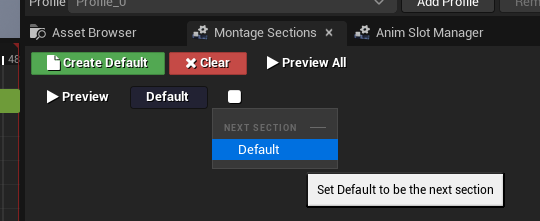
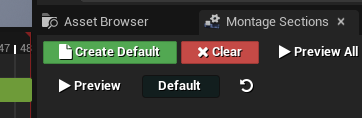
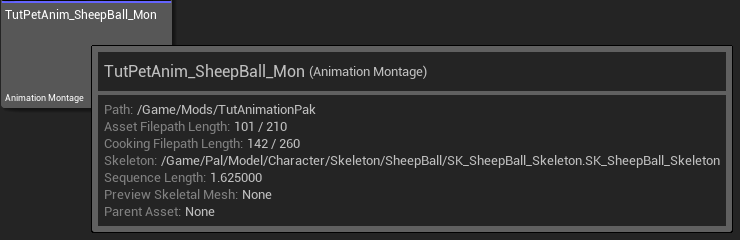
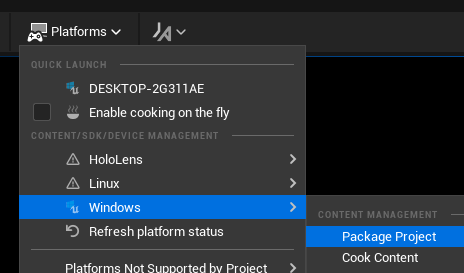
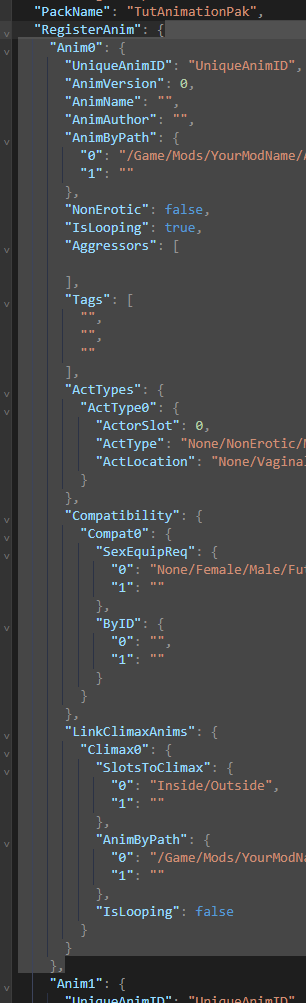
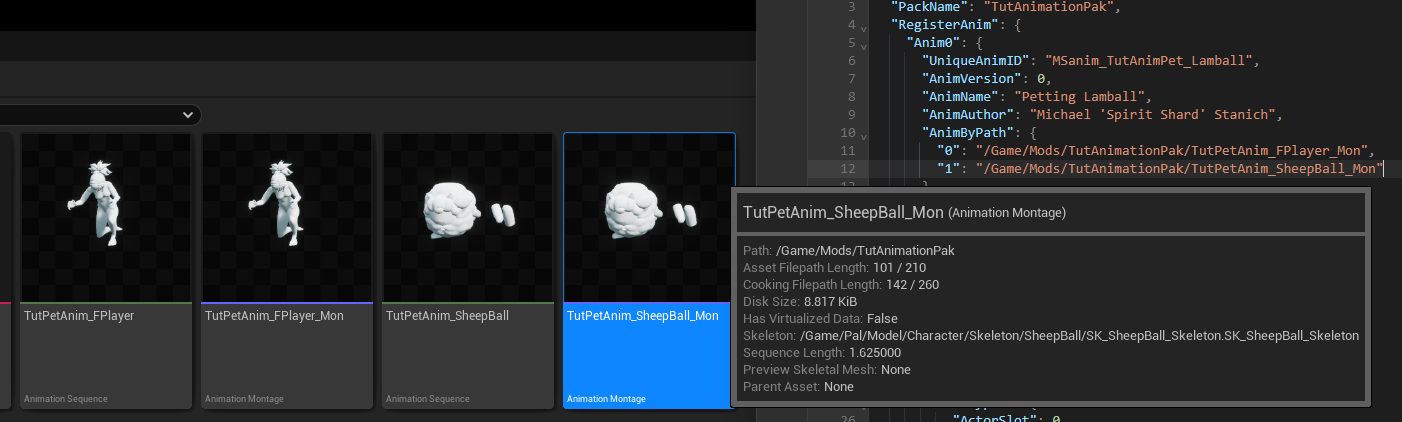
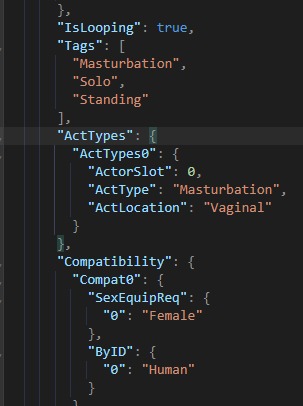
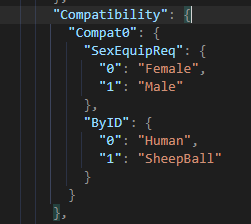
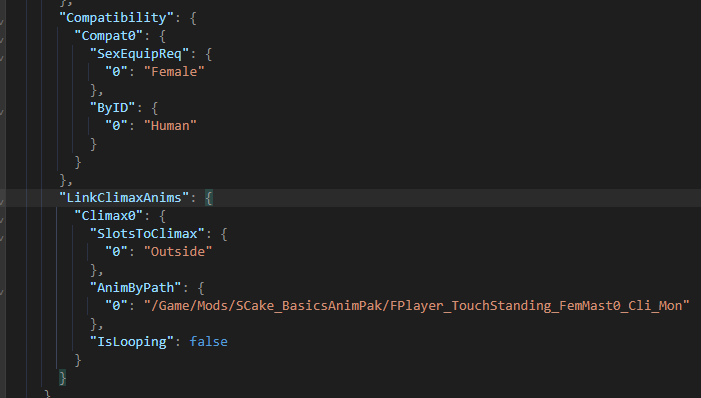
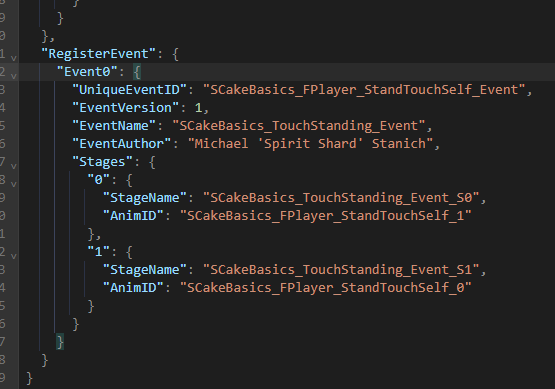

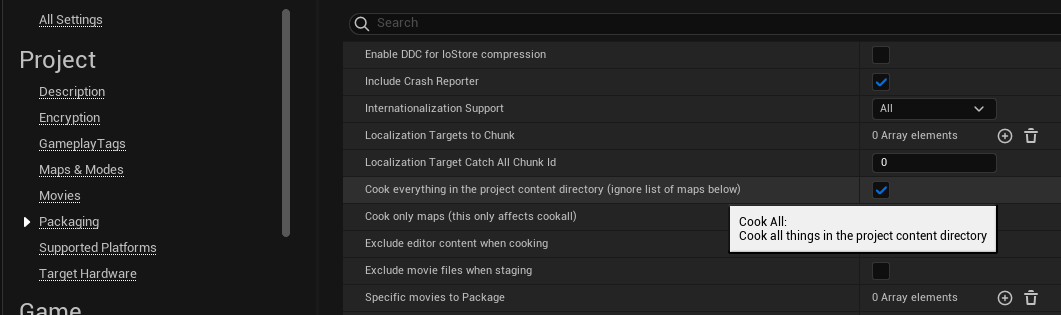
-
Thats exactly it. I cant find a tutorial or a consistent expanation on how to use BHUNP for those who are new. I`ve just removed: Caliente's Beautiful Bodies Enhancer -CBBE- CBBE AE-CC Outfits In order to install BHUNP and have better physics. I also instaled BodySlide and Outfit Studio. But now, I just dont know where to go. And its so hard to find a tutorial on how to make it work, or even educational general concepts. It took me some time even to understand exactly what the mod does, and what it does not. Do you know if there is a post/tutorial/guide somewhere? If not for BHUNP , at leas for those wanting to understand it. I mean, I have to start somewhere.
-
Version 4.1
6,860 downloads
Additional Clothes for Heroine Rumble 2 and a Tutorial on Blender. -
View File How to create your own Skyrim Porn This is basically a file that contains information, tutorial videos and adult mods (also links to other mods). All of this will help you create the most awesome erotic art with Skyrim . Took a long time to put all of this together, so I hope people will appreciate it ?. Submitter qgoodforu Submitted 08/13/2018 Category Sexual Content Requires Special Edition Compatible Yes View File
-
Good evening, here is the complete modpack for Monochrome Mobius: Rights and Wrongs Forgotten! Here is a 3 minute video with almost ALL of the NSFW changes included in the modpack, it is really condensed and concise so you might have to re-watch it a couple of times. It also has some great editing and music as well. Monochrome Mobius NSFW Modpack Video.mp4 Mega link to the video: https://mega.nz/file/VG9lWAiT#vtOVa68tBuTRA5e-BCJeklVuTs15bpzJnnoOBB1gex4 Iwara link (requires account due to being 18+) https://www.iwara.tv/video/aEreJ4Cn0eB045/monochrome-mobius-nude-modpack-video-download-available-this-week-for-free Some screenshots from the modpack: Download the all in one modpack: Monochrome Mobius NSFW Modpack.rar (give this post a like if you don't mind, it helps a lot.) (make sure to have an updated original version of the game first) Alternative mirror modding sites and censored version (Nexusmods or Gamebanana) Drag and drop in the game folder, replace everything when asked. The game will take a bit to boot/run some textures the first time you install the modpack due to the huge amount of new files. If 3DMigoto ask for an update at the start of the game, just say no. Buy the game on steam and support the creators: https://store.steampowered.com/app/1962430/Monochrome_Mobius_Rights_and_Wrongs_Forgotten/ What is changed to be NSFW: - ALL of the main playable female characters have been changed. (if bugged, press F2 to fix) - ALL of the in-game events images have been changed. - ALL of the HUD characters have been changed. - ALL of the text-box faces/models has been changed. (more than 220+ faces) - ALL of the skits that occur while in the dungeon in the corner. (more than 20+ skits) - ALL of the menus, status, skills and equip screen have been changed. - The logo has been changed. (A bit cutout in-game) - All languages variations (Global, EN, CN and JP) have this changes applied. - Can be mixed and customized with other mods from other modding pages. *UPDATE: If some models appear invisible, you can press F2 to toggle 3Dmigoto and fix them, after a while press it again to see them nude! Thanks to @Tomopo923 for the help! Also not a bug, but keep in mind that the first time you boot the game, the title screen is black for story reasons, after the prologue it should work just fine. And after the prologue, the game takes a big loading screen, especially if you use an HDD, so be patient. This modpack is completely modular so you can mix and match between versions and compatible mods!* For example: If have you the the nude Shunya mod included from the modpack (chara_001) you can change it for the bottomless version of the model and the modpack will load without a problem. * It works just fine with the other variants of the modpack. (Complete and Lite) Other mods that are not compatible might cause the models to T-Pose so check accordingly before installing. EXTENSIVE LIST OF WHAT IS CHANGED: Special THANKS @jmedia7 : For letting me use your nude mods for Shunya and Munechika support him on patreon> patreon.com/Jmedia7 Profile: https://www.loverslab.com/profile/833017-jmedia7/ @Coates87: For giving feedback on the modpack and the video https://www.reddit.com/user/coates87/ Myself: https://www.loverslab.com/profile/10039981-meekurukuru/ and you for reading of course. SHORT F.A.Q Thx as always.


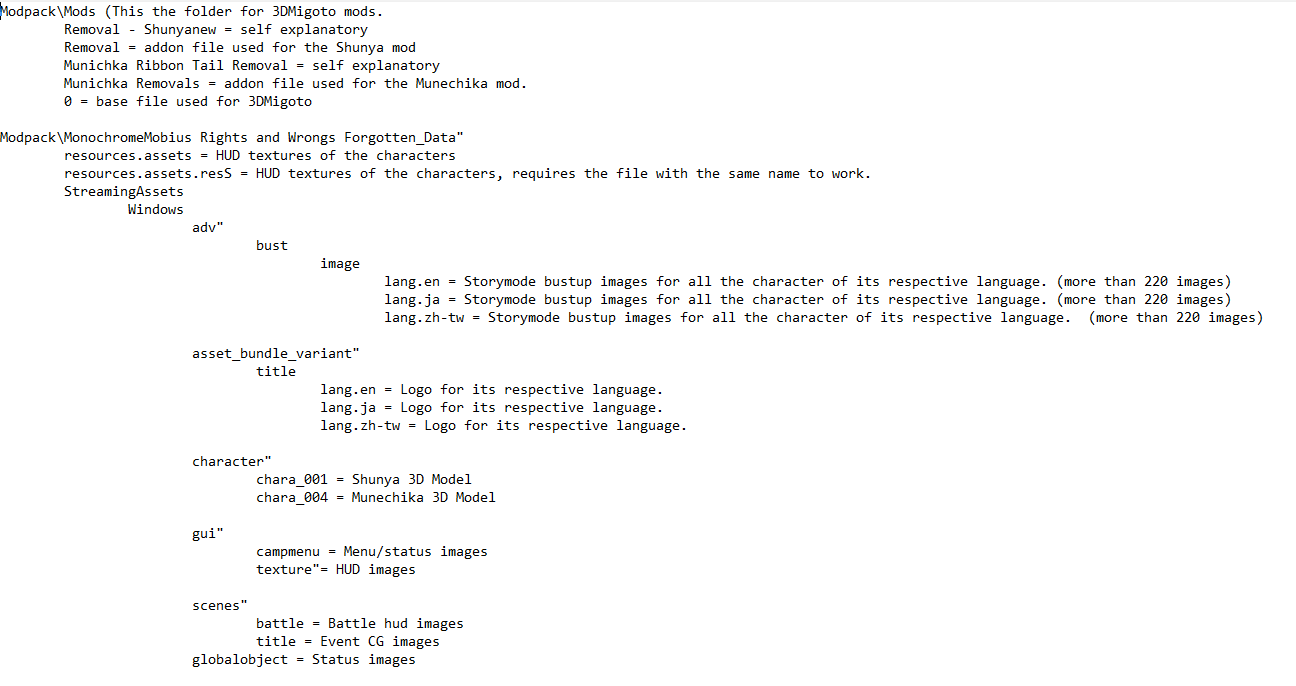


-
Don't be afraid to ask for help. I'm making changes to this tutorial all the time. Your feedback is greatly appreciated! Step 1: Install UE 4.22 with Epic Games Launcher Step 2: Extract Assets Step 3: Import to 3D modelling application Step 3a: Import the base mesh to Blender Step 3b: Rename everything Step 3c: Apply the morph targets This is a good time to save your .blend file! Step 4: Edit the mesh. Step 4a: Get artsy! Step 4b: Split the face from the rest Step 5: Export FBX file. Step 6: Import FBX to Unreal Engine 4.22 Step 7: Create new assets. Step 7a: Make a list of required files Step 7b: Common Skeleton Step 7c: Animation Blueprint and Shadow Physics Asset Step 8: “Package” Project files Step 9: “Pak” Project files Step 10: Textures Step 11: Further reading / Advanced modding
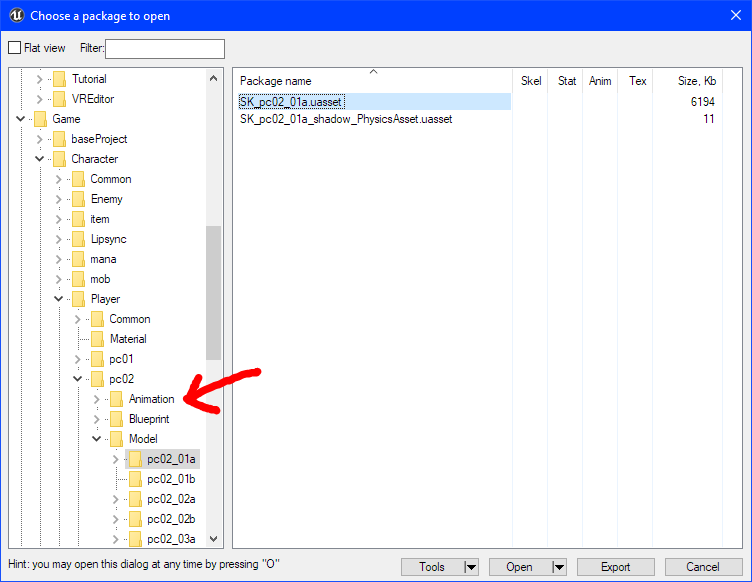
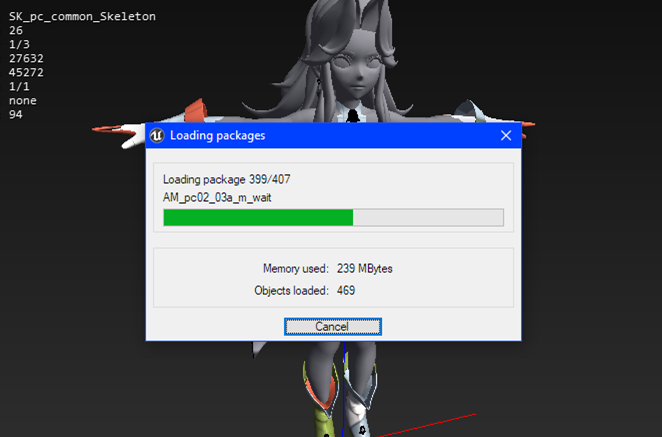
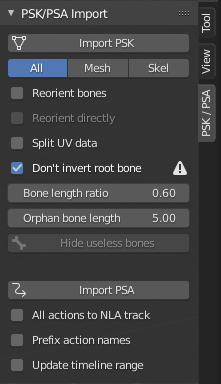
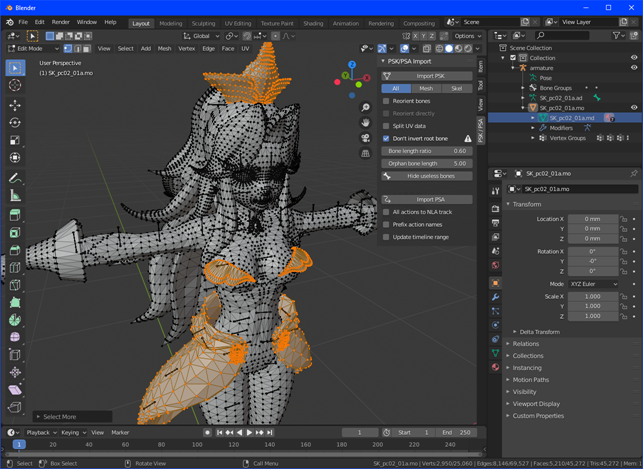
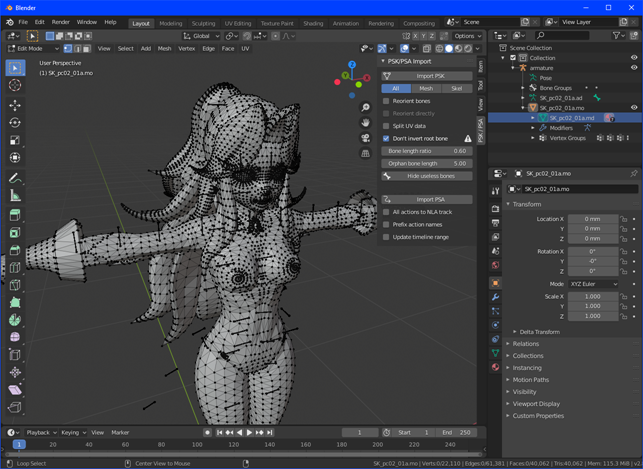
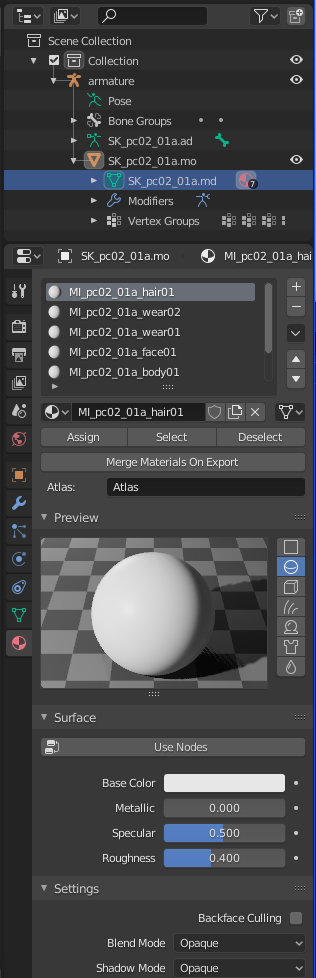
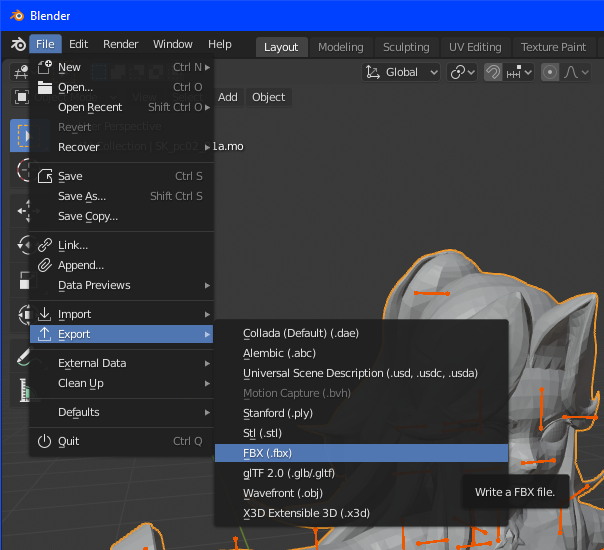
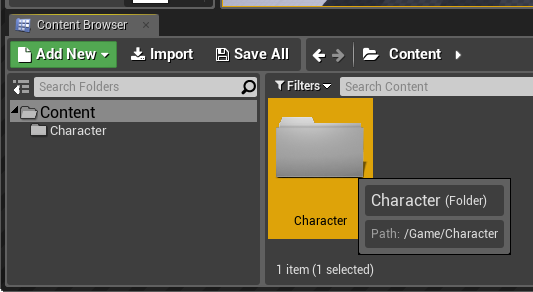
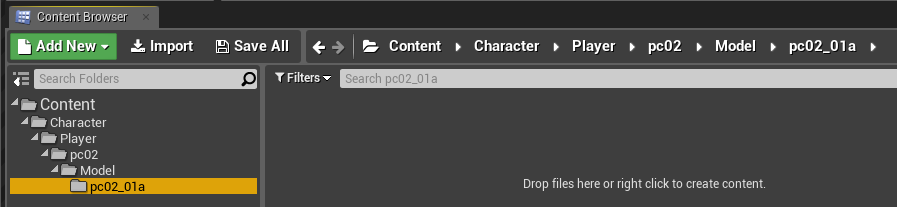
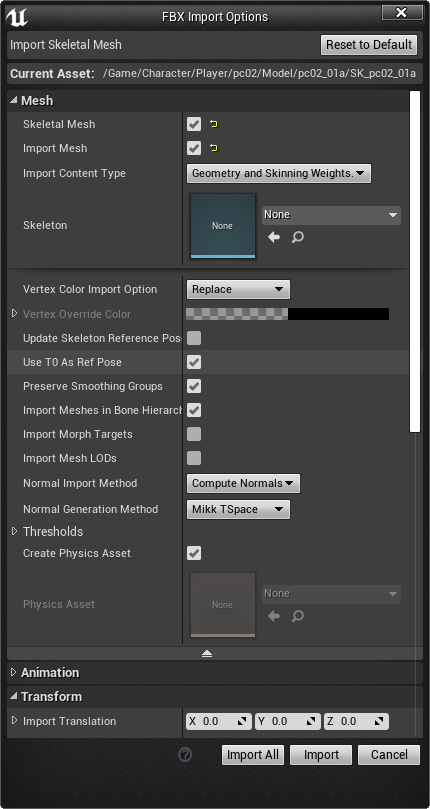
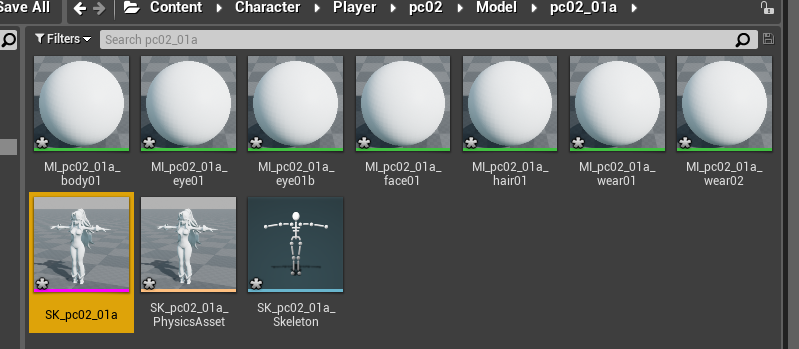
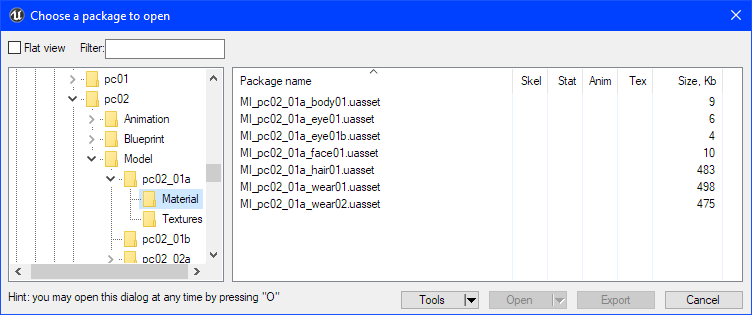
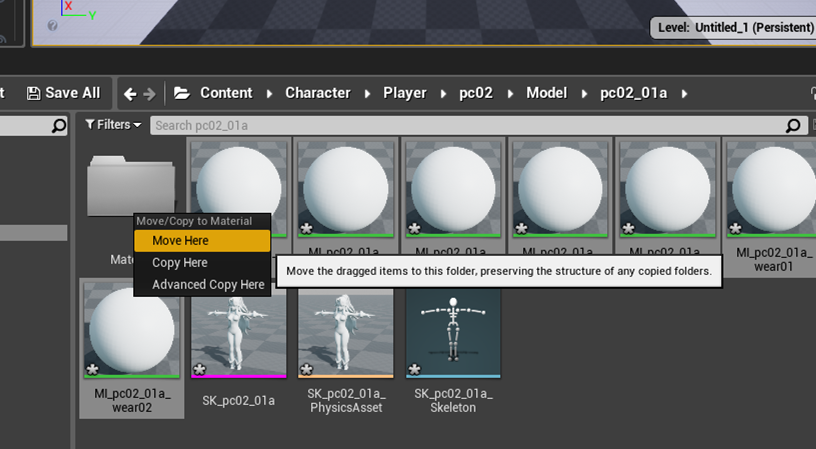
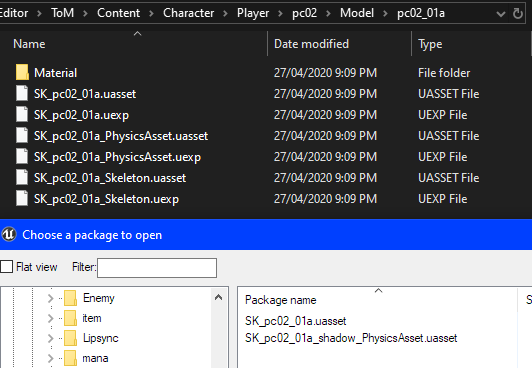
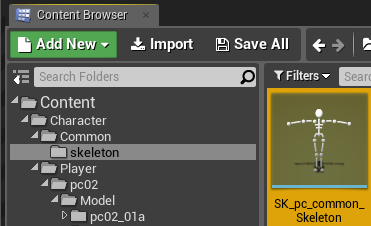

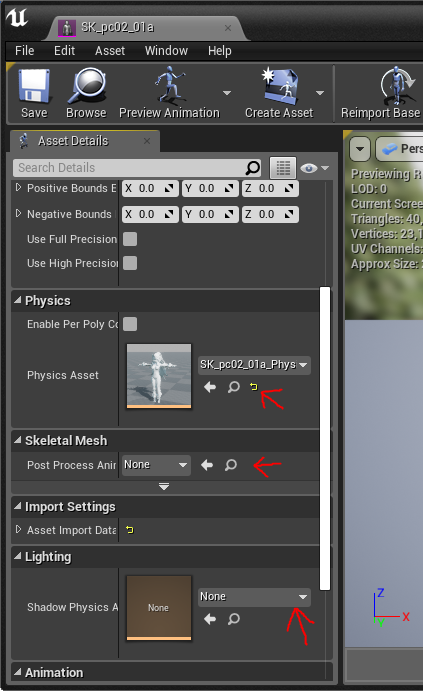
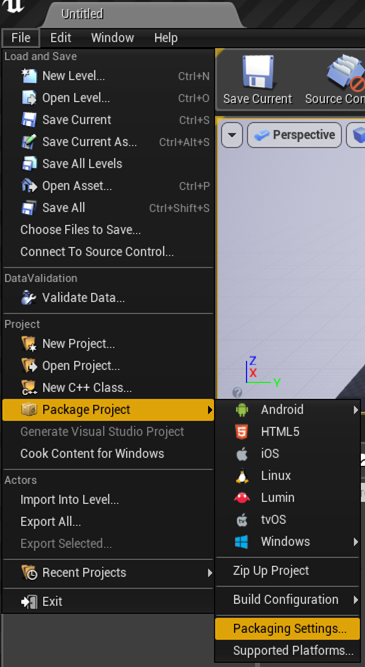
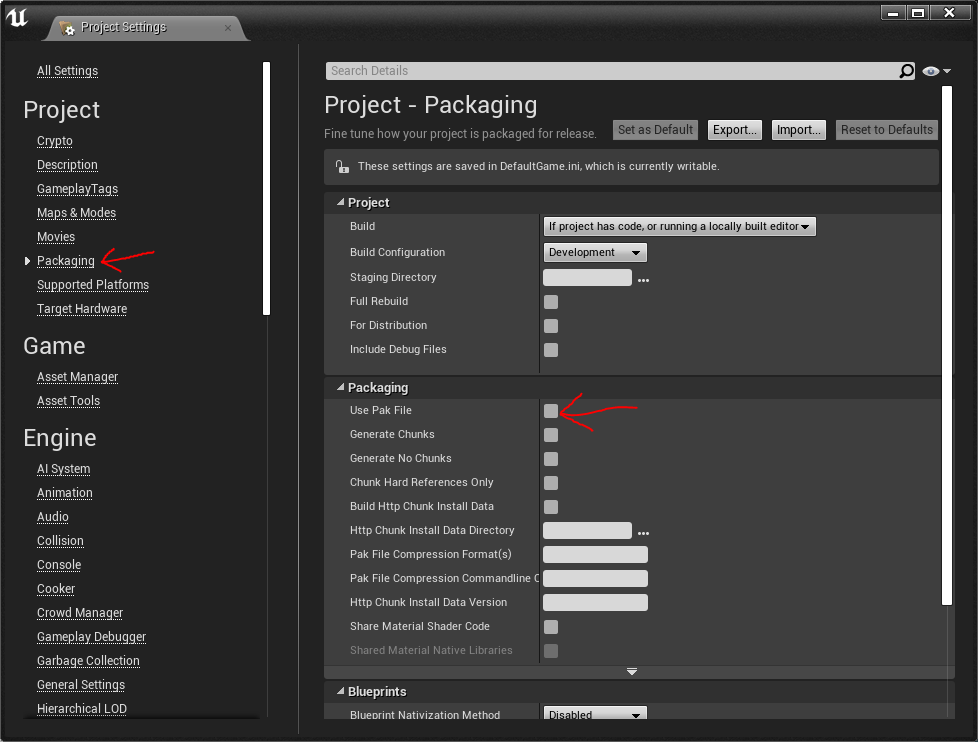
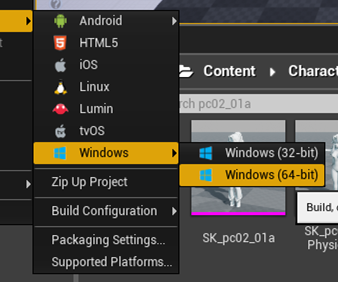
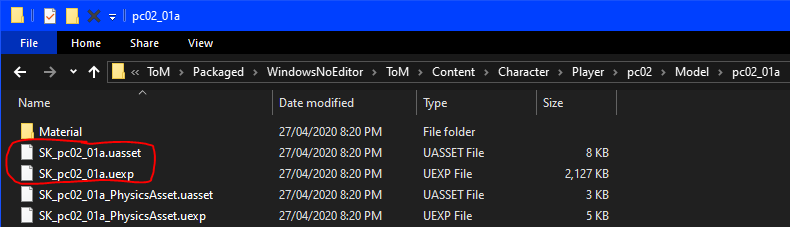
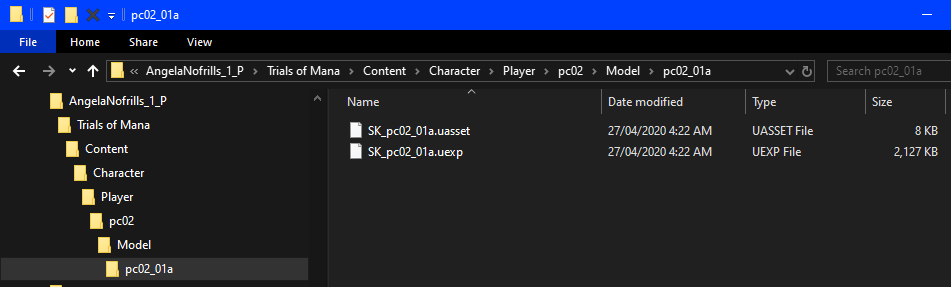


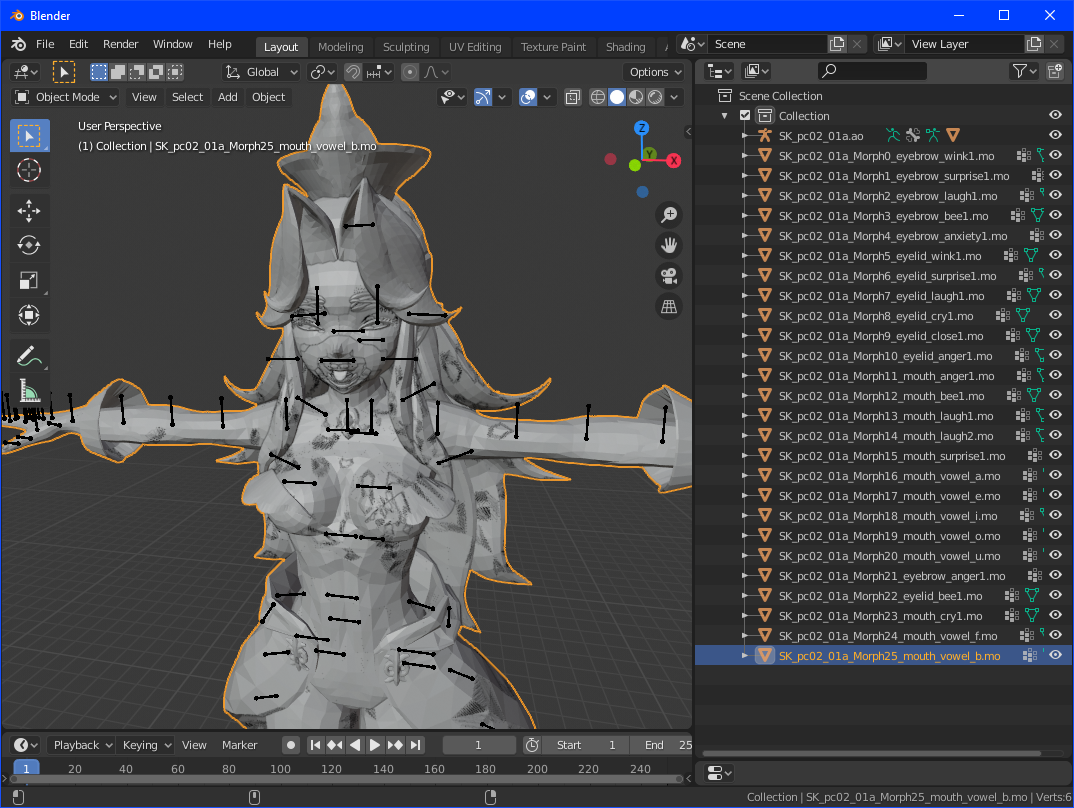
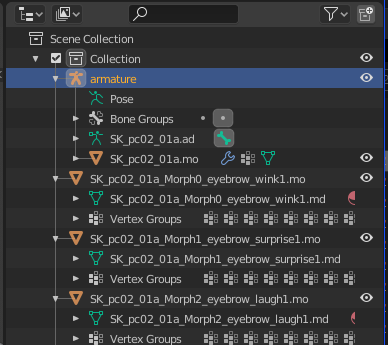
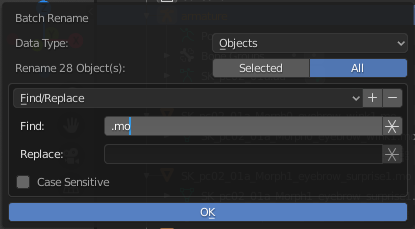
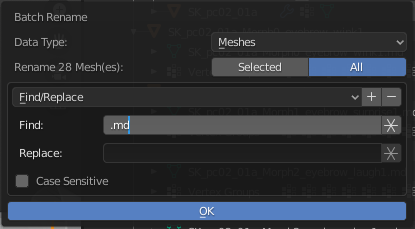
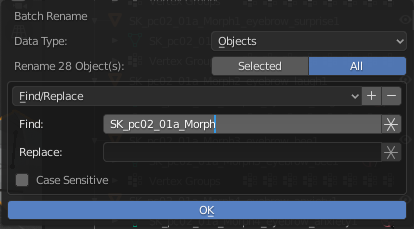
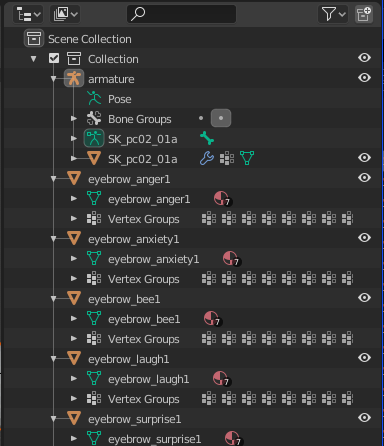
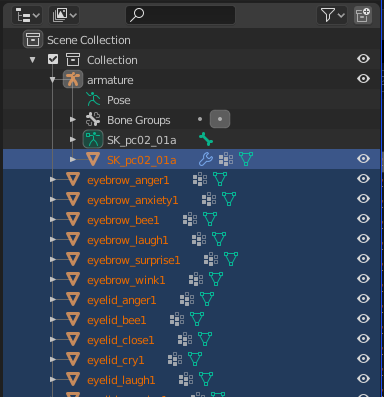

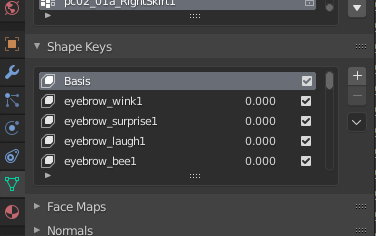
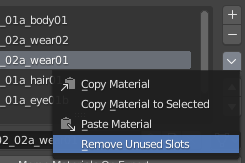
-
 Using and Modifying Prylipala Sliders By arse22 APR 2021 Intro This will be a small guide to using and base modifying Prylipala sliders. It’s a powerful mod that allows you to morph the head further than the base game would allow. I will also briefly describe how to modify the head used in the mod, without the need for any 3d knowledge or programs, exponentially increasing the possibilities in your TK modeling. Pre-Requisite -Installed VX -Installed Prylipala Sliders Installing Prylipala Sliders Installing this mod is very simple, in VX it is an add-on head, that adds a new sliders which can morph into other heads, but also in any combination and anything in between. Basically, it replaces the useless asymmetry sliders into something much more practical. Download Prylipala sliders somewhere, if you dont already have it. Locate Custom.Prylipala_AltAsymFull.FaceSlider folder and place it into your AddOns. Then, in game you select it like so (the tool tip in the top left will tell you if its the right mod:) Reload the room or customizer, that means exit to title screen and load it up again. The model you did this to should have additional sliders under the second face tab. I am using Maya, which is a base model that was commonly used before and even quite some time after head replacers. Using Prylipala Sliders Here, is Prylipala sliders applied to a very no-frills default Maya at their max and minimum range to show what is possible and maybe a handy reference for some: Base_Maya_Prylipala_Min_Max_Big_Pic.rar Base_Maya_Prylipala_Min_Max_Individual_Pics.rar Modifying Prylipala Sliders There is a couple of things worth noting here. First, VX does not support HiPoly heads, the sliders for HiPoly heads (labelled HP,) are only the morphs from my understanding. Second, there is no way to add additional morphs to the base mod, as far as I know (the author of the mod, did not support a VX port or further development.) So, if you find that the pre-selection of sliders is limiting (which it is,) what you can do is replace the base head (.tri) file in the mod. As long as it is not a HiPoly (HP) head it will work with the sliders. I will show this example. First locate the head mod you would like to use as your new base: So, that is the head mod of EiraV. It is the only file in the mod, a .tri file. The best practice would be to copy and pase the folder of Prylipala, “Custom.Prylipala_AltAsymFull.FaceSlider” and rename it like “Custom.Prylipala_AltAsymFull.FaceSlider_EiraV.” This is just for organization. Then you go to the same directory and replace fg_head.tri with the one from the mod you want to use. If you are using a EMFS headpack that looks like this: All you need to do is select the .tri file of the head you want to use and rename it fg_head.tri, before moving it into your Prylipala custom mod. (You can also do head02 for male and head03 for shemale.) Heads To Use I was going to post about this on MG right before it died, since I haven’t seen anyone doing this, and it’s quite easy, greatly increasing the potential face types you can get into the game. Not all are great as you see from the previews, in fact I would not recommend using the maximum or minimum of any sliders when creating a model. Some head replacers are very generic and work really well with the sliders, while others strive for a very unique shape and may create poor results with most sliders, so on such heads it’s still useful to do this to fine-tune some parts to your liking. Examples of versatile heads that are good to make a Prylipala mod for: GE, Female Head Normal or Younger, Hybrid, Realistic Nose, Aaron More unique ones that will give mixed results: Daz-like head, Widowmaker, WaxHead, HurkV Conclusion Of course if you are capable, the absolute best is still just making your own head in a 3d program and adding it in as a replacer, but even such a head could easily benefit from the vast number of morphs provided by this mod for in-game tuning. It’s a shame HiPoly version of this mod was not made. I believe RK created some 2x (hipoly) versions of standard used head replacers in a package on MG, which I still have. From what he explained it is a simple process of doubling some value, but I personally do not know what value to modify to make Prylipala sliders work with it and certainly no clue how to add it to VX. This aside though, there isn’t much to using this and it is as good as it gets for TK face customization.

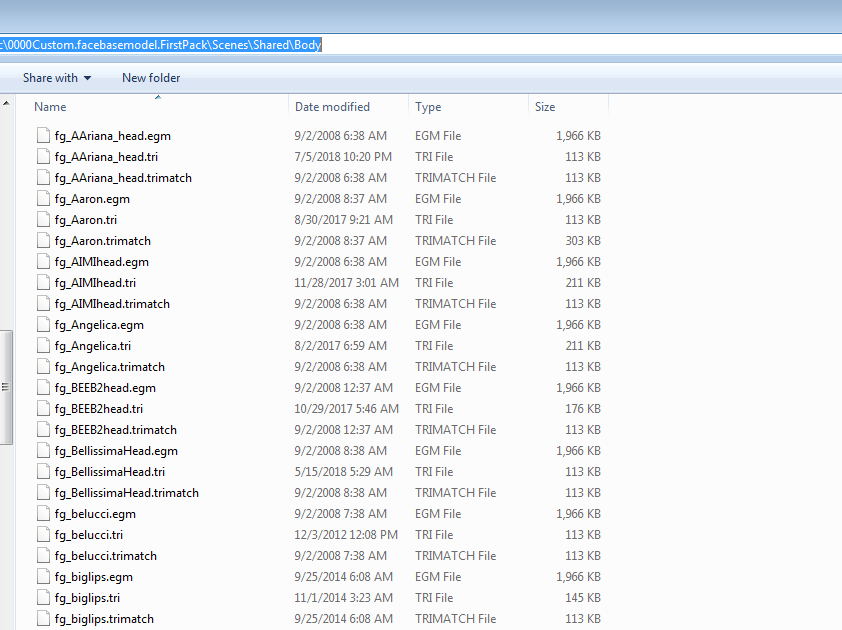
-
 So you chose Autobody cause its easy or whatever reason and your followers have broken bodies cause they keep their pre installed one when naked (see photos) The easy way to solve this is for followers that use a bodyslide you already have, you gonna go and replace the female body with your own with zeroed sliders. So find your zeroed body you built in bodyslide files femalebody_0.nif and femalebody_1.nif and copy them in your followers \meshes\actors\character\ElizabethJV\Body replacing hers* (make sure you dont just drag them removing your body files) now you are basically done for the easy way just use autobody to set the followers body preset and refresh her by equipping armors *BUT you gonna need to keep a copy of the files if you dont have the preset cause we gonna need it for the hard way later The hard way i have yet to test but it requires this guide and your followers original body you kept before. I will test it and see if i can make a short version here or find an alternative but it should work great.
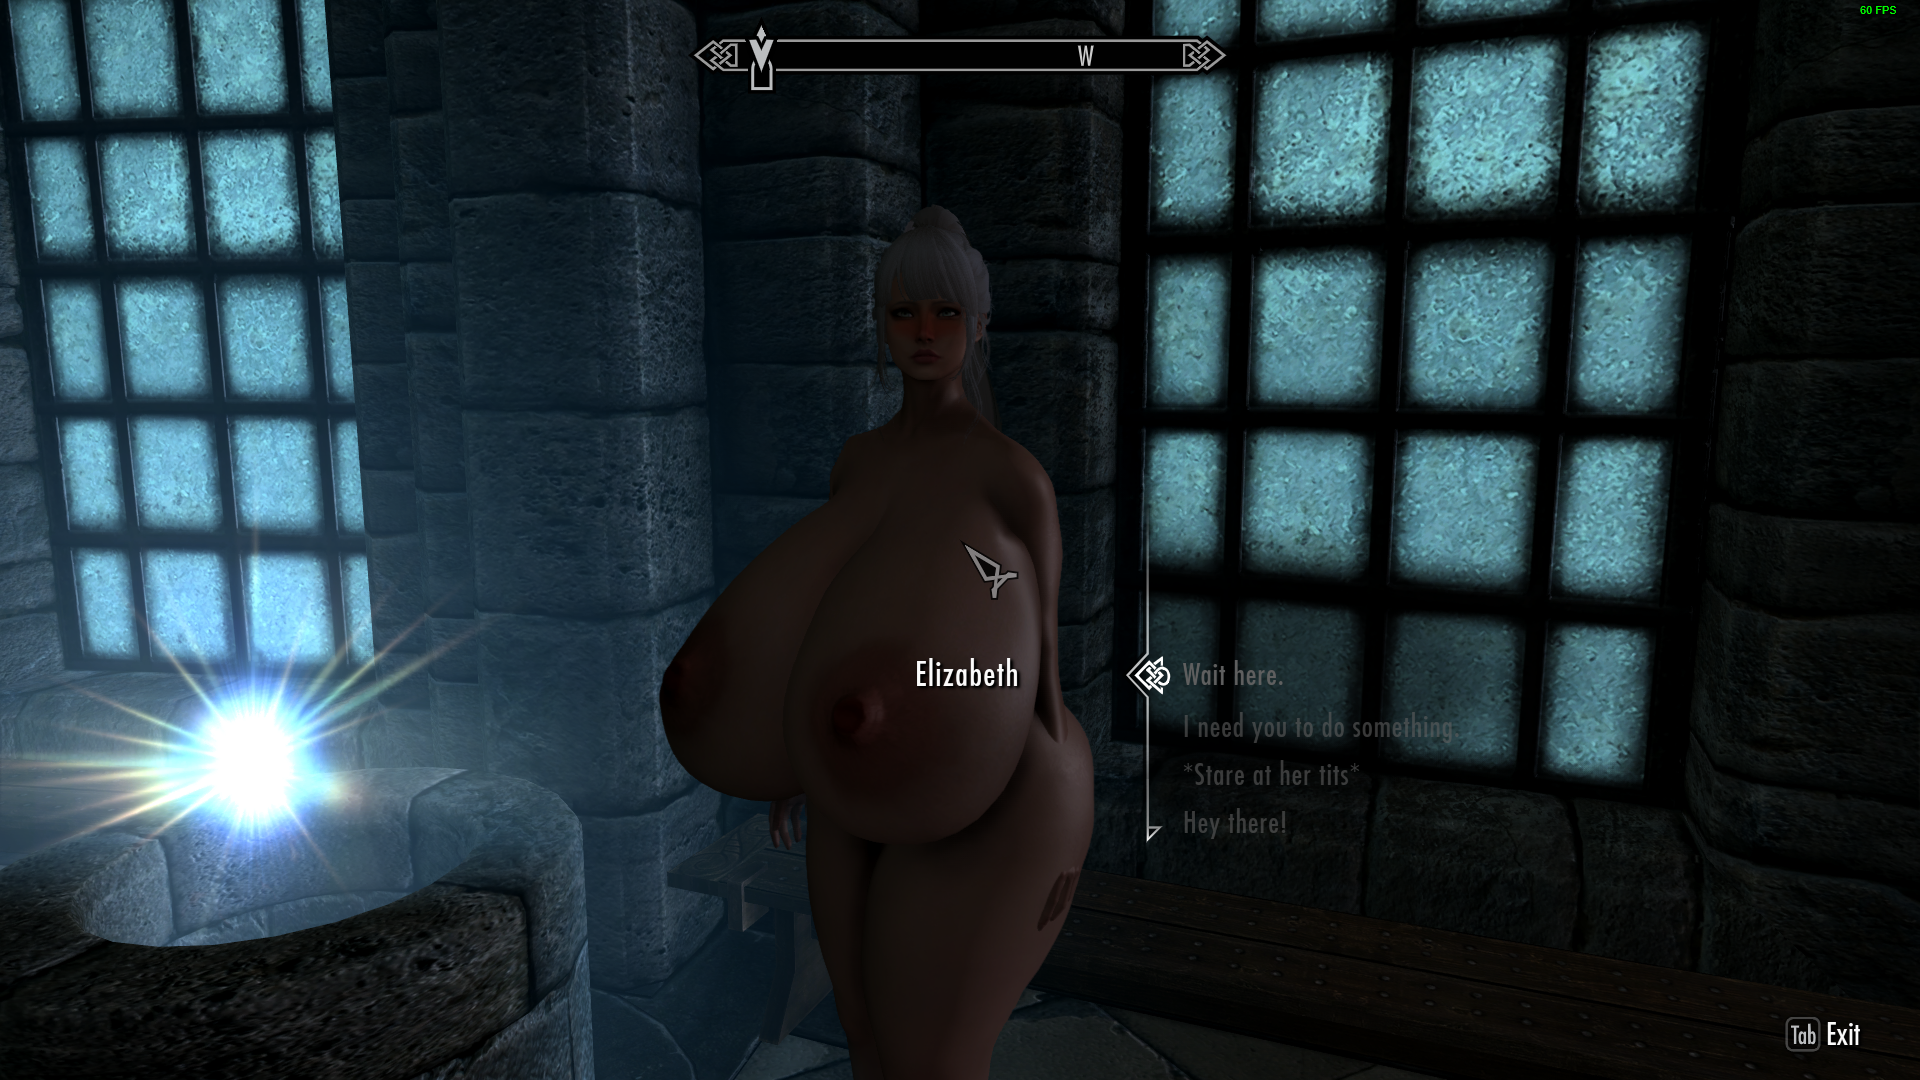
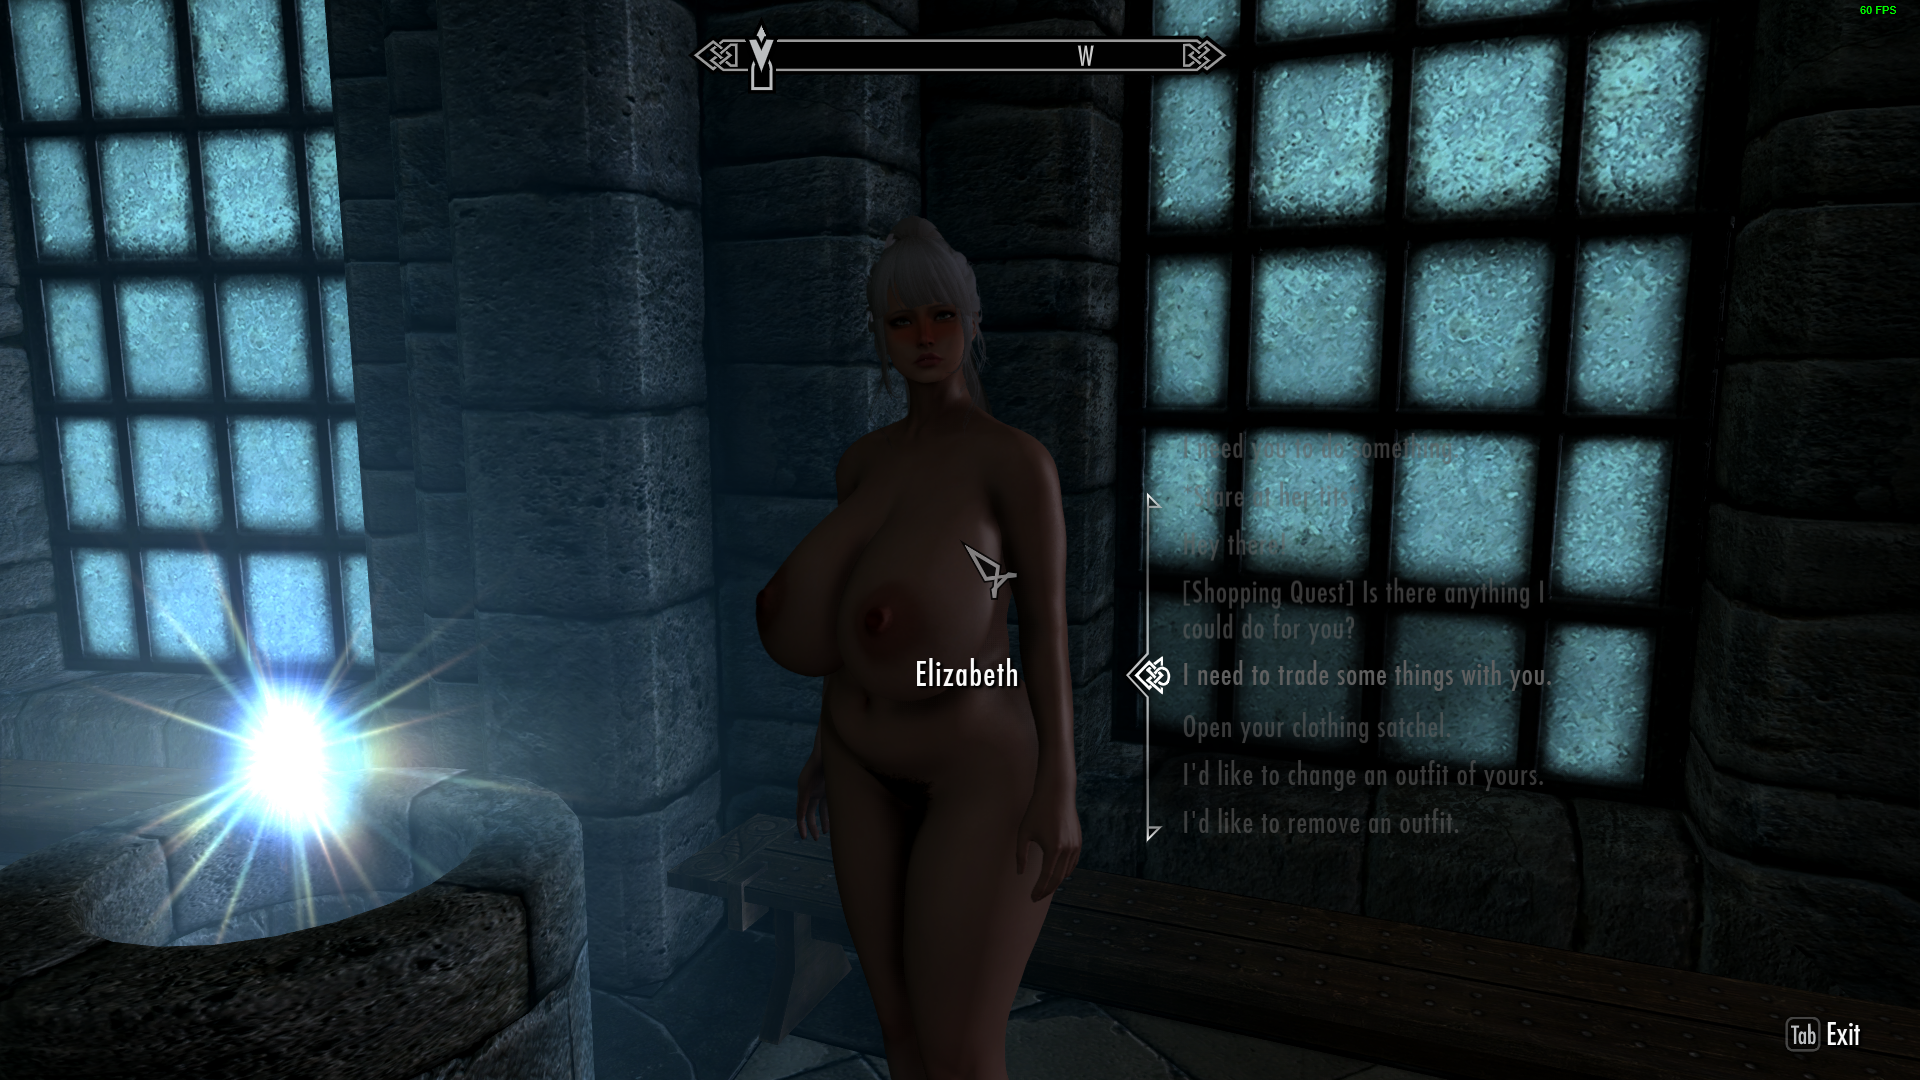
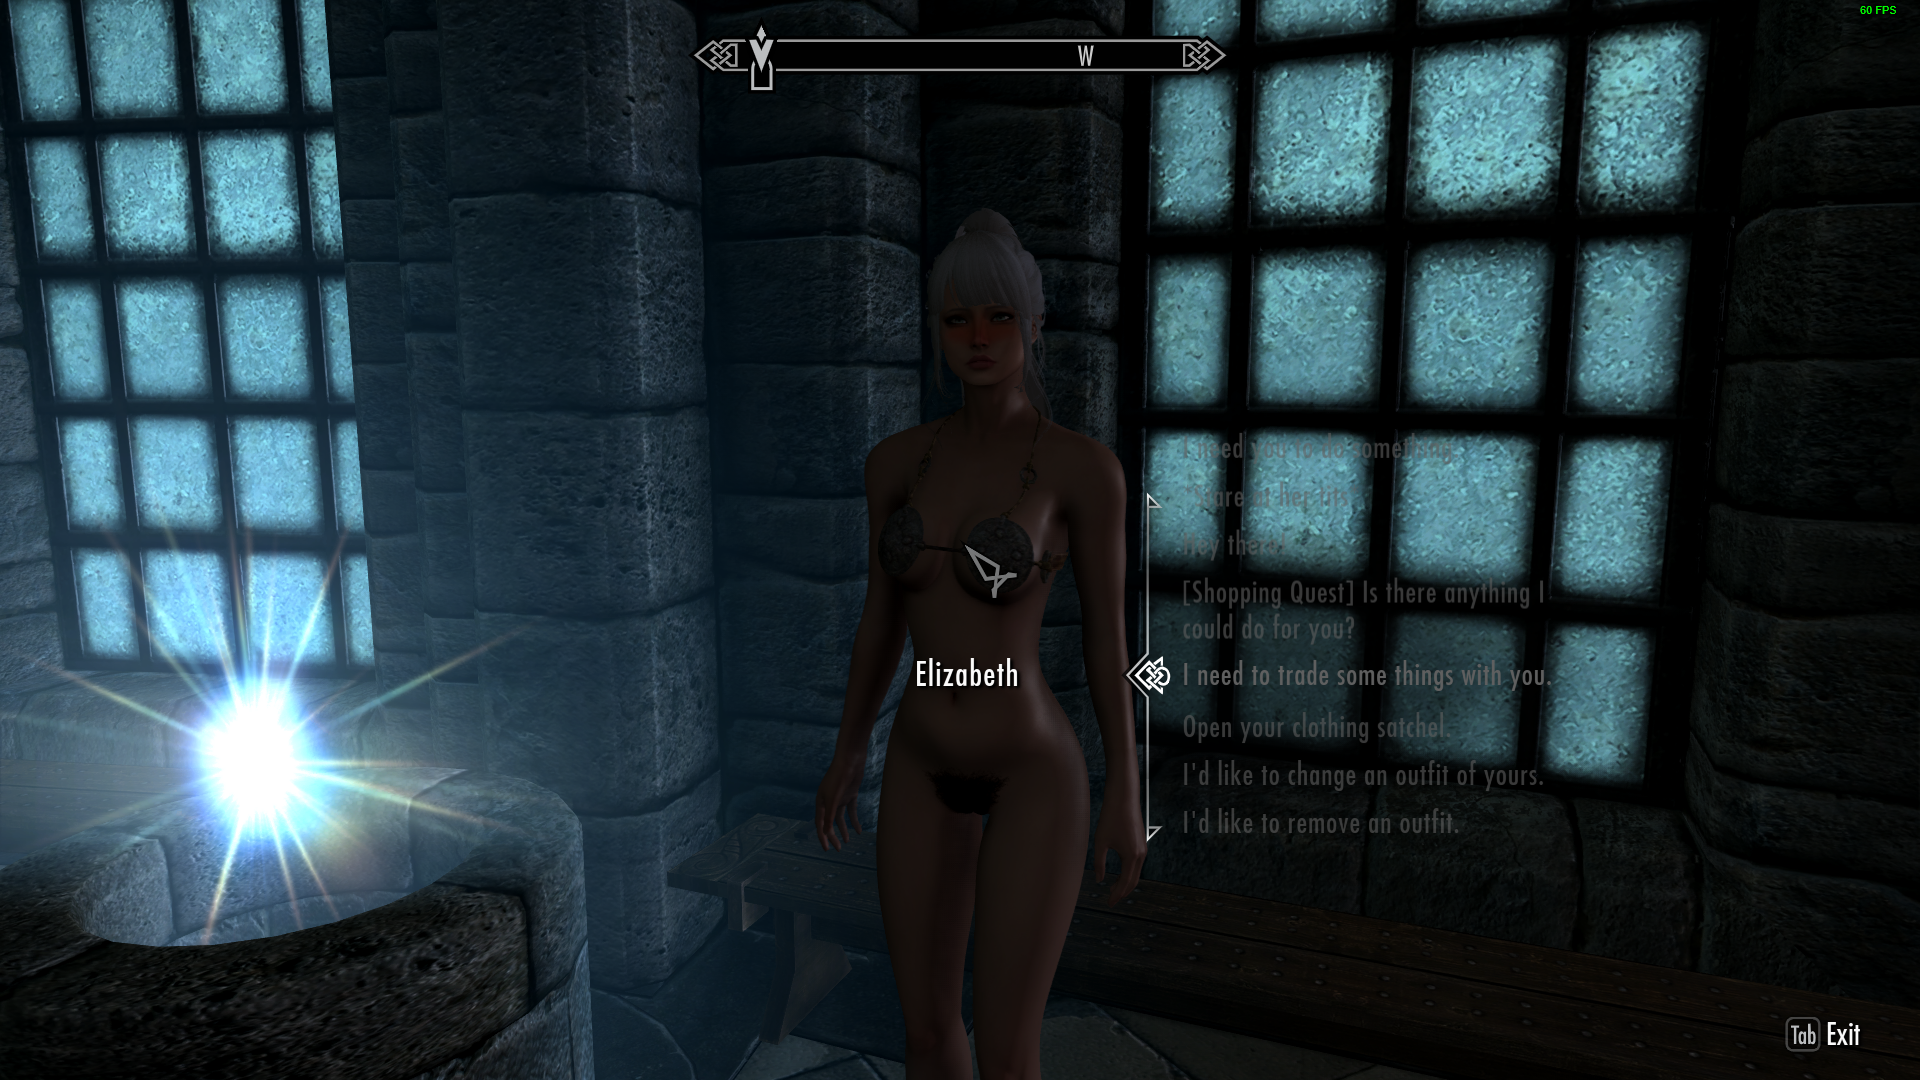
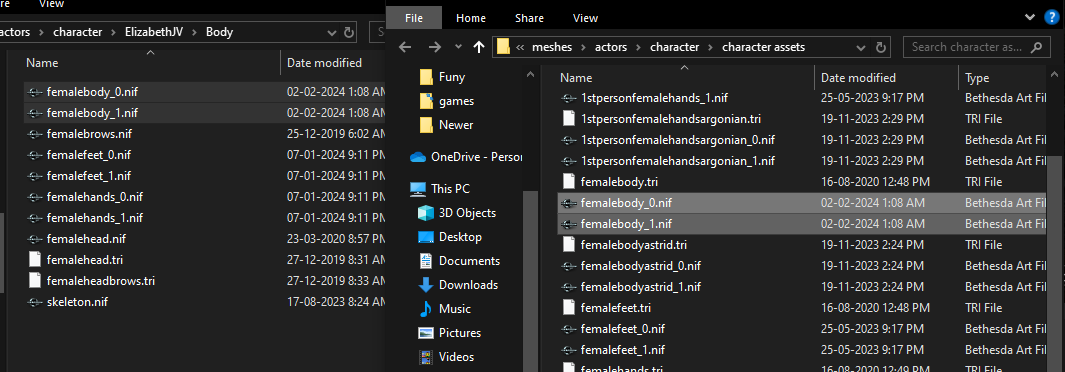
-

Version 1.0.1
4,054 downloads
Hi, These are several Nude, wallpaper based "Main Menu" alternatives. Installation: Just use your mod manager. MO/Vortex/NMM. Overwrite other files during installation. That's it. You probably use Clean Menu. I use it also. Each main menu has only one ".nif" file, and ".dds" file. They won't disturb your computer. Uninstallation: Use your mod manager. Reinstall "Clean Menu" mod again. Notes: When you install one of these Naked Main Menus, you'll see that there have been two files created in new folders: data\meshes\interface\logo logo.nif data\textures\interface\objects MAINMENUWALLPAPER.dds After the uninstallation, you can check if "textures\interface" and "meshes\interface" folders still exist or not. If they do, you can delete them. Main Menu "Version 2" is fancier one. In its .nif file there are some animations, There is a sound file. Is this "V.2" necessary? I don't think so. They show the same hot babes, the same list. Maybe, Clean Menu mod would allow to play neither sound file, nor Skyrim logo animation. How can you create your own Main Menu based on a wallpaper? In the support website, I explain how I did. I added wallpaper .dds file, logo.nif file, a .7z archive file that you can use to add your own .dds file, .nif file, folders, then create your .7z main menu package. I prepared the list of the tools that you might need, and explained how to use them to create your .dds file, etc... If you have any questions/suggestions, please do not hesitate to ask/tell me... ------------------------- Have Fun... & & & ... Nehaberlan... ------------------------- -
 Hi, In my mod, I created a dog. I wanted to created as a NPC. It works great. Someone asked for sex animations compatible version. Long time ago, as I remember, someone created a dog follower that has fully functional and/or compatible with More Nasty Critters, or its related mods/animations. Do you know any mod, and/or webpage that I can use as tutorial? If you can help me anyway, I'll appreciate. Thank you in advance...
 -
 I must say before everything that this guide is made from a BHUNP-Legendary-Edition perspective. There are some variations on SE, given the different body mods, especially if you're using CBBE-3BA type bodies instead of the UUNP-BHUNP lineage. But a lot of the concepts are somewhat general to all systems, considering that in the end, it all comes down to nif files, and the mechanics that make them have physics. With the arrival of SMP, the entire world of modding was revolutionized again, offering incredible looks for body physics, but the problem is these mods are some whimsical, and most people just see a gif of bouncing tits, and they immediately want to get the new mod, without really understanding what it is, how to set it up right, and how to even make it work in the first place. Even more, something that I dont think many people notice, is that following the install documentation on BHUNP doesnt actually guarantee that SMP is going to work. It's more likely that it doesnt, because in order to truly install SMP propely, one needs extra steps that are hardly described anywhere. My experience might perhaps be limited due to the fact I figured out all of this by just deconstructing some of the basic mods. Perhaps more people out there get different results using stuff like COCO Body or some other addon, physics repack or custom setting lying around. Maybe that's why I see so many SMP enthusiasts on the modding community and I cant for the life of me understand how is it that people actually manages to get SMP working since there's literally no documentation on the base files that helps users get a actually functional install. But what I found here, is less about what mods you install and more about why some things work the way they do while some others just dont. It has taken me several months of research and the creation of my own body mod, to understand how these things work. So in hopes of helping someone else, and also as a way to put my findings in written, I decided to make this guide which will attempt to be addessed to modders and users alike. So let's get on with it. Part 1 - What is HDT/SMP HDT, is actually the name of the modder who created physics for Skyrim, which is also the same person behind SMP. But both are different versions of a physics engine, the original HDT has the long name of HDT-PE (For "Physics Extensions"), but I will refer to it on this guide as simply HDT. SMP stands for "Skinned Mesh Physics" and they have a couple of fundamental differences: HDT is a system based on collision objects. A body or clothing item has certain "bones" that animations can move, and when the animation moves a bone, the model moves. In the case of physics bones, they arent controlled by game animations but by the physics system instead. HDT assigns physics bones values such as acceleration, movement limitations and inertia. It also assigns collision objects to these bones, which are simple invisible meshes such as cubes, boxes, cones, cyllinders and spheres. When those invisible objects colide, you get in-game model collisions. SMP instead, relies less on the collision objects and more on an actual model. The bone assignment mechanic is the same, there are physics bones on a model, and the system will assign motion values and move them, but the collisions can be asigned to an entire actual mesh instead of needing collision objects. This provides for the smoother and more realistic looks you see on the bouncing titty gifs people posts. SMP however is much more CPU-Demanding than HDT, which is why when in game you can just "install it" right off the box. To activate body SMP collisions in game, it is needed that you use the mod, and activate "SMP Mode" from inside the game, which equips invisible collision structures that enable true SMP physics. Part 2A - Installing HDT HDT is the simplest physics system to install. In fact, you only need 3 mods to get it working. XMPSE Skeleton, Bodyslide and HDT-PE, which is the system itself and consists of 2 files, which are hdtPhysicsExtensions.dll and hdtPhysicsExtensions.ini The skeleton just goes in the game directory as ordered by the installer, Bodyslide requires the use of the software inside to generate meshes. In order to generate physics-enabled meshes, users should choose the options labeled as "Special" or "HDT". As for HDT itself, it needs to be added or else, you still wont have jiggle physics. Bodyslide provides the prepared meshes, HDT makes sure they have physics. Part 2B - Installing SMP For now, I have only ever used BHUNP, but it's my understanding that 3BA works more or less the same. This is when things get tricky because SMP will not work right off the box. The BHUNP installer comes with a lot of options most of it are kind of hard to understand, especially for new users, and you may think you're setting up an SMP setting, but you will not succeed unless you take extra steps. The basic process is about running the installer and generating the collision meshes with Bodyslide. When running the installer, you should mind 2 things: First, the size of your collision mesh (referred to as cup size), this is important because it refers to the Players, breast cup size. If you play a small chested character, and choose D Cup IE, your breast jiggle will probably look ridiculous. This is not an issue for NPCs since the mod inside the game allows you to choose a specific physics collision setting for NPCs when you add SMP mode to them. Second, the "Head for NPCs" option. This installs a head mesh that has embedded physics, "for NPCs" this might seem like a good idea at first, but in my experience its a terrible one. For starters, it doesnt really work on NPCs. It only works on the Player. which is why some of my testings with this file active, resulted in different behavior between Player and NPCs. More specifically, stuff like generating the "Advanced V2" model in Bodyslide (which is meant to be the one you use for SMP) can result in the player having automatic breast jiggle (With no SMP collision mode active) while NPCs do not. The reason for that is described on the next part. But basically, when the installer prompts you to install the head, I recommend you don't click that. Finally, after the installer is done, you should generate meshes with Bodyslide, and you have 2 sets of things to generate: The Body Mesh: 3BBB comes with several body options, but the "Advanced V2" should be the one used for SMP, while the "Havok Path" one is meant to be a bit different than normal HDT models BUT IT STILL USES HDT PHYSICS. The rest of the options labeled BBP and TBBP are also set to behave on HDT physics. Collision Meshes: Very important. These models are invisible in game, and can only be equipped from inside the game by activating "SMP Mode" on the player and a target NPC. These must be generated or else true SMP will not work. There are about 5 models to generate, 1 for player, and the other ones are for NPCs. VERY IMPORTANT AGAIN: Remember that at least the basic nude body settings for SMP, work like this, for what I've seen, in both games. SMP mode is triggered from inside the game by an MCM-configurable hotkey. If something jiggles and collides without you activating the key, then it's either not really using SMP physics, or it's an outfit that has internal SMP setting (which will probably conflict with normal SMP if you try to use the hotkey). Part 2B.1 - Why SMP doesnt "just work" and how to fix it. SMP actually has 3 problems: First, the dlls are all wrong. For SMP to work, one needs to have a couple of functional files which are called hdtSkyrimMempatch.dll and .ini. The ones that BHUNP has, do not work, at least on version 2.31. Some other mods come with working copies of these files, including my own body mod, and other mods such as Naturalistic Jiggle. Once you get those files, the SMP collision meshes, when called upon in game, should actually work. Which brings us to the second problem which is physics overlap. I mentioned the head option on the installer before, because if you did install the head, you may notice that generating the Advanced V2 model, already uses physics without the need of SMP mode in game, at least for the player. This is because the head was adding physics to the actor, but the issue here is that SMP requires the actor to have no preexisting physics instead. If you try to add SMP mode to an actor (in this case the Player) in game, when physics are already active, you will get pysics overlap, which in simple terms, means HDT and SMP are competing for control of the physics bones. This will look in game as trembling breasts and buttocks. On top of that, the head also has body, fingers and vagina physics settings, which will mean if you use SMP, you may also get trembling on those areas. The solution to this, is simply minding the previous part and not installing the head. Alternativelty, I was able to solve this by editing hdt3BBB.xml and removing all bone values from it by using JFF to edit the xml. This last option however, will also make 3BBB-PE stop working. Adding one more point, in my case it was the head, but the head is not the only place where physics paths might exist. Sometimes hands and feet can also have them and though Hands didn't seem to add physics for me, maybe they do in other cases. Rememer: Proper SMP requires that HDT is completely shut down, so you can't have other models adding HDT controllers to your actors. Physics Overlap in all their glory The third problem, is that even if you did everything right, have the collision meshes, generated an SMP-Prepared body, and didn't install the head, so that your character's body is ready, you will still have physics overlap in the buttocks. Now the reason for this, is actually HDT. Coded internally, within HDT, is the fact that physics get added to every single model in the game. No exceptions. This means if a model has the "rigging" AKA bones to jiggle, it WILL jiggle. No need to have an xml path embedded inside the nif file for it to jiggle, it will just jiggle no matter what you do. But Myst, what the fuck even are these "embedded" things? I hear you say. Well, embedded xmls or "havok paths" are properties that are contained inside a nif file. They tell the game that this particular nif, should have physics, as they point to controller files that move bones within the nif's "skeleton". Now, some files may have embedded havok path, but some of them have nothing. Having nothing embedded, however, doesnt mean the model wont have physics, because, every model already has an implicit physics file attached to it, even if the nif file itself does not. The controller file for the implicit physics, is the default physics file, called hdtPhysicsExtensionsDefaultBBP.xml. The problem is that SMP requires a model that's clean of preexisting physics, which means HDT should be turned off if we are to use SMP. But this is impossible because HDT is hardcoded to be present in all things, and there is no real way of completely shutting HDT physics down from the nif file. The only solution I could find to this issue, was editing the xml manually. Which means using JFF, locating the DefaultBBP xml you are using, and remove the 4 Butt bones from it. Once that's done, SMP should finally be able to use a mesh that's clean of physics so it can use its own gimmick to generate proper jiggles and collisions. The downside of this procedure is that automatic butt jiggle that models used to have without embedded havok, will in fact, stop working for every model unless the nif file specifically contains xml paths pointing to a file that does use those bones. The good news is such alternate file that can provide full physics without being the default xml, exists. It's called HDT.xml, and it's present on Bodyslide and BHUNP. In other words, a nif with no havok path embeds, will not have butt jiggle. Technically, it's still using defaultBBP xml but that file no longer controls buttocks. The way to give a mesh HDT butt jiggle, is simply a matter of embedding an xml file that does have the bones, such as "HDT.xml" (At least the versions that come in Bodyslide and BHUNP do have the bones) Part 3 - On making properly set collision mods. This part is meant for modders since I feel like I need to say somewhere, that making correctly prepared models is important. For this, any modder should have a few things in consideration. HDT ALWAYS has embedded physics to all the models. So if you simply rig a model to have HDT-Controlled bones, they will jiggle even if you make nifs without embedded xml havok paths inside. The default file is always hdtPhysicsExtensionsDefaultBBP.xml Adding alternate xml havok paths, pointing to the same bones hdtPhysicsExtensionsDefaultBBP.xml controls, results in an overriding (not overlapping) physics controller for a file. Which is probably why many models use HDT.xml instead of DefaultBBP.xml. Those control the exact same bones, but the HDT file has the capacity to override the default one, resulting in different looks for the physics. It is relatively simple; if a model has butt bones, and no embedded xml, Default will move them. If a model has butt bones and embedded hdt.xml, hdt xml file will move butt bones instead In my game, I have removed the butt bones from DefaultBBP and left them on a separate file, which means if a model has butt bones, the default xml has no data about them, so they wont move, unless another xml includes them, which is how I'll be setting my models my models on BHUNP-Lite and every further mod I make from now on. I would like this to become a common practice but unfortunately I'm just a random modder in a sea of other people doing their own thing. I hope this can be a somewhat easy method to fix models anyway. Finally, some mods might add parts that have their own xml paths on some parts other than the body, like IE hands and Feet. This is also a thing since Bodyslide (If you look at Hands-Special and Feet Special, you'll notice the difference is they have embedded xmls) As mentioned before, it used to be a good idea to have extra models containing physics paths, but that was before SMP became a thing. Now with SMP, the priority is to get rid of HDT physics in SMP models which can prove really hard if you have anything else that's adding them. Hands, Heads and Feet seem to be the most common alternate places where people puts physics paths, and they can be somewhat tricky since they dont always work the same for Player and NPCs. IE on my tests I found that an embedded Head gives physics to the player, but not to NPCs, while Hands give physics to an NPC but not the Player. Part 4 . Recommended Install: Depending on what setting you want, the process varies, but what I did is this: I hope you fid this guide useful, It may or may not be subject to further changes as I'm still figuring this all out. If you have any comments feel free to leave them and I'll be sure to check them. Thanks for reading and have a nice day.
 -
 Smol Warning; Alright, these tutorials are not quite up for magical all-in-one solutions yet. They will more than suffice for making species and monster supports, beds, etc, but you will have some errors due to newer versions changing a few things. Once the next big update is here, i'll be able to update these and point everyone in the right direction towards updating/fixing/making supports. For now though, have some patience, as even i am learning this process again. It is time, we've had no documentation for how to things for a solid while, so time for me to use my holiday to just push out several tutorials at once! Now now, what can we do... Lets see here: Species Supports Dialog Files Bed supports and Sexbound-only beds Monster Supports Clothing Supports Config Fiddling Custom Positions Custom Artworks & Replacements Just a key point i wanted to share though: I don't and won't promote people making mods without consent from original authors, their permission, and such. We at the Sexbound community Discord and project would like to harbor better relations with modders and wouldn't want to give them unwanted attentions by making mods with their content under their nose, with adult content. Remember to request permission when working with mods that don't belong to you. Also, i want to preface this real quick; These tutorials will require a minimum savvy-ness and probably the following: A Packing and Unpacking tool to allow you to view mod's files and data/folders and names is very handy, like Pakit! A image editing program, among options are Photoshoop($), GIMP, Aseprite($?), Paint.NET, PAIN tool SAI (I think this one is for drawing tablets?) or any program of your prefence with layers and transparency. (This excludes MS-Paint) A program for viewing and editing codes and text files in general, i recommend Notepad++, but Window's default notepad works aswell, along with any of your preference! Should anything in particular be unlisted here, or just general questions, i can give a heads up for it, for any users looking for basic info on how to approach these things. This is the Index post, as it will refer you to the right following post for how to do these things later. I'll have to write every single one individually and with lots of example images folks, so be ready for lots of spam in this topic.
 -
Adult Naked Main Menu - SE View File Hi, These are several Nude, wallpaper based "Main Menu" alternatives. Installation: Just use your mod manager. MO/Vortex/NMM. Overwrite other files during installation. That's it. You probably use Clean Menu. I use it also. Each main menu has only one ".nif" file, and ".dds" file. They won't disturb your computer. Uninstallation: Use your mod manager. Reinstall "Clean Menu" mod again. Notes: When you install one of these Naked Main Menus, you'll see that there have been two files created in new folders: data\meshes\interface\logo logo.nif data\textures\interface\objects MAINMENUWALLPAPER.dds After the uninstallation, you can check if "textures\interface" and "meshes\interface" folders still exist or not. If they do, you can delete them. Main Menu "Version 2" is fancier one. In its .nif file there are some animations, There is a sound file. Is this "V.2" necessary? I don't think so. They show the same hot babes, the same list. Maybe, Clean Menu mod would allow to play neither sound file, nor Skyrim logo animation. How can you create your own Main Menu based on a wallpaper? In the support website, I explain how I did. I added wallpaper .dds file, logo.nif file, a .7z archive file that you can use to add your own .dds file, .nif file, folders, then create your .7z main menu package. I prepared the list of the tools that you might need, and explained how to use them to create your .dds file, etc... If you have any questions/suggestions, please do not hesitate to ask/tell me... ------------------------- Have Fun... & & & ... Nehaberlan... ------------------------- Submitter nehaberlan Submitted 01/01/2024 Category Adult Mods Requires Regular Edition Compatible No
-
Hi, I tried to convert a follower mod from LE to SE. I checked several video tutorial too. Basically I did this: I opened the .esp file in the Creation Kit SE. I changed a file's name. I saved the file. Exit. I reopened the file. I changed the name to previous, original name of that file. Then, I saved/exited. Then, I used SSE Nif Optimizer for the mesh files. I selected their folder. Run it. I ran it separately for head-part, after I selected "head-parts only" option selected. Right now, all of .nif files have "User Version 12, and User Version 2 : 100". I checked the face mesh had also. It looks weird. I tried by using "Cathedral Assets Optimizer". I got the same result. Same weird face. Then, I imported the new files in my SE data folder. In the game, the follower's all body parts were in somewhere else. I couldn't figure out why this problem occurs. The follower has HDT .xml lines on her body .nif files. It uses SexLab, SOS, Sexab Aroused by default. Here they are some screenshots: If you can help me anyway, I'll really appreciate... Thank You...

-
 There are hundreds - if not thousands - of custom species in the Starbound universe, and it will be impossible for any one person to provide support for all of them. Players and creators may choose to take it upon themselves to provide support for their favorite custom species. This modding guide will serve as a walk-through for adding support for most custom species. 1 ) Download the Template 1.1 ) You will need to download the following mod template before you get started: Important: The template files have been updated for Sexbound API v2.6 and up. ☑ Download: CustomSpeciesTemplate.zip 1.2 ) Download the artwork for all vanilla species (Optional): ☑ Download: SexboundHumanoidArtwork.zip 1.3) Download the Sexbound Dialog Tools (Optional): ☑ Download: SexboundDialogTools.zip 2 ) Extract the Template Files into an Appropriately Named Folder. 2.1 ) Rename the template folder. ☑ You may choose to use the following naming convention for the root folder name: SexboundAPI_<SpeciesName> For example, SexboundAPI_Human is good name to use for the Human species. The folder should contain the following files and folders: artwork (Folder), dialog (Folder), positions (folder), sexbound.config.patch (File), _metadata (File), and changelog.txt (File). 3 ) Unpack the Custom Species .Pak File. ☑ For the species that you want to provide support. If the original custom species is provided as a .pak file then you must use the Starbound modding tools to unpack it. The Starbound modding tools are automatically installed with the 32-bit version of Starbound, and you may find them located in the 'win32' folder which is located in the same folder as 'mods'. In the 'win32' folder, you must use the asset_unpacker.exe file to unpack the contents of your chosen species' .pak file. Furthermore, this step requires that you have knowledge of using the Windows command prompt. 4 ) Determine the Correct Species Kind. 4.1 ) Locate the custom species' .species file. ☑ Navigate the unpacked files of the custom species, and you will navigate into the 'species' folder. You should see a .species file in this folder. 4.2 ) Open the .species file, in notepad or another text editor program. 4.3 ) Note the value of "kind". ☑ Read the JSON configuration, you must find the correct value of 'kind'. You must note the value for kind, and you must ensure to preserve any capitalization. For example, the Human species has a kind value of "human". Please, notice that the kind value is in all lower-case letters. 5 ) Use the Kind Value (Aka. Species Name) to Replace the Text in all of the Following Template Locations. 5.1 ) In the _metadata file: ☑ Replace all [replace with species name] tags with the value of kind. ☑ Replace the [author_name] tag with your name too. 5.2 ) In the /sexbound.config.patch file: ☑ Replace all [replace_me_with_species_name] placeholder tags with the value of kind. 5.3 ) In the following folder location - /artwork/humanoid/actor1: ☑ Rename the '[replace_me_with_species_name]' folder to be the value of kind. 5.4 ) In the following folder location - /artwork/humanoid/actor2: ☑ Rename the '[replace_me_with_species_name]' folder to be the value of kind. 5.5) In the following folder location - /dialog/sexbound/en: ☑ Navigate inside of each position name folder (I.e. butterfly, cowgirl, etc..) ☑ Rename each file by replacing [replace_me_with_species_name] placeholder tag with the value of kind. 5.6) In the following folder location - /positions ☑ Open each patch file. ☑ Replace all [replace_me_with_species_name] placeholder tags with the value of kind. 6 ) Edit All Sprite Sheets to Resemble the Custom Species. There are two different sets of sprite sheets, actor1 and actor2: 6.1 ) Edit the sprite sheets for both actor 1 and actor 2. ☑ You must use a sprite editor program to edit all of the sprite sheets to match the design of the custom species. You may simply choose to use Microsoft Paint. Actor1 sprite sheets are in the following location: /artwork/humanoid/actor1/<kind> Actor2 sprite sheets are in the following location: /artwork/humanoid/actor2/<kind> Note: In the unpacked custom species files, you may find the original sprite sheets stored somewhere in the humanoid directory. You must use the exact same color palette used in the original custom species sprites. 7 ) Patch each unique NPC Type and Tenant to be Sex Enabled. This step is may be difficult to write a explanation, but I will give it a try. 7.1 ) Create a patch file for each unique NPC and tenant in the 'npcs' folder. ☑ You'll have to research which NPCs need to be patched because some will already be patched by SexboundAPI. Sometimes the configuration in the NPCType file may have a baseType, so you may choose to only patch that specified file that matches the baseType value. You'll have to hunt for that baseType file in the custom species 'npcs' folder, and if it is not in there then be sure to check the below list of default NPCTypes (aka baseType). Note: SexboundAPI already patches any NPC that has a baseType of 'base', or 'merchant'. So, you shouldn't have to worry about creating a patch file for an NPC that inherits one of those two baseTypes. Always research a baseType before patching it because many baseType actually inherit from 'base'. For example, baseType 'guard' already inherits from the 'base' npctype, so you don't need to create a patch for an .npctype with baseType 'guard'. Please see the below list of NPCType (aka. baseType) that you should not need to create a patch: NPCTypes / BaseTypes (Defaults) If you need to create a patch for a unique .npctype in your custom species support mod, then the filename must match the file name of the file which you are patching. Furthermore, the filename must end in .npctype.patch. Example: File Name: comfortertenant.npctype.patch You must ensure that the patch file is stored in the exact same folder location. So, if you are patching an .npctype file in the following location: /npcs/tenants then you must place the .npctype.patch file in the exact same folder location in your support mod. 7.2 ) You must put this exact code in each of your NPCType patch files. [ { "op" : "add", "path" : "/scripts/-", "value" : "/scripts/sexbound/override/npc.lua" } ] 8 ) Create Dialog Files (Optional) 8.1 ) Choose whether to create custom dialog or not. ☑ If you don't want to create custom dialog for your species support mod, then delete both the dialog and positions folder out of your template. 8.2 ) Choose between editing the dialog config files directly, or choose to use Microsoft Excel. ☑ Choose to use Microsoft Excel. ☑ Open the sexbound-dialog-template.xlsx ☑ Switch to the Species List spreadsheet. ☑ Change Column A - Line 11 "custom" to be the species name. ☑ Switch back the Dialog Editor spreadsheet. 8.3 ) Create a new line of dialog. ☑ Click each cell to receive an options dropdown menu, then choose your preferred option. In each row, every cell must have a value. 8.3.a ) Role (A.K.A. Actor's Role) The role of the actor who speaks this dialog entry. Valid options: 1 or 2 8.3.b ) Status The status that corresponds with the actor in the chose role. Valid options: default, climaxing, or pregnant 8.3.c ) Other Species If you set the Actor Role to 1, then this is species of Actor 2. Otherwise, this is the species of Actor 1. 'default' is actually recognized as any species. Valid options: default, apex, avian, fenerox, floran, glitch, human, hylotl, novakid, or (custom) 8.3.d ) Other Gender If you set the Actor Role to 1, then this is gender of Actor 2. Otherwise, this is the gender of Actor 1. 'default' is actually recognized as any gender. Valid options: default, male, or female 8.3.e ) Other Status If you set the Actor Role to 1, then this is status of Actor 2. Otherwise, this is the status of Actor 1. 'default' is actually recognized as any status. Valid options: default, climaxing, or pregnant 8.3.f ) Dialog Text The dialog string that is spoken by the actor in the chosen role. Valid entry: A string of text. 8.4 ) Export the spreadsheet as a .csv file. ☑ Exported spreadsheet as a CSV file. 8.5 ) Convert the exported CSV file into a dialog config file ☑ Drag 'n' drop the exported .csv file on to the included DialogCSVToConfigConvertor.exe tool, then a .config file will be outputted into the same folder as the exe. 8.6 ) Copy the contents of this file into your chosen position dialog file. ☑ You may choose to overwrite the already existing .config file in the /dialog/sexbound/en/<position> folder. Ensure that your file uses the proper naming convention too. Or ☑ you may choose to open the converted .config file in notepad and copy-paste its contents into the corresponding dialog template file. 9) Test Your New Species Support Mod. 9.1 ) Ensure that Sexbound API can correctly display the correct animations for your custom species. ☑ Tested successfully. 10 ) Distribute Your Custom Species Support Mod. 10.1 ) Pack your mod for distribution (Optional). ☑ In the 'win32' folder, you must use the asset_packer.exe file to pack the contents of your custom species support mod. 10.2 ) Archive the file and make it available for download. CustomSpeciesTemplate.zip SexboundDialogTools.zip SexboundHumanoidArtwork.zip
 -
Hi, My knowledge about SE is limited. I have a plan to convert some LE mods to SE. As I noticed, after converting some small, or vanilla based mods, these converted mods have worked perfectly in SE. However, some mods that have not well created, or have scripts like SexLab scripts, or have big files, might cause lots of problems and couldn't run at all. For an amateur like me, attempting to convert such files from LE to SE might cause a disaster. After some googling, I got one YouTube tutorial created by DarkFox124, Creation Kit (Convert Mods to Skyrim Special Edition). There was another video tutorial that was explaining how to use Cathedral Assets Optimizer Its tutorial is there: Convert LE mods to SE! | Skyrim Modding Guide. I would like to ask you which one is more effective for converting files/textures/scripts, custom mods, mods that have SexLab scripts, from LE to SE. If you have another suggestion other these two tutorials that I mentioned above, can you say it too? Thank you in advance...
-
View File Layla's Ripped Clothes Additional Clothes for Heroine Rumble 2 and a Tutorial on Blender. Submitter Layla2727 Submitted 10/29/2023 Category Misc Adult Mods Requires Nothing
-
 A guide to make a bashed patch that works. Why? Because most guides to making a bashed patch neglect to mention that not all mods have bash tags. Or how to add them. Benefits: Proper Bash Tags in your important mods, will be utilized by Wrye Bash to create a bashed patch that will resolve more conflicts. LOOT will utilize these Bash Tags, to assist in sorting your load order. Annoyances in-game can be avoided or minimized. i.e. having to have an NPC in your cross-hairs, enter MCM for Schlongs of Skyrim to set the "Revealing" Keyword repeatedly Makes making a "Merged patch" in SSEEdit obsolete. Makes the game stable Resources required: Wrye Bash: https://www.nexusmods.com/skyrimspecialedition/mods/6837 SSEEdit: https://www.nexusmods.com/skyrimspecialedition/mods/164 Generate Bash Tags script from https://github.com/fireundubh/WryeBashTagGenerator ****Install to "Edit Scripts" folder of SSEEdit**** Skyrim SE Mod Organizer 2: https://www.nexusmods.com/skyrimspecialedition/mods/6194 LOOT: https://loot.github.io/ Patience General installation guidelines: Make sure the mods you install ARE SE compatible - several guides located here: https://www.loverslab.com/topic/94228-se-compatibility-tracking-jul-19-6272/ Even mods that are downloaded from Skyrim Special Edition Nexus can have missed textures, animations and meshes! It is highly recommended to install Steam, Skyrim SE, Mod Organizer 2 & your other tools outside of Windows UAC control. This means not in "Program Files" or "Program Files (x86)" For Mod Organizer 2, I recommend the installer version {ends in .exe}, this will add entries in the system registry. On first run of Mod Organizer 2, select the "portable instance" option, this will keep your files out of the %LocalAppData% folders. Again, that is to keep clear of Windows UAC issues. A guide to installing Mod Organizer 2 - https://www.loverslab.com/topic/136543-v112-mod-organizer-2-other-tools-from-zero-to-hey-sexlab-is-working/ The folder structure I use: Setting up Windows Explorer to prevent confusion: Wrye Bash Configuration in MO2: Note: The folder listed in "Create files in mod" was created by: Setting SSEEdit up in MO2: Running the Bash Tags script: The script will remove any bad tags, and write the missing tags to the header. Exit SSEEdit, making sure to save the plugin. Making the Bashed Patch: Well that was complicated, but worth it. I'd like to thank user @Mertz for advice given and the users at the forum AFKMods https://www.afkmods.com/index.php?/topic/4966-wrye-bash-all-games/ @tasairis for the hard work keeping the SE Compatibility thread going https://www.loverslab.com/topic/94228-se-compatibility-tracking-jul-19-6272/ All the users here who have offered free advice over the years, you know who you are Excellent reading for those who want to know more: Tome of xEdit: https://tes5edit.github.io/docs/ REALLY in-depth look at modding & conflict resolution Wrye Bash : https://wrye-bash.github.io/docs/Wrye Bash General Readme.html#intro
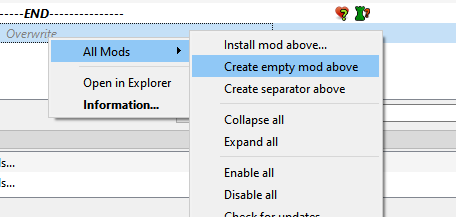
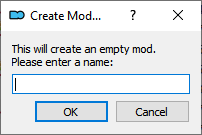

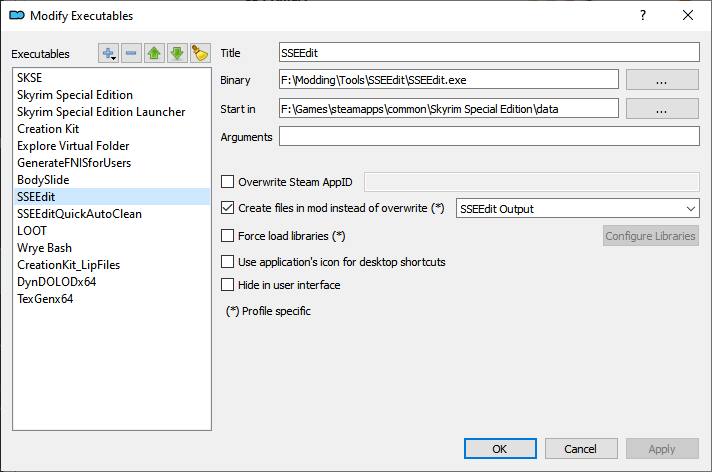

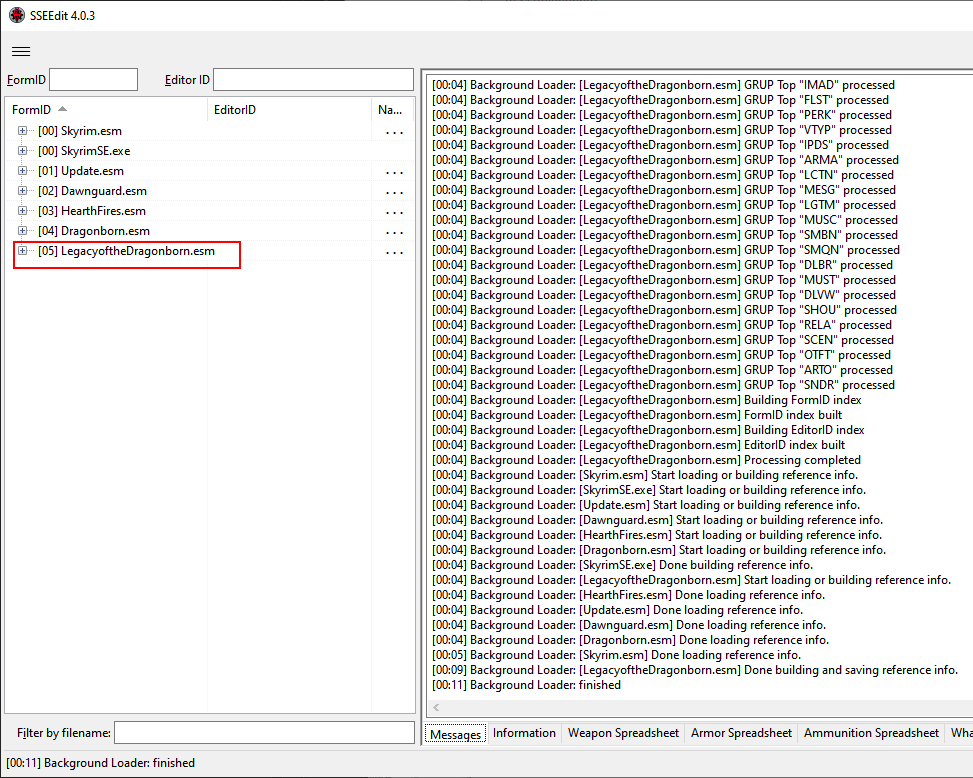
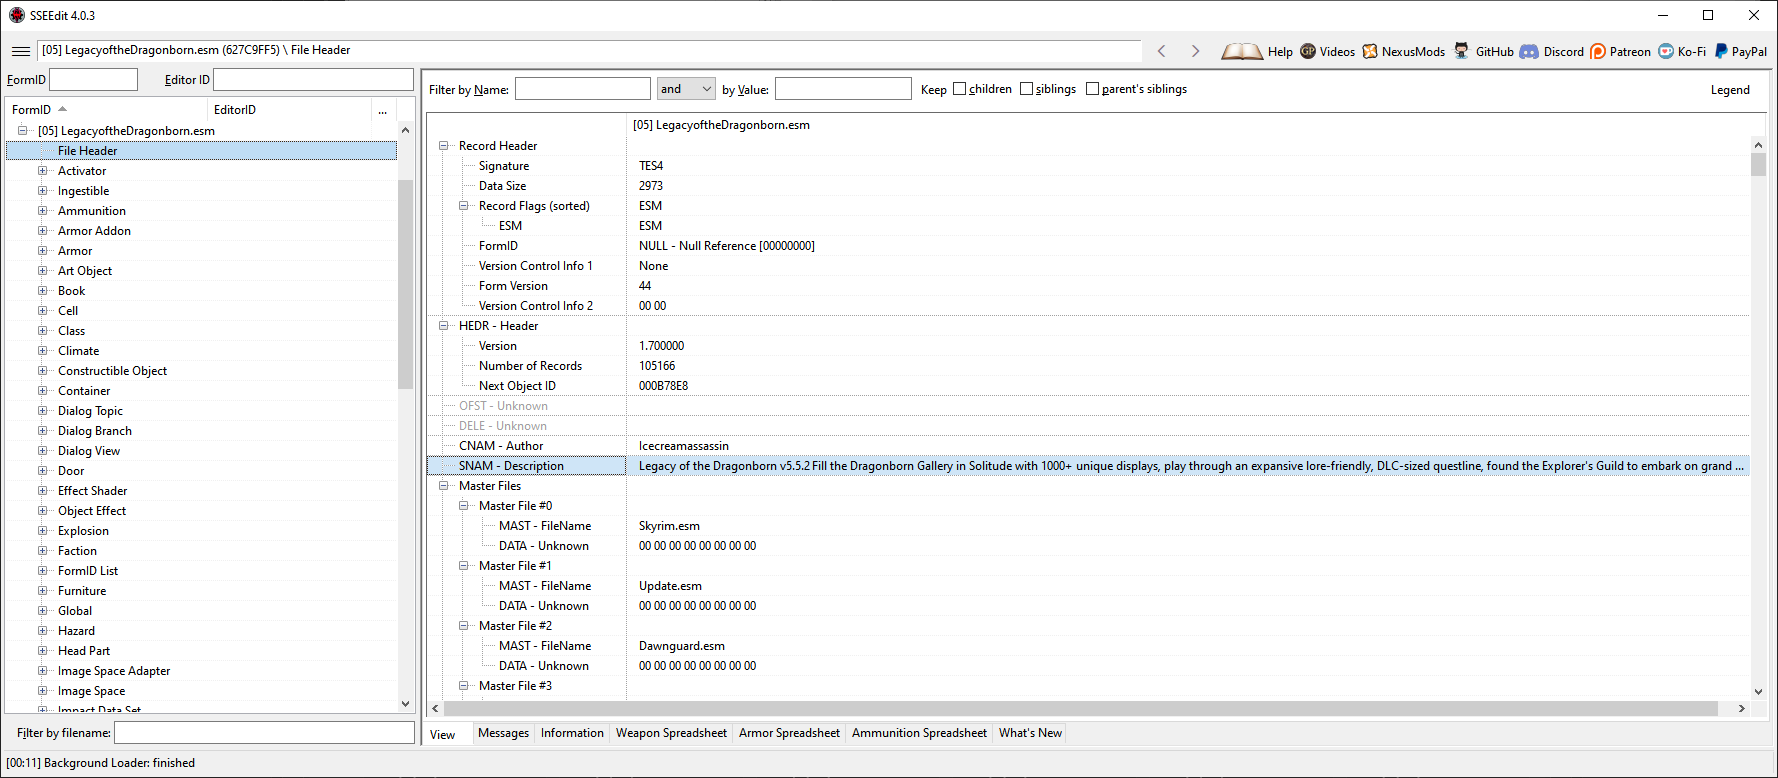

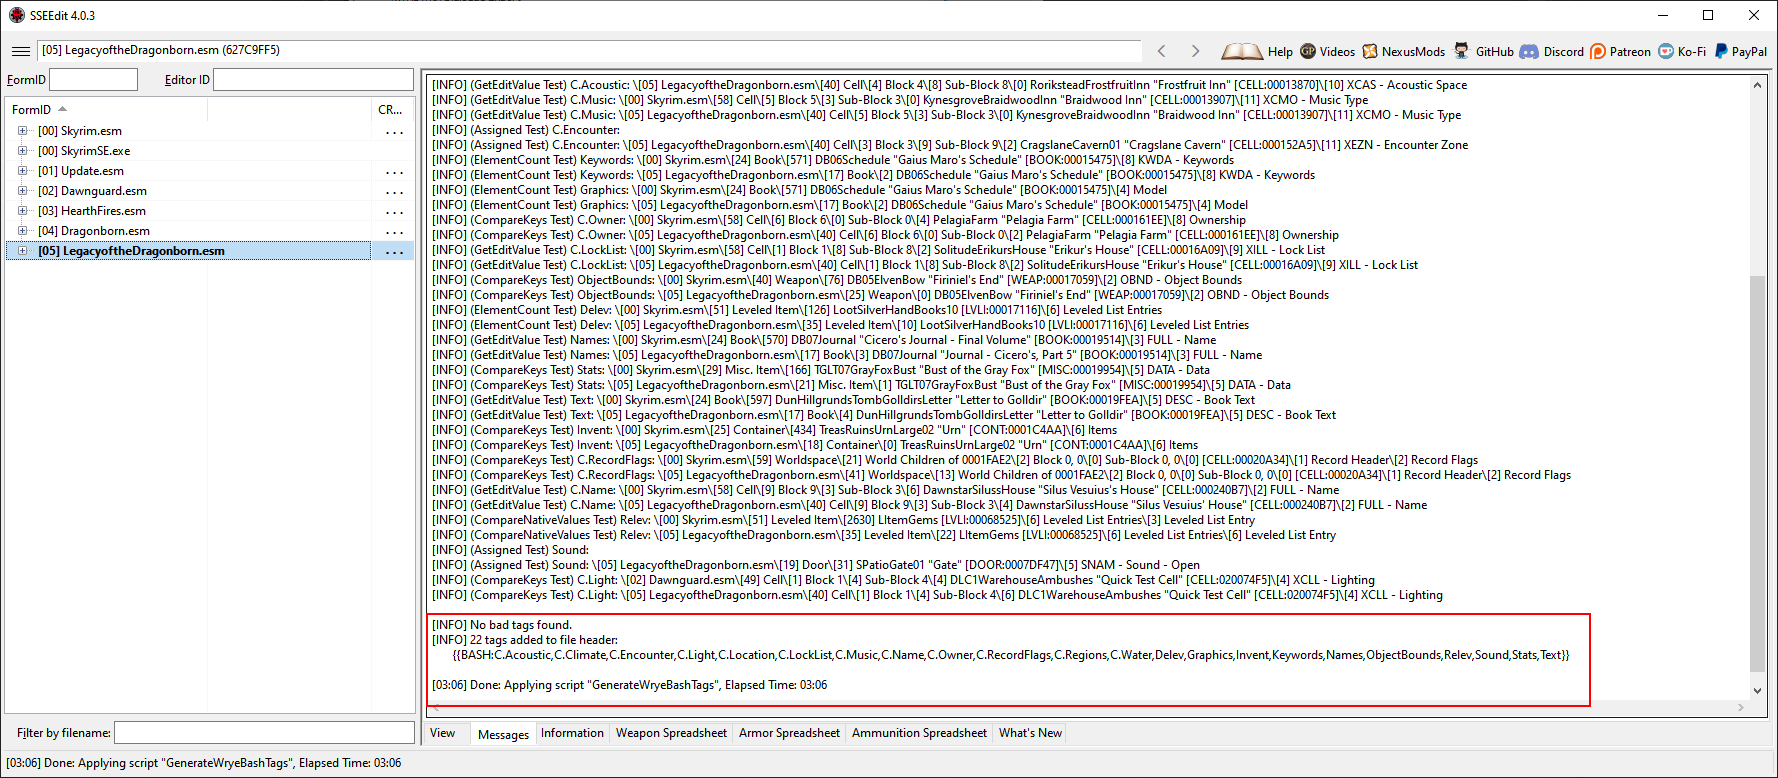
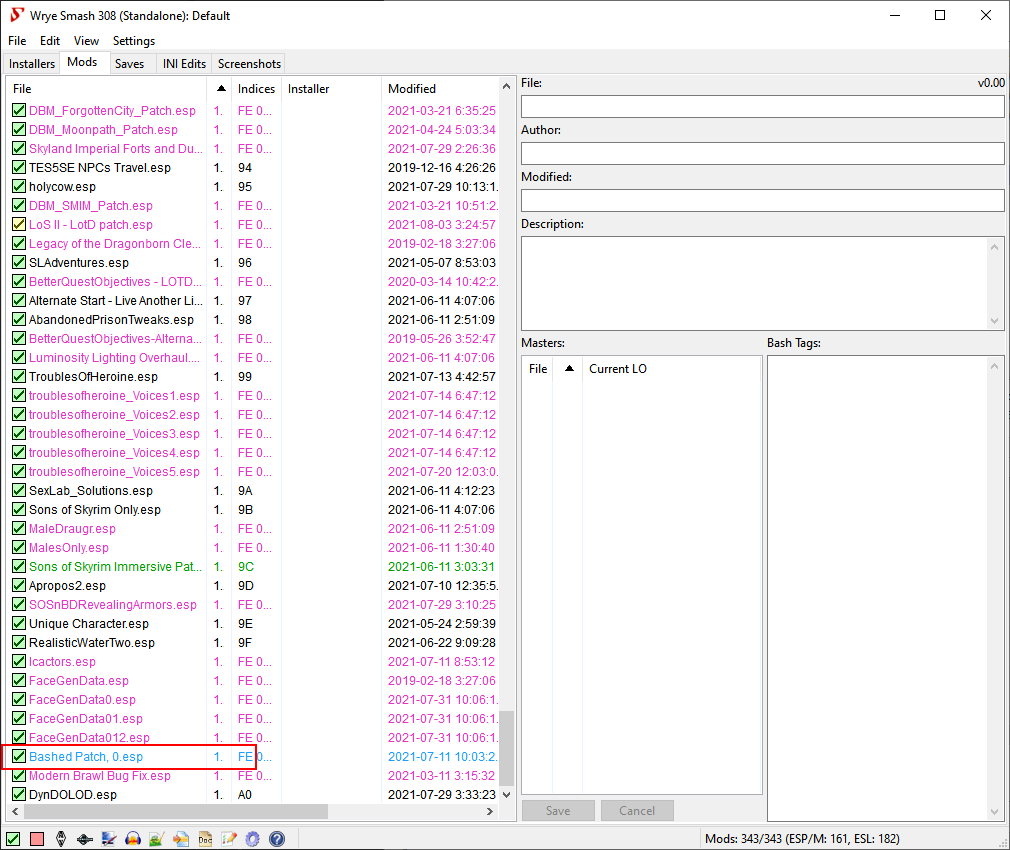
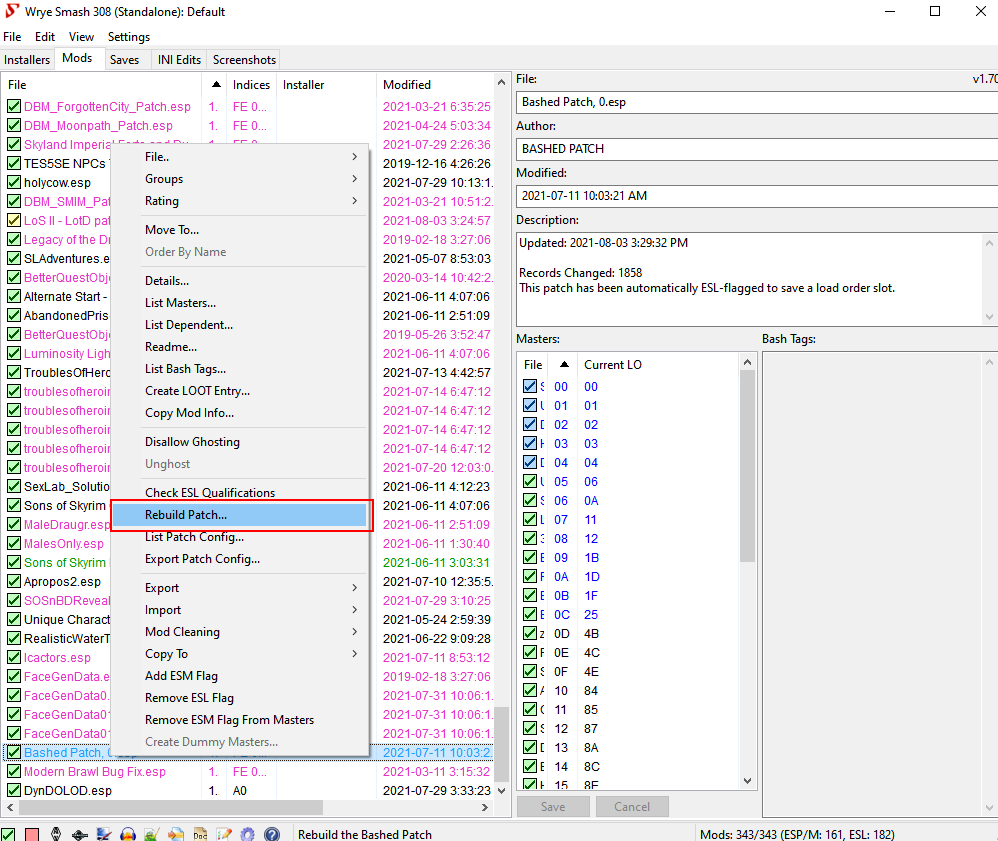
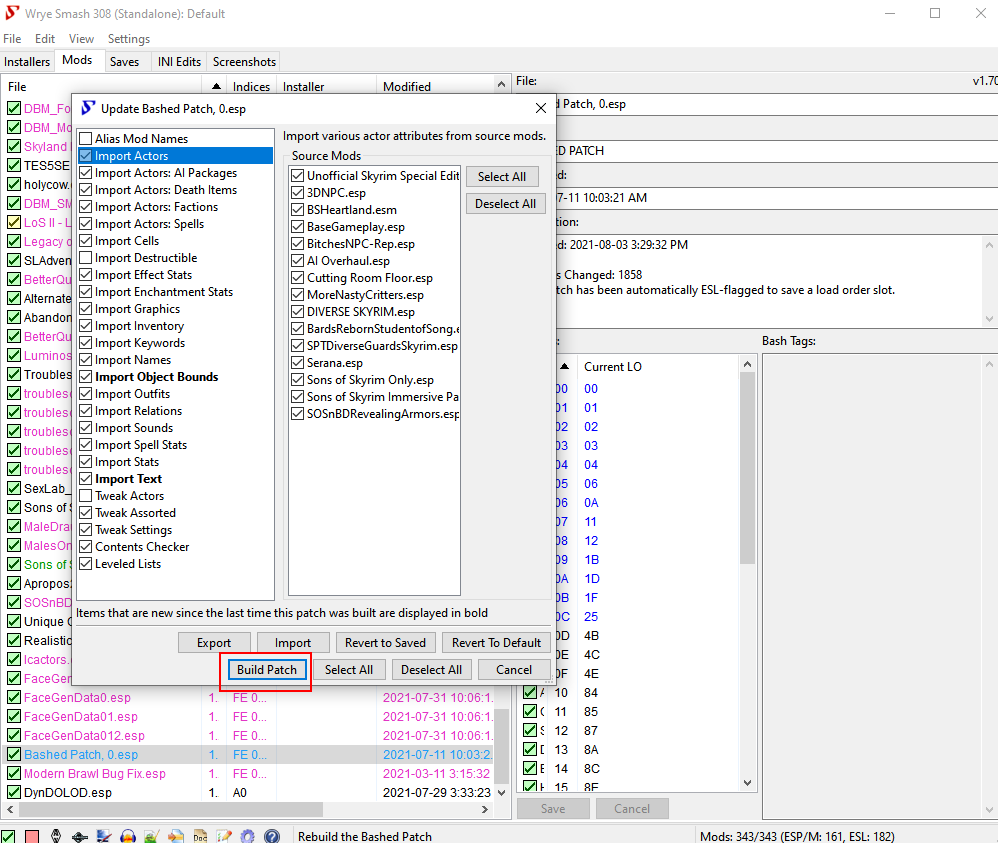
-
Hi, This tutorial is not about creating a real, "Fomod" that has options, selections. It's about adding basic information, picture, website, version, name of the mod that can be able seen in your mod manager, when you add your mod in the mod manager. Because I use NMM, and don't understand about the other mod programs like Mod Organizer, or Vortex, I can't say a word how a mod has seen while a user adds a mod in the mod program after he/she added it. I'll give an example by using one of my followers. Requirements: Notepad++ It's good for editing for .xml files. If you need a free, easy-to-use image editing for cropping/resizing pictures, you can use: PhotoScape PhotoScape 3.7 PhotoScape X Paint.NET GIMP is much more complicated. But, if you want to use it, here is its website: Let's start: You created your beautiful follower. 32DDD-24-36. Blue eyed. Wavy blond long hair. Her name is Bambie Jewel Swallows a.k.a. "B.J." "Your Dream Girl" You created a new folder in "D:". You have a folder like this: BJ_Follower folder. In it, there is "Data" folder. In it there is: "Meshes", "Textures" folders, and your "BJ_Follower.esp" file. Great. In that folder, create a new folder. Name it as : Fomod In that folder, there is a filw that we need: info.xml Another file is a widescreen screenshot that I renamed it as "screenshot.jpg". The other one is cropped picture. If you checked my NMM's mod preview screenshot, that mod preview appears at right. So, I needed vertical, smaller picture. I used Photoscape for cropping. I just drag/drop. I selected the area that I wanted to keep. Click the "Crop" button. Save it. If you select the "Home" tab, you can resize and make a smaller picture to fit in the right preview window of NMM. Save it as, for example "Screenshot_Cropped.jpg". Put it in your Fomod folder. It would be easy to find in the future. You installed NotePad ++. Right-Click on "info.xml".On the context menu, select "Edit with NotePad++". You should see a text something like this: Here is how it looks in NMM: Some Information: Name: That part will appear at the left as the name of your mod. Maybe, your mod's name is "B.J. Follower". Version is 1.0.0 Then you created an update an your version is 1.0.1 The name is same. B.J. Follower. During adding the new version and uninstalling, because their names are same, there might be some confusion. To avoid that, you can name your mod as "B.J. Follower 1.0.0". Website: In NMM, as you now, there is column named "Mod Version". If you added your Version and Website, you can see your version number. If you click on it, you can go to your mod's website that you added in the info.xml About image... In the past, I heard that there was a line that I could use in the info.xml that show the screenshot/picture in the info.xml <image path="Fomod\screenshot.jpg"/> Path of the image is "screenshot.jpg" file that is in the Fomod folder. Very simple. It sometimes has worked, sometimes hasn't. The only way that make possible to show an picture is "adding its URL, website link. Do "Groups, Companions" info work? I don't know. Nevertheless, I added in the file. You needed screenshots for your follower. You created a cropped screenshot. You don't have any pictures in the internet that you can add in your info.xml You didn't uploaded your hottest, horny follower in the LoversLab. OK... In the LoversLab, you selected to add a new mod, companion, etc... Don't worry about uploading your mod that has Fake fomod. The most important thing is adding is uploading your cropped picture. Getting your download website. About using your uploaded pictures. If you use a picture sharing website, and you upload your picture and copy/paste its link in the info.xml. It's one way. If you are not a member of such a website, you can use LoversLab, and add your screenshot(s), cropped image. Open your cropped image in a new tap. So, you can see the full web address of that cropped picture. For example, the address of the picture that I used was: https://static.loverslab.com/screenshots/monthly_2023_07/Outfit1-Leather-2023-screenshot.jpg.246c10cdb743ecc58e5a815facc70f2a.jpg[/img] Yours might be https://static.loverslab.com/screenshots/monthly_2023_08/Screenshot_Cropped.jpg.afdd43gfvdsgr567953hy5gdc.jpg So, in the info.xml rename between and [/img] line with your cropped picture's link. img is for image. b: bold i: italic u: underline What is "/" for? It's for the end. You might know spoiler. When you post a message, you would like to add huge pictures sometimes. So, you prefer to add . Picture gets hidden. You can see it if you don't click on its bar. At the beginning, you add the name. At the end, you add "/" before the name each time. For example: About font style, font size, color: In an another info.xml, I've seen this line: REQUIREMENTS Recommended: I don't know the details, and/or how it works. For using as a reference or just checking it, I added that info.xml also. It's name: RP's Feet UNPB with sliders 2.2-91261-2-2 - info.xml The name of that mod is: Healthy Feet Female feet - RP's Feet for Skyrim - UNPB UUNP CBBE I created a basic info.xml that just includes basic lines. So, you can add fill the your own necessary info. Reference - info.xml It has my followers fake fomod info.xml So... You created your follower's download website. You copied/pasted it in your between <Website></Website> part. You've been successful to upload your cropped picture in the screenshots. You opened in a new tab to see its full web address. You copied it. Then, pasted in between: [/img] part. So, it's done. Add the name, author, version, description, etc... Then, save it in NotePad++. For checking, open your info.xml by right-click, then selecting "edit with NotePad++". If you have something missing, or you need to change something in it, do your editing, then save it again. You have finally a fake fomod. A info.xml file. And two .jpg image files. You can keep the image files in that folder. They're harmless. Maybe, the "screenshot.jpg" will appear next time. Before, you should prepared very arousing screenshots, didn't you? You would need them to add in your screenshots in your mod's website. People can't wait to see "B. J. Swallows Follower". Don't let them wait longer. They say "we want B.J.,we want B.J.!!!" Let's prepare the .7z package that has Fake Fomod. Go back to your "BJ Follower" folder. (That was the folder's name that you created for this package). Right click on data folder. 7-zip. Add to archive. Rename it as "B. J. Swallows Follower 1.0.0" for example. B.J. Swallows Follower 1.0.0.7z package. Upload it as your mod. You're done... Fomod.7z Fake Fomod Basic Tutorial.txt
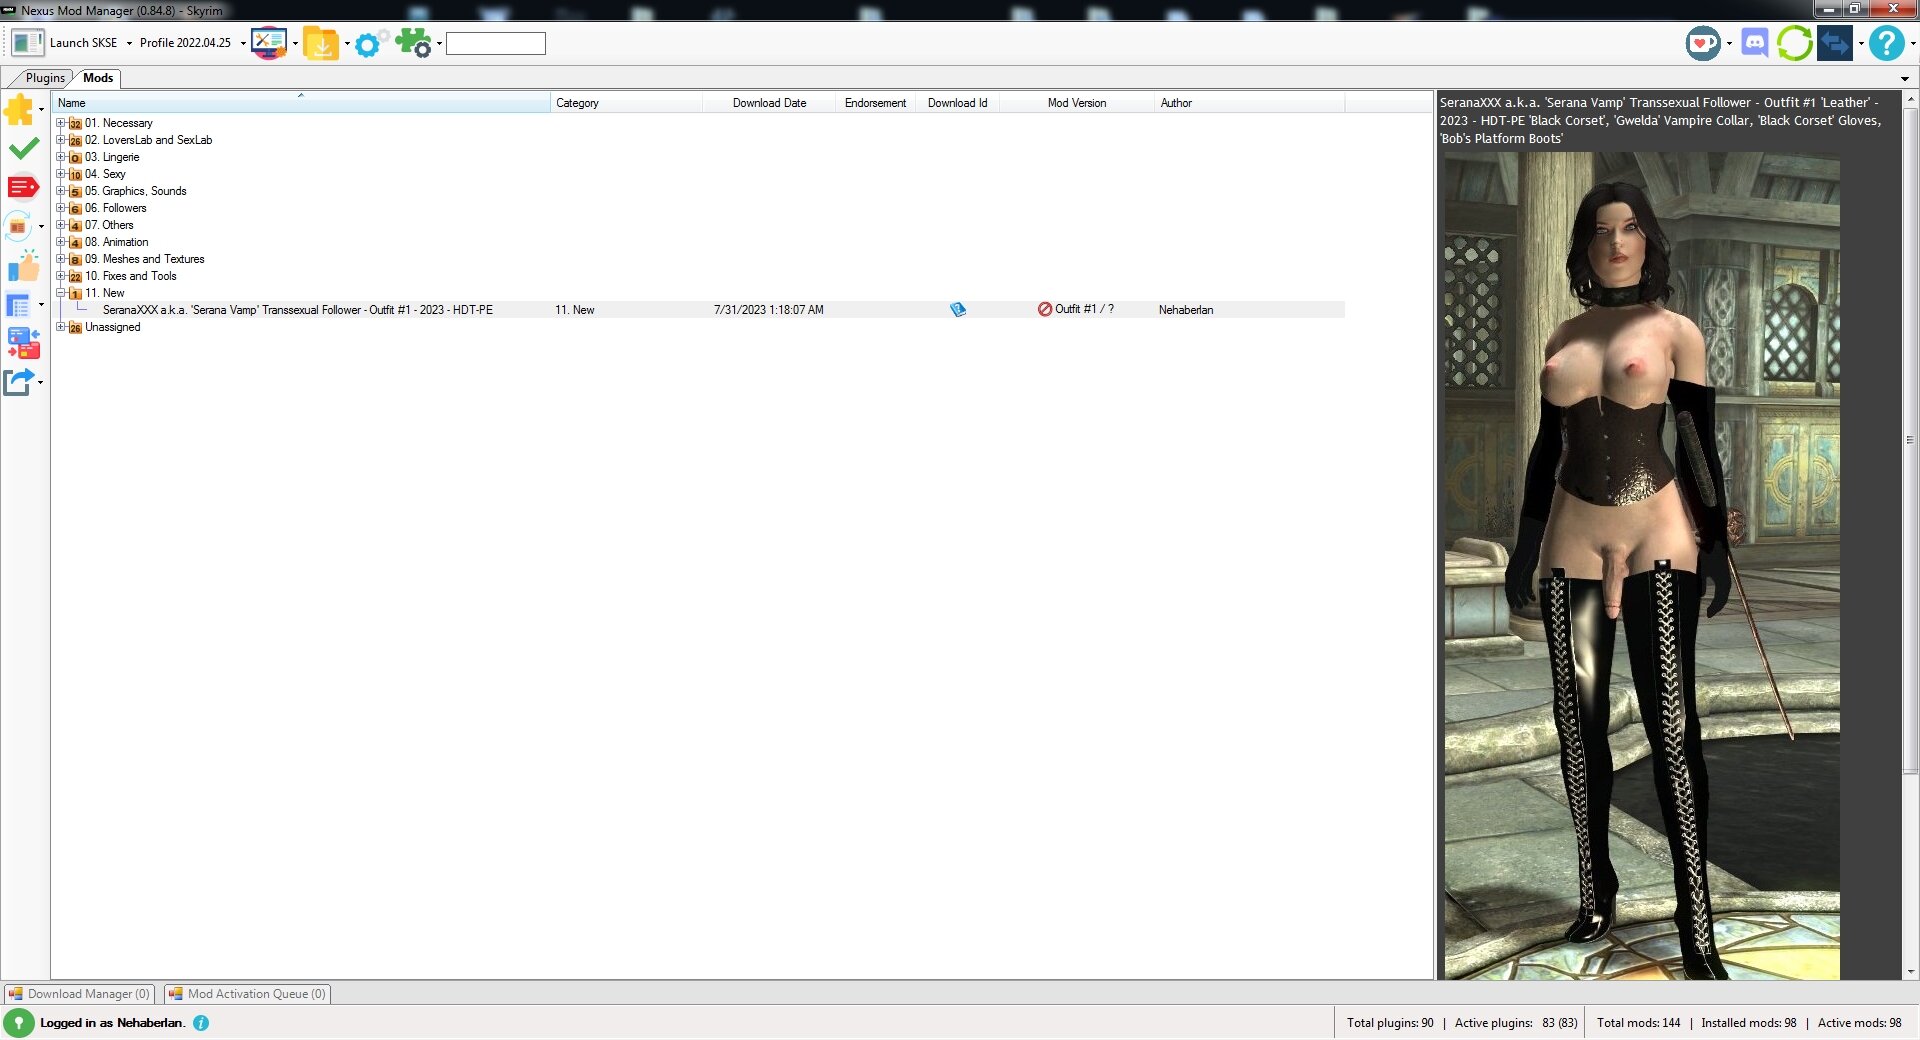
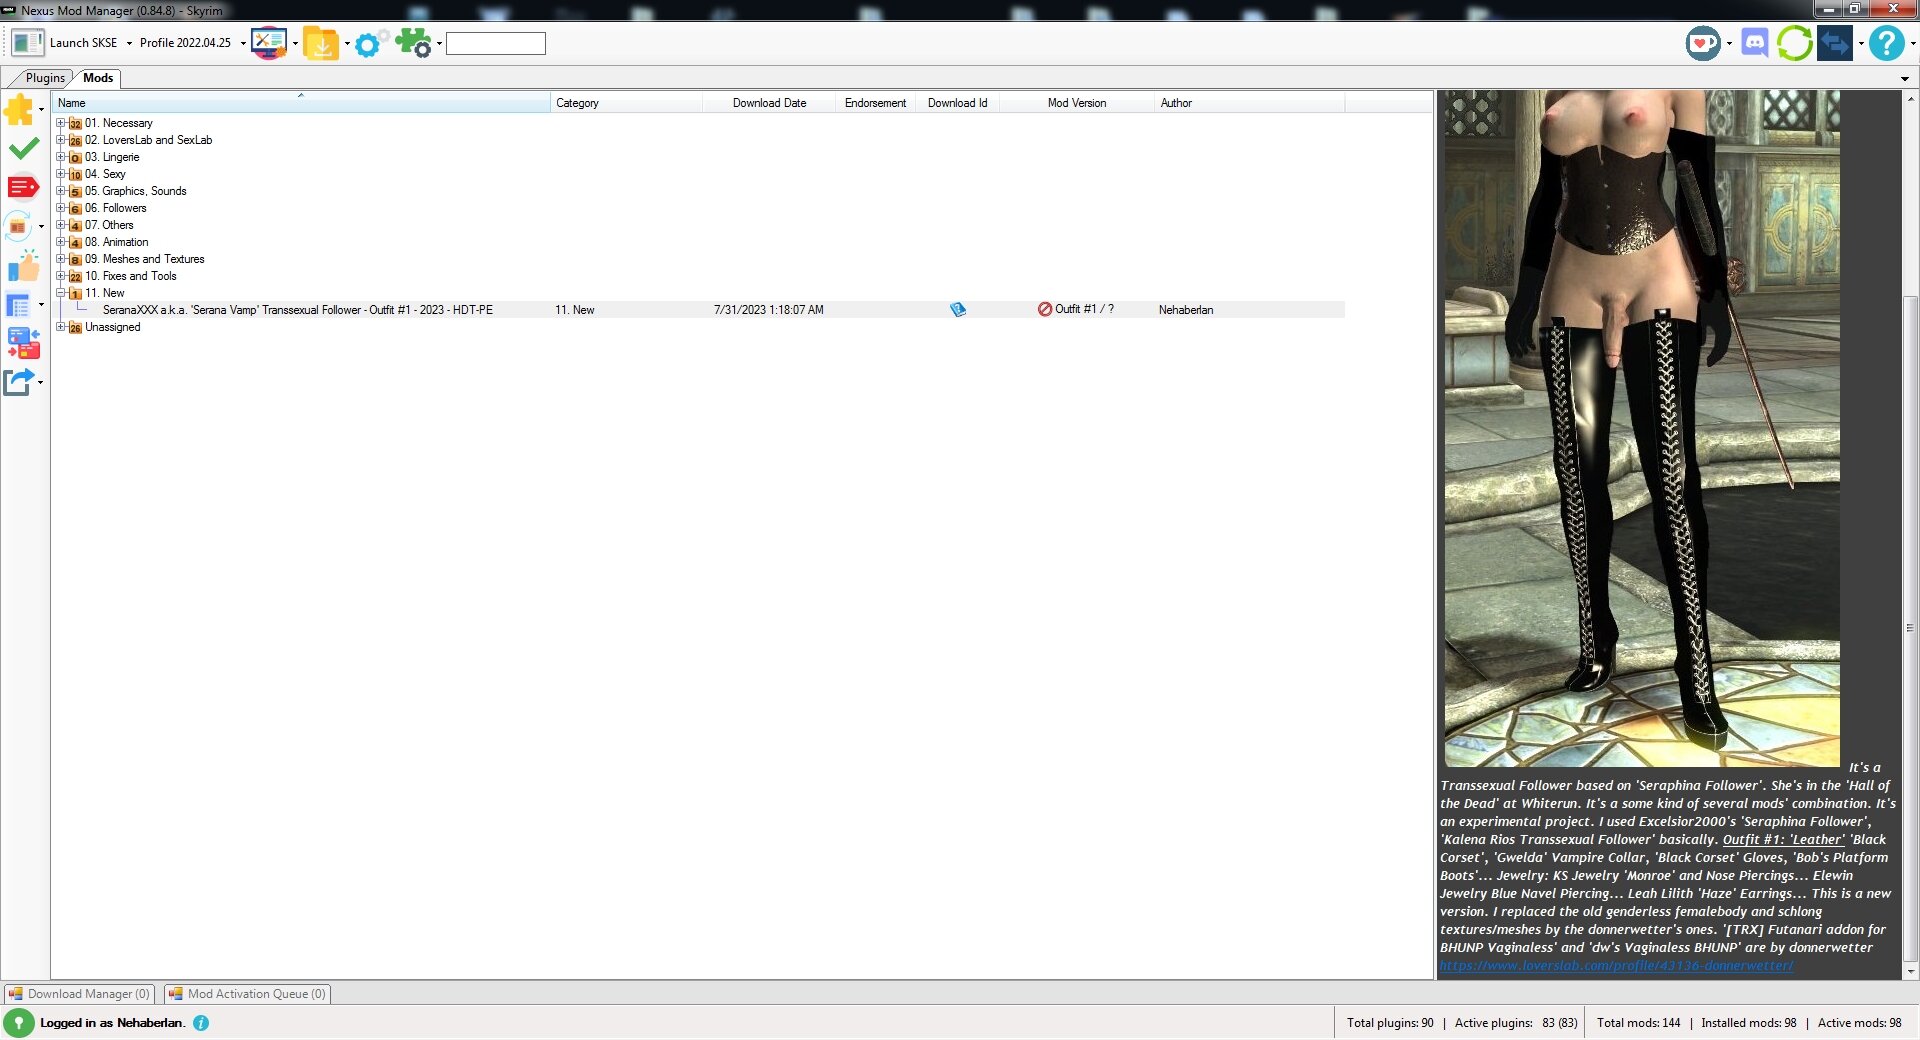
-
 [TUTORIAL & GUIDE] OBJECT TOOL : How to use and understand it. Doutoku Tool. This thread is under construction. Over years using this tool I will provide all what I know and discovered about this tool. How to use it, how to understand it, what is the capacity of this tool, how to optimize your mods using materials, environnement, shiny effects and else. There are a lot to say and explain about this tool. UNDERSTAND INTERFACE : On this guide I will use the version 0.26.2. Be careful if you use lower versions there are some property that don't exist with some issues and crash, I found this version stable that's why I'm using this one. WGT_all_body : Show mesh name and amount of meshes inside a TMC. VGrp : Show the group assigned per meshes. VtxCt & IdxCt : Show the amount of vertices & index count per meshes slots. Tex1-2-3-4-5 : Show the textures orders. TexType : Show how the textures are read. Trnsp : Transparency level. Dsid : Double Sided level. Mcol / mtcp / Mtrl : Material property. Z1 / Z2 / Cast / Recv / Culling : Advanced parameters. Z1 & Z2 need to be combined with Trnsp, Cast - Recv & Culling are for shadows & lightning. UNWRAPPING ALL OF THIS : WGT_all_body : RIGHT CLICK OVER A MESH SLOT ADD SUB OBJECT : .You can add as many meshes slots as you need, until now I didn't found a maximum but I also didn't tried to add more than 15 meshes slots in 1 TMC. DELETE SUB OBJECT : . You can also delete usless slots that don't include meshes, this is HIGHLY recommended to delete them to fix the blinking shadows issues. DELETE ALL VERTICES AND INDICES : . Remove the mesh inside this slots but DO NOT delete the slot itself. GET MATERIAL : . Import and inject a new material for the targeted mesh (this part will be developped separately). VGrp : . This tab show the number of UV (textures) that the mesh slot can hold. As show on the screenshot it have to be combined with the lower part. . You CAN'T change the number of UV count if a mesh is already added, you have to create a new WGT_all_body group and change the number before inject a mesh inside. . Usefull if you have a mesh that have only diffuse or don't wan't to use Normal Map and others textures for x reasons. But keep in mind a mesh group that have only 1 UV could be less detailed due to lack of Normal Map & Specular. . Also usefull for certain material injection. => On the screenshot you can notice some of my meshes actually use 1 UV (VGrp 2), this is a mesh that have shiny material with only diffuse. VtxCt & IdxCt : . Vertex Count & Index Count are just showing the amount of vertices & their index per meshes inside each slots. . I already added a mesh that have 100k vertices and was working, so I guess there are no limit but you could get some lag in game, specially if the mesh is big. Tex1-2-3-4-5 : . This is where you will swap your textures for each meshes. . A TMC can hold 5 textures per mesh slot, but until now the 5th slot is useless or I didn't found an utility despite some test. . This tab have to be combined with TexType tab to know how to swap and place your textures. . By default the order is usually 0012 (Diffuse - Diffuse / Wet - Normal Map - Specular). TexType : . 0 = Diffuse / Wet, 1 = Normal Map, 2 = Specular & 3 = Environnement. . Unless you are using a Skin Slot you can duplicate the diffuse texture when you use TexType 0012. . To enable the Environnement property you have to choose a TexType that include 3 (example 0123) then check the option. Example to understand better : 0012 : Diffuse - Diffuse - Normal Map - Specular 0123 : Diffuse - Normal Map - Specular - Environement 03 : Diffuse - Environnement . When you decided of your TexType you can swap your textures in the proper order in Tex1-2-3-4-5 tab. Trnsp : . Enable transparency for meshes that have textures with alpha channel. => Level 0 no transparency => Level 1 soft transparency => Level 2 hard transparency . If your mesh don't need alpha channel textures you can leave the setting on 0, but if you set it to 1 or 2 anyway you'll get a lighter mesh. . If your mesh have alpha channel you will have to find the proper setting (to combine with Z1 tab) : => Level 1 need to be combined with 08 setting on Z1 tab. => Level 2 need to be combined with 02 setting on Z1 tab. Others mix will give differents results but are mostly uncompatible and could give bugs. Dsid : . Give to the mesh the double sided property, useful when you have a mesh that is not "closed", good example with skirt then you won't have a kind of see through issue. . If your mesh don't need to be double sided and you activate it anyway you'll get a lighter mesh. => Combined to Level 2 Trsnp where a mesh don't need alpha channel it will give an even more lighter mesh. Mcol / mtcp / Mtrl : . Mcol is the main property where you'll inject or change your material setting. . Try to change the number and see the result by yourself, your mesh will become more or less light / dark, combined to mtcp & Mtrl it will give different result. . If you are using a Skin Slot and want to remove this property you will have to change the mtcp parameter, usually decreasing by 1 is enough to remove it (but will still have other property anyway, this is just to avoid the Wet property mostly). . This part will need a separated tutorial where you'll understand how inject and change your material property (shiny effect, animated textures and others) for each meshes via advanced tab. Z1 / Z2 / Cast / Recv / Culling : . Z1 have to be combined with Trsnp setting to enable and optimize your transparency level (reference said before). . Z2 is how the transparency meshes are read to avoid overlapped problems, 0 - 1 - 2 is the proper order, this is mostly used for hair.TMC. . Cast, Recv & Culling are 3 property where I didn't spend a lot of time but look to be related to lights & shadows, changes are almost not visible in game where I recommend to don't change these settings, whatever the original. => Set the Cast option to 2 if you have a mesh slot empty to avoid flickering shadows issue. __________________________ UNDERSTAND & EDITING MTCOL PROPERTY : This part is an advanced parameters to control and edit the material property (but I'm not talking about injecting material yet). Click on the desired mesh you want to edit then click on the top on MtrCol option. In this example I will show the first mesh slot parameters "WGT_all_body_0 (this is a body mesh without Body Skin Parameter). As show on the screenshot a new window will be opened, revealing all advanced parameters where you'll control the material in detail. INDEX : Show the material index, all meshes who have the same index will be grouped together (in this example, the mesh index 12 is lonely), editing a parameter with many meshes inside the same index will change this parameters for all these meshes. USE : Show the amount of meshes for the same material. RGB - B/W column : R = Red Color G = Green Color B = Blue Color B/W = Black & White Colors . You an add from 0 to 255 numbers for RGB setting but I don't recommend it since low number is enought to change colors too. -> This is where you can control the colors per parameters, as example you can give to a specular a red reflection without recoloring the texture itself. AMBIANT : Control the ambiant, this is what the object reflects when illuminated by ambient light rather than direct light. => Here is an example by increasing the ambiant & diffuse RGB parameters : (Left MtCol edit / Right no MtCol edit) DIFFUSE : Control the diffuse parameter, changing the colors without editing the texture itself. SPECULAR : Control the specular parameter, changing the colors without editing the texture itself (but keep in mind you'll always be more accurate by editing the texture than the MtrCol parameter, this parameter globalize all where editing a texture can let you create colors reflection on the desired spots). ENVIRONNEMENT : Control the environnement parameter, changing the colors without editing the texture itself, even increasing or decreasing the power with B/W tab. GLOW : Control the shiny effect but CAN NOT work without the material injection before (will be developped separately). SPECULAR2 / DIFFUSE2 / SPECULAR3 : Advanced parameters to dig deeper with them. RIM LIGHT : This is a light that highlights only the contours of the subject (will be developped separately). SPECULAR(Wet) : Property only applied to Skin Mesh, control the wet effect. UNKNOWS Parameters : From few test I didn't saw a change with these parameters so I don't know their utility for the moment. IMPORTANT NOTE : . Except Diffuse & Speculars parameters I HIGHLY not recommend to put high number on others settings or your mods could crash in game. . Don't abuse and don't go over 50 maximum per column. If your mod keep crashing after edited a parameter just low the numbers. . More you edit all parameters and more you take the risk to have an unstable mod, be careful and don't be greedy. ________________ GLOW & RIM LIGHT EFFECTS : GLOW : Now let's talk about how to make a mesh shiny with Glow parameter and material injection. First you will have to inject the shiny material from another TMC that include it, on this example I will take Raidou COS01 model and his WGT_All_Body_8 material. Once you located the mesh that have a shiny property in a TMC, open your mod that need to have the shiny material in Object Tool and choose the WGT_all_body slot that need this effect. On this example I will inject it in the WGT_all_body_9 slot. Right click on the mesh slot and choose "Get Material", a new window will appear. Drag Raidou COS01 into "Referenced TMC File", choose the shiny material in "Referenced Object", click on MtrlCol - Add in "Material Type" and then click OK. If your mod never had shiny material it will automatically add a new number in the MCol parameter (here it's number 13). If your mod already had this material it will ask you if you want to add it anyway since it already exist, just click yes. Your mesh is now shiny. You can increase or decrease the power of the shiny effect & their colors via Advanced MtrlCol tab as show before with RGB column. IMPORTANT NOTE : The shiny effect is sometime not visible via Neosis and LR Studio, you have to check in game to be sure it's well injected. --- RIM LIGHT : Now let's talk about how to make a mesh having highlight around the border of your mesh. Difference with Shiny material is Rim Light don't need to have a material injected and can be changed anytime on a mod. You just have to play with the advanced parameter and RGB column to choose the intensity and colors that you want to give on your mod. Here is an example with Durga Mecha HLOD mod, she have custom blue Rim Light : And here the property inside MtrlCol advanced parameters : IMPORTANT NOTE : Rim Light IS NOT Cel Shading. You can't add black Rim Light. _________________ More to explain later. Please keep in mind all of this are explained ONLY by experiments over years using the tool.
-
 I've been promising a video on this topic for almost as long as I've been a member of the forum. Since that seems like it will never happen, I decided to write up a post to help folks out. I keep reading about folks with load times ranging up to almost twenty minutes, and there's no reason for that. First, some background on what qualifies me to speak on the subject. This is important because what I'm posting here is in complete contradiction to the standard advice provided by the entire community since the dawn of the game. I'm not a hacker, programmer, or sysadmin. But I have been around computers since the days of green phosphor monitors and floppy discs. I also have 11 IT certs in my pocket. Plus, I'm a life-long tinkerer and hotrodder who enjoys making things work better than they do. So what I'm posting here is based on lots of research and experimentation. This is how I run over 20,000 packages in my mods folder while keeping load times under ~3 minutes. And that's on a mid-tier PC. For starters, and I cannot stress this enough, do not merge packages! I know this is the #1 recommendation of every single YouTuber and forum poster, but it is the worst thing you can do as far as managing CC. Merging stuff dumps it all into a black box. The first source of trouble you run into is that you no longer have any idea what you actually have. I cleaned up one friend's folder and she had seven copies of one particular piece. Overall, nearly a third of the items in her folder were duplicates. That was an extreme case, but even in my own folder I have found multiple duplicates because I had merged stuff and then downloaded it again later. The external programs available to find duplicates and conflicts can't detect duplicates inside merged packages. I don't know how the game handles duplicates. But the best case scenario, it's still a file the system has to spend time loading. Worst case scenario, duplicates cause glitches or lag. The other big problem with merging is that it hides broken items. If you do a 50/50 search to find a broken item and the item turns out to be in a merged package then you will have to unmerge the package to remove the broken piece. Along the same lines, don't waste your time with any of the "mod manager" programs available. Every one that I've seen obfuscates file names, maing it impossible to find files with other programs. They essentially act like a middleman between your mods folder and the game. That's how they let you turn mods off and on. These programs are entirely unnecessary anyway. But we'll get to that later. So step one in the process of optimizing your mods folder is to unmerge any packages you have merged. This is the only way to find the junk hiding in your folder. Sorry, but I have no idea how to undo what those mod manager programs do. Step two, install "Sims 4 Tray Importer". This is the single best program available for managing CC. I'm not clear on the forum policy for linking to external sites, so I'm not providing a link here. But I trust that everybody reading this knows how to get programs from the internet. Step three, getting rid of duplicates/conflicts. I use a lot of Powershell to manage my stuff. But I'm trying to keep this as simple as possible and I know not everybody is comfortable using a terminal. So I won't be discussing that here. It isn't essential, just immensely helpful for finding and moving files. If you are comfortable with Powershell, I doubt you need me to explain anything I do with it. If you don't use it, but would like to try it, I might be able to get you started. I'm a hack, though. You could probably learn more by searching the internet like I did. Step four, slaughtering the sacred cow of folder organization. Now that I've, hopefully, explained why you should move your CC to other folders, I want to share a trick to simplify the process. Of course, if you know Powershell you can move everything in a matter of minutes with a couple lines of code. But if you don't use the terminal, all is not lost. Most folks don't know that you can tile windows in Windows. Open two Windows Explorer windows. Pick one and hit the WIndows key and the Left Arrow key at the same time. That will pin that window to the left side of the screen. When you do that, it should give you the option to select which window to pin to the right side of the screen. Just select the other Explorer window. If it doesn't give you the option, just pick the other window and hit "Windows+Right Arrow" and it will be pinned to the right. Now you can easily drag things from one side to the other to move them around. It's also handy to pin some of your folders to the "Quick Access" bar on the left of the Explorer window. You can drag things directly to folders that are pinned there without having to to open another window for that folder. Step five, eliminate the cruft. With all the useless subfolders and junk files gone, you should already see a massive improvement in load times. But there's one more important step. Step six, fixing file names. And that's it for getting your mods folder into professional shape. Next, I'll get into how to tweak your collection to further improve load times as well as to improve the in-game experience.
 -
 I am wanting to convert some Sims 4 hairs to Skyrim, and am running into a few issues. I followed Kalilies' youtube tutorial and while it's a good tut it skips over a lot of stuff I still don't know how to do. I was wondering if you lovely LoversLabbers knew of any other tutorials that help with converting sims hair to skyrim. It's okay if it's for LE, apparently the nif plugins for 3DS max don't like SSE hair meshes anyway, so I'll just convert it separately using NIF optimizer. Thank you!