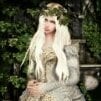
Myst42 Posted August 21, 2014 Posted August 21, 2014 Hi there guys I am really bored of not being able to produce textures of the quality I'd like too Here's the thing. I have made a few mods. I guess I'm more skilled at modeling, but when it comes to textures I know next to nothing. I know a lot of you guys are professionals and know graphic design and stuff. So please excuse my noobness as I only do this for hobby and never had any previous training on design programs. Here's what I DO know -I use Adobe Photoshop C6 with limited knowledge -How to use the pen tool -Copy, paste, use the wand cut tool, use the lasso cut tool, use the pen tool to make selections -Apply layers, change brightness/contrast opacity saturation, color, apply certain blend effects -Use a certain cloning tool -Apply a few filters -Use adjustment layers -Mess a bit with the brush tool -Use alpha maps, glow maps and normal maps -A few other tricks but nothing fancy But either I cant figure it out, or I lack knowledge of this Here's what I currently want to do Specifically, the silk(?) texture How can I do a simple silk texture that looks like that. I got the model, got the UV map in Blender, all I need is to make the texture I'd really, really appreciate the knowledge to do whatever texture I want, metal, silk, leather, rags... (especially rags) My questions are where do I learn this stuff? Where do I begin? How do I do that? What do i need to know to be at peace with myself on this stuff Someone recently directed me here to this dDo tool, but it seems (on the video) I need a previous normal map and a specular... what the hell is a specular? XD I know the Nvidia Photoshop plugin makes normal maps from color textures and I've used it before, but in this case, it needs the normal first I'm getting really sick of tweaking existing textures when I should be making my own So any directions please? I don't know anywhere else to ask Please keep in mind that: I dont have 3dsMax, I use Blender I'm no professional, so I hardly know any technical talk I'm not asking for you guys to make my work, I'm asking for indications or tutorials to how do I learn to do it right Help is greatly appreciated
mem4ob4 Posted August 21, 2014 Posted August 21, 2014 Hi, I am a texture noob also, but if you are talking about the semi-transparent part of the outfit, I think it is the alpha channel that will create that for you. Check this thread (esp. post #8). GIMP is mentioned but can be done with your version of PS I think. Just leaving the 'folded' parts of the material white and fading (or the opposite I mean) darker for the seethrough area. Once you have your UV layout from blender (in tga or other format), its all up to PS and nifskope. If that is not what you were asking about, sorry Mem
Myst42 Posted August 21, 2014 Author Posted August 21, 2014 Thanks! But not quite the point. Actually, I can and have messed with alpha maps before, transparency is not the problem. Making the texture from nothing is. I just learnt that the regular main texture files are named "diffuse", those that contain the most obvious part of a texture, the color itself. Types of Maps That's what I want - to be able to create an entirely new "diffuse" map
tenzan Posted August 21, 2014 Posted August 21, 2014 One of the best resources for all things IMO: http://www.poopinmymouth.com/tutorial/tutorial.htmHe paints textures from scratch. For me, it's a combination of things. I generate textures using filters ('filter - render clouds' is an easy starting point) and create a library from that, then I can drag and drop those in and chop them up for whatever purpose. I'll then paint in details and add shadows and highlights and maybe some PS effects. If you have a detailed mesh you're texturing, you can generate an ambient occlusion map from it and it'll give you a great starting point. In that tutorial page, there's also a trick you can use to directly edit a normal map in PS. For the silk texture, are you talking about the background or her underwear? A specular map is a texture used for specularity--lighting/shininess. It's a greyscale texture and these days, referenced from the diffuse map's alpha channel.
mem4ob4 Posted August 21, 2014 Posted August 21, 2014 Ahhh! I understand now.I will share my general workflow for a new texture.1.export uv map from blender to tga format after moving/pining the layout the way I want. [i learned that part from Lhammonds video ]2.load it into PS and open a new blank image (512X512).3.copy the uv map into a layer on the blank image and erase all background so only thetriangle outlines are visible.4. make new layer under the uv outline and begin painting.5. remove un-needed layers (like the uv overlay) and save my painting as dds file, DXT5 with name of choice.6. then I apply the nvidia tools normalmapfilter (plugin) and save that one just the same with samename_n7. load the mesh in nifskope and adjust the texture path (or paths)Mem
darkconsole Posted August 21, 2014 Posted August 21, 2014 the biggest thing that bumps quality i've noticed, is the normal map. (the normal map being the thing that applies fake lighting to flat surfaces, if unaware) quite a few impressive pieces have the most ugly cartoon coloured diffuse/colourmap you have ever seen, and then the normal map gets applied and that shit just pops out and looks amazing. from what i can tell, the only real way to properly generate a normal map that works well is to make a very high poly model, make a copy and convert it to a low poly model that the game will actually use, and then use something like mudbox to say "take this high poly version, compared it to the low poly version, and make me a normal map that looks awesome." the second most important part is yet another layer, the environment mask. this is a black/white/gray version of the texture which tells the game how shiny a specific part of the armor should be. so something like a lace on boot will be not shiney, but the aglets will be really shiney, and the leather part of the boot a little shiny but not much. in the context of like, a leather catsuit, your diffuse map could literally be a solid black image, and using the normal and environment maps to create texture, lighting, and shine, create something amazing. one example of a thing doing this is http://static-4.nexusmods.com/15/mods/110/images/41534-2-1378414375.jpg these boots as well. 100% of the magic is the normal map. the wrinkles don't even exist in the model. http://www.loverslab.com/index.php?app=downloads&module=display§ion=screenshot&record=135271&id=1252&full=1 the more i work with things, the more i realise awesome texturing is really magic byproduct out of awesome modeling. if you can make something look nice and have realistic features like wrinkles, automatically generating that down to a texture that looks good becomes easy - and the actual amount of painting required becoming minimal.
Myst42 Posted August 21, 2014 Author Posted August 21, 2014 One of the best resources for all things IMO: http://www.poopinmymouth.com/tutorial/tutorial.htm He paints textures from scratch. For me, it's a combination of things. I generate textures using filters ('filter - render clouds' is an easy starting point) and create a library from that, then I can drag and drop those in and chop them up for whatever purpose. I'll then paint in details and add shadows and highlights and maybe some PS effects. If you have a detailed mesh you're texturing, you can generate an ambient occlusion map from it and it'll give you a great starting point. In that tutorial page, there's also a trick you can use to directly edit a normal map in PS. For the silk texture, are you talking about the background or her underwear? A specular map is a texture used for specularity--lighting/shininess. It's a greyscale texture and these days, referenced from the diffuse map's alpha channel. -Great!! I'll go dig in those tutorials -Clouds is one of the filters I know, but for some reason, editing things from clouds looks really crappy in this case (I use clouds to create color differences, then edit on top of those differences perhaps with more filters from the gallery) -The outfit is what I'm doing, need her underwear the biggest thing that bumps quality i've noticed, is the normal map. (the normal map being the thing that applies fake lighting to flat surfaces, if unaware) quite a few impressive pieces have the most ugly cartoon coloured diffuse/colourmap you have ever seen, and then the normal map gets applied and that shit just pops out and looks amazing. from what i can tell, the only real way to properly generate a normal map that works well is to make a very high poly model, make a copy and convert it to a low poly model that the game will actually use, and then use something like mudbox to say "take this high poly version, compared it to the low poly version, and make me a normal map that looks awesome." the second most important part is yet another layer, the environment mask. this is a black/white/gray version of the texture which tells the game how shiny a specific part of the armor should be. so something like a lace on boot will be not shiney, but the aglets will be really shiney, and the leather part of the boot a little shiny but not much. in the context of like, a leather catsuit, your diffuse map could literally be a solid black image, and using the normal and environment maps to create texture, lighting, and shine, create something amazing. one example of a thing doing this is http://static-4.nexusmods.com/15/mods/110/images/41534-2-1378414375.jpg these boots as well. 100% of the magic is the normal map. the wrinkles don't even exist in the model. http://www.loverslab.com/index.php?app=downloads&module=display§ion=screenshot&record=135271&id=1252&full=1 the more i work with things, the more i realise awesome texturing is really magic byproduct out of awesome modeling. if you can make something look nice and have realistic features like wrinkles, automatically generating that down to a texture that looks good becomes easy - and the actual amount of painting required becoming minimal. I agree, normal and shiny can make a texture go from crappy to awesome What you say sounds possible, but different from what I'm doing. I.E the first step is to create a low poly model - That's one of the Blender tricks I'm not very familiar with (I remember a script to reduce vertices though...). The second step is to use mudbox - that's the first time I hear of it (Is it too hard?) And once I have the normal, the third step is what? Use dDo? - That's also the first time I hear of that program, and I would totally go on the journey of learning to use it... If I knew that it's gonna give results, but I don't - specially given the fact that I have limited knowledge and a few of these other programs, I hear for the first time. I would like if possible, to grow from what little I know, which is my safe ground. What I've made in the past is: Create my model, define UV maps, export. Open in photoshop, create texture (diffuse, doing what I can). Once it's done, use Nvidia script that creates normal from diffuse, adjust alphas if necessary, save as dds. All these tools seem to create diffuse from normal instead. Should I continue to try to learn from what I know? or should I go on this new path of other software in which I know nothing?
movomo Posted August 21, 2014 Posted August 21, 2014 As long as you stick with blender you'd better not think about baking normal maps from the high-poly model. If you use commercial stuff then you can simply sculpt the model without ever caring about vertex count, and the software will do the retopology for you if you choose to use the model for games. Blender has its own advantages, for example 2.49b nifscript is just excellent. My recommendation is simply to use Photoshop dds plugin; because you are doing Oblivion stuff, am I right? Since texturing is at some point between 2d arts and 3d arts, I believe your skill (such as drawing) would affect more than which tool you choose.
tenzan Posted August 21, 2014 Posted August 21, 2014 ^I sculpt in Blender.. it can also spit out normal maps and whatever else you need, though I use xnormals as well.
Recommended Posts
Archived
This topic is now archived and is closed to further replies.