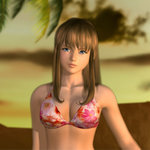
HokageSama Posted March 29, 2019 Posted March 29, 2019 Before explaining the tutorial on how to edit the skin of the girls, I want to thank the users HI-METAL, string072, avenger54, Knight77 and KuroKaze78 for the attention and help me with my doubts and creating greats mods. Unfortunately I do not know much programming and I do not know how to extract the image files directly from the game. I'm editing the skin files that people create for the mods. But the tutorial will work for everyone. Installing image editor: 1 - Install Photoshop CC 2017. I think it is better and easier to use to edit the images. 2 - Install the IntelTextureWorks_1.0.4 plugin. It is for Photoshop to open the .dds files. Links: Facial Expressions mod v3.3 by avenger54: https://www.loverslab.com/topic/115798-facial-expressions-mod-v33-yukata-and-doax3-swimsuits-mods-updated/ Intel Texture Plugin site: http://gametechdev.github.io/Intel-Texture-Works-Plugin/ 3 - When downloading a mod, open the files folder and see if you have the .dds file (remembering that it is for the skins). I will use as example the facial_expression created by avenger54. 4 - Right click and select "open with ..." and choose photoshop. 5 - When opening the program, check the "Load Transparency as Alpha Channel" box. Click Ok. On the next screen, check the option: leave as is. 6 - The image has opened and you now have the skin file. Editing skins: 1 - Above the image, create a new layer. This is not to damage the original skin, if you want to undo after something you did. 1.1 - To add images like tattoo, look for png files on the internet, they have no white background. Beware of images that have copyright, if you make the changes for your own use no problem, but if you put on the internet your work be careful. 1.2 - To use makeup, use the brush tool, choose the color you want and draw over the skin in the desired place. I'm going to do a battom for example. After, put the opacity to 50%, to mix with the actual colors of the skin. 2 - Add whatever you want on girls' skin. Remembering one detail: the images of the body and face are divided in the middle. Whatever you add on one side will appear on the other. Unfortunately I still do not know how to add only one side. (who knows, comment to help us). 3 - After the changes, save your file as PSD (photoshop file) to be able to move when you want, add or take the images. 4 - Now let's save to .dds. Click file, save as ... and enter the same skin image name. If you enter another name, the mod files will not be able to read it. Select the option "Intel Texture Works (* .DDS, * .DDS)". Click save. 5 - Some settings will appear. In the Texture Type option, select "Color + Alpha". And in compression choose "BC7 8bpp Fine (sRGB, DX11 +)". Click in Ok. 6 - While you make the modifications and save the .dds file, simply press F10 in the game to update the modifications. Ready, your texture is already in your game with the mod you prefer. If you use some mod to do your work and post here in the forum, include the post and the author of the mod. Change color eyes: To change eye color is the same plugin installation procedure. Some files on the face have eyes and some do not. Like I said, I do not know programming to extract the textures. But I'll teach it to anyone who knows. Note: You have to tinker with the texture files and test with F10 in the game to see if you've moved the right file. In the example I will use Kasumi, the file to use by pressing the Q key is the "blush2.dds". In other girls can be the blush1 or 2 or 3 ... 1 – Open the .dds file by following the top tutorial. (remember new layer). 2 – Use the polygonal loop tool (shortcut key L). 3 - Circle the desired area. Be careful not to pick up other parts of the skin, otherwise the color will change too. 4 - Click on images / settings / matrix and saturation. Keyboard shortcut "Ctrl + U". 5 - Move the first color bar. Adjust to the desired color. After saving the file as described above. Adding painted nails: I'll leave the PSD file (photoshop) for anyone who wants to get the painted nail tip model. Just copy and paste over the skin of the mod you are using. But I'll teach you how to paint it all. Nails Hand and Feet.rar Create a new layer (make a layer for the hand and foot). 1 - In the layer of the foot, contour the nails, being careful not to escape the limit of them, not to paint another part of the body. 2 - After marking the area, select the paint bucket option, or shortcut on the G keyboard. 3 - Choose the color you want in the ink palette. Apply the paint bucket inside the selected area to paint it. 4 - Choose the layer of the hand and select the area of the nails and paint. 5 - Save the file as it was already taught. Remember to save the .dds file with the same name as the original file, otherwise the mod will not recognize the file. I used the mods for the model: https://www.loverslab.com/topic/87780-dead-or-alive-xtreme-venus-vacation-modding-thread-and-discussion/?do=findComment&comment=2526936 https://www.loverslab.com/topic/87780-dead-or-alive-xtreme-venus-vacation-modding-thread-and-discussion/?do=findComment&comment=2356343
Undercova Posted April 11, 2019 Posted April 11, 2019 Thx for the Tutorial ! Where do I find the Textures of all the Girls ? For example the Hair/Face Textures. You're using Kasumi Face texture as an example, but where do i find it ?
jwheeler86 Posted April 25, 2019 Posted April 25, 2019 Thanks for the writeup! If you're like me, you might prefer to not buy photoshop. I haven't found any tool that can be used to edit the texture .dds files beyond what's mentioned above. The closest I've come is Microsoft's texconv.exe tool to convert DDS files to TGA. Doing this: $ texconv.exe -ft TGA <FILE.dds> will generate a TGA file that I can load into a free image editor (e.g. gimp). The image appears be a correct conversion, as the texture shows up with sane colors, etc. However, if I try to reconvert the TGA file to DDS, without having changed the TGA at all: $ texconv.exe -m 0 -ft DDS -f BC7_UNORM_SRGB <FILE.TGA> then I'll get a .dds file of the proper size, but which displays as all-white in-game. It might have something to do with alpha channels, as supplying -pmalpha to texconv.exe when generating the .dds file will instead have the texture show as grey in-game. Or maybe that's a red herring. Basically, I don't know how to get texconv.exe to generate the same type of .dds file as what the intel plugin does with " select "Color + Alpha". And in compression choose "BC7 8bpp Fine (sRGB, DX11 +)". Anyway, I might fiddle with this some more, but my knowledge of texture formats is pretty low. If anyone's interested, have a look. If you know more about .dds formats, perhaps you can pick the correct set of options to give from the texconv.exe help, which I've put into the following spoiler. Spoiler $ texconv Microsoft (R) DirectX Texture Converter (DirectXTex version) Copyright (C) Microsoft Corp. All rights reserved. Usage: texconv <options> <files> -r wildcard filename search is recursive -w <n> width -h <n> height -m <n> miplevels -f <format> format -if <filter> image filtering -srgb{i|o} sRGB {input, output} -px <string> name prefix -sx <string> name suffix -o <directory> output directory -y overwrite existing output file (if any) -ft <filetype> output file type -hflip horizonal flip of source image -vflip vertical flip of source image -sepalpha resize/generate mips alpha channel separately from color channels -nowic Force non-WIC filtering -wrap, -mirror texture addressing mode (wrap, mirror, or clamp) -pmalpha convert final texture to use premultiplied alpha -alpha convert premultiplied alpha to straight alpha -pow2 resize to fit a power-of-2, respecting aspect ratio -nmap <options> converts height-map to normal-map options must be one or more of r, g, b, a, l, m, u, v, i, o -nmapamp <weight> normal map amplitude (defaults to 1.0) -fl <feature-level> Set maximum feature level target (defaults to 11.0) (DDS input only) -t{u|f} TYPELESS format is treated as UNORM or FLOAT -dword Use DWORD instead of BYTE alignment -badtails Fix for older DXTn with bad mipchain tails -xlum expand legacy L8, L16, and A8P8 formats (DDS output only) -dx10 Force use of 'DX10' extended header -nologo suppress copyright message -timing Display elapsed processing time -singleproc Do not use multi-threaded compression -gpu <adapter> Select GPU for DirectCompute-based codecs (0 is default) -nogpu Do not use DirectCompute-based codecs -bcuniform Use uniform rather than perceptual weighting for BC1-3 -bcdither Use dithering for BC1-3 -bcmax Use exhaustive compression (BC7 only) -bcquick Use quick compression (BC7 only) -wicq <quality> When writing images with WIC use quality (0.0 to 1.0) -wiclossless When writing images with WIC use lossless mode -wicmulti When writing images with WIC encode multiframe images -aw <weight> BC7 GPU compressor weighting for alpha error metric (defaults to 1.0) -c <hex-RGB> colorkey (a.k.a. chromakey) transparency -rotatecolor <rot> rotates color primaries and/or applies a curve -nits <value> paper-white value in nits to use for HDR10 (def: 200.0) -tonemap Apply a tonemap operator based on maximum luminance -x2bias Enable *2 - 1 conversion cases for unorm/pos-only-float -keepcoverage <ref> Preserve alpha coverage in generated mips for alpha test ref -inverty Invert Y (i.e. green) channel values -flist <filename> use text file with a list of input files (one per line) <format>: R32G32B32A32_FLOAT R32G32B32A32_UINT R32G32B32A32_SINT R32G32B32_FLOAT R32G32B32_UINT R32G32B32_SINT R16G16B16A16_FLOAT R16G16B16A16_UNORM R16G16B16A16_UINT R16G16B16A16_SNORM R16G16B16A16_SINT R32G32_FLOAT R32G32_UINT R32G32_SINT R10G10B10A2_UNORM R10G10B10A2_UINT R11G11B10_FLOAT R8G8B8A8_UNORM R8G8B8A8_UNORM_SRGB R8G8B8A8_UINT R8G8B8A8_SNORM R8G8B8A8_SINT R16G16_FLOAT R16G16_UNORM R16G16_UINT R16G16_SNORM R16G16_SINT R32_FLOAT R32_UINT R32_SINT R8G8_UNORM R8G8_UINT R8G8_SNORM R8G8_SINT R16_FLOAT R16_UNORM R16_UINT R16_SNORM R16_SINT R8_UNORM R8_UINT R8_SNORM R8_SINT A8_UNORM R9G9B9E5_SHAREDEXP R8G8_B8G8_UNORM G8R8_G8B8_UNORM BC1_UNORM BC1_UNORM_SRGB BC2_UNORM BC2_UNORM_SRGB BC3_UNORM BC3_UNORM_SRGB BC4_UNORM BC4_SNORM BC5_UNORM BC5_SNORM B5G6R5_UNORM B5G5R5A1_UNORM B8G8R8A8_UNORM B8G8R8X8_UNORM R10G10B10_XR_BIAS_A2_UNORM B8G8R8A8_UNORM_SRGB B8G8R8X8_UNORM_SRGB BC6H_UF16 BC6H_SF16 BC7_UNORM BC7_UNORM_SRGB AYUV Y410 Y416 YUY2 Y210 Y216 B4G4R4A4_UNORM DXT1 DXT2 DXT3 DXT4 DXT5 RGBA BGRA FP16 FP32 <filter>: POINT LINEAR CUBIC FANT BOX TRIANGLE POINT_DITHER LINEAR_DITHER CUBIC_DITHER FANT_DITHER BOX_DITHER TRIANGLE_DITHER POINT_DITHER_DIFFUSION LINEAR_DITHER_DIFFUSION CUBIC_DITHER_DIFFUSION FANT_DITHER_DIFFUSION BOX_DITHER_DIFFUSION TRIANGLE_DITHER_DIFFUSION <rot>: 709to2020 2020to709 709toHDR10 HDR10to709 P3to2020 P3toHDR10 <filetype>: BMP JPG JPEG PNG DDS TGA HDR TIF TIFF WDP HDP JXR <feature-level>: 9.1 9.2 9.3 10.0 10.1 11.0 11.1 12.0 12.1
arvеw Posted April 26, 2019 Posted April 26, 2019 On 4/25/2019 at 5:41 AM, jwheeler86 said: Thanks for the writeup! If you're like me, you might prefer to not buy photoshop. I haven't found any tool that can be used to edit the texture .dds files beyond what's mentioned above. The closest I've come is Microsoft's texconv.exe tool to convert DDS files to TGA. Doing this: $ texconv.exe -ft TGA <FILE.dds> will generate a TGA file that I can load into a free image editor (e.g. gimp). The image appears be a correct conversion, as the texture shows up with sane colors, etc. However, if I try to reconvert the TGA file to DDS, without having changed the TGA at all: $ texconv.exe -m 0 -ft DDS -f BC7_UNORM_SRGB <FILE.TGA> then I'll get a .dds file of the proper size, but which displays as all-white in-game. It might have something to do with alpha channels, as supplying -pmalpha to texconv.exe when generating the .dds file will instead have the texture show as grey in-game. Or maybe that's a red herring. Basically, I don't know how to get texconv.exe to generate the same type of .dds file as what the intel plugin does with " select "Color + Alpha". And in compression choose "BC7 8bpp Fine (sRGB, DX11 +)". Anyway, I might fiddle with this some more, but my knowledge of texture formats is pretty low. If anyone's interested, have a look. If you know more about .dds formats, perhaps you can pick the correct set of options to give from the texconv.exe help, which I've put into the following spoiler. Hide contents $ texconv Microsoft (R) DirectX Texture Converter (DirectXTex version) Copyright (C) Microsoft Corp. All rights reserved. Usage: texconv <options> <files> -r wildcard filename search is recursive -w <n> width -h <n> height -m <n> miplevels -f <format> format -if <filter> image filtering -srgb{i|o} sRGB {input, output} -px <string> name prefix -sx <string> name suffix -o <directory> output directory -y overwrite existing output file (if any) -ft <filetype> output file type -hflip horizonal flip of source image -vflip vertical flip of source image -sepalpha resize/generate mips alpha channel separately from color channels -nowic Force non-WIC filtering -wrap, -mirror texture addressing mode (wrap, mirror, or clamp) -pmalpha convert final texture to use premultiplied alpha -alpha convert premultiplied alpha to straight alpha -pow2 resize to fit a power-of-2, respecting aspect ratio -nmap <options> converts height-map to normal-map options must be one or more of r, g, b, a, l, m, u, v, i, o -nmapamp <weight> normal map amplitude (defaults to 1.0) -fl <feature-level> Set maximum feature level target (defaults to 11.0) (DDS input only) -t{u|f} TYPELESS format is treated as UNORM or FLOAT -dword Use DWORD instead of BYTE alignment -badtails Fix for older DXTn with bad mipchain tails -xlum expand legacy L8, L16, and A8P8 formats (DDS output only) -dx10 Force use of 'DX10' extended header -nologo suppress copyright message -timing Display elapsed processing time -singleproc Do not use multi-threaded compression -gpu <adapter> Select GPU for DirectCompute-based codecs (0 is default) -nogpu Do not use DirectCompute-based codecs -bcuniform Use uniform rather than perceptual weighting for BC1-3 -bcdither Use dithering for BC1-3 -bcmax Use exhaustive compression (BC7 only) -bcquick Use quick compression (BC7 only) -wicq <quality> When writing images with WIC use quality (0.0 to 1.0) -wiclossless When writing images with WIC use lossless mode -wicmulti When writing images with WIC encode multiframe images -aw <weight> BC7 GPU compressor weighting for alpha error metric (defaults to 1.0) -c <hex-RGB> colorkey (a.k.a. chromakey) transparency -rotatecolor <rot> rotates color primaries and/or applies a curve -nits <value> paper-white value in nits to use for HDR10 (def: 200.0) -tonemap Apply a tonemap operator based on maximum luminance -x2bias Enable *2 - 1 conversion cases for unorm/pos-only-float -keepcoverage <ref> Preserve alpha coverage in generated mips for alpha test ref -inverty Invert Y (i.e. green) channel values -flist <filename> use text file with a list of input files (one per line) <format>: R32G32B32A32_FLOAT R32G32B32A32_UINT R32G32B32A32_SINT R32G32B32_FLOAT R32G32B32_UINT R32G32B32_SINT R16G16B16A16_FLOAT R16G16B16A16_UNORM R16G16B16A16_UINT R16G16B16A16_SNORM R16G16B16A16_SINT R32G32_FLOAT R32G32_UINT R32G32_SINT R10G10B10A2_UNORM R10G10B10A2_UINT R11G11B10_FLOAT R8G8B8A8_UNORM R8G8B8A8_UNORM_SRGB R8G8B8A8_UINT R8G8B8A8_SNORM R8G8B8A8_SINT R16G16_FLOAT R16G16_UNORM R16G16_UINT R16G16_SNORM R16G16_SINT R32_FLOAT R32_UINT R32_SINT R8G8_UNORM R8G8_UINT R8G8_SNORM R8G8_SINT R16_FLOAT R16_UNORM R16_UINT R16_SNORM R16_SINT R8_UNORM R8_UINT R8_SNORM R8_SINT A8_UNORM R9G9B9E5_SHAREDEXP R8G8_B8G8_UNORM G8R8_G8B8_UNORM BC1_UNORM BC1_UNORM_SRGB BC2_UNORM BC2_UNORM_SRGB BC3_UNORM BC3_UNORM_SRGB BC4_UNORM BC4_SNORM BC5_UNORM BC5_SNORM B5G6R5_UNORM B5G5R5A1_UNORM B8G8R8A8_UNORM B8G8R8X8_UNORM R10G10B10_XR_BIAS_A2_UNORM B8G8R8A8_UNORM_SRGB B8G8R8X8_UNORM_SRGB BC6H_UF16 BC6H_SF16 BC7_UNORM BC7_UNORM_SRGB AYUV Y410 Y416 YUY2 Y210 Y216 B4G4R4A4_UNORM DXT1 DXT2 DXT3 DXT4 DXT5 RGBA BGRA FP16 FP32 <filter>: POINT LINEAR CUBIC FANT BOX TRIANGLE POINT_DITHER LINEAR_DITHER CUBIC_DITHER FANT_DITHER BOX_DITHER TRIANGLE_DITHER POINT_DITHER_DIFFUSION LINEAR_DITHER_DIFFUSION CUBIC_DITHER_DIFFUSION FANT_DITHER_DIFFUSION BOX_DITHER_DIFFUSION TRIANGLE_DITHER_DIFFUSION <rot>: 709to2020 2020to709 709toHDR10 HDR10to709 P3to2020 P3toHDR10 <filetype>: BMP JPG JPEG PNG DDS TGA HDR TIF TIFF WDP HDP JXR <feature-level>: 9.1 9.2 9.3 10.0 10.1 11.0 11.1 12.0 12.1 Can you upload this tool here? I tried to download it from your link, but they demanded that I create an account.
jwheeler86 Posted April 26, 2019 Posted April 26, 2019 Here's a better link. The pre-built exes are on that page. Note that I also tried using the texdiag tool to see if my generated .dds files are in the same format as the original, and as far as I can tell they are.
arriozzo24 Posted May 10, 2019 Posted May 10, 2019 On 4/26/2019 at 12:29 PM, arvеw said: Can you upload this tool here? I tried to download it from your link, but they demanded that I create an account. nuget.7z DirectXTex-apr2019.zip
KingKu59 Posted May 13, 2019 Posted May 13, 2019 I was always interested in this game: can I change the length of the eyelashes? Can anyone answer?
traviolо Posted May 17, 2019 Posted May 17, 2019 On 5/13/2019 at 8:08 AM, KingKu59 said: I was always interested in this game: can I change the length of the eyelashes? Can anyone answer? I believe that only Blender can help you. (sorry, google translate).
daydreamer250 Posted May 20, 2019 Posted May 20, 2019 I am using Photoshop CC 2015 with IntelTextureWorks_1.0.4 plugin. I save the DSS with Color + Alpha option. But I got the white face here and don't know what's wrong.
HI-METAL Posted May 20, 2019 Posted May 20, 2019 4 hours ago, daydreamer250 said: I am using Photoshop CC 2015 with IntelTextureWorks_1.0.4 plugin. I save the DSS with Color + Alpha option. But I got the white face here and don't know what's wrong. I think that was the case when the layer structure remained. If there are multiple layers, combine them into one and save them.
daydreamer250 Posted May 21, 2019 Posted May 21, 2019 14 hours ago, HI-METAL said: I think that was the case when the layer structure remained. If there are multiple layers, combine them into one and save them. Thanks, I double checked the texture, it is a single layer before saved to DSS. This only happens to skin texture, the costumes are fine.
fc2otica Posted May 25, 2019 Posted May 25, 2019 Why I cannot save the file? I met error when I want to save it as .dds : Failed to Create Preset Directory. Does anyone know how to solve?
Scherzando Posted January 14, 2020 Posted January 14, 2020 On 5/20/2019 at 12:18 PM, daydreamer250 said: I am using Photoshop CC 2015 with IntelTextureWorks_1.0.4 plugin. I save the DSS with Color + Alpha option. But I got the white face here and don't know what's wrong. I have encountered the same problem before. I've found out that I had my settings wrong when exporting the file. Just make sure the export setting is set to "BC7 8bpp Fine (sRGB, DX11+)" should work.
ayawrxsti Posted January 15, 2020 Posted January 15, 2020 On 5/20/2019 at 12:18 AM, daydreamer250 said: I am using Photoshop CC 2015 with IntelTextureWorks_1.0.4 plugin. I save the DSS with Color + Alpha option. But I got the white face here and don't know what's wrong. HOLY shit i was scrolling down mid night with all lights off this scared the shit out of me.......
Hans Jürgen Posted January 16, 2020 Posted January 16, 2020 That is how the texture looks in Photoshop CS2 with Intel texture thingy. Somehow doesn´t seem right
knight77 Posted January 16, 2020 Posted January 16, 2020 19 minutes ago, Hans Jürgen said: That is how the texture looks in Photoshop CS2 with Intel texture thingy. 1.24 MB · 0 downloads Somehow doesn´t seem right This happens when you open the file without giving the alpha a separate channel! The alpha texture on the skin is used as bump mapping, but if you applie it as a typical alpha map, it will make it transparent like what you posted
daydreamer250 Posted January 16, 2020 Posted January 16, 2020 On 1/14/2020 at 7:48 AM, Scherzando said: I have encountered the same problem before. I've found out that I had my settings wrong when exporting the file. Just make sure the export setting is set to "BC7 8bpp Fine (sRGB, DX11+)" should work. Thank you so much
Hans Jürgen Posted January 16, 2020 Posted January 16, 2020 1 hour ago, knight77 said: This happens when you open the file without giving the alpha a separate channel! The alpha texture on the skin is used as bump mapping, but if you applie it as a typical alpha map, it will make it transparent like what you posted Thanks for answering knight! But I did everything as written above! I have the same Problem with Gimp, Photoline, Paint.net and so on.... Damn I so wish I could at least mod textures when I am too stupid to use Blender. Seemingly too dumb to use even paint prog properly
lipo886 Posted March 6, 2020 Posted March 6, 2020 On 4/25/2019 at 10:41 AM, jwheeler86 said: Thanks for the writeup! If you're like me, you might prefer to not buy photoshop. I haven't found any tool that can be used to edit the texture .dds files beyond what's mentioned above. The closest I've come is Microsoft's texconv.exe tool to convert DDS files to TGA. Doing this: $ texconv.exe -ft TGA <FILE.dds> will generate a TGA file that I can load into a free image editor (e.g. gimp). The image appears be a correct conversion, as the texture shows up with sane colors, etc. However, if I try to reconvert the TGA file to DDS, without having changed the TGA at all: $ texconv.exe -m 0 -ft DDS -f BC7_UNORM_SRGB <FILE.TGA> then I'll get a .dds file of the proper size, but which displays as all-white in-game. It might have something to do with alpha channels, as supplying -pmalpha to texconv.exe when generating the .dds file will instead have the texture show as grey in-game. Or maybe that's a red herring. Basically, I don't know how to get texconv.exe to generate the same type of .dds file as what the intel plugin does with " select "Color + Alpha". And in compression choose "BC7 8bpp Fine (sRGB, DX11 +)". Anyway, I might fiddle with this some more, but my knowledge of texture formats is pretty low. If anyone's interested, have a look. If you know more about .dds formats, perhaps you can pick the correct set of options to give from the texconv.exe help, which I've put into the following spoiler. Reveal hidden contents $ texconv Microsoft (R) DirectX Texture Converter (DirectXTex version) Copyright (C) Microsoft Corp. All rights reserved. Usage: texconv <options> <files> -r wildcard filename search is recursive -w <n> width -h <n> height -m <n> miplevels -f <format> format -if <filter> image filtering -srgb{i|o} sRGB {input, output} -px <string> name prefix -sx <string> name suffix -o <directory> output directory -y overwrite existing output file (if any) -ft <filetype> output file type -hflip horizonal flip of source image -vflip vertical flip of source image -sepalpha resize/generate mips alpha channel separately from color channels -nowic Force non-WIC filtering -wrap, -mirror texture addressing mode (wrap, mirror, or clamp) -pmalpha convert final texture to use premultiplied alpha -alpha convert premultiplied alpha to straight alpha -pow2 resize to fit a power-of-2, respecting aspect ratio -nmap <options> converts height-map to normal-map options must be one or more of r, g, b, a, l, m, u, v, i, o -nmapamp <weight> normal map amplitude (defaults to 1.0) -fl <feature-level> Set maximum feature level target (defaults to 11.0) (DDS input only) -t{u|f} TYPELESS format is treated as UNORM or FLOAT -dword Use DWORD instead of BYTE alignment -badtails Fix for older DXTn with bad mipchain tails -xlum expand legacy L8, L16, and A8P8 formats (DDS output only) -dx10 Force use of 'DX10' extended header -nologo suppress copyright message -timing Display elapsed processing time -singleproc Do not use multi-threaded compression -gpu <adapter> Select GPU for DirectCompute-based codecs (0 is default) -nogpu Do not use DirectCompute-based codecs -bcuniform Use uniform rather than perceptual weighting for BC1-3 -bcdither Use dithering for BC1-3 -bcmax Use exhaustive compression (BC7 only) -bcquick Use quick compression (BC7 only) -wicq <quality> When writing images with WIC use quality (0.0 to 1.0) -wiclossless When writing images with WIC use lossless mode -wicmulti When writing images with WIC encode multiframe images -aw <weight> BC7 GPU compressor weighting for alpha error metric (defaults to 1.0) -c <hex-RGB> colorkey (a.k.a. chromakey) transparency -rotatecolor <rot> rotates color primaries and/or applies a curve -nits <value> paper-white value in nits to use for HDR10 (def: 200.0) -tonemap Apply a tonemap operator based on maximum luminance -x2bias Enable *2 - 1 conversion cases for unorm/pos-only-float -keepcoverage <ref> Preserve alpha coverage in generated mips for alpha test ref -inverty Invert Y (i.e. green) channel values -flist <filename> use text file with a list of input files (one per line) <format>: R32G32B32A32_FLOAT R32G32B32A32_UINT R32G32B32A32_SINT R32G32B32_FLOAT R32G32B32_UINT R32G32B32_SINT R16G16B16A16_FLOAT R16G16B16A16_UNORM R16G16B16A16_UINT R16G16B16A16_SNORM R16G16B16A16_SINT R32G32_FLOAT R32G32_UINT R32G32_SINT R10G10B10A2_UNORM R10G10B10A2_UINT R11G11B10_FLOAT R8G8B8A8_UNORM R8G8B8A8_UNORM_SRGB R8G8B8A8_UINT R8G8B8A8_SNORM R8G8B8A8_SINT R16G16_FLOAT R16G16_UNORM R16G16_UINT R16G16_SNORM R16G16_SINT R32_FLOAT R32_UINT R32_SINT R8G8_UNORM R8G8_UINT R8G8_SNORM R8G8_SINT R16_FLOAT R16_UNORM R16_UINT R16_SNORM R16_SINT R8_UNORM R8_UINT R8_SNORM R8_SINT A8_UNORM R9G9B9E5_SHAREDEXP R8G8_B8G8_UNORM G8R8_G8B8_UNORM BC1_UNORM BC1_UNORM_SRGB BC2_UNORM BC2_UNORM_SRGB BC3_UNORM BC3_UNORM_SRGB BC4_UNORM BC4_SNORM BC5_UNORM BC5_SNORM B5G6R5_UNORM B5G5R5A1_UNORM B8G8R8A8_UNORM B8G8R8X8_UNORM R10G10B10_XR_BIAS_A2_UNORM B8G8R8A8_UNORM_SRGB B8G8R8X8_UNORM_SRGB BC6H_UF16 BC6H_SF16 BC7_UNORM BC7_UNORM_SRGB AYUV Y410 Y416 YUY2 Y210 Y216 B4G4R4A4_UNORM DXT1 DXT2 DXT3 DXT4 DXT5 RGBA BGRA FP16 FP32 <filter>: POINT LINEAR CUBIC FANT BOX TRIANGLE POINT_DITHER LINEAR_DITHER CUBIC_DITHER FANT_DITHER BOX_DITHER TRIANGLE_DITHER POINT_DITHER_DIFFUSION LINEAR_DITHER_DIFFUSION CUBIC_DITHER_DIFFUSION FANT_DITHER_DIFFUSION BOX_DITHER_DIFFUSION TRIANGLE_DITHER_DIFFUSION <rot>: 709to2020 2020to709 709toHDR10 HDR10to709 P3to2020 P3toHDR10 <filetype>: BMP JPG JPEG PNG DDS TGA HDR TIF TIFF WDP HDP JXR <feature-level>: 9.1 9.2 9.3 10.0 10.1 11.0 11.1 12.0 12.1 I finally success using texconv.exe with below args: texconv.exe -m 1 -srgb -ft DDS -f BC7_UNORM_SRGB <FILE_TGA> Without -srgb arg output dds's spec(alpha) is correct but color level distribution is twice as original, i guess color range between input and output file may be considered different by this tool This is my first reply on loverslab^_^
AlexIlluminati Posted March 8, 2020 Posted March 8, 2020 On 1/16/2020 at 4:13 AM, knight77 said: ¡Esto sucede cuando abres el archivo sin darle al alfa un canal separado! La textura alfa en la piel se usa como mapeo de relieve, pero si la aplica como un mapa alfa típico, la hará transparente como lo que publicó Thanks for the info. I'm using a translator since I don't speak English, I'm sorry. I have the same problem, I want to edit the file femalebody_1_msn but when using paint.net and photoshop CS6 the file changes from 12mb to 4 mb and when I load it in departure you see the changes in game ,however you lose quality of lighting in the body. When loading the dss file it does not give me the option to load transparency as an alpha channel, instead this happens (image in Spanish). So my question is: how can I fix it? Given that I save the file as BC7 8bpp Fine (sRGB, DX11 +)
Dudebro60 Posted March 18, 2020 Posted March 18, 2020 Does anyone know if there's an available face DDS for Sayuri?
Ghost-writer Posted May 3, 2020 Posted May 3, 2020 I will explain from the introduction of the texture to the editing becomes possible. Required tools PhotoshopCS2 Search keyword → PhSp_CS2_English (2020 April Free distribution English only) Plugin Texture Tools for Adobe Photoshop → Windows (32-bit) https://developer.nvidia.com/gameworksdownload#?dn=texture-tools-for-adobe-photoshop-8-55 Intel® Texture Works Plugin for Photoshop* → http://gametechdev.github.io/Intel-Texture-Works-Plugin/ I have introduced both plugins. XnView MP → https://www.xnview.com/en/xnviewmp/ ---------------------------------------------------------------------------------------------------------------------------------------------------------------------- ① 3Dmigoto 0 key dump data ② C:\Users\PC name\DOAX-VenusVacation\FrameAnalysisDeduped Select textures. Display using XnView MP Check the face number and extract the data you want to process ③ Sayuri face texture 89af397d-BC7_UNORM_SRGB Open in Photoshop Load Options Put a check ④ Save AS → D3D/DDS → Save → DXT1 RGB 4 bpp i I no alpha(I'm not sure if this is the best. Please try various things) ⑤ Open it again in Photoshop and it will be in a normal state. Subsequent processing and storage are as above. ⑥ Process the texture, save it in the usual way and reflect it. If left untouched, the face will turn white and glow a little. ⑦ The reason is that the alpha is discarded in ⑤. I will revive it. A. Select Channels tag and add Alpha. B. The screen turned black and confirmed that this was added Copy and paste image to alpha location Adjust brightness (brightness-70 contrast-30) C. Click the top RGB D. The storage method is the same as above. Note The face turns white when the image is written on another layer and then saved. You need to merge the layers and process the alpha image again. For the introduction of textures into the game, please refer to the hair mod that I distribute and the face mod that everyone creates. Good Luck.
Jenovate Posted May 6, 2020 Posted May 6, 2020 Hi there, I too would like to make some custom skins for this game. I have a background in 3d so it shouldn't be a problem but I had some questions regarding the shades the engine used. If anyone can shed light on it (knight77?) I noticed all the skin mods come as a single dds file. What texture maps does this file include? Only diffuse for RGB and bump for alpha? Does the game use PBR shaders? Are there spec maps, normal maps, roughness/gloss maps we can modify? Any SSS support? Would love to give this game some modern shaders and detail.
etsorhtt Posted May 6, 2020 Posted May 6, 2020 15 hours ago, Jenovation said: I noticed all the skin mods come as a single dds file. What texture maps does this file include? Only diffuse for RGB and bump for alpha? Are there spec maps, normal maps, roughness/gloss maps we can modify? Would love to give this game some modern shaders and detail. Hello there, I'll try answering what I can. Yes there are specular maps, normal maps and some special ones(hair uses special texture for "gloss" shader that I havent seen in any other games before) so it's always depends on the specific model/type. For example as you mentioned - body/face skin textures come in one file, where alpha channel controls specularity/gloss. they also dont use normal maps at all. Shader modification goes beyond my knowledge but it's something that seemingly can be done with 3dmigoto. ------------------------------------------------- Great thread! I have one thing to add: When saving your textures follow the good practice of generating Mip Maps! Mip Maps are great, Mip Maps are awesome! They eliminate in-texture aliasing! Don't be like Venus Vacation developers:
Recommended Posts
Archived
This topic is now archived and is closed to further replies.