Entry posted by Myst42 in Modding Tutorials and Guides
1711 views
Much has been done in the area of follower modding, but when it comes to publishing them, one of the things that every author knows is probably gonna get screwed up, is their precious waifu's designer's body type.
In order to avoid this, most followers get released using their own body meshes, and a custom outfit (unless the author doesnt really care about what body they use)
But for some purists like me, this is heresy, and ideally, you should be able to install a follower and have them use the exact body the designer gave them without them turning into something they're not. After all, that's probably why you downloaded a follower in the first place, because he/she looks good on the original author's images.
That's where this method enters.
What I'm offering here, is the possibility of getting a follower, and having them use their designer's body specs on your game without the need of extra custom meshes for them.
That's right. Use a follower by someone else, on your game, with your preset, but the follower gets to keep their original shape, and they can wear anything you give them.

Now why would anybody want this?
Maybe you dont. But if you're like me and have any type of respect for aesthetic values, you should. Some followers may be designed to be delicate flower types with a rather slim figure, and they will probably look terrible if someone comes and slaps them on a super thicc titty/bootymonster preset.
Before you continue, keep in mind the following:
Quote
- This method is still experimental, so far I've tested it on a few followers, which I'm very happy to have in my game, and this is said with my extended gratitude to their original creators 7thSinner, xtudo and TheBaldHedgehog.
- This method only works on meshes that have been created by bodyslide USING THE "BUILD MORPHS" option. If the meshes don't have a tri file, BodyGen Randomize will not work.
- In order to apply this method to a follower's nude meshes, you'll probably need to copy-paste your own body meshes into the follower's folder, since most authors seem to simply give their characters a fixed body mesh, already sculpted to their preset, and with no tri files. This method requires the "host's" body mesh to be the one being used by the follower.
- VERY IMPORTANT: If you want to test this, make sure you get the method right. BodyGenRandomizer cannot be reset, and it does not get reset if you remove a mod and try again. Once the Randomizer applies a morph to an NPC, it STAYS FOR THE REST OF THE SAVEGAME, so this method is best applied on A)A testing instance and B)Once the testing works, it's probably best to try it on a new game (Although I think it does work on existing saves, but only ig the Randomizer has never touched that NPC before)
- I am very sorry if some parts of this get confusing, I'm trying very hard to remember all details, and explain them, but if anything is missing or not working with BodyGen Randomize, you can check RaceMenu page for additional explanations on some things.
So let's get on with it. It wasnt easy to come up with this method, but here it goes:
Requirements
I'm assuming you can manage to install these, especially TES5Edit Scripts, because I will not be covering the instalation process for the requirements:
Quote
- RaceMenu: Check the subtext on BodyGen Randomize, since this is where all of this comes from
- JBS2BG - BodySlide to BodyGen Converter and Generator
- Bodyslide and Outfit Studio
- TES5Edit
- *The follower's creator's custom bodyslide preset specifications. -There are some workarounds for this if one doesnt have it.
In simple terms:
What we'll be doing here consists in basically 2 main steps, which allow the Randomizer feature to apply a bodymorph to a partifular follower. These steps are:
- "Nullify" one's own bodyslide preset. This is essentially getting a morph setting that will revert any settings done by your bodyslide preset to meshes, turning an already morphed mesh into what Bodyslide files call "Zeroed Sliders" body.
- Once we get a neutralizer template, we are going to calculate a new bodyslide teplate that would turn a Zeroed Sliders body into whatever the creator wanted for their follower, that is saying, their own custom preset specifications.
Part 1: The Bodygen Preset "Nullifier"
The first thing we need to do is nullify whatever changes our bodyslide does to meshes in order to get that Zeroed Sliders body on top of which to build a custom preset.
For this, We will require JBS2BG and TES5Edit
JBS2BG comes with a script that can extract NPC data from esp files. First, we use that script to create the file which will make using JBS2BG easier.
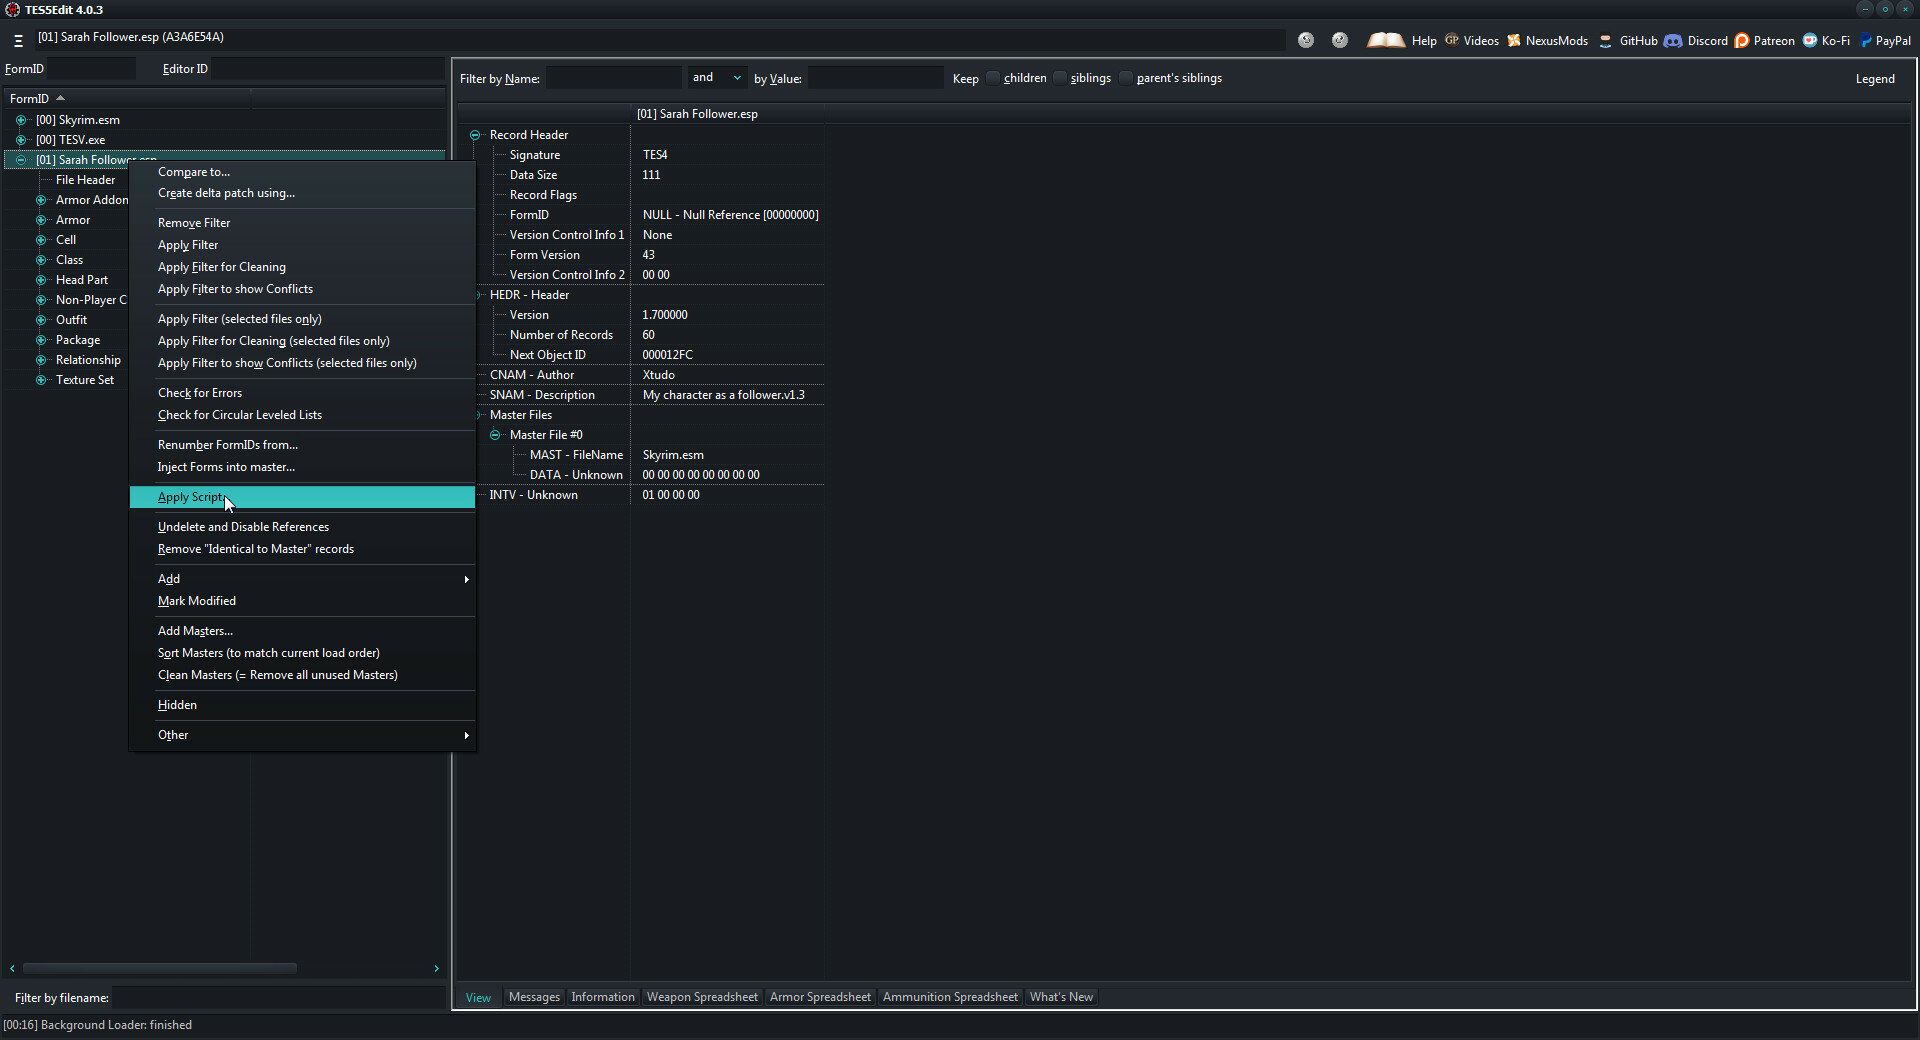
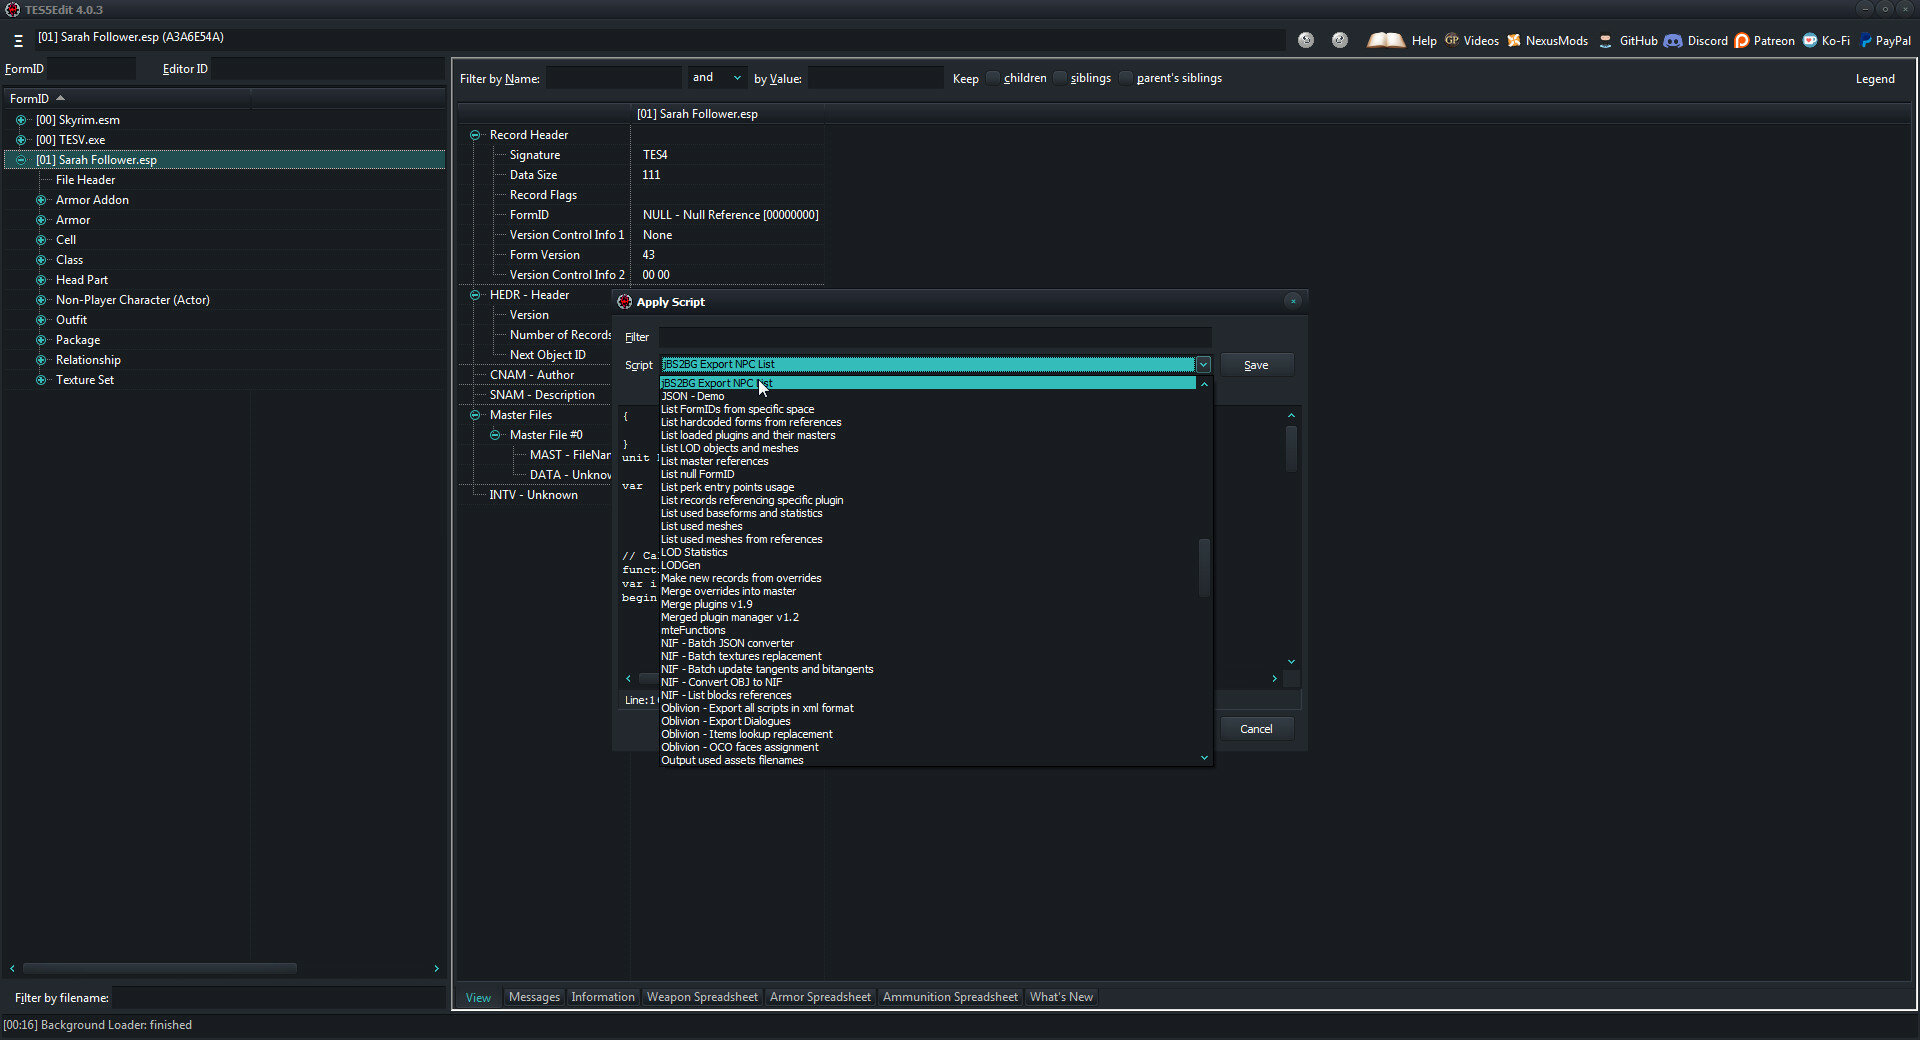
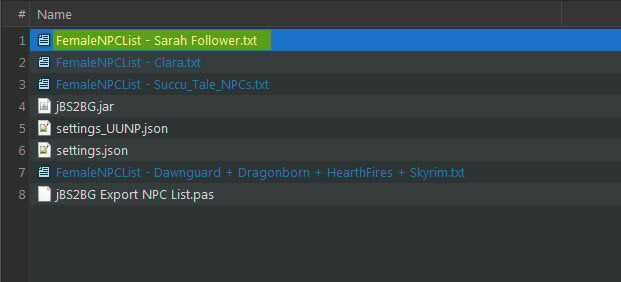
One it has been done, you will find the file at your games root directory, as a txt tile.
While you're on TES5Edit, you should open the NPC file tree, locate the follower and take a note of their weight.
You can leave that file there or move it to BS2BG folder where it will be easier to find later.
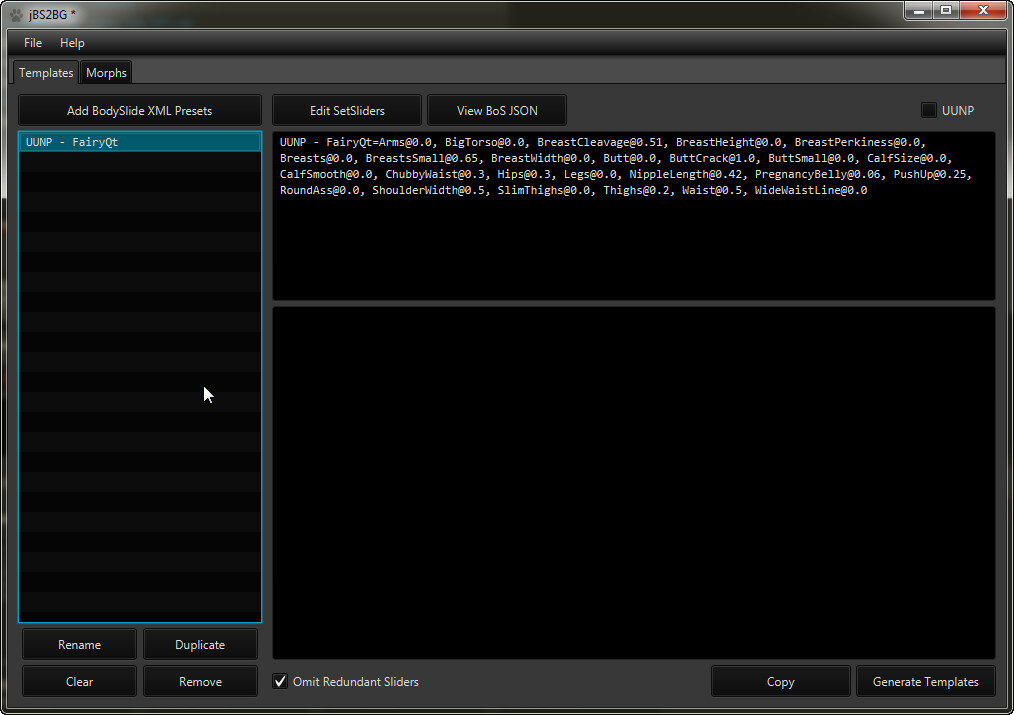
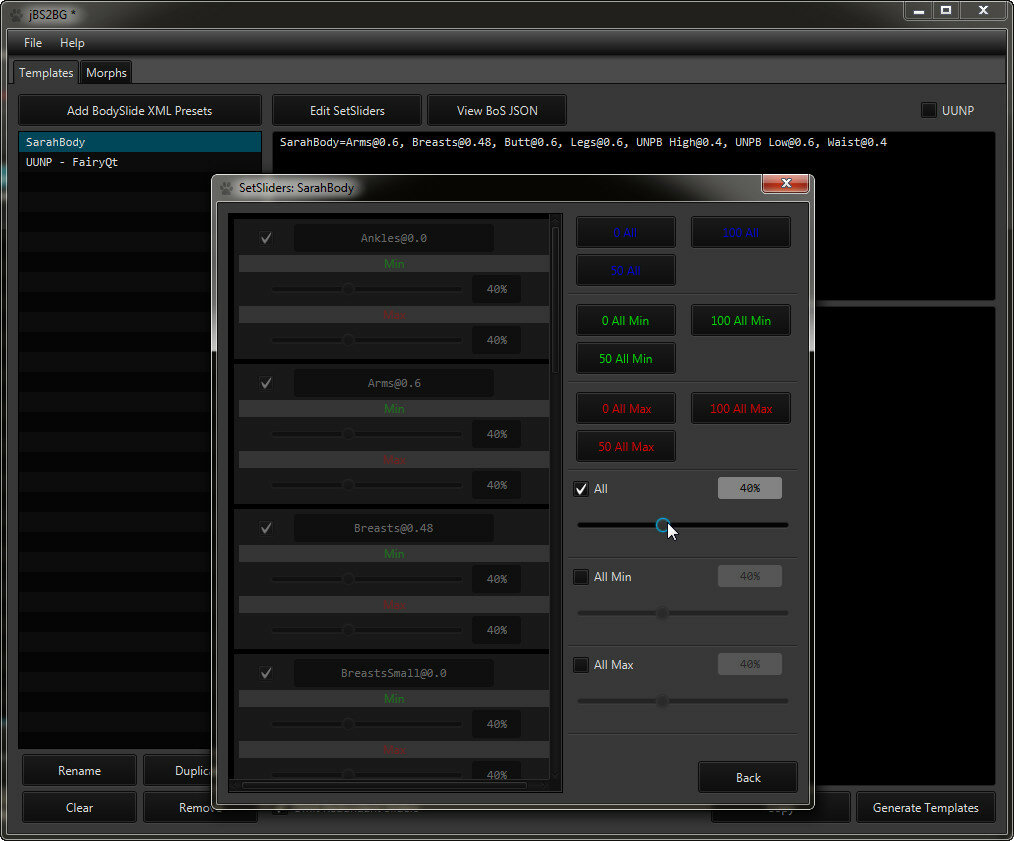
Next, you have to open JBS2BG and then open your own Bodyslide Preset

If you did it right, you should see your bodyslide preset, along with some specification on what sliders does it mess with.
Now we have loaded the preset, we will use it applied on a specific NPC
For that, we need to load an NPC list for a target mod, so we go to Morphs label, choose Add NPCs below, and then find the previous archive we "extracted" from the esp file using TES5Edit
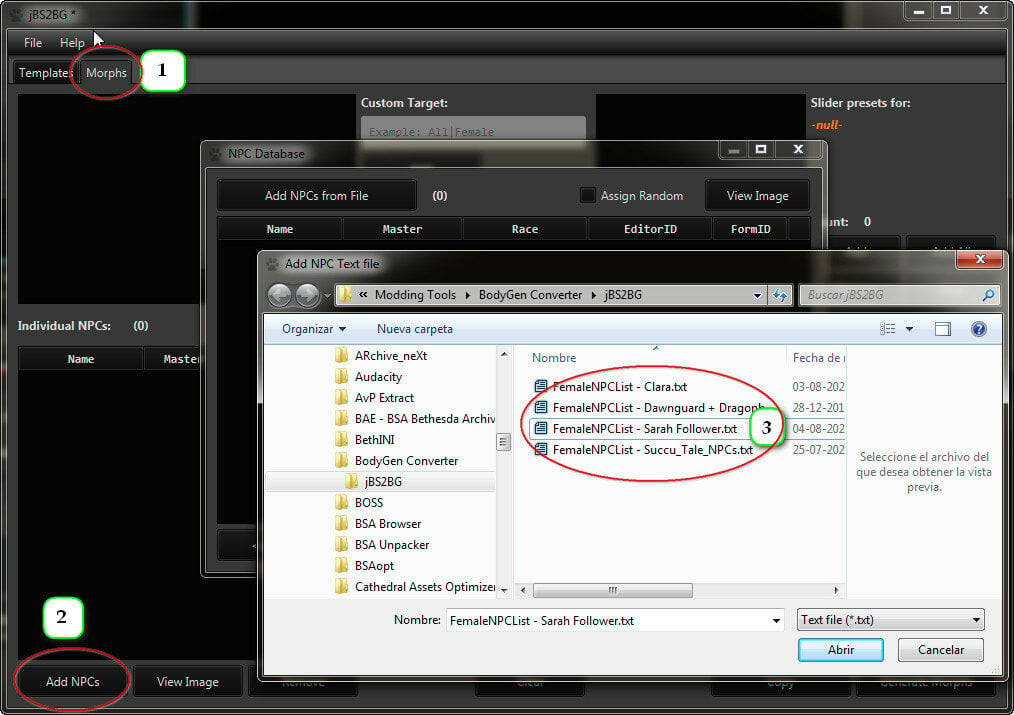
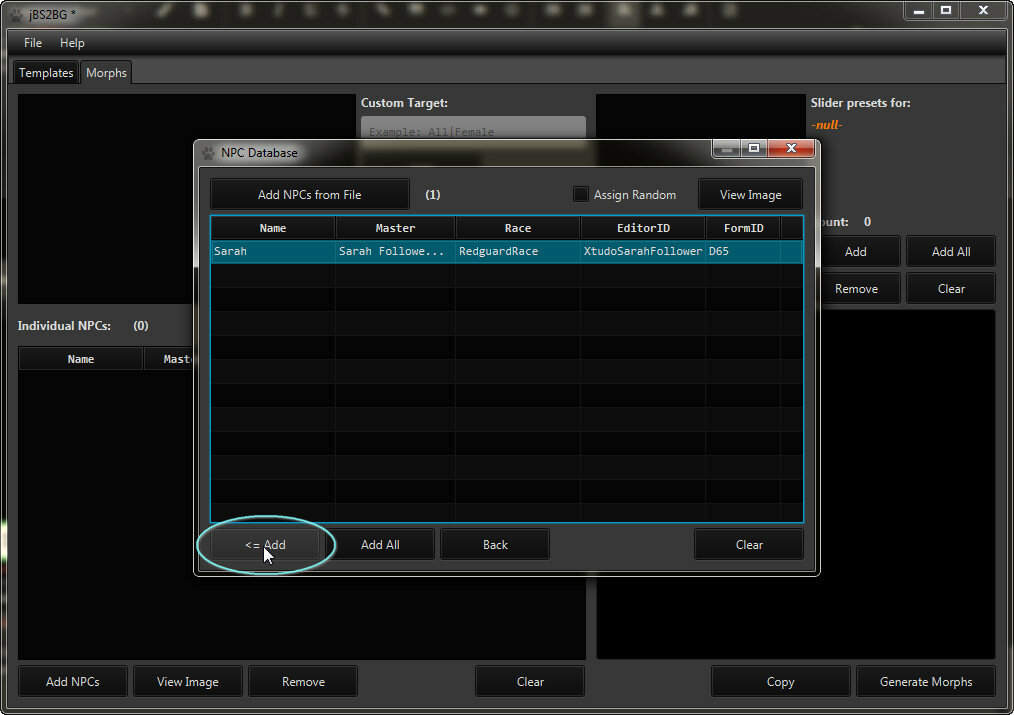
You should be seeing a list of NPCs or a single NPC depending on how many actors the esp file had.
The next part is just hitting "Add" so that they are loaded on JBS2BG
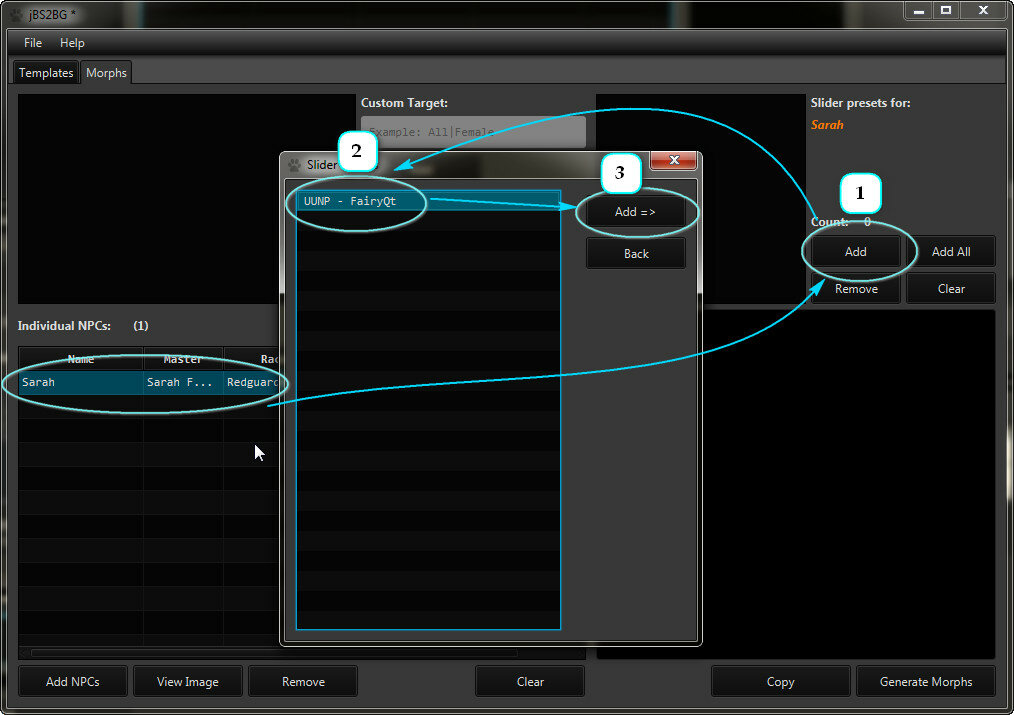
Now you can add the loaded preset into the specific NPC. Once you hit Add=>, the preset should appear on the list of presets for that specific NPC
Before exporting, there is one last step you should do, and that is adjusting the weight slider for the specific NPC
You need to go back to the Templates label, select your preset, hit "Edit SetSliders" then the "All" checkbox, and move the slider to the desired weight. This is why I mentioned you should take not of the follower's weight while being on TES5Edit.
This part is actually the reason why this method was tricky, because finding the correct slider values to apply a preset depended a lot on their weight and making the calculations manually eded up giving me a lot of headaches, but no more, since the program does it for you.
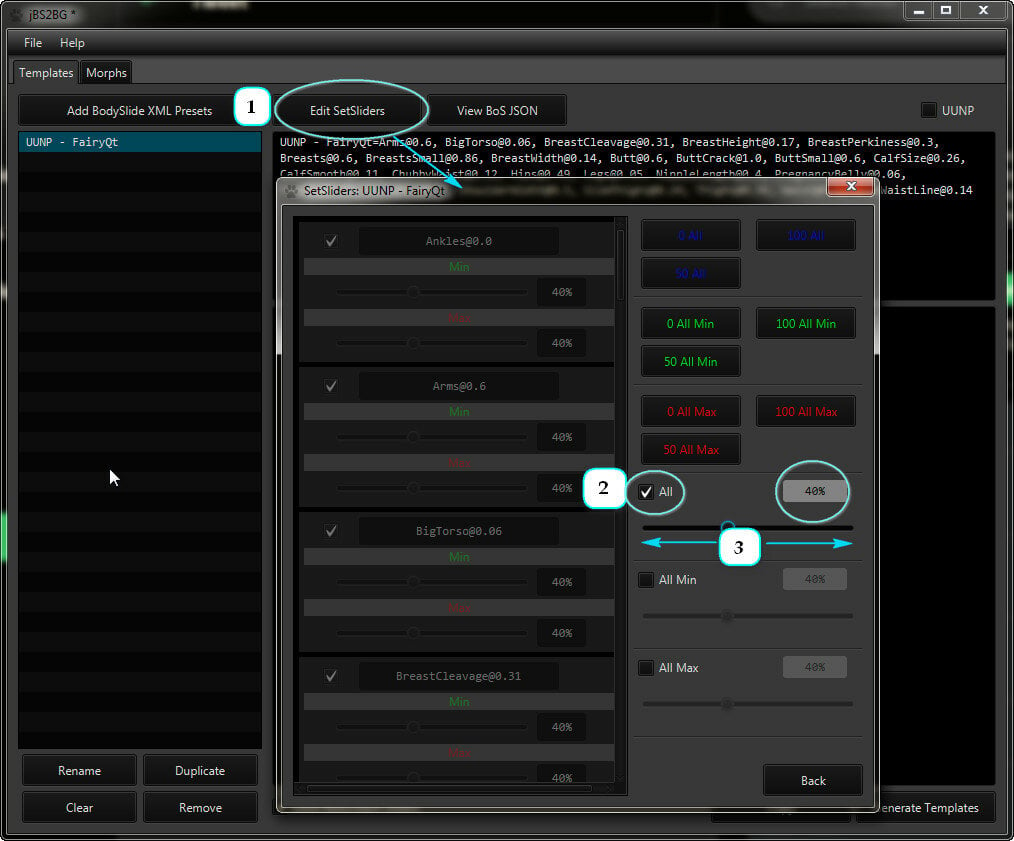
If you've done the above correctly you might notice the values on the text start to change as you move the slider, this means it's working since those values are mathematical results of how "max weight" and "low weight" options are applied to a mesh considering the weight variable.
Now, you're ready to export the inis.
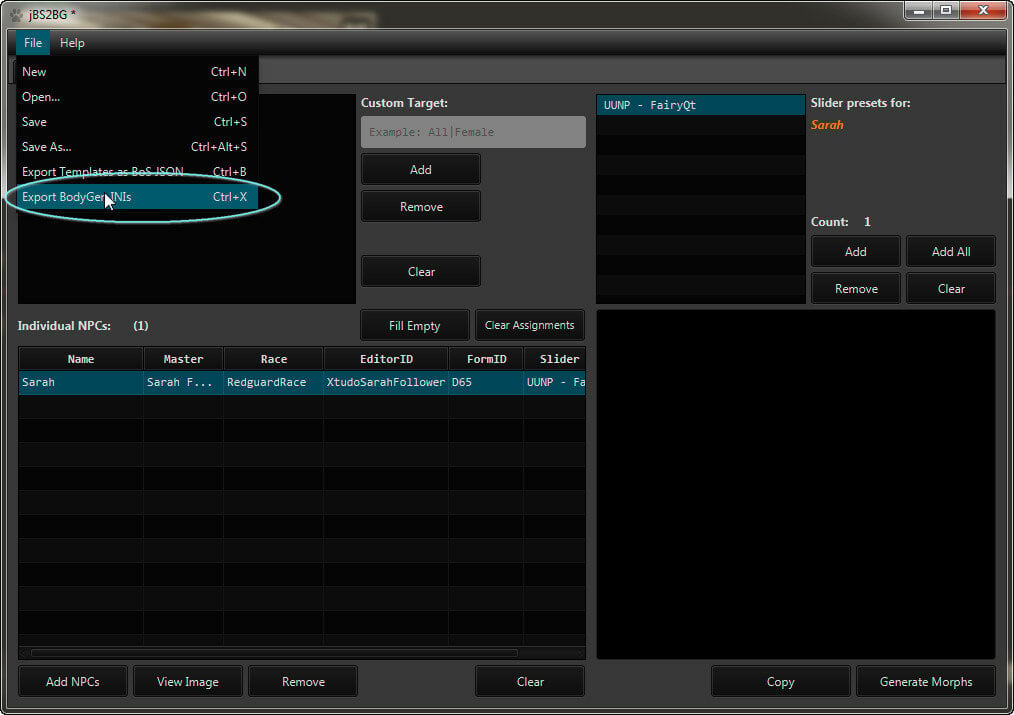
That option will ask you to specify a folder. You can choose anything, but for the procedure to work, you have to save the files under:
Meshes\Actors\Character\BodyGenData\[FollowerMod'sName].esp (without the brackets, just the esp name.)
This will generate 2 files: Morphs.ini and Templates.ini
Now the final step of the "nullifier" file, is to change the sign of every value in it.
What you have done is create a file setting that will ensure a certain NPC gets applied your personal preset by body morphs. But since you're already using your own preset, applying it again would be reduntant and look bad. What we need to do us Un-Apply it.
The simplest way to do this is just to locate the files where you saved them and open Templates.ini with a text editor.
Once you do, you will need to change the sign of every value in there. Probably this just means putting a (-) sign before every number
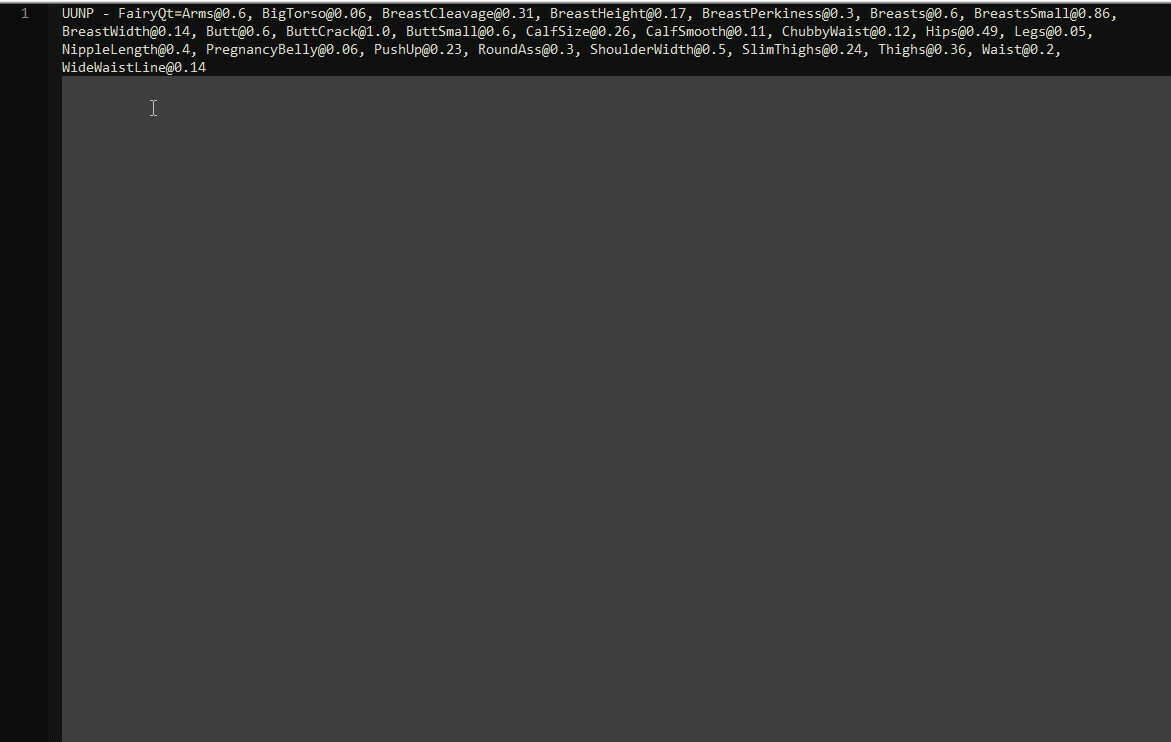

And there it is. That concludes the "creating a nullifier" part of this guide. What this file does is reset your preset to a "Zeroed Sliders" type of body, but only for a specific NPC of a specific file., which brings us to part 2:
Part 2: Applying the Follower specs.
Now we have established how to nullify one's own body preset for a specific NPC, it's time to give that character their intended shape.
We made sure that the character has a Zeroed Sliders body, and we have to combine those specs, with the ones that make sure the follower looks as intended.
*NOTE: If you don't have the follower's body preset, well, you're in tough luck... Some authors include it with their downloads, some authors can be asked for them and some times there is a method to actually recreate (or try to) a preset based on the shape of the provided body meshes using Outfit Studio. But I will not be covering that part here, since it would be an extra step that could complicate the explanations. So for now, we will assume you are able to acquire the preset values for the follower.
*Note#2: Sometimes, a bodyslide preset isn't enough to get a character's likeness to their original creator's body, this can be because the creator combined Bodyslide morphs on the mesh with RaceMenu in-game slider editing (using the plugins). If this is the case, only the author knows the correct configuration to make their character look as intended, but most people I've talked to doesnt really touch in-game body sliders, and if they released a preset, they probably released one that actually works, otherwise, one can always ask.
For this we are going to trace a few steps back and remember how to load a bodyslide preset into JBS2BG
Usually, most body presets are a lot easier than mine.
The idea here is to retrace the steps on the previous part a bit, except now, we are creating a template that creates the desired body shape on top of an unchanged one (Zeroed Sliders).
Make sure you do it exactly as the first time, including the weight slider edits. ESPECIALLY the weight slider part.
Remember we are now creating a bodymorph that has to apply the desired slider to a follower under a specific weight.
This time you wont need to be exporting anything new, since what we want is to combine that new preset specs with the nullifier.
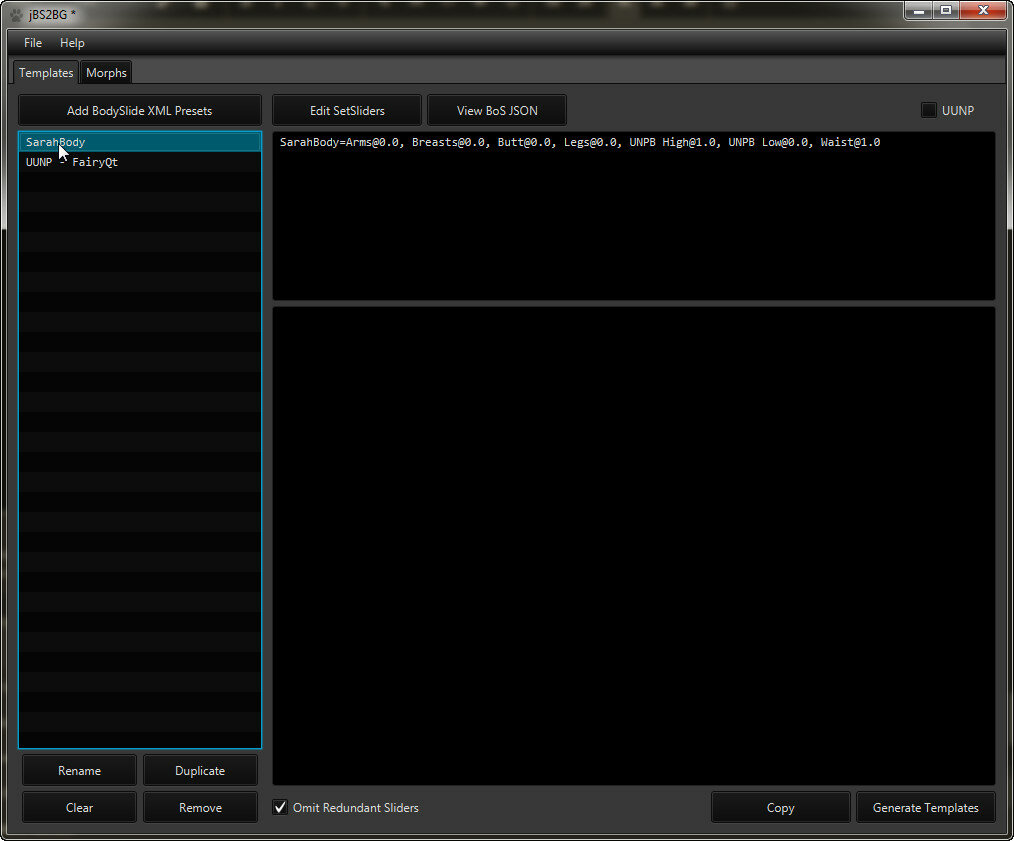
For this we can hit "Generate Templates" at the bottom, and then they will appear on the bottom box. From there we can hit Copy, and they'll be on the clipboard.
Now it's time to edit the Templates file again.

This is the messiest part since there's no program-driven function to do this, only manual edits. But in simple terms, what you need to do is edit each value so that the total is the result of the sum of both templates.

In this example I copied and pasted the text into the templates file (Ignore and remove the original preset if it copied it again like in my screenshots - you only need the new specs)
So we start doing some additions. These need to be done by value, so for example, if the nullifier edits breasts to -0,6, and the preset sets them to 0.48, the value you must enter is ((-0,6) + (0.48)) which equals [-0.12]. So where it edits that slider it must say Breasts@-0.12
And so on for each slider.
Lastly, dont forget to observe the naming rules, like every new item you put, if it's not replacing an already listed slider, must be put after a comma, and a space, which means "and" in this file.
The final file should look something like this
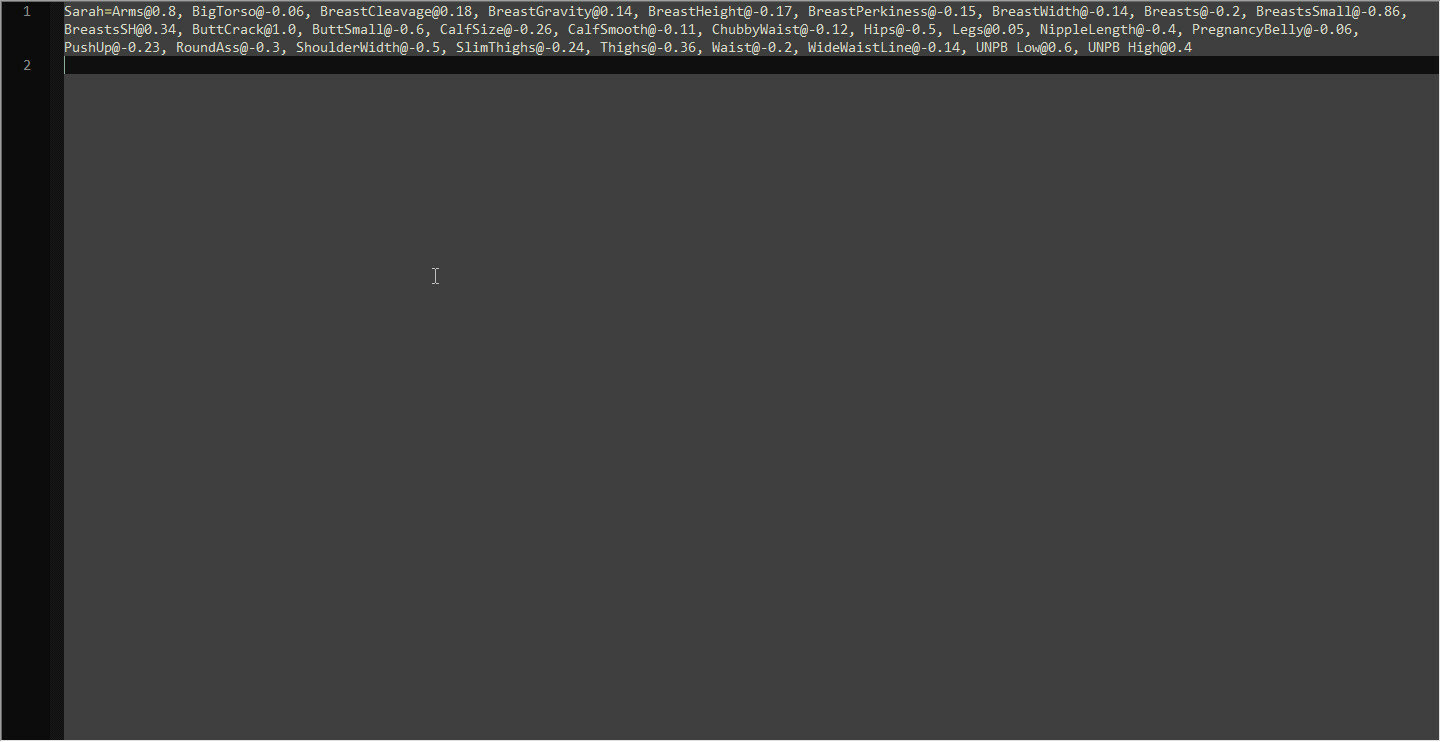
Please ignore the values being a little different here. The preset I used thare was a bit more complex than the one I was using when building this guide, but it's still the result of the same procedure, which is creating a nullifier file and applying a new preset on top of it.
I changed the name of the preset for the target NPC there as well, the preset's name needs to match in both Templates.ini and Morphs.ini
I also left an extra line after the end, because the file seems to need it to work, according to some of the documentation.
If everything went right, you should now be able to test this by launching the game and seeing that the target follower now can use any clothing in your game, and if you shaped it to be for your preset, Randomizer will ensure the follower looks as originally intended regardless of what you use for everybody else
I hope this guide was of use, I'll be making more use of it in my game, and hopefully it can work just as wall as it did for me, for someone else.
Possible FAQs
Q: For the love of God WHY is this so complicated!?!
A: Life ain't easy. I tried to simplify this as much as I could, but this cannot be published in the form of a mod, sadly, it has to be a procedure, so the only way to publish my findings is by making a tutorial.
Q: It doesnt work, this is bullshit!!!
A: It took me a few tries to get BodyGen Randomizer working for me, but after a while I can promise it works. You just need to be careful about the details, follow the steps to the letter, and be very mindful not to fuck up because any mistake can fuck up the entire process.
Q: This thing destroyed my game, now all NPCs are fucked!!
A: Really? Sorry but I did warn of a lof things and you probably skipped it since I left every instruction there, including the part where I mention this procedure is permanent on a save so before attempting it, one should first make sure if absolutely works, on a testing instance instead of your main game.
Thank you for reading, and I really hope it works.
Edited by Myst42
0 Comments
Recommended Comments
There are no comments to display.