Entry posted by DocClox in Tattoo Workshop
2544 views
If you followed the previous entry, you should now have a set of dds format overlays ready for looksmenu. Now I'm going to show you how to set them up so Looksmenu can show them on your character.
Software Needed: Material Editor
Setting It Up
The first thing you're going to need is a plugin. Every set of tattoos in Looksmenu has its own folder based on the plugin file with which it is associated. So let's have a new one. The easiest thing to do here is copy one of the minimal .esl files that Raider Reform School uses to install optional plugins. So take raider_reform_school_names.esl and copy that to whatever_you_like.esl.
For the sake of the tutorial, I'm going to call mine raider_reform_school_machine_tattoos.esl.
Next, you need a very specific folder structure. The easiest way to explain this is to use the filetree display from MO2
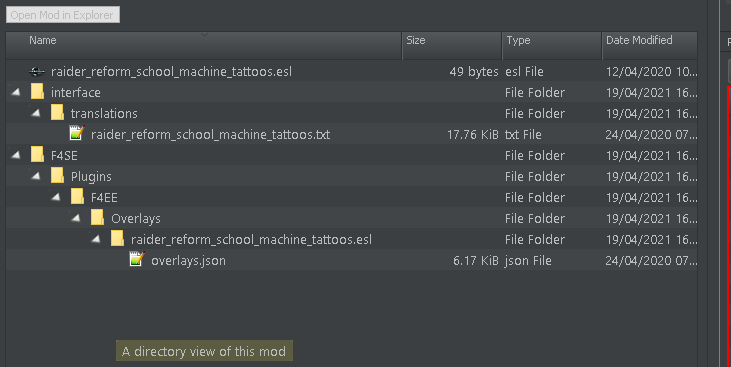
Start off creating a folder to be the root of your mod. It doesn't matter what it's called at this point, but it's probably sensible to name it for the plugin, so I called my root mod raider_reform_school_machine_tattoos. This folder is going to be the one that you zip up to create your mod, so name it with that in mind.
One you have your root folder, copy in the copied and renamed .esl plugin. Then you need to create some subfolders, as above. So you want one called "interface" with a subfolder called "translations", and another one that goes F4SE->Plugins->F4EE->Overlays->name_of_your_plugin.esl. Note that the ".esl" here is part of the folder name.
In the translations folder, you create an empty text file with the same name as your plugin file, but with .txt as the extension instead. And at the bottom of the F4SE fodler chain, create a file called "overlays.json".
Textures and Materials
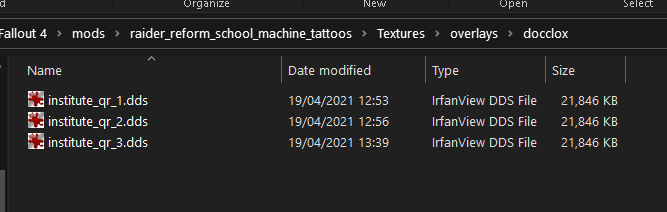
For Looksmenu to apply you spanking new overlay textures, it needs to be able to find them. So we'll start by putting the textures where the game engine can see them. Under the mod root, create folders "Textures"->"Overlays"->YourName. For yourname, you can use your LL login or the plugin name or anything else you like, really. Just try and pick something that's unlikely to overwrite anyone elses overlay textures.
With that done, copy your dds files from last tutorial into the new folder.
Now we need material files to tell the game just how to display that texture. Create a folder for them under the mod root. Materials->Overlays->Yourname; same structure as for textures.
The easiest way to do this is to alter one that already works, so I've attached the material file for the raider QR code from which is the default tat in last session's blend files. Download the .bgem file, and open it with the Material Editor. Then select the Effect tab and change the name so it points at institute_qr_1.dds or whatever you called the first overlay.
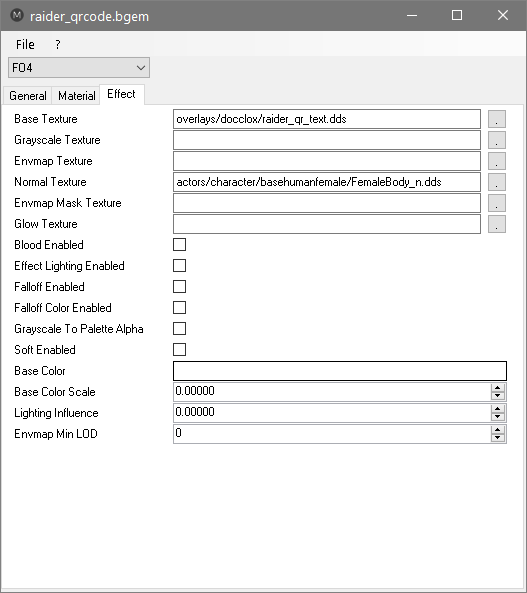
Now save it into the Materaisl\Overlays\YourName folder and change the name to institute_qr_1.dds.
Repeat the process to create material files for the other two dds files.
Writing Overlays.json
Again, the easiest way is to copy a working file. So, basically, copy this.
[
  {
    "id" : "institute_qr_1",
    "name": "$RRS Institute QR Code Stage 1",
    "slots" : [
      {
        "slot" : 3,
        "material" : "overlays\\docclox\\institute_qr_1.BGEM"
      }
    ],
    "playable" : true,
    "transformable" : false,
    "sort": 0,
    "gender": 1
  },
  {
    "id" : "institute_qr_2",
    "name": "$RRS Institute QR Code Stage 2",
    "slots" : [
      {
        "slot" : 3,
        "material" : "overlays\\docclox\\institute_qr_2.BGEM"
      }
    ],
    "playable" : true,
    "transformable" : false,
    "sort": 1,
    "gender": 1
  },
  {
    "id" : "institute_qr_3",
    "name": "$RRS Institute QR Code Stage 3",
    "slots" : [
      {
        "slot" : 3,
        "material" : "overlays\\docclox\\institute_qr_3.BGEM"
      }
    ],
    "playable" : true,
    "transformable" : false,
    "sort": 2,
    "gender": 1
  }
]
The "id" field has to be unique in the mod, the "name" field is what shows up in the Looksmenu UI, subject to traslation which we;ll get to in a moment. Slot 3 tells Looksmenu that this is going to apply to the body and the material path should point at the material file for the first overlay, with everything from the "overlays" folder on down, included.
"Playable" means that it'll show up in the Looksmenu UI, transformable means you can drag it around in the UI. That doesn't work with anything that crosses seams in the textures (such as our ass tats) so I've set it to false. "sort" lets you order the files as they appear in the Looksment UI if you care about that, and "gender : 1" says this overlay is for a female body, which is important.
If you have more tats, you can add more entries following the same format. Comma separate the blocks, but no trailing comma on the last entry. JSON is notoriously picky about punctuation and your mod will silently fail if there's an error. I recomment pasting the text into one of the many only JSON checkers and making sure there are no problems.
OK. One last hurdle and we're ready to test this.
Translation.
This is easy. If it's not there already, create a file in Interface\Translations called "en_raider_reform_school_machine_tattoos.txt" So that's "en_"fo r "English", then the plugin name without the .esl extension, and then a .txt extension instead. Open the file in a text editor and, for each entry in overlays.json, add a a line that has the $prefixed name from the overlays.json entry, complete with dollar, then a tab character, and then the text you'd like to appear to someone if they have their language set to English. In my case, that's going to look like this:
$RRS Institute QR Code Stage 1	RRS Institute QR Code Stage 1
$RRS Institute QR Code Stage 2	RRS Institute QR Code Stage 2
$RRS Institute QR Code Stage 3	RRS Institute QR Code Stage 3
Test it out
We're done! Zip up the mod folder and install it using your preferred mod manager.
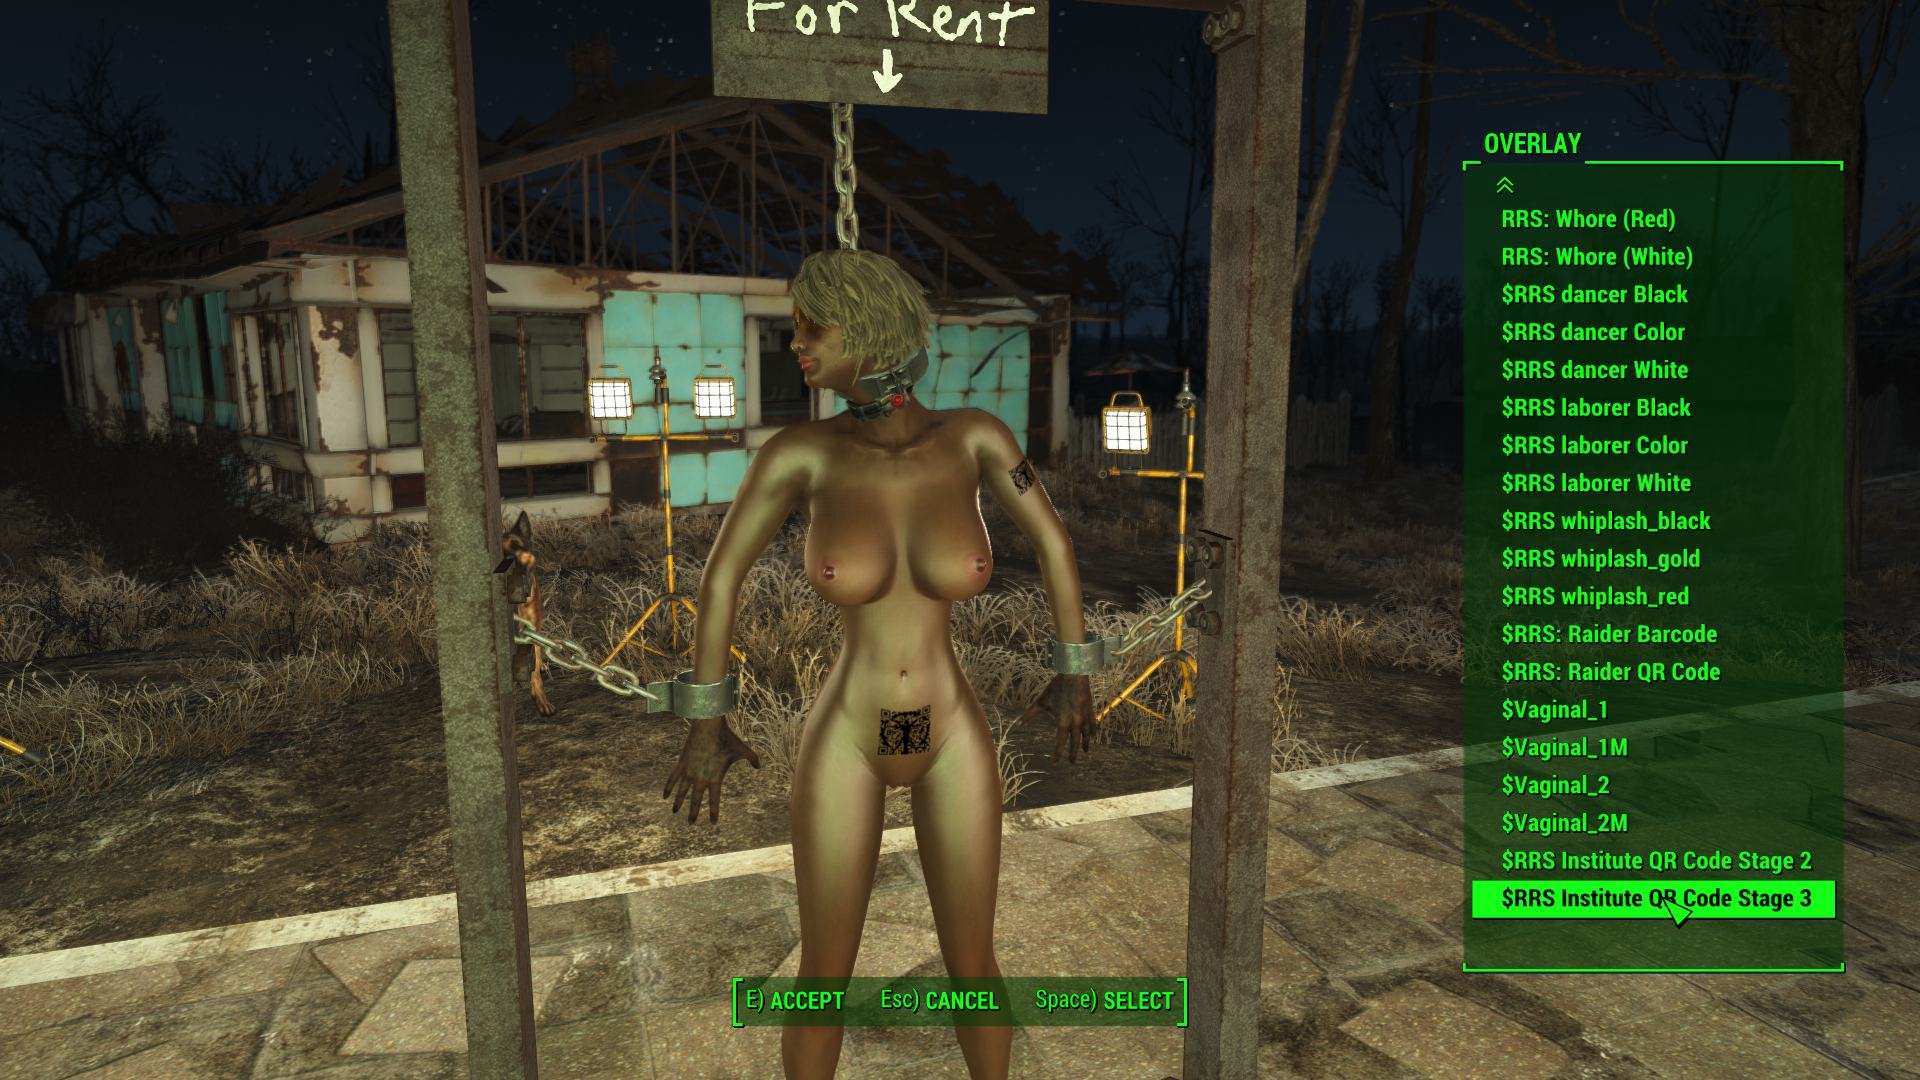
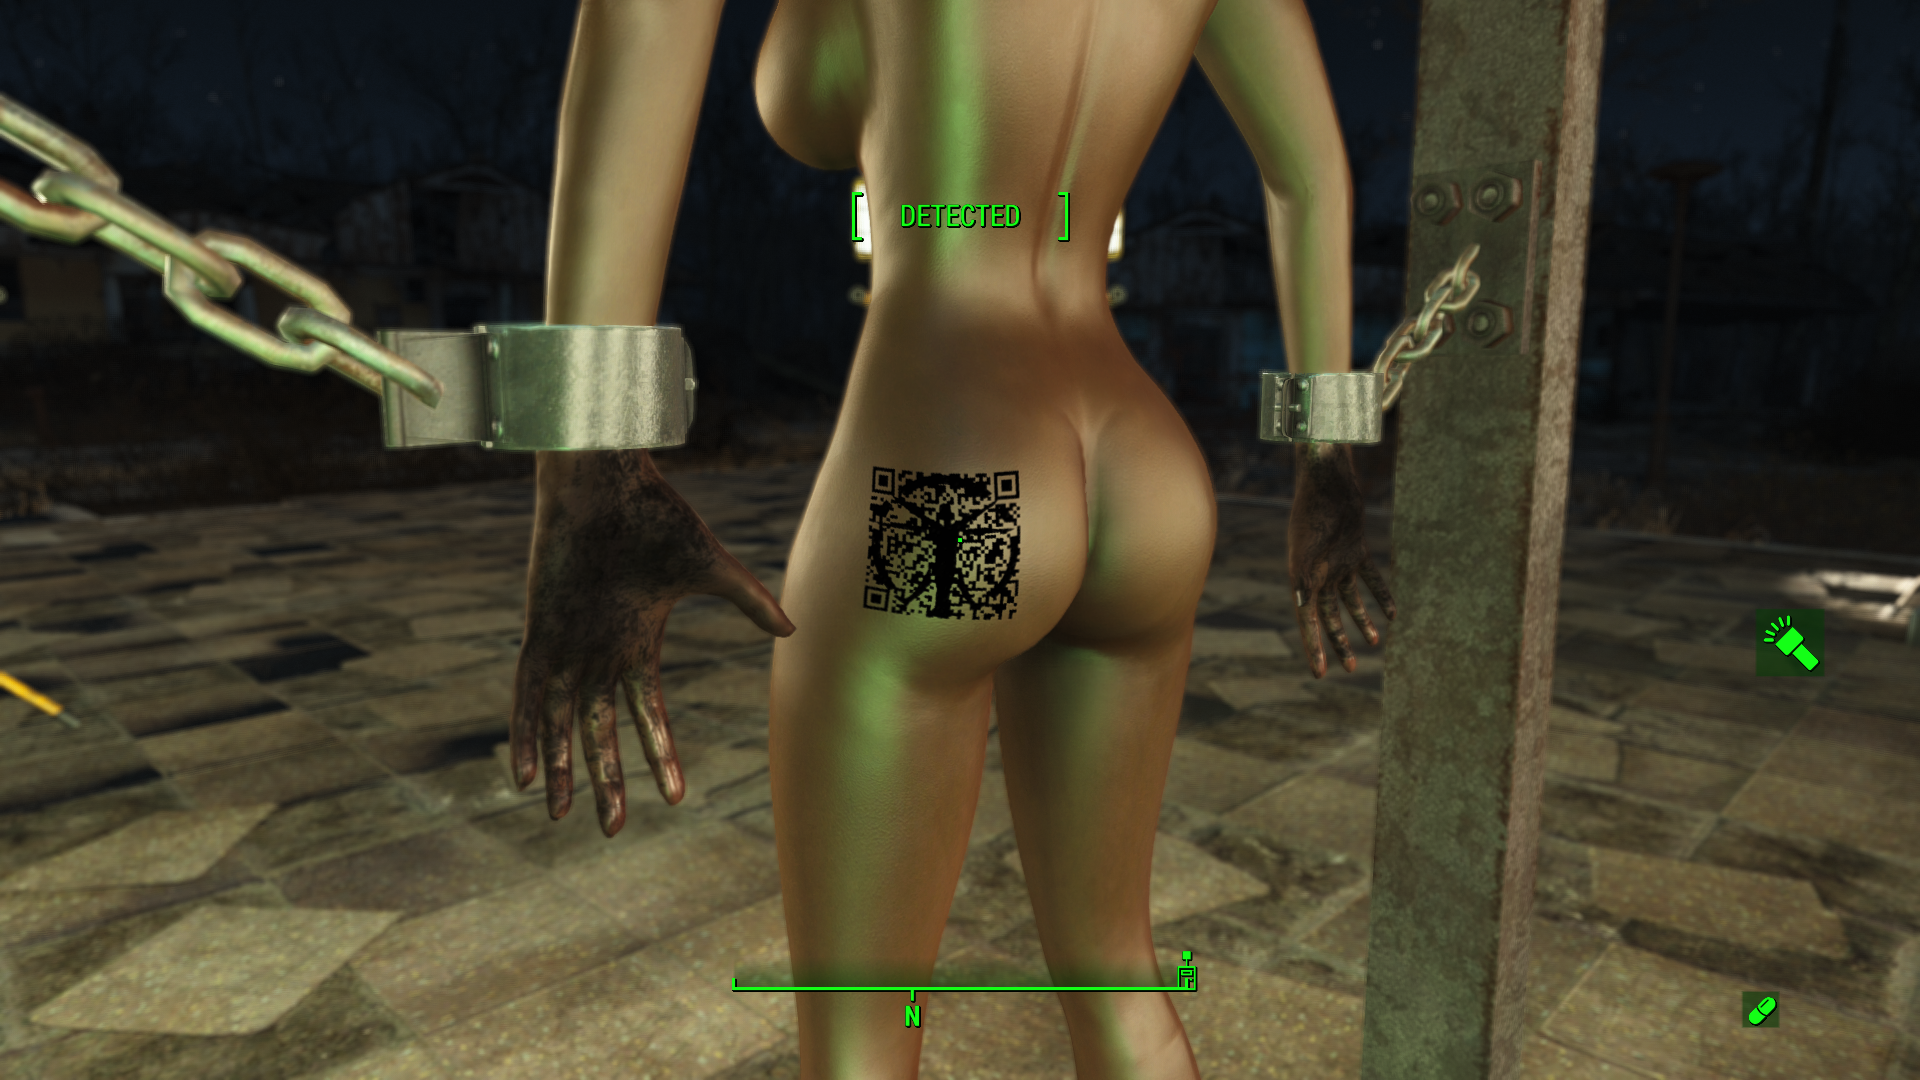
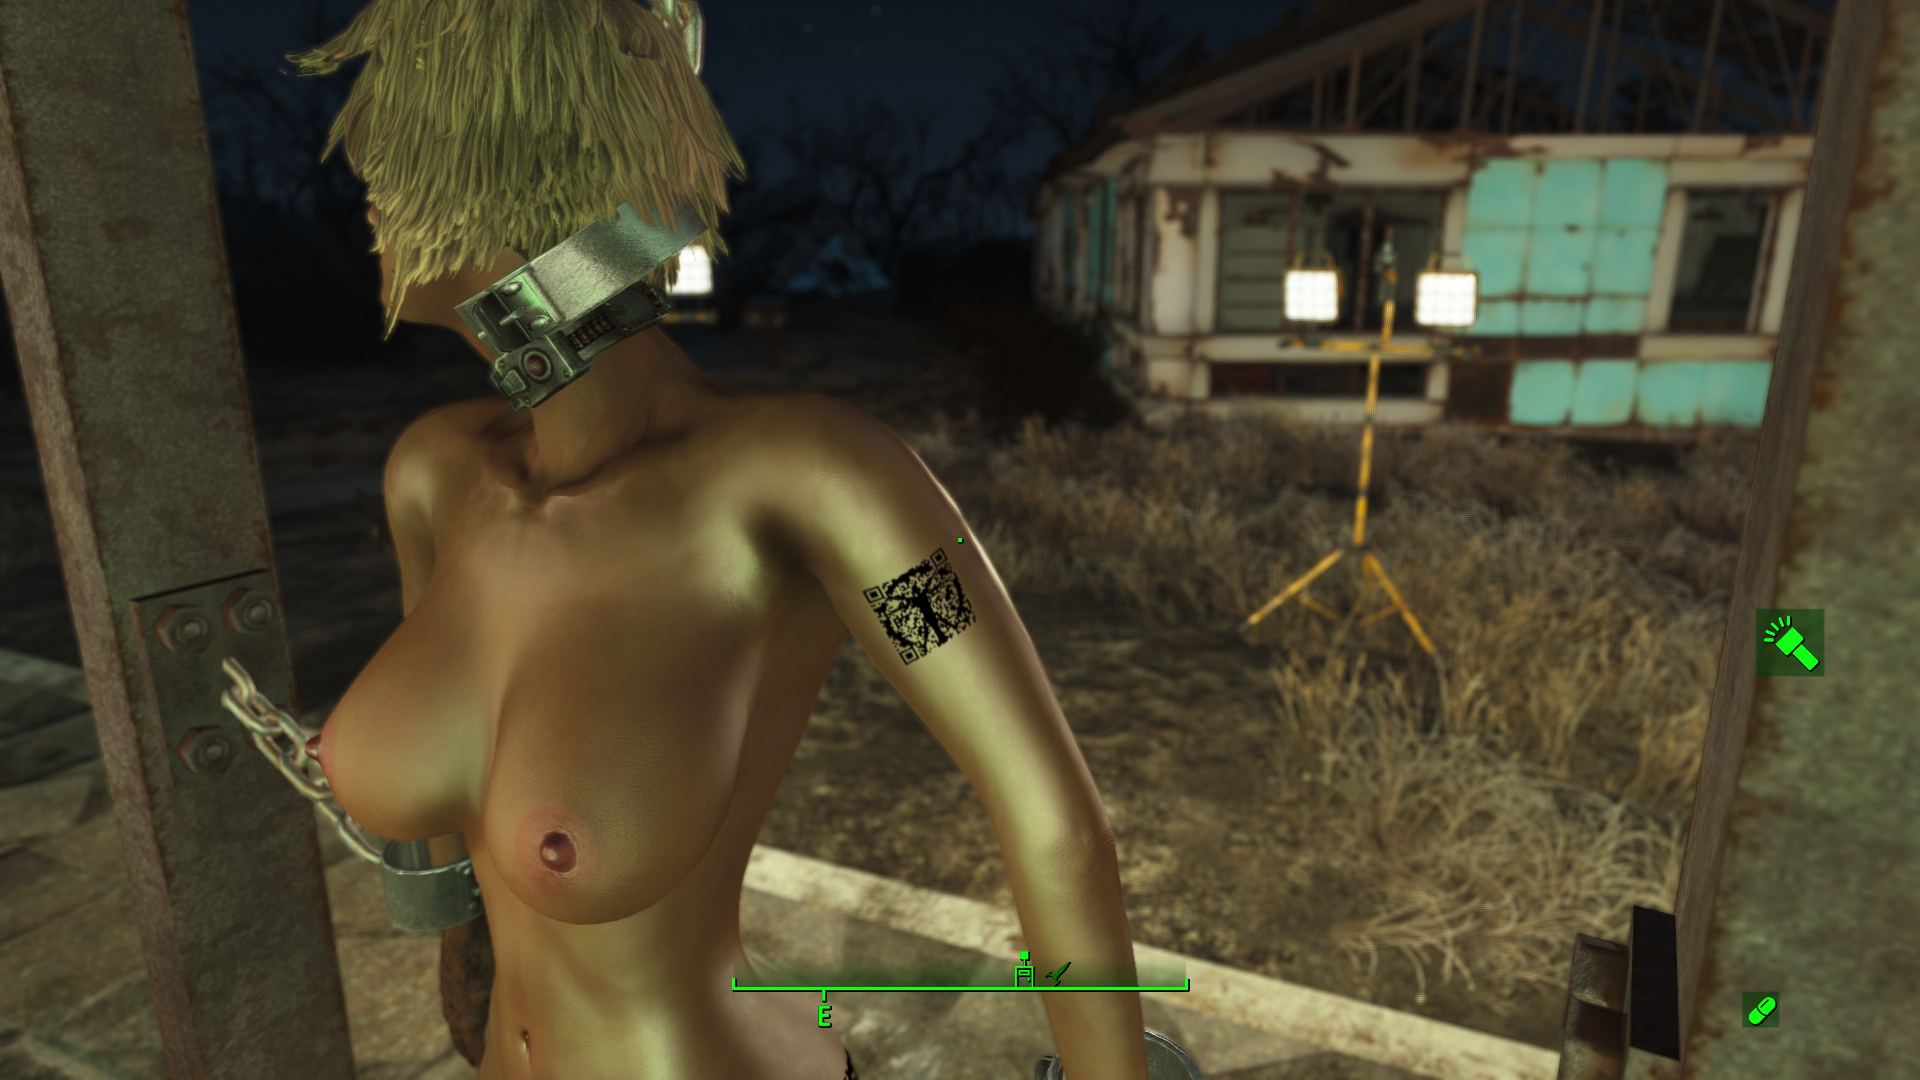
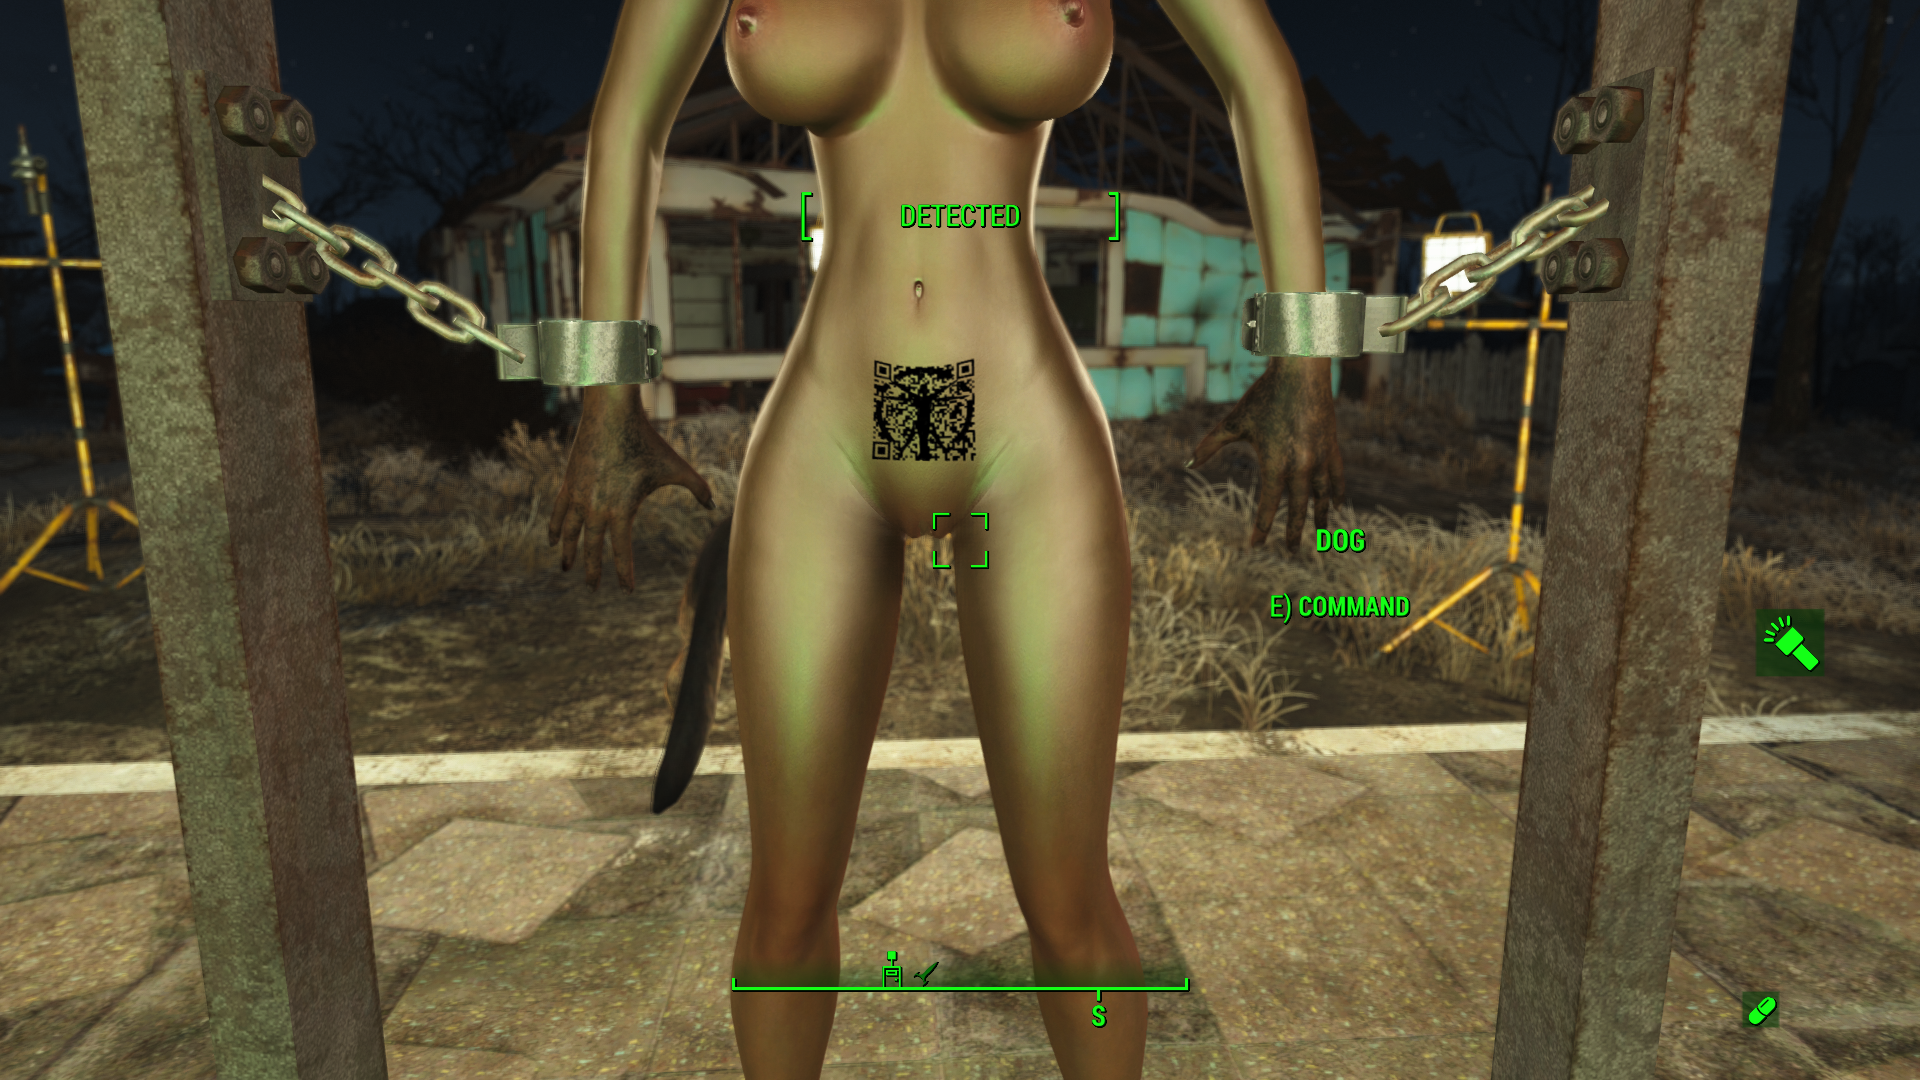
Seems to work ")
I still need to talk about facial tats, which work a little differently. Next time for that.
2 Comments
Recommended Comments