Entry posted by DocClox in Tattoo Workshop
2380 views
I want to walk through the process of making tattoo sets for the Tattoo Frame I'm making for the Raider Reform School. Specifically, I'm going to create a tattoo set based on this:

That's a scannable QR code, watermarked with the Institute logo, and identifying the wearer as a designated Institute Synth, and encoding a brief statement regarding the Institute's policy towards synths in general. I'm going to make a tattoo overlay branding this on someone's left ass cheek, right arm, pubic mound and left facial cheek. We're going to make transparent overlays for each, and then combine some of them so the final tattoo only uses one overlay slot.
Software Needed: Blender, Paint.net and/or Gimp. If you want to make your own tats, I like to use Inkscape, but that's outside of this tutorial.
Step One: Download the Blend files.
I've attached a zip with a set of blender save files. There are versions for CBBE and Fusion Girl, and another for face tats which should be the same for both. Download that and save the unpacked folder somewhere sensible. This is going to be your workspace. While you're at it, right click the Institute QR above and save it to the same folder.
The reason for having several files for the same body shape is that, with the position of the body and the size of the tattoo baked into the save, you can just change the brush image and get consistent size and placement for a series of tattoos. Of course, if that's not something that interests you, just rotate the body at will and scribble where you see fit. For current purposes though, I'm assuming we're making tattoos for pre-programmed locations for an automated tattoo machine, so these blend files are going to keep things consistent between one tat and the next.
Step Two: In the unpacked folder, go to the sub-folder for your preferred body type and double-click on "ass_l.blend". With a bit of luck, you'll see something like this:
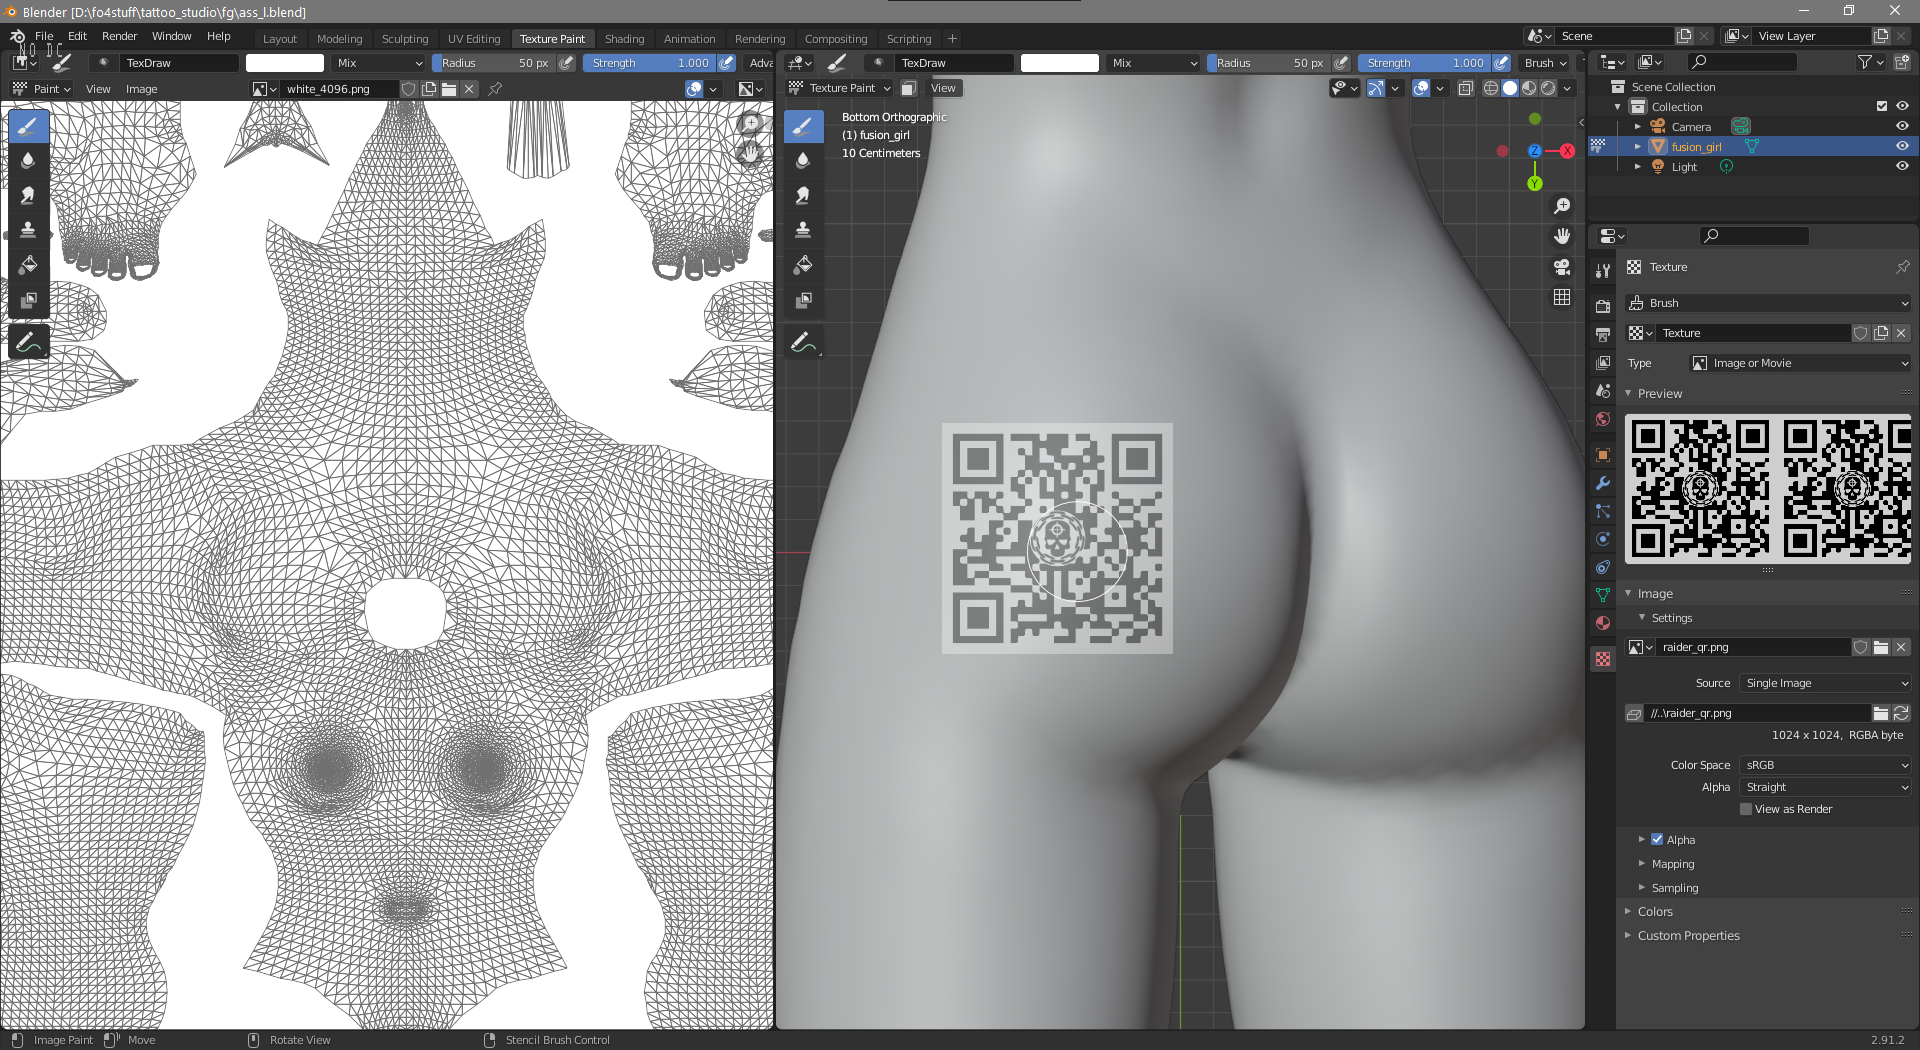
That's blender open in Texture paint mode. A blank, while 4k by 4k skin texture is loaded, as is a Raider QR Code as a brush. Notice that if you move your mouse pointer so it hovers over the left side pane the QR Code design will move to that side, ready to paint directly on to the skin texture. In general, we don't want that, so move the mouse back on the right hand pane.
If your monitor is the same size and aspect as mine, you should get the tattoo appearing in the same place and size. If not, you may need to move and resize the image.
- To Move the tattoo: Right click and drag
- To Scale the tattoo: Shift-Right click and drag.
- To Rotate the tattoo: Control-right click and drag
Move and scale the image until it looks more or less the same as the screenshot above, and then - and this is important -- save the blender file. Normally we won't want to alter the .blend files at all, but this first time we want to get the size and location right, and then save that for subsequent tattoos. If you've already got the image where you want it, you can skip this part.
Be aware that if you resize your Blender window, the brush placement will change again. I recommend working with the Blender window maximized at all times, at least for tattoo purposes.
Step Three: Load your chosen tattoo image.
Click on the folder icon under Image->settings in the side panel. Then select the design you want to paint.
Important Note about tattoo images. They have to be square and, for current purposes, they have to be black and white. If they're not square, Blender will try and project them as if they were, and you'll get distortion. If they're not B&W ... well you can use single color tats, probably with a little tweaking of the materials definition in the next tut, but I never did get full color images to work right.
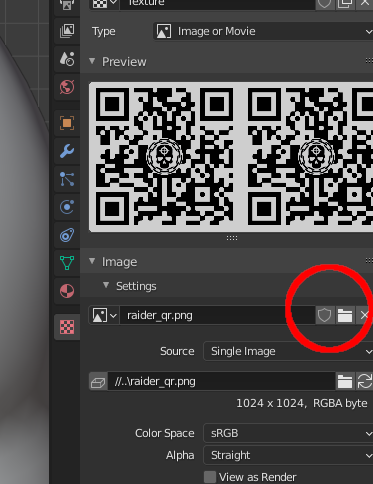
The image projected onto the 3D model will change, as will the one in the preview panel on the sidebar
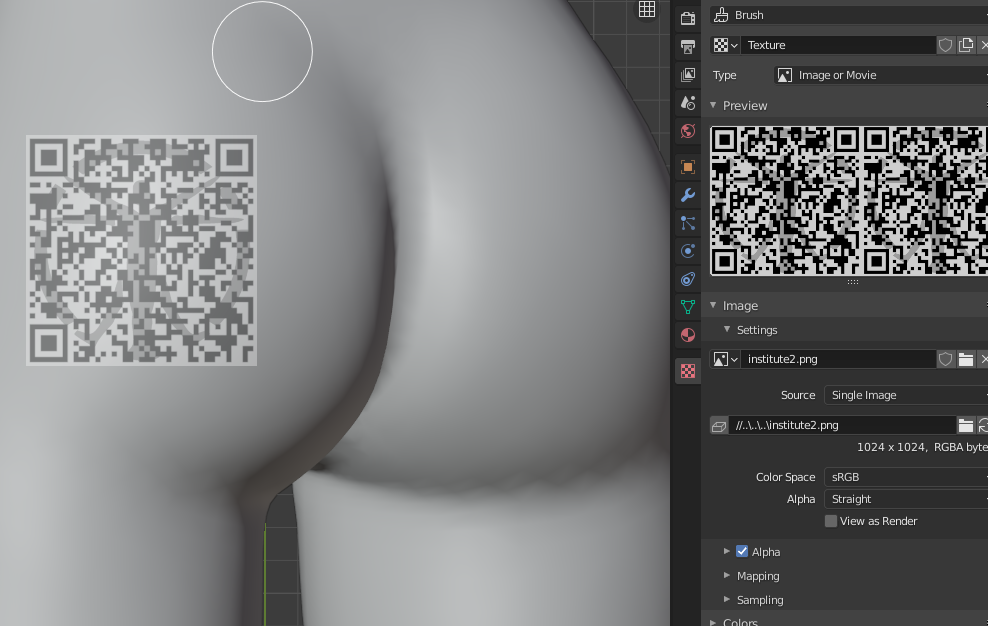
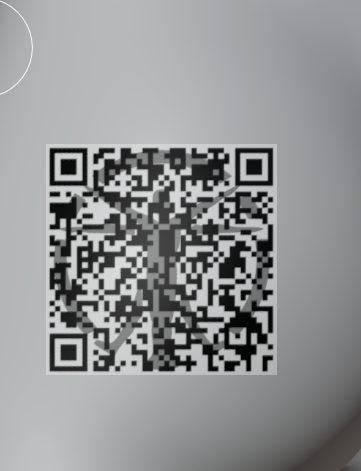
Step Four: Paint the tattoo
This is really easy. Just left click and drag the cursor over the tattoo design, and it will be painted on to the white texture underneath. It's easy to bits, and if you do that you'll end up re-doing the whole thing, so go over it carefully, occasionally flicking the cursor into the left hand pane so you can see how the deisgn looks without the brush overlaying it.
One you're happy with the painted, you can rotate the model and check it out from other angles. Middle click to rotate the view, mousewheel to scroll in and out. If you decide you made a mistake, revert the file and start over. Don't try and get back to your original position; chances are you won't get the position and zoom levels exactly the same, and over-painting will give you a blurry, confused mess.
Step Five: save the pained skin texture to a new name.
Go to the image menu down on the left hand pane and choose "save as", and save the tattooed texture somewhere you can find it again. I suggesting saving as "institute_qr_ass_l.png" to the BW (for Black and White) sub-folder under your chosen body shape.
Now quit blender without saving. If there are changes to the body position or base skin texture, we don't want to preserve them.
Step Six: Repeat the r_arm blend and then for the mons. The first time you open each of them, you may have to adjust the size and position of the brush. So do that, save the blend file, and then paint your tattoo as above. Save copies of the textures using a similar naming scheme.
Step Seven: Turn the white in the layers to Alpha.
Close Blender, and then open the BW images in Paint.Net. Choose the "magic wand" tool and, for each image in turn, shift-click on the image in the white area, and then hit the delete key. That will give each of the three tattoos in black on a transparent back ground. Save each in turn the the "Alpha" folder for your current body type.
Incidentally, if this fuss about naming conventions and folders seems excessive ... well I won't argue with you. But when you have a dozen or more tattoos with intermediary files dropped at random all over the place, it gets confusing quickly. This way you'll always know what's what, and where to find it.
Anyway...
Step Eight: Build Composites
Normally, for a tattoo like this one, I'd pate all three images on top of one another and save the result and my final tattoo. And We're going to do that. But there are a couple of extra steps here. I;m assuming we're making tats for the tattoo machine, and the machine only tattoos one place at a time. So if we apply the tats when the first are is tattooed, they magically appear on the other sites before the tattoo head gets there. Conversely, if wait until they're all done, the machine appears to be doing nothing.
So, we're going to make partial tattoos for the early stages. The order of the program is going to be Ass, Arm, and then flip the ring over for the Mons, so we'll make one overlay with just the ass tat, then a second one with ass and arm, then a third with all three. The facial tats need a separate process and that's going to have to be a separate post, I think.
But I digress! Open the transparent ass image in Paint.net and save it filename "institute_qr_1" and type DDS in the DDS folder. (I'm just going to suffix these "_1", "_2" and "_3" because "_ass_arm_mons" could get really long if there's a lot of locations in a set). Choose BC7 (Linear DX 11+) as the compression type and make sure "Generate Mip Maps" is ticked.
Now open the transparent arm image. Select everything with control-a, copy it, then go to the ass image and choose Edit->Paste Into new layer. Save the result as institute_qr_2.dds with the same settings as above. It will ask if you want to flatten the visible layers; say "yes".
Now Do the same thing with the mons tattoo. Paste that to a new layer over the ass-arm composite and save that as institute_qr_3.dds.
We now have the three tattoo overlay images. Next step is to get them into looksmenu, which I'll talk about next time.
[edit]
Whoops, forgot to attach the blend files!
1 Comment
Recommended Comments