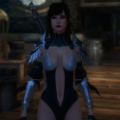
agiz19 Posted April 18, 2020 Posted April 18, 2020 Hi. Seranaholic is my test subject here and if works here than any npc can be modified to have HighPoly Head and not just the player. the head i use https://vectorplexus.com/files/file/283-high-poly-head/ I managed to convert Serana's face to highpoly version from a racemenu export of her lowpoly face, then the head works perfectly as a racemenu preset(pic 01) but not as a follower , when I replace her nif with this highpoly one ingame the head is updated and after a couple of seconds this happens(pic 02) , her face is normal if she is quite far from my character and as soon as she comes close enough the same thing happens, same with console enable/disable or changing cells. Then in CK I also set up .tris and .nifs from HighPolyHead to her new HighPoly nif since she uses vanilla tris and nifs and after this the weirdness is gone but here face became vanilla/dark/generic thing so I think I missed something somewhere in the proccess but have no idea.
agiz19 Posted April 19, 2020 Author Posted April 19, 2020 here is the modified nif, texture paths are the same as in original Seranaholic facegenom nif00002B6C.NIF If i just copy the new nif and replace the old one i get what is shown in pic02 in the post above after couple of seconds. When I import it into CK , face is not shown, if I define headpart SeranaHeadHP with highpolyhead i get vanilla appearance ingame if i define the new highpolyhead only teeth and hair remain in renderview of CK and ingame the same. If I open the original head in CK the same outcome occurs, her face is not shown in render view , just hair & teeth and the same happens if i define parts with vanilla ones since she uses vanilla assets. For this procedure CK is not needed according to few tutorials since everything is defined in the original nif and with nif merge only face part is modified to have higher polycount and smoother edges and nothing else. As I stated when I import head in Racemenu for player charater everything is fine. The only problem is that face wont work ingame on Serana, hair , teeth, eyes are fine and remain the same as original.
agiz19 Posted April 19, 2020 Author Posted April 19, 2020 Well after some thinking I decided to let go of CK and fixed it with SSEDIT. Yay. Its nice to finally have NPCs with high poly heads in 2020.
roxac Posted April 26, 2020 Posted April 26, 2020 How did you fixed with SSEdit? I've tried using CK but it didn't worked. Then I loaded my nif on SSEdit and manually changed the paths of the head parts but it didn't worked either. The mesh was glitching and stretching like your second pic.
agiz19 Posted April 26, 2020 Author Posted April 26, 2020 2 minutes ago, Takggyak said: How did you fixed with SSEdit? I've tried using CK but it didn't worked. Then I loaded my nif on SSEdit and manually changed the paths of the head parts but it didn't worked either. The mesh was glitching and stretching like your second pic. you load both mods esps the head and the folllower then you have to change paths of .nif files and .tri files in the headparts section , you can copy/paste path from head into follower then save and replace follower mod esp with this one SSEdit just created and thats it.
roxac Posted April 27, 2020 Posted April 27, 2020 On 4/26/2020 at 3:25 AM, agiz19 said: you load both mods esps the head and the folllower then you have to change paths of .nif files and .tri files in the headparts section , you can copy/paste path from head into follower then save and replace follower mod esp with this one SSEdit just created and thats it. Thanks for the answer. Unfortunatelly it didn't worked for me. Regardless of changing the paths on the ESP, the face mesh kept warping and stretching like crazy (I believe this has something to do in how I created the follower, maybe some misconfiguration or problems with my preset that I used as a base for her face). But I managed to fix it with CK by changing my followers head in the Char Gen Parts to the VectorPlexus head and merging CK's generated high poly head with the high poly head that I exported from RaceMenu.
agiz19 Posted April 28, 2020 Author Posted April 28, 2020 glad it worked in CK for you i had only problems there but nice you got it working enjoy the high poly face
afshin76 Posted August 14, 2020 Posted August 14, 2020 Is there any tutorial on how to convert modded npc like bijin to high poly?
agiz19 Posted August 15, 2020 Author Posted August 15, 2020 15 hours ago, afshin76 said: Is there any tutorial on how to convert modded npc like bijin to high poly? well you will have to do it one by one , sent u message .
Vortec Posted August 19, 2020 Posted August 19, 2020 On 8/15/2020 at 6:19 AM, agiz19 said: well you will have to do it one by one , sent u message . Could you post what you did as I want to replace Yuriawench heads because they keep causing CTD's.
voiddude Posted October 9, 2020 Posted October 9, 2020 Sorry for bad English, can you give me guide on how to do it? I tried both CK and SSEEdit but nothing works for me
saintdie Posted November 16, 2020 Posted November 16, 2020 I would like to echo the request for a guide if you have time. First just for converting low poly faces to high poly and second for sticking them on NPCs. Thank you.
FlufyFox Posted December 30, 2020 Posted December 30, 2020 Hey hi, i just got back into the skyrim stuff and how we change the vanilla head to HP without losing our preset? Just for us the player, remaking all the faces is pretty you know.. i know this could be nearly noob question xD if you have an tutorial can you help me please ? :3 thanks oh i use the Skyrim LE
roxac Posted January 9, 2021 Posted January 9, 2021 On 12/30/2020 at 2:29 PM, FlufyFox said: Hey hi, i just got back into the skyrim stuff and how we change the vanilla head to HP without losing our preset? Just for us the player, remaking all the faces is pretty you know.. i know this could be nearly noob question xD if you have an tutorial can you help me please ? :3 thanks oh i use the Skyrim LE For anyone that is interested here are the boring steps to keep your preset as is but upgrading to a higher poly count head. Since I only use SE, I can't provide LE files but you can find them on the internet just fine. I also rarely play as a male character, so I never tried this for them thus I'm only providing the vanilla female head, but I believe it works the same way. The basic steps are (with some pics to help; I use Racemenu, I have no idea if this works with ECE, never used it, it is tiresome to do this but worth if you don't wanna lose your precious preset): - Install the High Poly head (I use Vector Plexus, but I believe it works with any high poly head). - On Racemenu, go to the Sculpt tab with the character that you want to keep the preset configs (using the vanilla head) and export the head. Spoiler - Download NifMerge, Outfit Studio and Nif Optimizer (this last one only if you use SSE). You'll also need to download (or get it from your game) the base vanilla head nif (femalehead.nif or malehead.nif if you play as a male character). - Go to the high poly head folder and get the femalehead.nif (or malehead) from there. If you're using Vector Plexus, the path is (High Poly Head SE\meshes\KL\High Poly Head\femalehead.nif). - Open Outfit Studio and load your preset that you exported earlier from Racemenu. With the preset loaded, find the head of your character, the head will have the name of the race. Something like "FemaleBretonHead" for a Breton character or "FemaleNordHead" for a Nord character (for vanilla heads). - Click with the right mouse button on the head and choose "Export > To OBJ" and save somewhere in your computer. Ctrl + W to delete everything and clean the workspace. Spoiler - Now you going to load both the vanilla female head as well as the high poly head that you saved from before on Outfit Studio (there is no right order to load them). - You'll then (using the right button) select the vanilla head and choose the option "Set Reference". After that, on the top menu click on "Slider > New Slider", then click on the pencil icon on the new slider created under "Masks". Go back to the Slider menu and find "Import Slider Data > Import OBJ..." then select the obj file that you saved earlier, when prompted with a window just click "Ok" without messing with any configuration. Spoiler - Go back to the Slider menu, now with the high poly head selected and choose "Conform All" option (just click Ok when the confirmation window appears). The slider that you created will automatically go back to 0%. Just move it back to 100% and you'll see that the high poly head now has the same shape of your preset. After that, choose on the same menu "Set Base Shape" (remember to check if the slider is at 100%). The slider you'll go back to 0% and the shape of the head will now be your preset per default. Click again on the pencil icon to make the slider editable and press delete on your keyboard to remove the slider. Spoiler - Click on the vanilla head and delete it. Go to "File > Export > To NIF" and put somewhere on your PC. YOU CAN IGNORE THIS STEP IF YOU'RE USING LE - Now, open Nif Optimizer, put both your original nif that you exported from Racemenu and the newly created high poly head from Outfit Studio on the same folder. Choose the path for this folder on your Nif Optimizer, tick the options "Head Parts Only" and "LE". NifMerge doesn't work with nifs generated by Skyrim SE, so we'll need to convert them back to LE-nif. After that hit Optimize. Spoiler - Open NifMerge and on the left side load the high poly nif (that has only the head) and on the right side load your Racemenu-generated head. Choose the options like in the pic below ticking only the head to be merged and hit "Merge to Target", NifMerge will complain that the vertex count is different, just press Ok, that is normal. Spoiler YOU CAN IGNORE THIS STEP IF YOU'RE USING LE - With Nif Optimizer, tick SSE instead of LE and Optimize back to SSE the newly merged head. - Will then copy and paste the merged head (with all the meshes, eyes, hair and etc) on your chargen folder. - Open the game, "showracemenu". Before importing the head, you'll need to go on the "Head" tab and find the slider "Face Part", there, you'll search for the high poly head from the presets and select it. Don't worry, your face will be messed up, but you'll fix this next. Spoiler - Go to Sculpt. This is a very important part, on the sculpting window, you'll need to add a mask to the neck of your mesh head. The reason this is important is because if you just import the high poly facegen, you'll almost certainly mess with the position of the neck in relation to the body, this will create a gap and the meshes will be disconnected. So, click on "Add Mask" and use the brush to select the lower part of the neck on the sculpting window of your head. After this has been done, click on "Import Head" and select the head that you merged earlier and it's done. Spoiler You can save you new preset on the preset tab just fine, and next time if you need to reuse the preset (as in creating a new game) the preset will be already set with the high poly head and no additional steps will be needed. Some things that I need to point out: - The pics I used are not in sync with the process, sorry for that but I've converted my old presets a year ago or so, so basically I don't have any low poly head around anymore, not that I'm aware that is. - If you decide to make any modification to your preset with the high poly head, you'll need to do again the step of exporting the head (after the edits) and importing it back. If you don't do that, all of your modifications will be lost but the sliders that you changed will not be reset to their original state. Just saving the preset again (without exporting/importing the edited head) doesn't work. This is not something that you would need if you created the preset with the high poly from scratch, but since your made the conversion, this step is necessary. - Don't know if this work on ECE. - High poly heads do not work with mods like "Expressive Facegen Morphs", so you'll need to choose one or another. If you like the additional sliders like myself, when creating a new preset, you can use it for shaping the base head and then do all the steps to convert it to a high poly head. Be aware that after converted, you'll lose the option to use the additional sliders. Hope this help anyone that want to use a high poly head but don't want to lose their presets. femalehead.rar
FlufyFox Posted January 17, 2021 Posted January 17, 2021 On 1/8/2021 at 10:33 PM, roxac said: For anyone that is interested here are the boring steps to keep your preset as is but upgrading to a higher poly count head. Since I only use SE, I can't provide LE files but you can find them on the internet just fine. I also rarely play as a male character, so I never tried this for them thus I'm only providing the vanilla female head, but I believe it works the same way. The basic steps are (with some pics to help; I use Racemenu, I have no idea if this works with ECE, never used it, it is tiresome to do this but worth if you don't wanna lose your precious preset): - Install the High Poly head (I use Vector Plexus, but I believe it works with any high poly head). - On Racemenu, go to the Sculpt tab with the character that you want to keep the preset configs (using the vanilla head) and export the head. Hide contents - Download NifMerge, Outfit Studio and Nif Optimizer (this last one only if you use SSE). You'll also need to download (or get it from your game) the base vanilla head nif (femalehead.nif or malehead.nif if you play as a male character). - Go to the high poly head folder and get the femalehead.nif (or malehead) from there. If you're using Vector Plexus, the path is (High Poly Head SE\meshes\KL\High Poly Head\femalehead.nif). - Open Outfit Studio and load your preset that you exported earlier from Racemenu. With the preset loaded, find the head of your character, the head will have the name of the race. Something like "FemaleBretonHead" for a Breton character or "FemaleNordHead" for a Nord character (for vanilla heads). - Click with the right mouse button on the head and choose "Export > To OBJ" and save somewhere in your computer. Ctrl + W to delete everything and clean the workspace. Hide contents - Now you going to load both the vanilla female head as well as the high poly head that you saved from before on Outfit Studio (there is no right order to load them). - You'll then (using the right button) select the vanilla head and choose the option "Set Reference". After that, on the top menu click on "Slider > New Slider", then click on the pencil icon on the new slider created under "Masks". Go back to the Slider menu and find "Import Slider Data > Import OBJ..." then select the obj file that you saved earlier, when prompted with a window just click "Ok" without messing with any configuration. Hide contents - Go back to the Slider menu, now with the high poly head selected and choose "Conform All" option (just click Ok when the confirmation window appears). The slider that you created will automatically go back to 0%. Just move it back to 100% and you'll see that the high poly head now has the same shape of your preset. After that, choose on the same menu "Set Base Shape" (remember to check if the slider is at 100%). The slider you'll go back to 0% and the shape of the head will now be your preset per default. Click again on the pencil icon to make the slider editable and press delete on your keyboard to remove the slider. Hide contents - Click on the vanilla head and delete it. Go to "File > Export > To NIF" and put somewhere on your PC. YOU CAN IGNORE THIS STEP IF YOU'RE USING LE - Now, open Nif Optimizer, put both your original nif that you exported from Racemenu and the newly created high poly head from Outfit Studio on the same folder. Choose the path for this folder on your Nif Optimizer, tick the options "Head Parts Only" and "LE". NifMerge doesn't work with nifs generated by Skyrim SE, so we'll need to convert them back to LE-nif. After that hit Optimize. Reveal hidden contents - Open NifMerge and on the left side load the high poly nif (that has only the head) and on the right side load your Racemenu-generated head. Choose the options like in the pic below ticking only the head to be merged and hit "Merge to Target", NifMerge will complain that the vertex count is different, just press Ok, that is normal. Reveal hidden contents YOU CAN IGNORE THIS STEP IF YOU'RE USING LE - With Nif Optimizer, tick SSE instead of LE and Optimize back to SSE the newly merged head. - Will then copy and paste the merged head (with all the meshes, eyes, hair and etc) on your chargen folder. - Open the game, "showracemenu". Before importing the head, you'll need to go on the "Head" tab and find the slider "Face Part", there, you'll search for the high poly head from the presets and select it. Don't worry, your face will be messed up, but you'll fix this next. Reveal hidden contents - Go to Sculpt. This is a very important part, on the sculpting window, you'll need to add a mask to the neck of your mesh head. The reason this is important is because if you just import the high poly facegen, you'll almost certainly mess with the position of the neck in relation to the body, this will create a gap and the meshes will be disconnected. So, click on "Add Mask" and use the brush to select the lower part of the neck on the sculpting window of your head. After this has been done, click on "Import Head" and select the head that you merged earlier and it's done. Hide contents You can save you new preset on the preset tab just fine, and next time if you need to reuse the preset (as in creating a new game) the preset will be already set with the high poly head and no additional steps will be needed. Some things that I need to point out: - The pics I used are not in sync with the process, sorry for that but I've converted my old presets a year ago or so, so basically I don't have any low poly head around anymore, not that I'm aware that is. - If you decide to make any modification to your preset with the high poly head, you'll need to do again the step of exporting the head (after the edits) and importing it back. If you don't do that, all of your modifications will be lost but the sliders that you changed will not be reset to their original state. Just saving the preset again (without exporting/importing the edited head) doesn't work. This is not something that you would need if you created the preset with the high poly from scratch, but since your made the conversion, this step is necessary. - Don't know if this work on ECE. - High poly heads do not work with mods like "Expressive Facegen Morphs", so you'll need to choose one or another. If you like the additional sliders like myself, when creating a new preset, you can use it for shaping the base head and then do all the steps to convert it to a high poly head. Be aware that after converted, you'll lose the option to use the additional sliders. Hope this help anyone that want to use a high poly head but don't want to lose their presets. femalehead.rar 24.33 kB · 1 download Hey hi thanks for sharing this :p i completely remade my character face editing from 0 the high poly head, but i will try this out for some another presets, you know when we made some character is special an unique thats why some people didn't share some of their presets, thanks again kudos from Flufy Fox s2 Flickr
roxac Posted January 30, 2021 Posted January 30, 2021 On 1/17/2021 at 12:34 AM, FlufyFox said: Hey hi thanks for sharing this ? i completely remade my character face editing from 0 the high poly head, but i will try this out for some another presets, you know when we made some character is special an unique thats why some people didn't share some of their presets, thanks again kudos from Flufy Fox s2 Flickr I know for sure, I'm really attached to my presets. Specially the first two. Glad I could be of help. And loved your presets, the elf one is gorgeous. ? Good luck!
Guest Posted April 18, 2021 Posted April 18, 2021 On 4/18/2020 at 6:09 PM, agiz19 said: I managed to convert Serana's face to highpoly version from a racemenu export of her lowpoly face How did you do this? Edit: Nvm, figured it out by using roxac's method. Thanks!
Wardensc2 Posted August 16, 2021 Posted August 16, 2021 Hi everyone Please to me how to convert follower mod to this high poly head. For example I load this mod and Toccata follower mod into creation kit, replace Toccata head by high poly head. Her face look amazing on render screen of creation kit then I use ctrl F4 to export her facegen to original mod and save the mod with new change of head part and high poly head as master of Toccata mod. Somehow when I come back to game and I get black face of Toccata or potatoes face, never get the correct high poly head render of Creation Kit (I used Mod Organizer 2) Can anyone write some guides about it. My object is very simple, change all my favourite follower mods which head part can be swapped in CK to high poly head to make the game more beautiful. Thank in advance.
astralara Posted September 25, 2021 Posted September 25, 2021 Thanks for all the info. This topic is the closest I could find to what I'm trying to do. I have a lot of nice High-Poly RaceMenu presets that I created in Oldrim / Skyrim LE that I don't want to lose and want to convert or import over to Skyrim SE. Any idea how I can successfully convert Oldrim High-Poly RM presets over to Skyrim SE?
afshin76 Posted June 27, 2022 Posted June 27, 2022 Has anybody had any success doing this for pandorable mods. I've been able to do this for bijin mods but I run into all sort of issues when doing it for PAN_Brelyna It's a great mod and I really wanna have her as high poly. Can anyone help?
Recommended Posts
Archived
This topic is now archived and is closed to further replies.