Tutorial: How to duplicate an existing SOS Addon to make your own [QUICK N' DIRTY EDITION]

Entry posted by donnerwetter in Tutorials
19035 views
Have you ever wished you could use more than one version of the same schlong simultaneously? Maybe you want one that uses SOSmale.hkx and one to use SOSfemale.hkx. Maybe you installed my ERF Horse Penis Redux mashups and want to use more than one version at the same time. Well, I'm going to show the way I do it.
Do note though that as the title says, this is the quick and dirty way, which means we are only duplicating and changing the absolute minimum amount of things necessary to get a separate schlong addon to show in the MCM and for it to use its own mesh and textures. All the other things that make up a schlong addon, such as potions and code related to gender and race probabilities will be left untouched and shared with the parent schlong. Presumably this will fuck with SOS mechanics that distribute schlongs to NPCs, but since I do not use those mechanics, I don't care. If you DO care about such things, you are welcome to duplicate, rename and then painstakingly reassign EVERYTHING in the addon.
Anyway, we'll be using XEdit. Hope you have it installed (google for information on how to do so.) For this example, I'll be using the .esp from TRX Futanari Addon. Once you load the esp, it should look like this:
.png.8a28f06f40fc50d1a08df7c03cf7e929.png)
What we need to do is duplicate the correct records to get a separate schlong addon with its own mesh and textures, I will start with the textures:
.png.508dc1db0c3f2b21d92386876c3ef1ad.png)
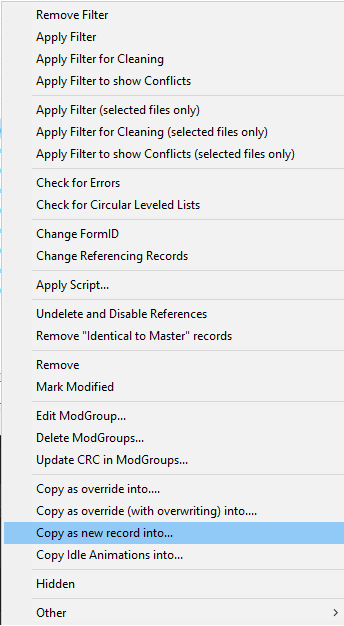
If we were being thorough, we would duplicate each of these records. But since we're all about doing things as quickly and lazily as possible, I will only duplicate the "Default" Texture Set since I only play as human characters anyway. If you play as other races, you might want to duplicate the texture sets relevant to you. Regardless, right click on a texture set you want to duplicate and select "Copy as new record into"
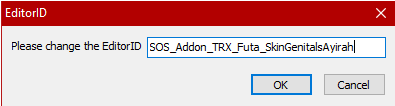
XEdit will ask you to change the EditorId. I am making a schlong addon for a character named Ayirah, so I will simply replace "Default" with "Ayirah".
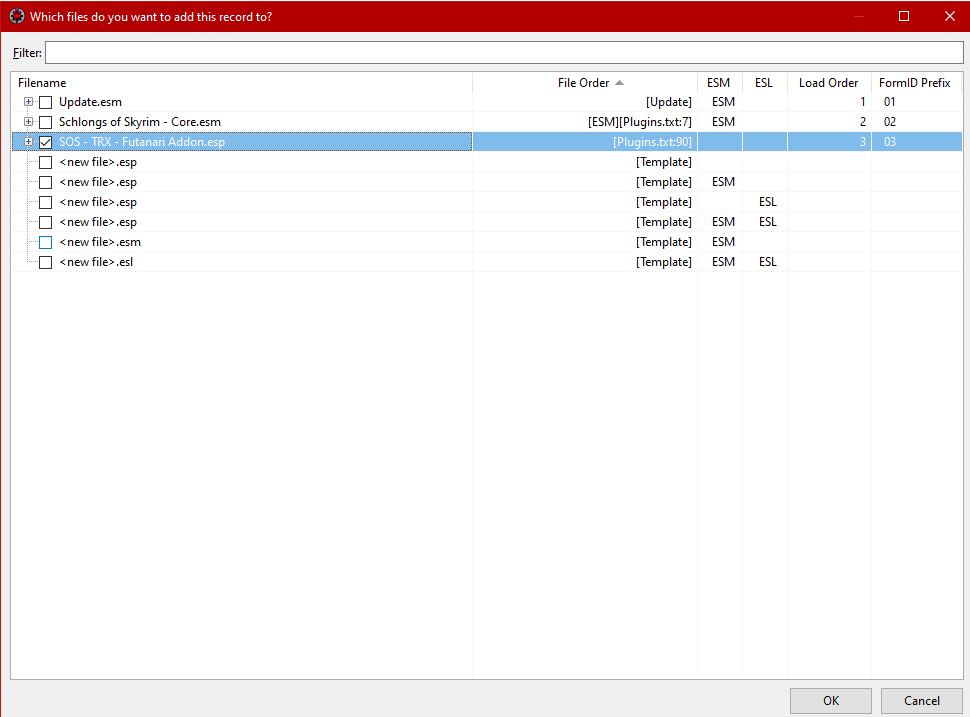
Next you will be asked which of the loaded files you want to add this new record into. We will choose the schlong addon we have been working on.
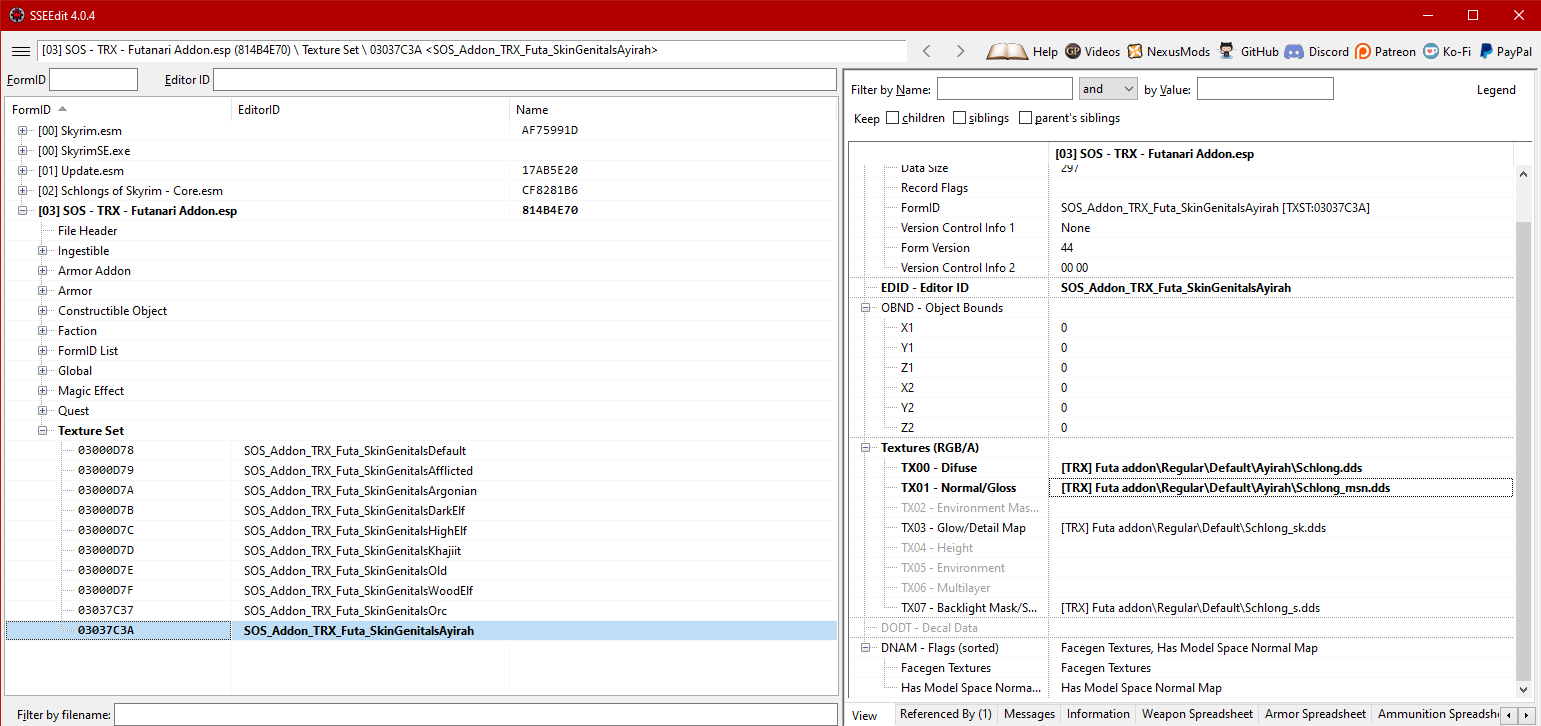
Congratulations! You have made a new texture set. Now to change the texture paths- my character will only need separate diffuse and normal maps from the regular addon, so those are the ones I will be editing. I'm going to place her textures in a folder named "Ayirah" inside the regular texture folder. You will notice that I'll do the same with the meshes too.
Next, we will go take a look at the Armor Addon records. Much like before, if we were being thorough, we would duplicate all 9 AA records, but again, I'll only need to duplicate the Default one for my purposes. (Your situation may be different)
.png.8b660b596a2037e65fbd04b18fa19231.png)
Duplicate and rename the record(s) you need the same way you did with the Texture Sets before. Then change the "Female world model" record (if this is a male addon, you will obviously need to change the male one instead) to point to the location you have chosen for the new mesh. Like I said, I'm just placing new folders inside the ones already existing in the mod and keeping the existing .nif name. The reason for this is that this way you don't need to rename the schlong .nifs once you have built them in BodySlide, just build them into the overwrite folder and place them inside the new folder you made. You will also need to alter the Female Skin Texture record and select the Texture Set you made previously.
.png.1f05b5fa84371722740f842504b2b7e7.png)
Next up is the Armor Record. Just like before, copy the record and rename it. Then in the Armature section, select the Addon(s) you made in the previous step.
.png.6be09dfa76c290bd6189b93dd908c5cb.png)
Now, we move on to the Faction record. This is what gives the addon the name it will be listed under in the SOS MCM. Once again, copy and rename the record. Afterwards, alter the text field next to Full - Name and give your new addon whatever name you wish.
.png.3b946894c40eb4fada16b950ebe32309.png)
Finally, we can tackle duplicating the SOS Addon quest. After you've done so, find the SOS_Addon_Faction and SOS_Addon_Genitals properties and change them to the Faction and Armor (Note: Armor, not ArmorAddon! Make sure it has the ARMO prefix) you made in previous steps. Finally, give the quest a new name, save the .esp and exit XEdit. You're done!
.png.532589aeef65c6338789ee8196976b50.png)
.png.d4a570d71e453615025af04995eb9c3e.png)

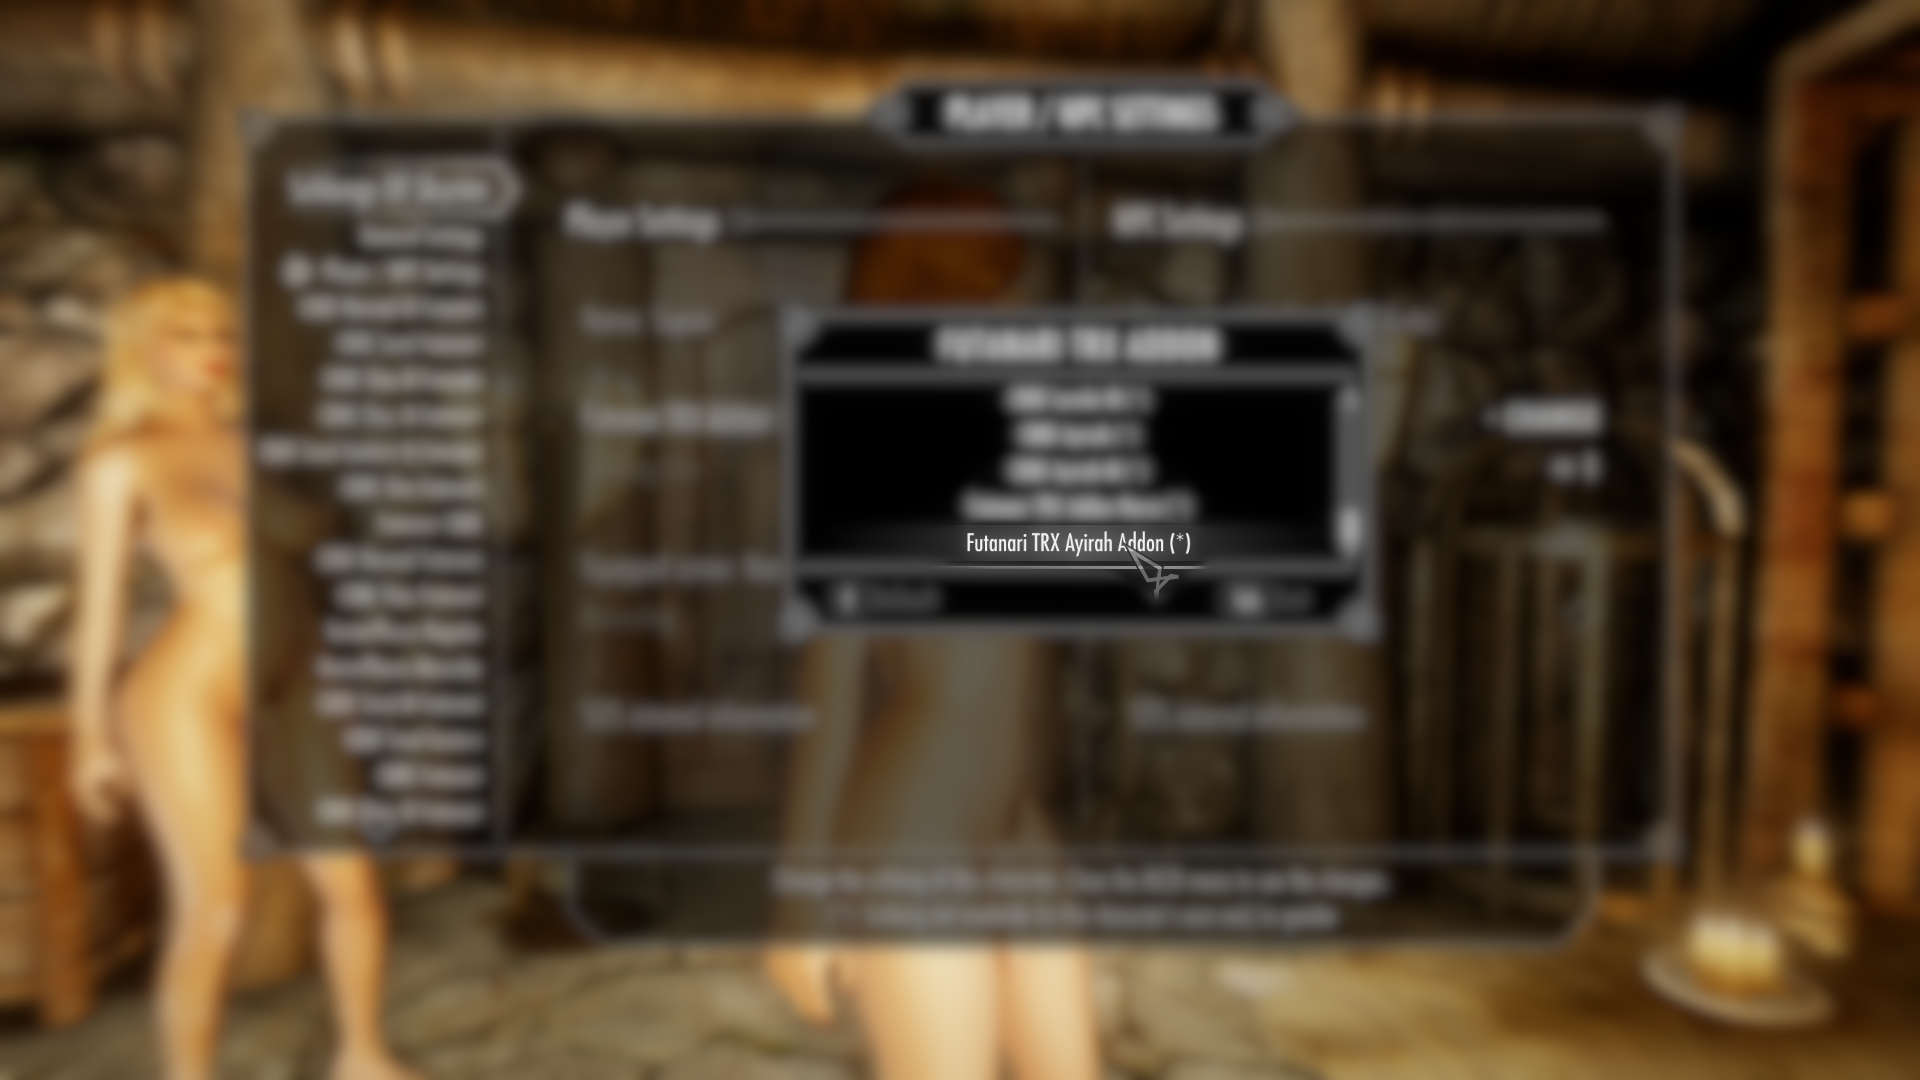
Now to check if our new addon works in game... success!
Edited by donnerwetter
40 Comments
Recommended Comments