- Overview
- Members
- Voices
- Video animations
- Update my Blog : News
- Tutorila TES5Edit
- Tutorial Nifskope
- Variations Armors
- Music Alternative : How To Replace
- Mod Released
- Bug fix
- Missions
- Combat Style : Shinobi
- Weapons
- BHUNP SMP
- Tutorial Bodyslide
- General Problems
- Area Test
- My Skyrim Modding
- Skyrim AI generation
- HUD Menu : Dear Diary

Overview
About This Club
- What's new in this club
-
 sanyss joined the club
 -
 SaltedShroom joined the club
 -
 amama123456 joined the club
 -
 pedrito1488 joined the club
 -
 PhilLovesCats joined the club
 -
 raphael8989 joined the club
 -
 Zimmy5500 joined the club
 -
 Bohauo joined the club
 -
 TyphoonXIII joined the club
 -
 JuCordell joined the club
 -
 5281727726 joined the club
 -
 pandoralewdbox joined the club
 -
 worldLee joined the club
 -
 SquishySlush joined the club
 -
 sorrytogod joined the club
 -
.thumb.jpeg.2f699d90fbed99adec2060b29a342bb0.jpeg) jmir90337 joined the club
jmir90337 joined the club -
 cascaouille joined the club
 -
 Ghostrider0523 joined the club
 -
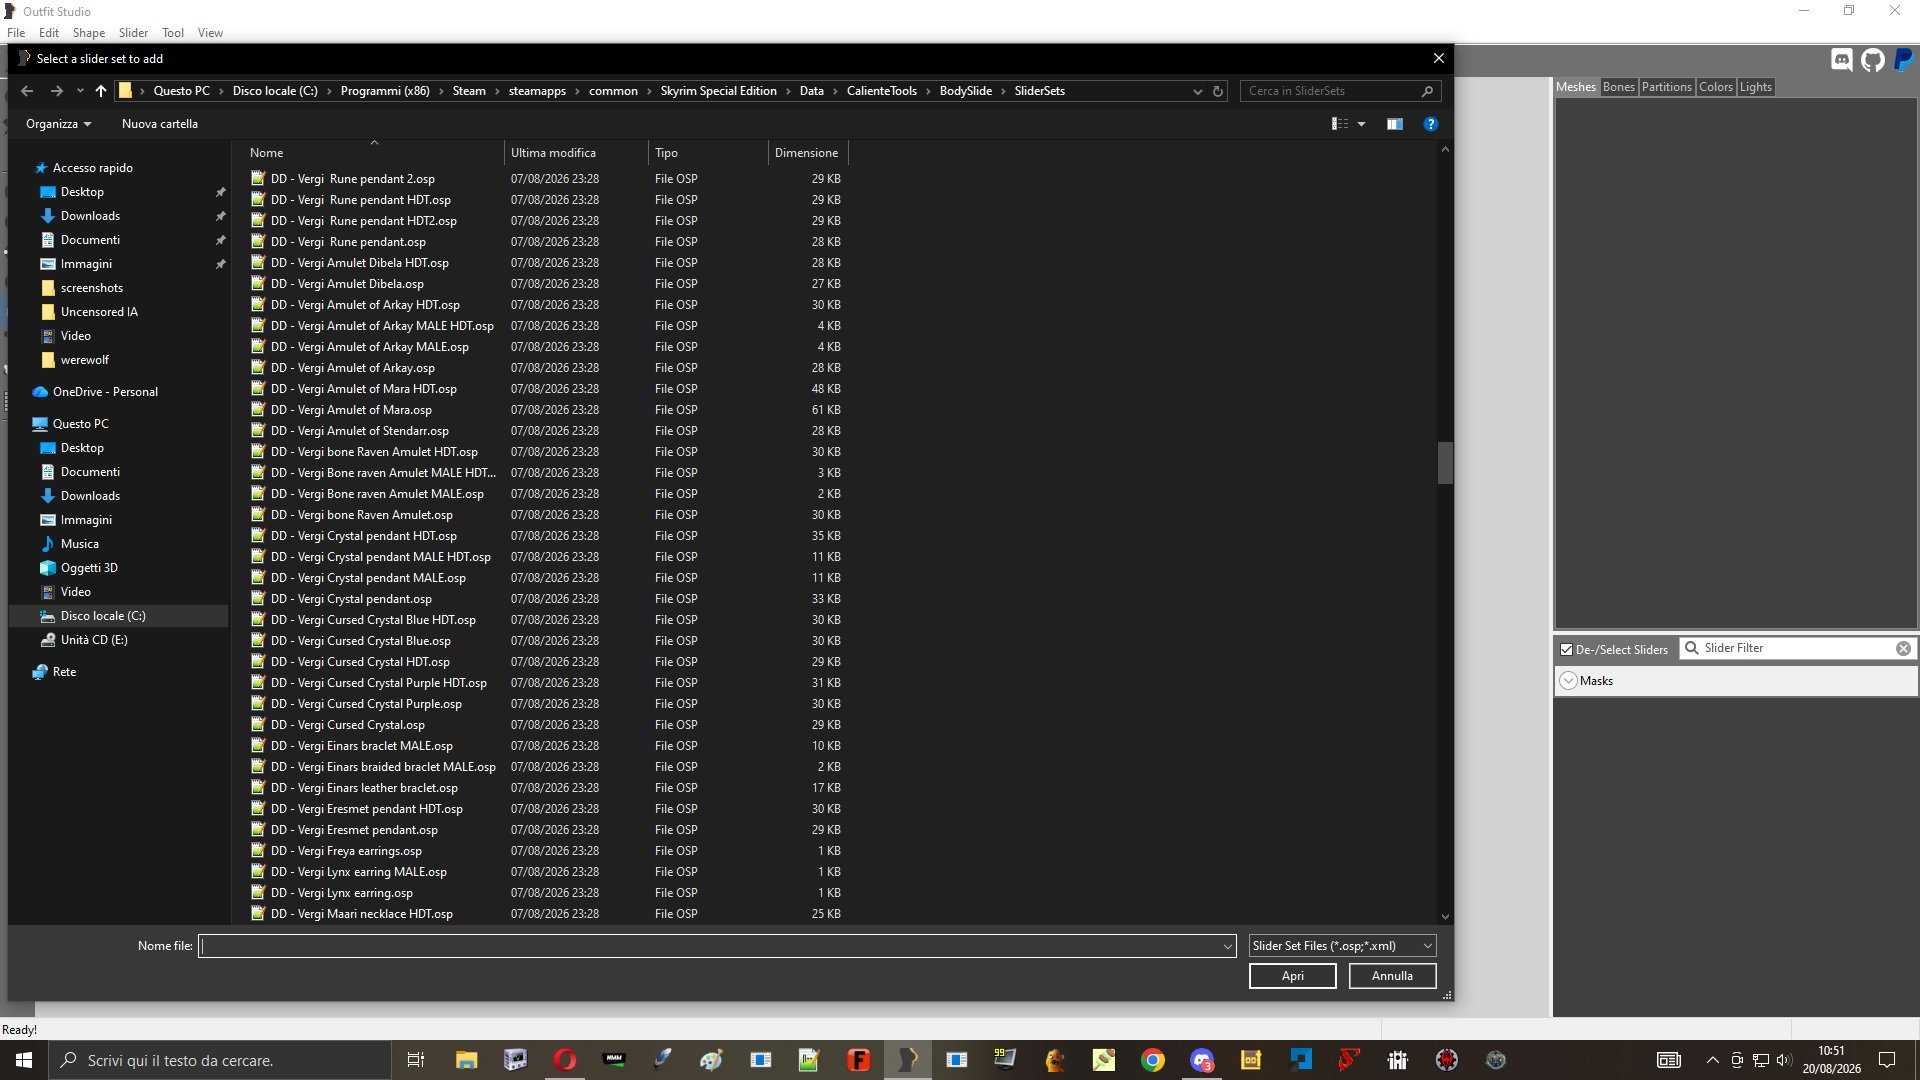
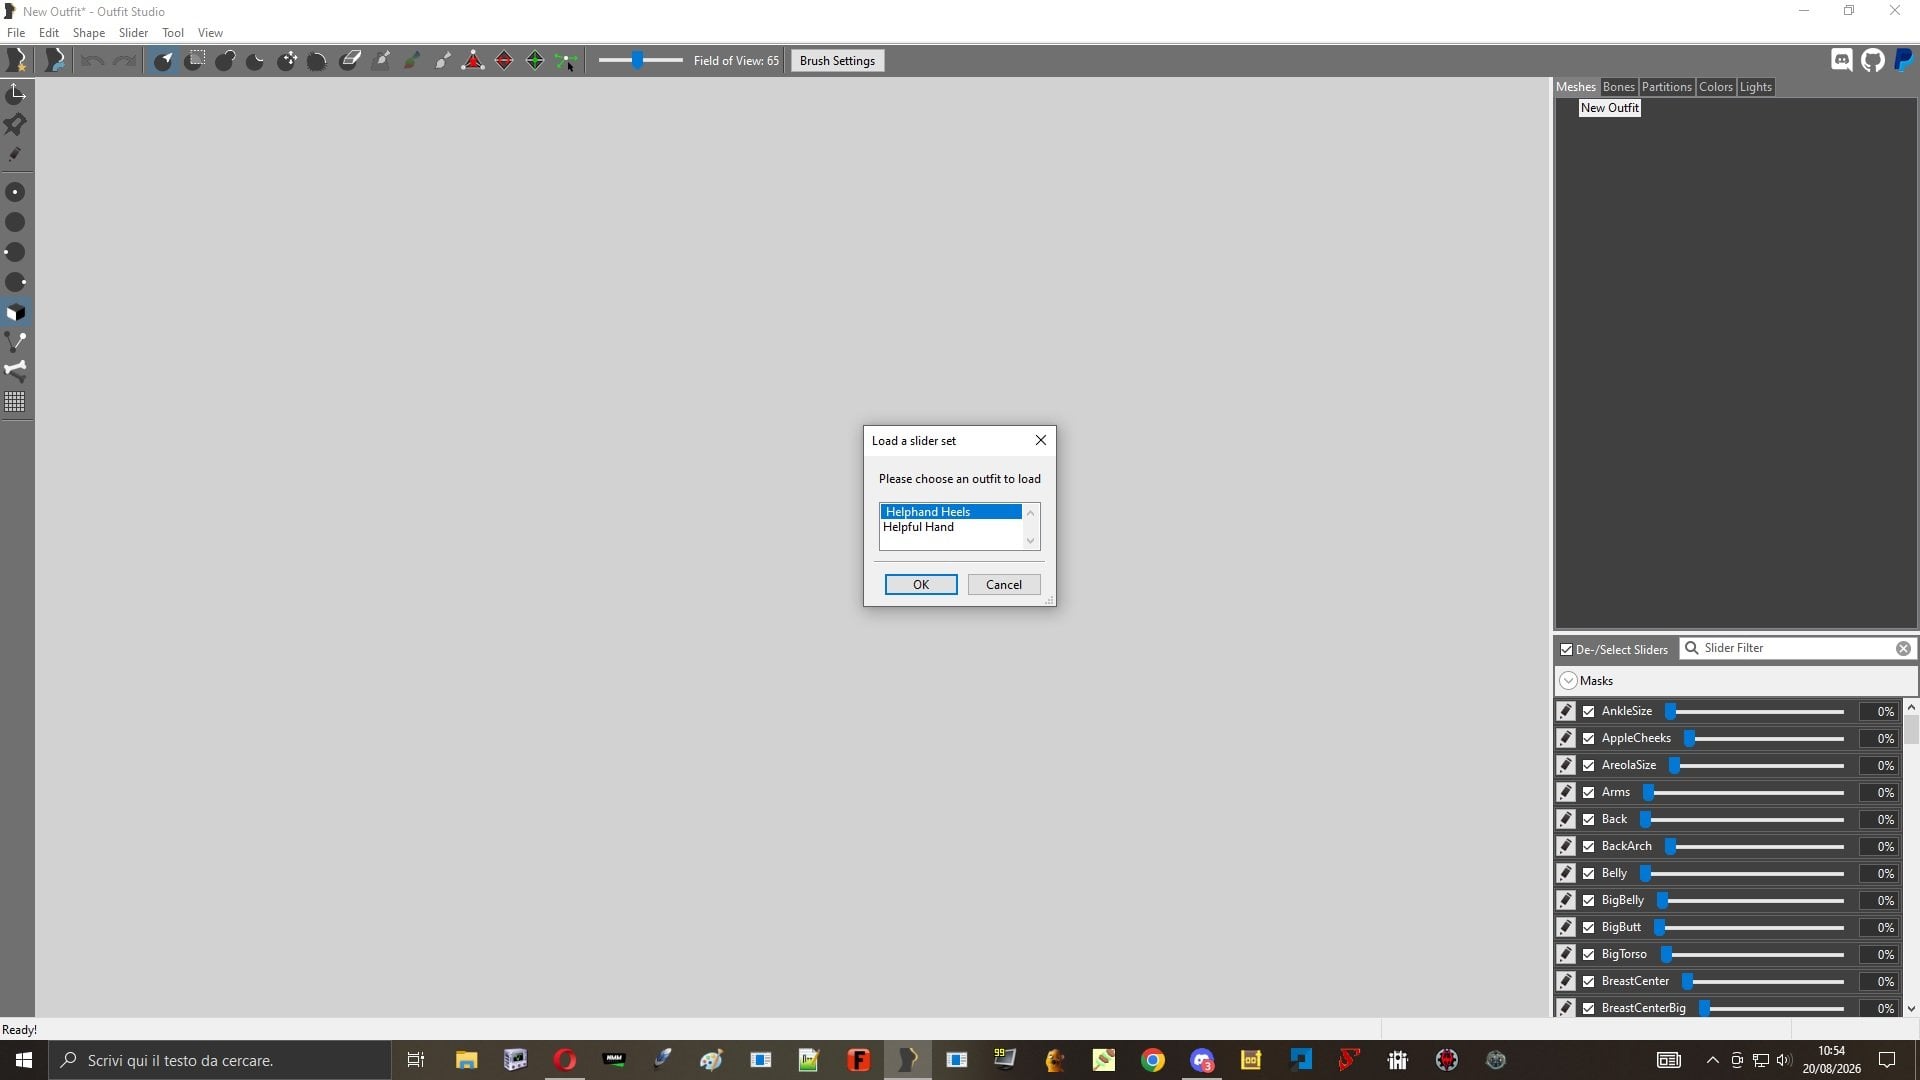
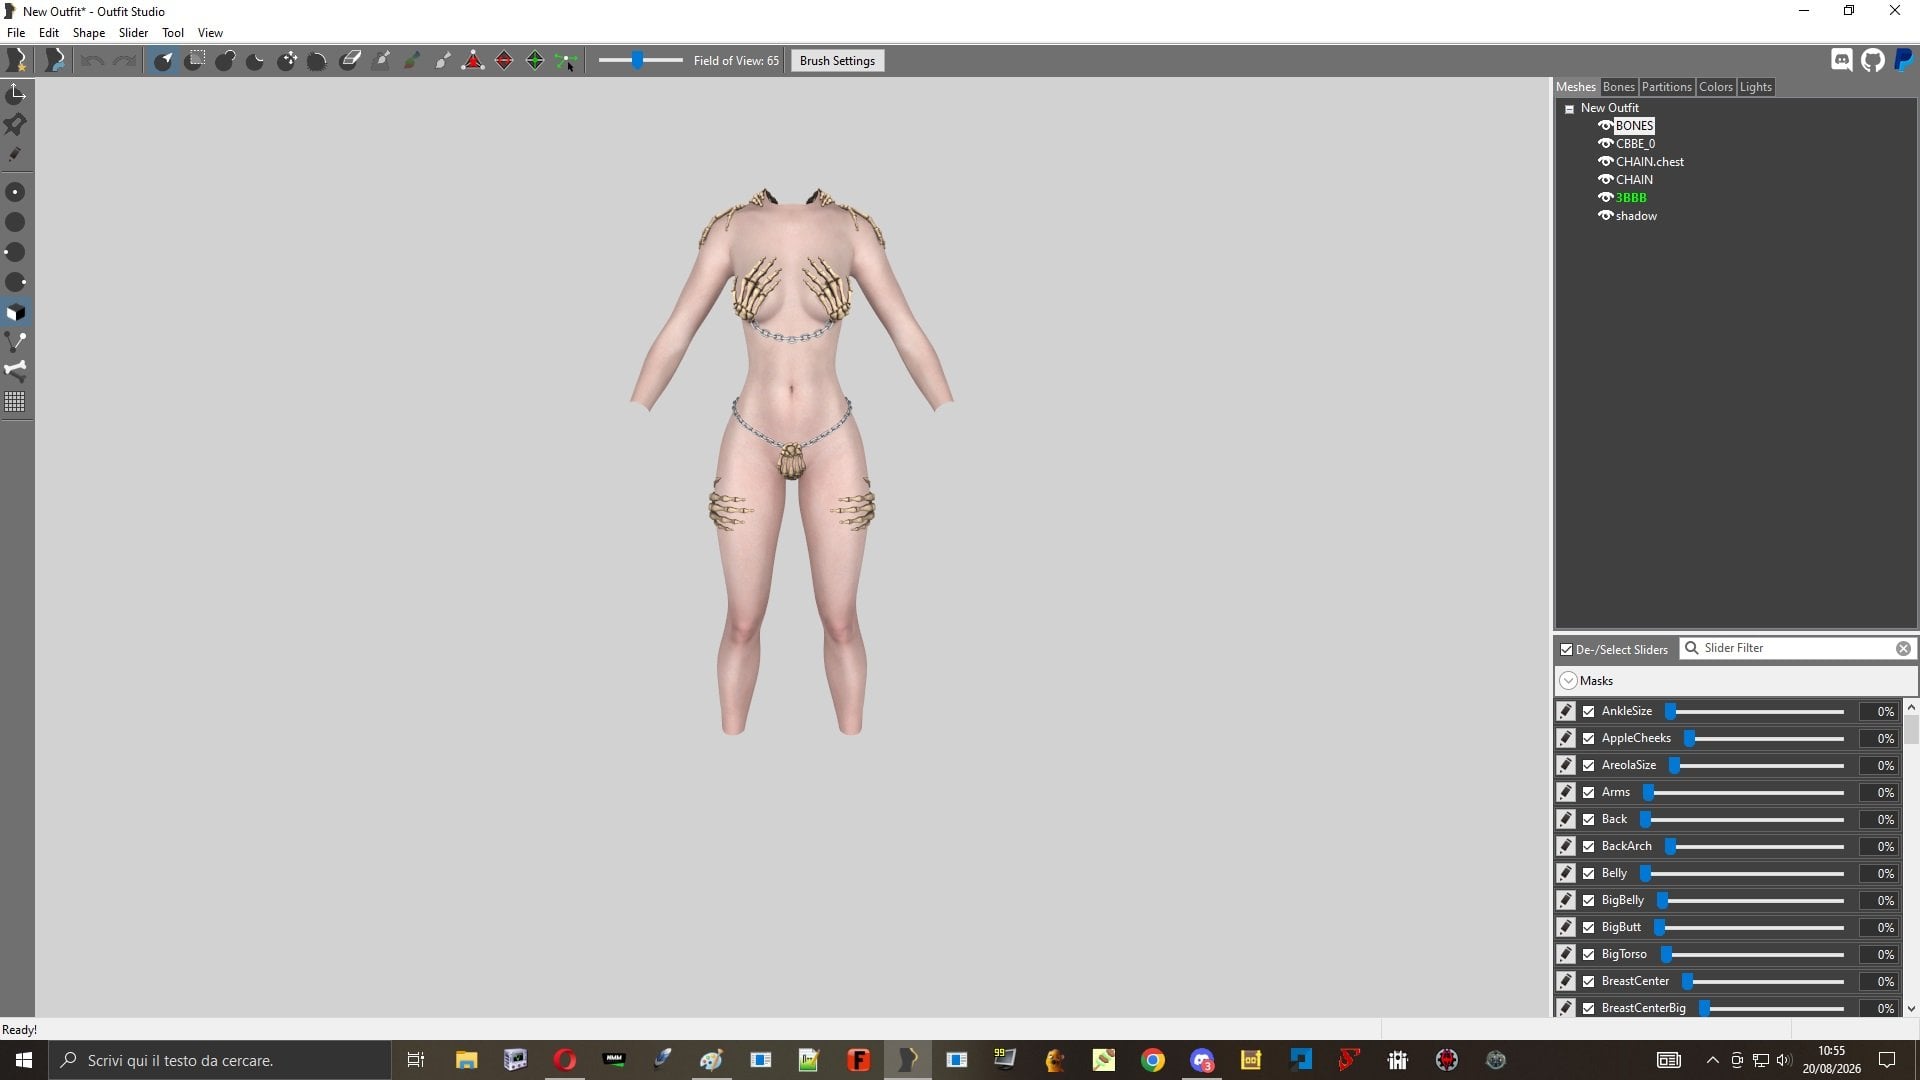
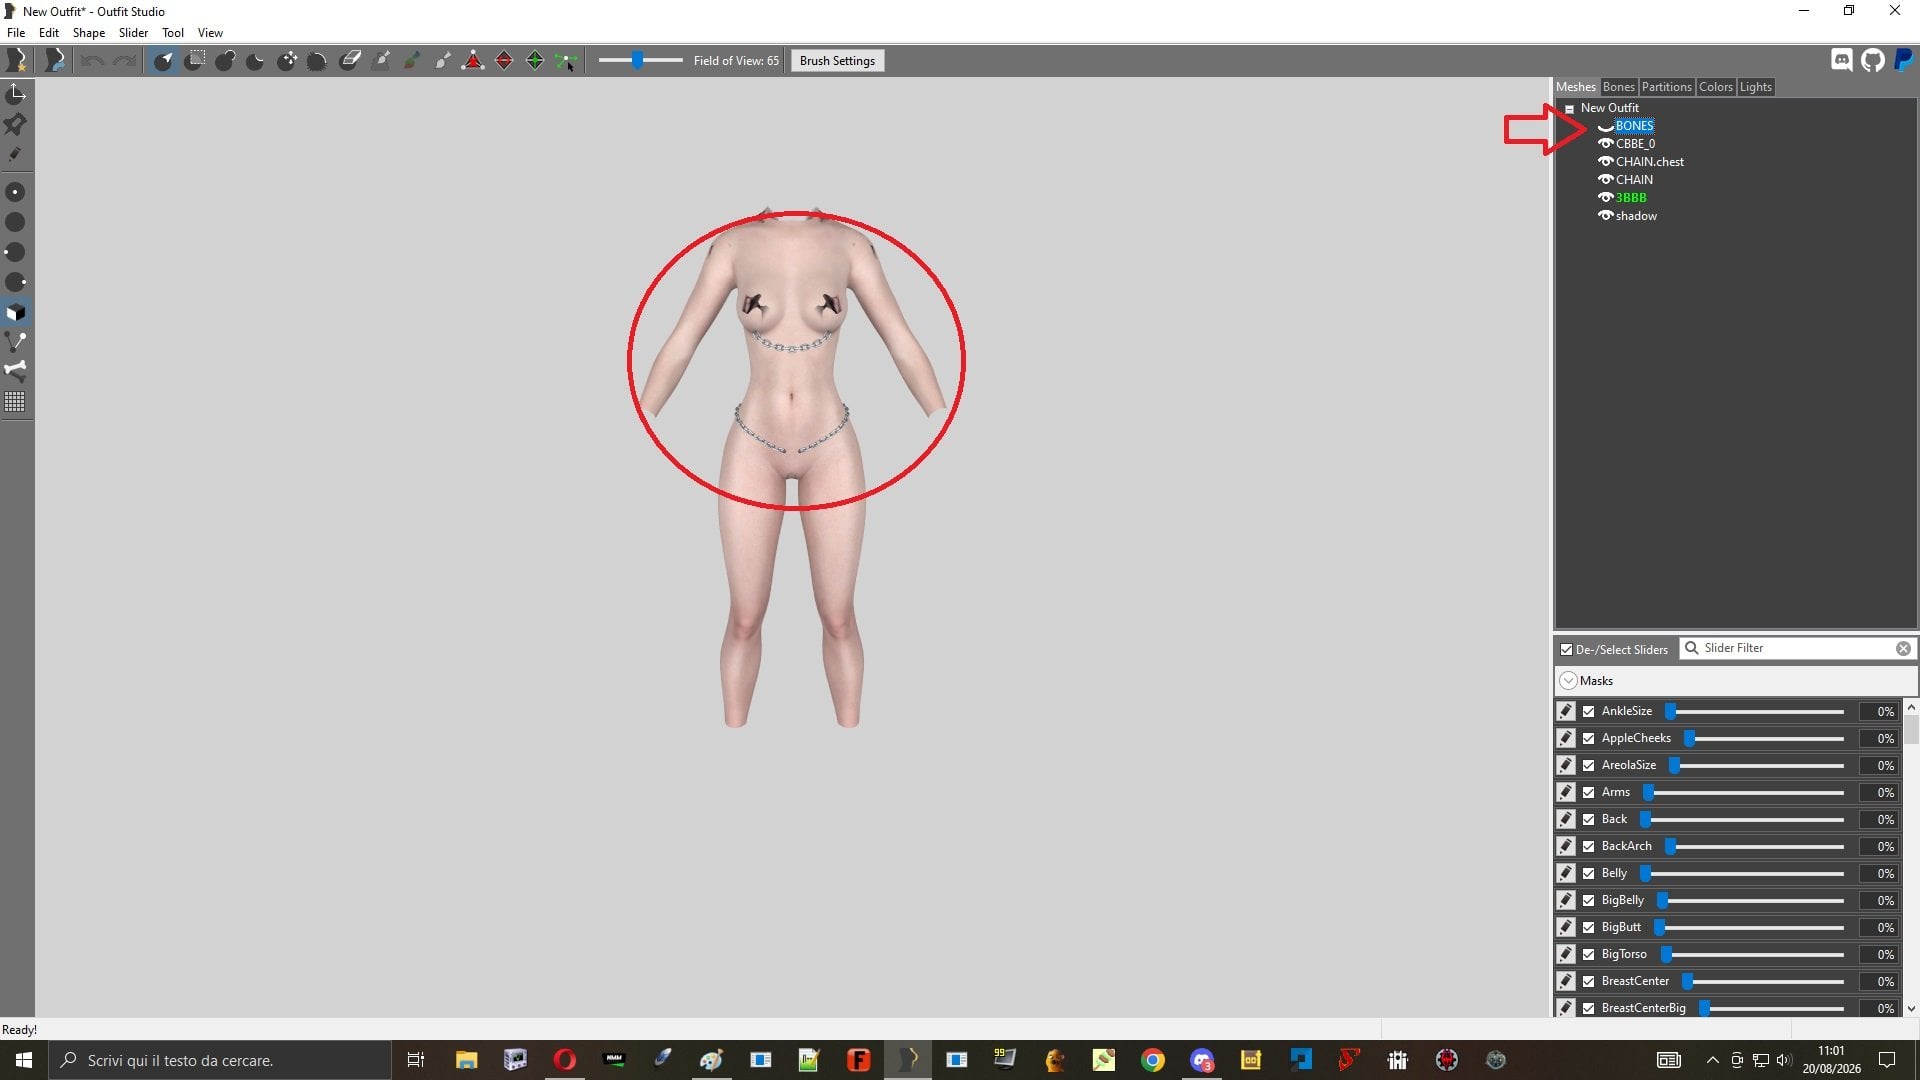
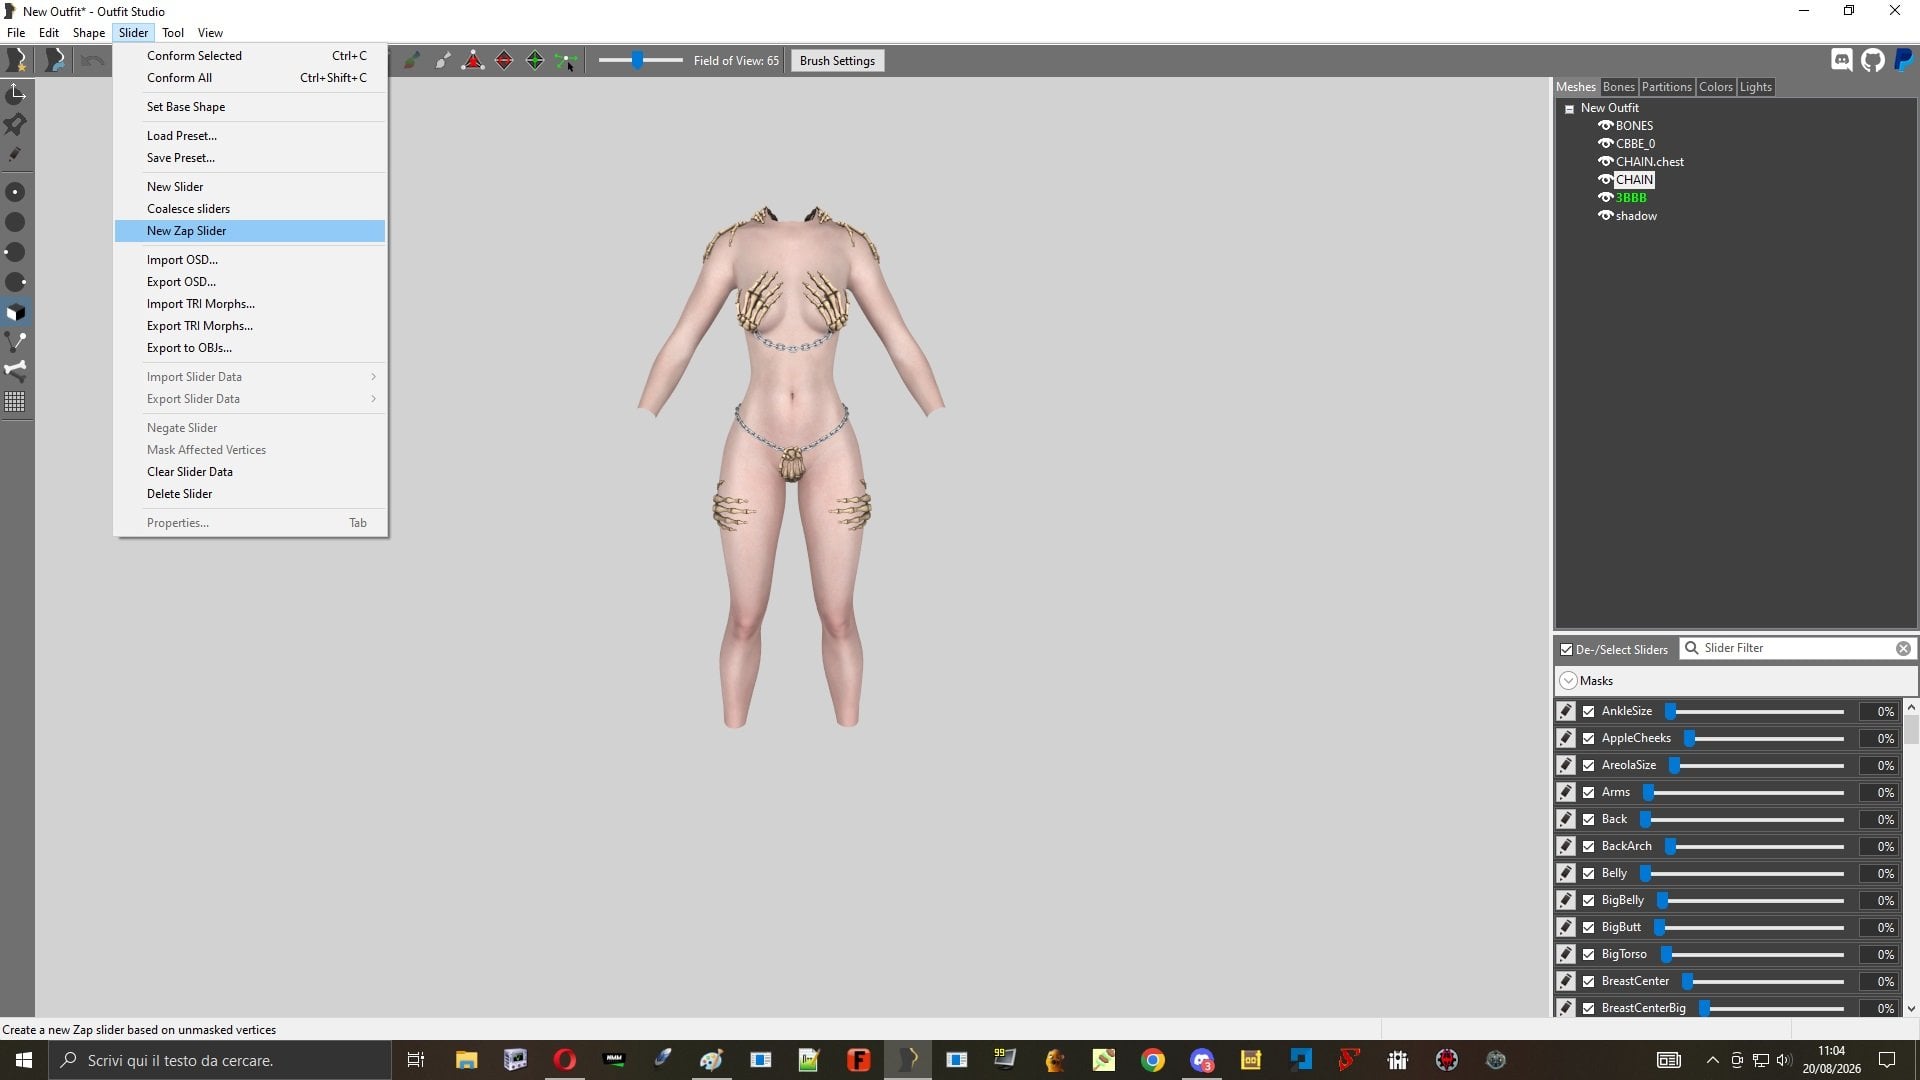
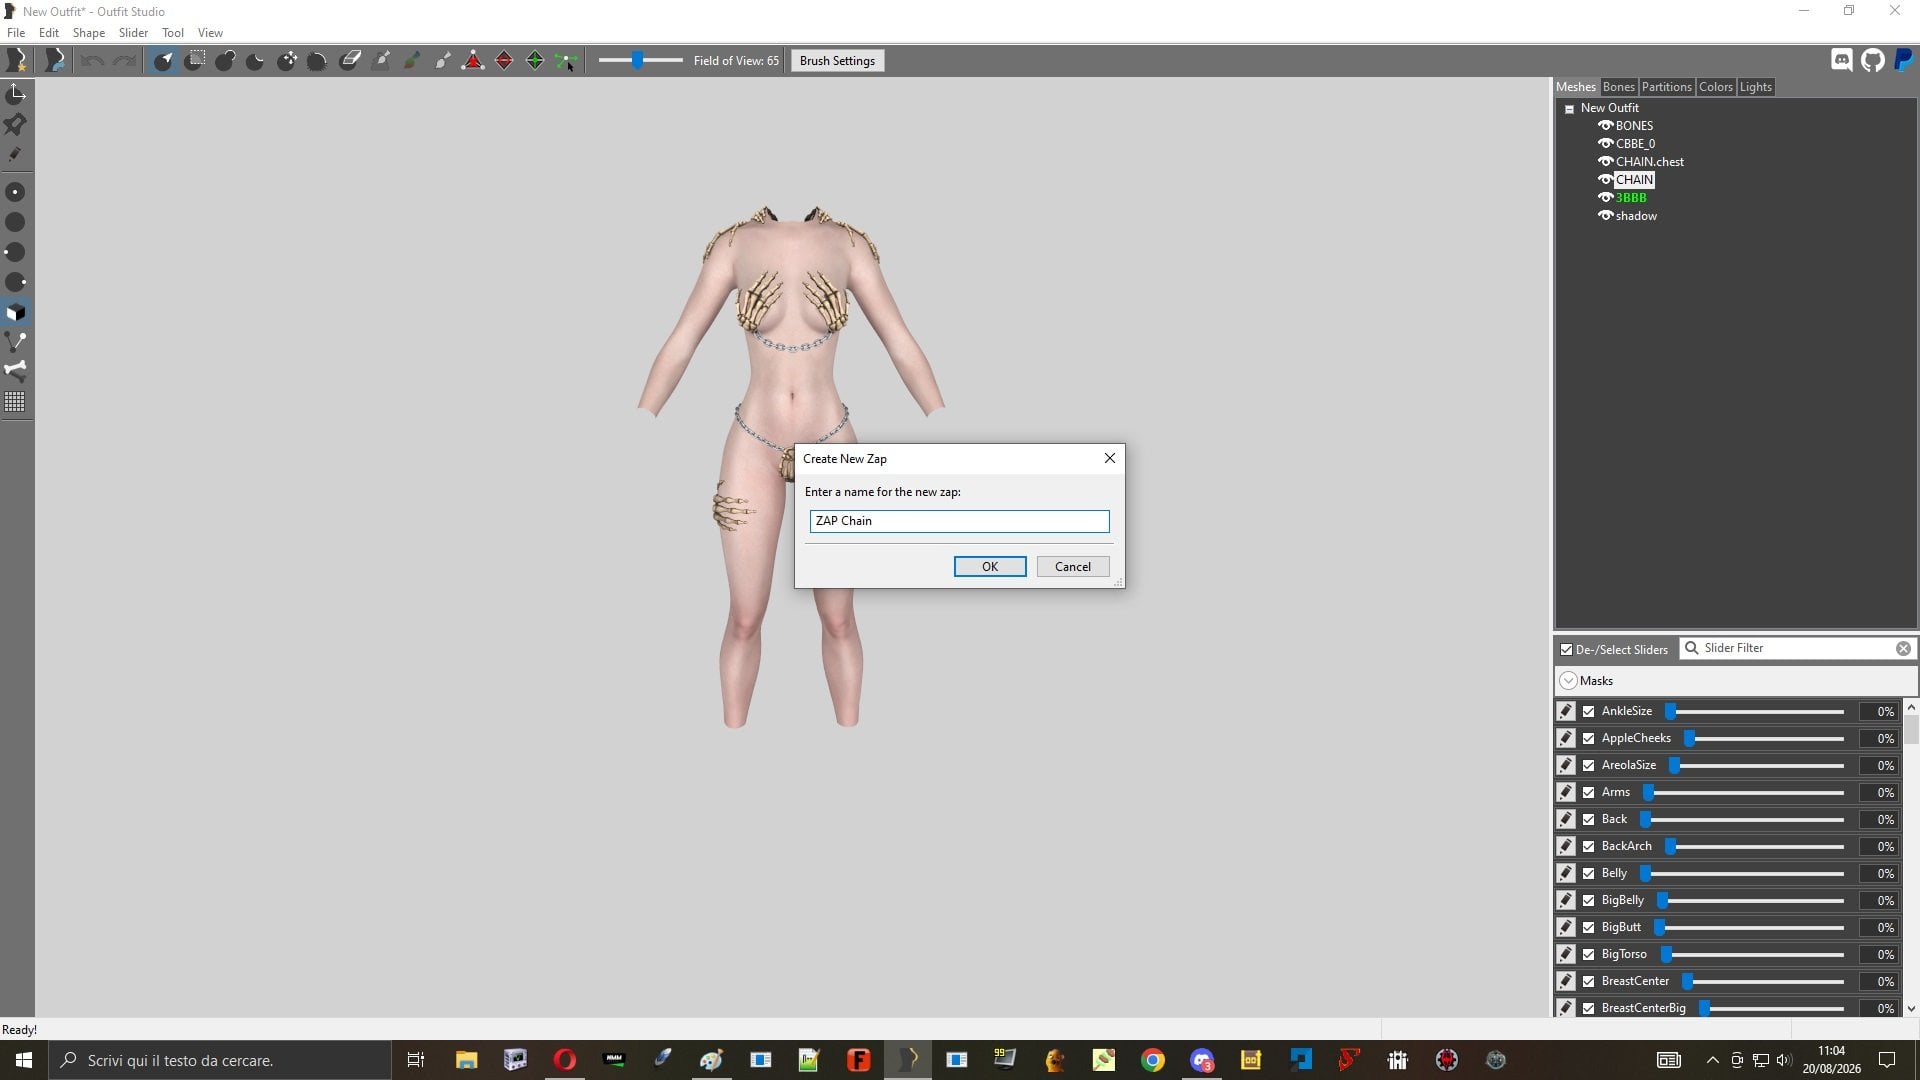
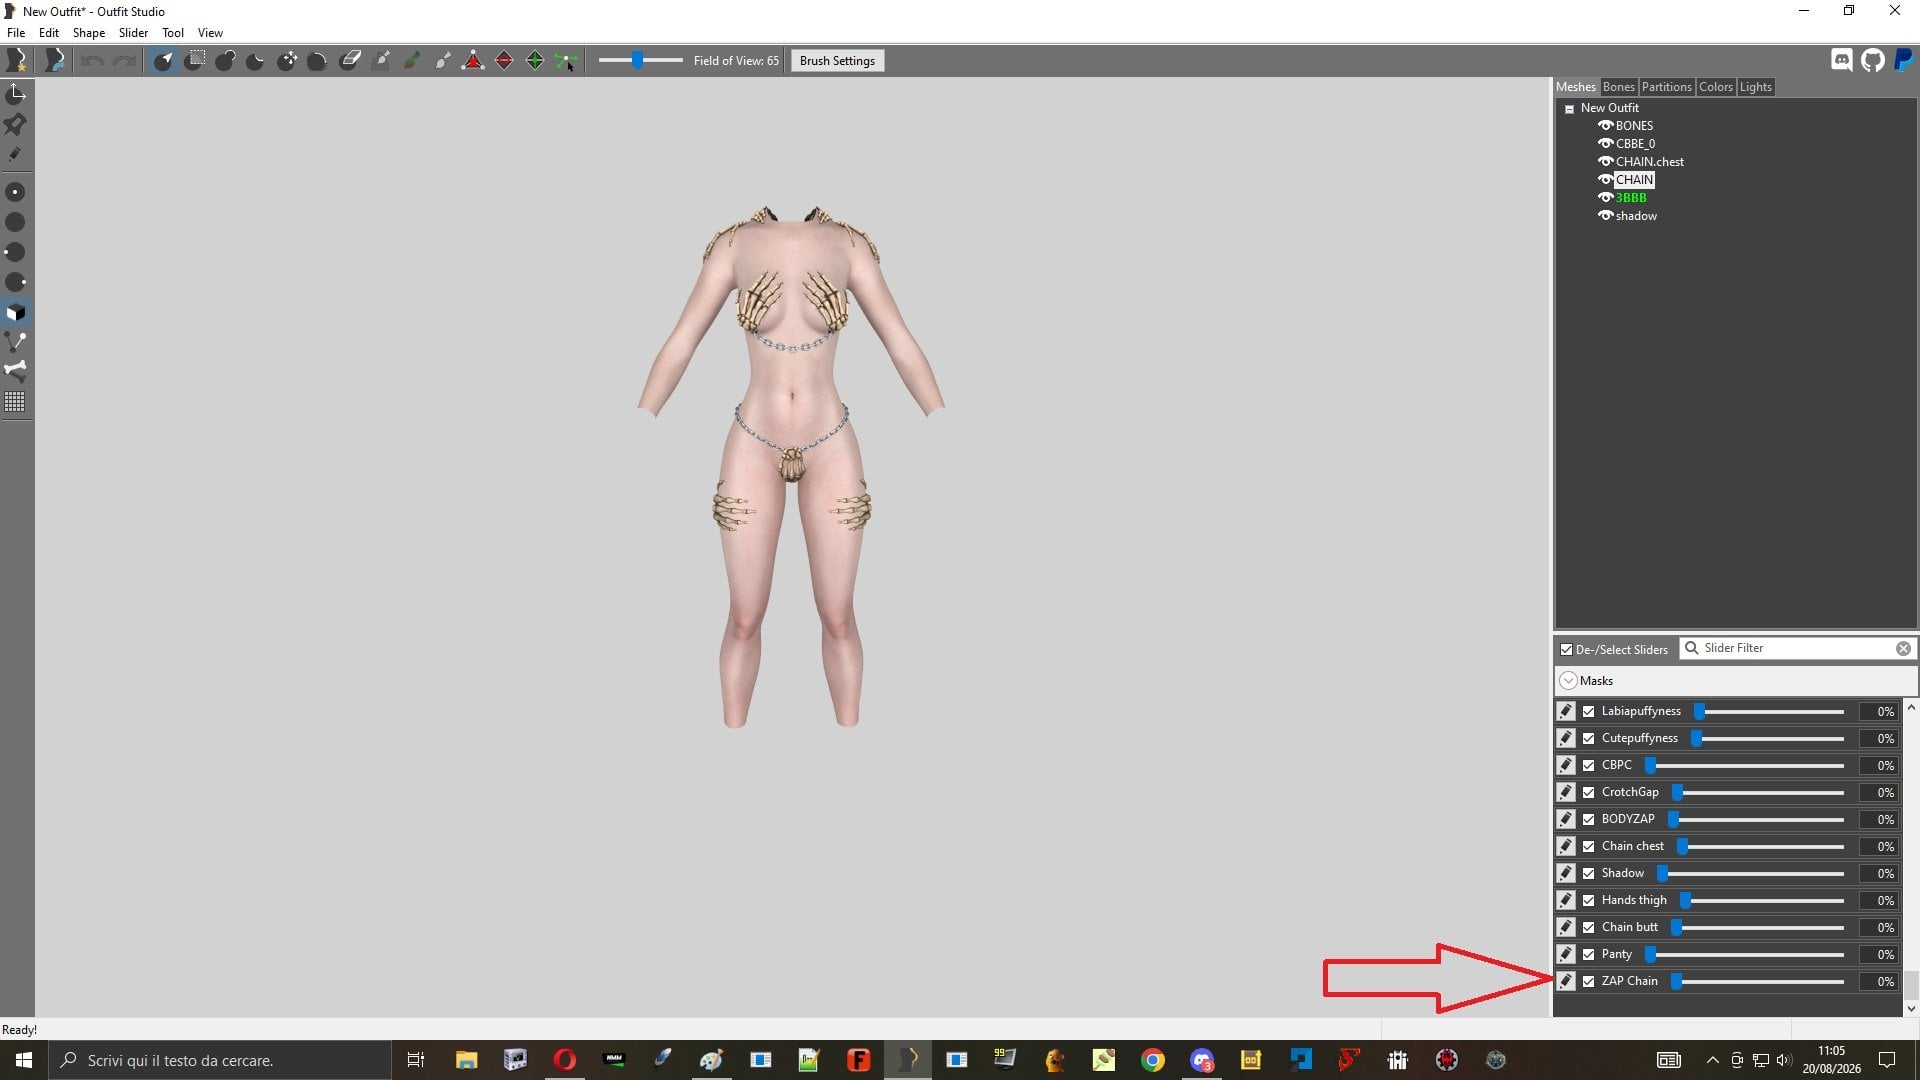
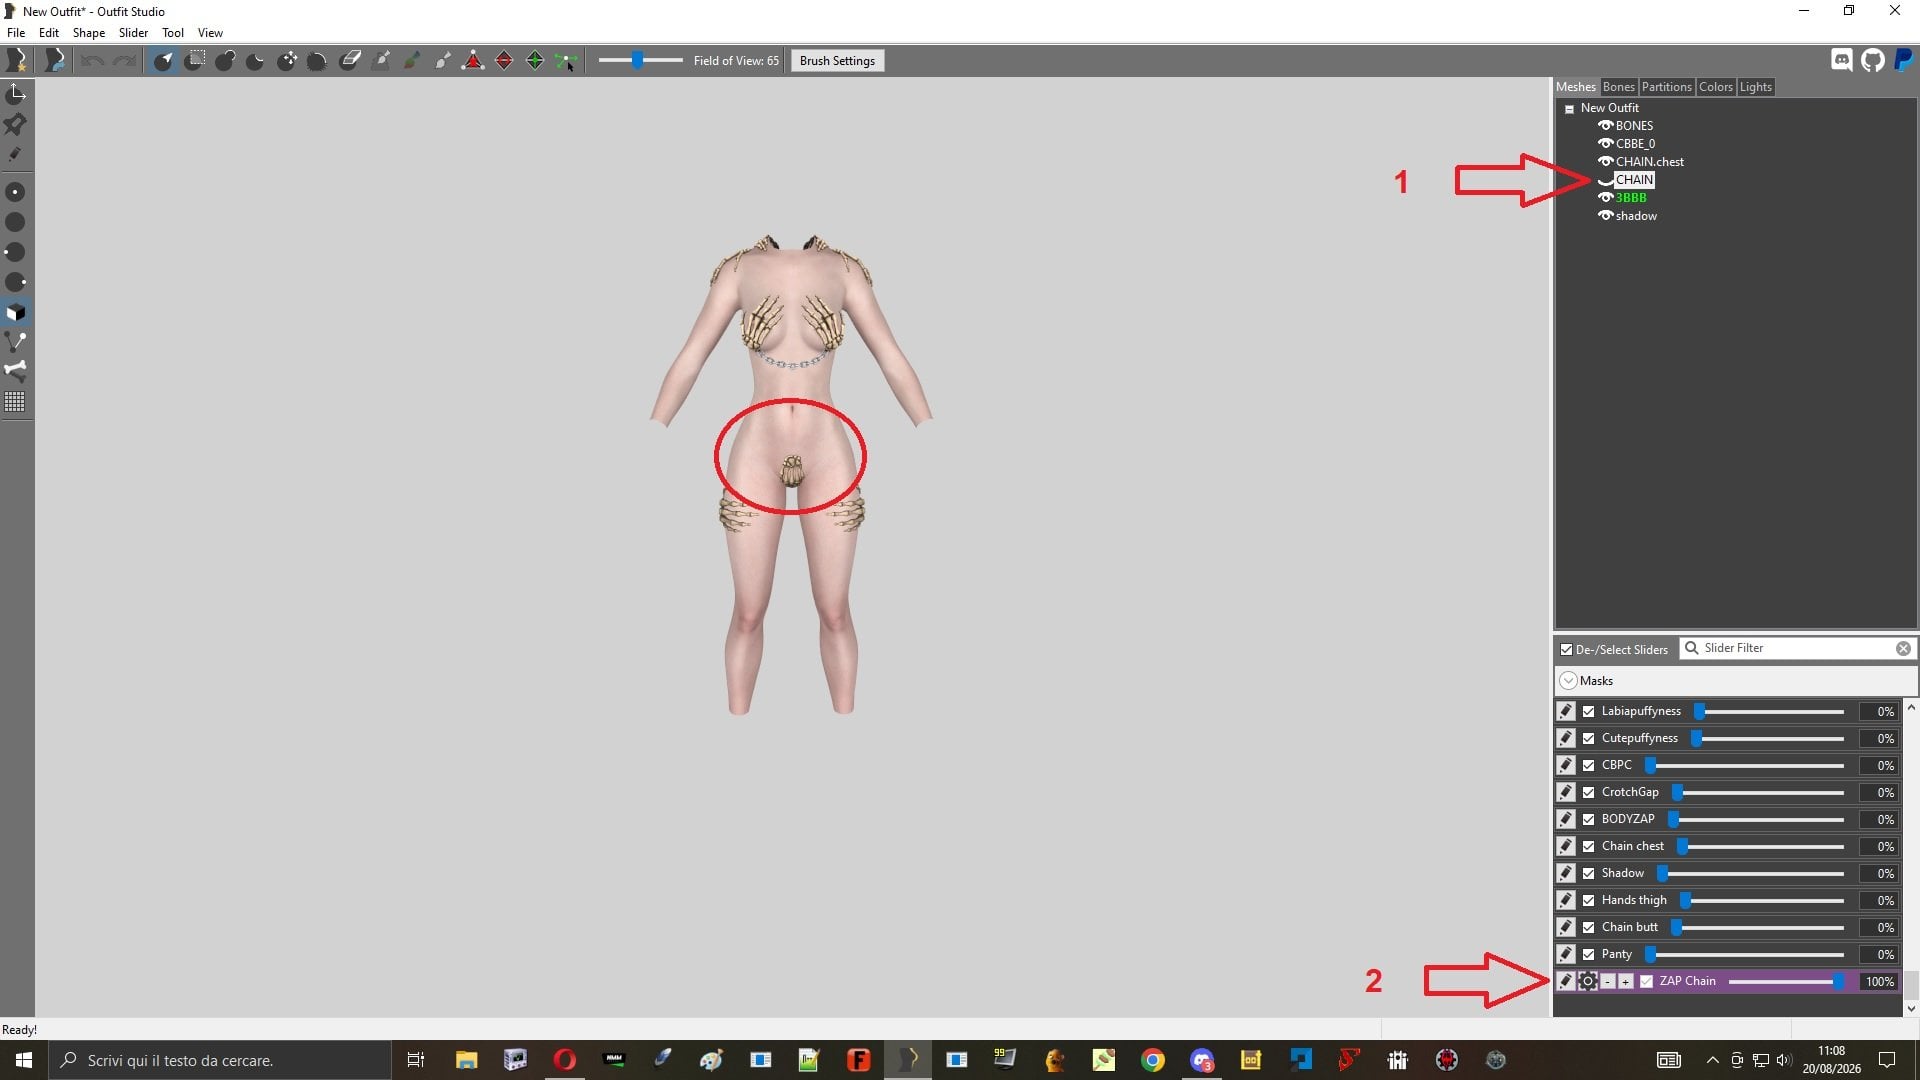
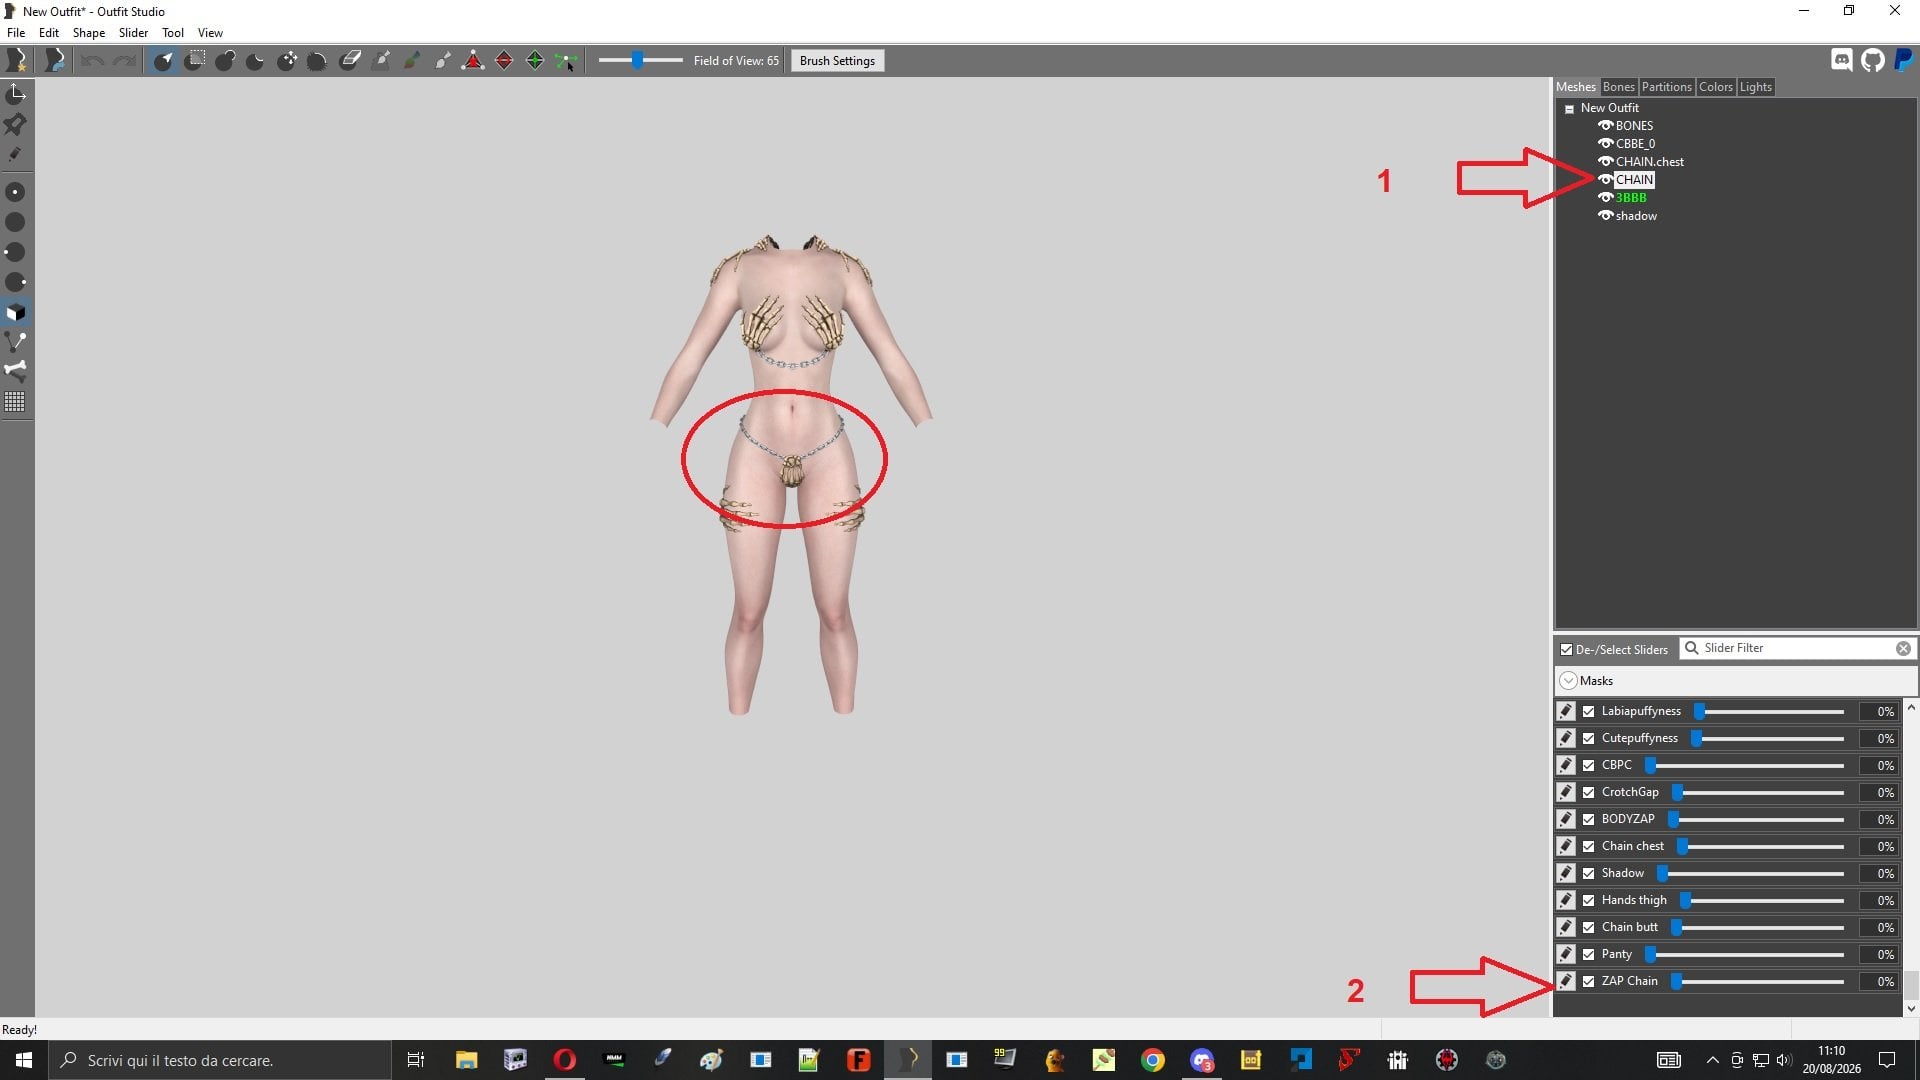
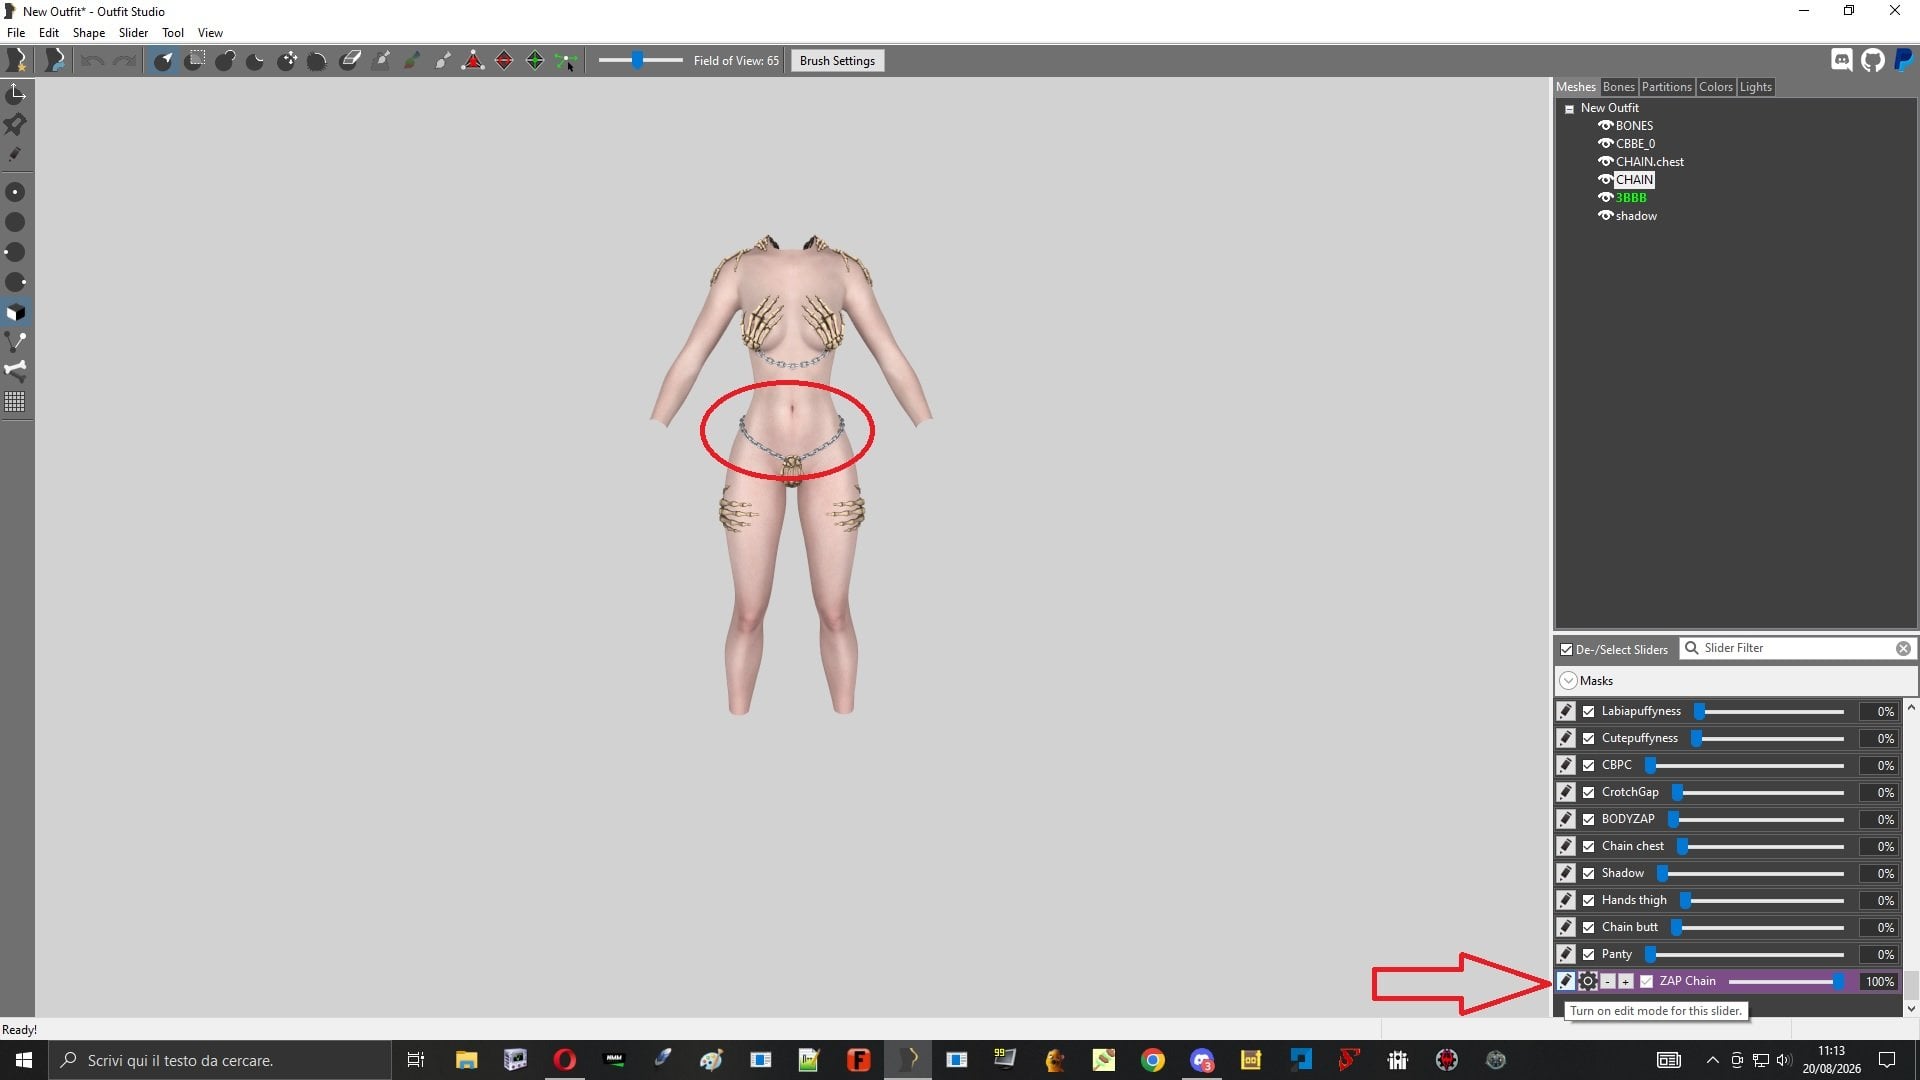
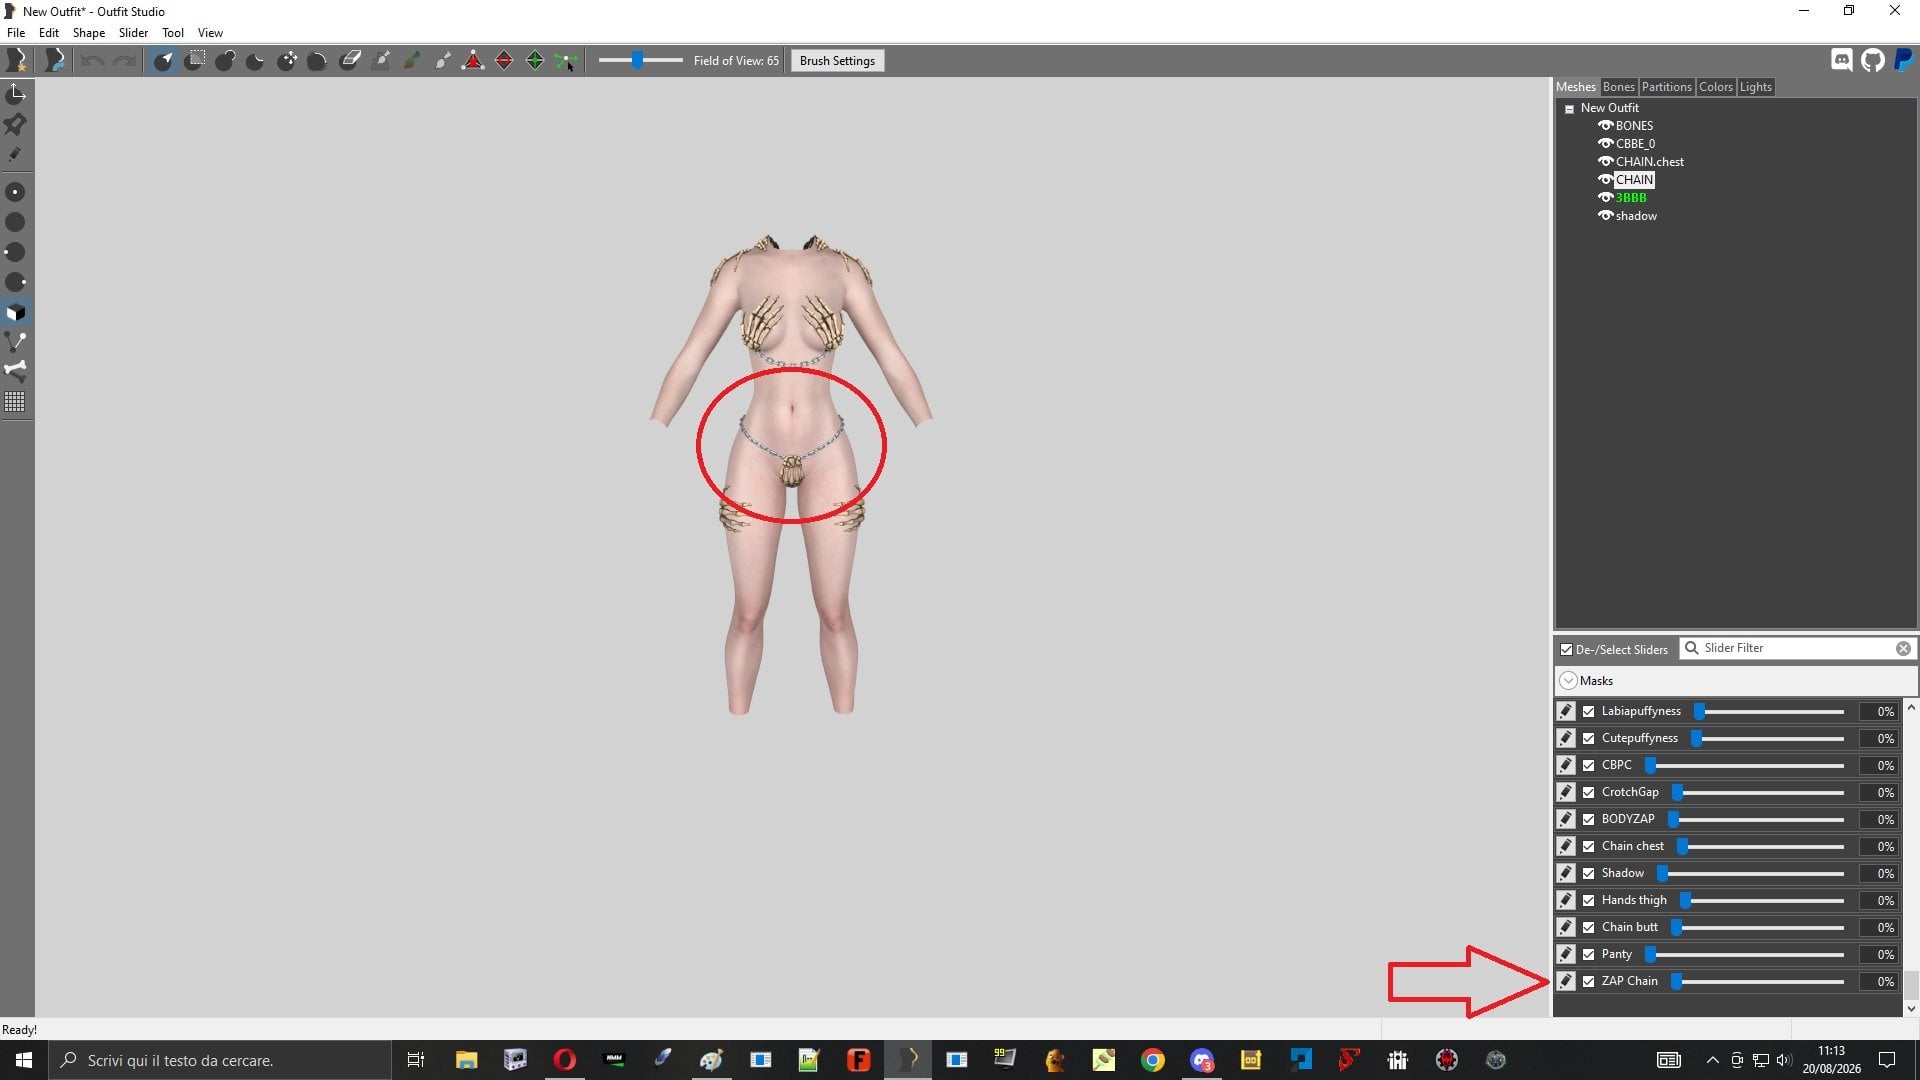
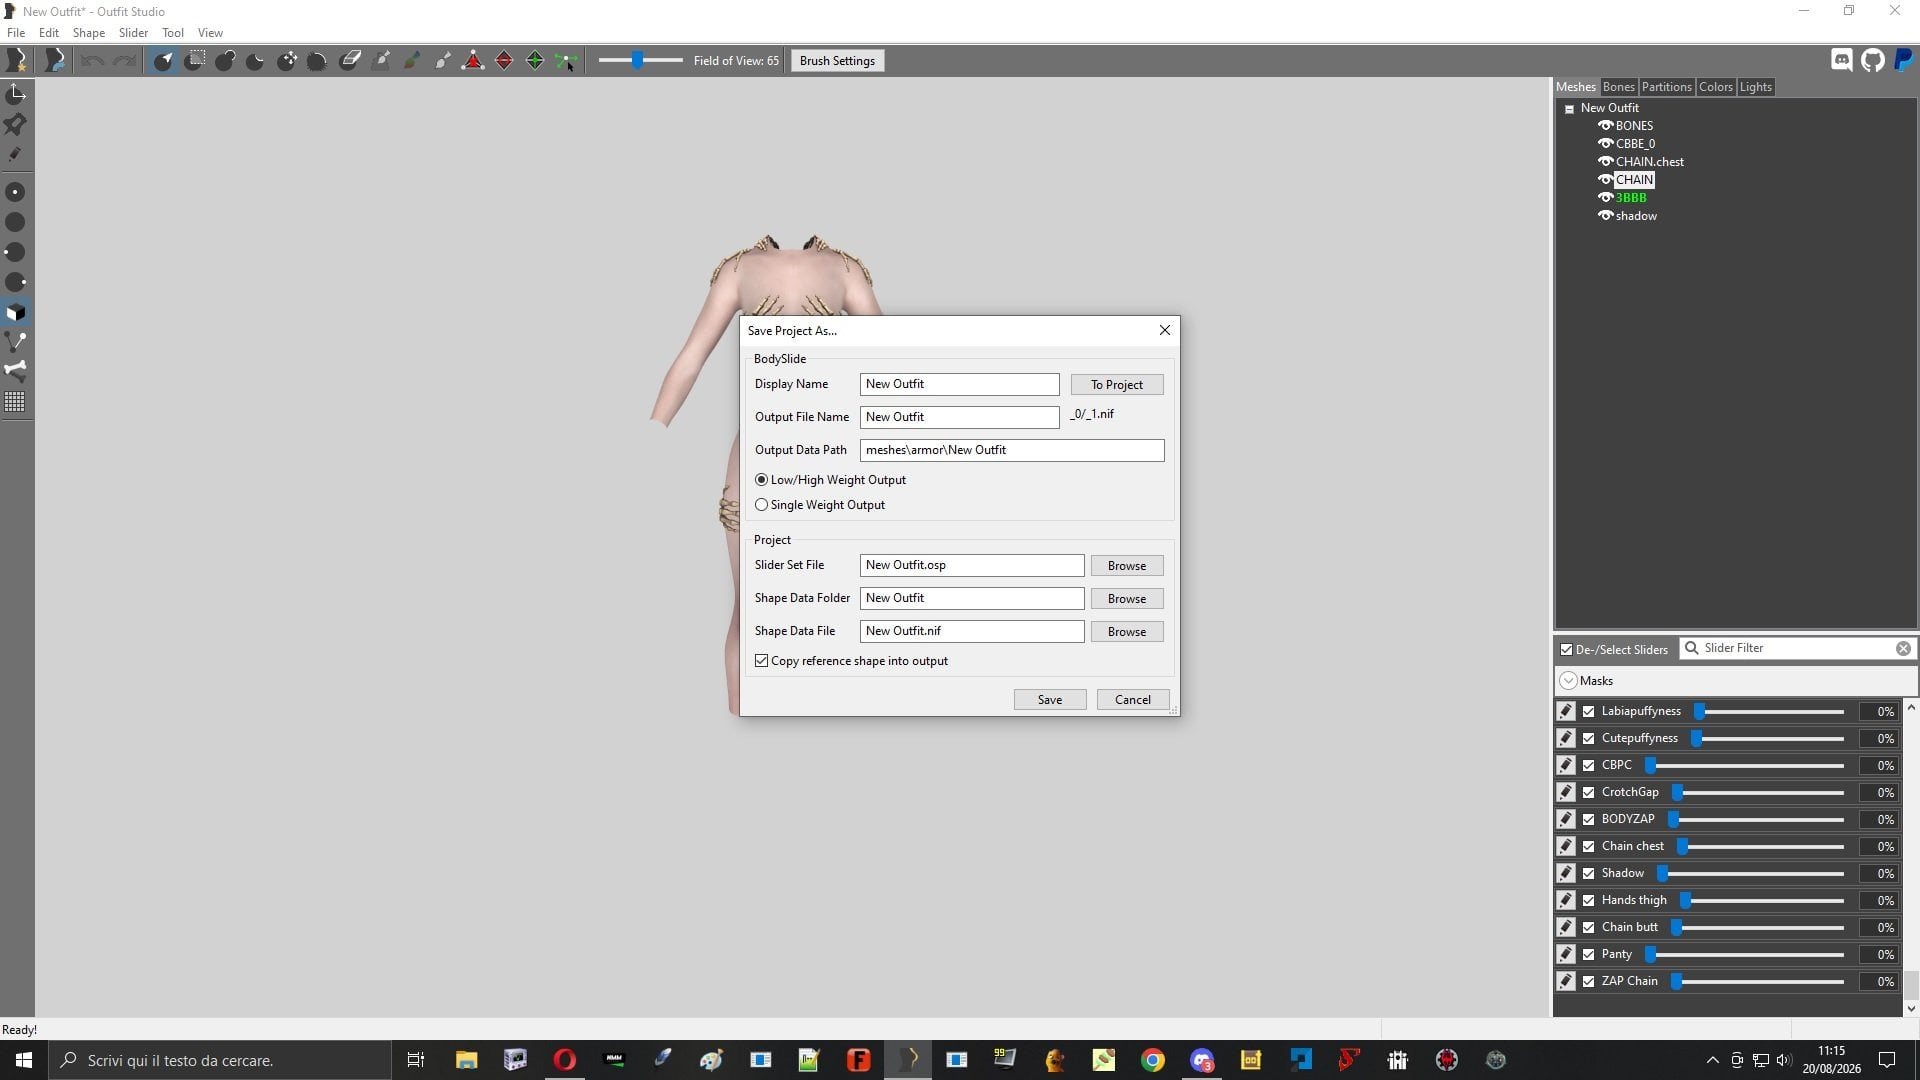
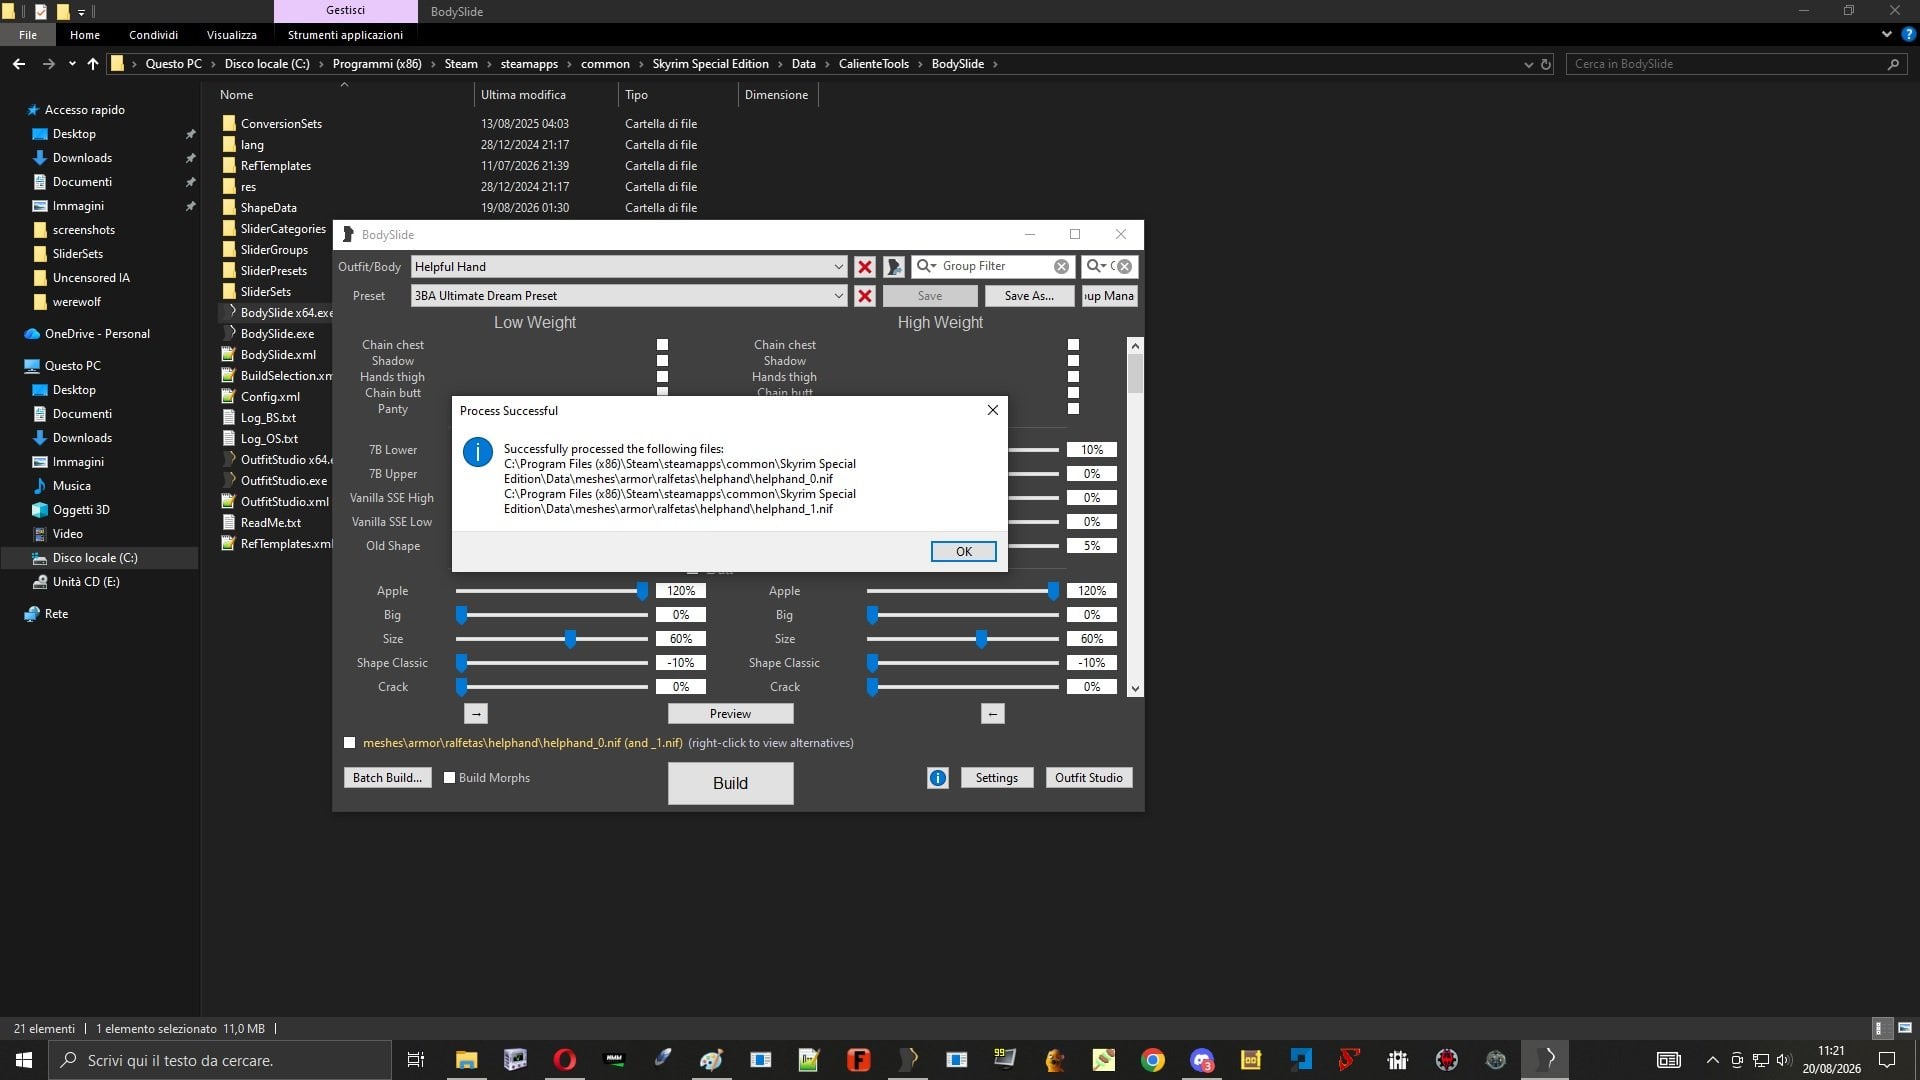
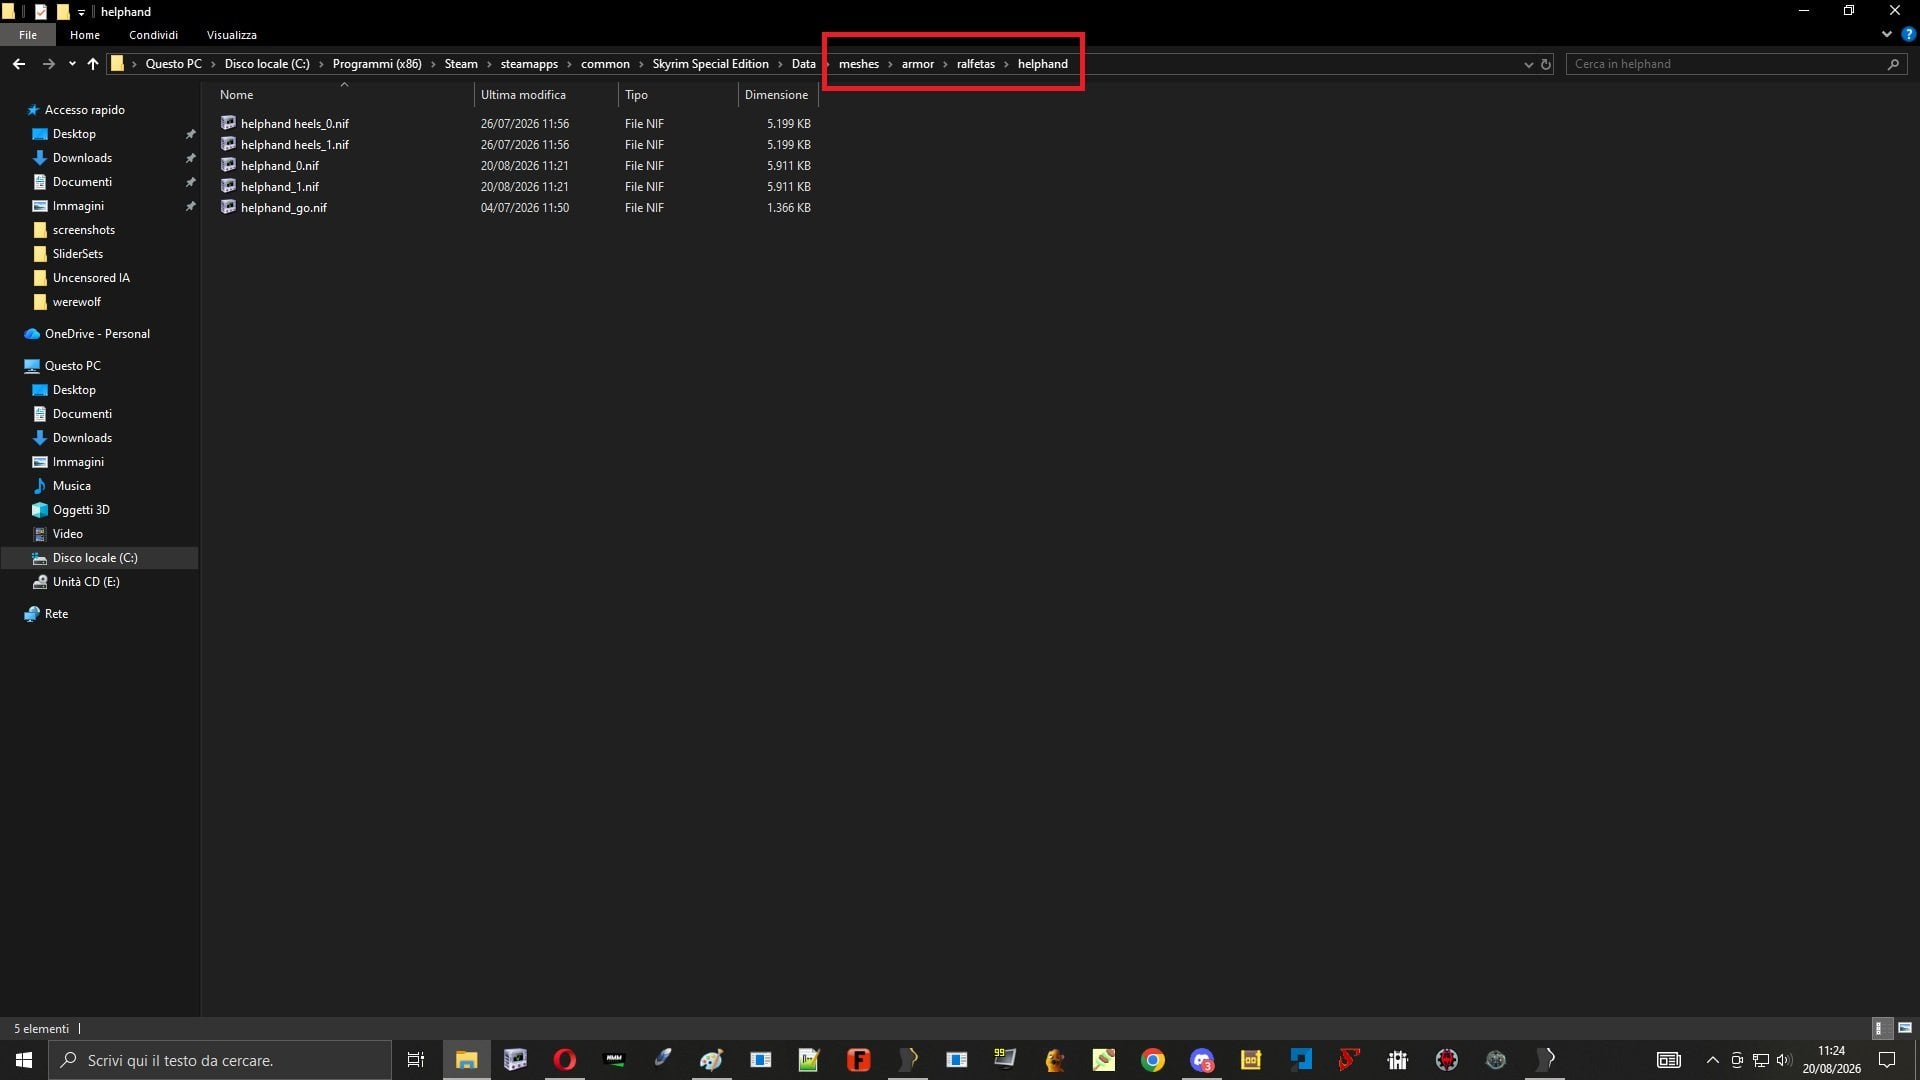
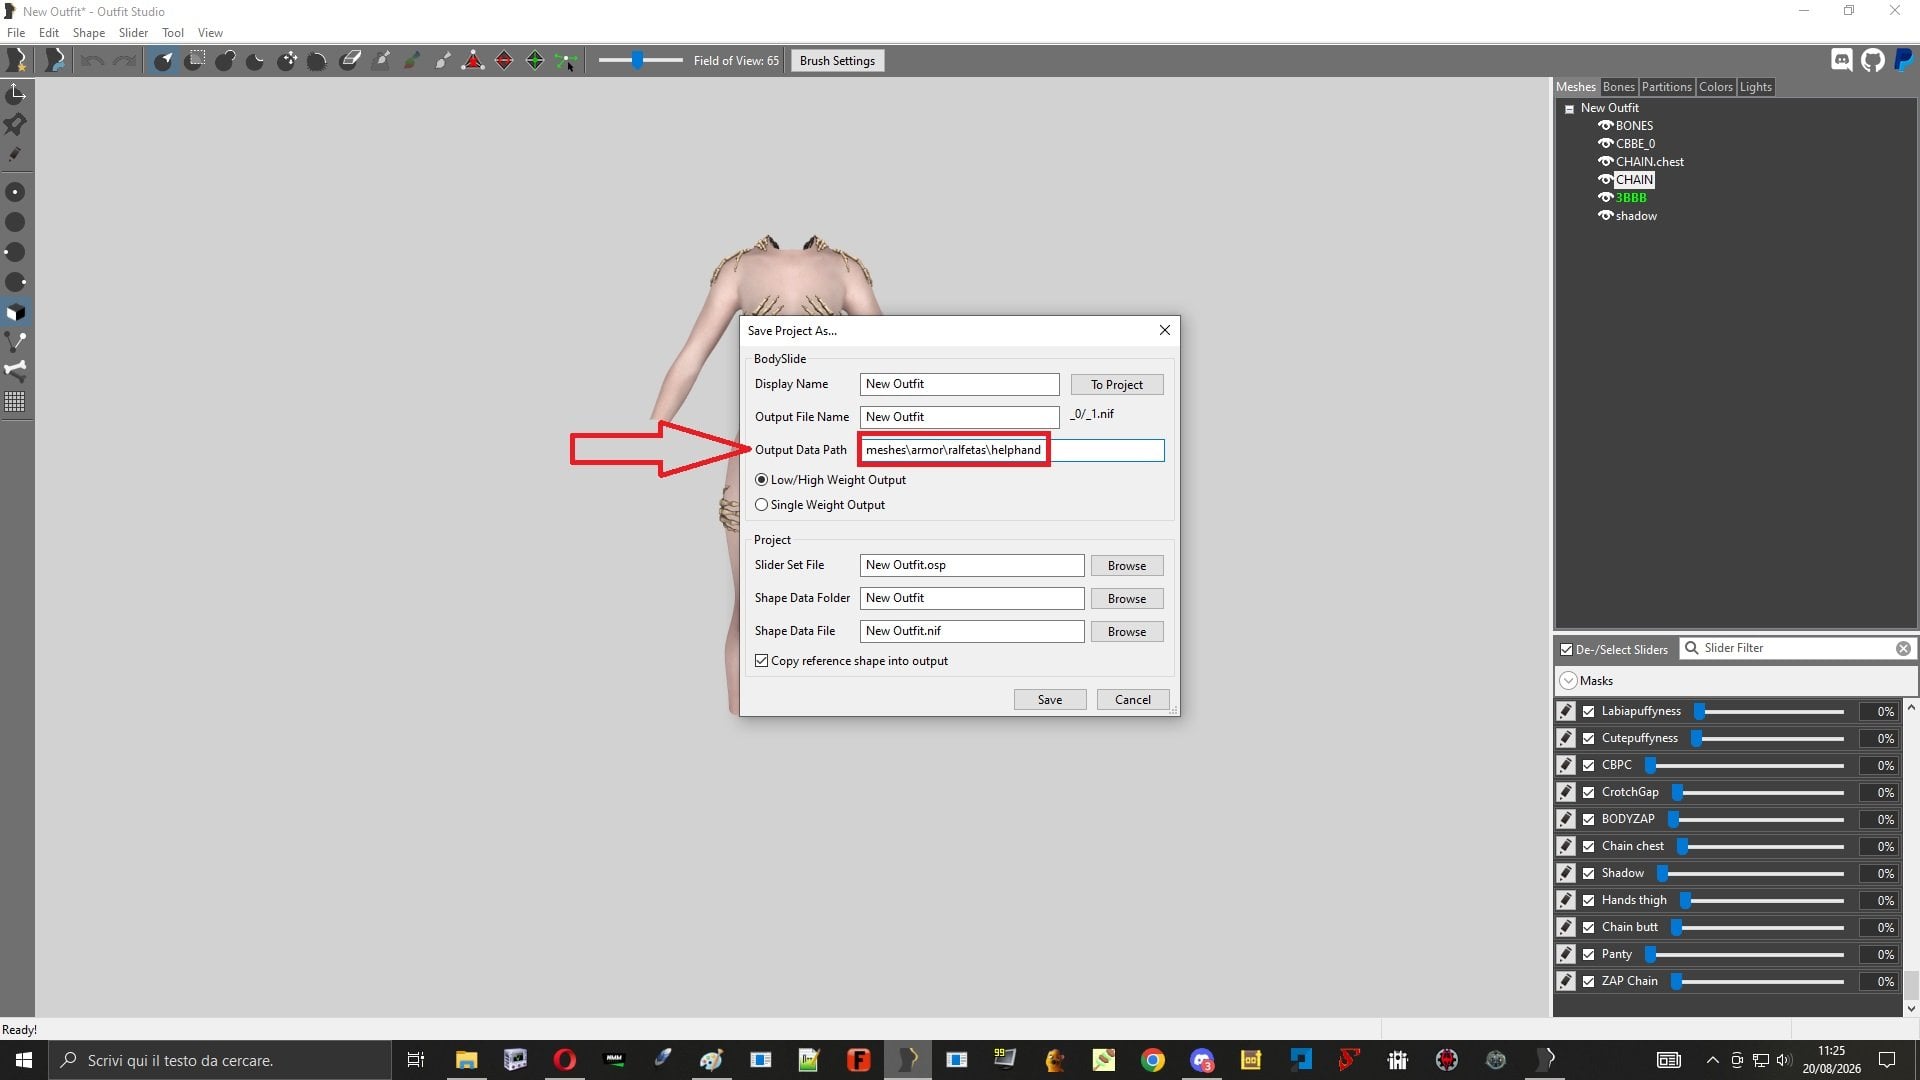
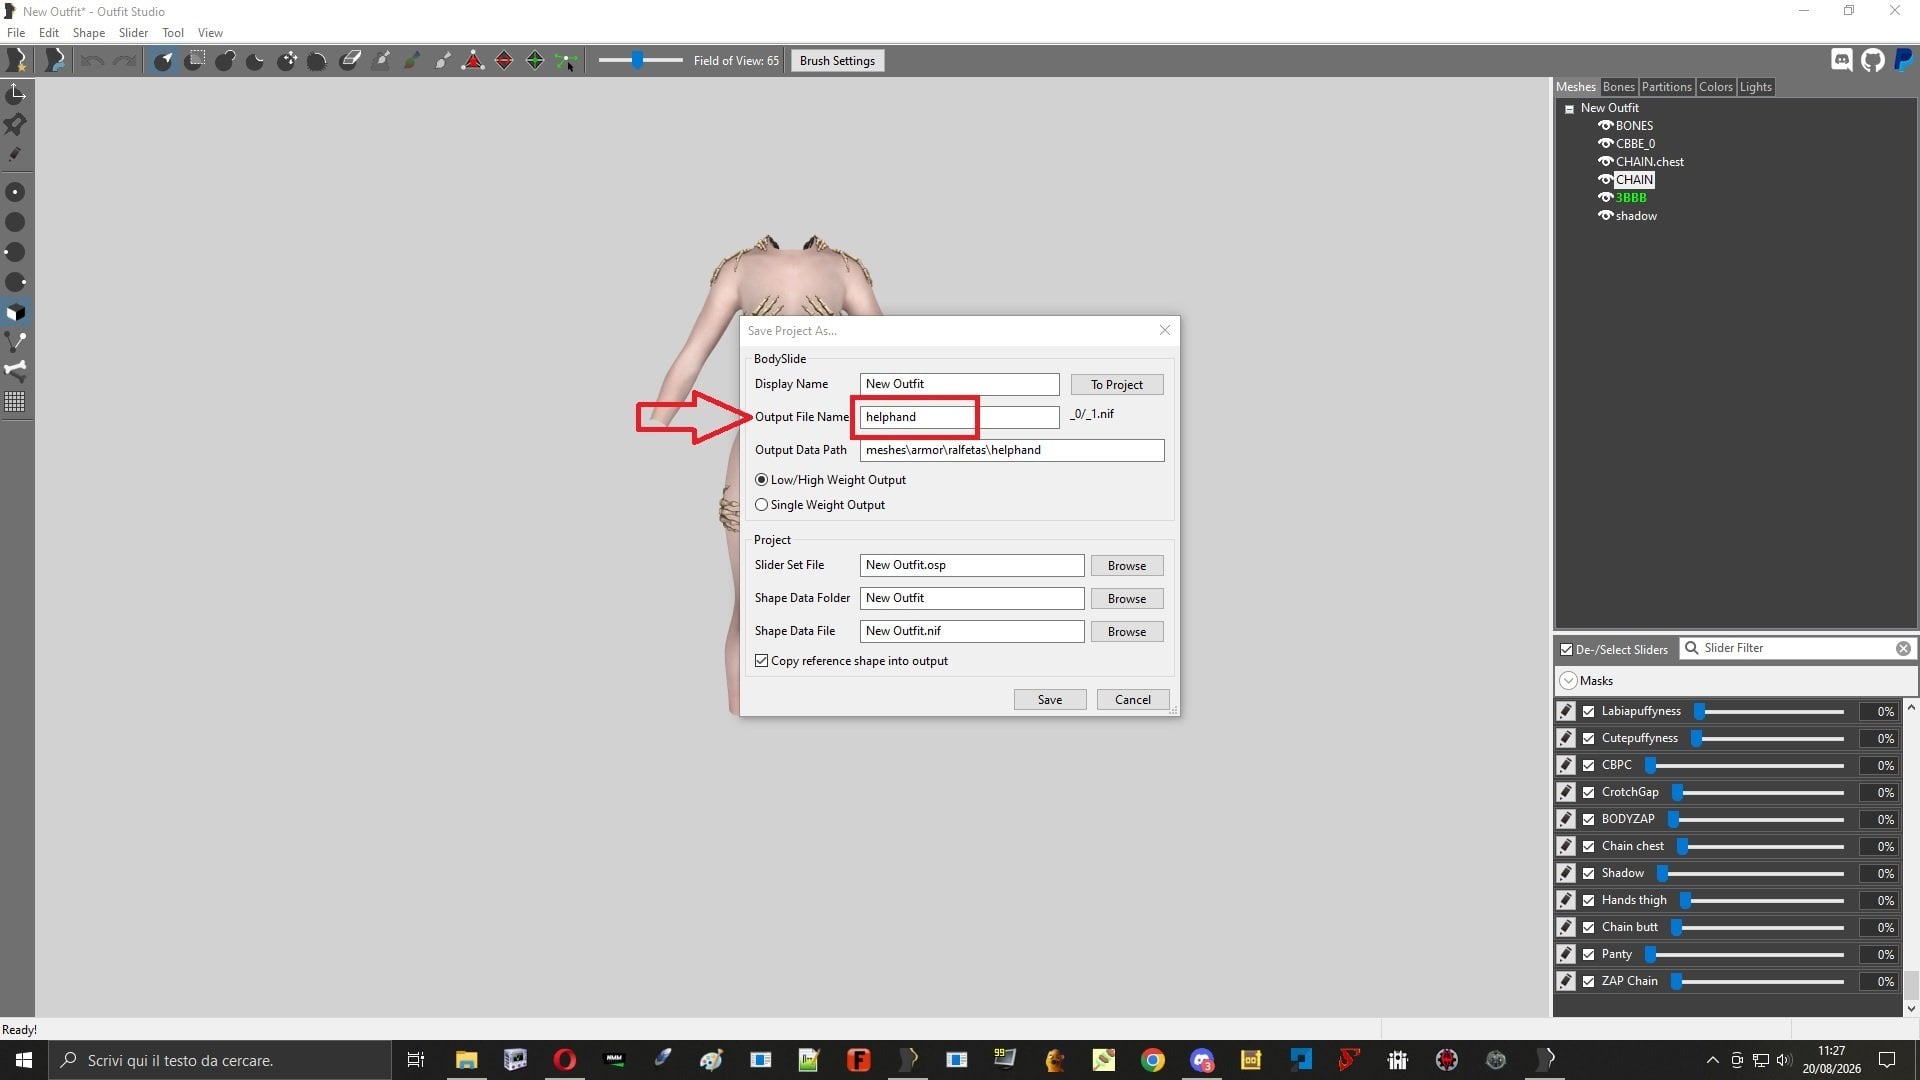
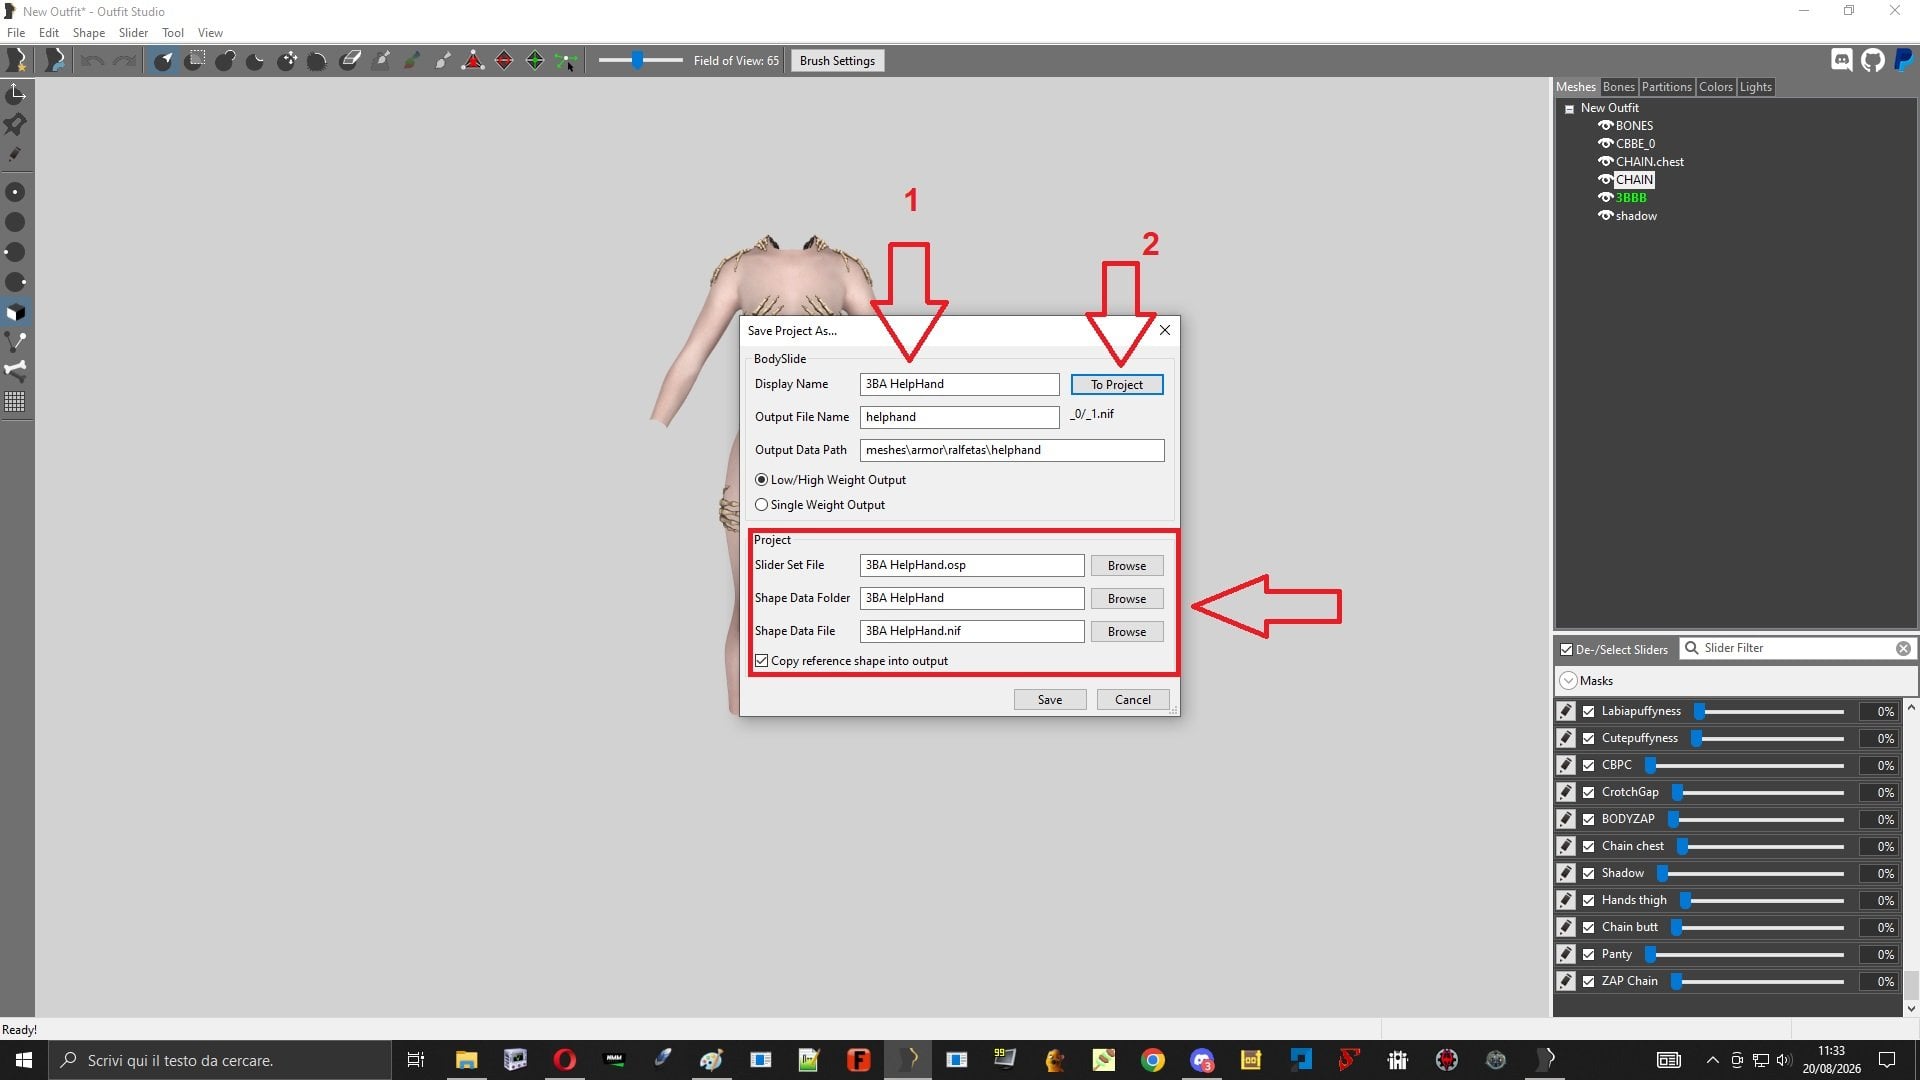
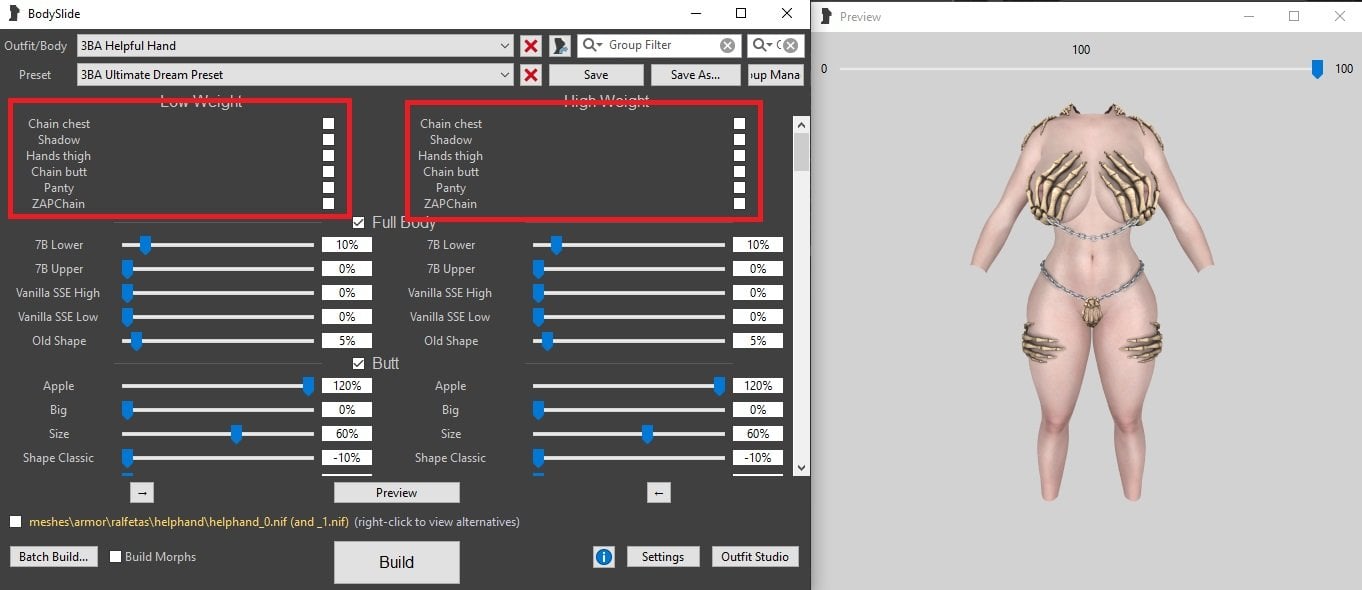
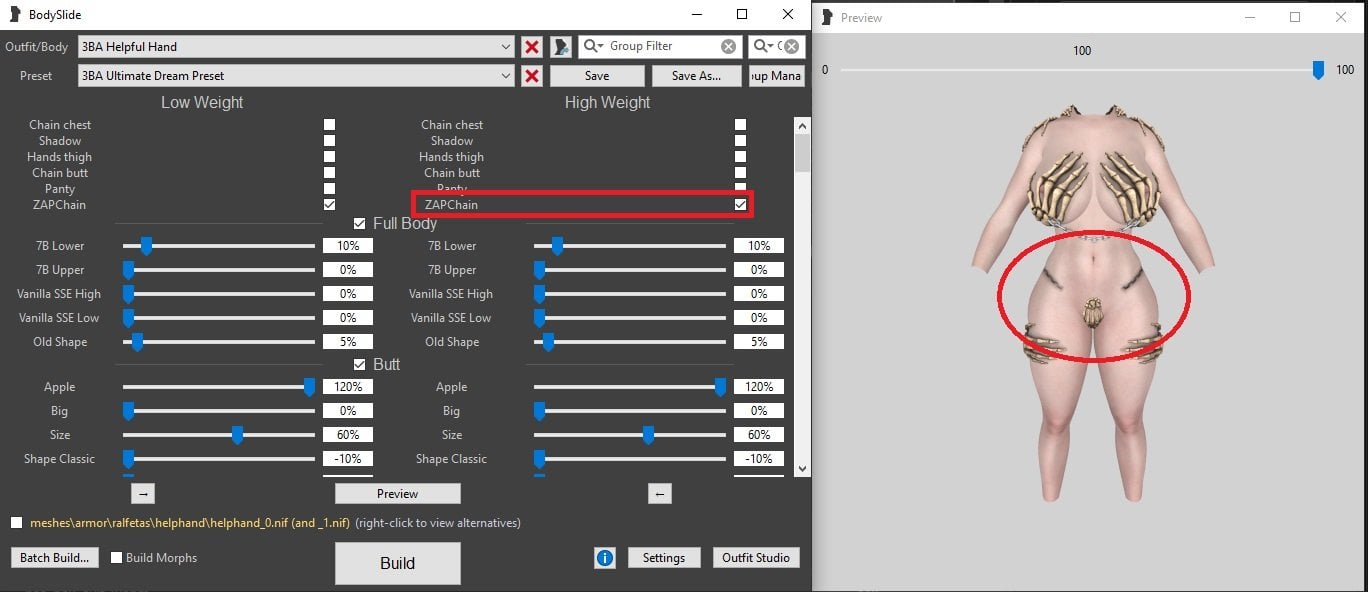
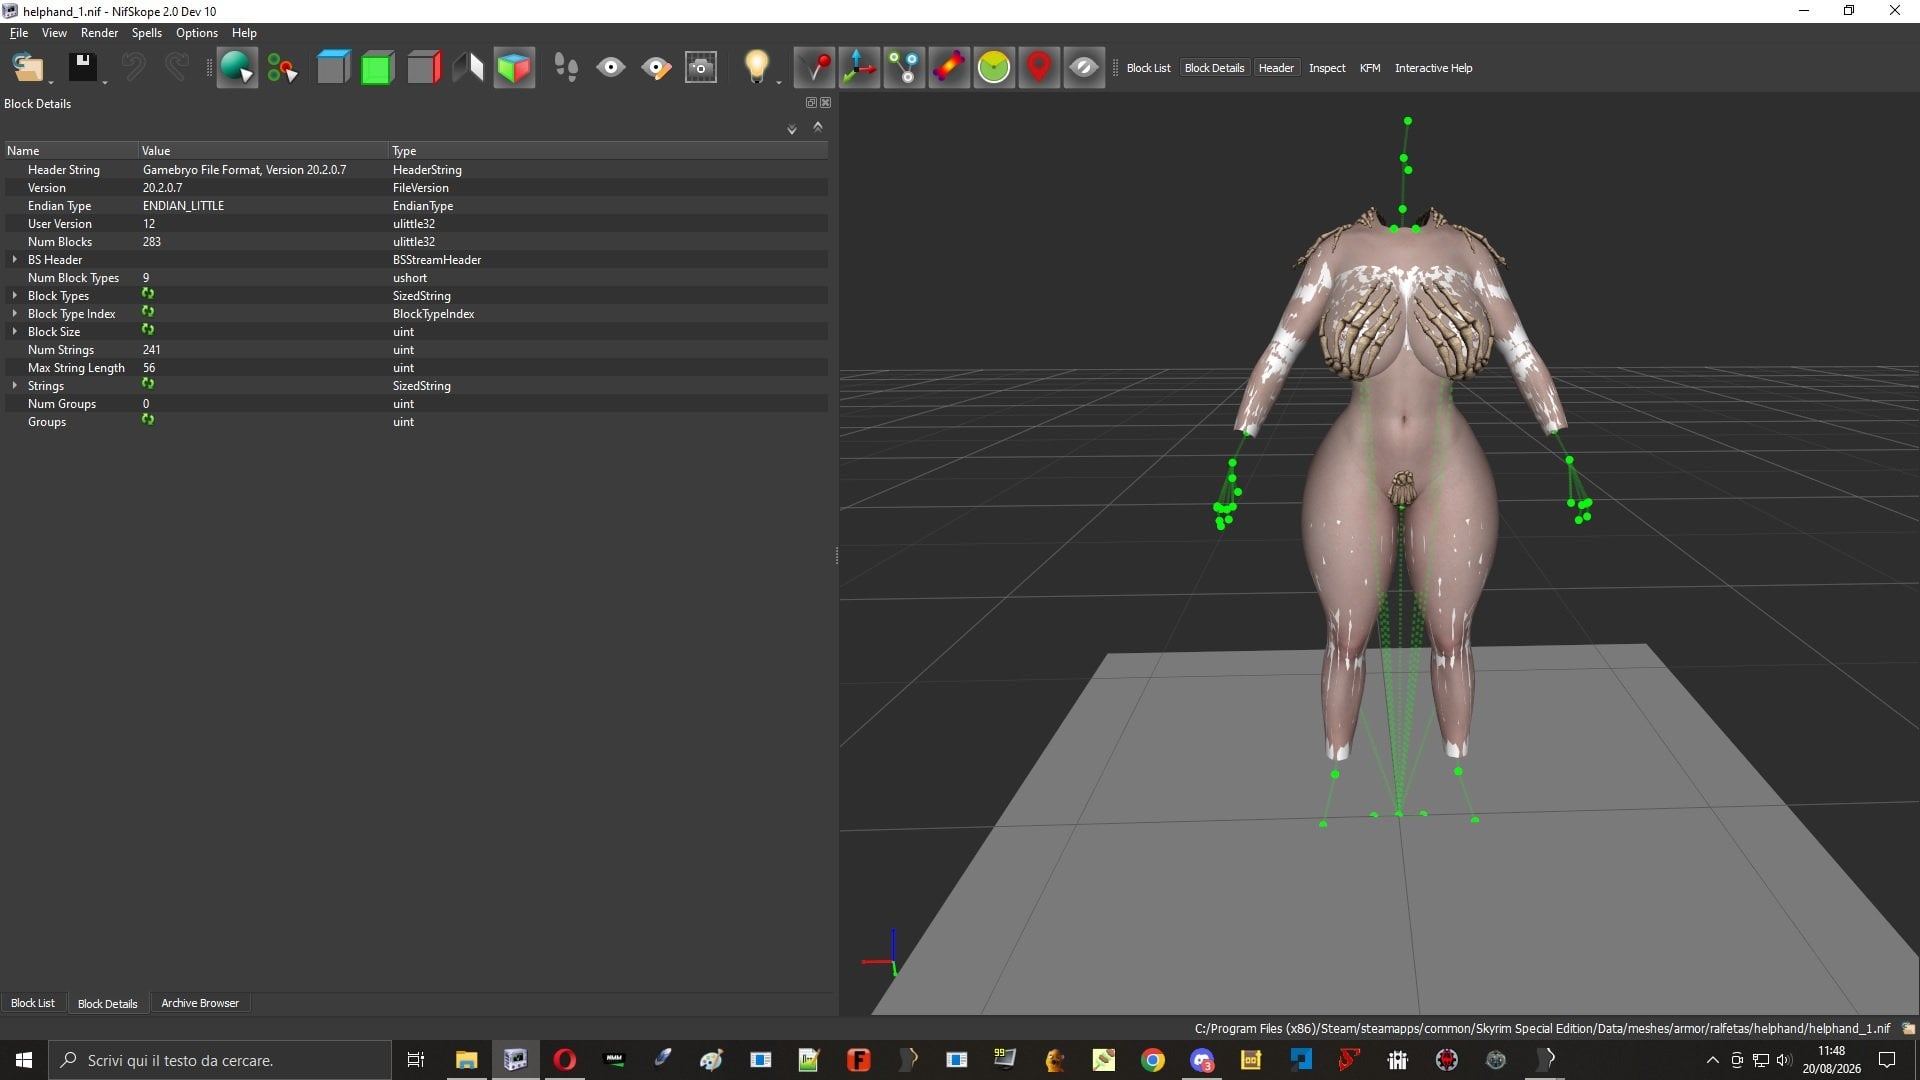
Zap Slider makes it easy to remove unwanted parts of armor without risking damage to the meshes. Open OutfitStudio\File\AddProject , The projects page (OSP file) will open. From the available options, choose the one you want to edit From the panel on the right, select the part you want to remove, then click the icon to see exactly which part it is Slider\New Zap Slider, rename; in this example, it will be named ZAP Chain Scroll through the Sliders list until you find ZAP Enable ZAP: Turn off the meshes, enable the slider Turn on the meshes, turn off the ZAP Verification Test: Turn the ZAP on/off. If the process is performed correctly, you will see the meshes move. File\Save Project As The details form will open. Compilation The hardest part is giving the meshes and the path the correct names. This is where Bodyslide comes in handy. When we go to remodel, we’ll be provided with both the NIF file name and the path where it’s located. DO NOT confirm the creation. This will keep the form open so you can use it as a guide when filling it out. Following the path shown, look for the “meshes” folder where the NIF file is located Take the path shown at the top, copy and paste it into the tab From the path, right-click on the NIF, then select “Rename” or “Copy and Paste” in the tab . Note: Copy only the NIF name; if necessary, remove any extra parts (for example, “Helphand_1.nif” will become just “Helphand”). Display Name : Here you can enter whatever you like; this will be the name you'll see in Bodyslide for the reshaping process. Click on To Project The rest of the form will be filled out automatically Your NIF has been created using ZAP. Confirm to save. Close Bodyslide and reopen it; this will confirm the registration of the previously modified NIF. Outfit\Body, search for the newly created NIF There will be a ZAP; activate it to remove the unwanted part. Build to obtain the NIF modified in this way
-
 Link4720 joined the club
 -
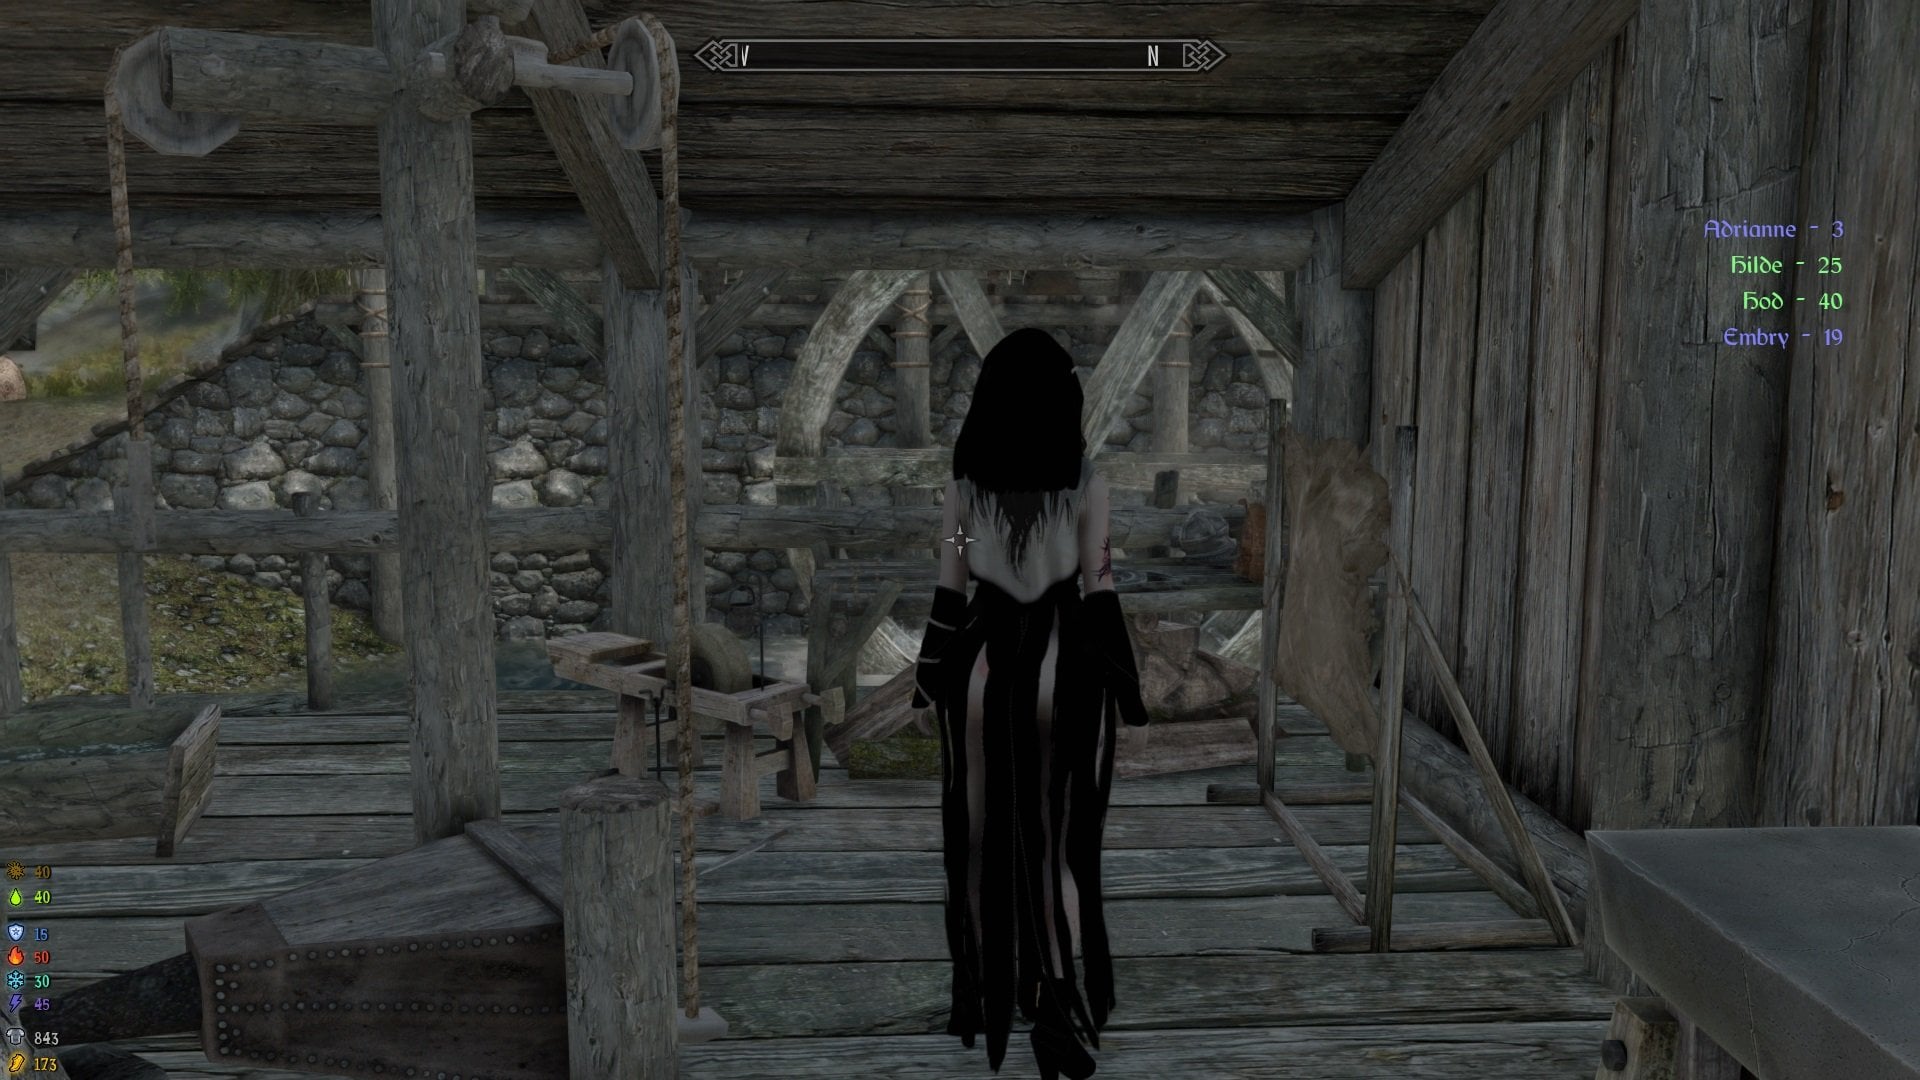
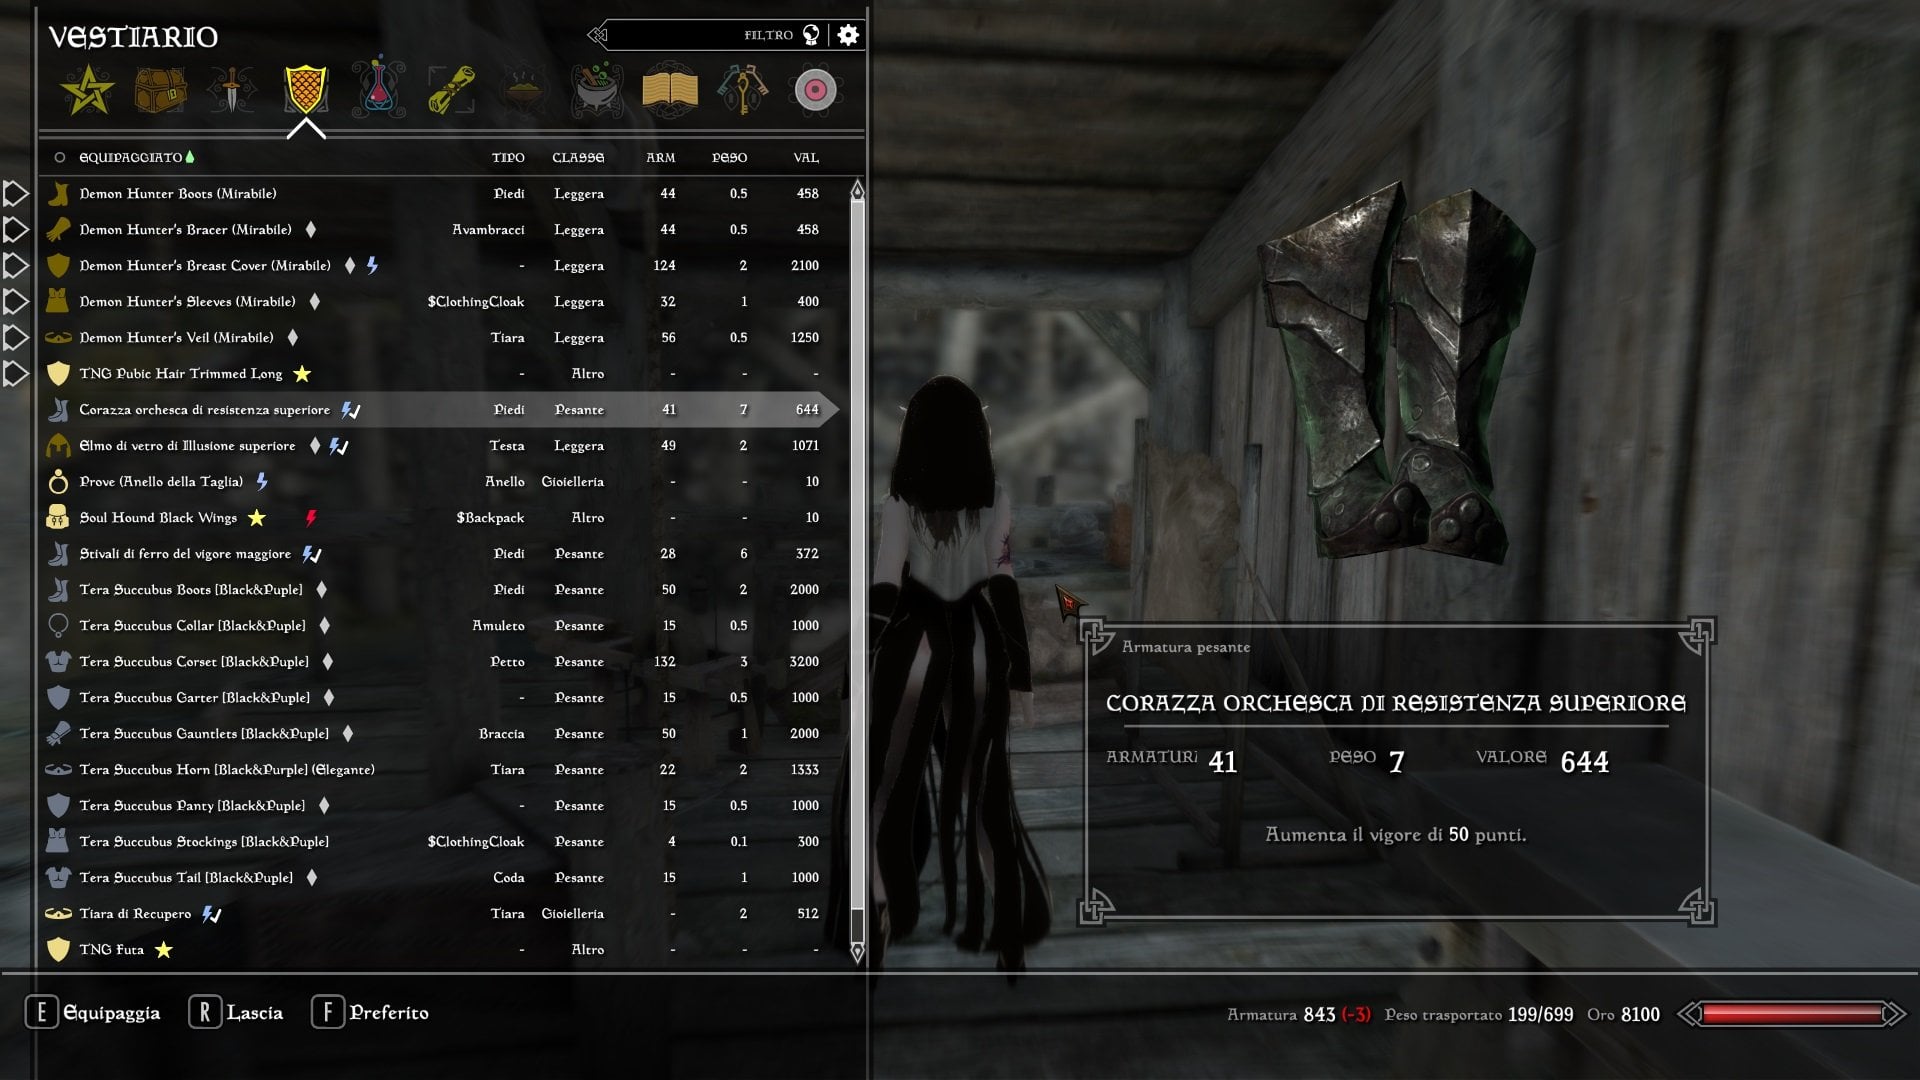
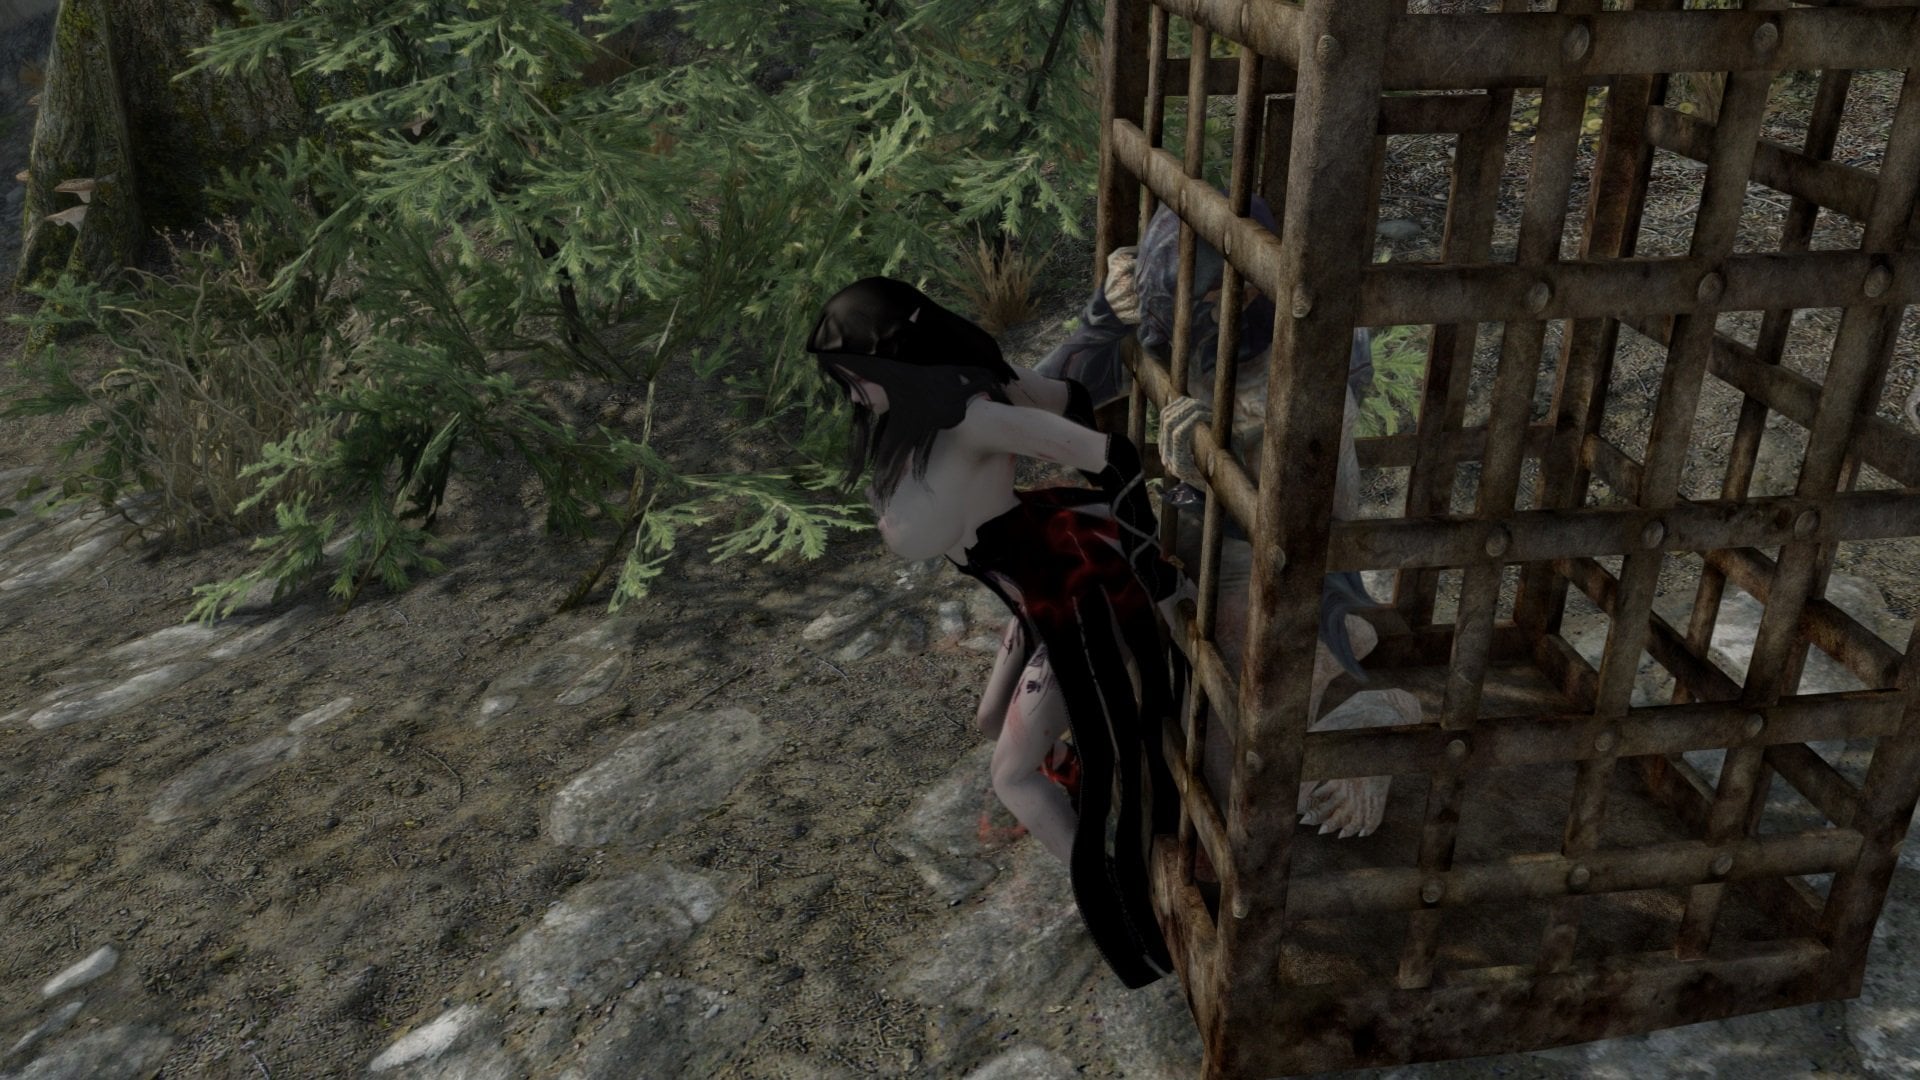
 As the title suggests, a variable from the Egil's Demon Hunter mod Created a script for skirt ripping Need Original Egil's Demon Hunter 3BA and requirements FSMP or HDT-SMP and requirements 3BA Demon Hunter Damage.7z Install with ModManager , overwrite when required Here for more details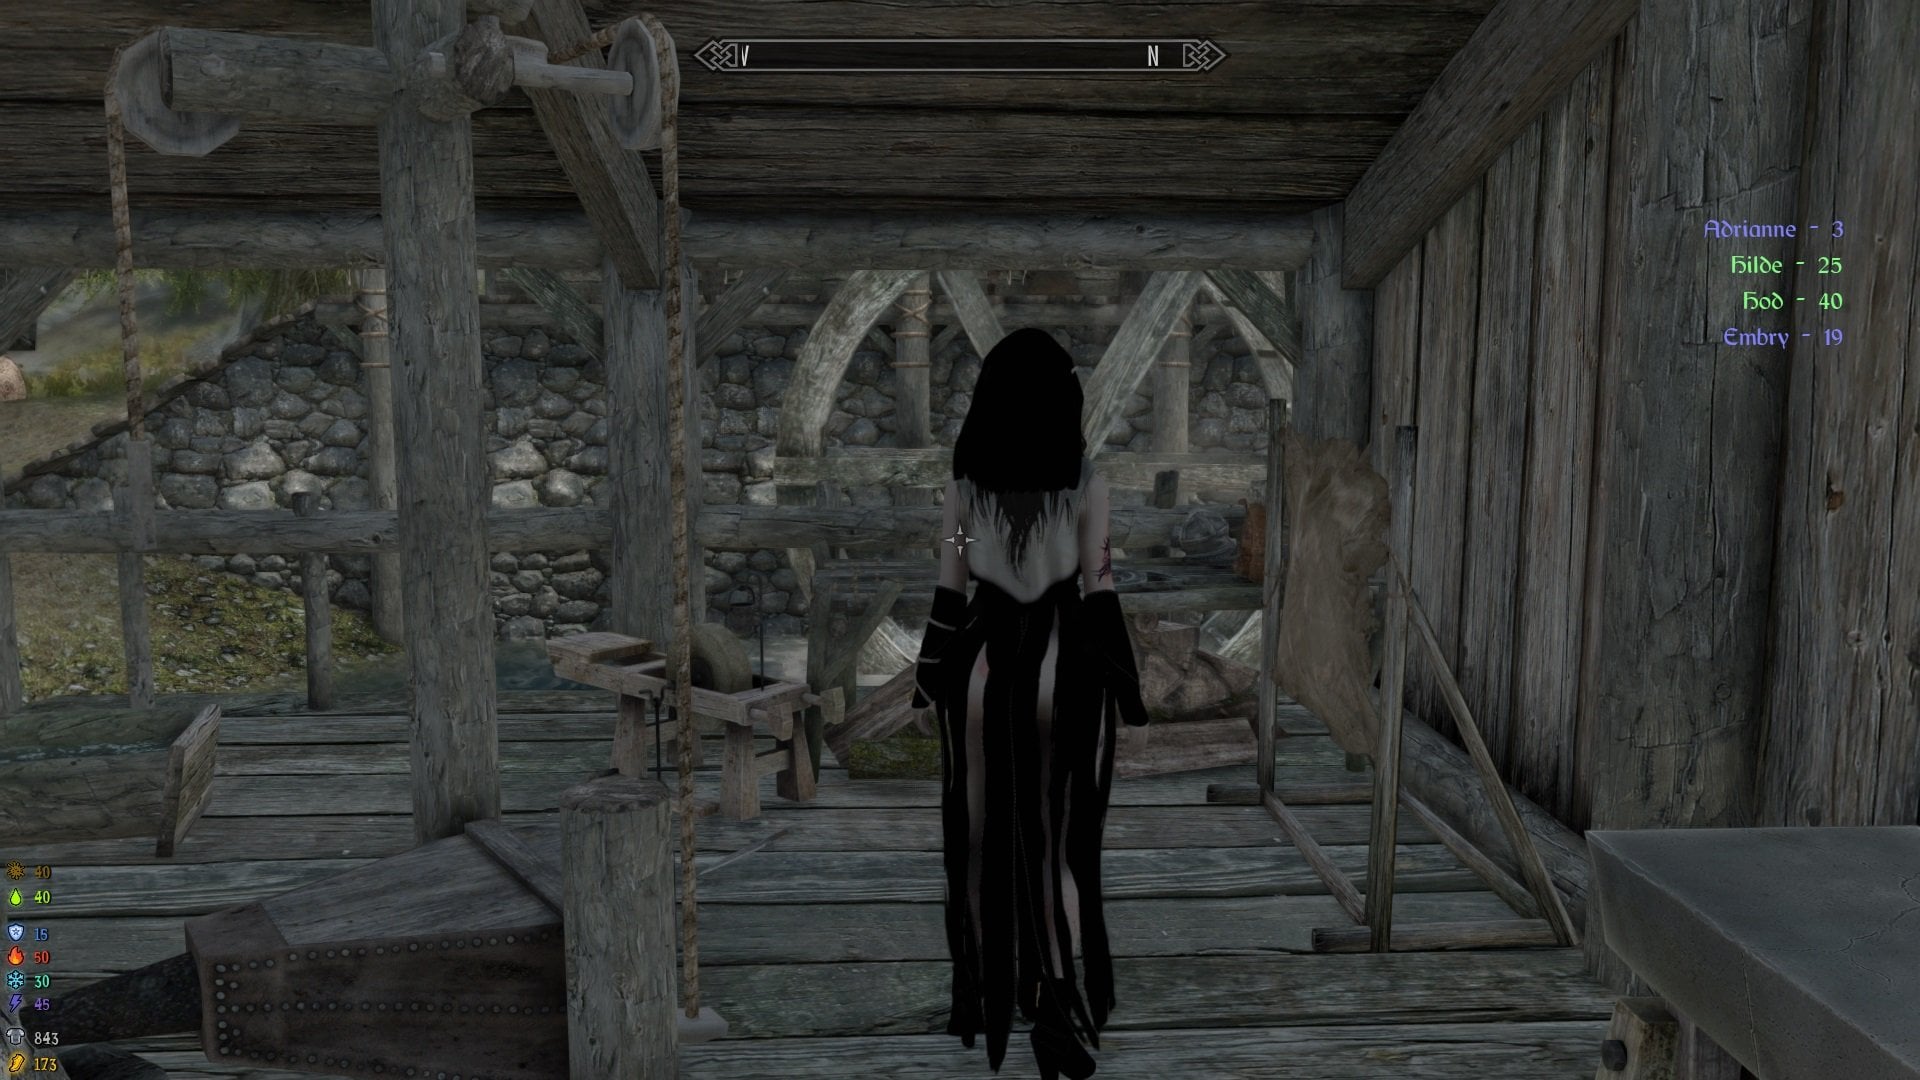
-
Damaging a armor in battle
Dorabella replied to Dorabella's topic in Skyrim : My mods and variations's Variations Armors
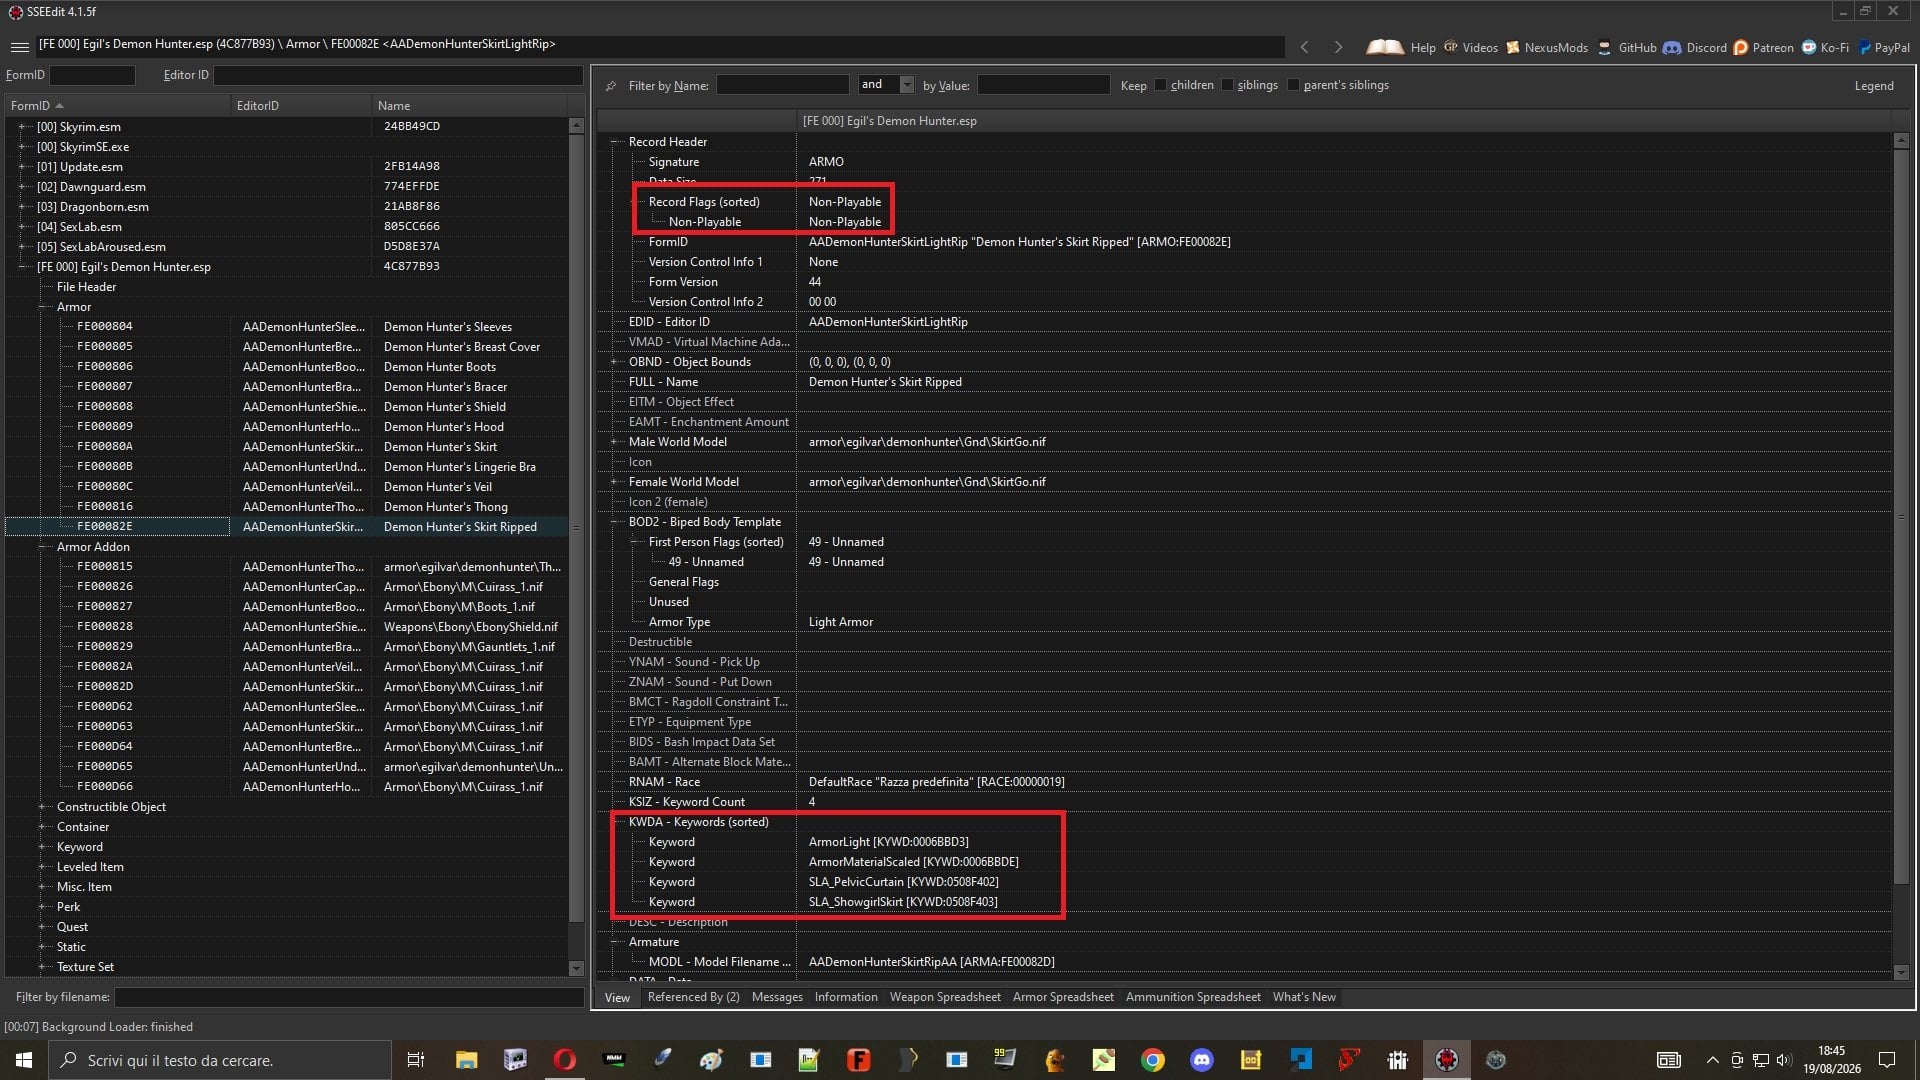
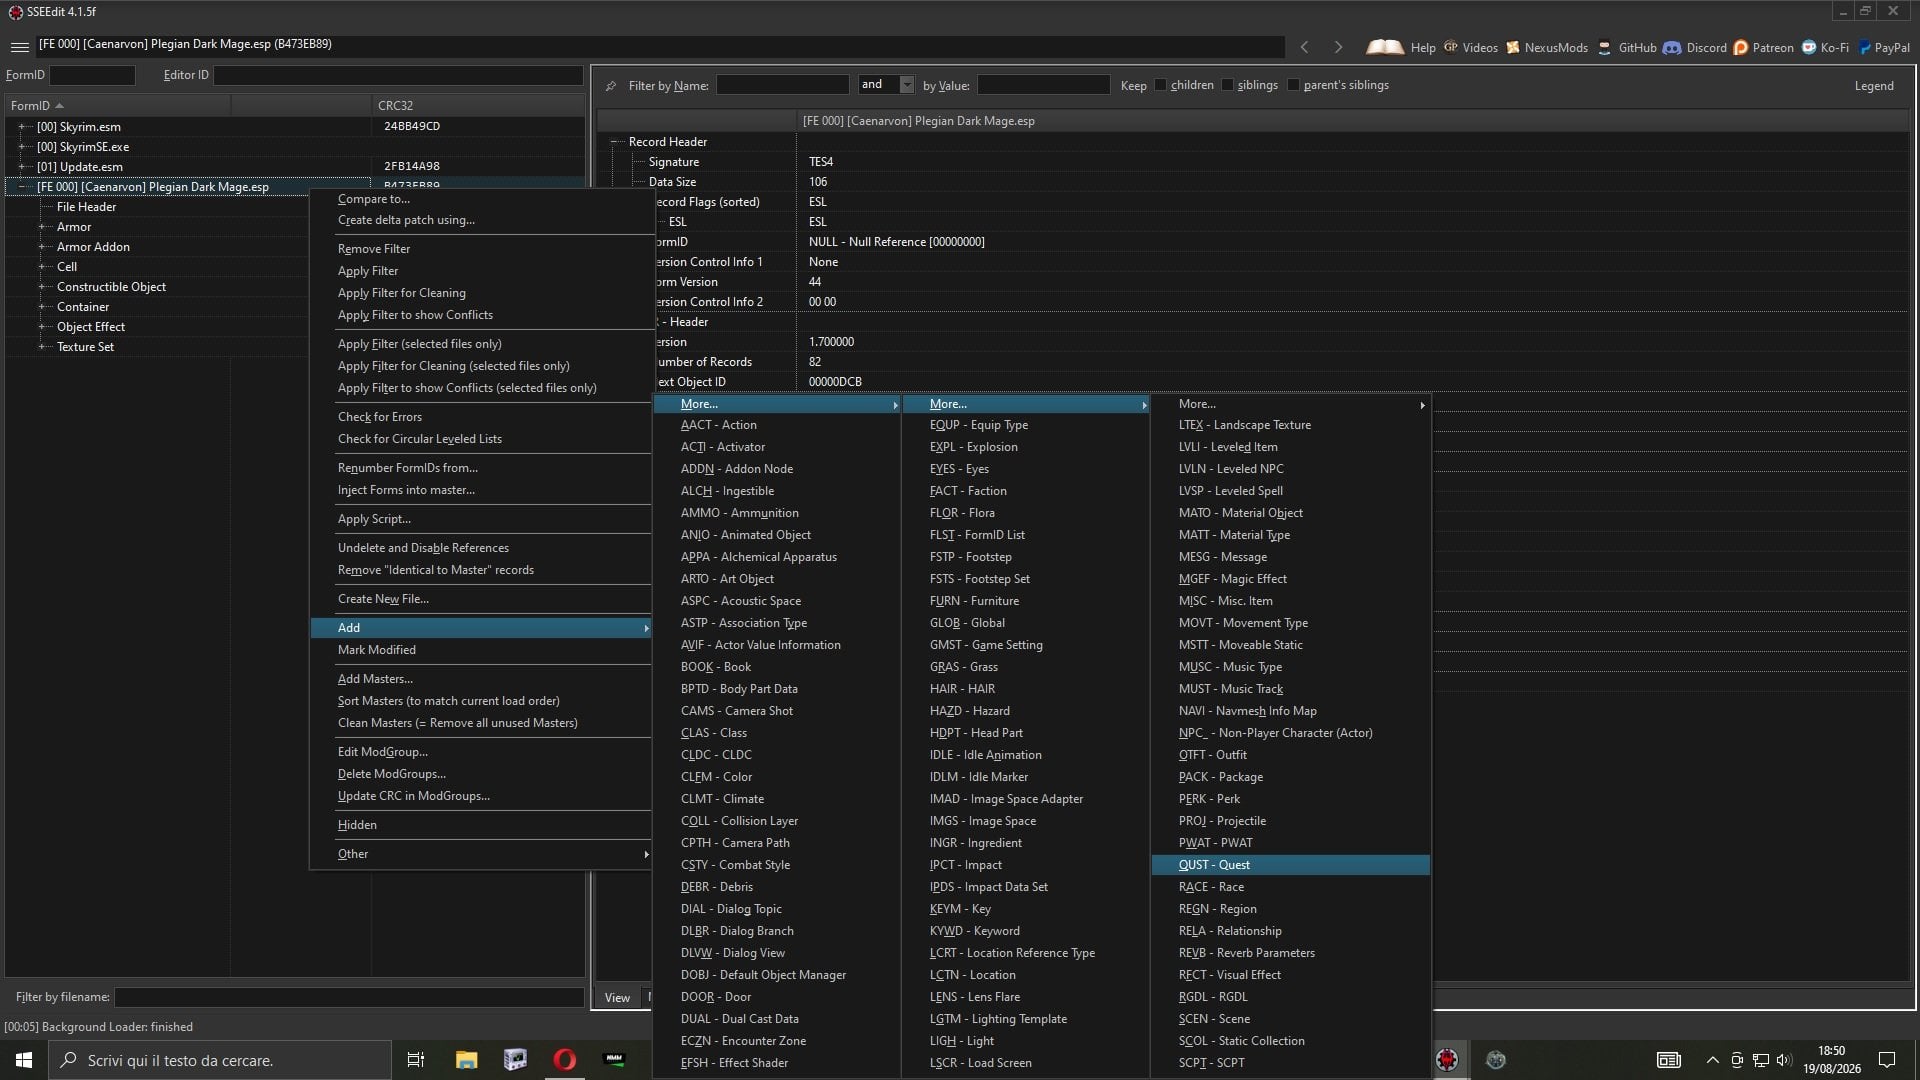
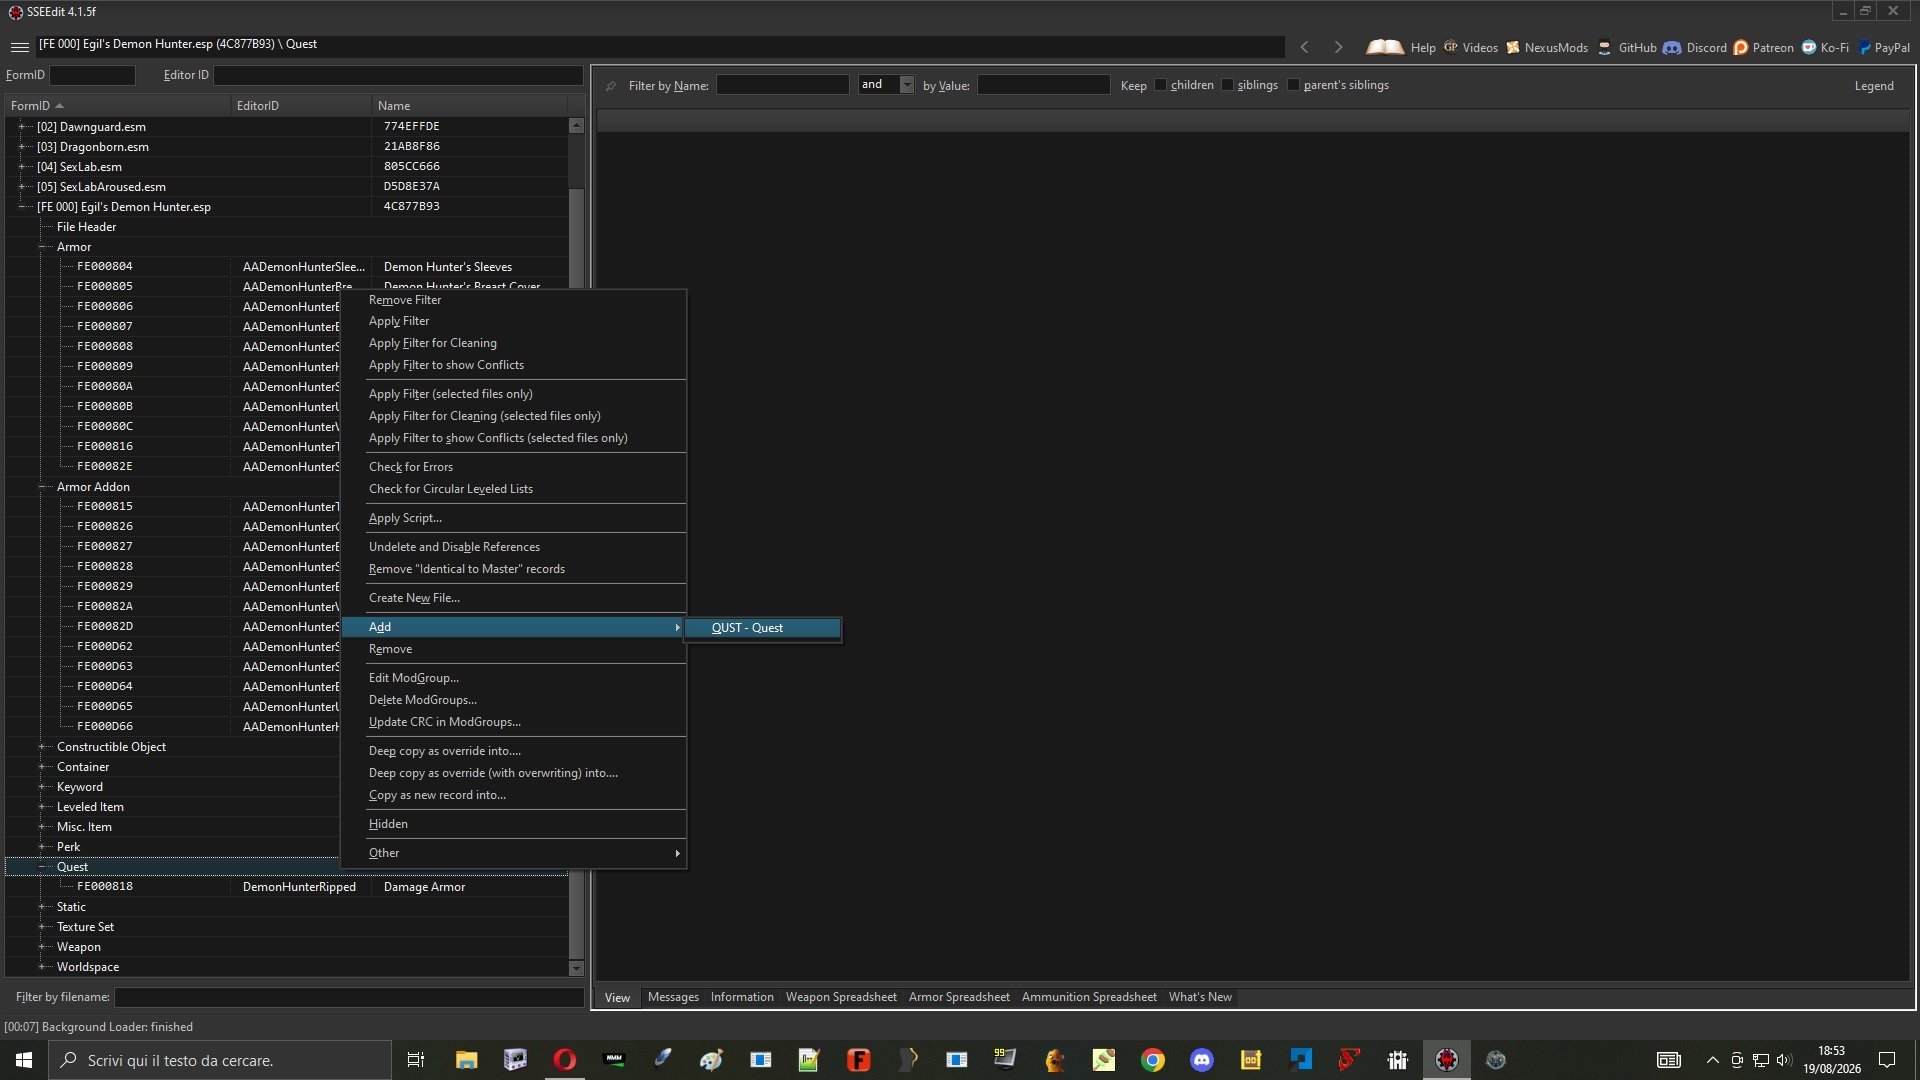
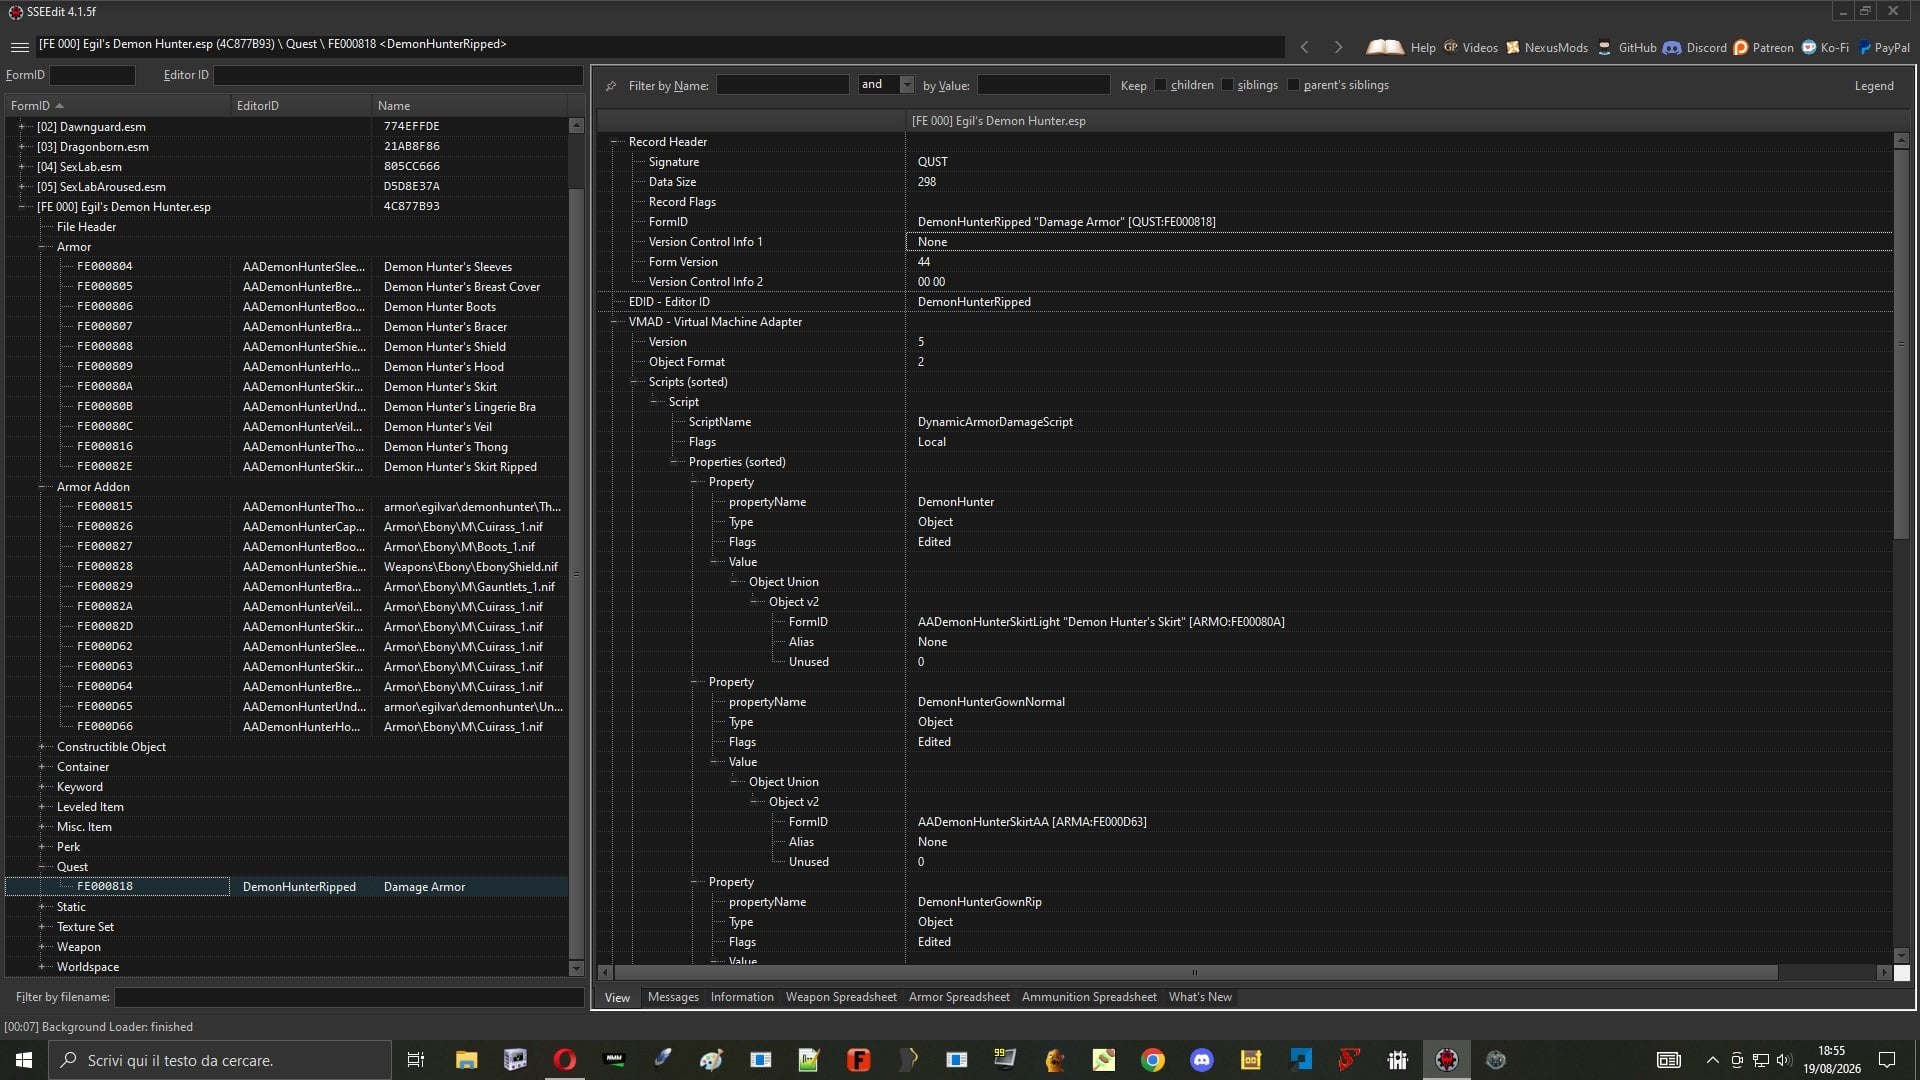
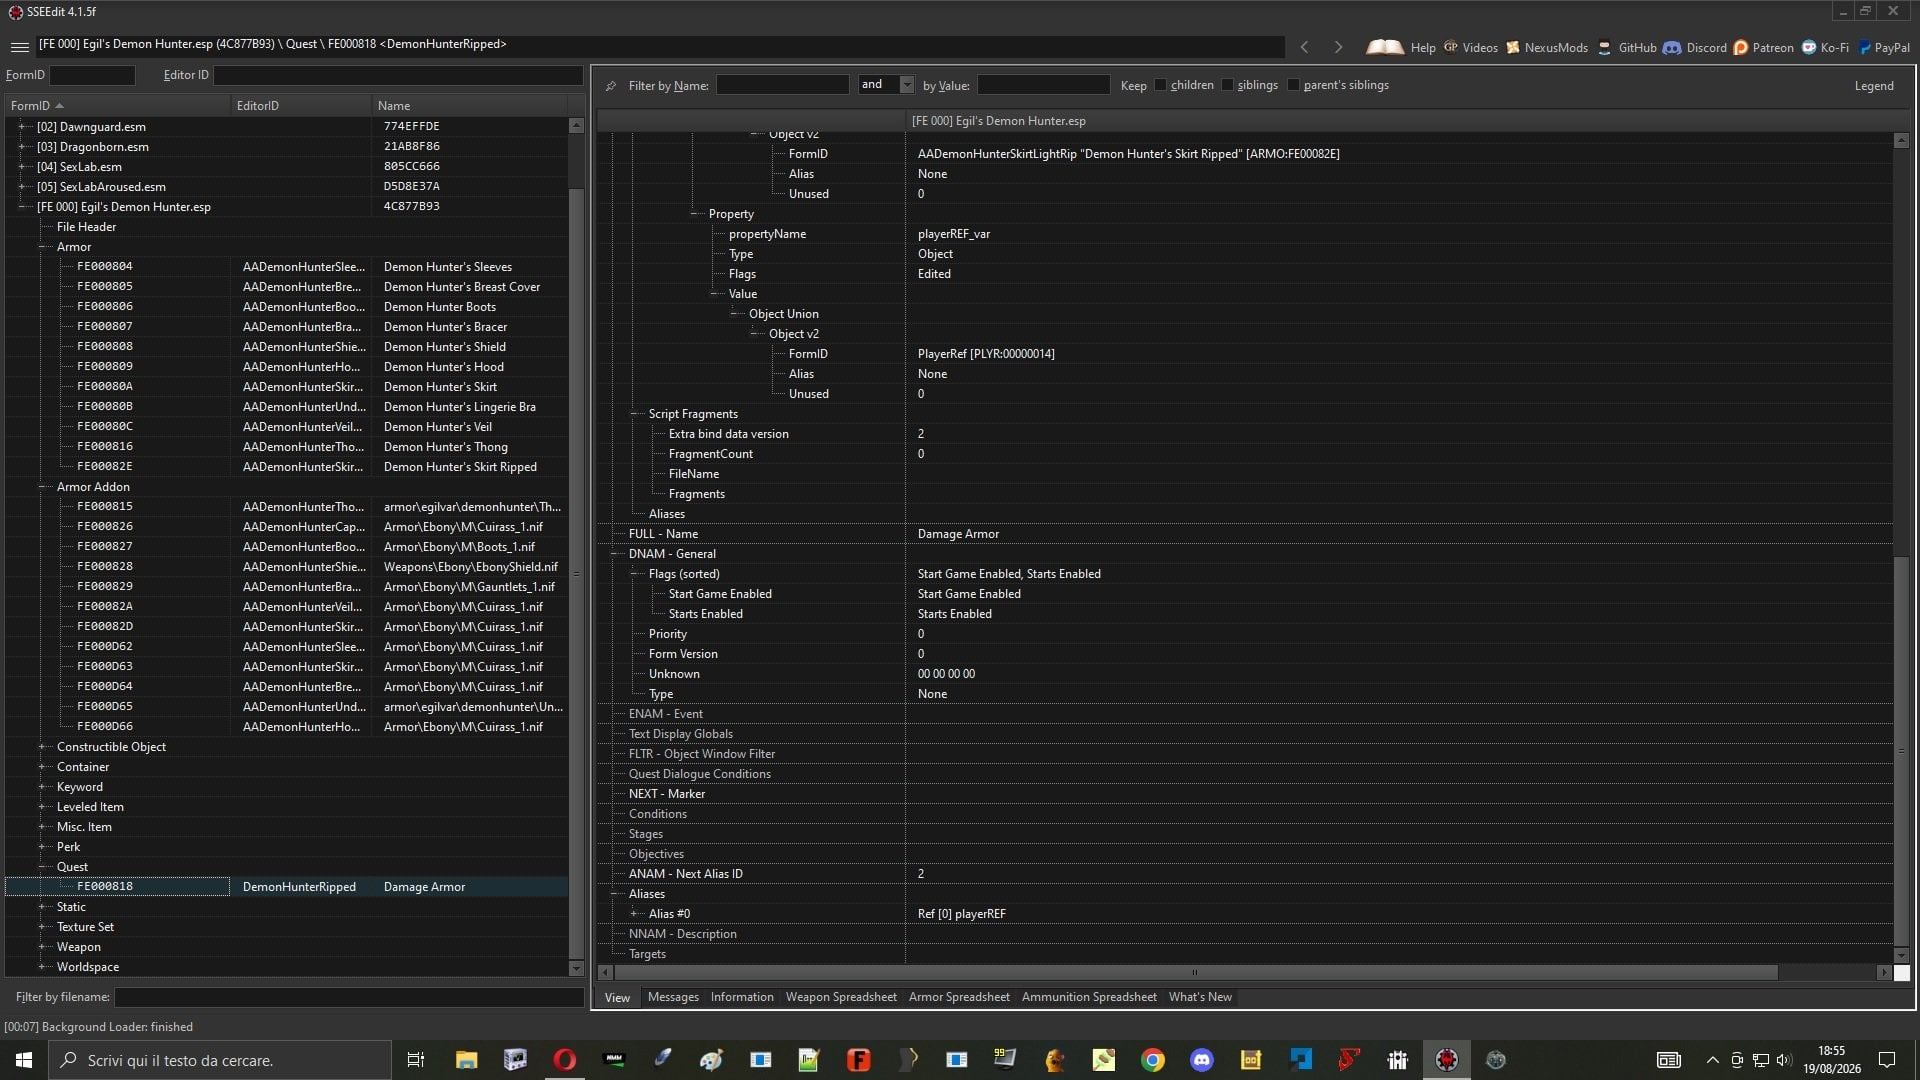
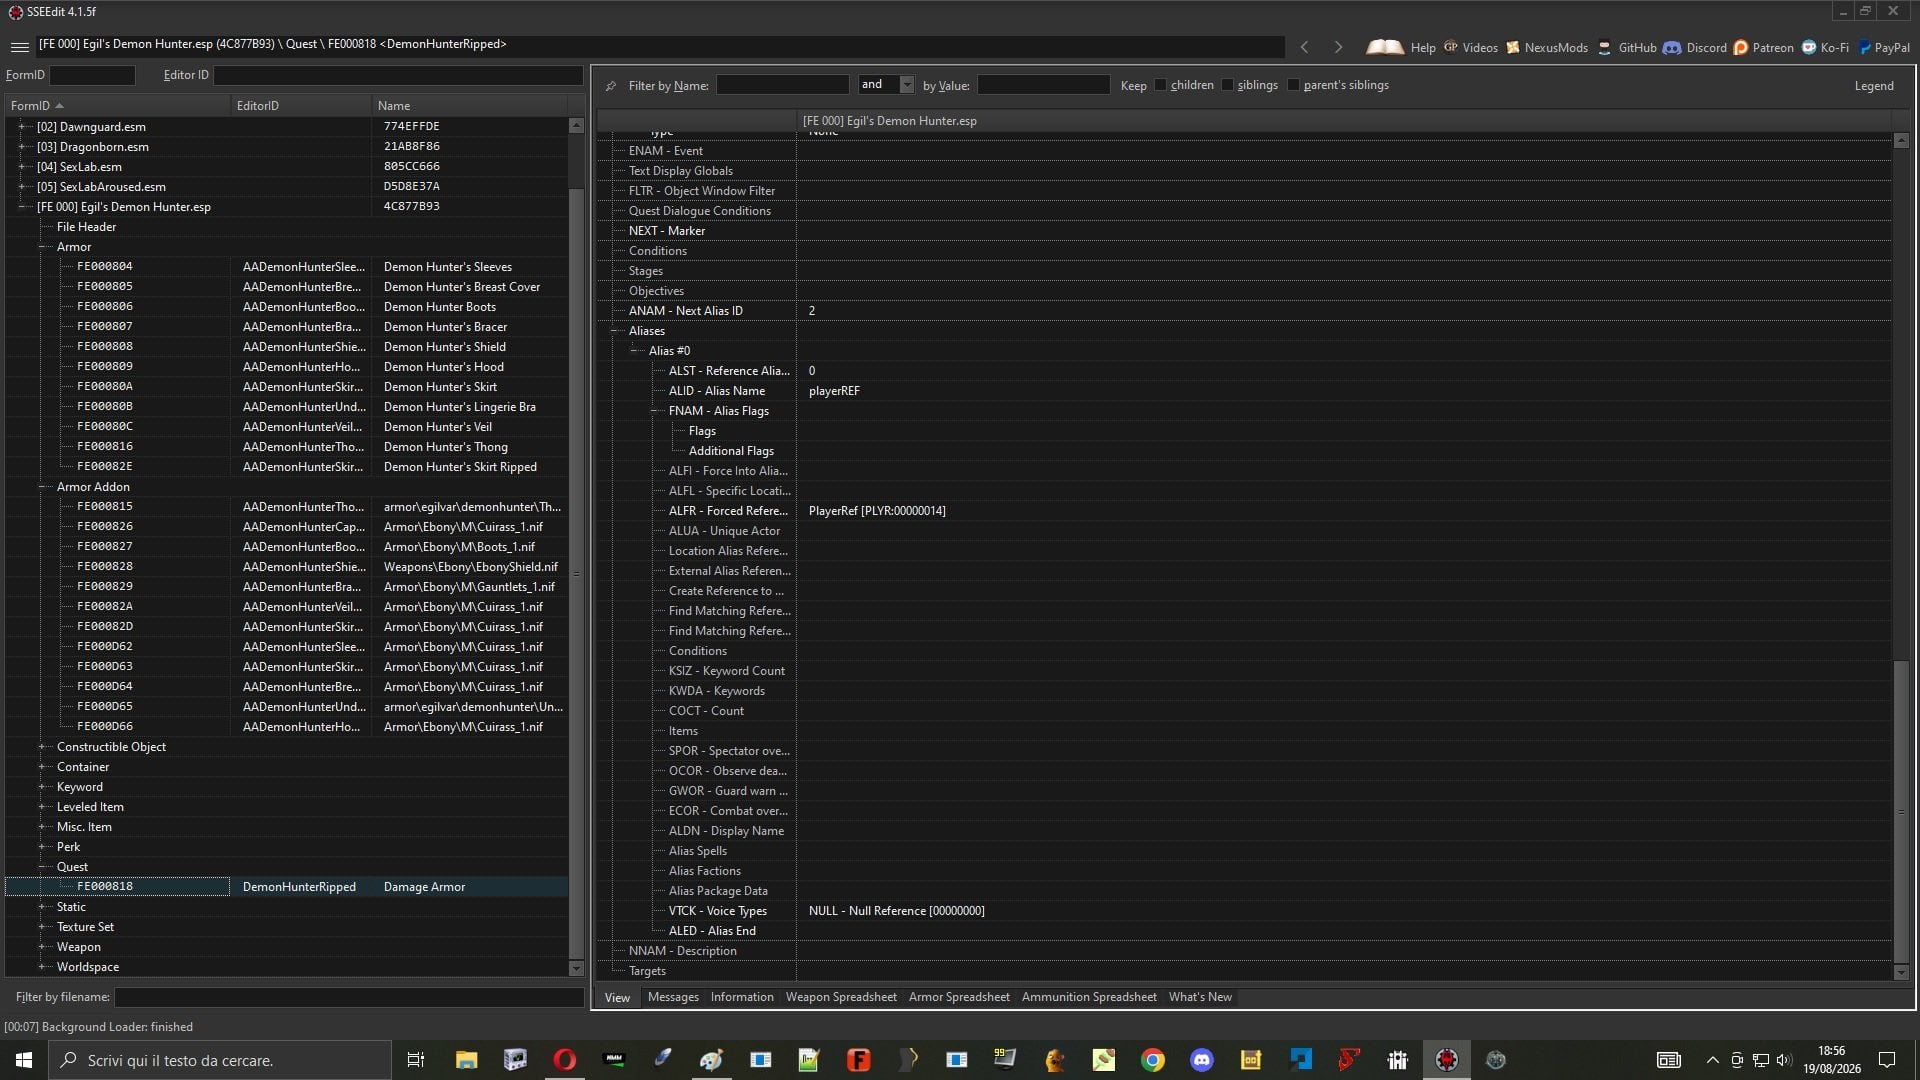
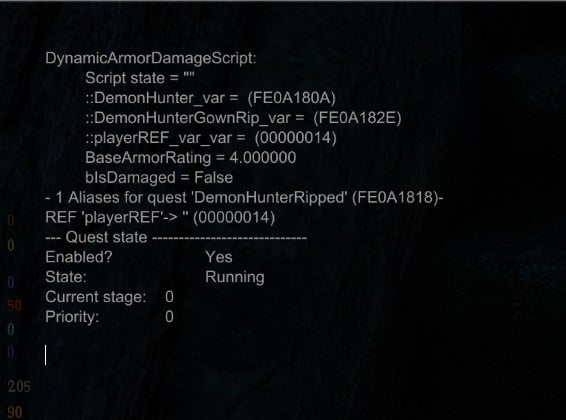
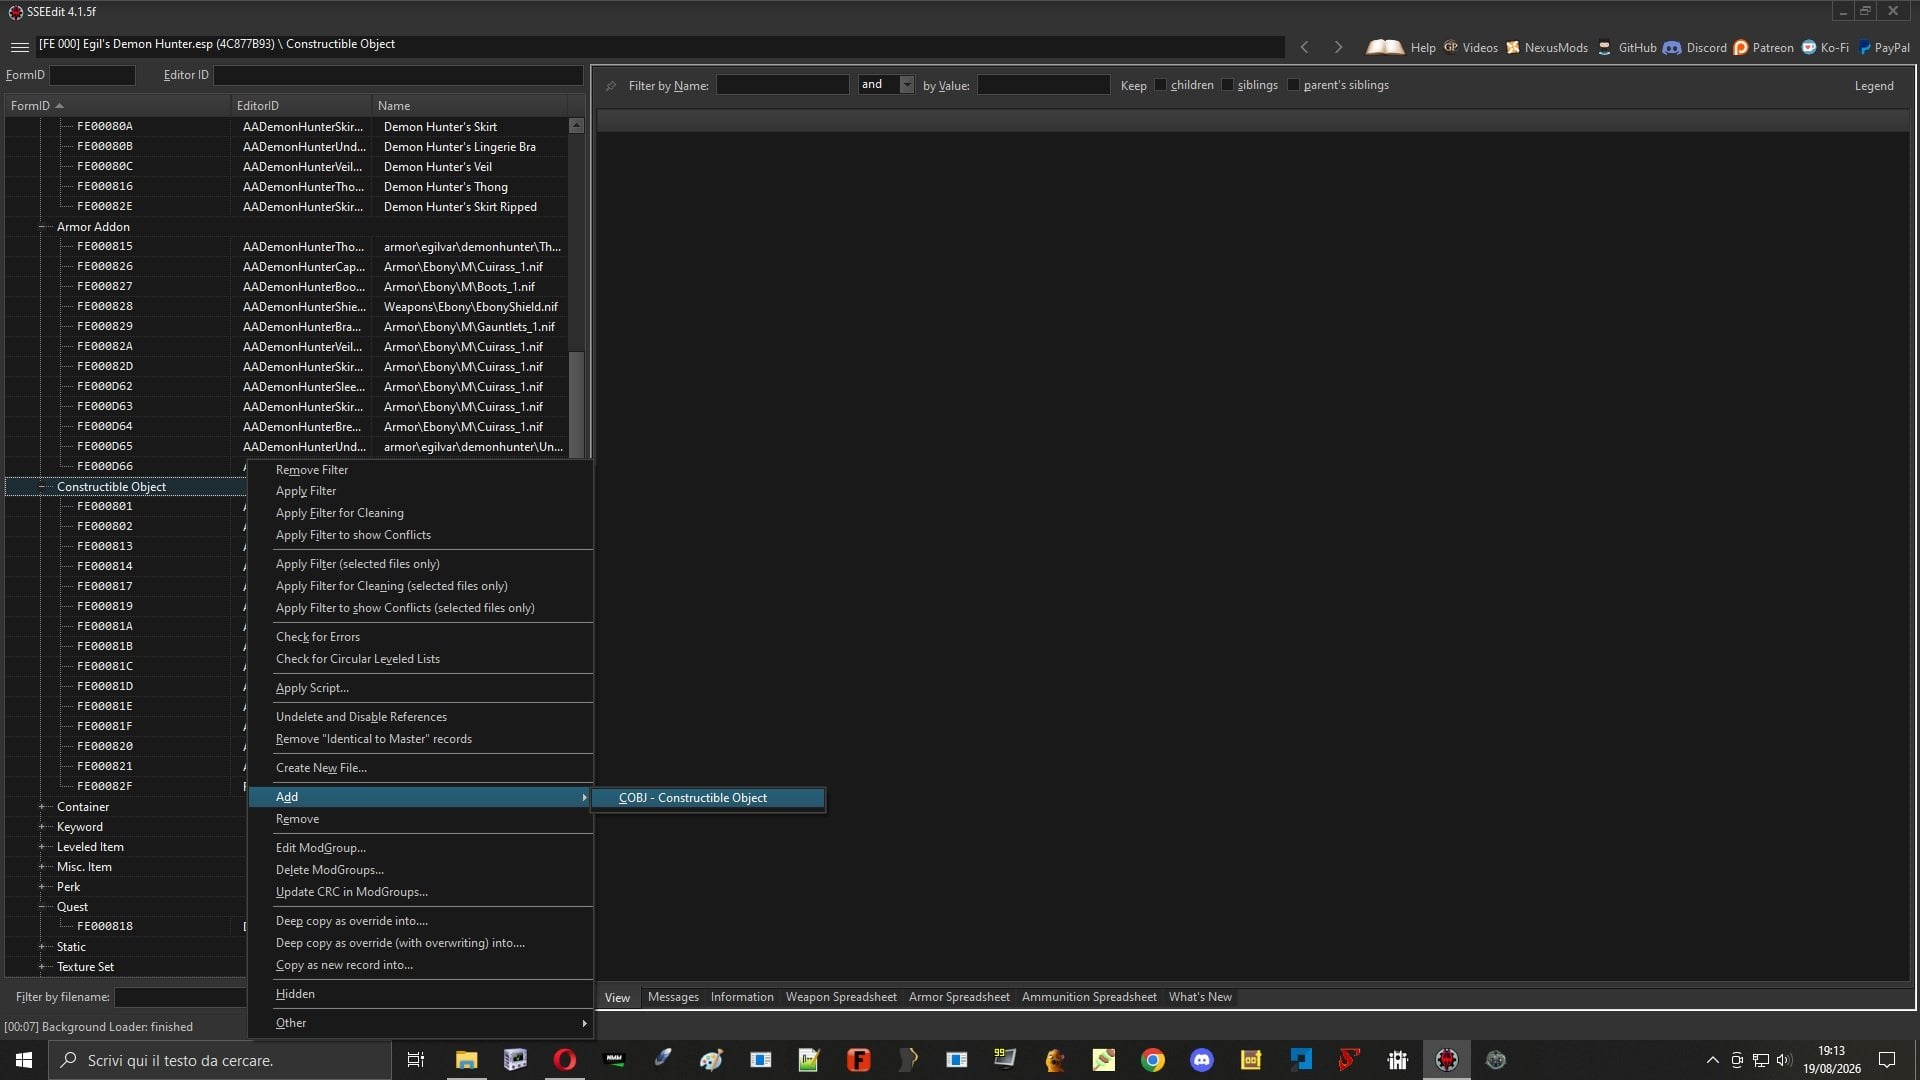
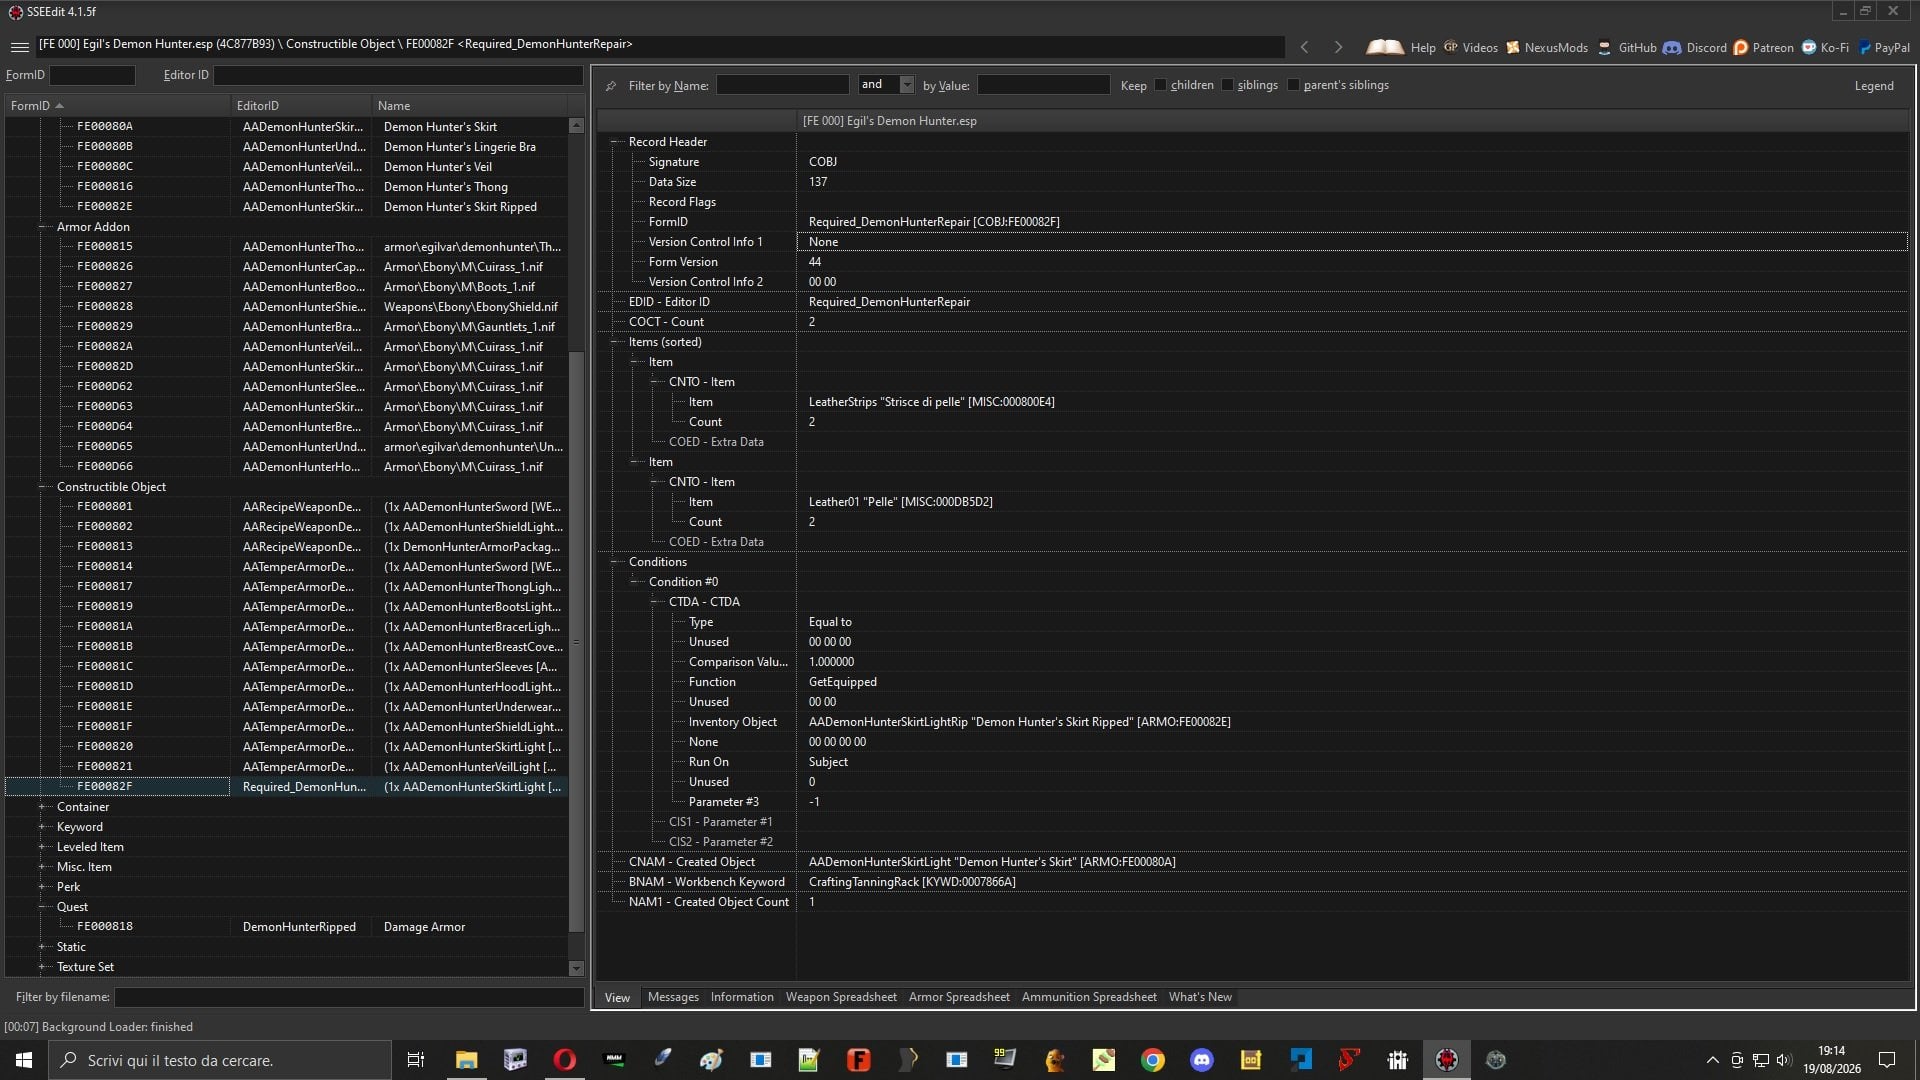
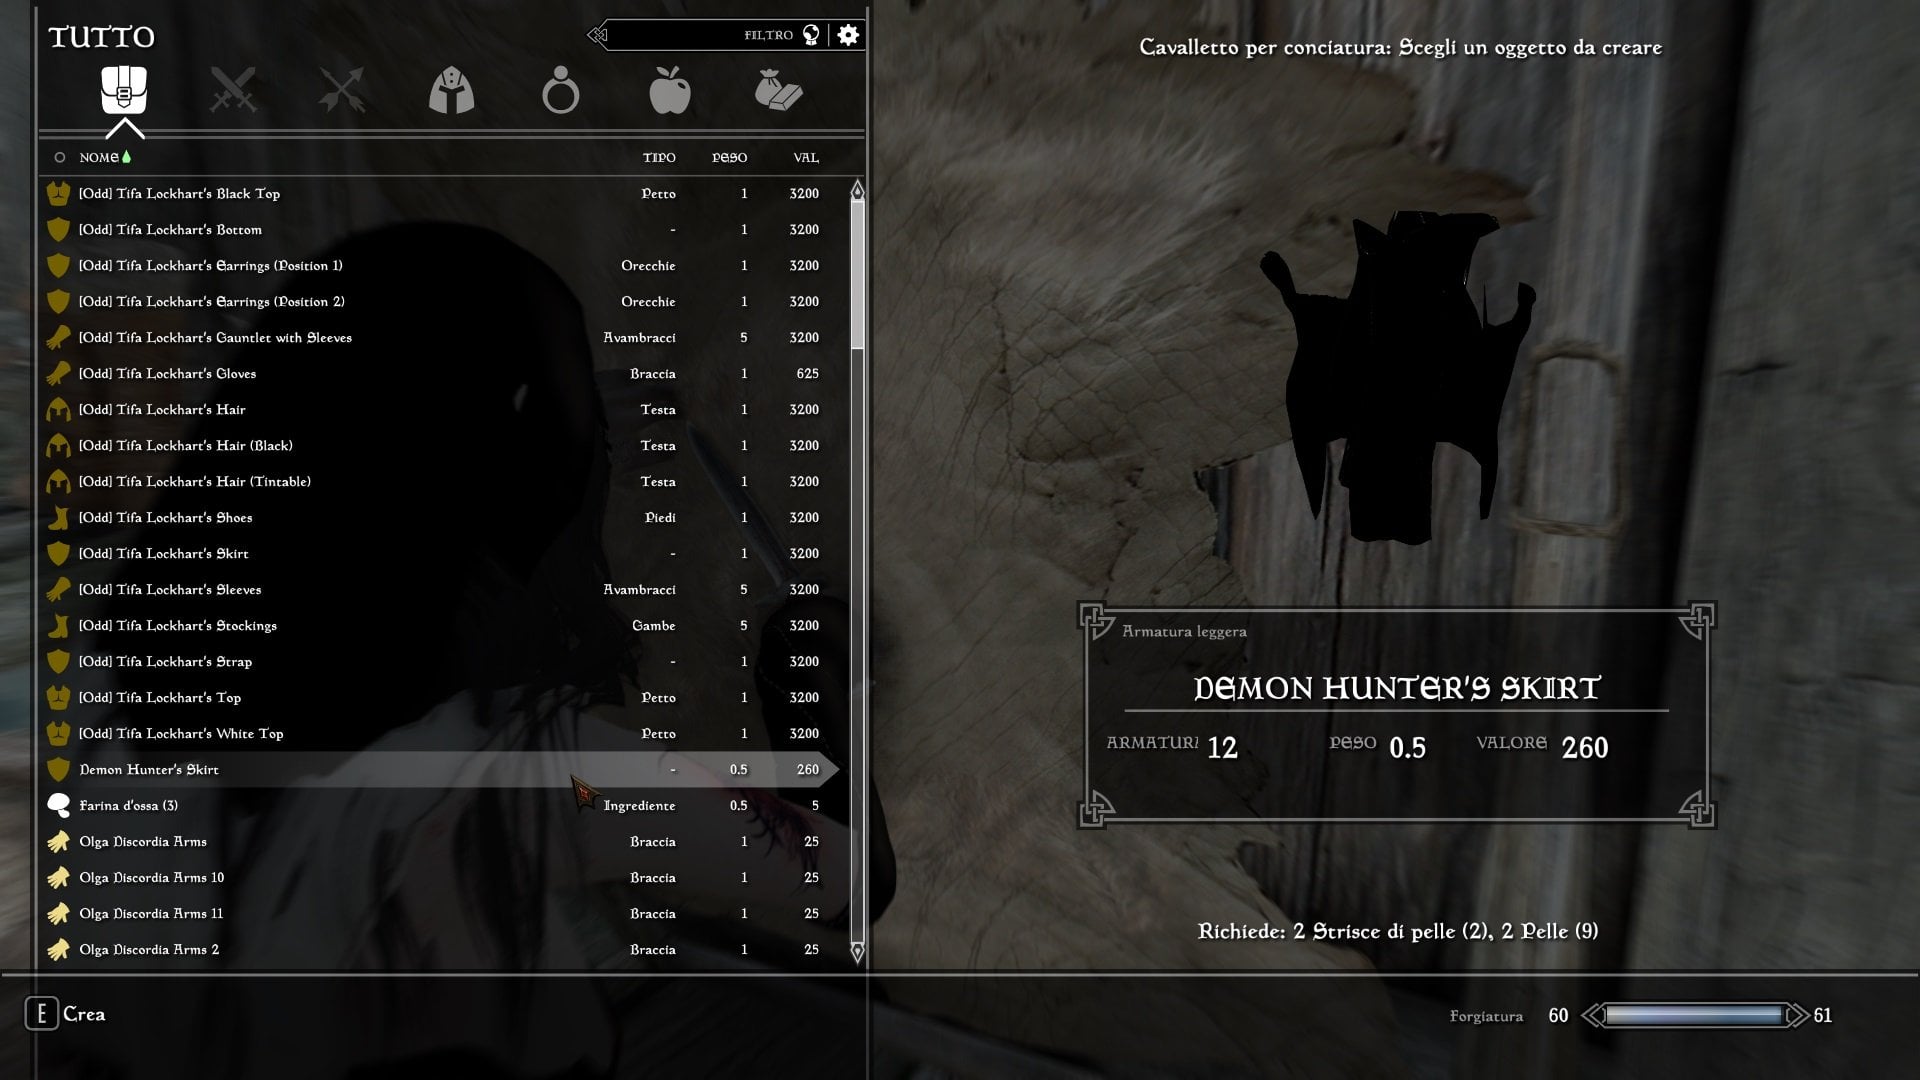
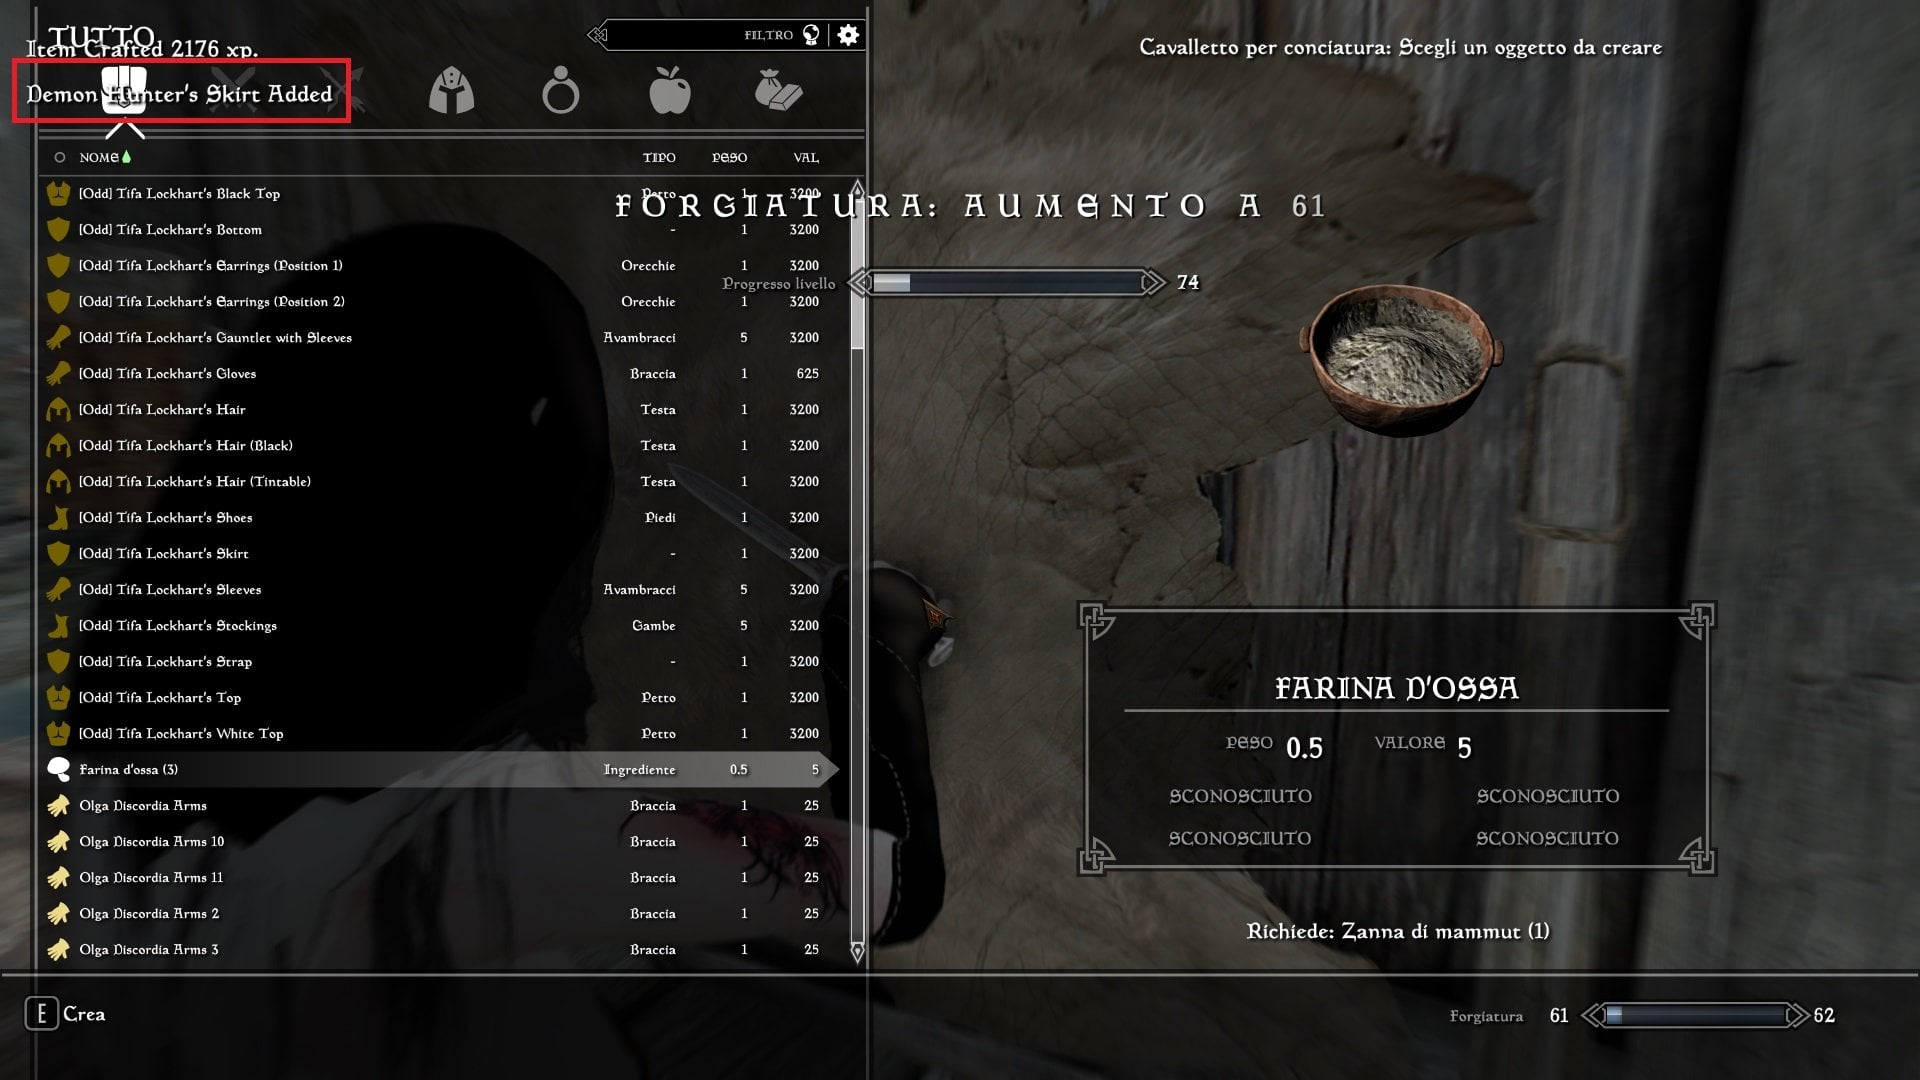
Part 2 After writing the script, it's time to activate it by creating the quest. To do this, we need XEdit In XEdit, open the ESP file for the outfit (in this example, Egil's Demon Hunter) Let's start by adding the NIFs we created earlier using OS. To do this, expand the ESP Armor Addon, right click and select Add Armo Addon and add the NIF (you can simply copy an existing one and change the IDName). Extend Armor, right click and select Add Armo Armor, then repeat the process by changing the Full Name and tagging it as Non-Playable . This measure will prevent it from appearing in the inventory and/or within the ESP using AddItemmenu. In effect, it will be a fake. DO NOT include keywords such as VendorItemArmor or similar terms. This (intentional) omission will prevent any NPC from having it. Quest Right-click on ESP\Add\QUST-Quest Right-click on Quest\Add QUST-Quest Compilation Editor ID: Enter an ID that's easy to remember (you'll need it later for testing). ScriptName: Enter the name of the PSC Enter the script and its properties Enable and associate the alias with the script We're done here. Close Xedit by clicking the X in the upper-right corner. The ESP will be saved automatically. In-Game Testing First of all, make sure you have the outfit in your inventory (this will make it easier to start the quest). Open the console and type sqv QuestID press Enter . In the example, the string will be: sqv DemonHunterDamage This will confirm that the Quest and the Script have been filled out correctly. Dress Repair If it's already in the ESP, all the better it'll be a faster process. Right-click on “ConstructibleObject”\ADD\COBJ-Constructible Object Compilation for Repair Edit Script with Repair Formula Unexpected event. Since this is a fake, Sexlab won't be able to remove it during the animations. Remember? It doesn't actually exist.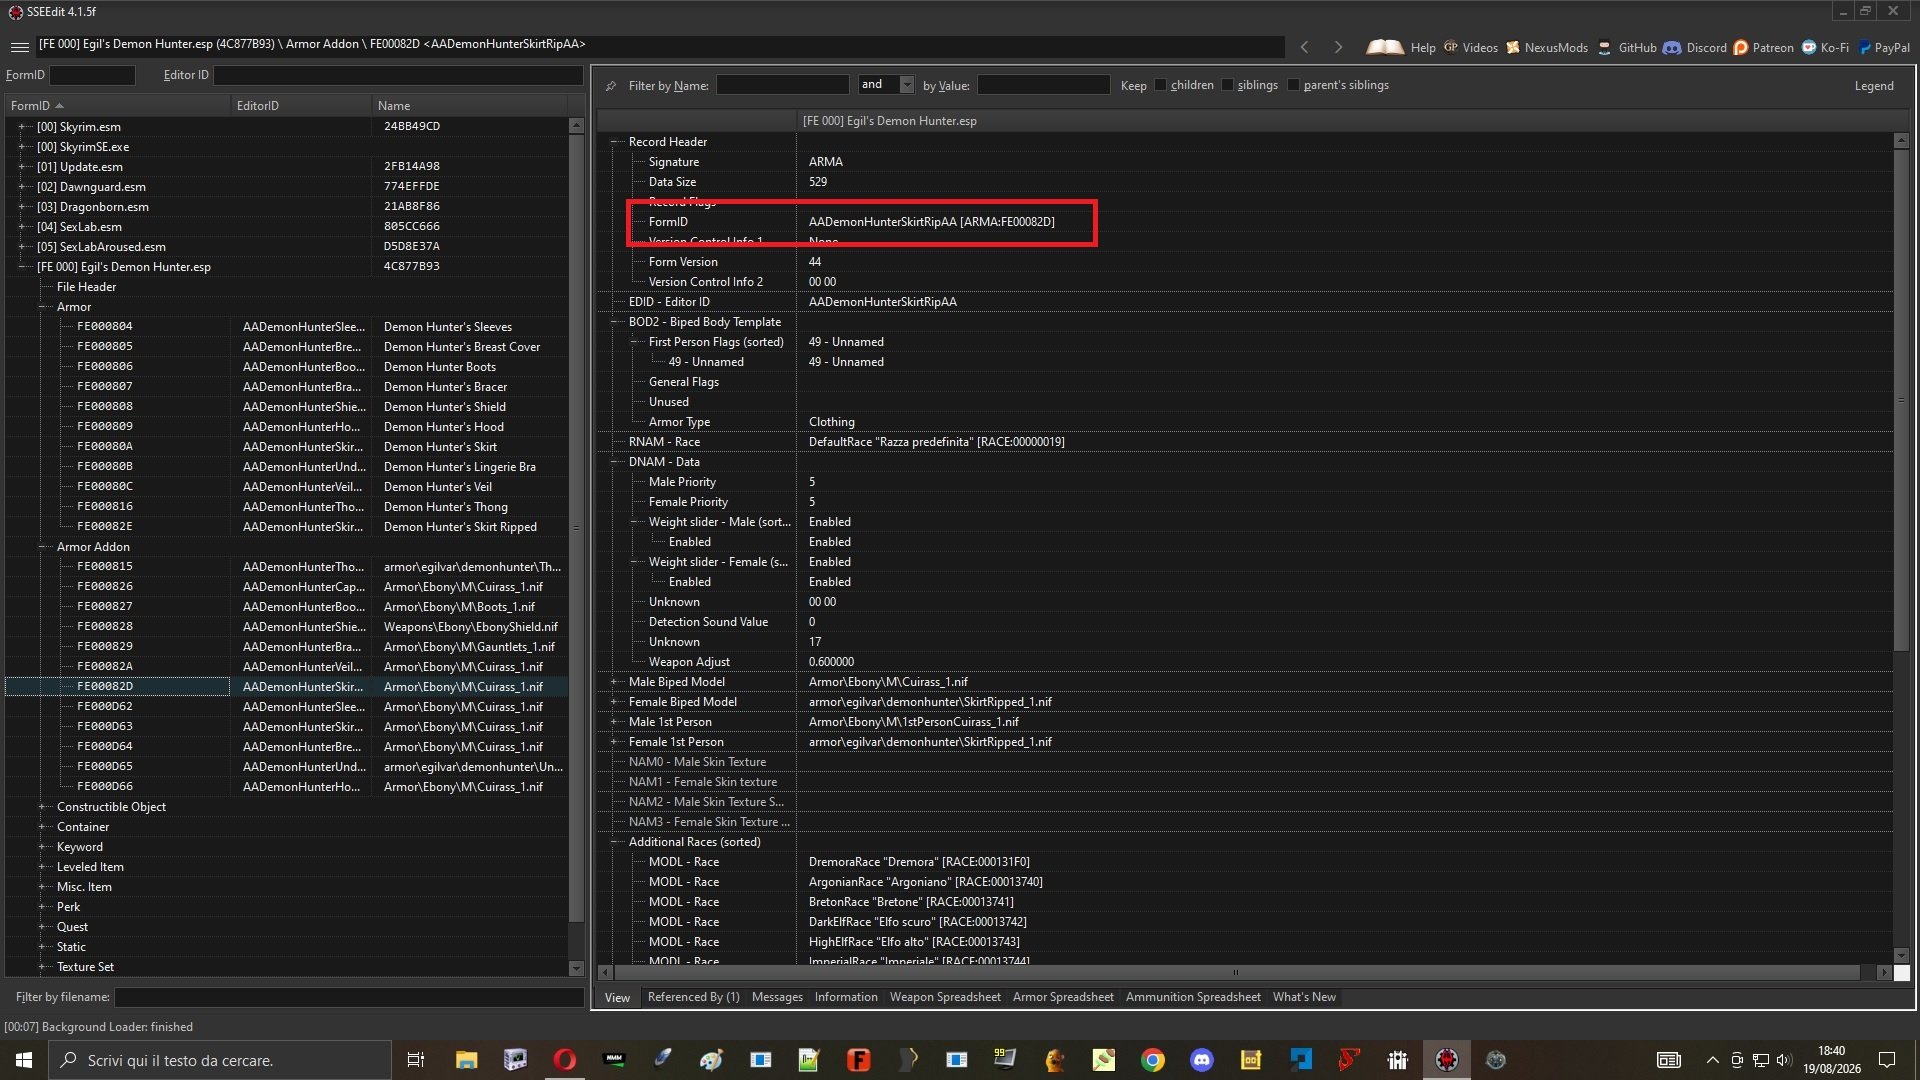
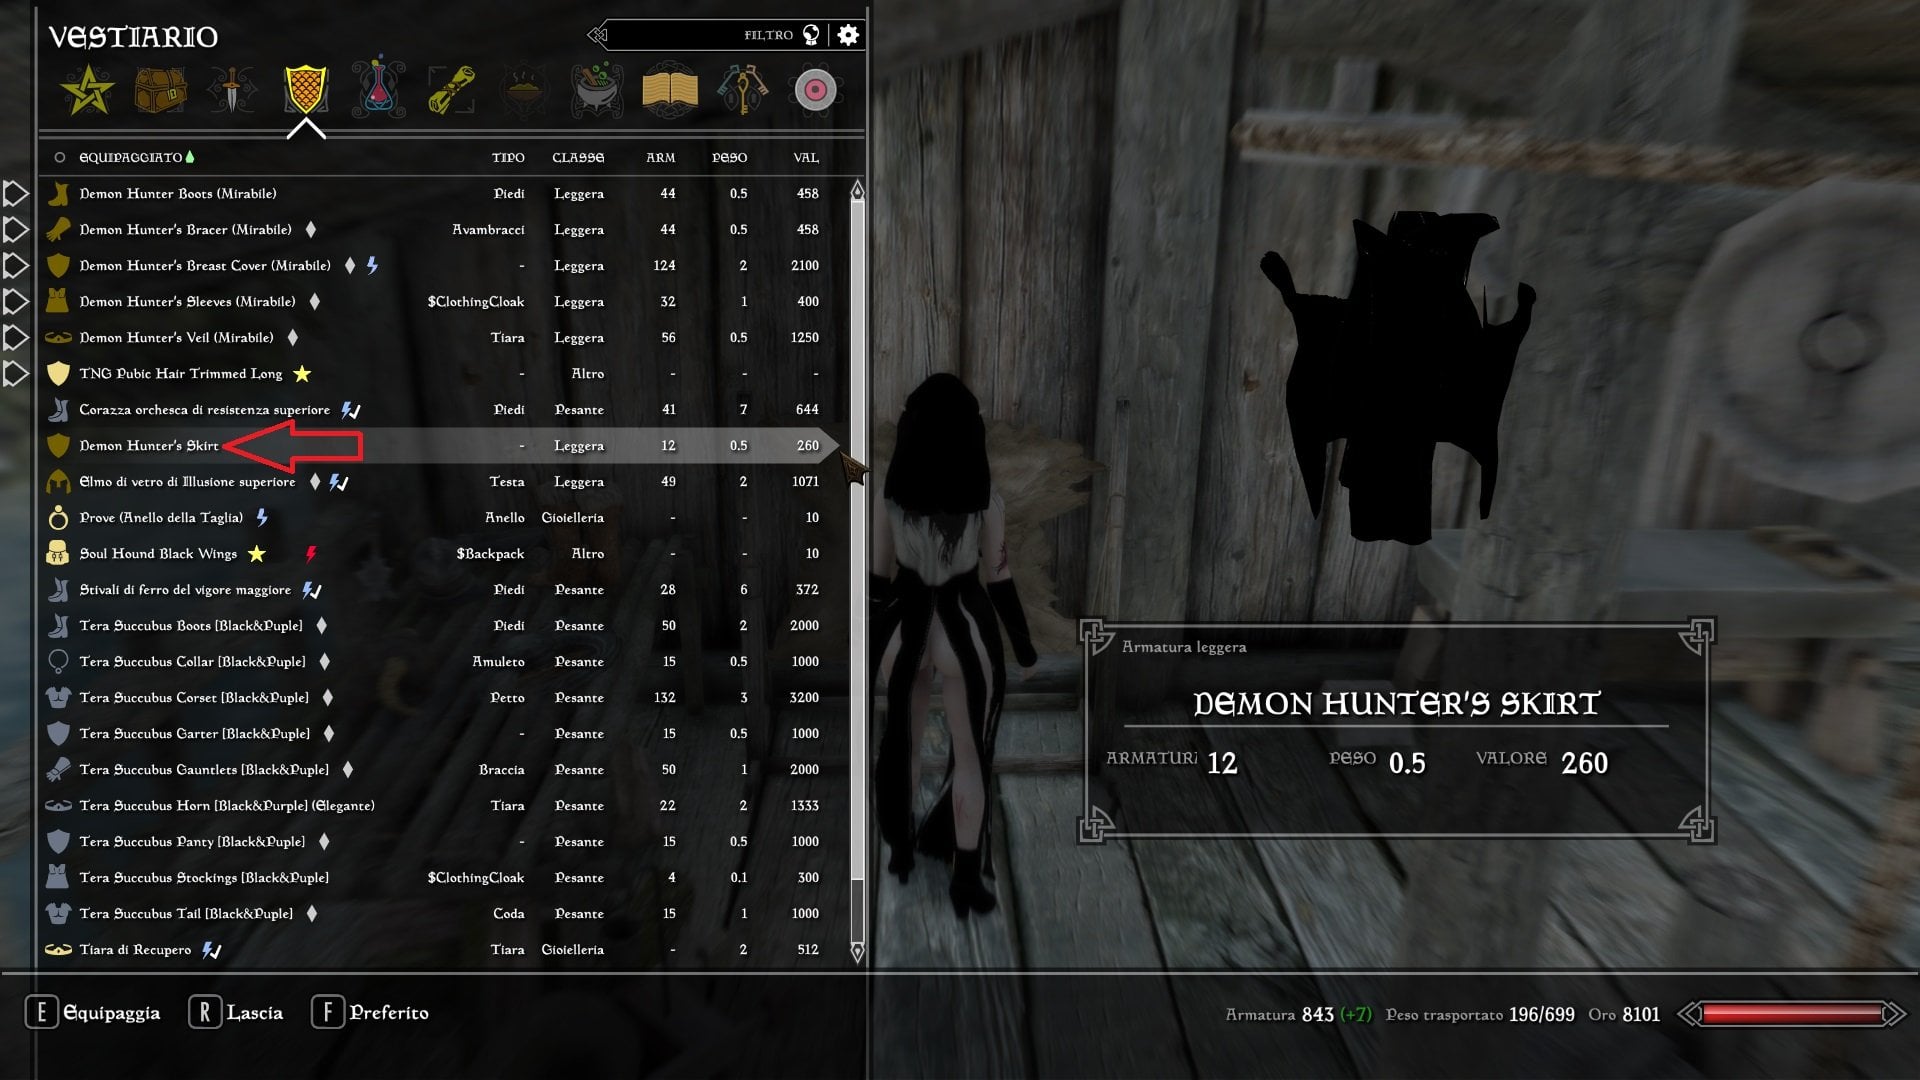
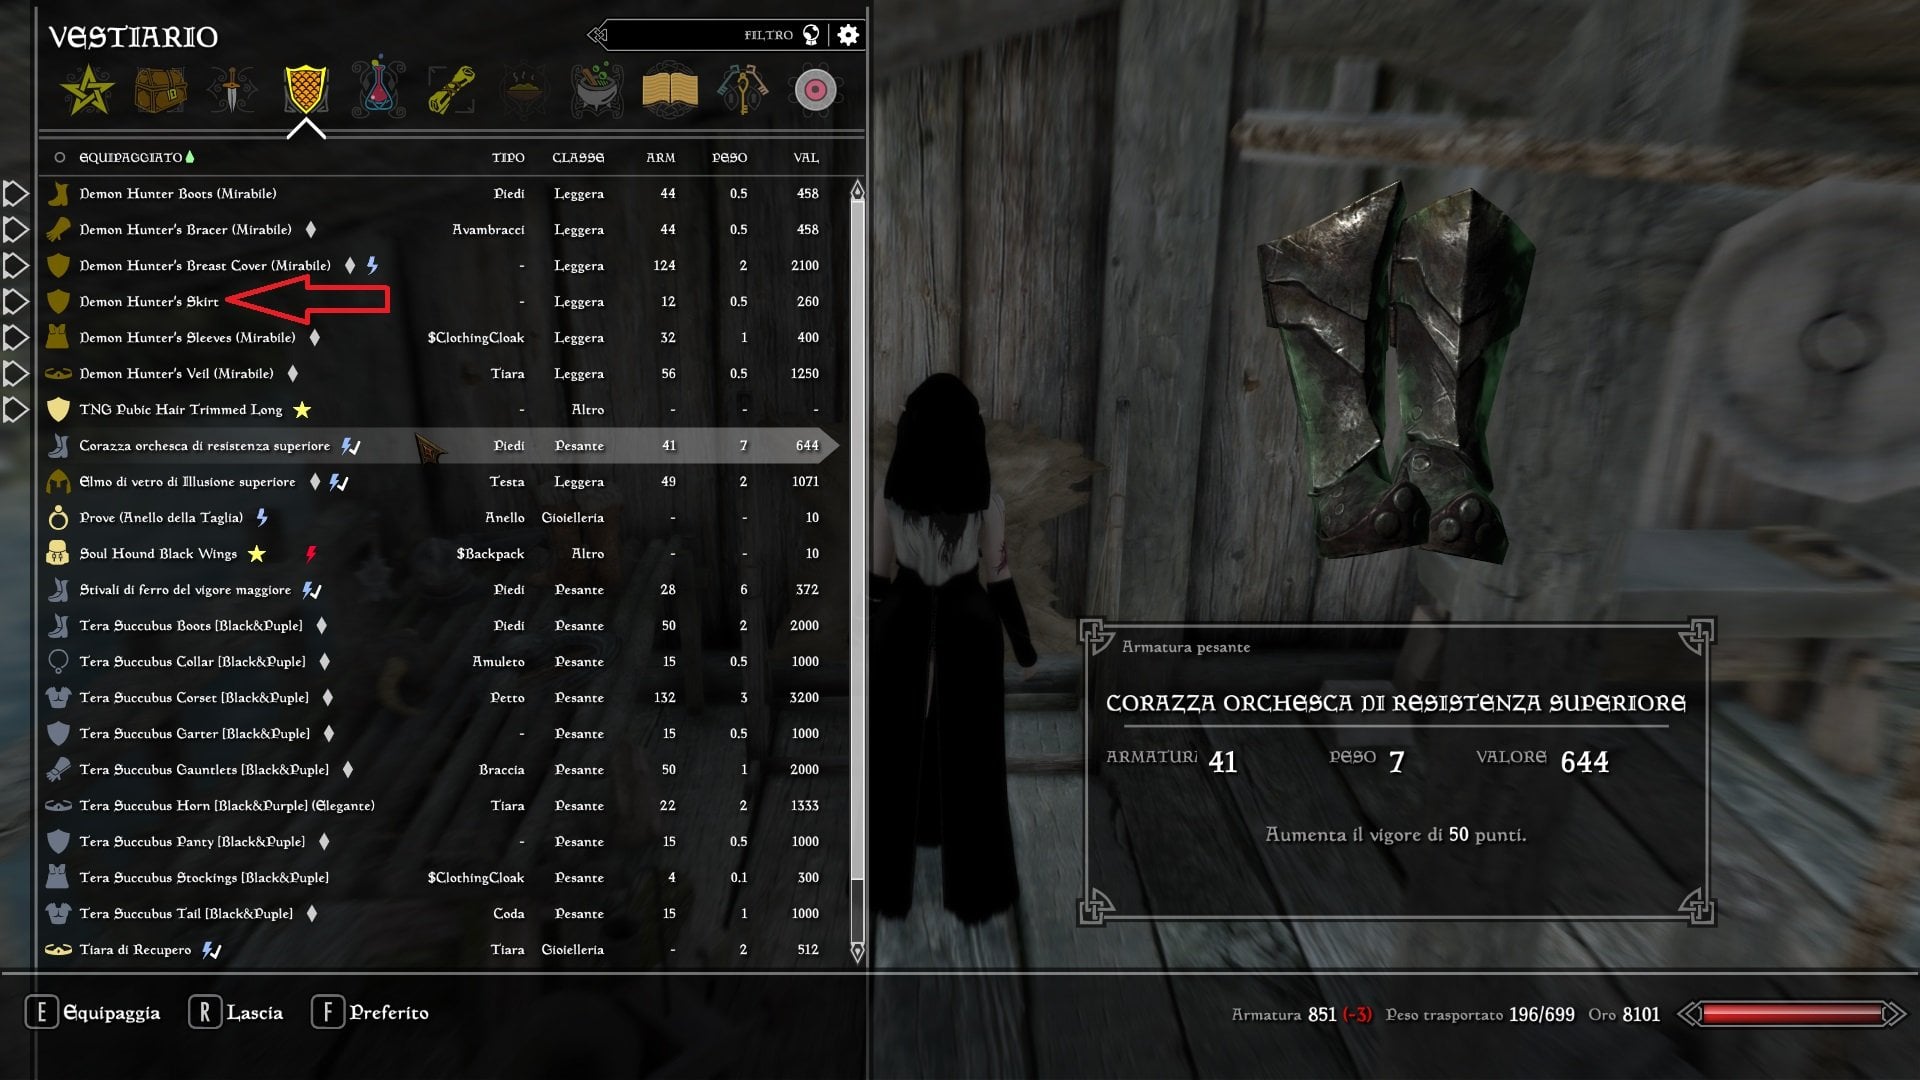
-
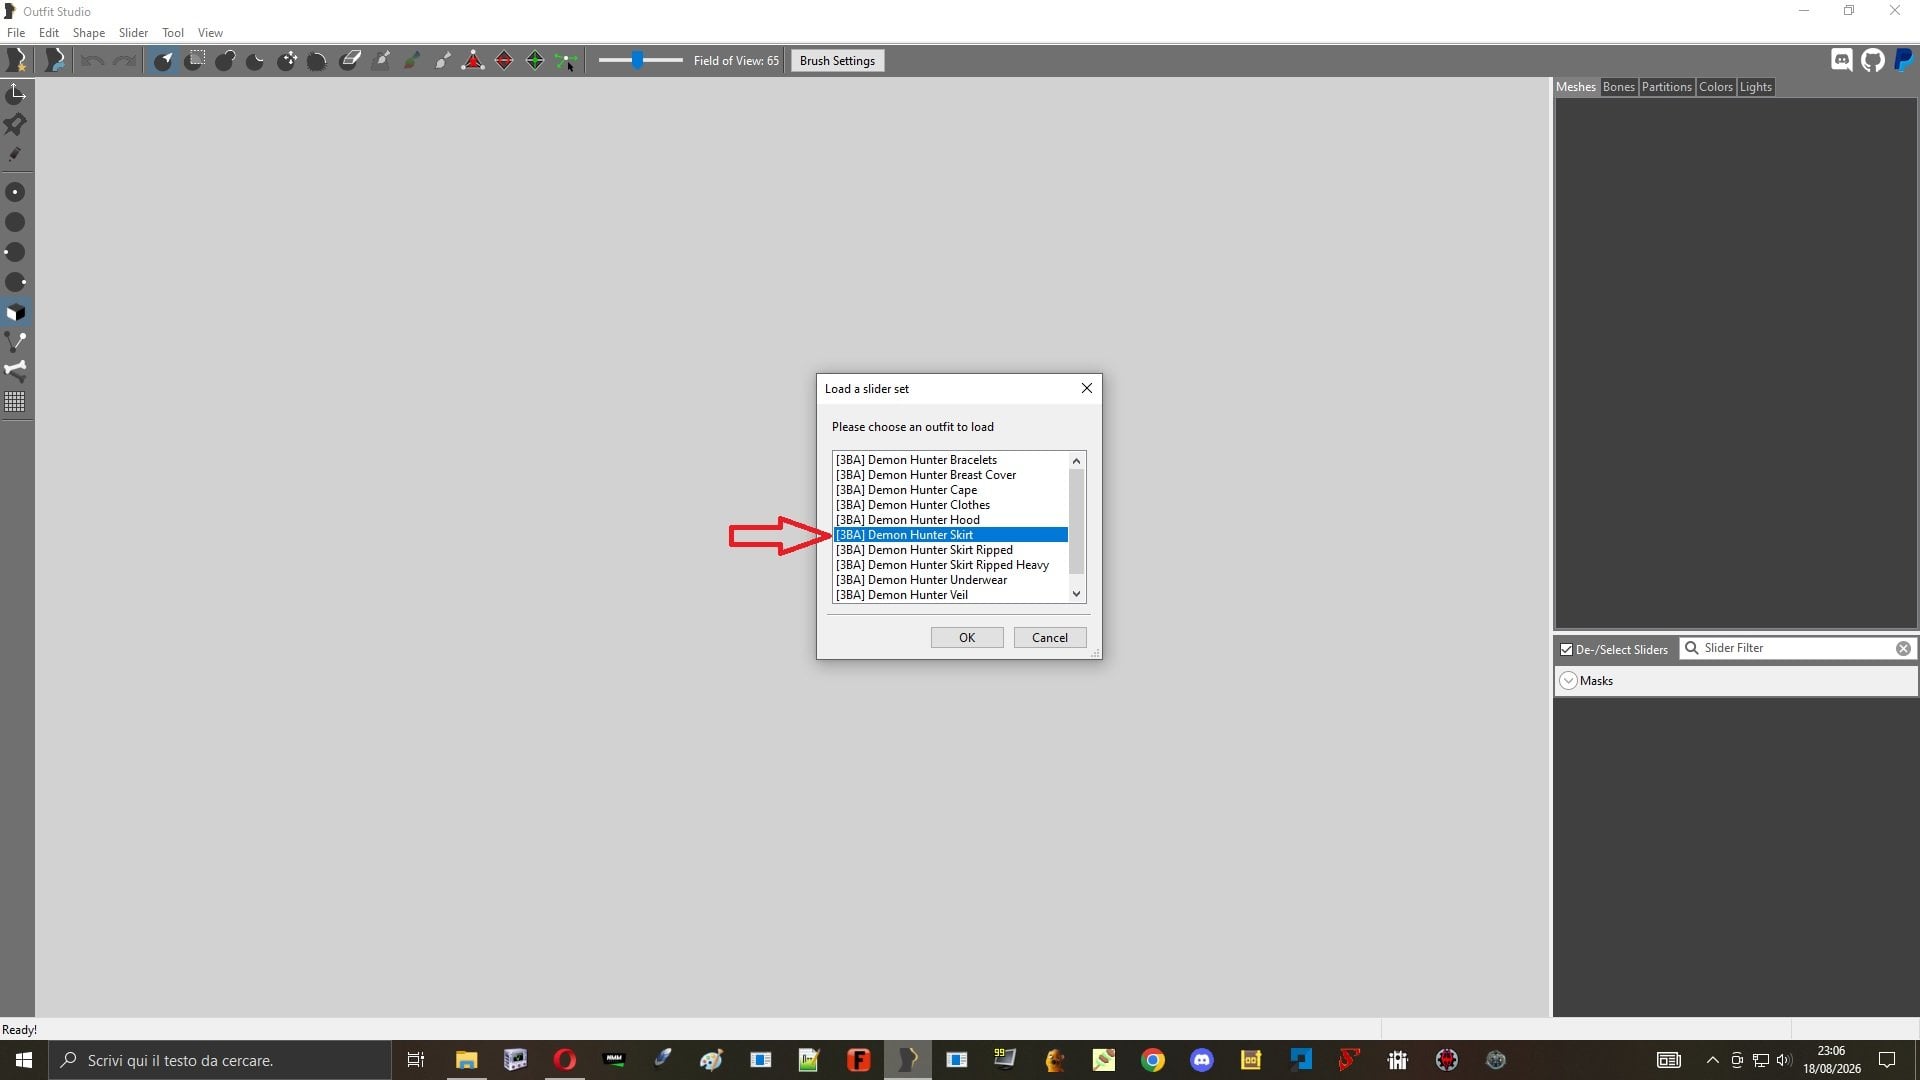
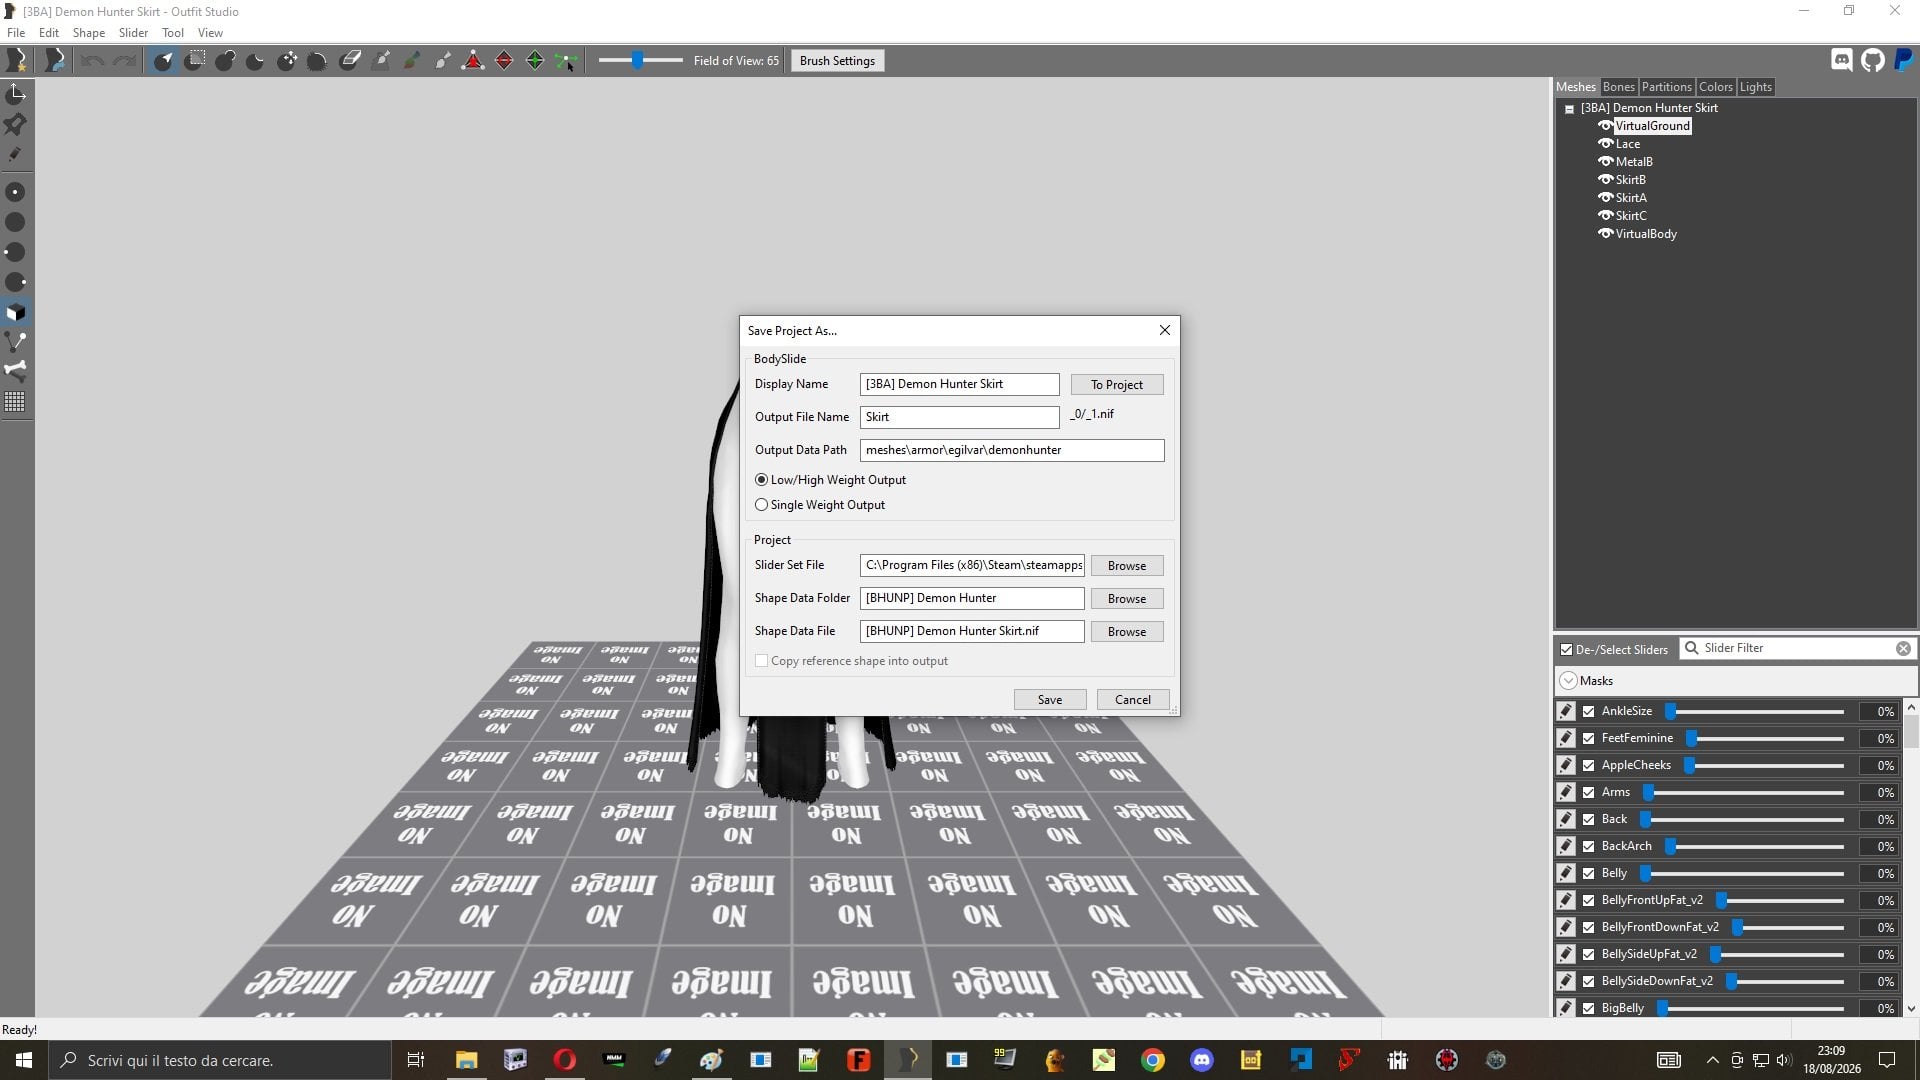
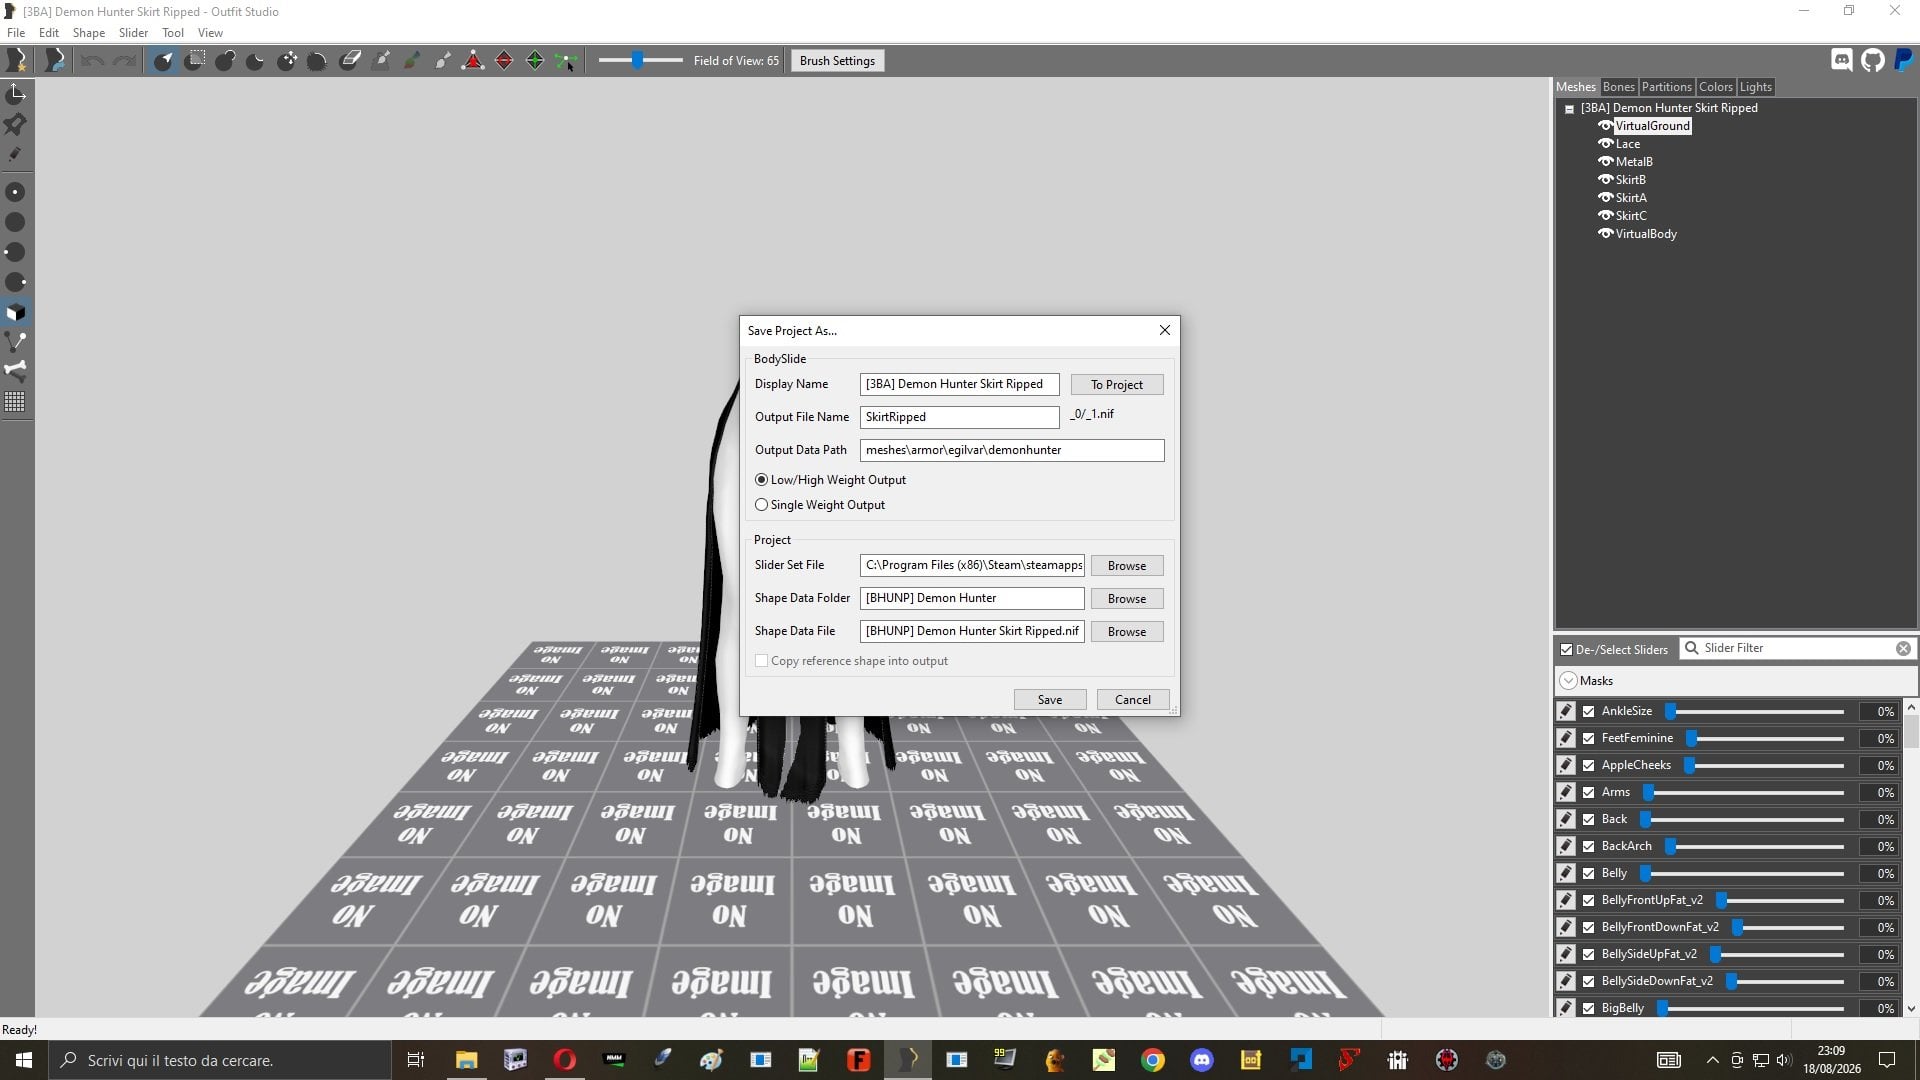
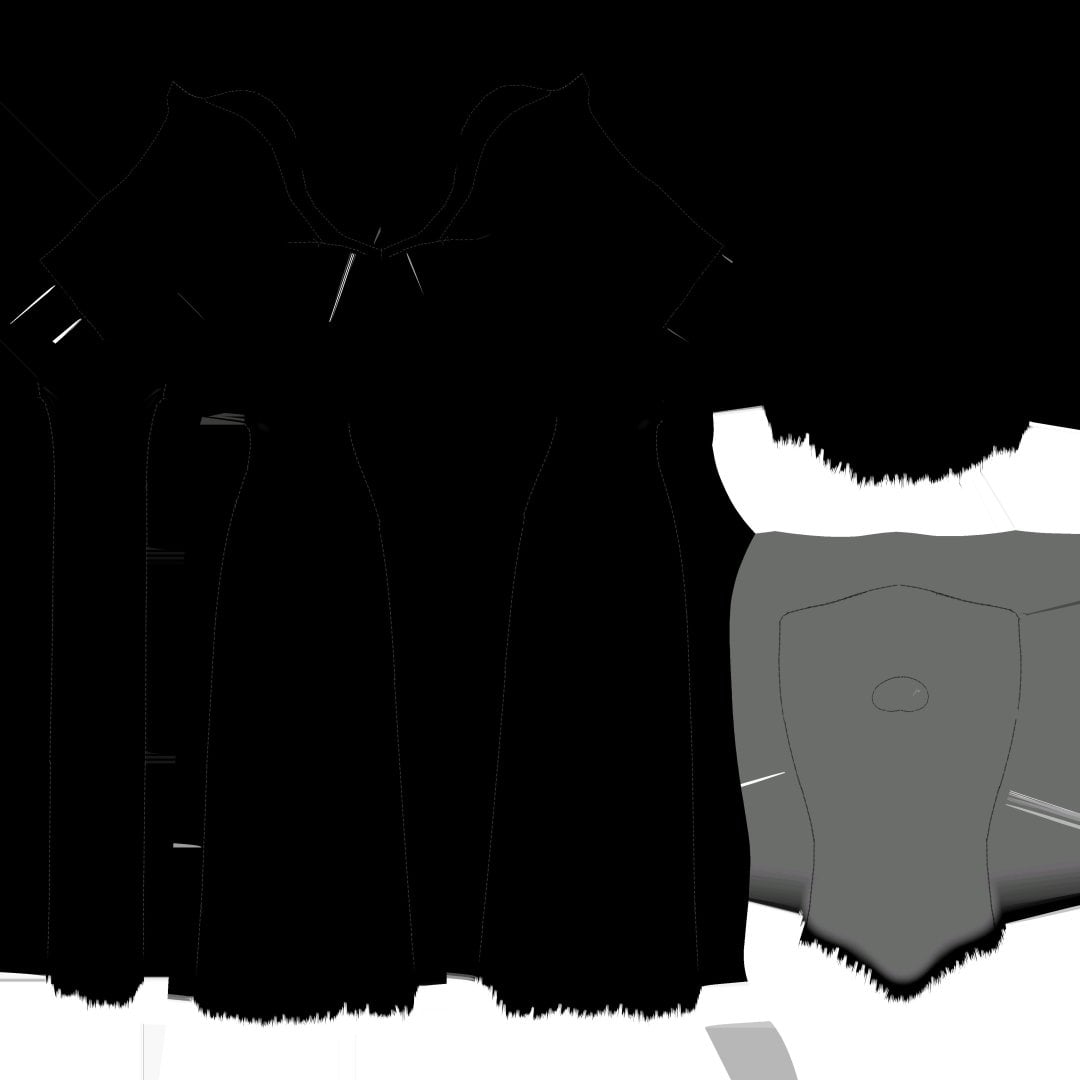
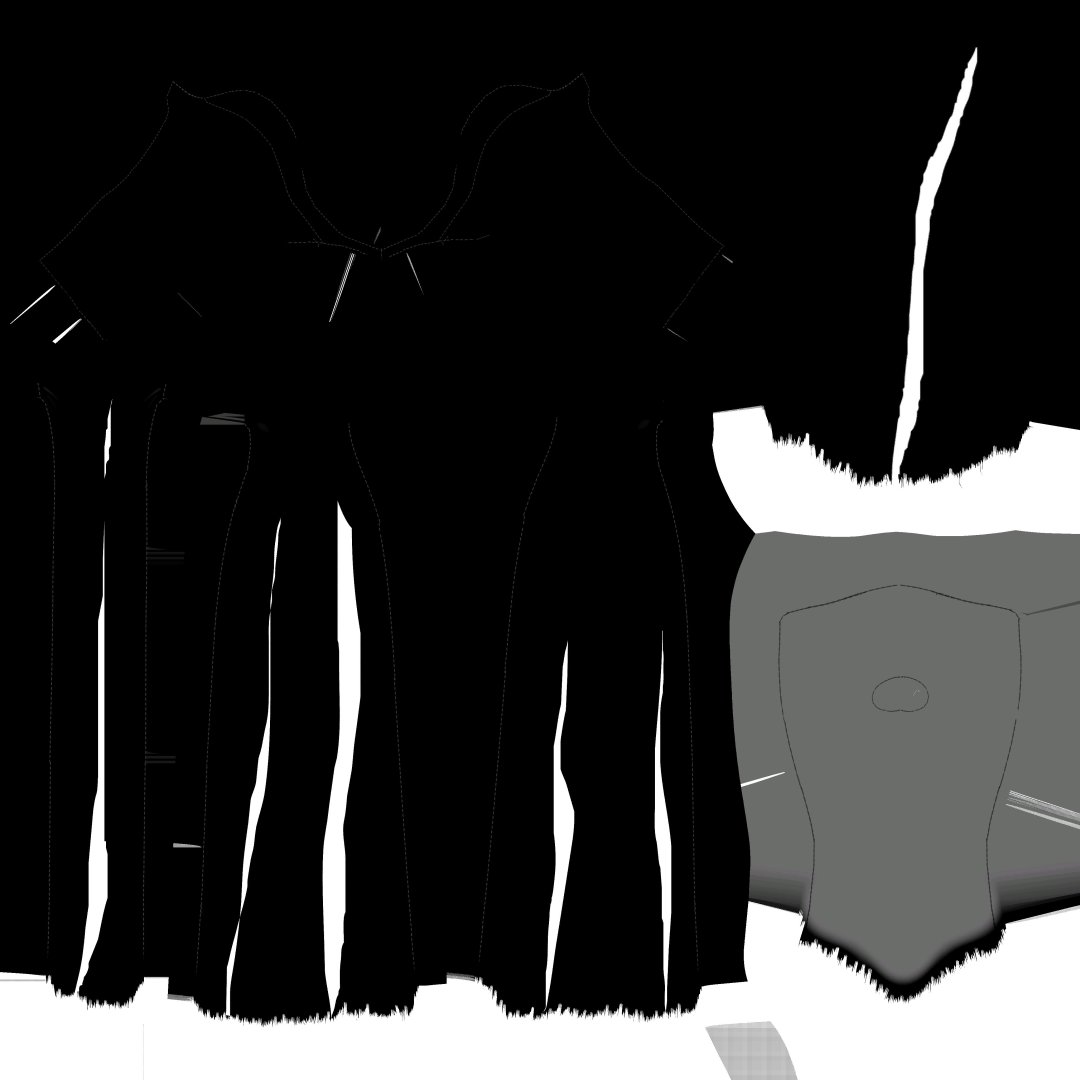
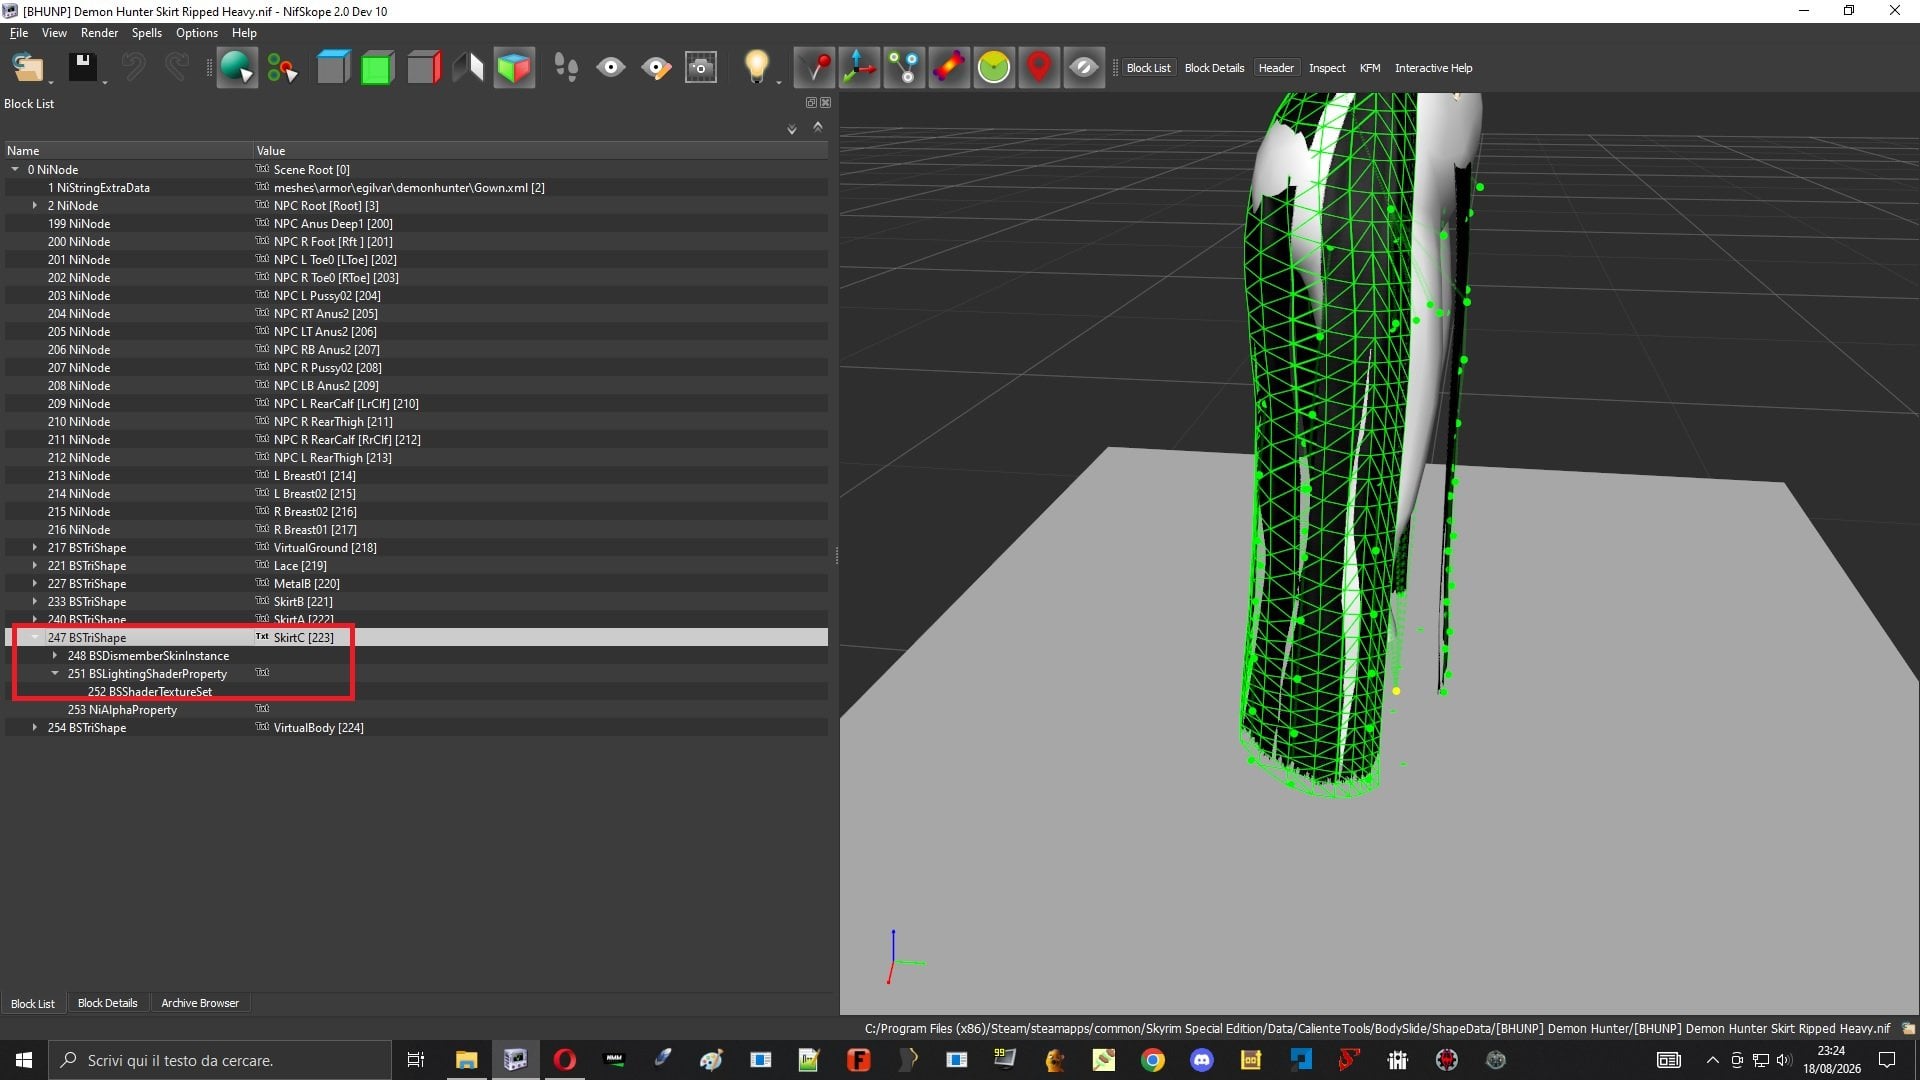
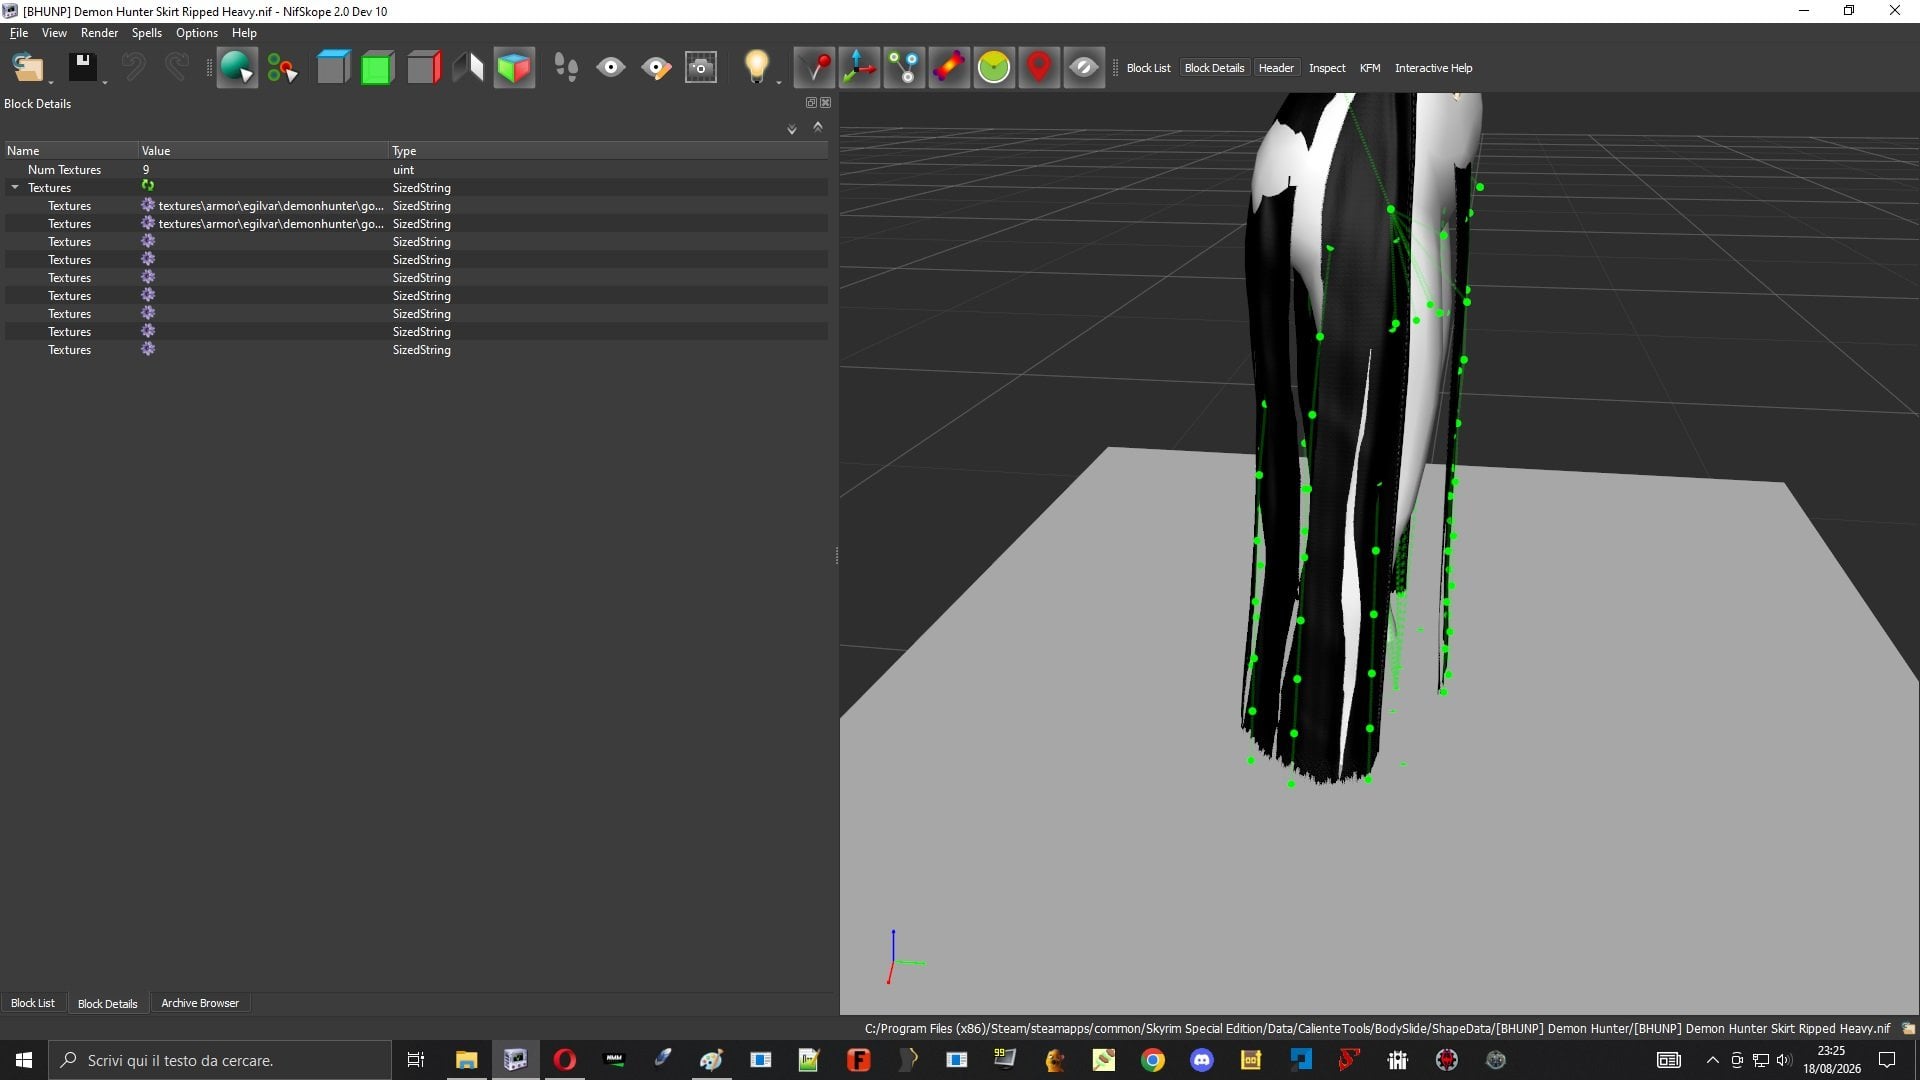
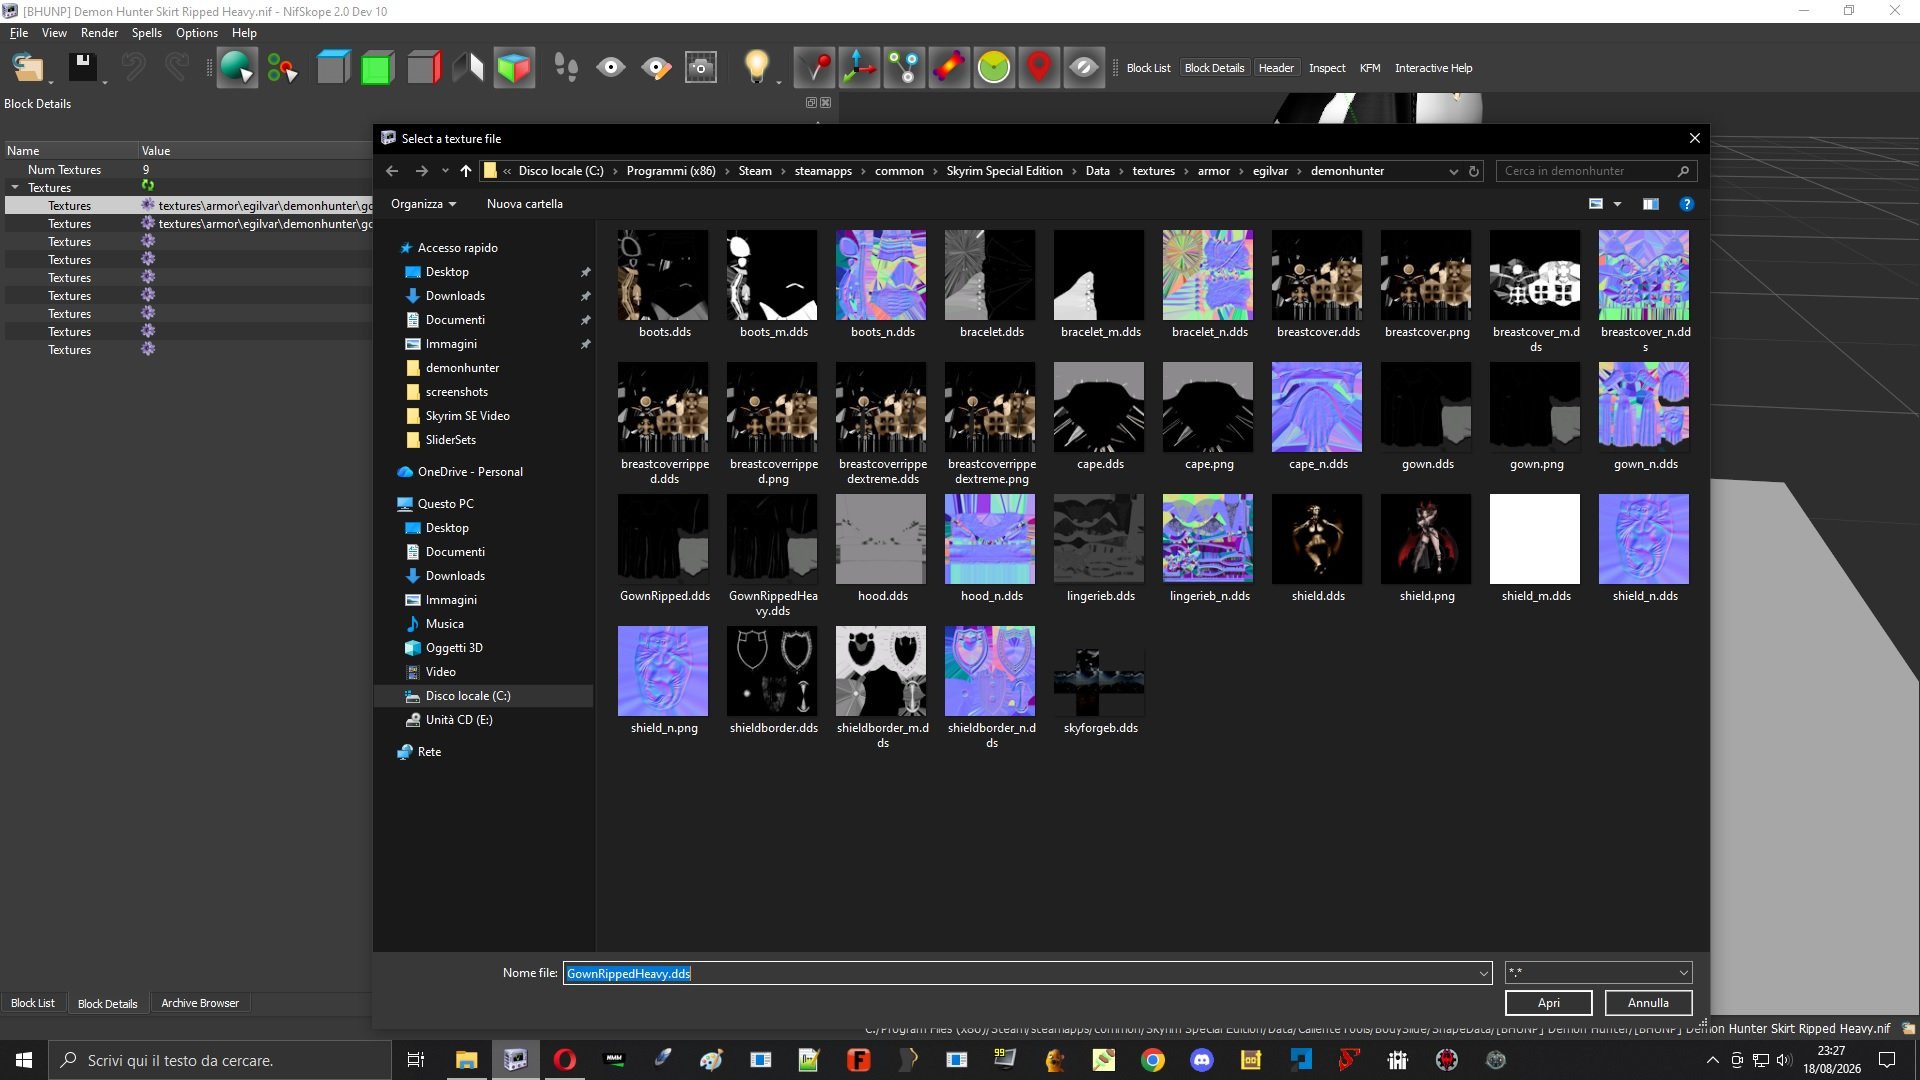
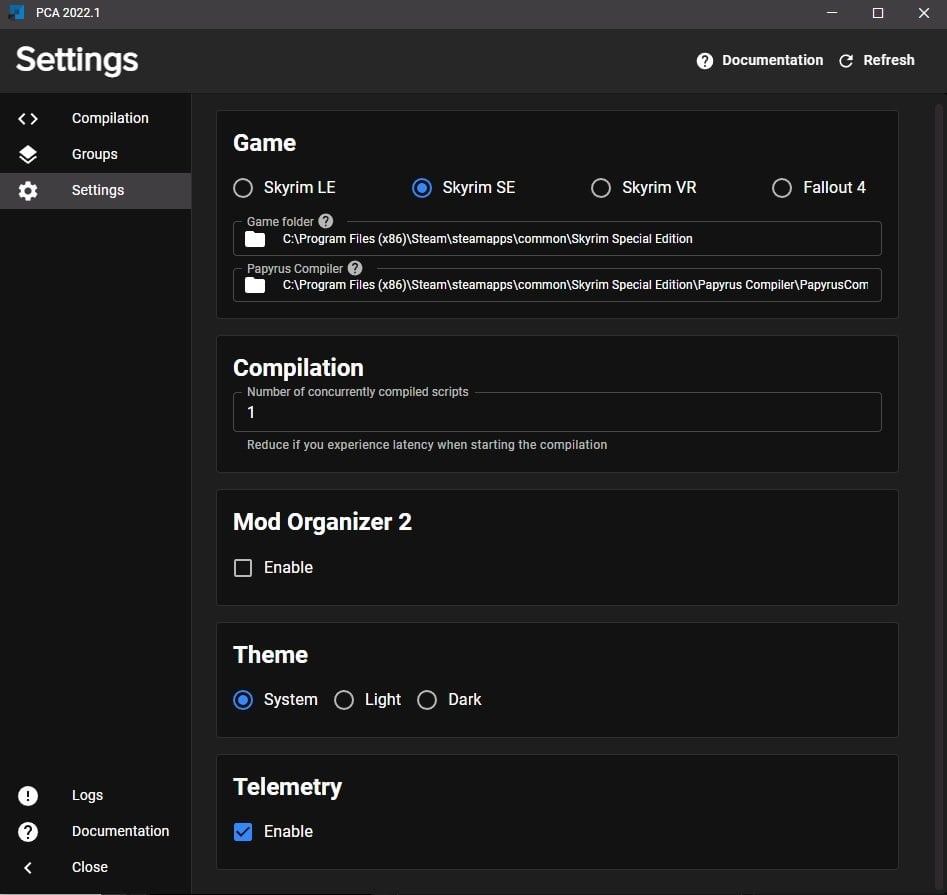
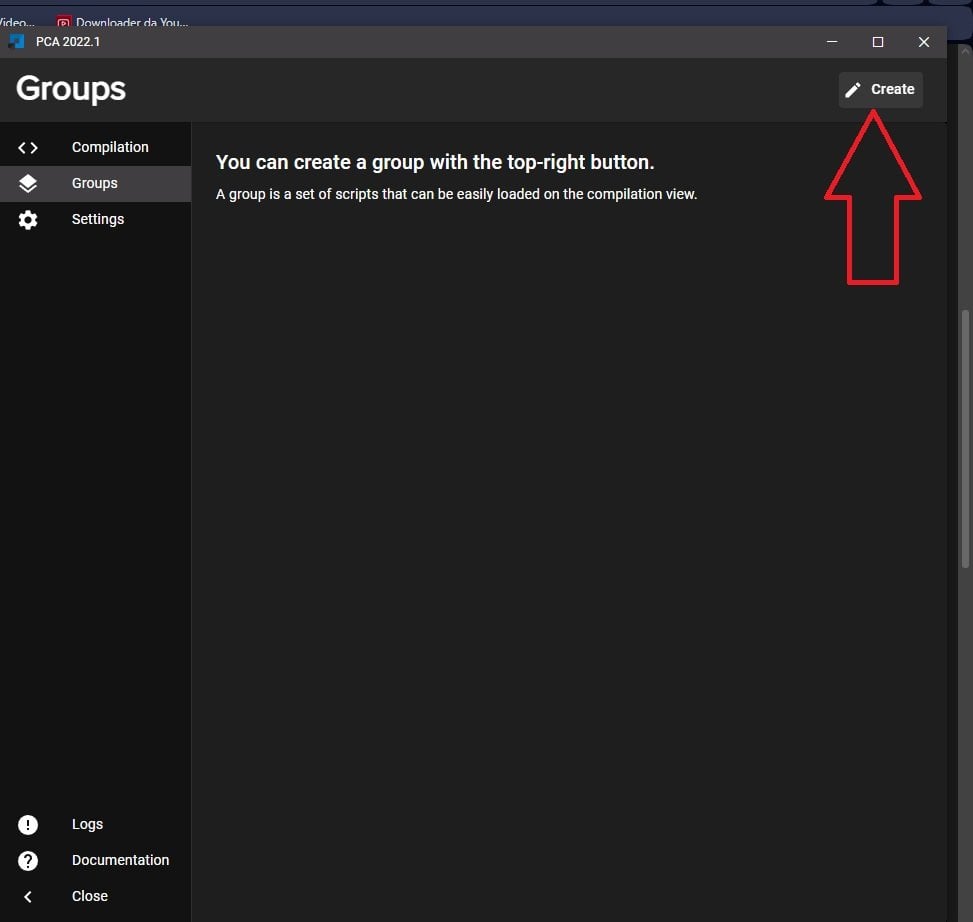
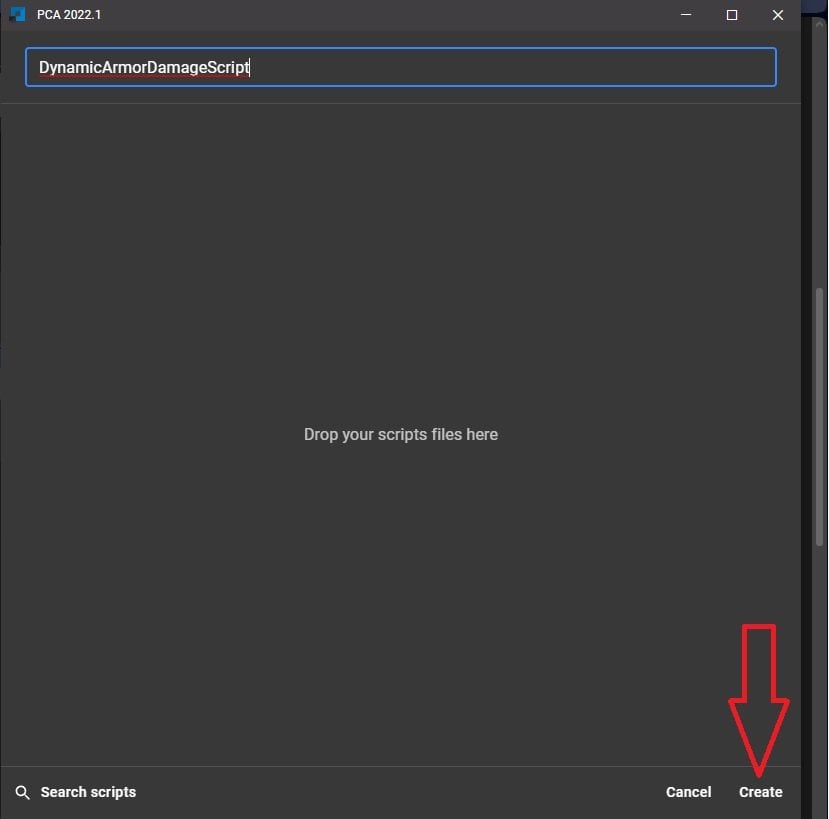
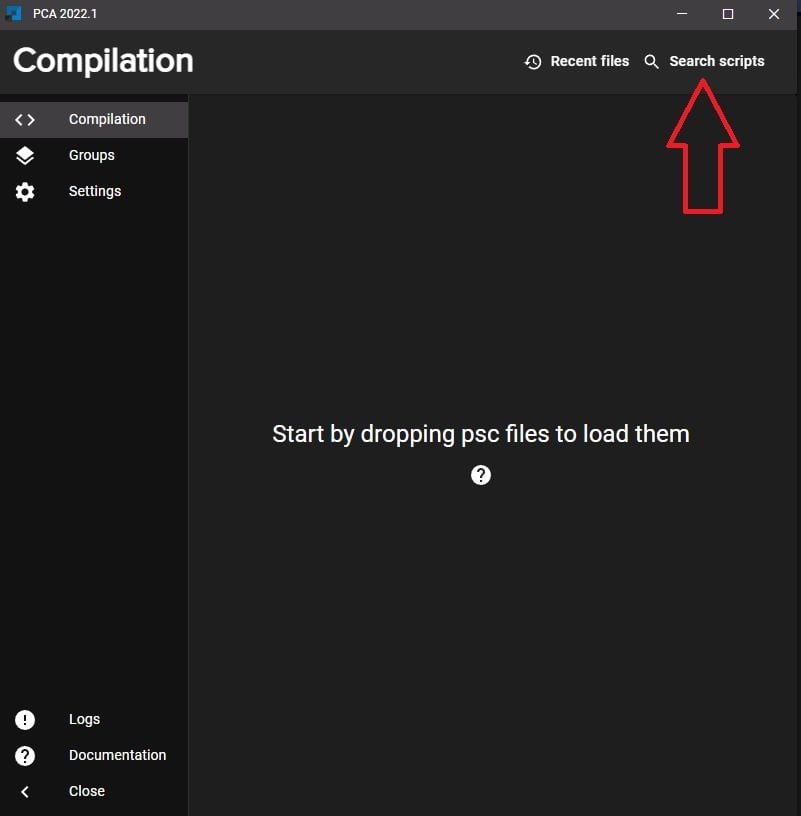
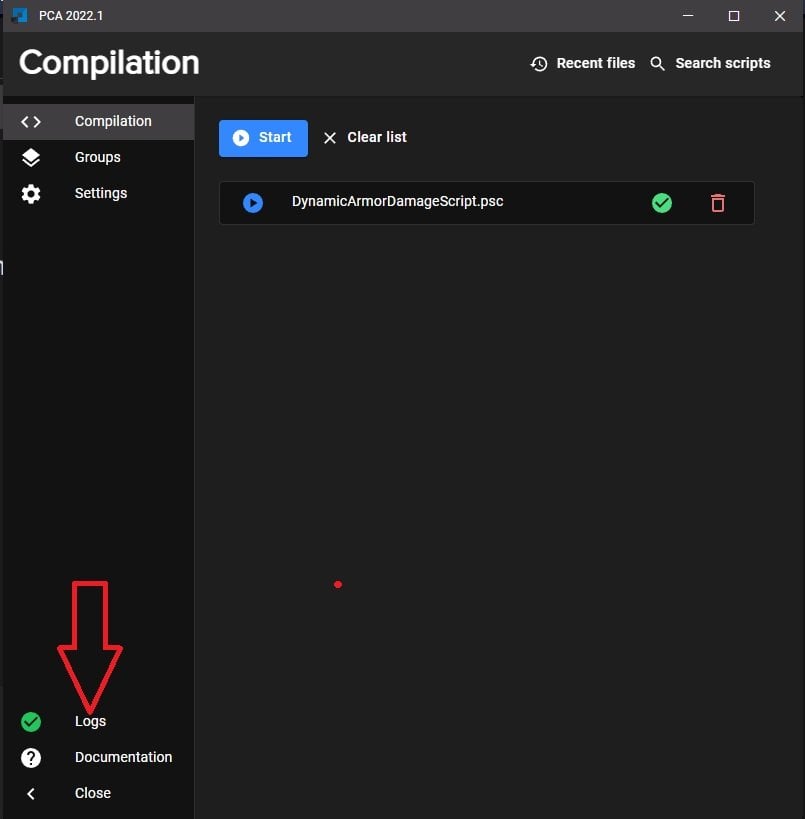
Experimental phase developed with the support of AI I had this idea. When you're fighting, why not have visible damage on the armor in a dynamic way? Tools Used : 1) AI Support for script creation 2) Notepad++ For compile the PSC script 3) Bodyslide and Outfitstudio to create appropriate nif 4) Photoshop/Gimp + Paint.Net to create the appropriate DDS . If your photo editor can open/save DDS files, Paint.net is unnecessary. 5) Nifskope to apply the DDSs to damaged NIFs 6) XEdit for the entry of new nif, create a quest , apply script 7) PCA SE to create pex script How I Did It Open OS, load the project, and select the one you want to edit Without changing absolutely anything, File\Save Project As , Rename where necessary ⚠️⚠️⚠️ Fill in all the paths correctly, or you won't find the NIFs where you expect them to be. Paint.Net + Photoshop Here, we can open the DDS files. Open the DDS file in Paint.Net without making any changes, then save it as a PNG. If your photo editor can open/save DDS files,this step is unnecessary. Photshop Break up the texture however you like . Save and rename With Paint.Net, open PNG and save as a DDS file in the designated “Textures” folder If your photo editor can open/save DDS files,this step is unnecessary. Nifskope File\Open , Import the NIF created earlier using OS Click on dress, extend BSTriShape until you find BSShadertextureSet, Click on the latter to access the Textures Right-click on the texture, then select Textures\Choose The Textures page will open; search for and apply the ones you broke earlier. Repeat this for all parts that use the same DDS. Now your NIF is ready; remodel it in Bodyslide Notepad++ and PCA SE Create a new file and fill it out as needed. That's why I asked AI for help. This script was created for the Egil's Demon Hunter armor . ⚠️⚠️⚠️ The script should be saved with the same name as the header ( E.G . DynamicArmorDamageScript ). Save with psc into Skyrim Data\Script\Source Once written, with the help of the PCA SE compiler, it generates the pex script So far, we can say we've done the backstroke the hardest part To Be Continued
-
 sswarley-swaltzon joined the club
 -
 nuancuyetas joined the club
 -
 yafa. joined the club
 -
 ewelinmali joined the club
 -
 odysseyhades joined the club
 -
 lyhehe joined the club
 -
 Vortec joined the club
 -
 deathlight joined the club
 -
 skfskf_ joined the club
 -
 woomy123 joined the club
 -
 Mightnare joined the club
 -
Why keep loading up the arcane table when we can just carry it with us and use it whenever we want? They can be obtained either through Additemmenu and/or similar mods, or by searching for the various Orbs scattered throughout Skyrim and Solstheim. Each time an Orb is activated, you gain the spell Kittytail
-
 seobe joined the club
 -
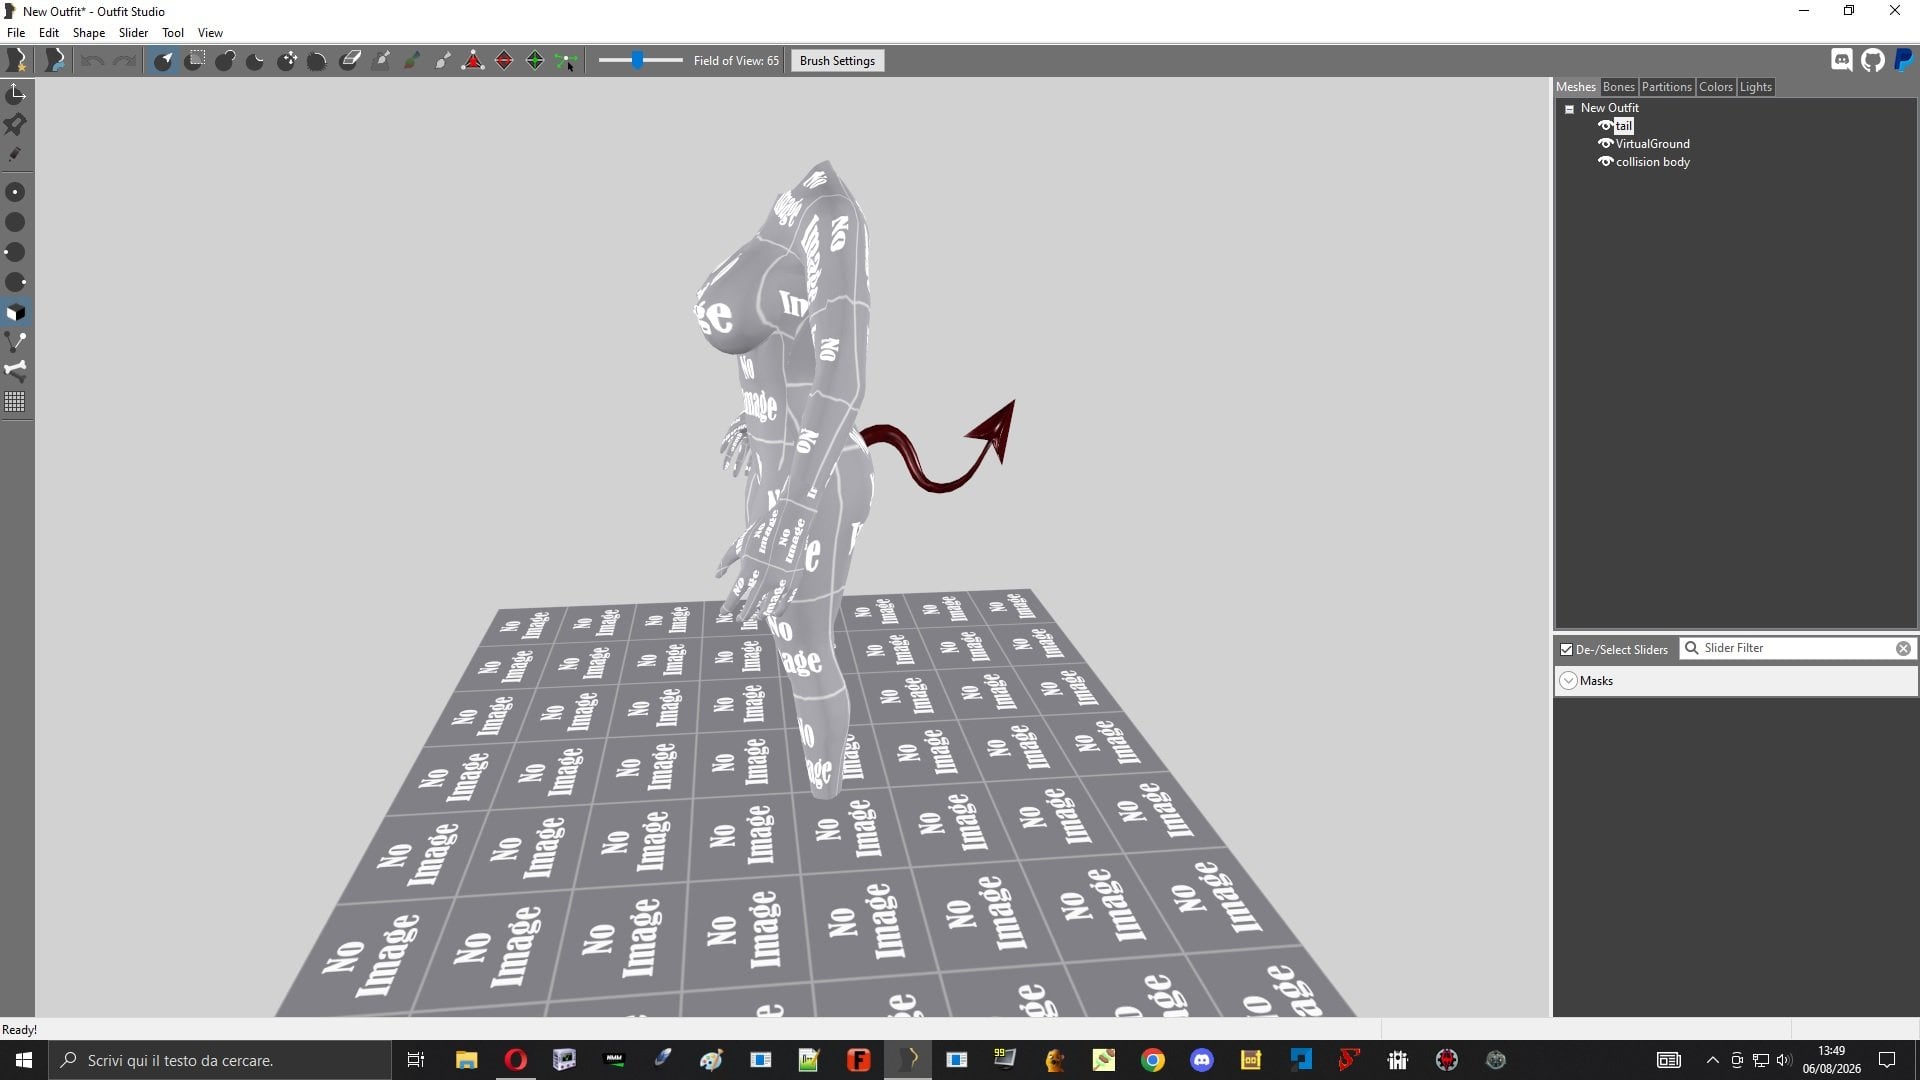
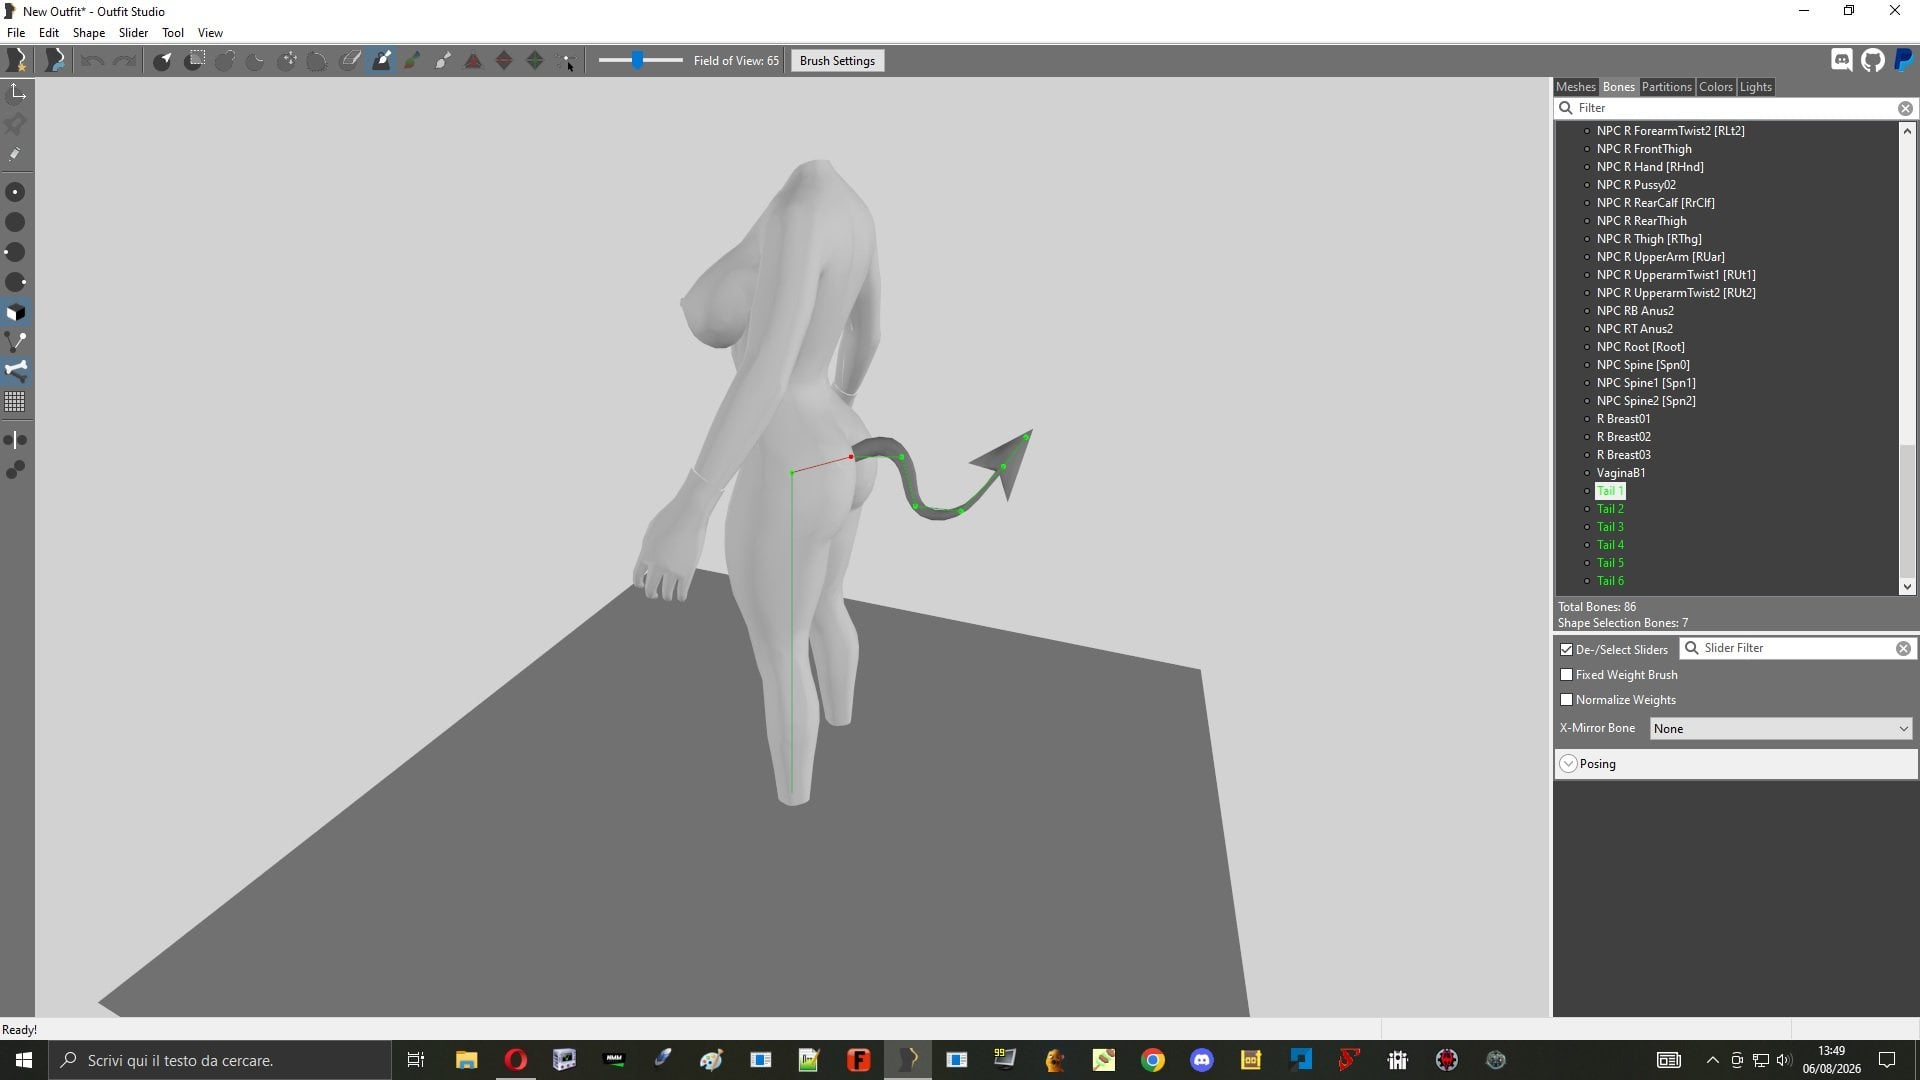
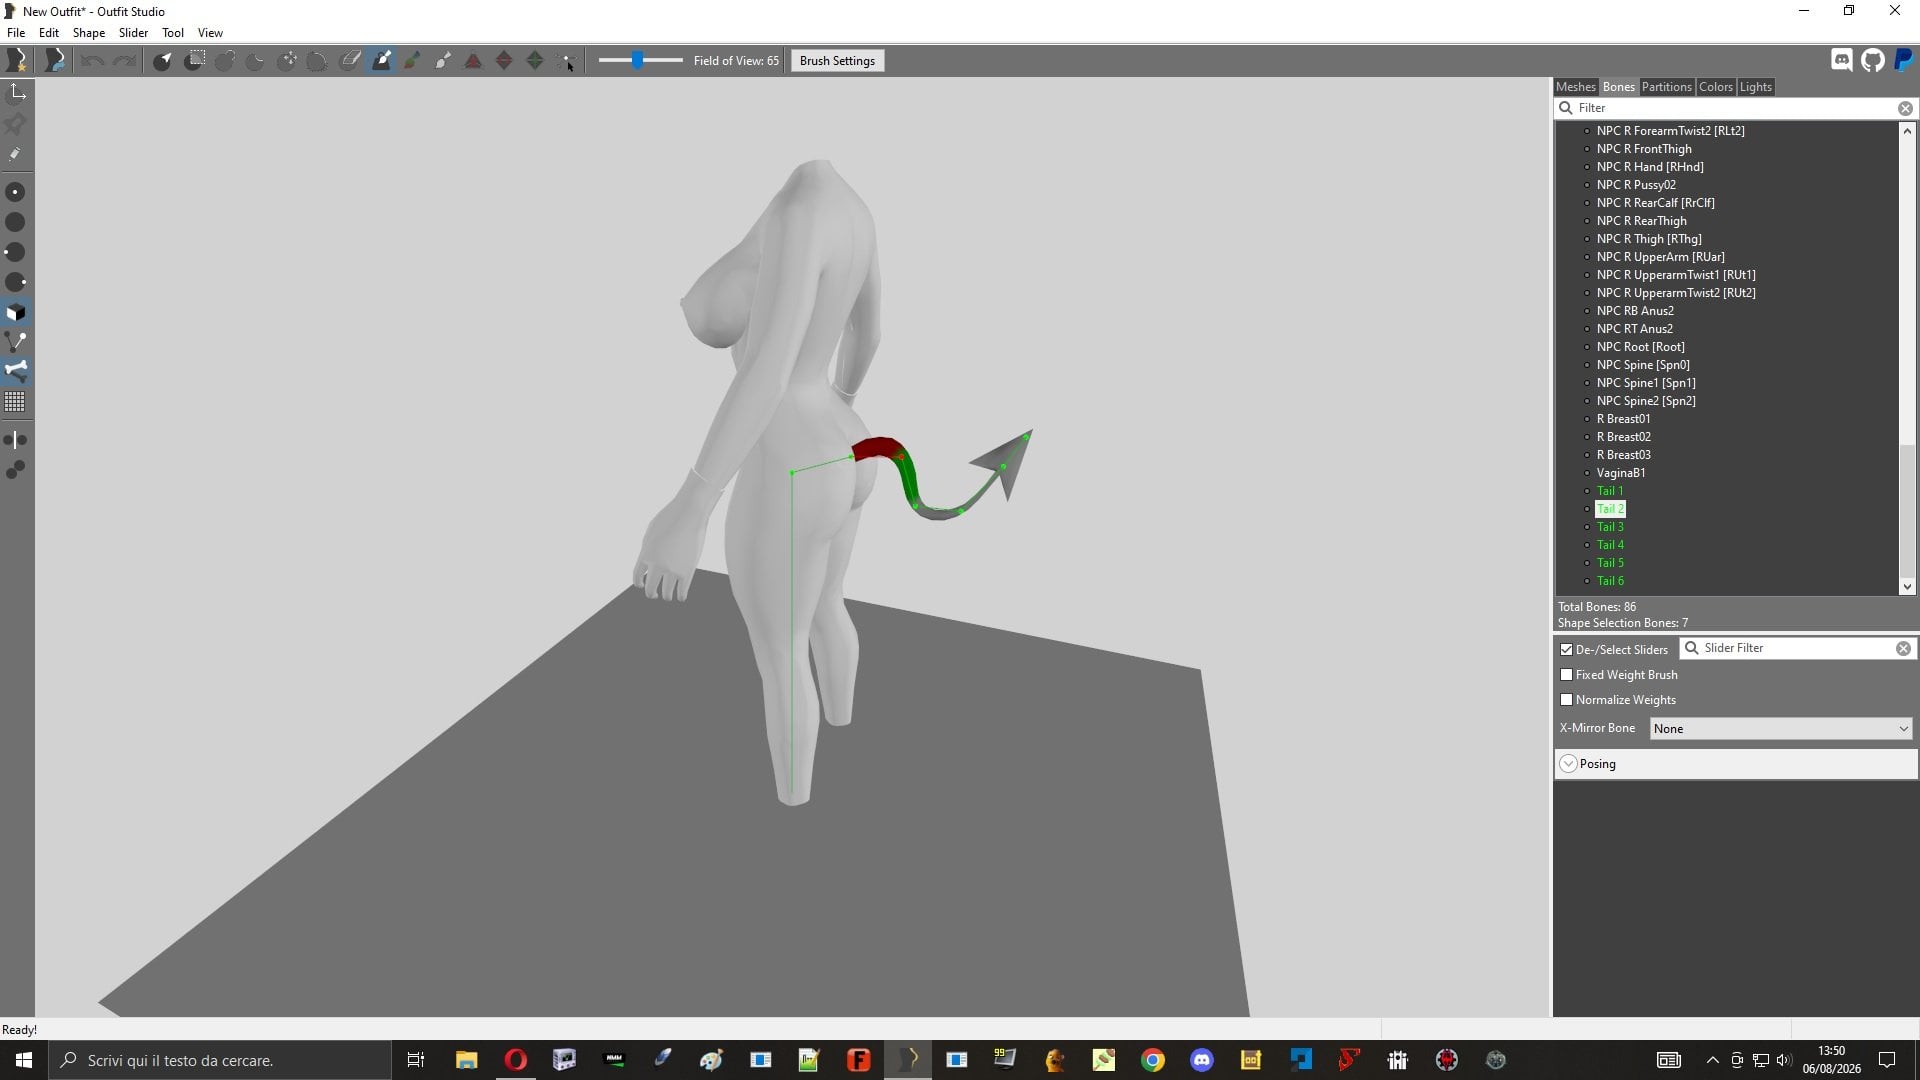
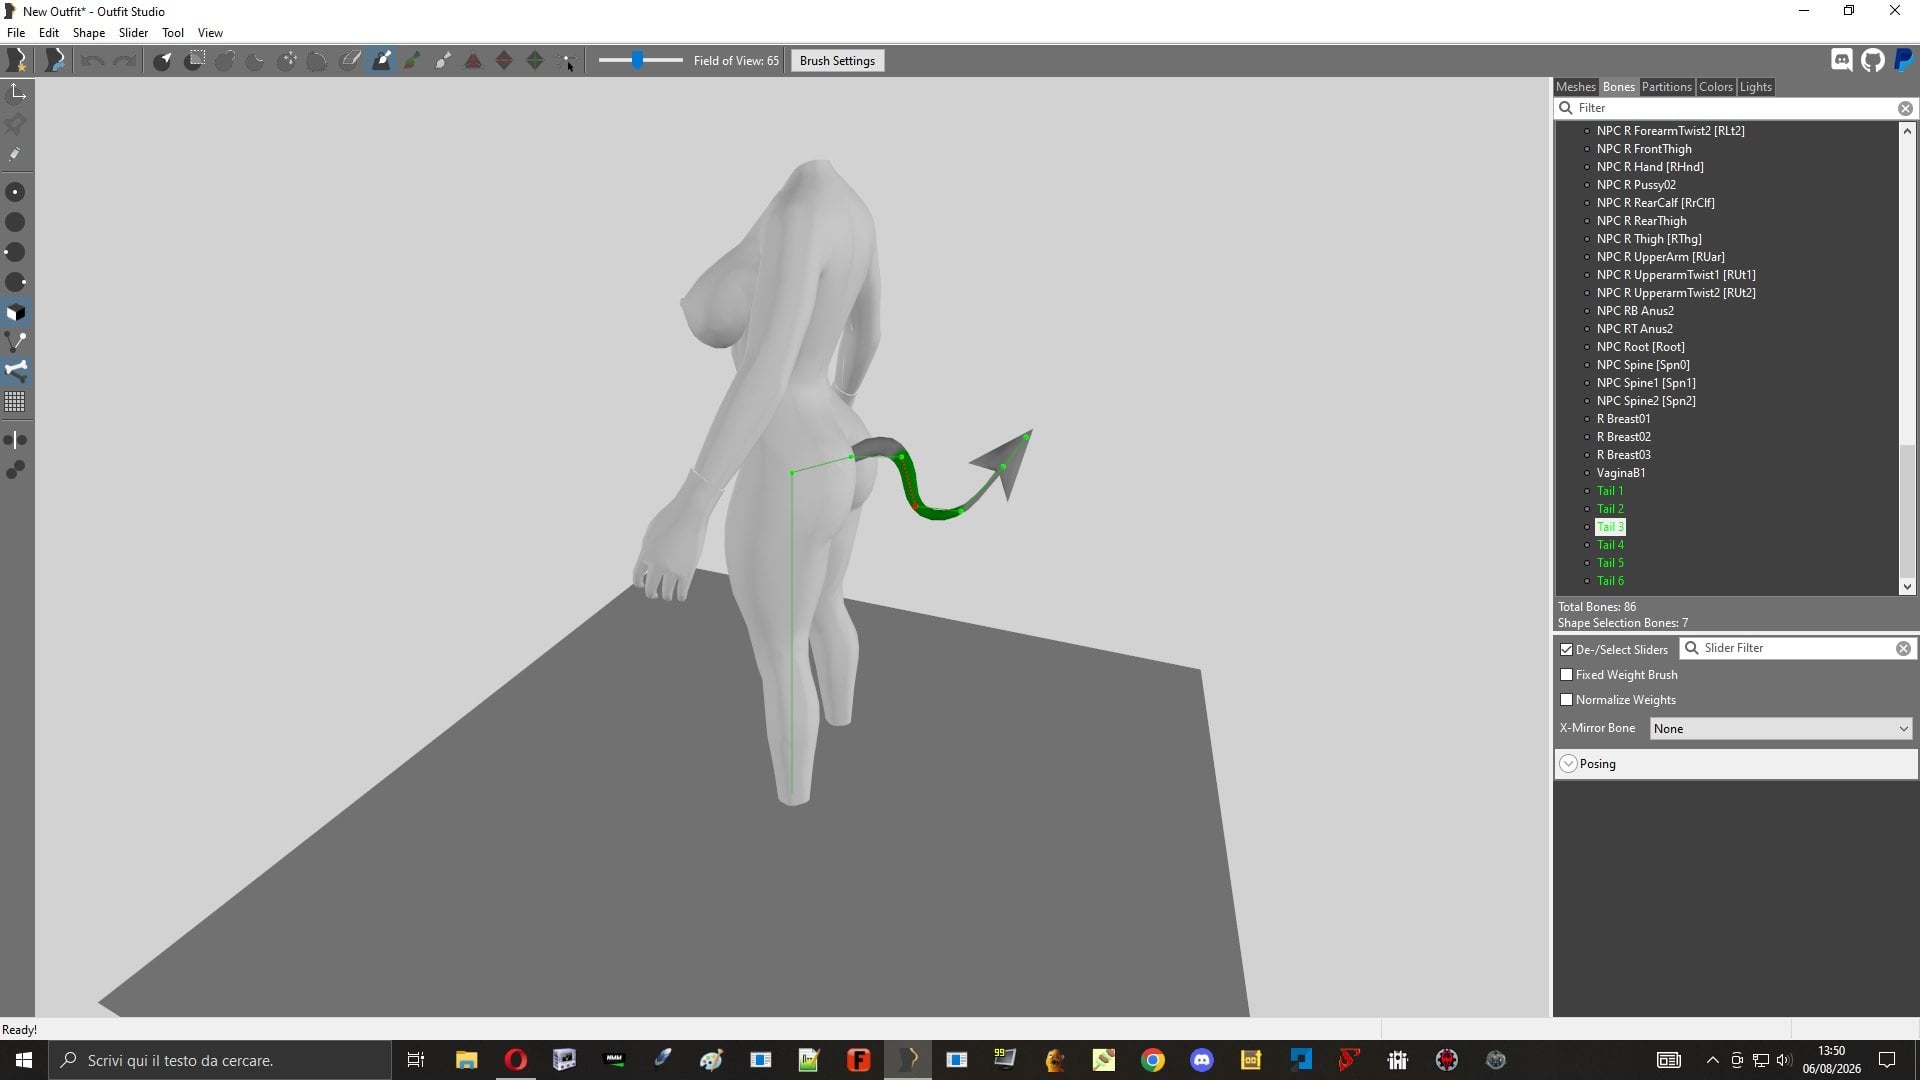
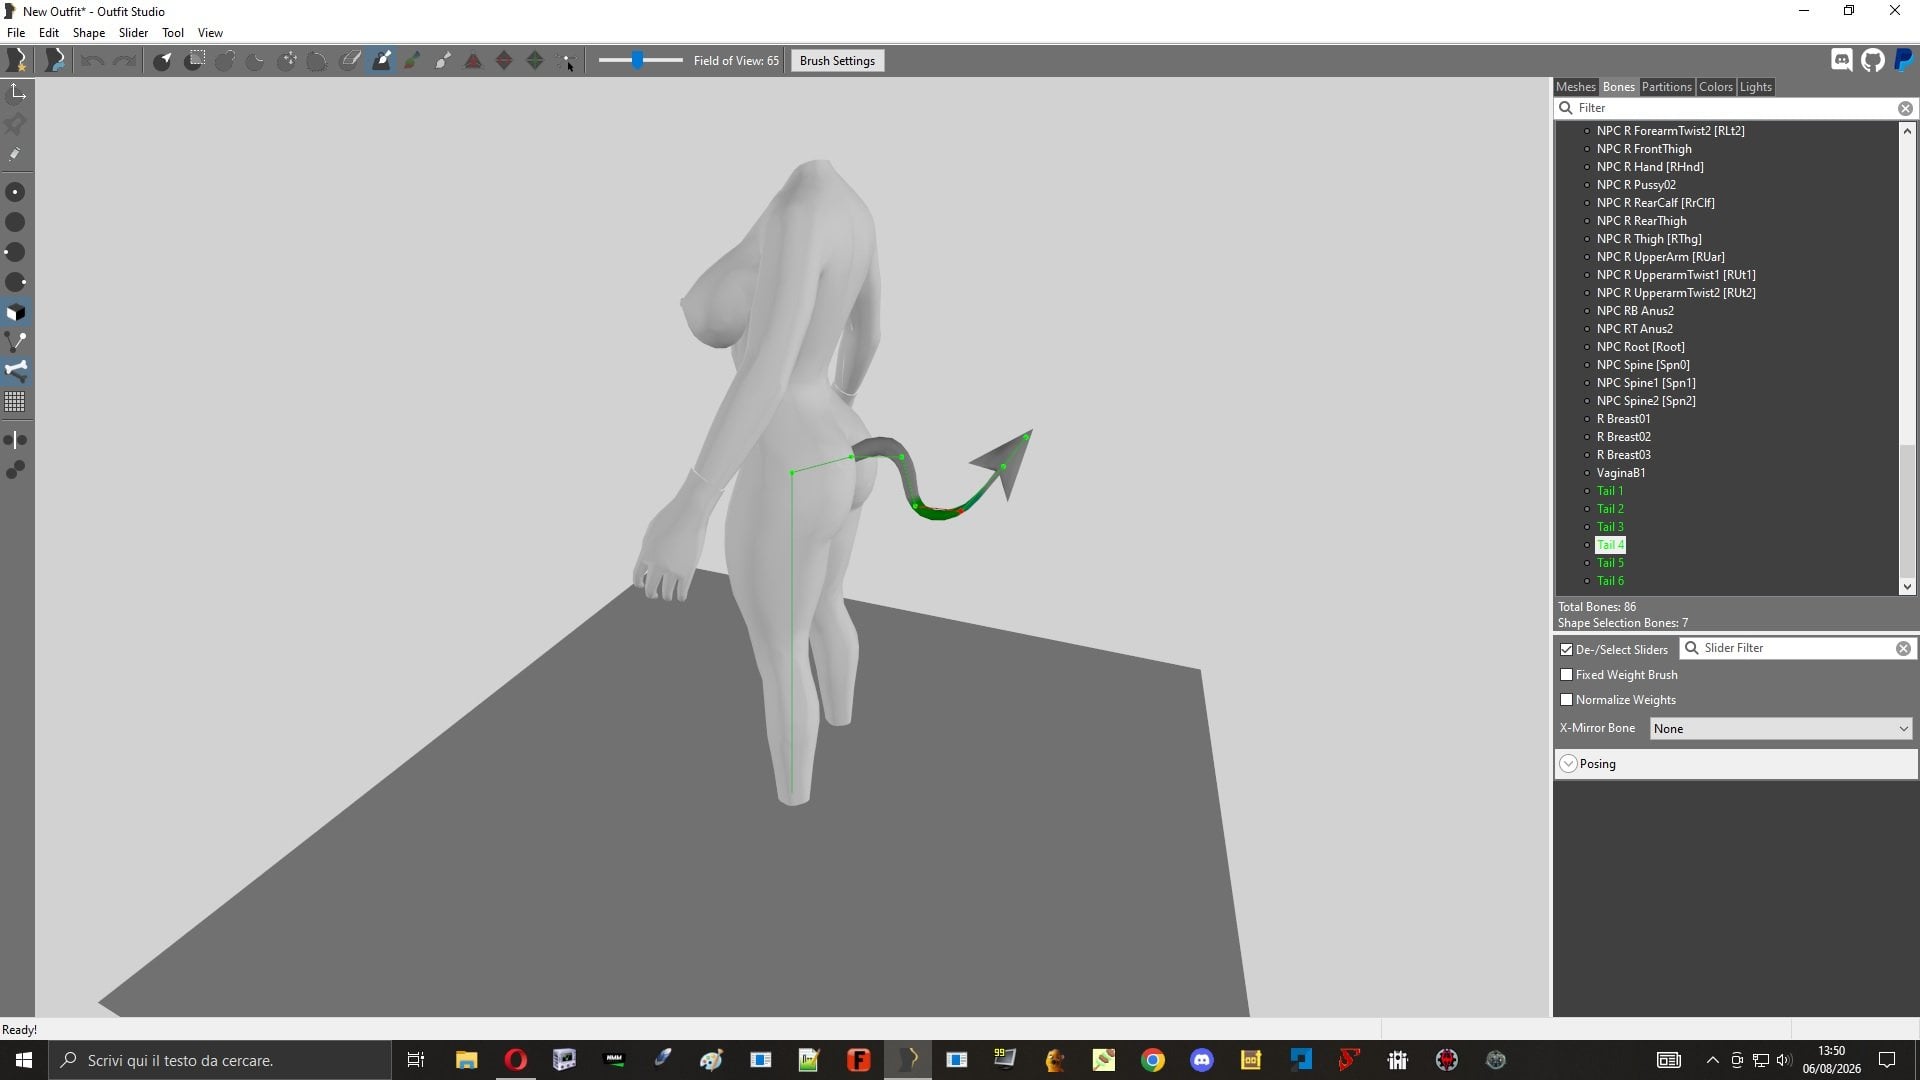
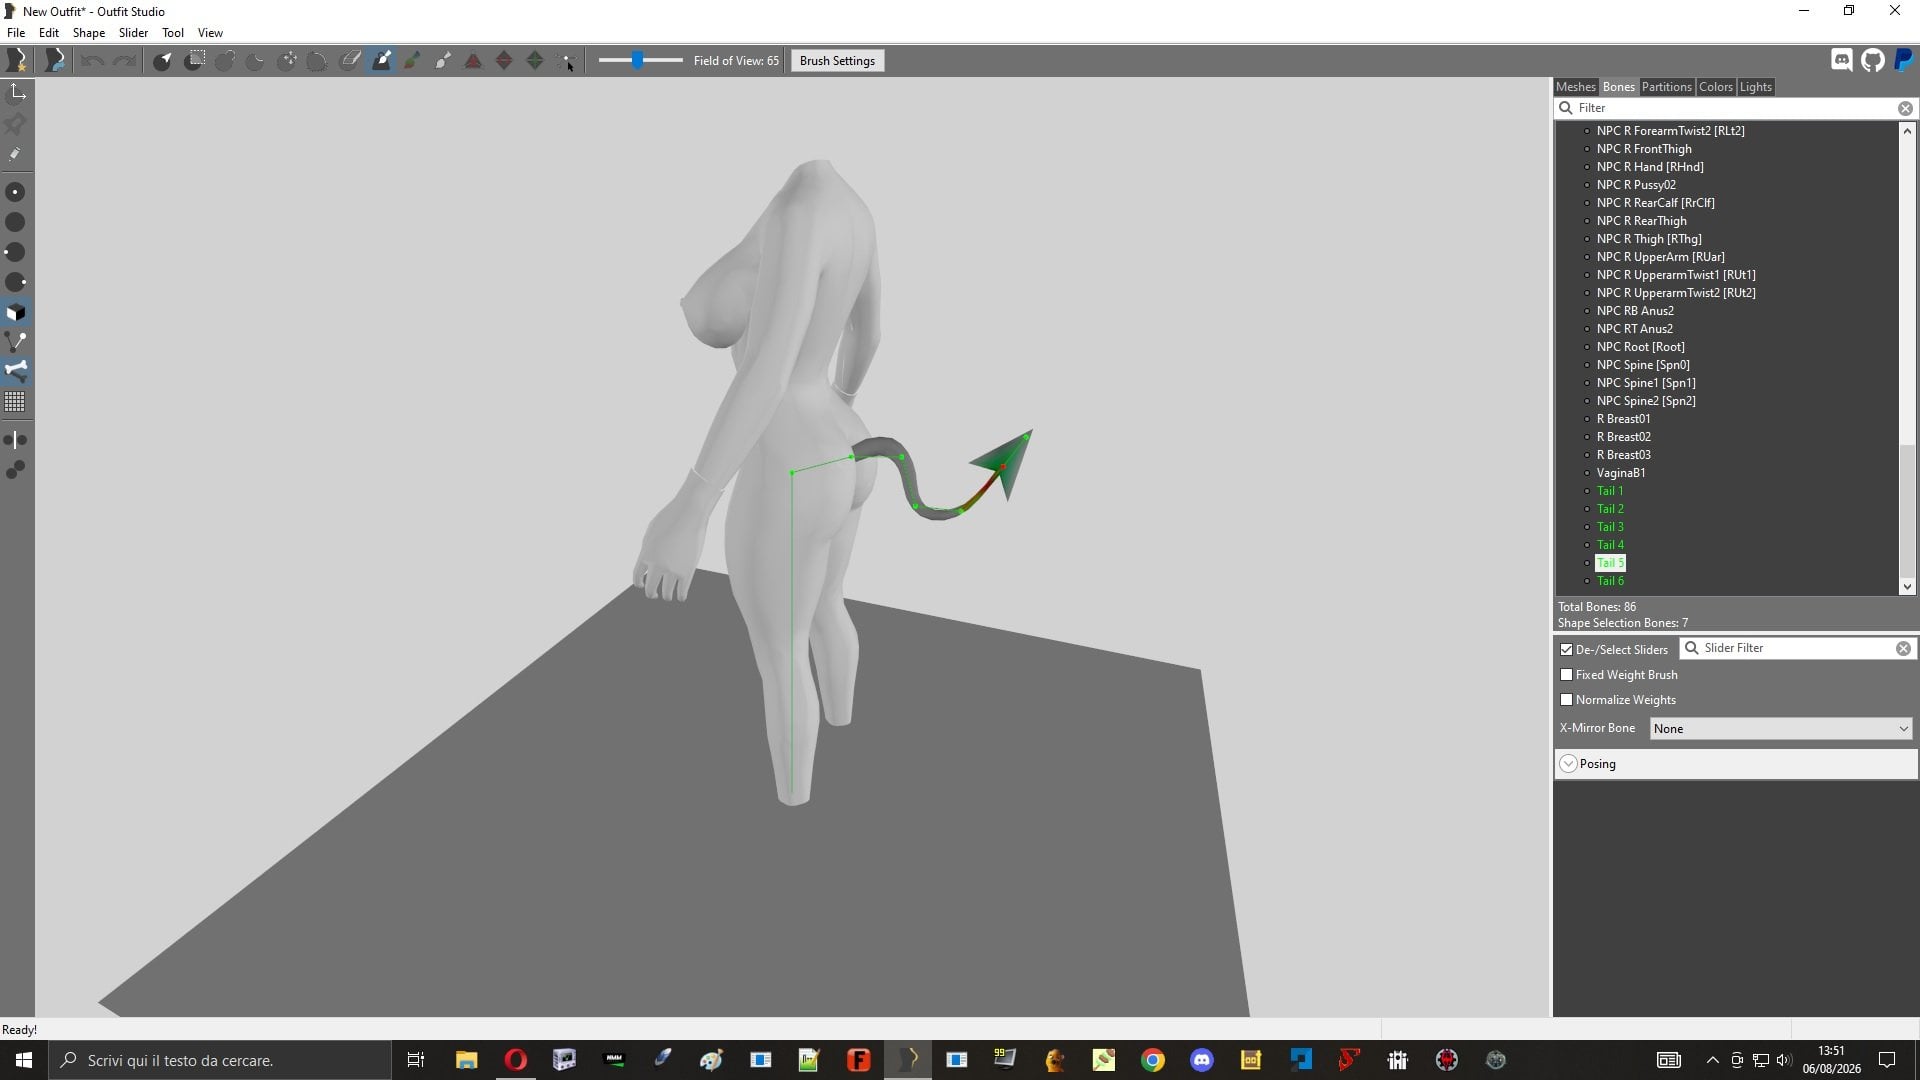
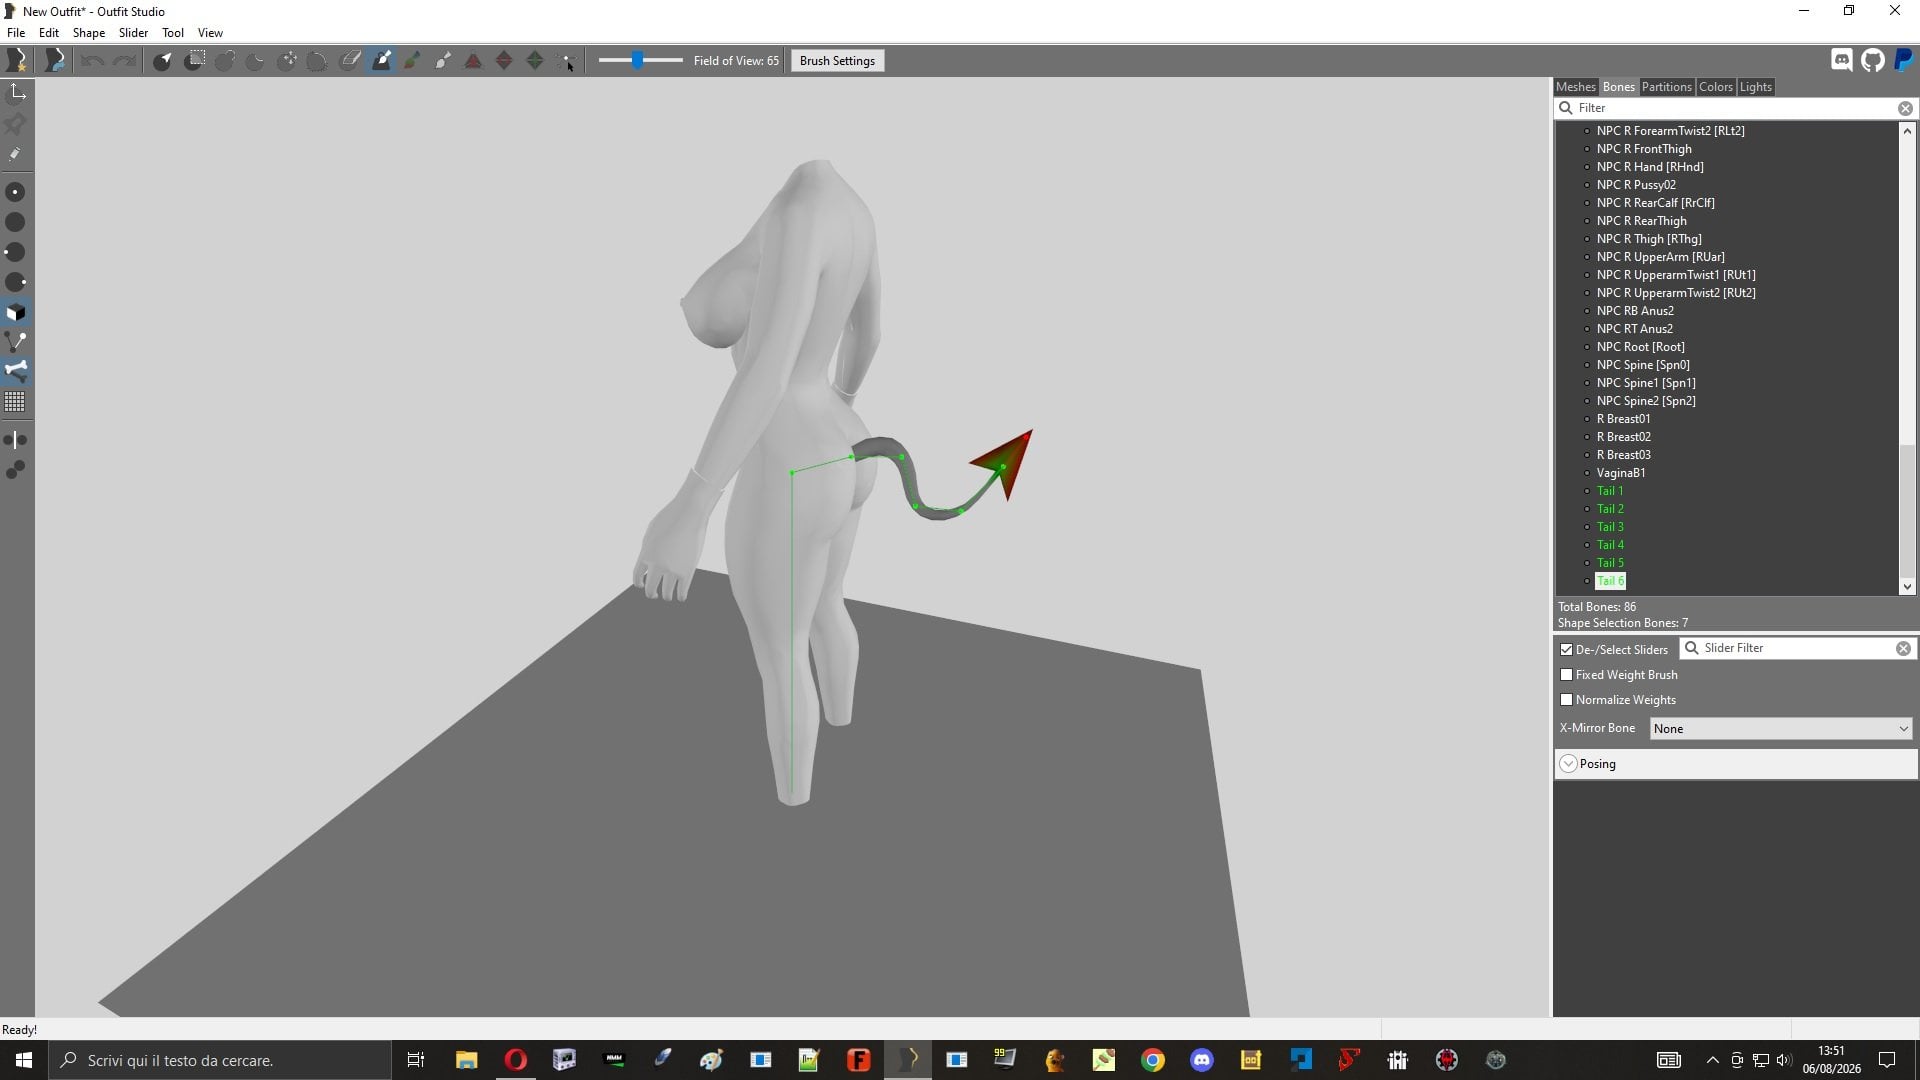
Modification of Harry2135's Tera Succubus Armor mod. Created the tails in SMP . Applied to all 4 colors of the armor Required original Mod I use a 3BA body, but since it's not a Bodyslide, it should fit any other type of body. Install using your ModManager (overwrite when required) , or extrat, copy/drop into Skyrim Folder ( (where the EXE file is located) , overwrite when required 3BA Harry2135 Tera Succubus - CBBE SE SMP Tail.7z
-
After several experiments, my first SMP . I used only Outfitstudio to create nodes and bones and Notepad++ for generating the XML I choose the H2135 Tera Succubus Armor and enabled SMP on the tail. Since it seems to work pretty well, using the tail on Tera's other armor sets will be a breeze. All I'll have to do is swap out the DDS files, rename the NIF file, and I'm all set. 😊
-
 Damiiji joined the club
 -
 therealbarden joined the club
 -
 深淵の神 joined the club
 -
 tata1243794697 joined the club
 -
 HayHydra joined the club
 -
 Long- joined the club
 -
 NASARMADA joined the club
 -
 zilvradrow joined the club
 -
 paixiaoxing joined the club
 -
 779999 joined the club
 -
 VFCHYU joined the club
 -
 180697212 joined the club
 -
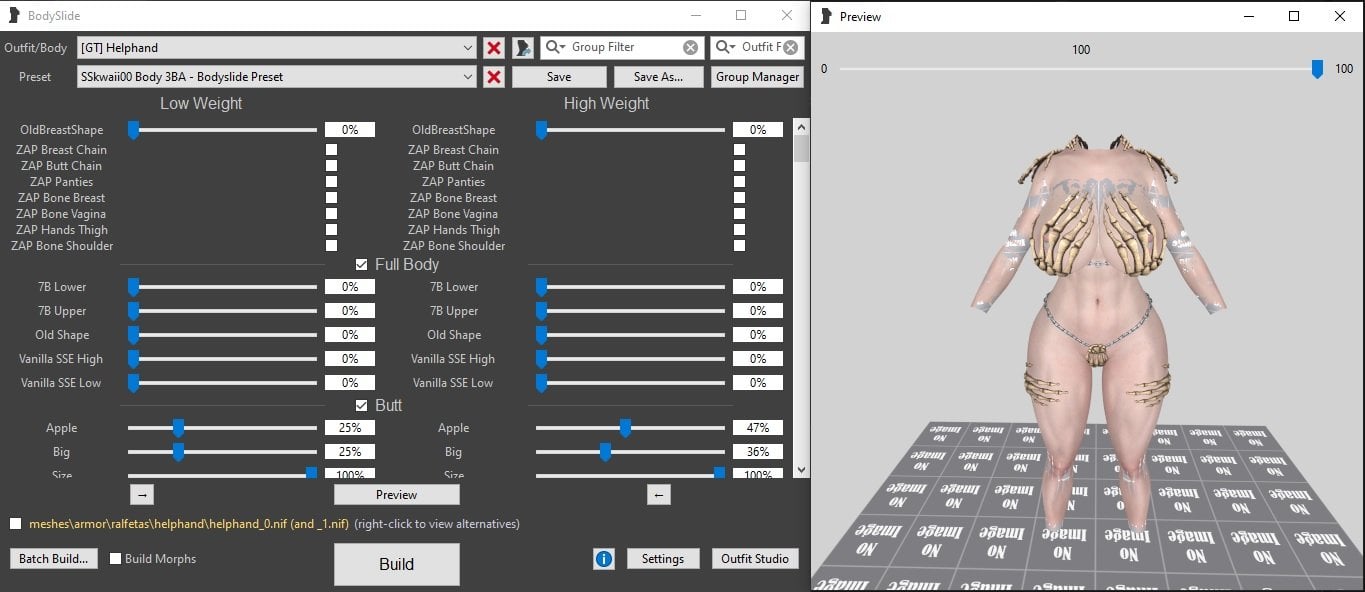
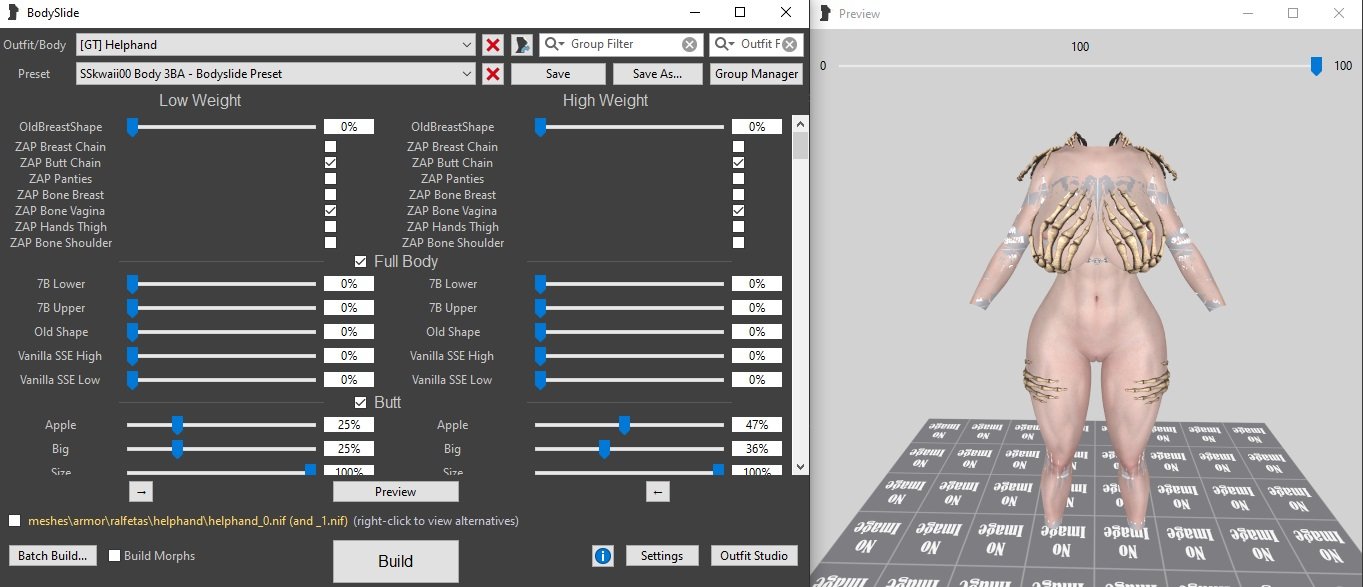
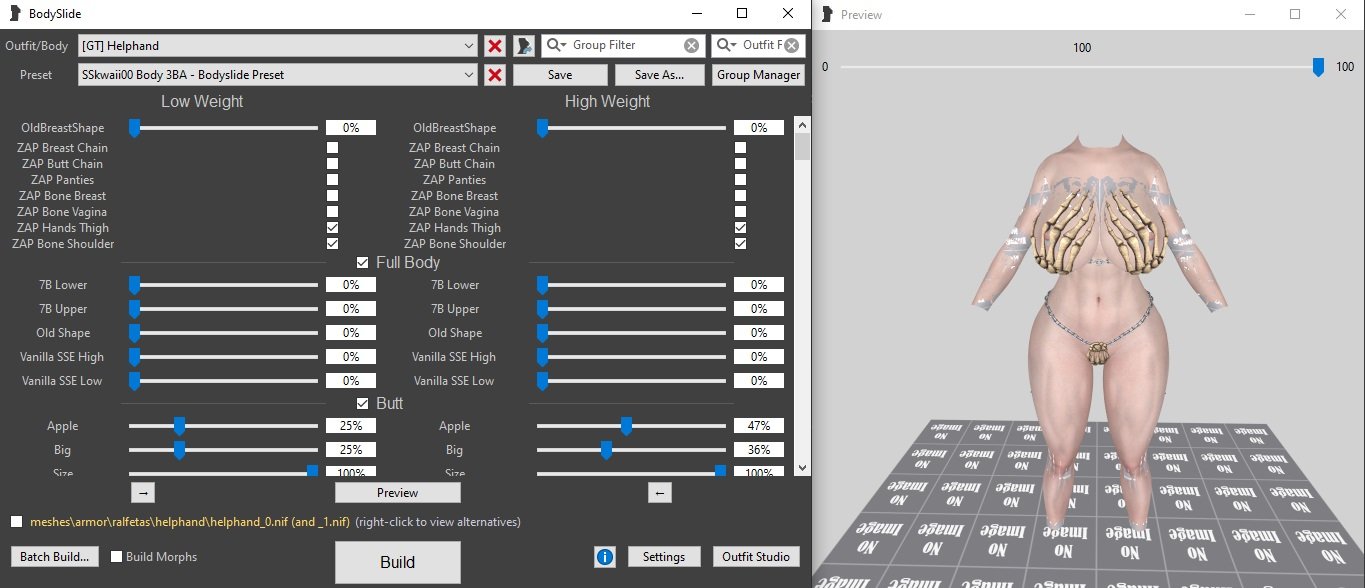
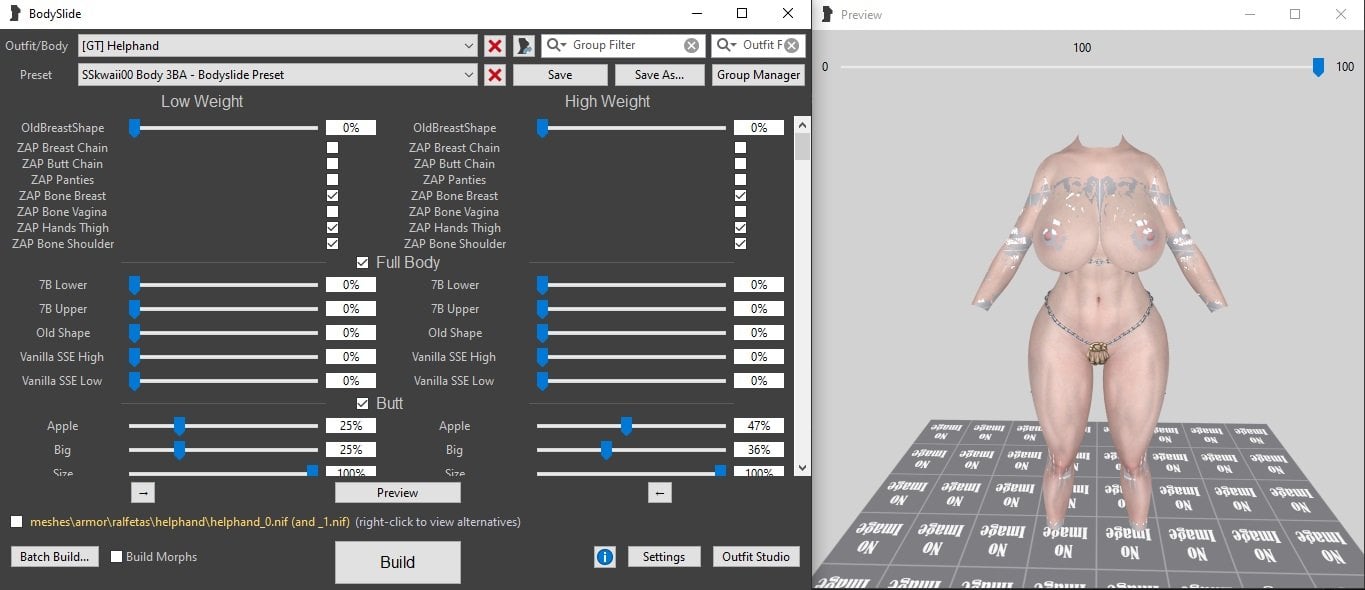
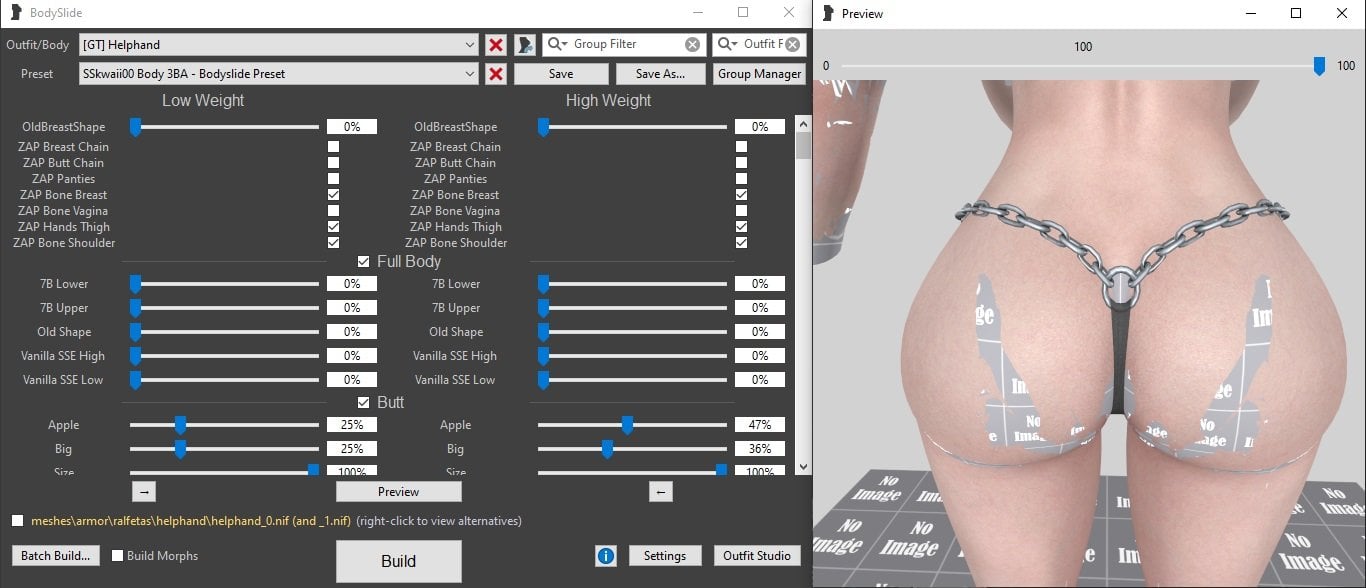
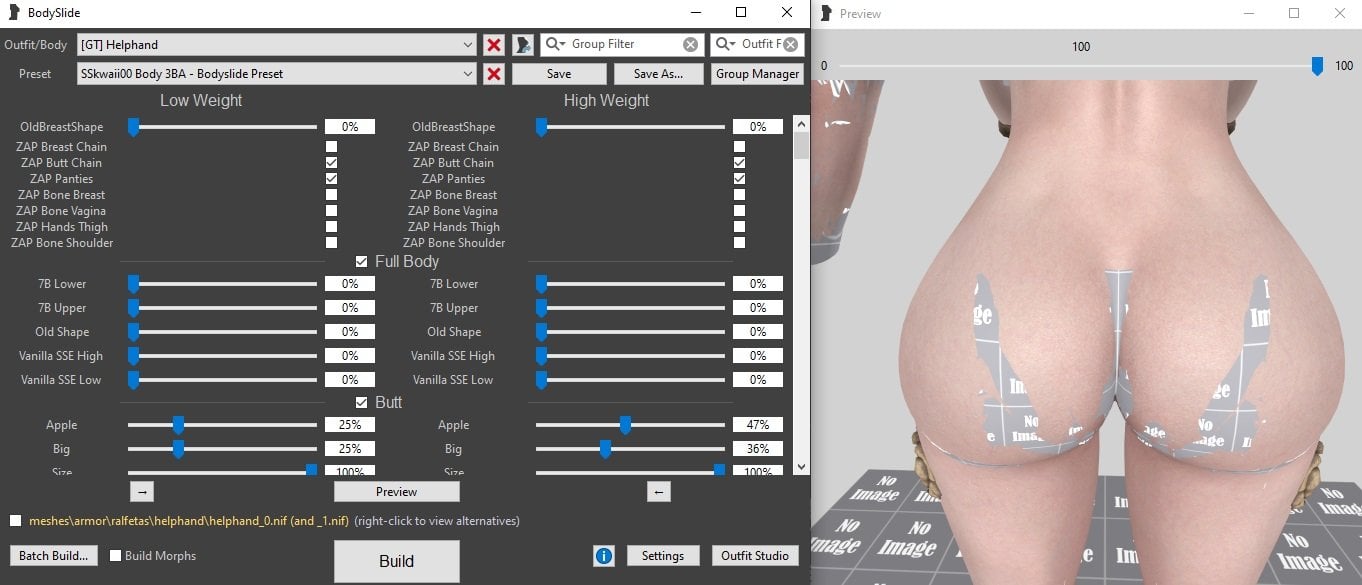
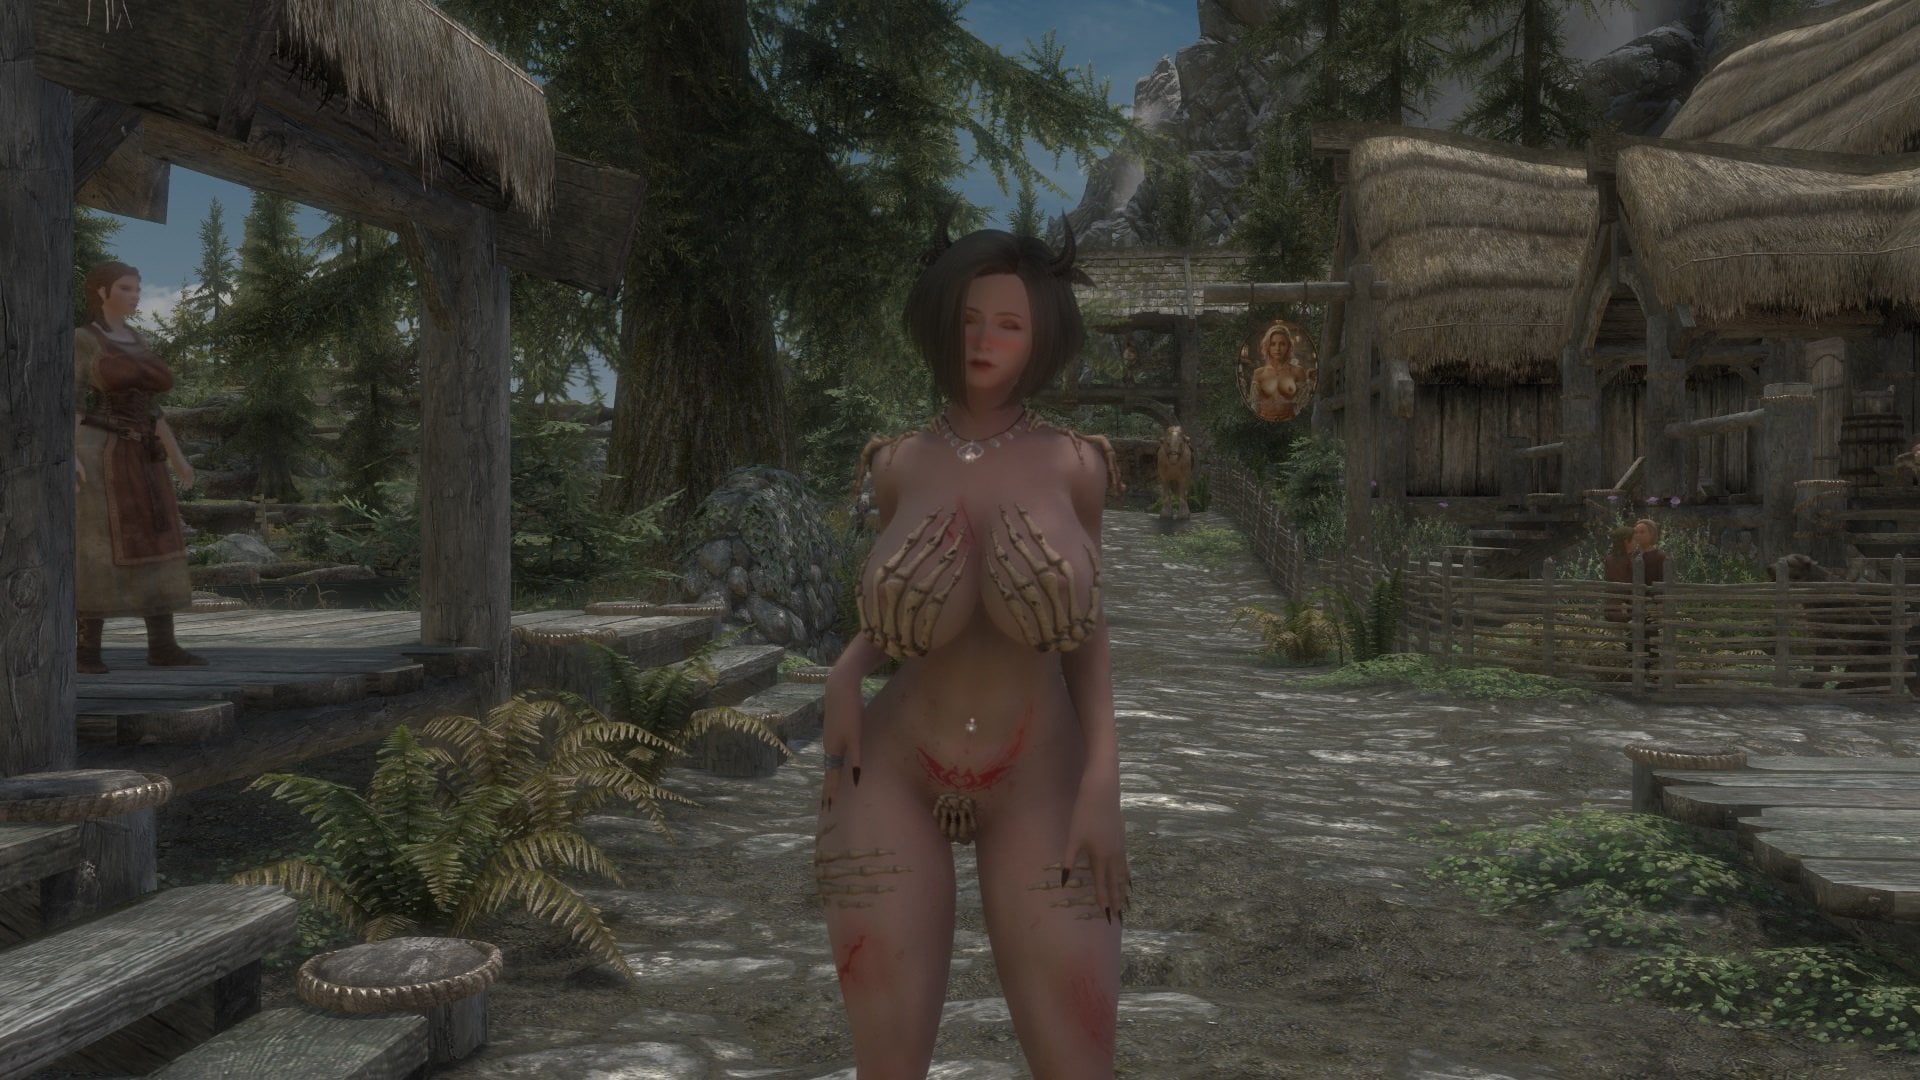
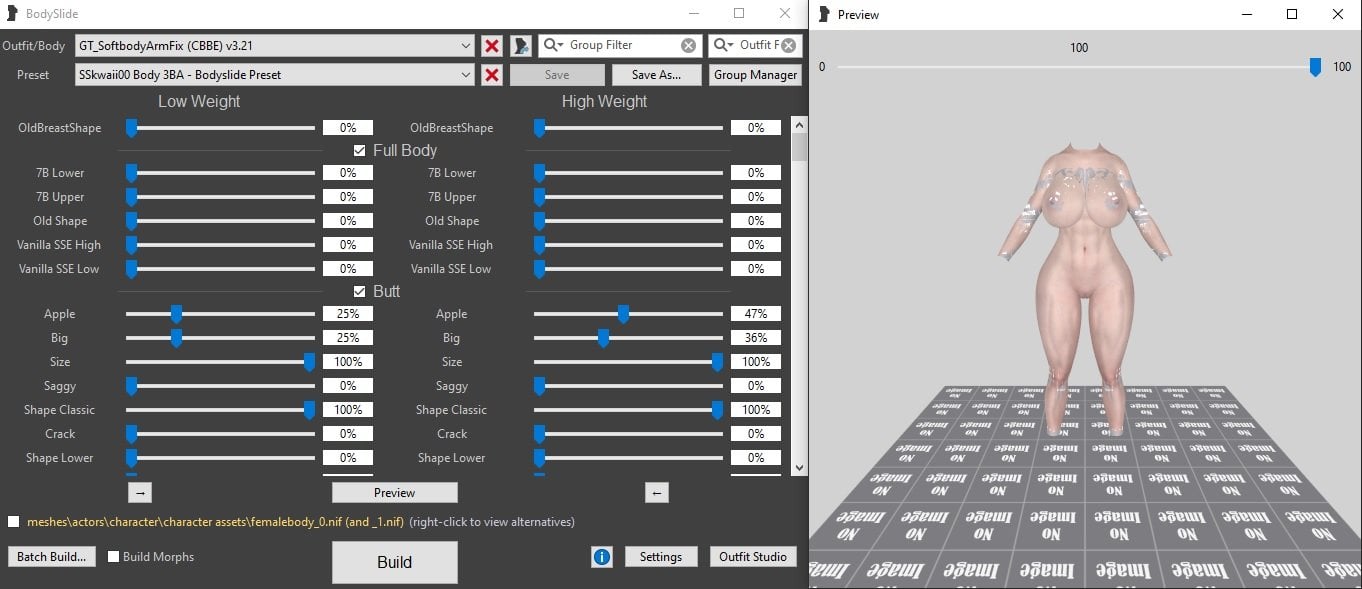
As the title suggests, this is a conversion of the HelpfulHand mod for GT Softbody Requirements : Original mod Helpful hand GT Softbody : SOFTBODY - More perfect physical collision of the body and all requirements My Body version Install using ModManager, or extract the files and copy/drop into Skyrim's data folder. Rebuild with Bodyslide. [GT] HelpfulHand.7z
-
 poi_daisuki joined the club
 -
 kkw3215 joined the club
 -
 red_dragon005 joined the club
 -
 kbcoco joined the club
 -
https://mega.nz/file/KIEV0CqY#FILi8tQ9gmfI6DQrWsUHCcO_SjgRJrUjZAIz31a4p3k
-
 vibrantpencil joined the club
 -
 Ratthew68 joined the club
 -
 Kike29 joined the club
 -
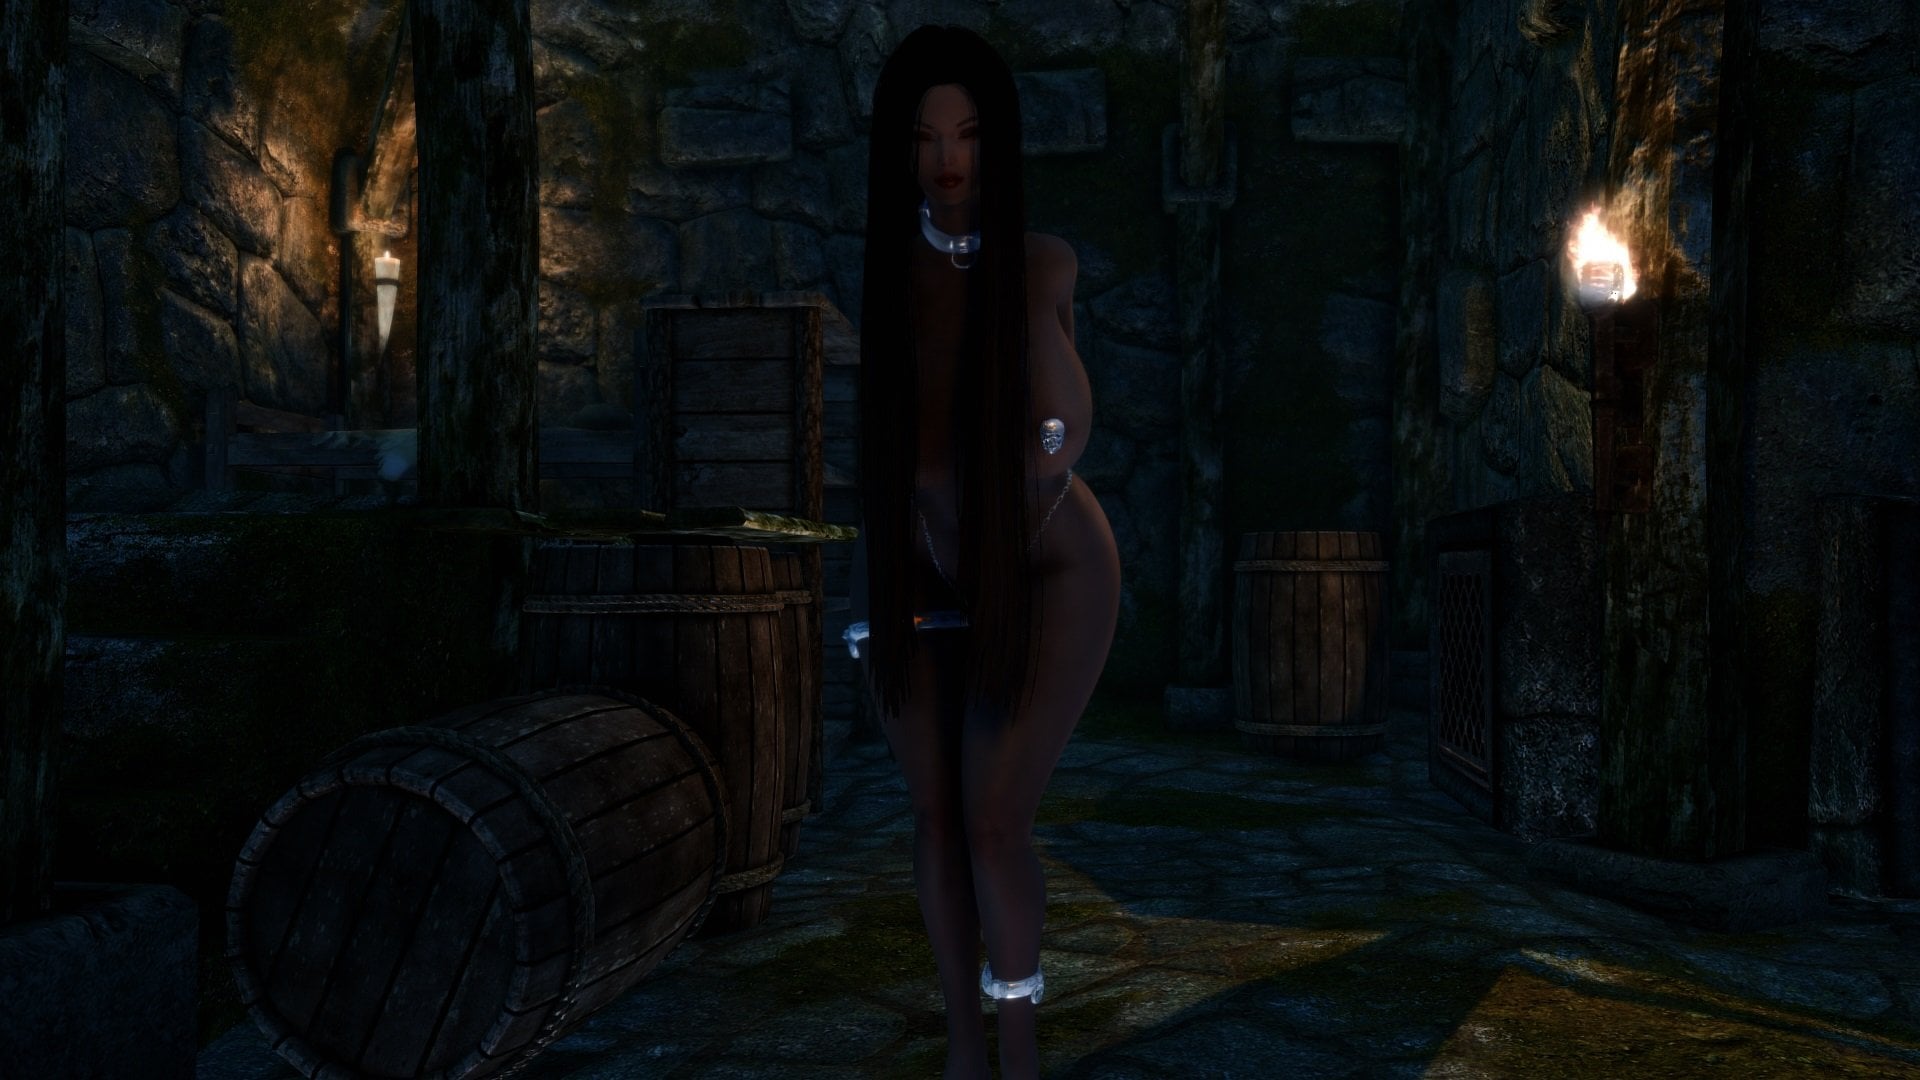
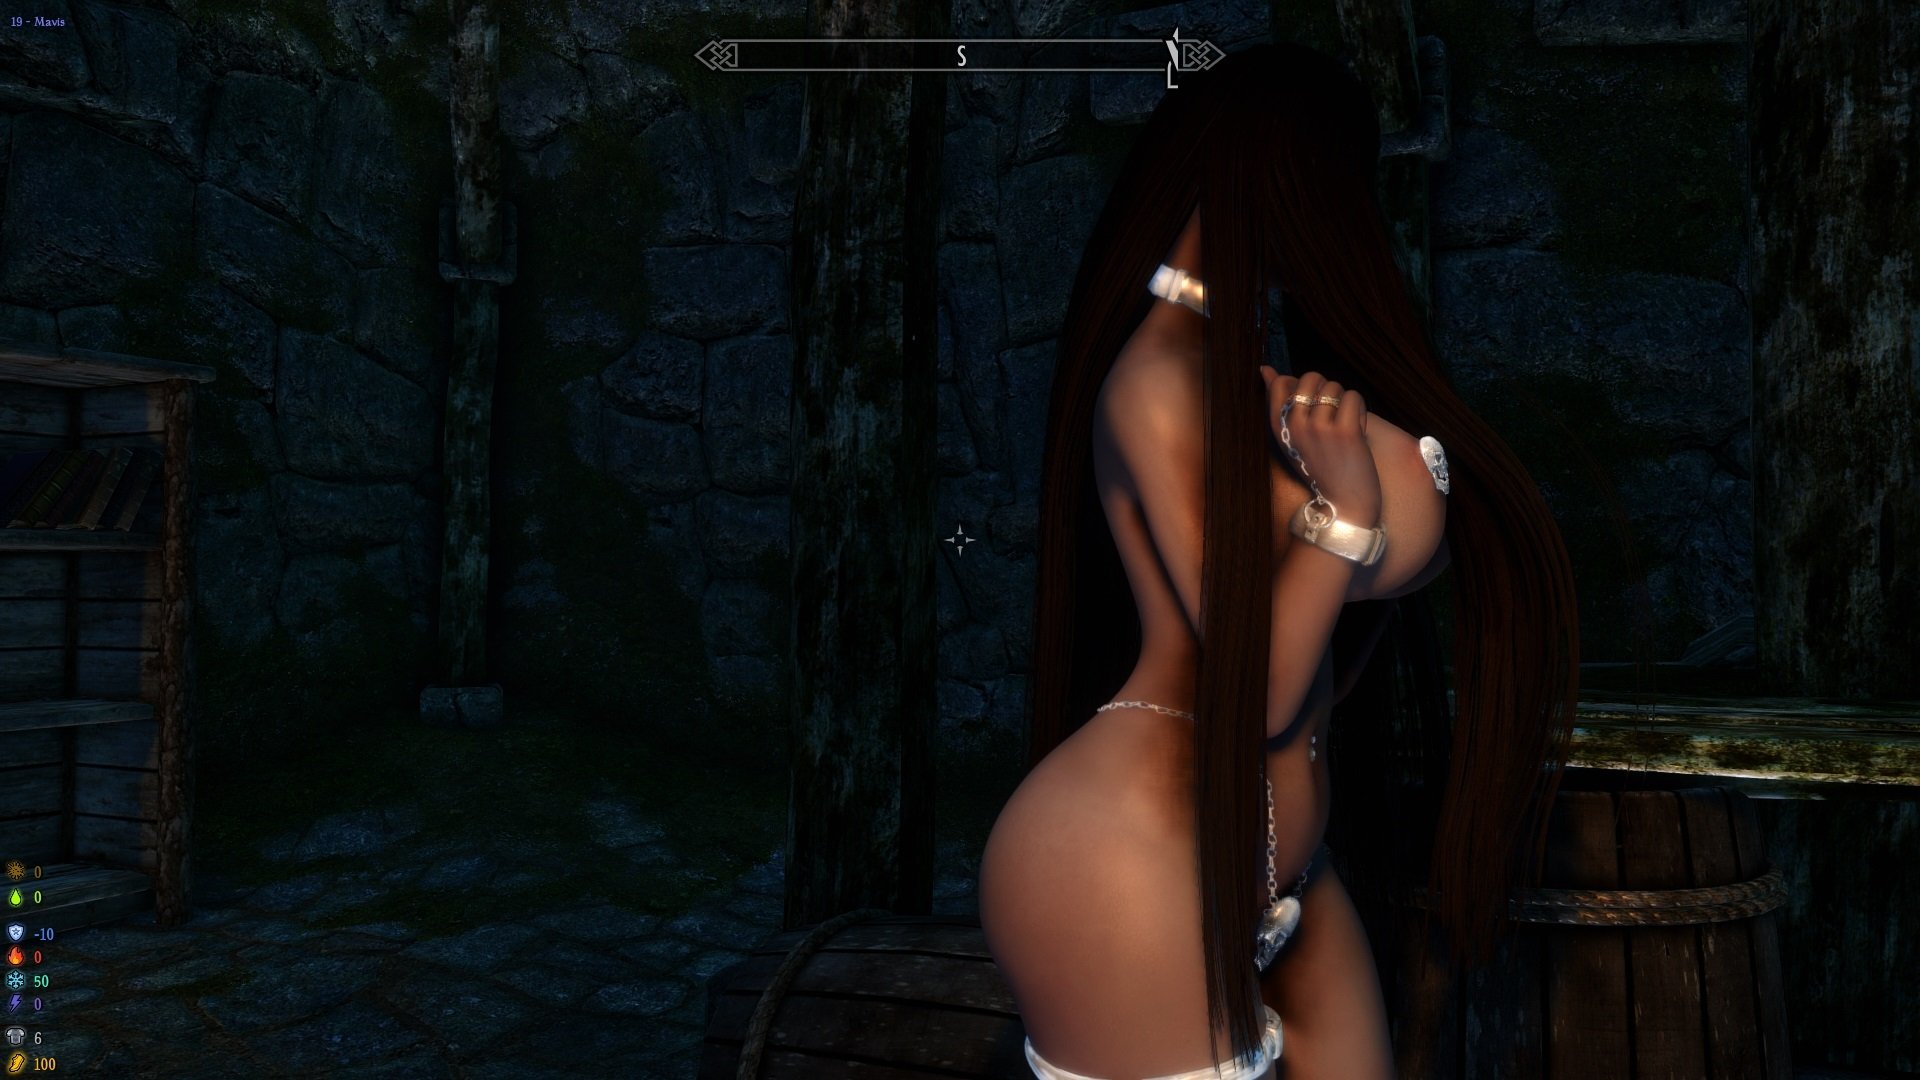
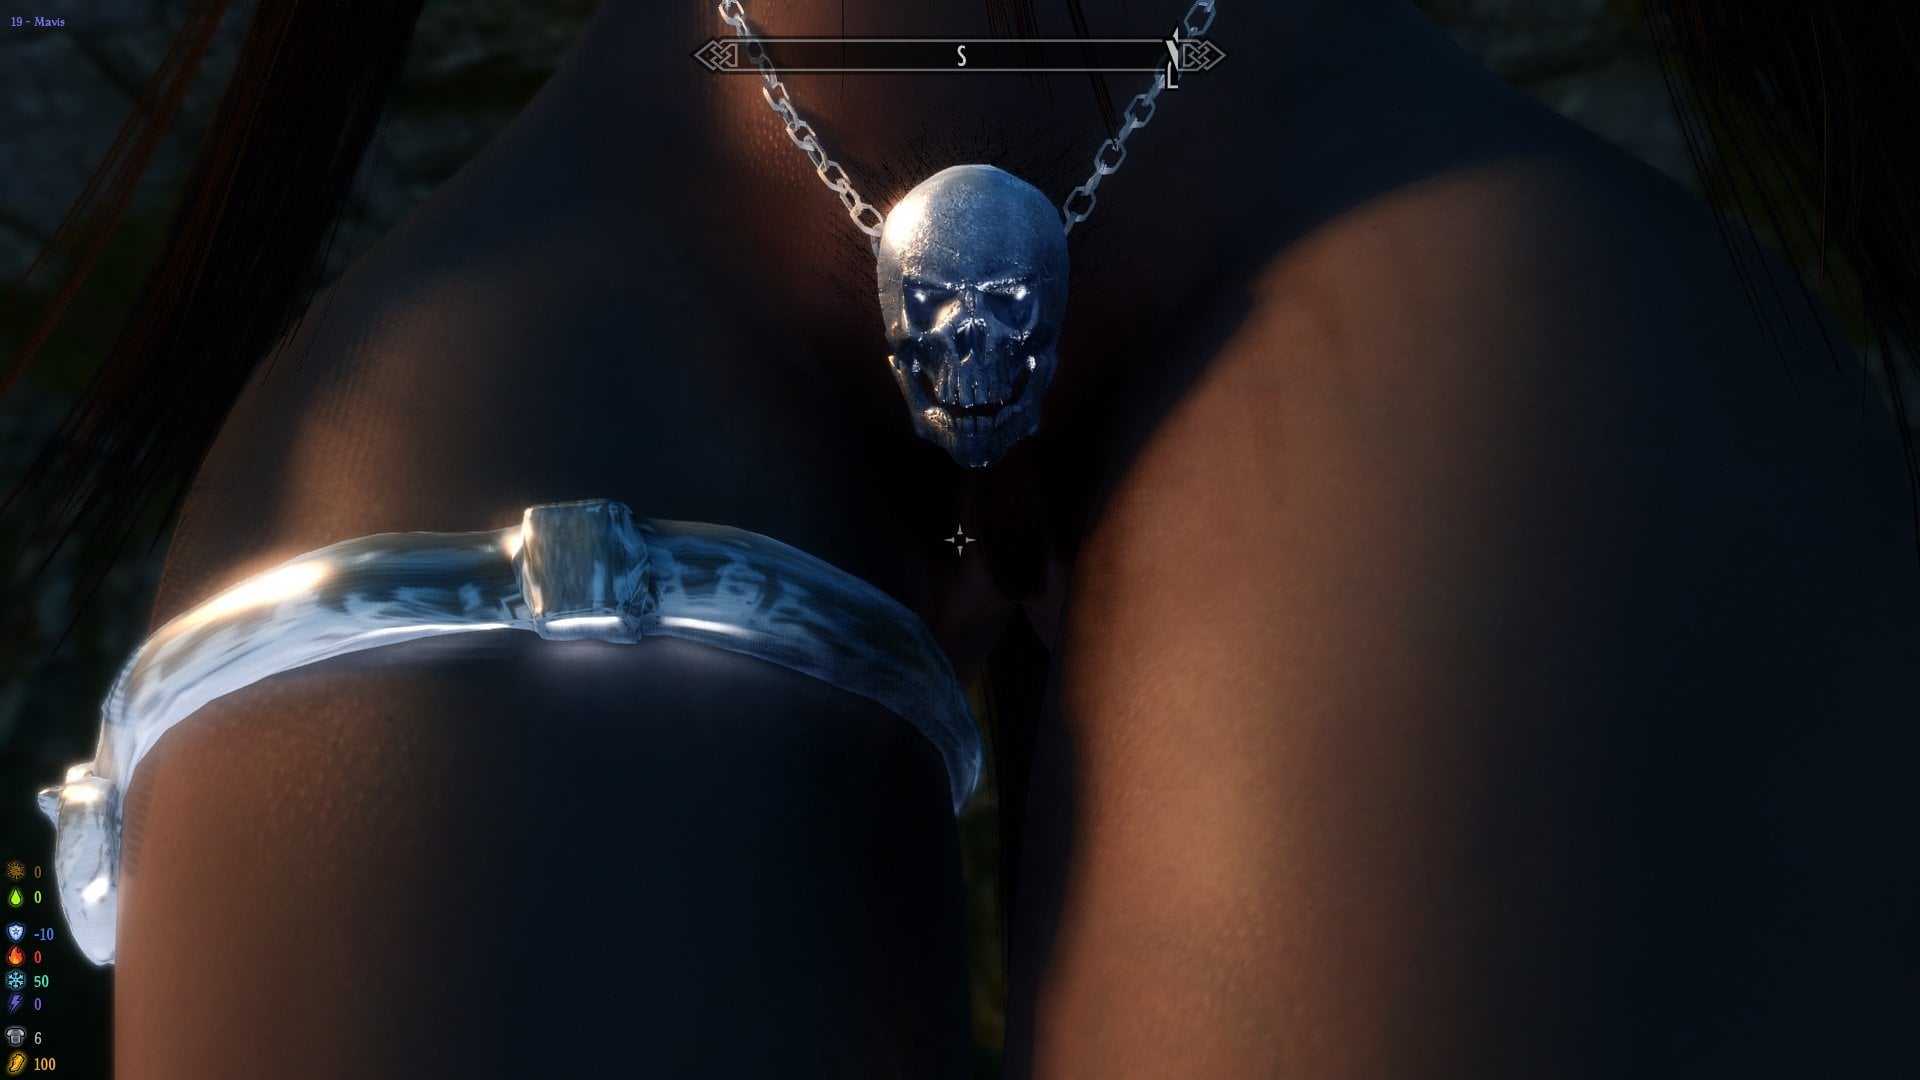
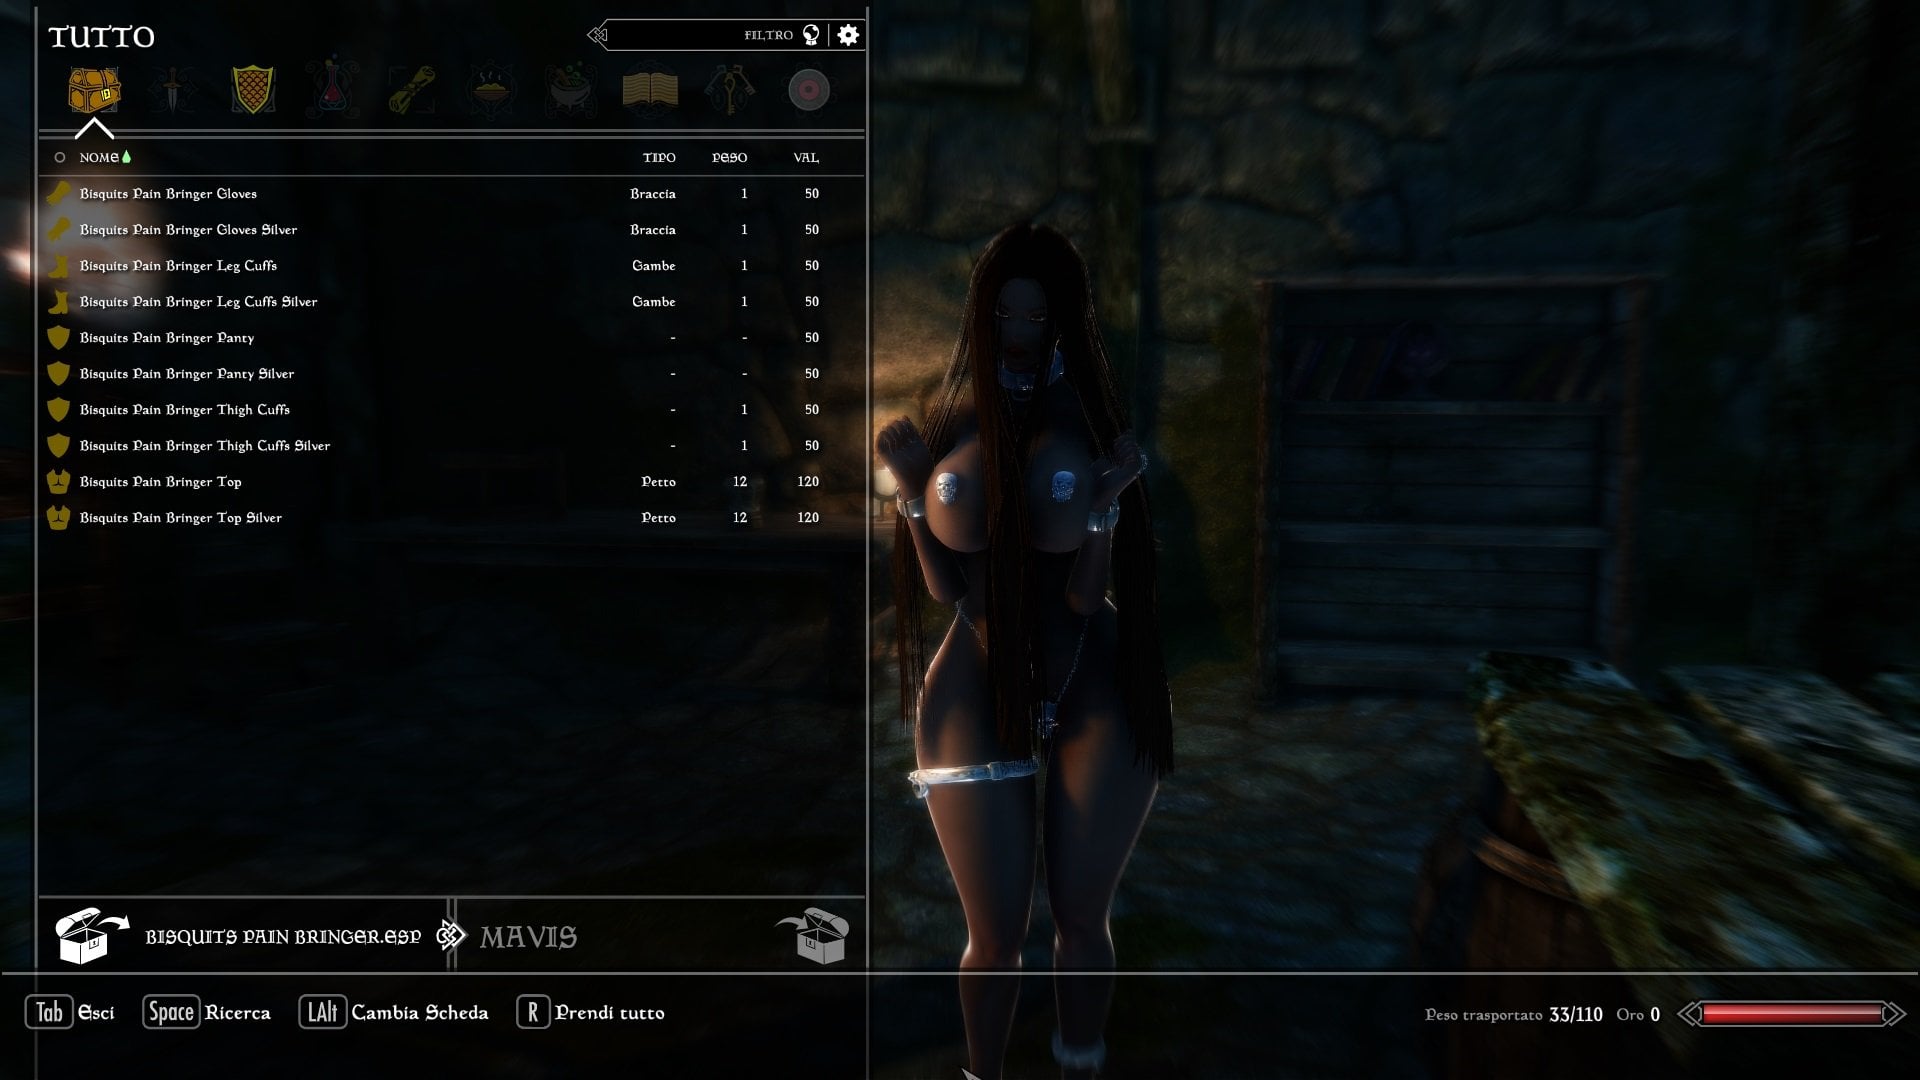
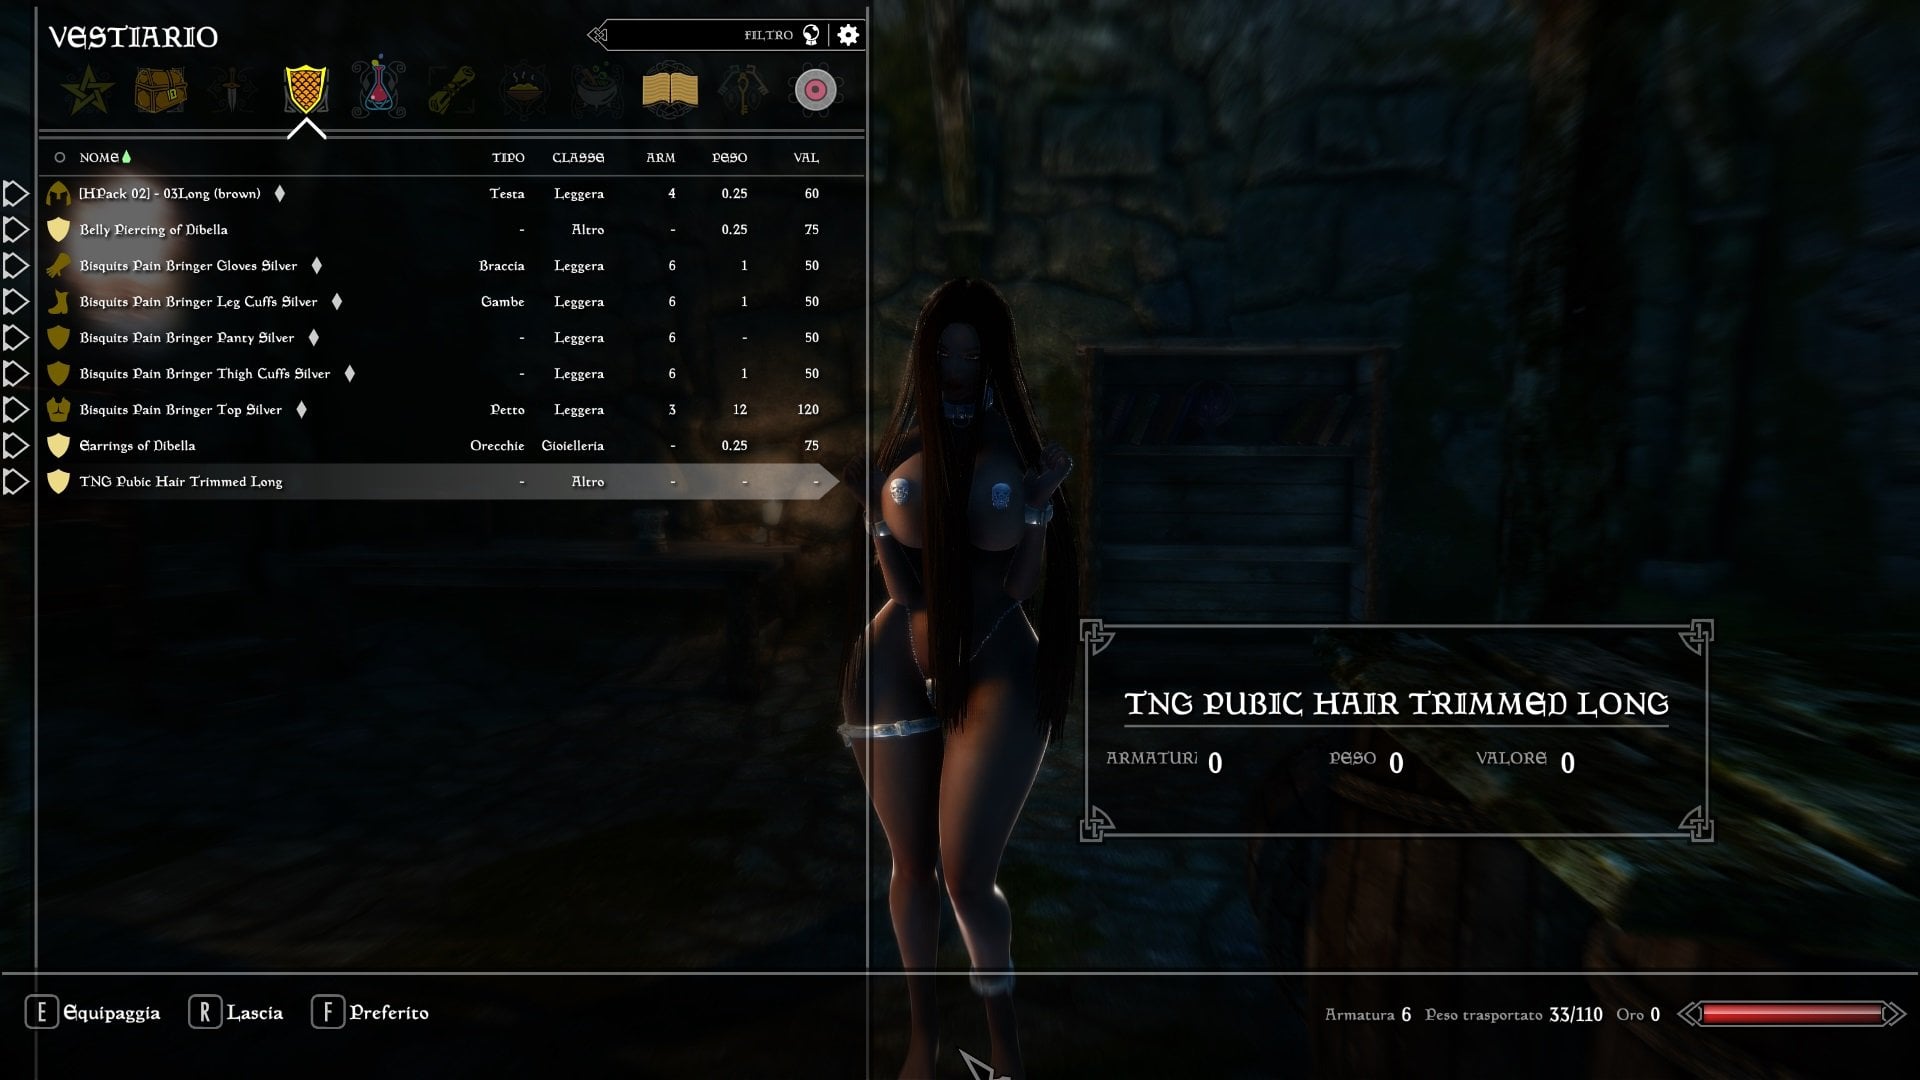
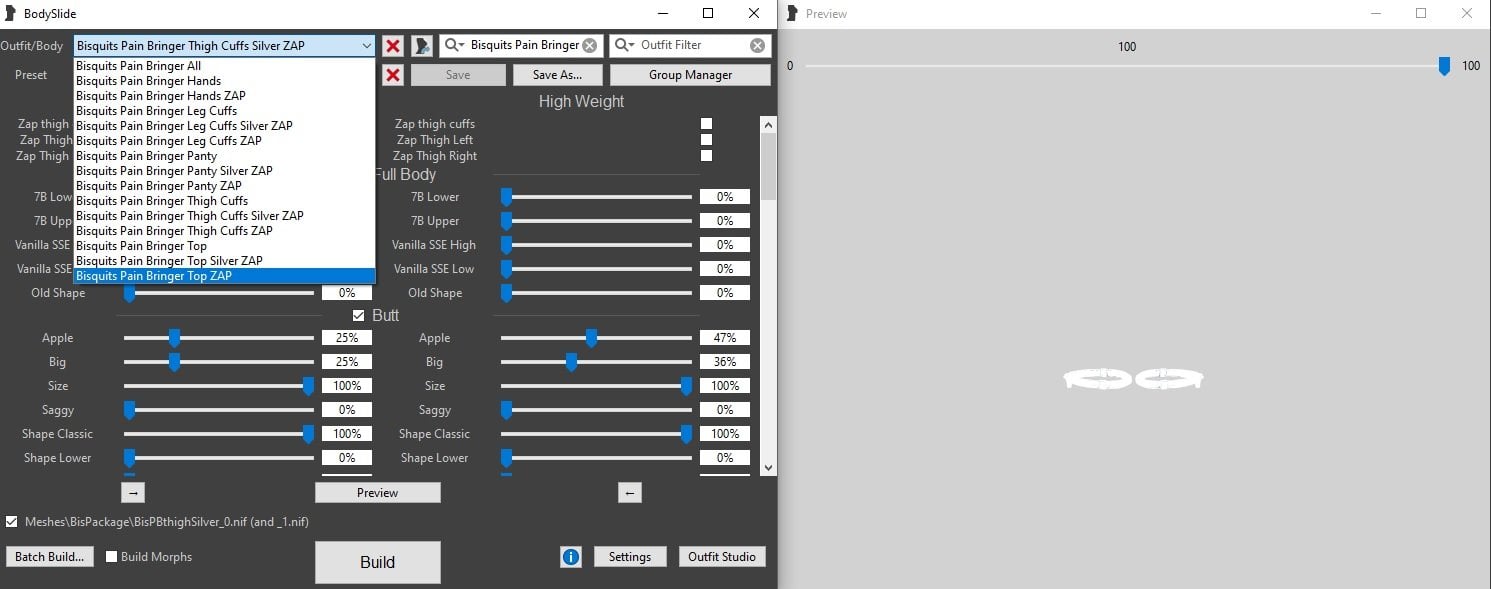
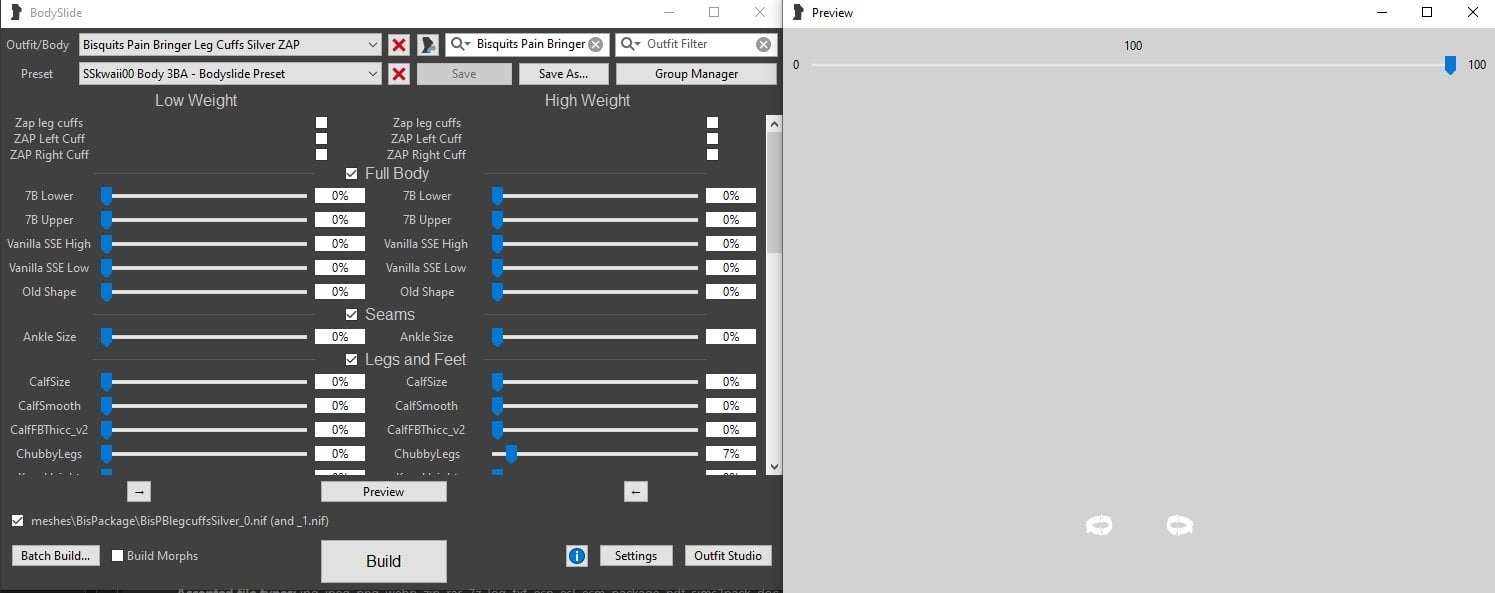
Creation of ZAP Sliders in Bodyslide; fixed the color change on the body (in the original version, the crotch remained blue when the top was worn) The ESP was modified to resolve the issue, and specific NIFs were created Changed the Panty partition to 48_SBP_48_MOD_MISC1 . This is to avoid the same partition as Belly Piercings (which is generally 49) ESP corrected and modified by changing the partitions and generating the correct Silver NIFs ADD Cubemaps Modify the SliderGroups by adding the new ZAP/Silver ADD AND.ini if use AND Mod Required original mod Bisquits Pain Bringer Belly Piercing, Hairstyle, Earrings, Pube Hair not included Extrat , copy drop into Skyrim directory (active plugin) or use your mod manager . Overwrite when required You can do this using AddItemMenu and/or similar functions Body into screen SSkwaii00 Body 3BA - Bodyslide Preset Bisquits Pain Bringer ZAP.7z
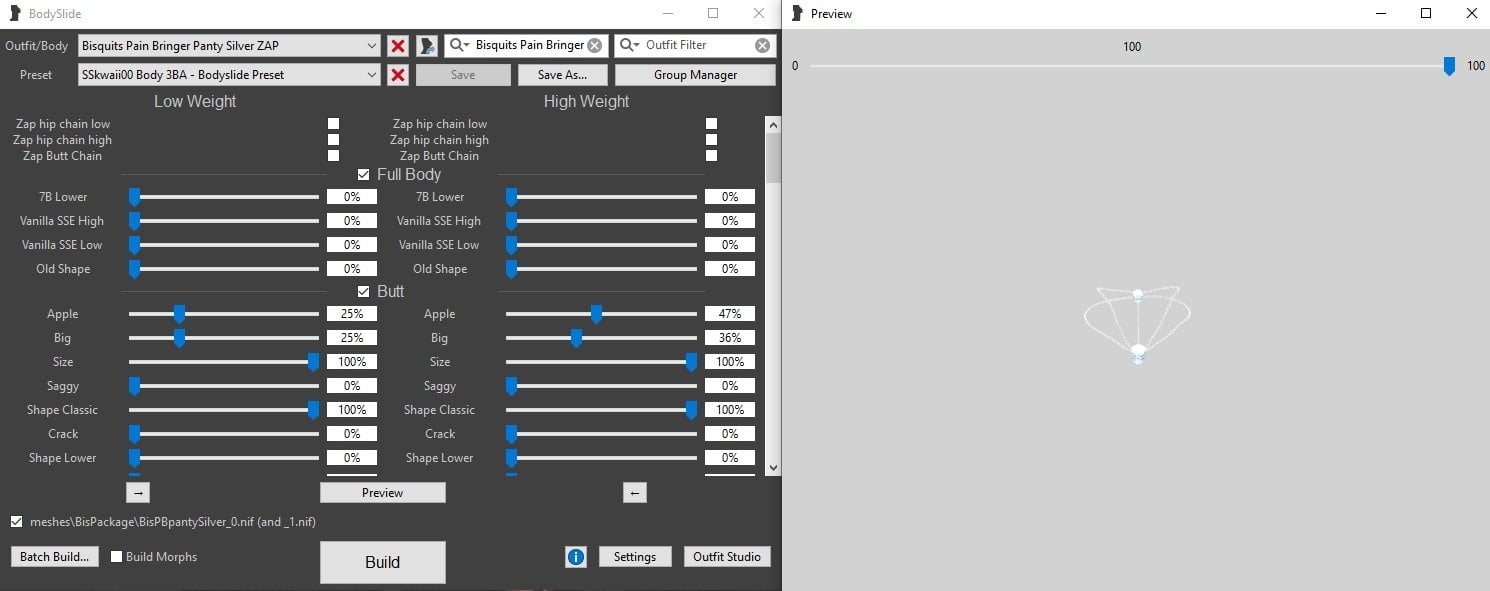
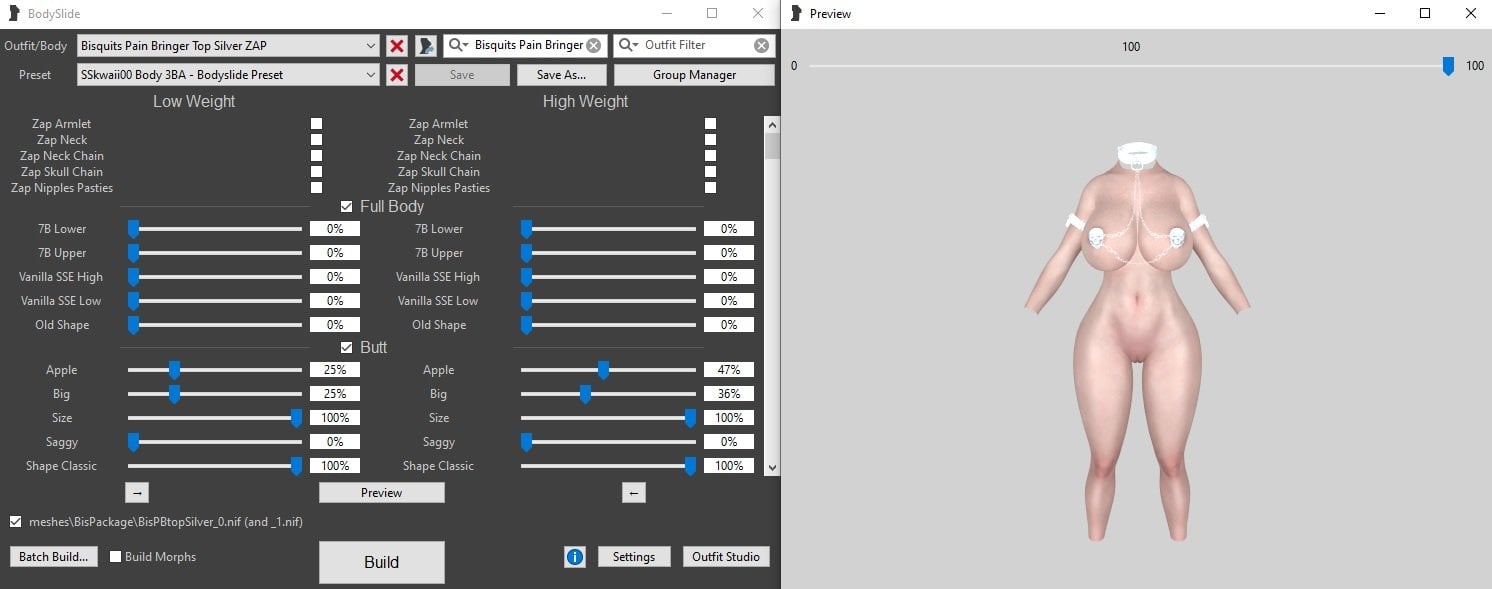
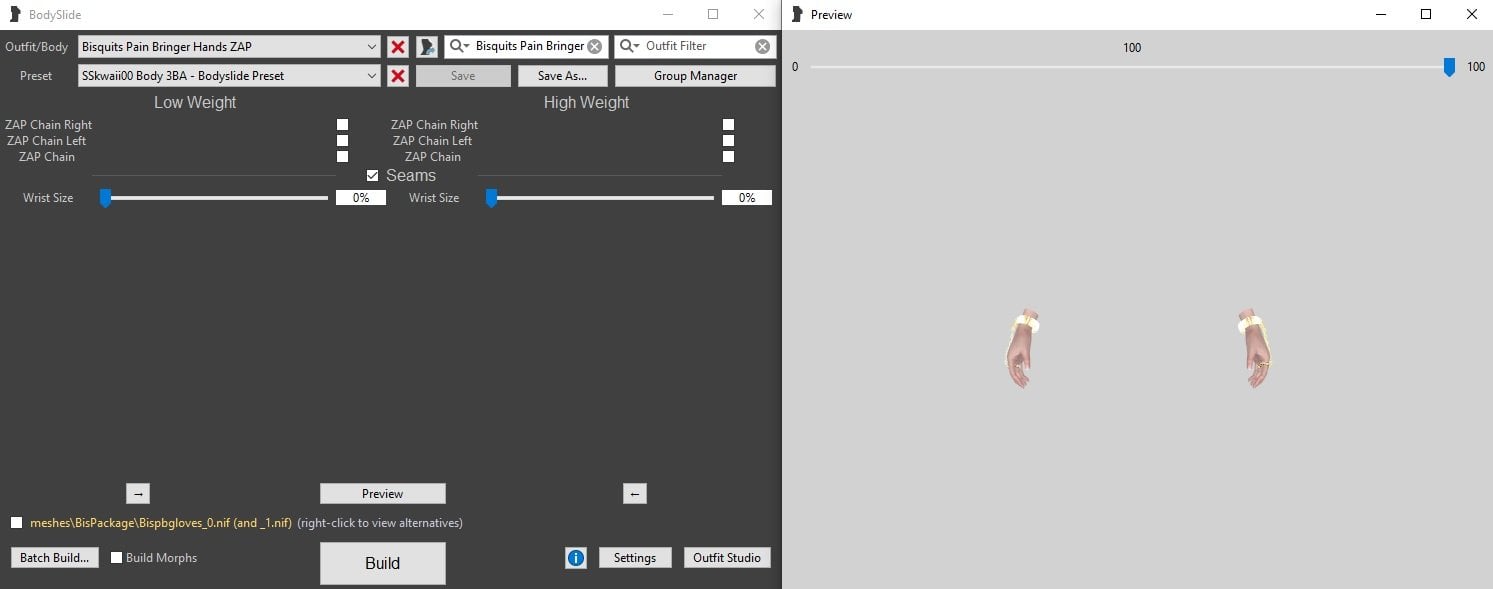
-
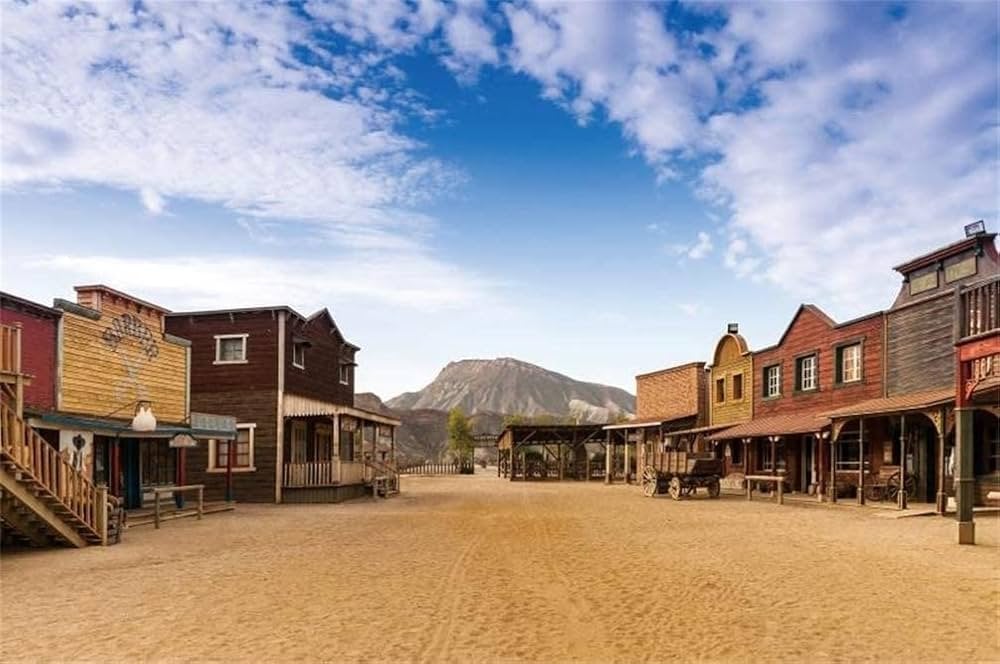
Since it's a Bordello (I assume it's from TAP), it should work in any case
-
Skyrim Creation a.i
Dorabella replied to Dorabella's topic in Skyrim : My mods and variations's Skyrim AI generation
Original scrren Grok PopVid.ai.jpg.2c06a297c21386b73b548c73d9bfefe0.jpg)
.jpg.81907337212439e5790f50759651c286.jpg)
-
Original screen First change Grok a.i
.jpg.25396625d01aec74387ee123fb90b66c.jpg)
.jpg.b98131382ef94905bbe3a16fc5cbb139.jpg)
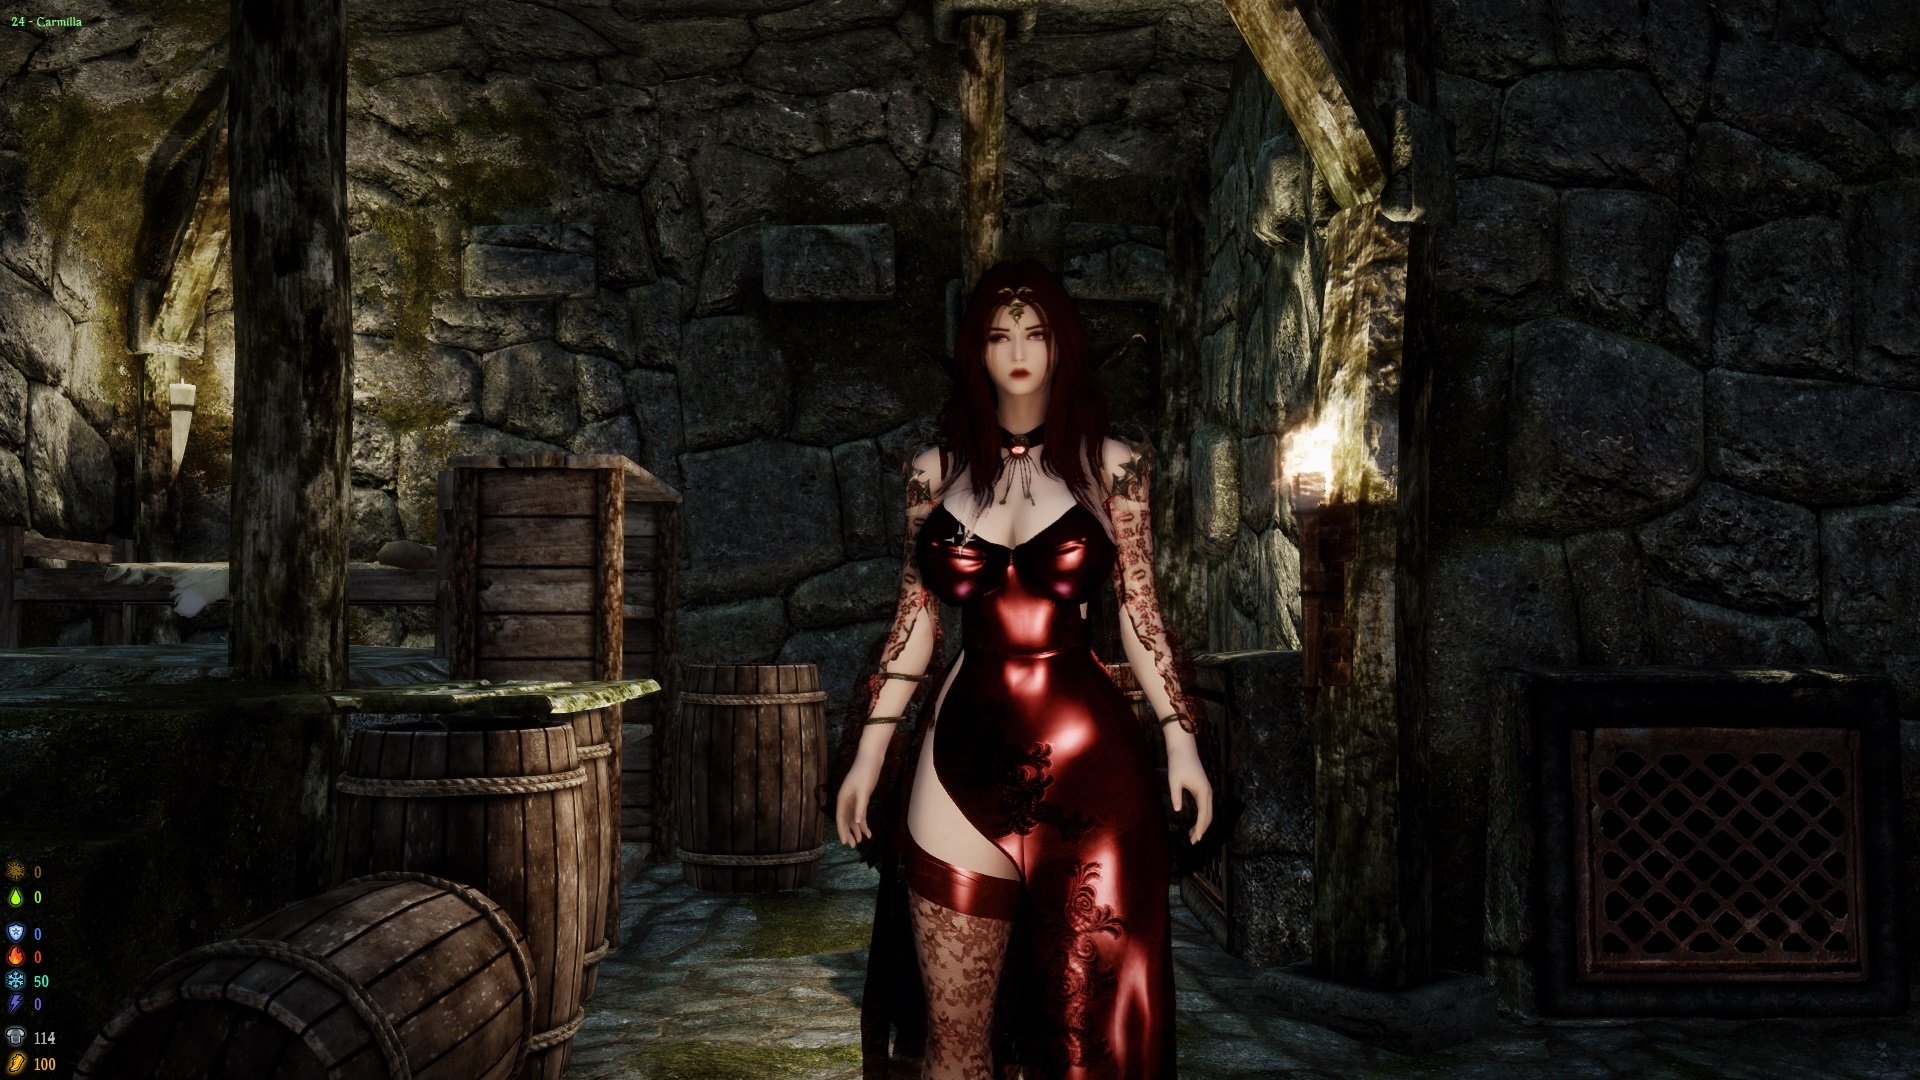
.jpg.b380da21c380e212e51e52633411afb0.jpg)
-
racemenu Animated Overlay
Dorabella replied to Dorabella's topic in Skyrim : My mods and variations's My Skyrim Modding
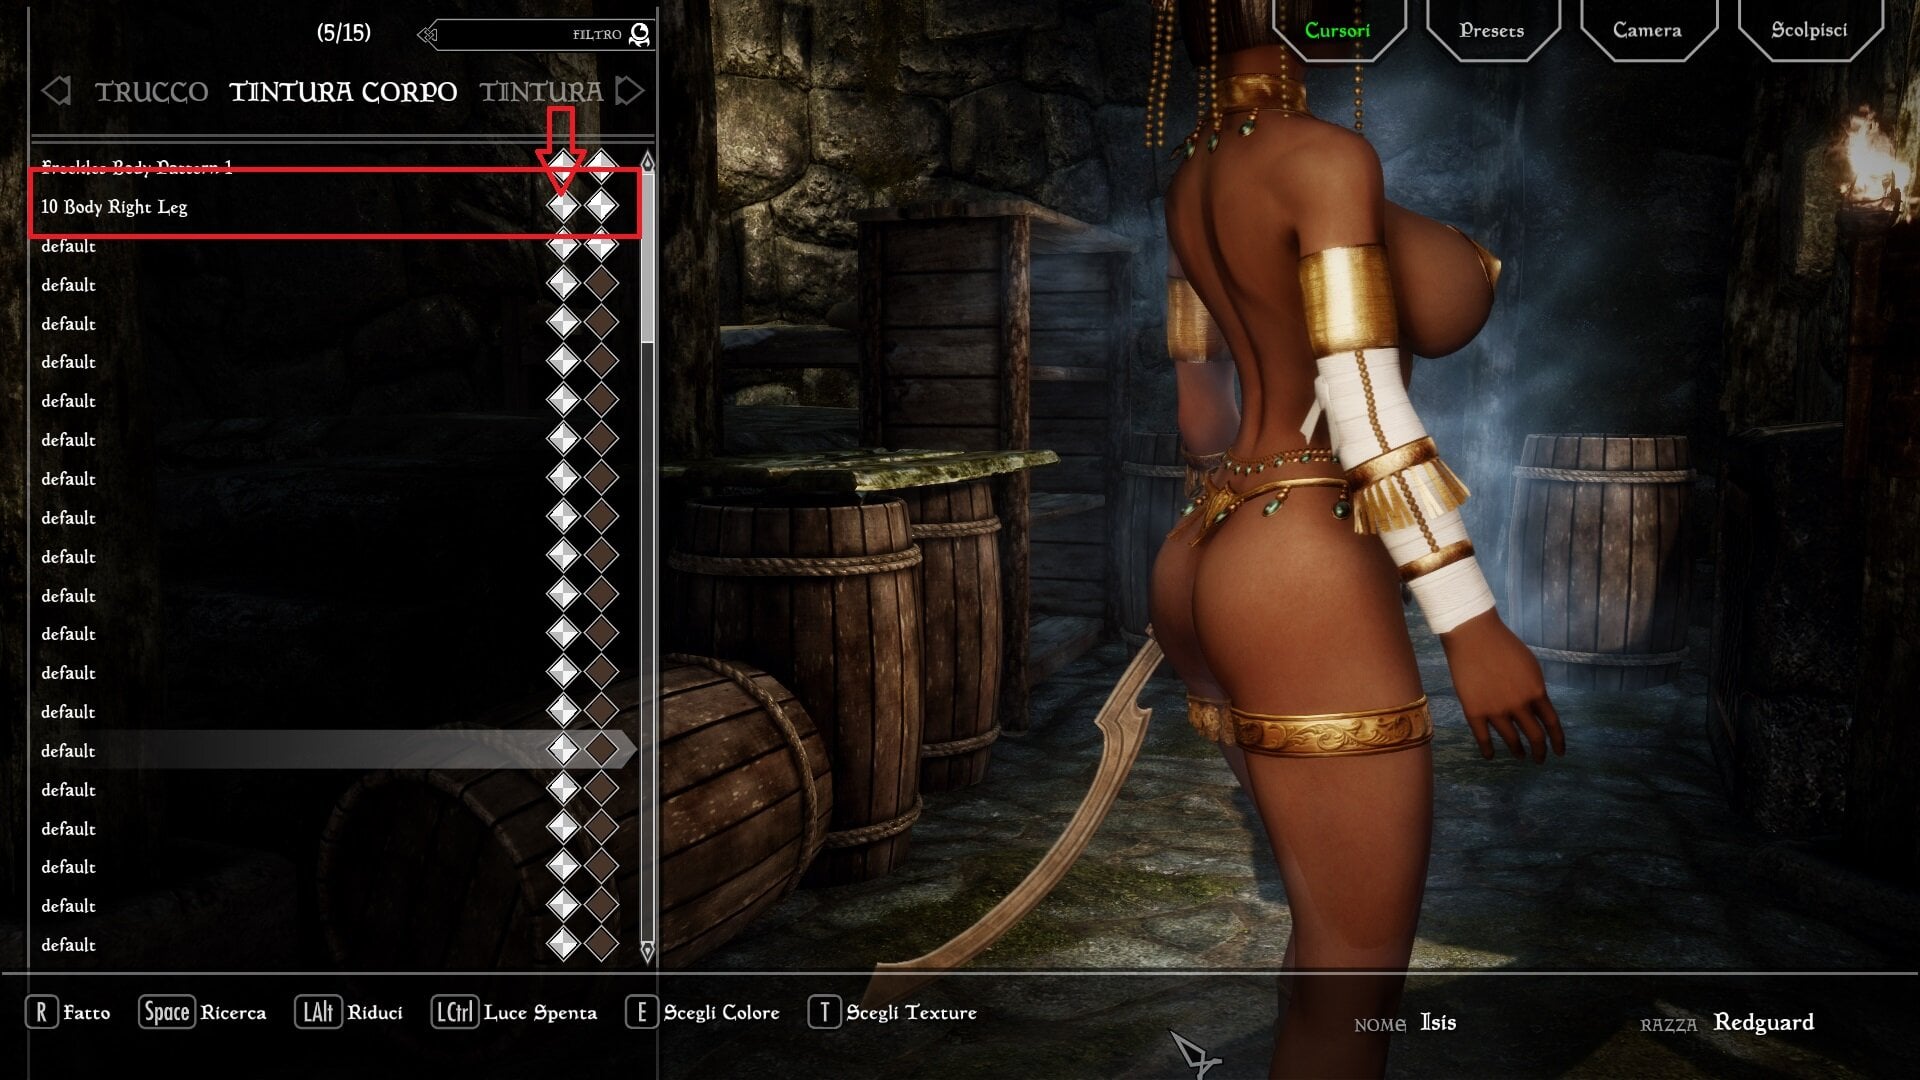
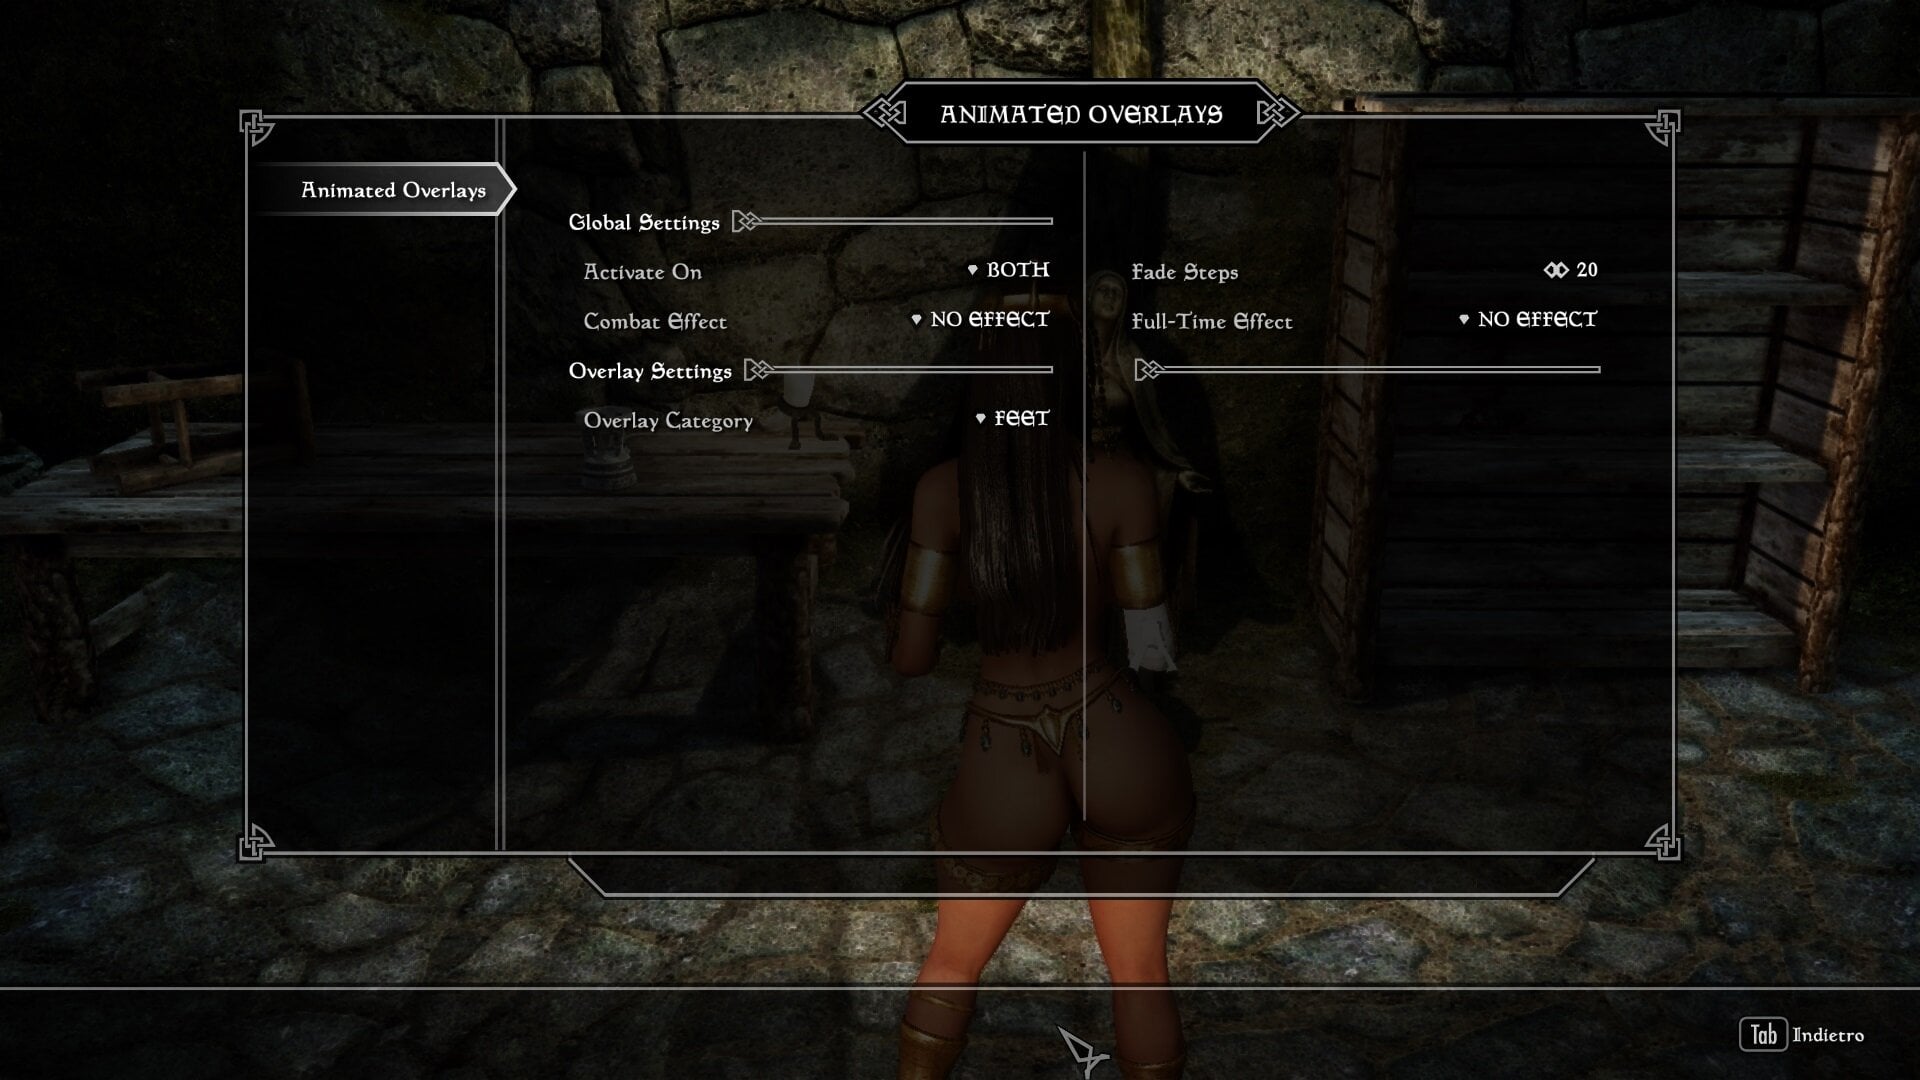
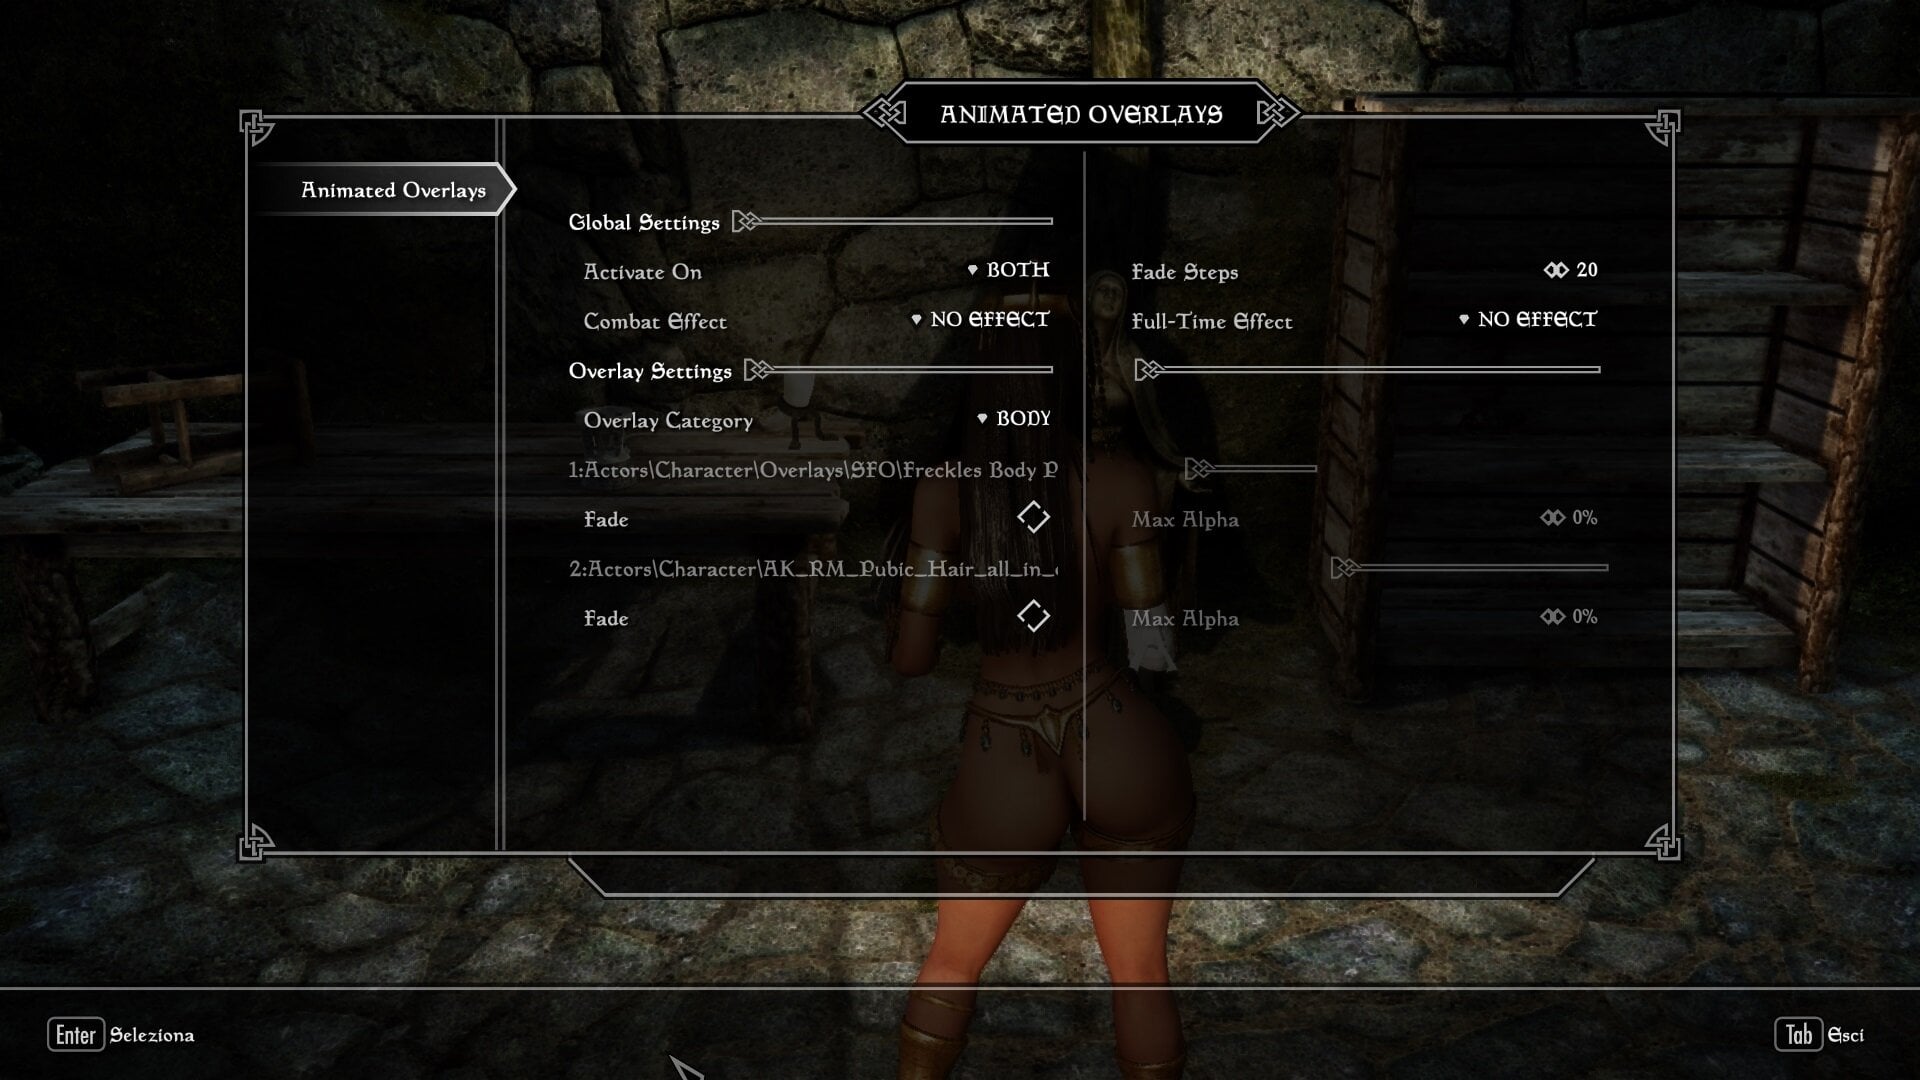
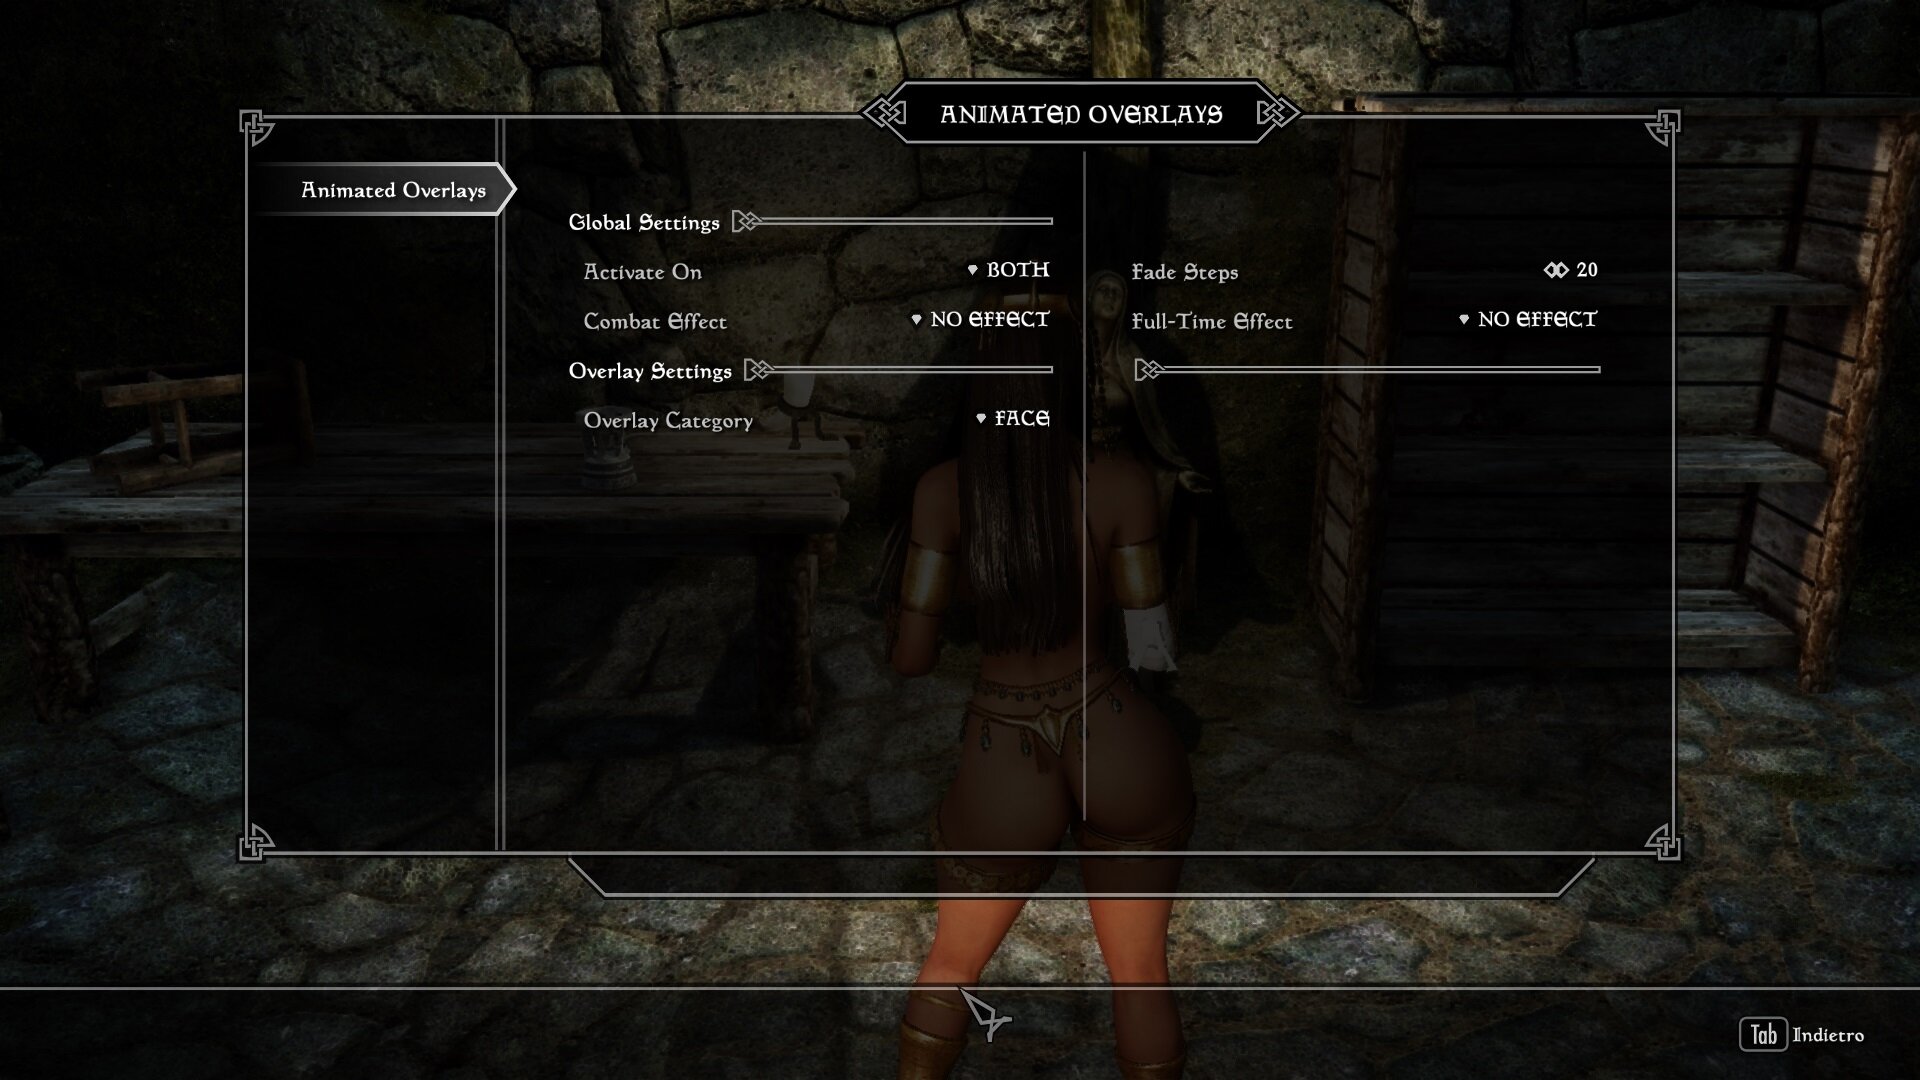
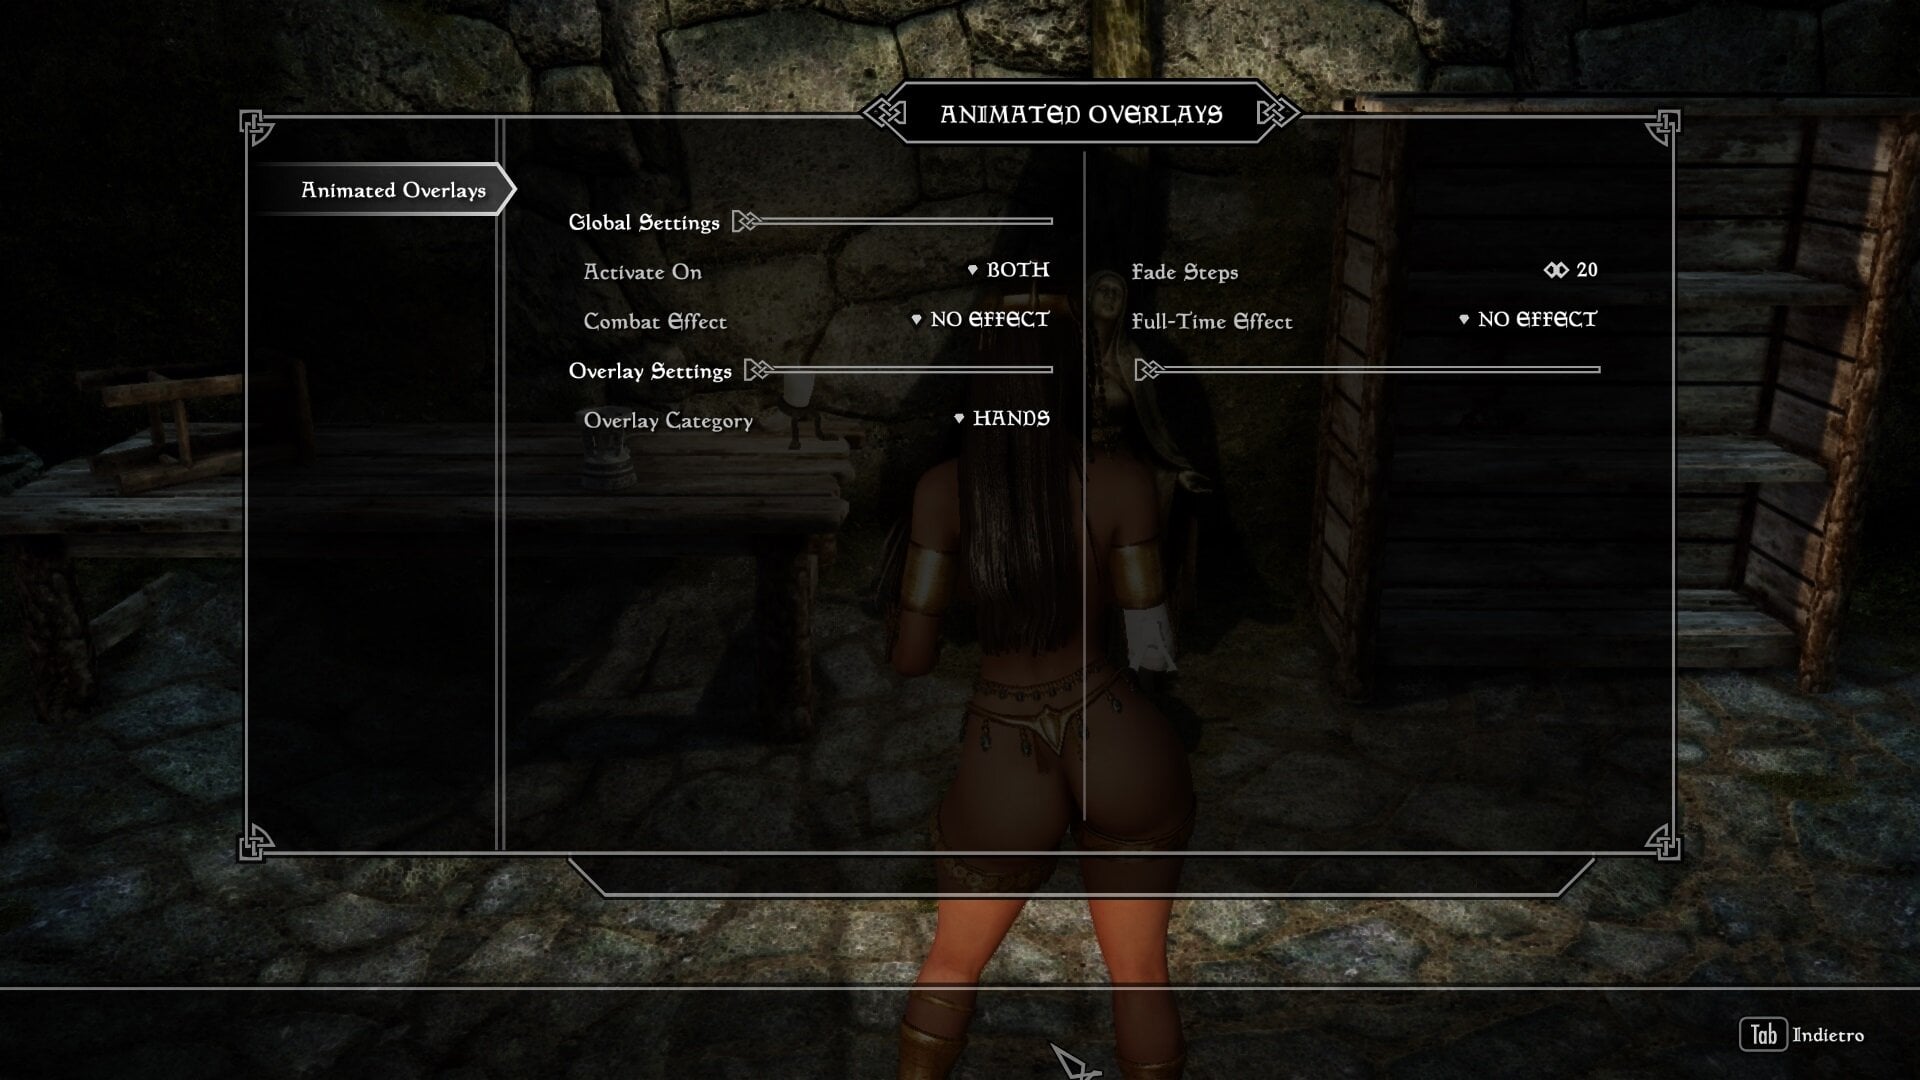
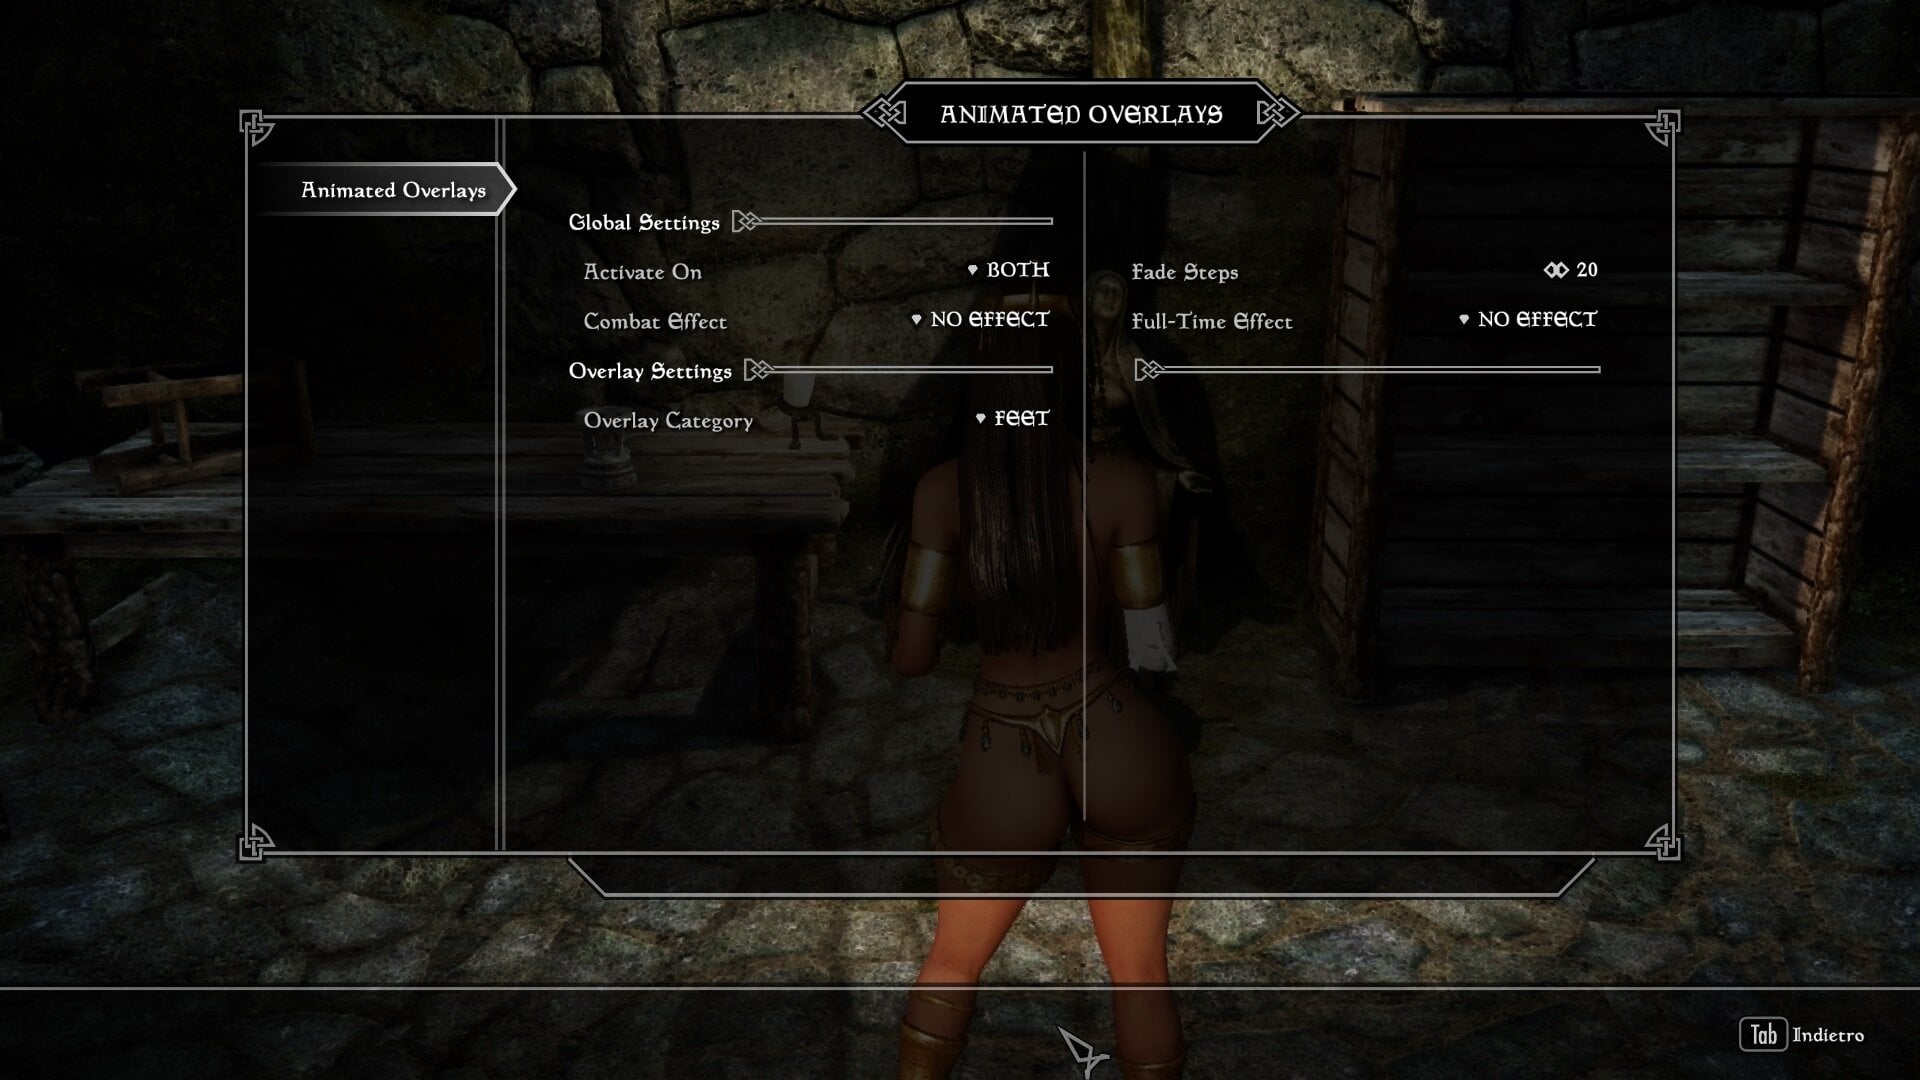
Add Legs Tattoos . You need install Community Overlays 1 (0-30) Bodypaints Warpaints Tattoos and more made for the Community (Special Edition) As before, download your PNG file. For this example, I created some text in the Egyptian font. Positioned on the thigh, saved as PNG rename with one of those Overlay Shaders then converted to SDD with Paint.Net. Save and Overwrite with console type Showracemenu\Body paint , import your Tattoo and turn Back Alpha Channel . I rename a Txt with Body Right Leg MCM\Animated Overlay , select Feet Since it is loaded onto the body, it will still work even without selecting Feet from Animated Overlay. Renaming, however, is useful to know which tattoo you are selecting. For other parts of the body, such as the head, hands and feet, the same procedure applies. First, create the tattoo and reposition it correctly , in Racemenu, make sure it exists and set it up. Then activate it from Animated Overlay.
-
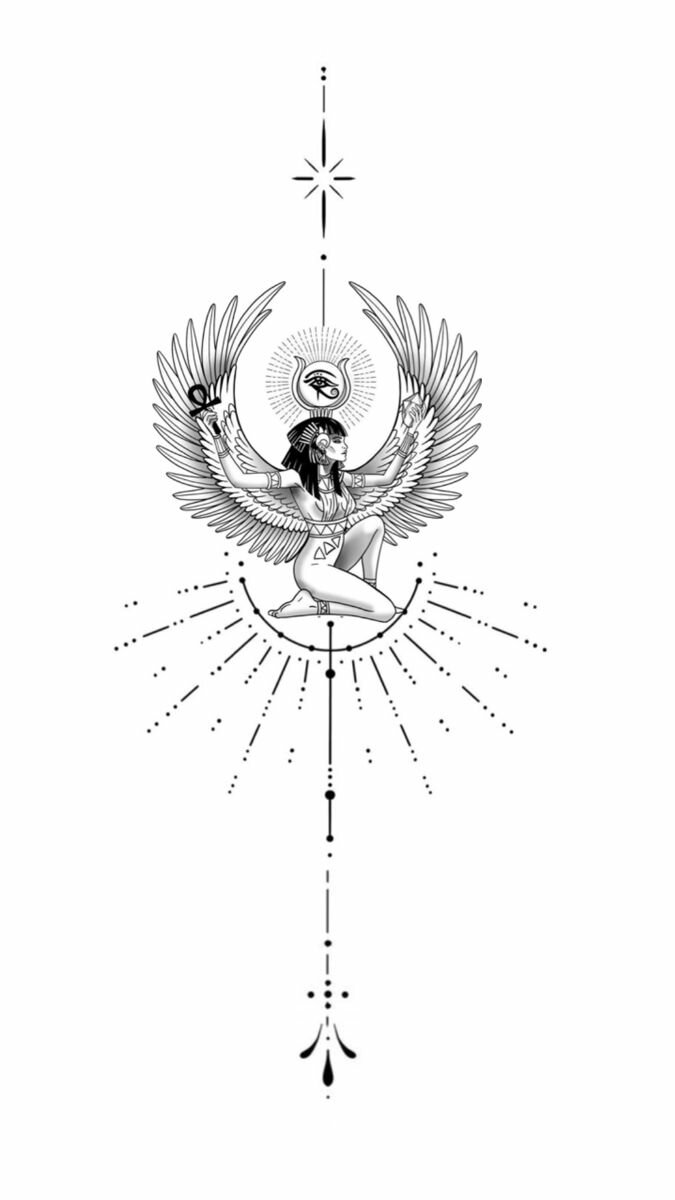
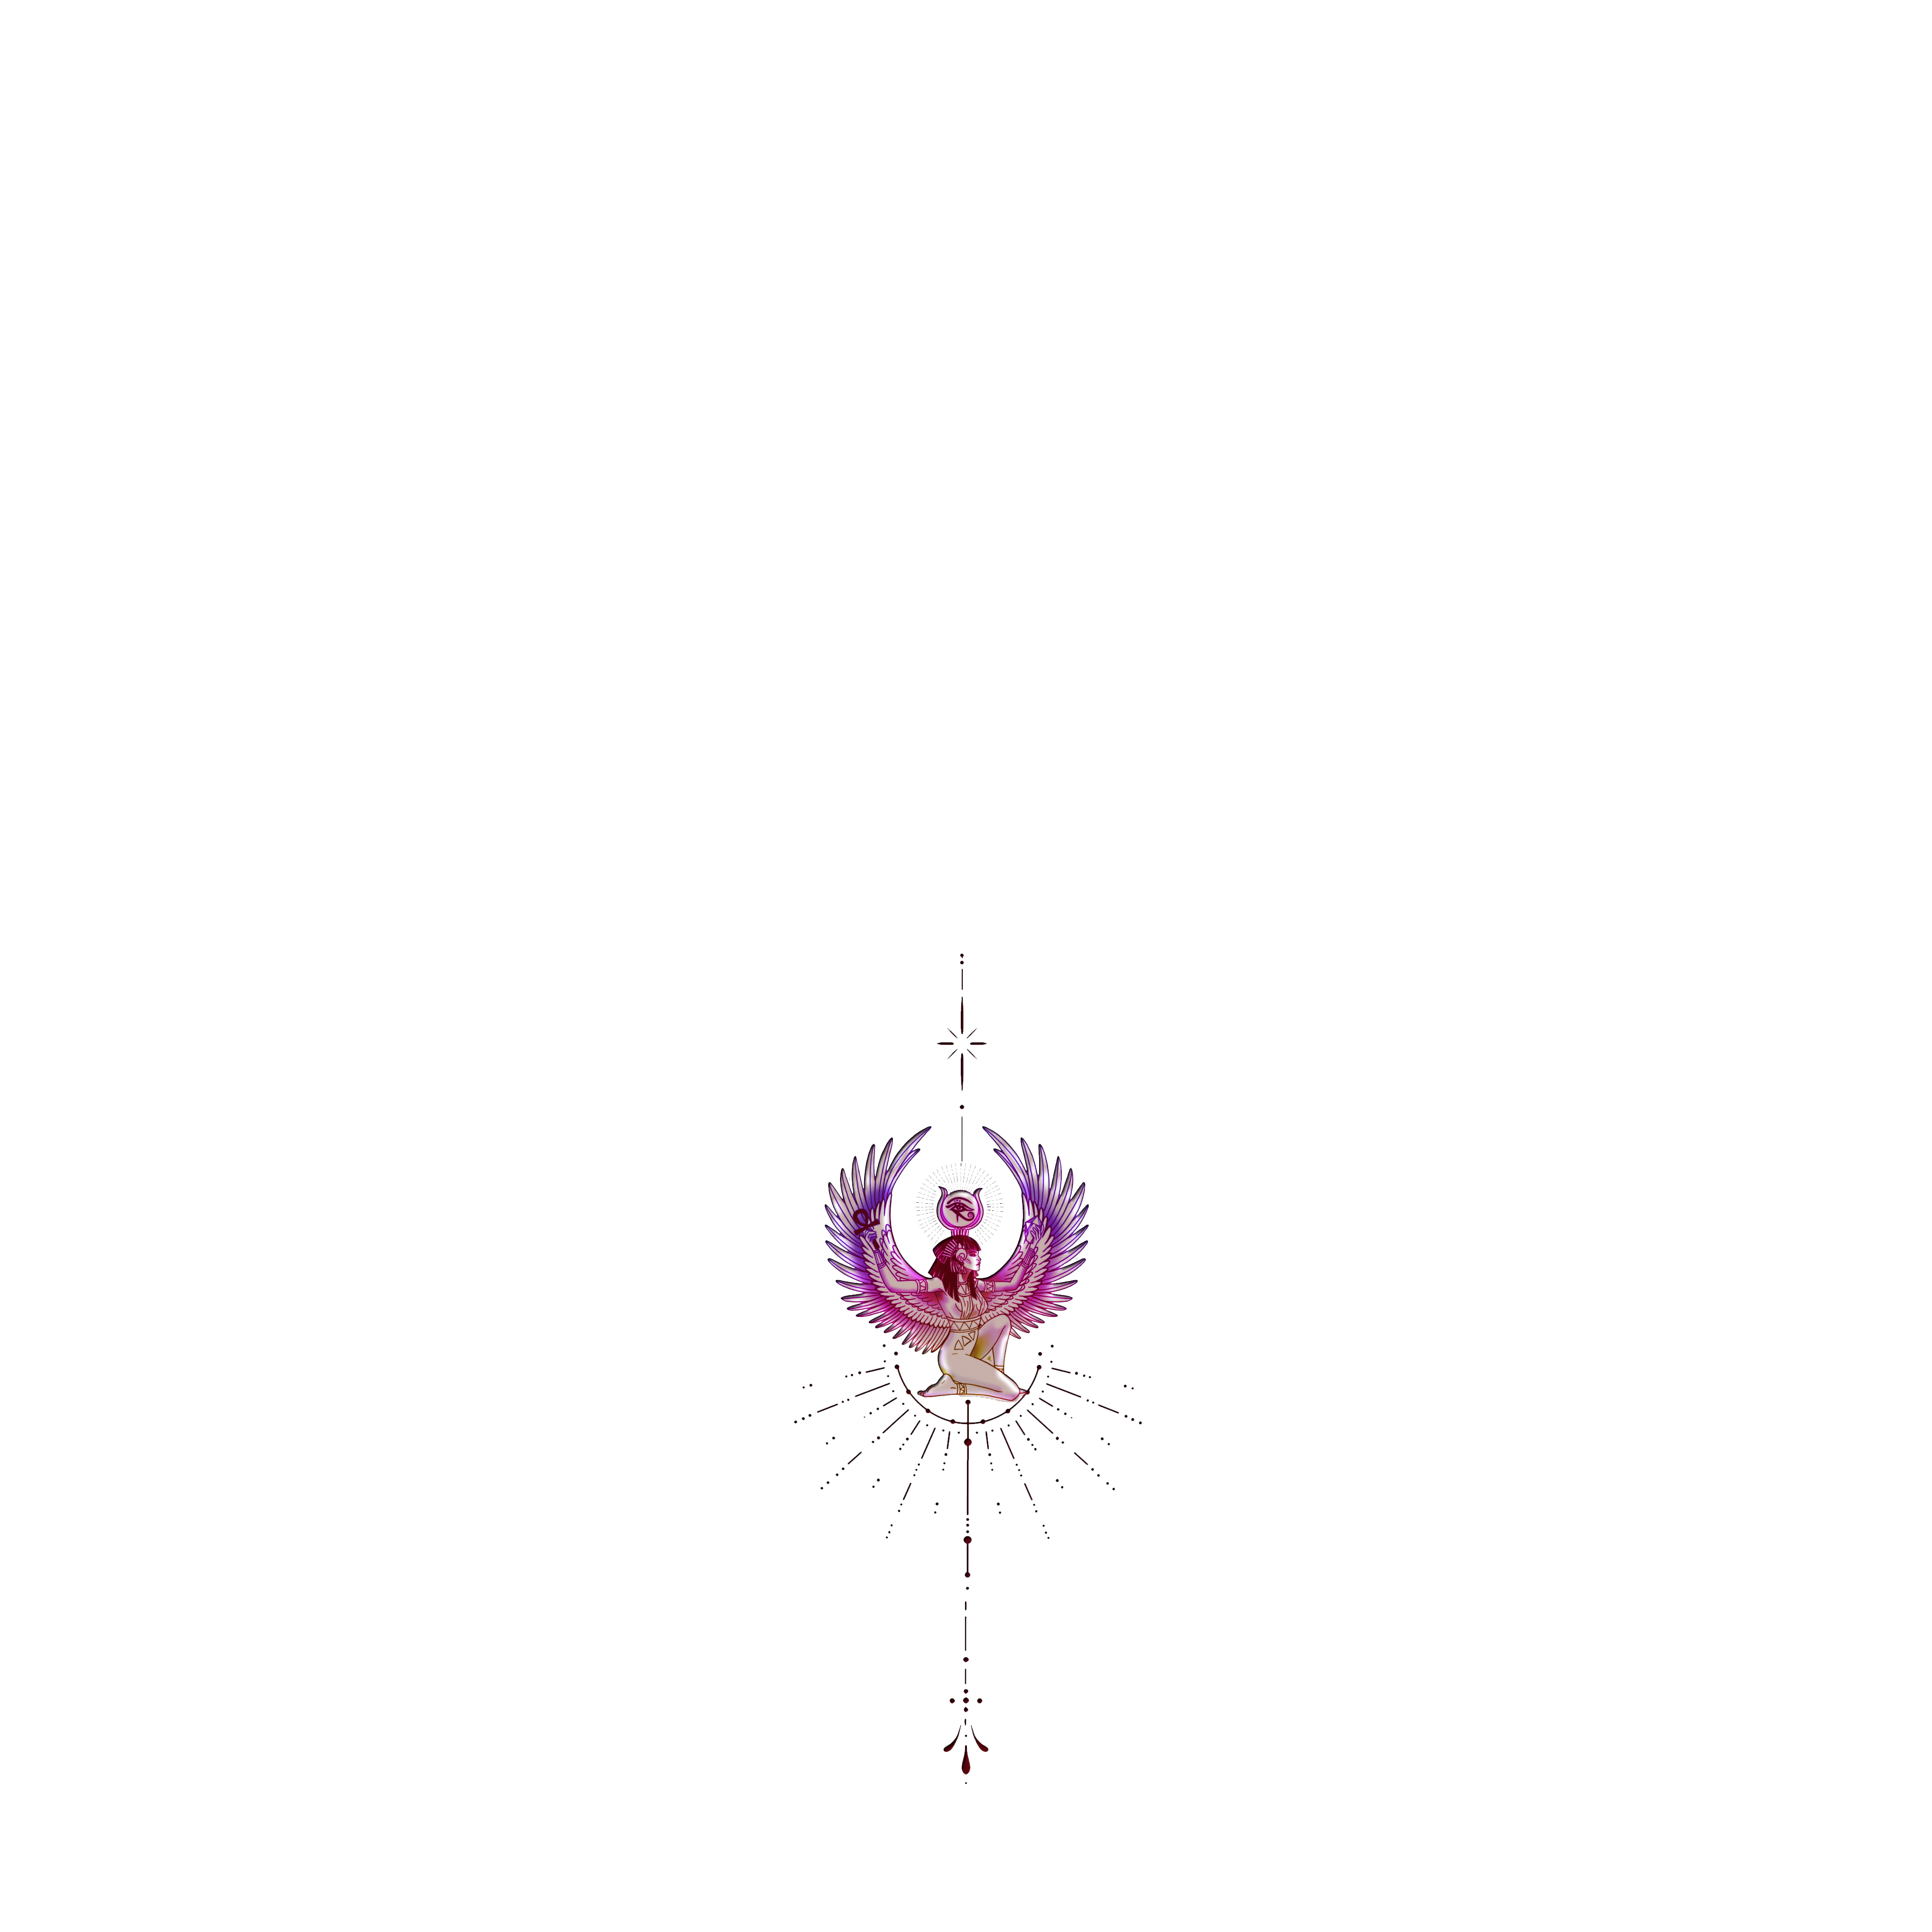
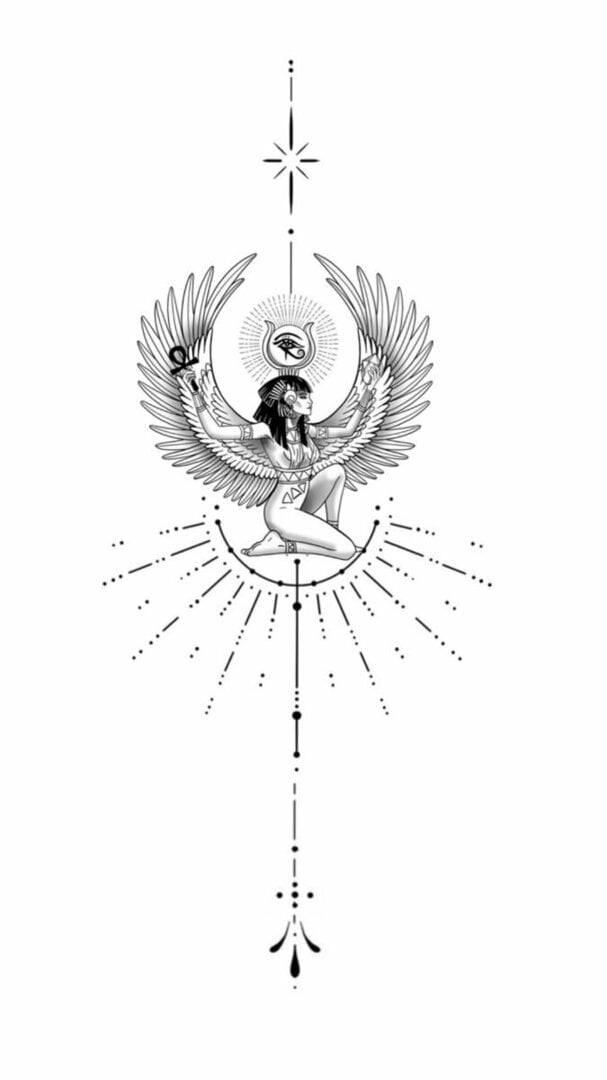
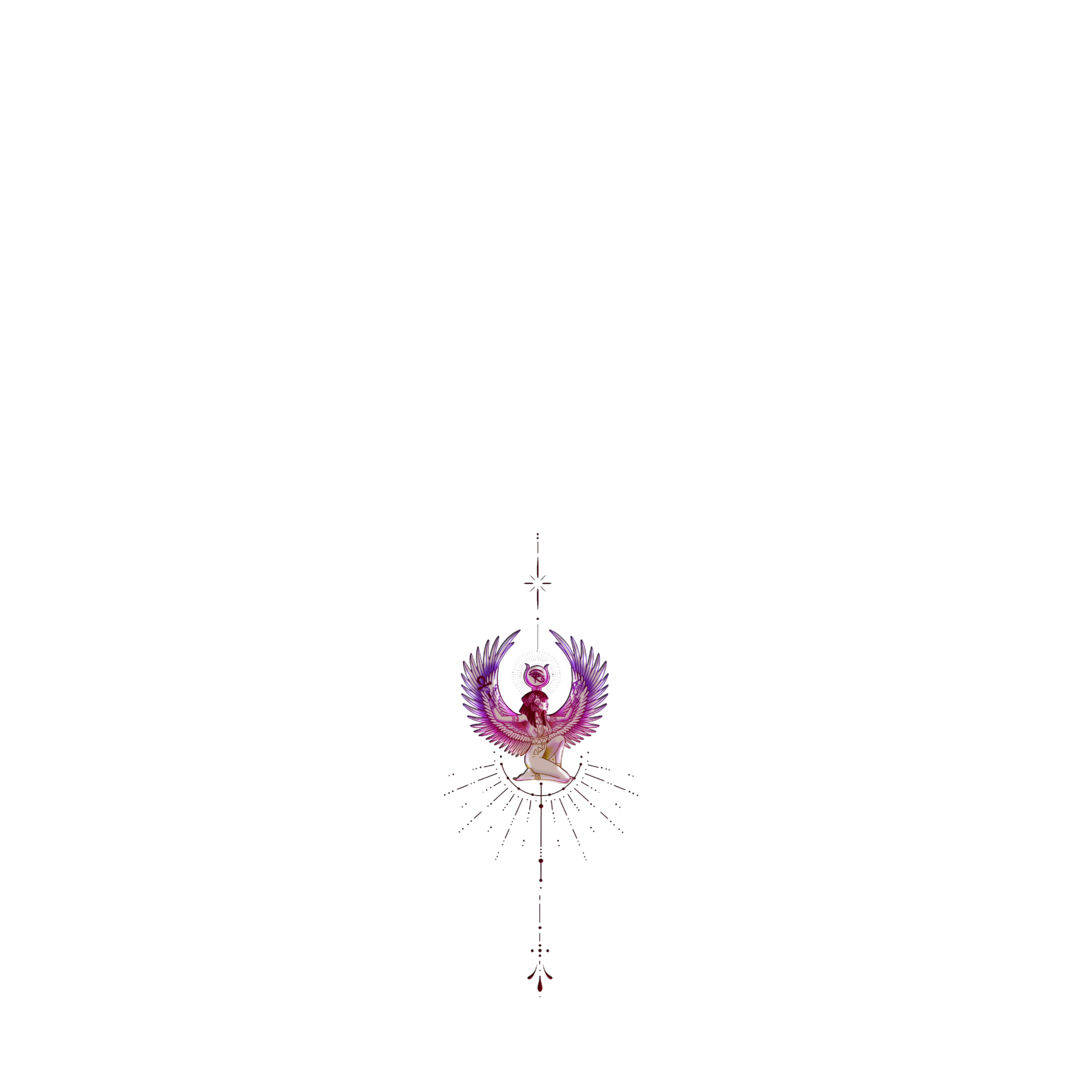
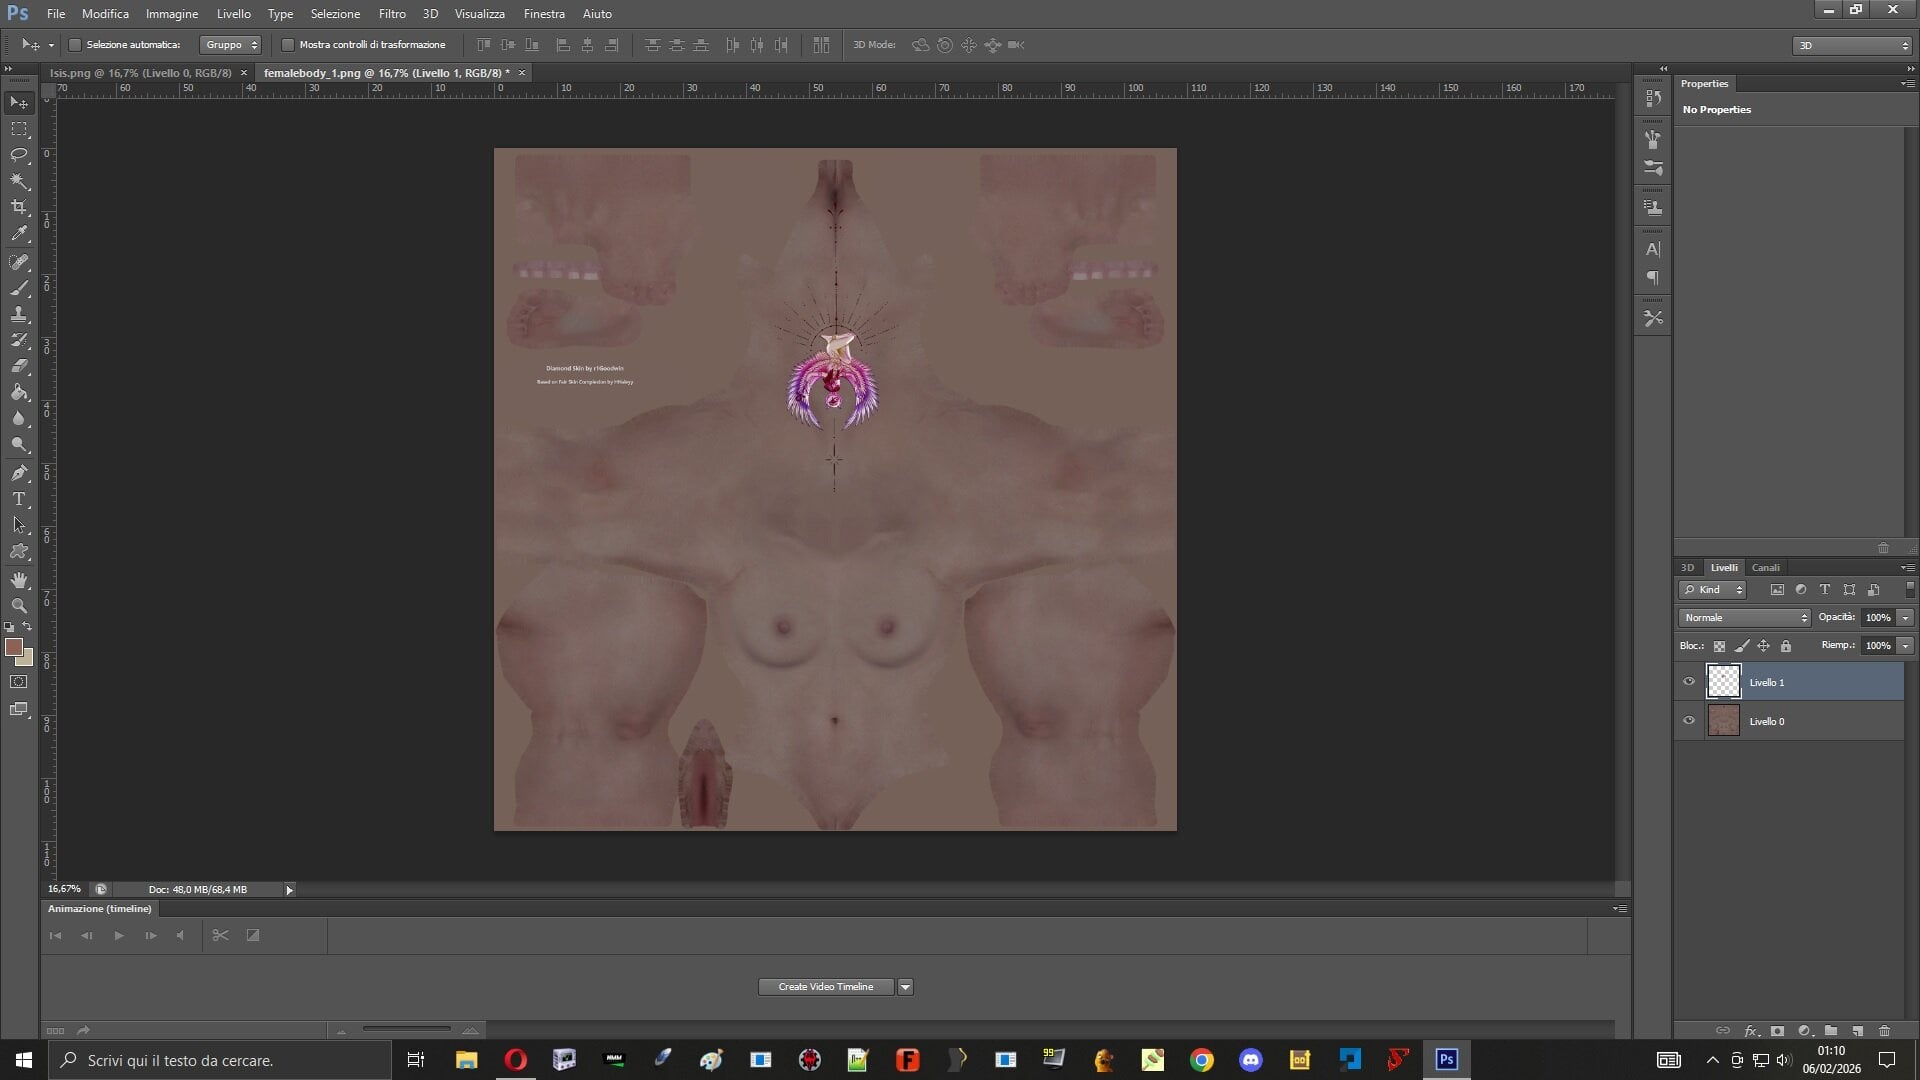
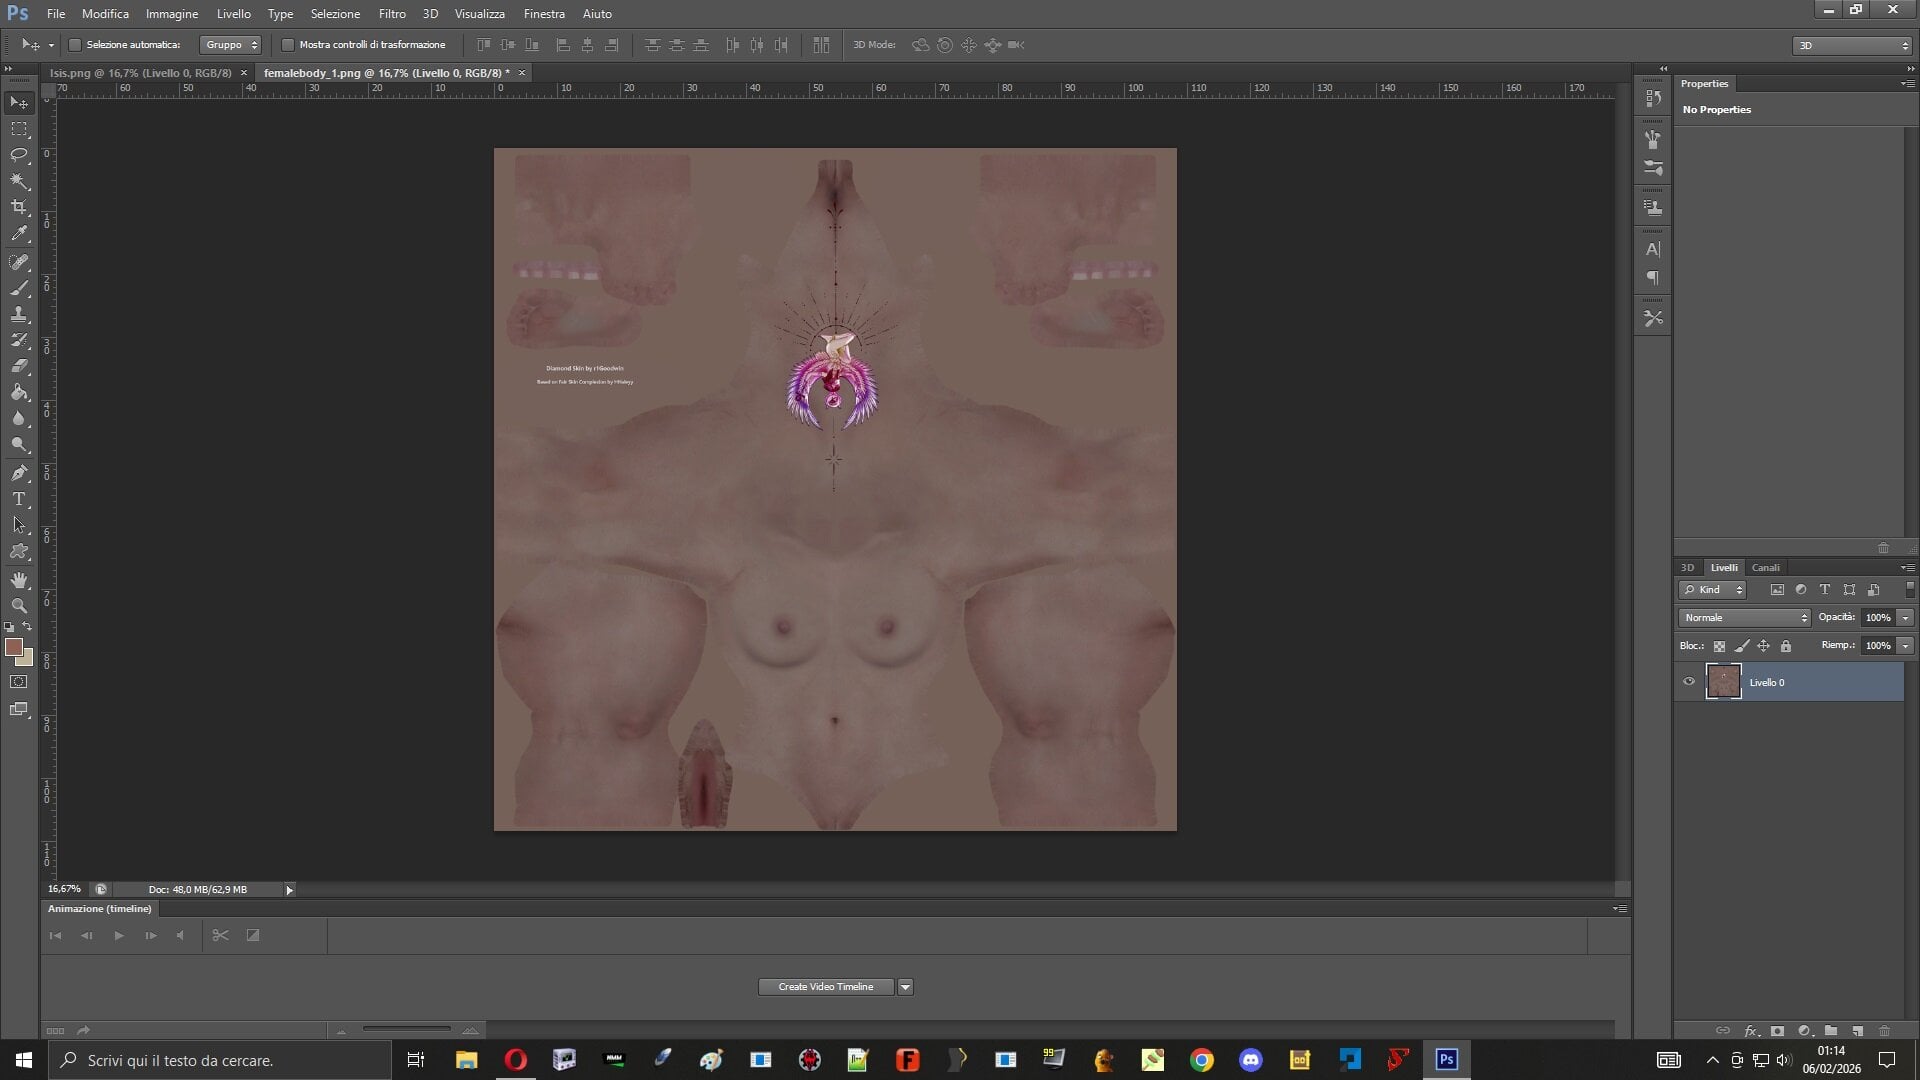
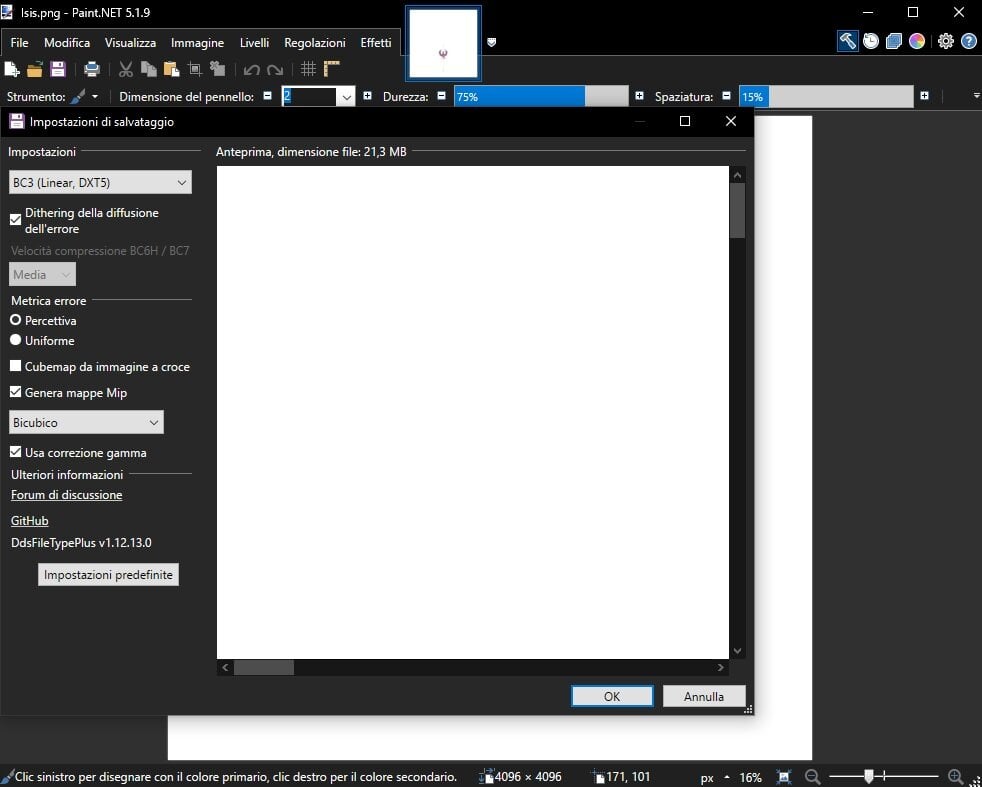
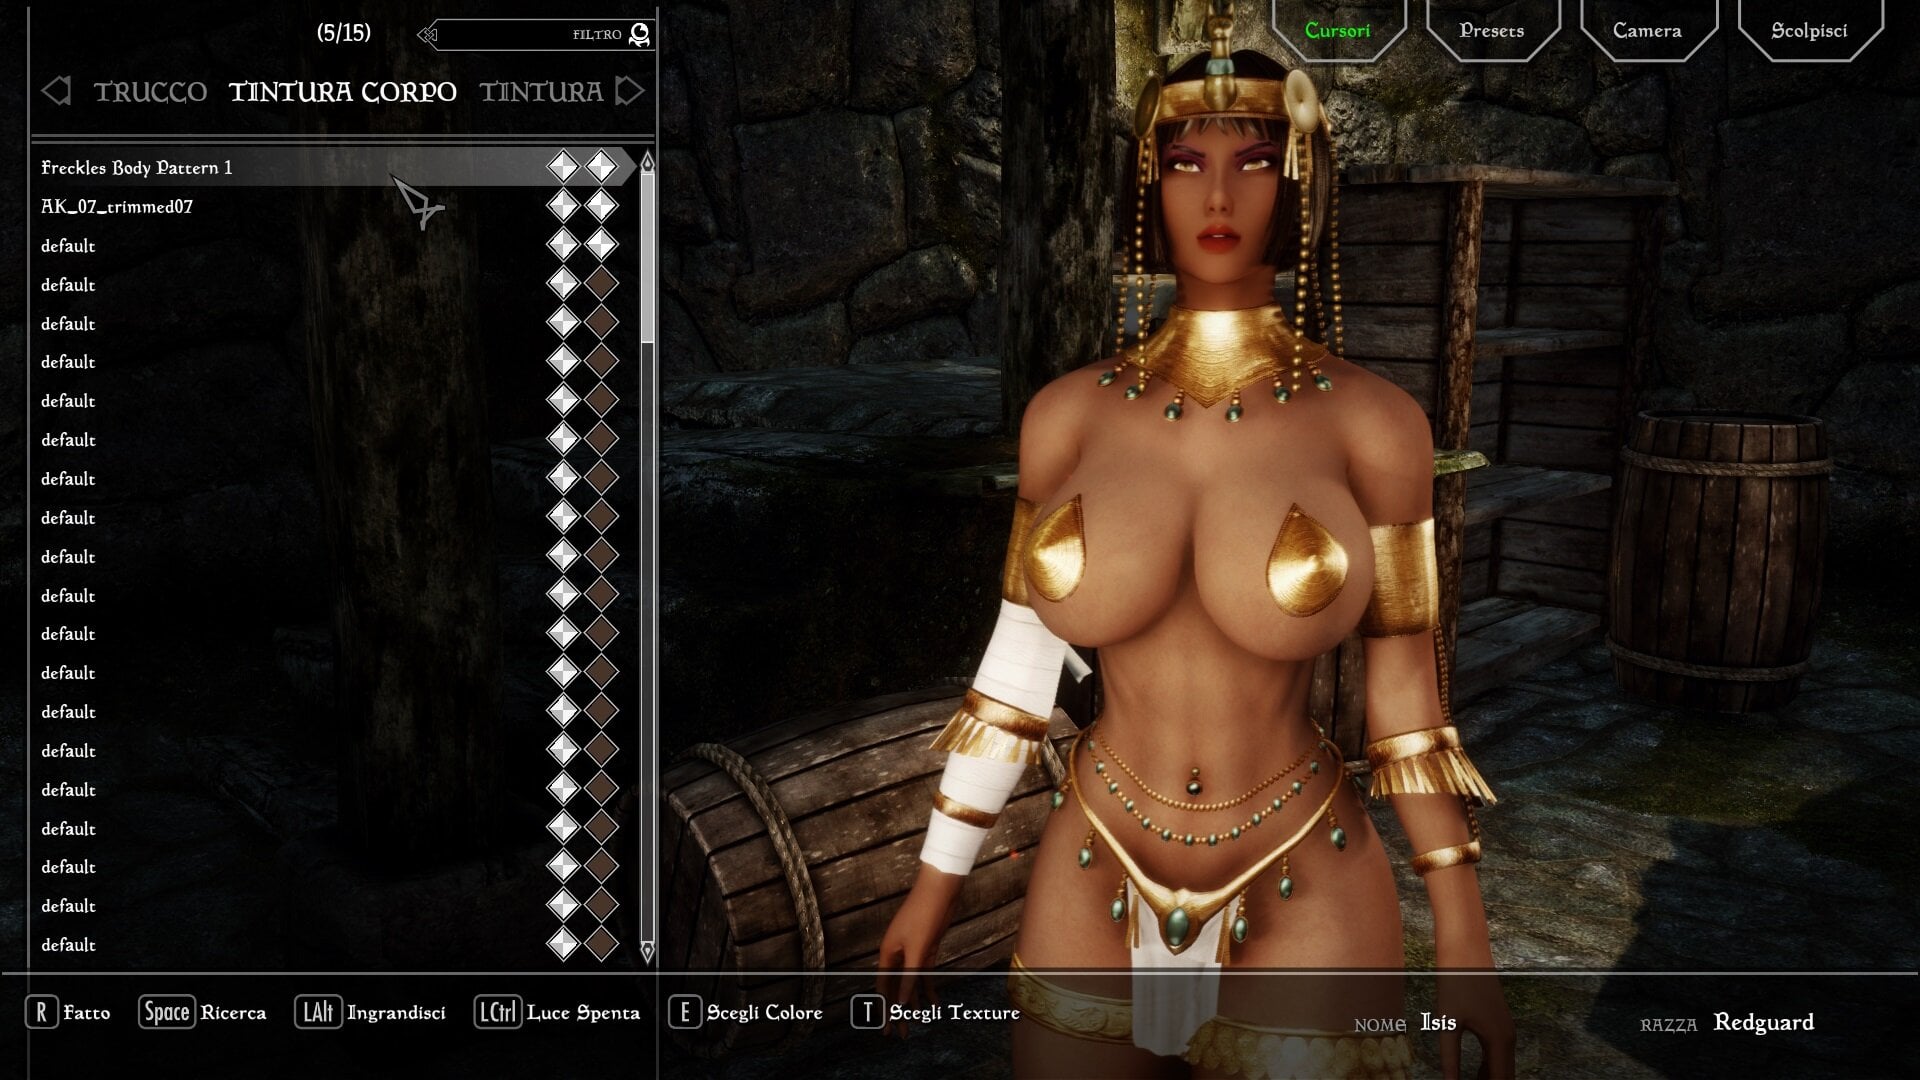
Here I am with another rather nice modification. It's called Racemenu Animated Overlay. RaceMenu - Animated Overlays I'll start by saying that the mod has a bug. I read that several users were unable to open it in MCM. Fixit 1) Extrat zip into separate folder ( e,g download section) delete zip 2) With BSA Browser , extrat all BSA( select extrat Here) , delete BSA 3) Rebuild zip and install with ModManager 4) Wait for it to load in MCM. Depending on what you have installed, this may take more or less time. It also works with a game that has already started. Preparing a dynamic tattoo The first thing to do is to find a PNG that you like. For the example, I used an image of the goddess Isis. Edited with Photoshop Again using Photoshop, I placed the tattoo on his back. If your image editing software does not have filters for DDS, the images will need to be converted to PNG and then converted to DDS using Paint.Net. Combine the image and save into PNG format Open with Paint.net and convert into SDD Skyrim Special Edition\Data\textures\actors\Character\Overlays\SFO create this path . Drop your tattoo and rename with Freckles Body Pattern 1.dds Into the game with console type showracemenu , search Overlay Body and make sure the tattoo is uploaded , return to the game without changing anything The tattoo is active. From the mod, apply the effects that are available. My Skyrim is : AE version 1.6.1170.0.8 SKSE is 2.2.6
-
General problems
sikamikanico78 replied to Dorabella's topic in Skyrim : My mods and variations's General Problems
its was the breakable equipment framework mod that caused the freezes...i removed it anw no problems.. but now i ahve a new problem the female orcs suddently have problem with their skeleton...their boobs dont have physics.. edit : i think i gound the problem...it the orc overhaul mod
-
General problems
Dorabella replied to Dorabella's topic in Skyrim : My mods and variations's General Problems
After looking at the log, I opened the offending .psc script. papyrus Log , it's the repeated mistake The script is about Katria ( likely, not the primary cause , unless something interferes with the dialogues or overwrite NPC ) , Looks like the NPC got messed up , she also has to do with Dwemer ruins Do you happen to have the Quest Lost to the Ages active ? If so, you can try resetting the quest open console and type : resetquest DLC1LD , press enter, close console. This command reset the quest from 0 If Katria went to Bug . Open Console, type : setstage DLC1LD 100 , press enter, close console . This command resets the quest, sending Katria to Arkngthamz If the cause is the NPC, below are all the chats to reset the quest If, you have anything that overrides the Dwemer ruins (including BlackReach), I suggest removing/disabling it If the Bug is concentrated only on a specific area (Bleackreach) : 1) Restart the game from a save game prior to the location , or into console, type coc and the destination , example coc Riverwood This command takes you back to Riverwood , you will be able to return to Blackreach using the world map . If you have taken the Synchrony Sphere, you will be able to access it from other ruins, it is found on the table near Sinderion's corpse . Accessible places are : Mzinchaleft Alftand Raldbthar If the bug affects any other Dwemer location (have Luccianna sit) then it's an overwrite from some mod , remove/disable Below for example If it concerns a specific creature (Falmer/Chaurus) you will likely need to reinstall ABC Baka Factory , only if Demonic Creatures overwrite ABC If, however, it is the usual random bug, the best solution is a new game (it's annoying) -
General problems
sikamikanico78 replied to Dorabella's topic in Skyrim : My mods and variations's General Problems
and another try again some random freeze while i was about to cast spells vs an enemy Papyrus.0.log -
General problems
sikamikanico78 replied to Dorabella's topic in Skyrim : My mods and variations's General Problems
so i went back to blackreach ...this time i could sit on the chair without crash but when an enemy aproached just about i was ready to cast spells i got the same freeze.. he is the papyrus log Papyrus.0.log -
As the title suggests, you can post any problems you encounter here. We'll try to resolve them, ensuring that potential solutions remain available to users. Please post them if possible: 1) FNIS Report ( under spoiler ) 2)Papyrus.Log ( under spoiler ) or txt 3)Crash.LOG ( under spoiler ) or txt 4) Any other information that may be helpful in solving the problem
-
Added demonstration video
-
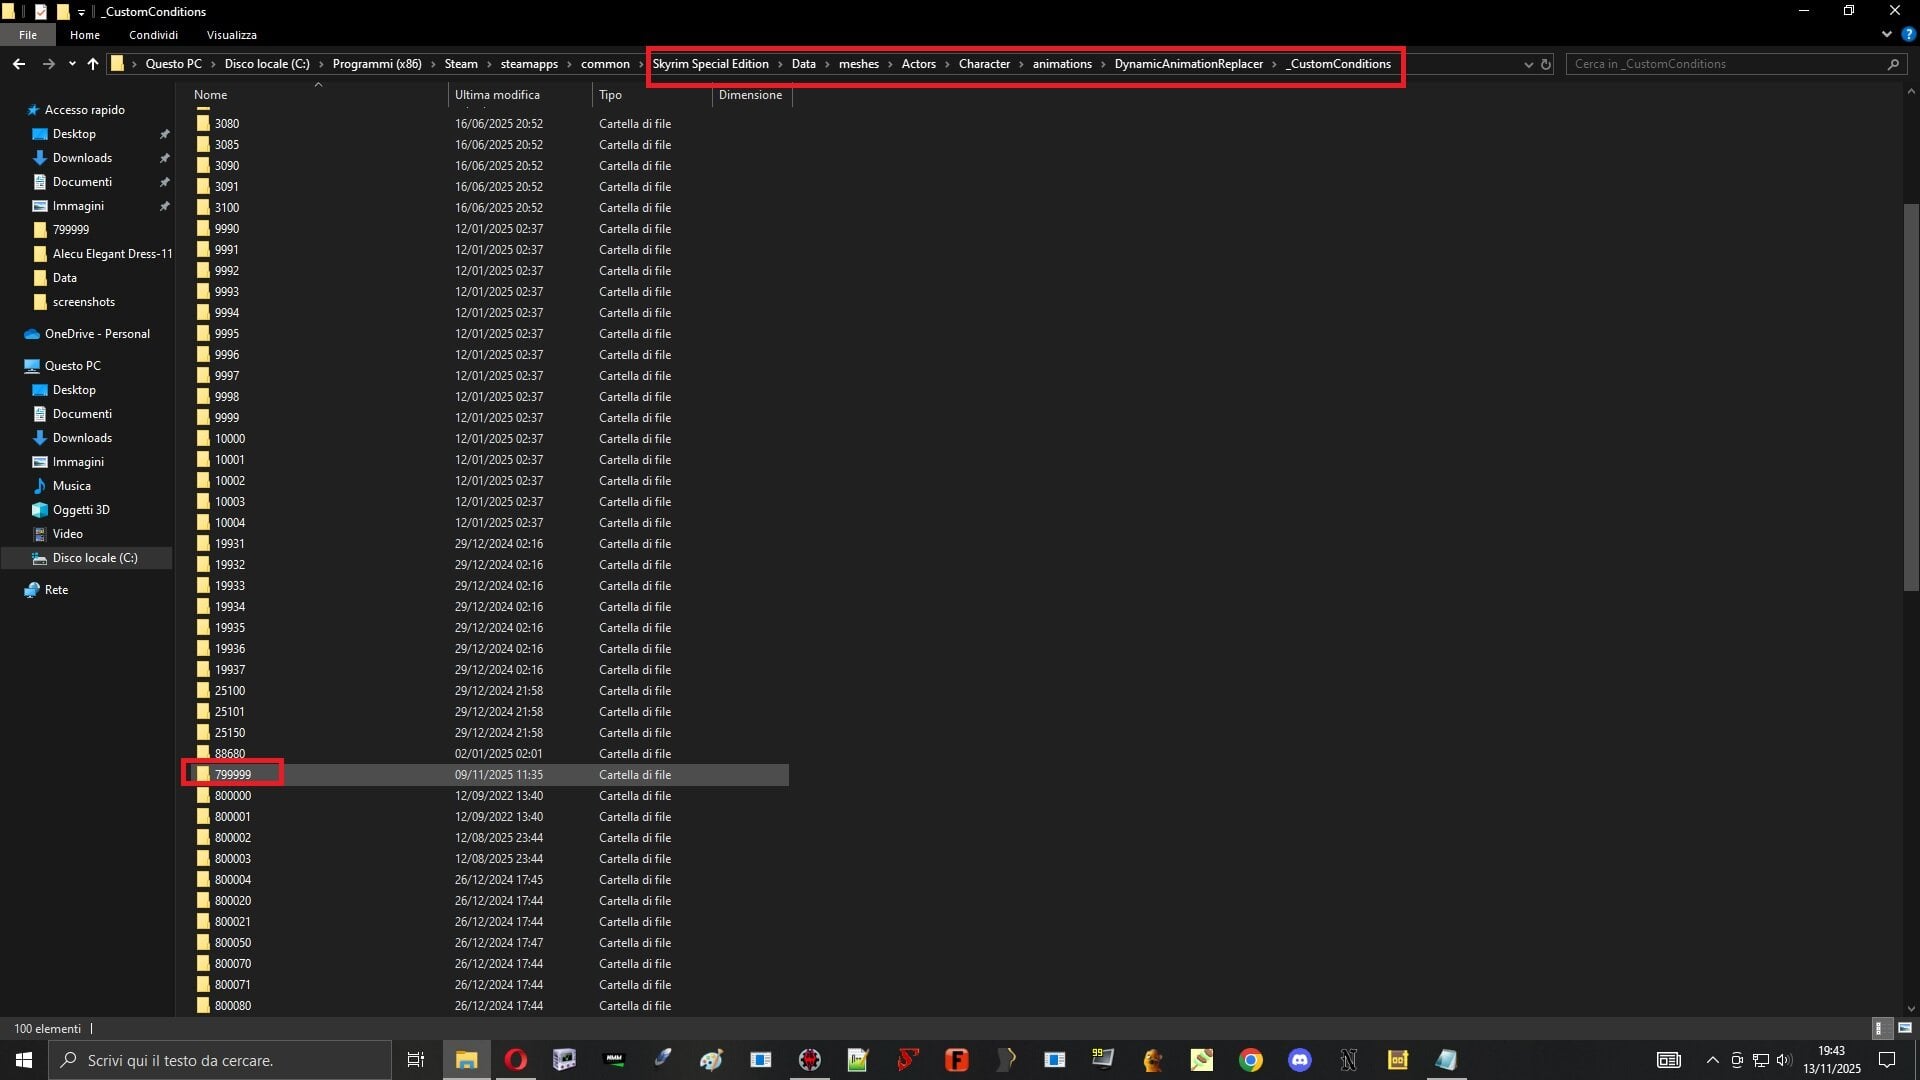
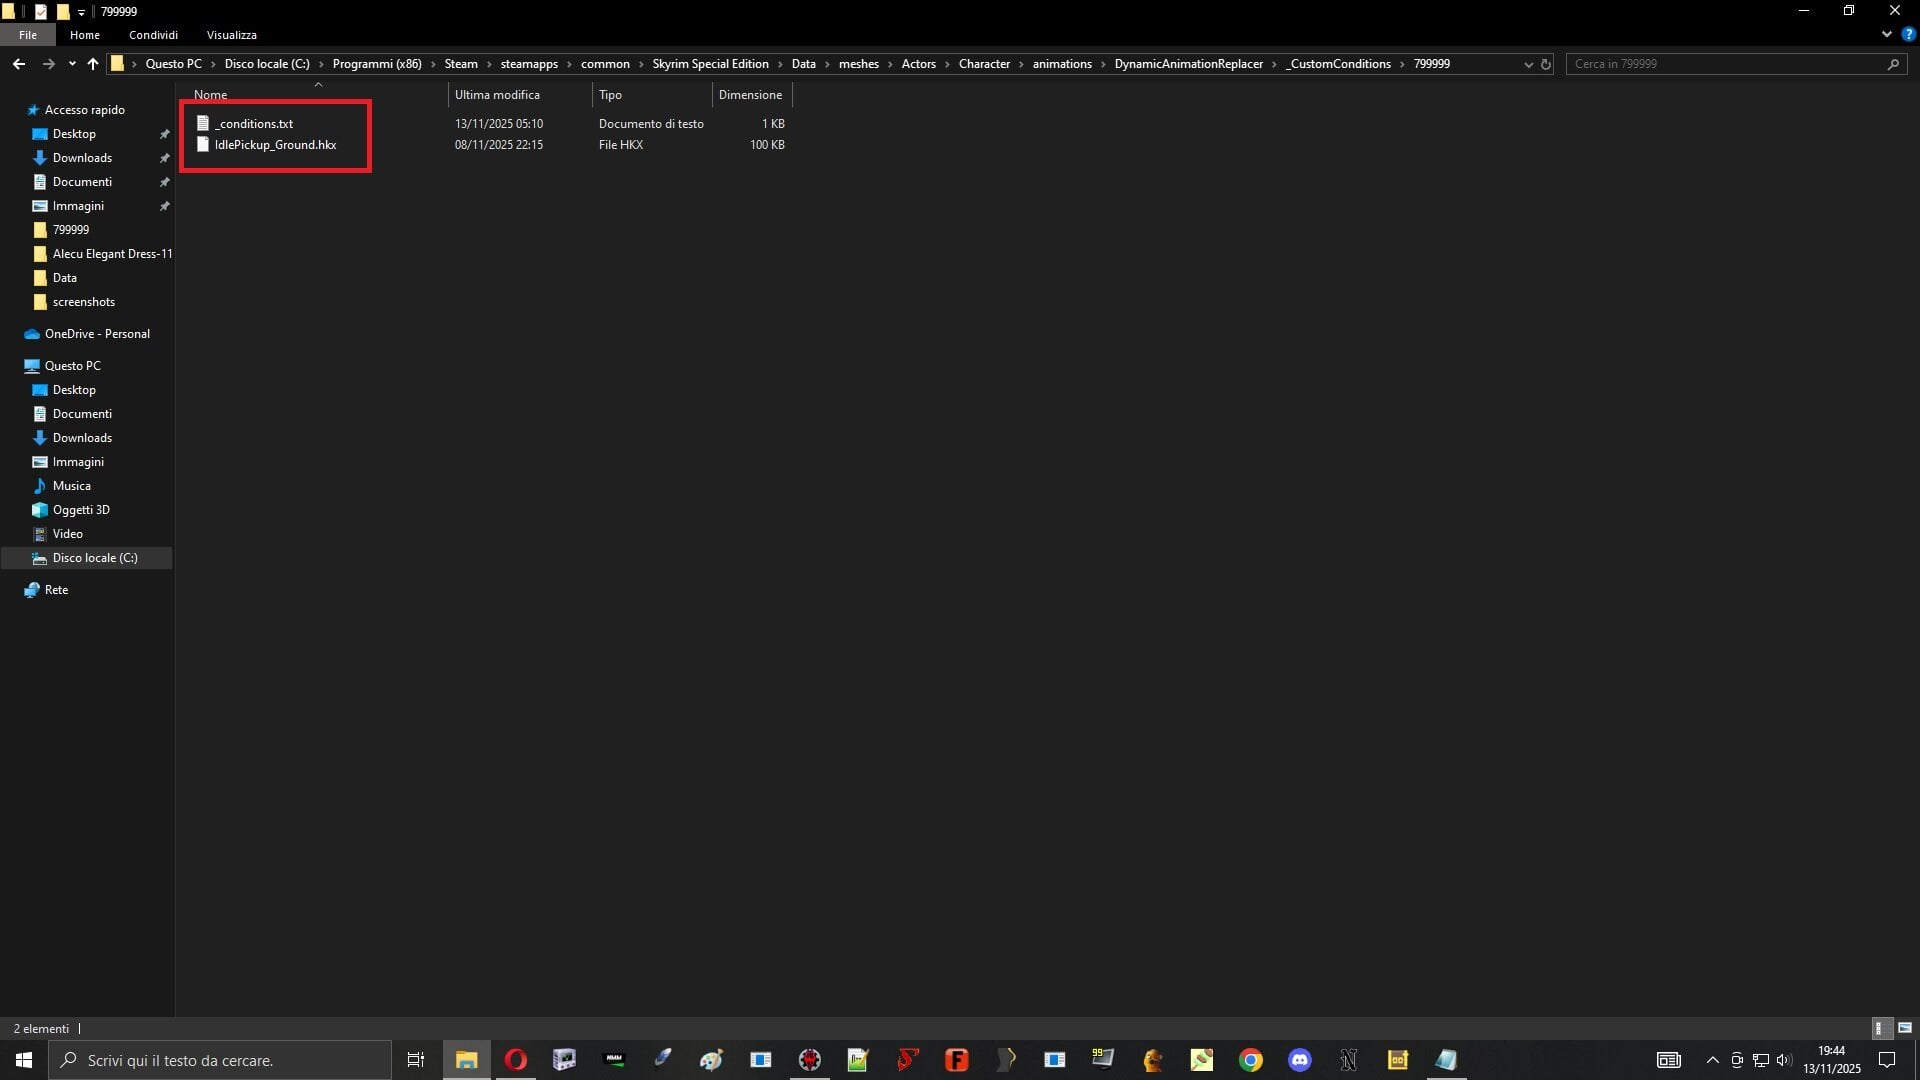
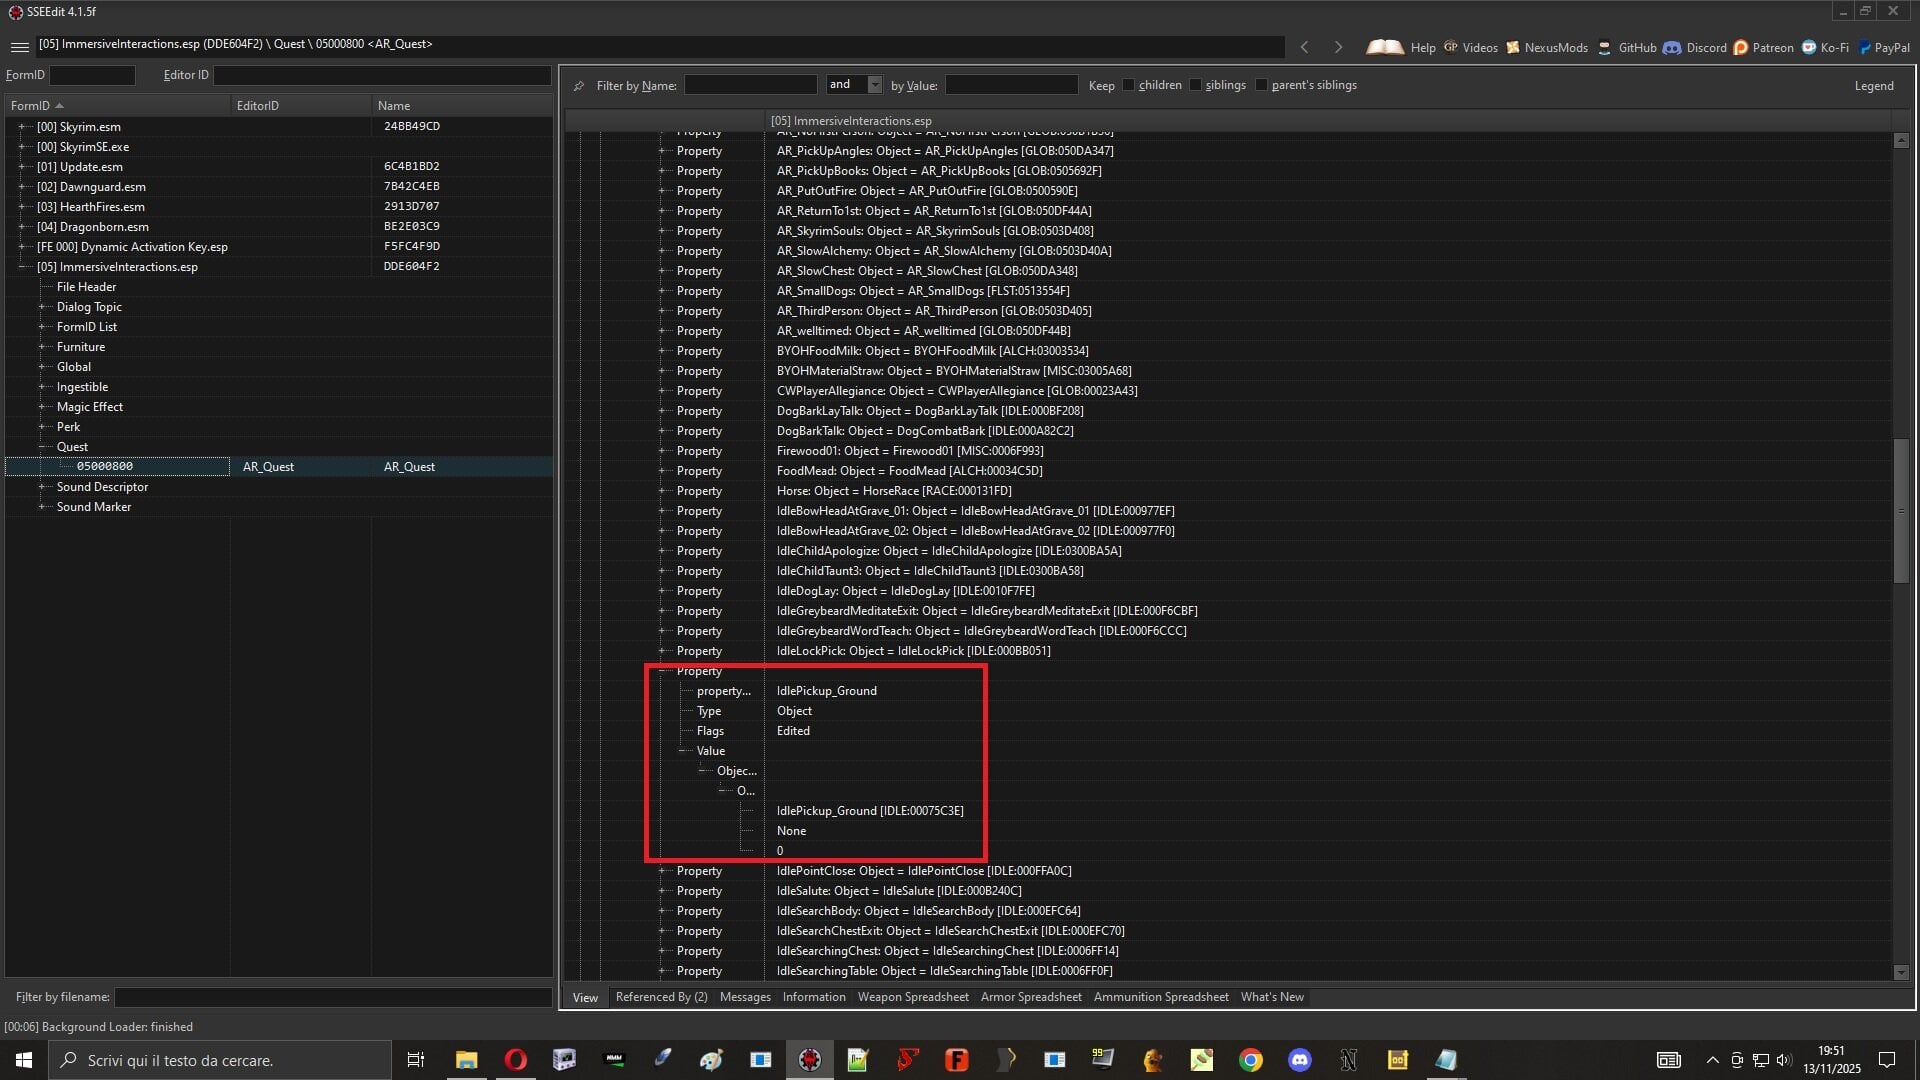
According to reports, the animation Feminine Pickup Animation SE It doesn't work for almost anyone, even when using the command in the console How I fixed the problem using DAR/OAR Required: the original mod, DAR or OAR animation, Immersive Interaction (if you want it or if you are using it) Download the mod; you will only need the HKX file. DAR/OAR Go to Skyrim Special Edition\Data\meshes\Actors\Character\animations\DynamicAnimationReplacer\_CustomConditions, create a folder and rename with any non-existent number ( In my case, I named it 799999) Inside this folder,paste the animation file IdlePickUp_ground, create a simple text file (TXT) and name it _conditions Open the TXT file and fill it in. In order to avoid interference, I have included the condition linked to SexlabAroused. IsFemale() AND NOT IsInCombat() AND NOT IsWeaponDrawn() AND IsFactionRankLessThan(10, "SexLabAroused.esm"|0x03FC36) save TXT , launch FNIS/Nemesis Immersive Interactions ( only if you're using it ) Open ESP with XEdit, extend menu Immersive Interactions /Quest , search PickUp_Ground and read ID Go to Skyrim Special Edition\Data\meshes\Actors\Character\animations\DynamicAnimationReplacer\_CustomConditions\19934 drop IdlePickUp_Ground.HKX, previously downloaded from the original mod Open TXT _conditions and change string with ValueEqualTo("ImmersiveInteractions.esp"|0x00075C3E) It is the value identified by the ESP. Save TXT and enjoy Demonstration video
-
 Weird...primary link is now active again. It said "Unavailable" when I went to download it last night. Either way, thanks a million!
 -
SexLab Pheromones SE v1.3.3.7z Strange, I just downloaded it.
-
I know this is an old post...but it's the only glimmer of hope I've seen after hours of searching... @Dorabella would you still happen to have access to this file and could share it again? The link has deactivated in the intervening months. Thanks in advance!