Jump to content

Making Faces


AVS

2625 views

So, I figured out what was fouling up the skin tints on the mask I built from the Charmers of the Reach headmesh. I had some vague memories about problems with using Racemenu's CharGen export meshes to create outfit parts from the abandoned experiment with detachable heads a couple years ago (cripes, it's been two years since I started doing all this Dwarven stuff), but I couldn't recall exactly what the issue was. Just that there was some processing involved to get them usable. I blew through pretty much an entire day trying various things that I could remember doing in relation to that project with no particular luck... until I finally, right as I was about to give up for the day, remembered that the Racemenu heads put the tint masks on a file path that can't actually work.


A-durrrrrrrr


Anyway, fix that, and everything works fine. Huzzah!


369637221_ScreenShot08-12-19at09_38AM.jpg.86368d0a5ec6b414e0d7eca6a966d160.jpg477602329_ScreenShot08-12-19at09_39AM.jpg.fb7c4467c3486356b9719e8cd0df9bab.jpg


With that issue resolved, I could move on to the second thing that appealed to me about using the COR head to make new masks: racial variation.


1799887225_ScreenShot08-10-19at06.18AM001.jpg.facad00267fb07e8d1878131c19ae694.jpg110989277_ScreenShot08-10-19at06_14AM.jpg.7b6f662a691e5cdc311ed4259ea1a83d.jpg


While I like the SeXtreme faces and found them well-suited for their use in the all-robotic body phase of DMA, as I started working on Doll bodies the fact that those faces are largely Caucasian with with skin tones that don't quite match the game's was a bit dissatisfying. I mean, I like the whole mix and match idea for the parts, but it'd also be nice to sometimes have ones that match more than mix. Especially for the Redguards and the Elves. Being able to use COR to generate new faces quite handily solves that problem.


1951463404_ScreenShot08-11-19at09.12AM002.jpg.790291a59ea80cb0234f66012003c1a6.jpg

177470043_ScreenShot08-11-19at09_13AM.jpg.e75024cbaee46e6759848a52e2ae00bd.jpg1396885790_ScreenShot08-11-19at09.13AM002.jpg.edc2eed14d23f6e3b5380adc7135c3fc.jpg404187610_ScreenShot08-11-19at09.13AM001.jpg.957d87a08e6f8ffb3f39b3d75ff21bc5.jpg

1716514763_ScreenShot08-11-19at09_12AM.jpg.beee7bfb488f044c788328030f520927.jpg1537471896_ScreenShot08-11-19at09.12AM003.jpg.21e88a0041605b2c943a7f1f931bd5e4.jpg1951938287_ScreenShot08-11-19at09.12AM001.jpg.0c4a09842bde0bb44074c575a69cbd5d.jpg


This... Gives me range.


28576807_ScreenShot08-12-19at09.47AM001.jpg.70503958d18d8b529efac986d1961cdd.jpg


There are some caveats involved, though. First is that many of the faces did admittedly come out a bit same-y. This wasn't really intentional, and I did in fact make an effort to distinguish their shapes a bit more as I was building them: 


1756474524_ScreenShot08-10-19at10_05AM.jpg.ccbdadce60e57895b7f970d09e6ce372.jpg987072823_ScreenShot08-10-19at10.05AM001.jpg.87fcbd9c2924603f7c8f4b47fb32c2e7.jpg


But, well, I was also trying to give them looks that I found attractive, as I figured I could tie these in to that initial Dibella face and present them as her race-specific Aspects, and that seems to have kept me from getting too adventurous with them. 


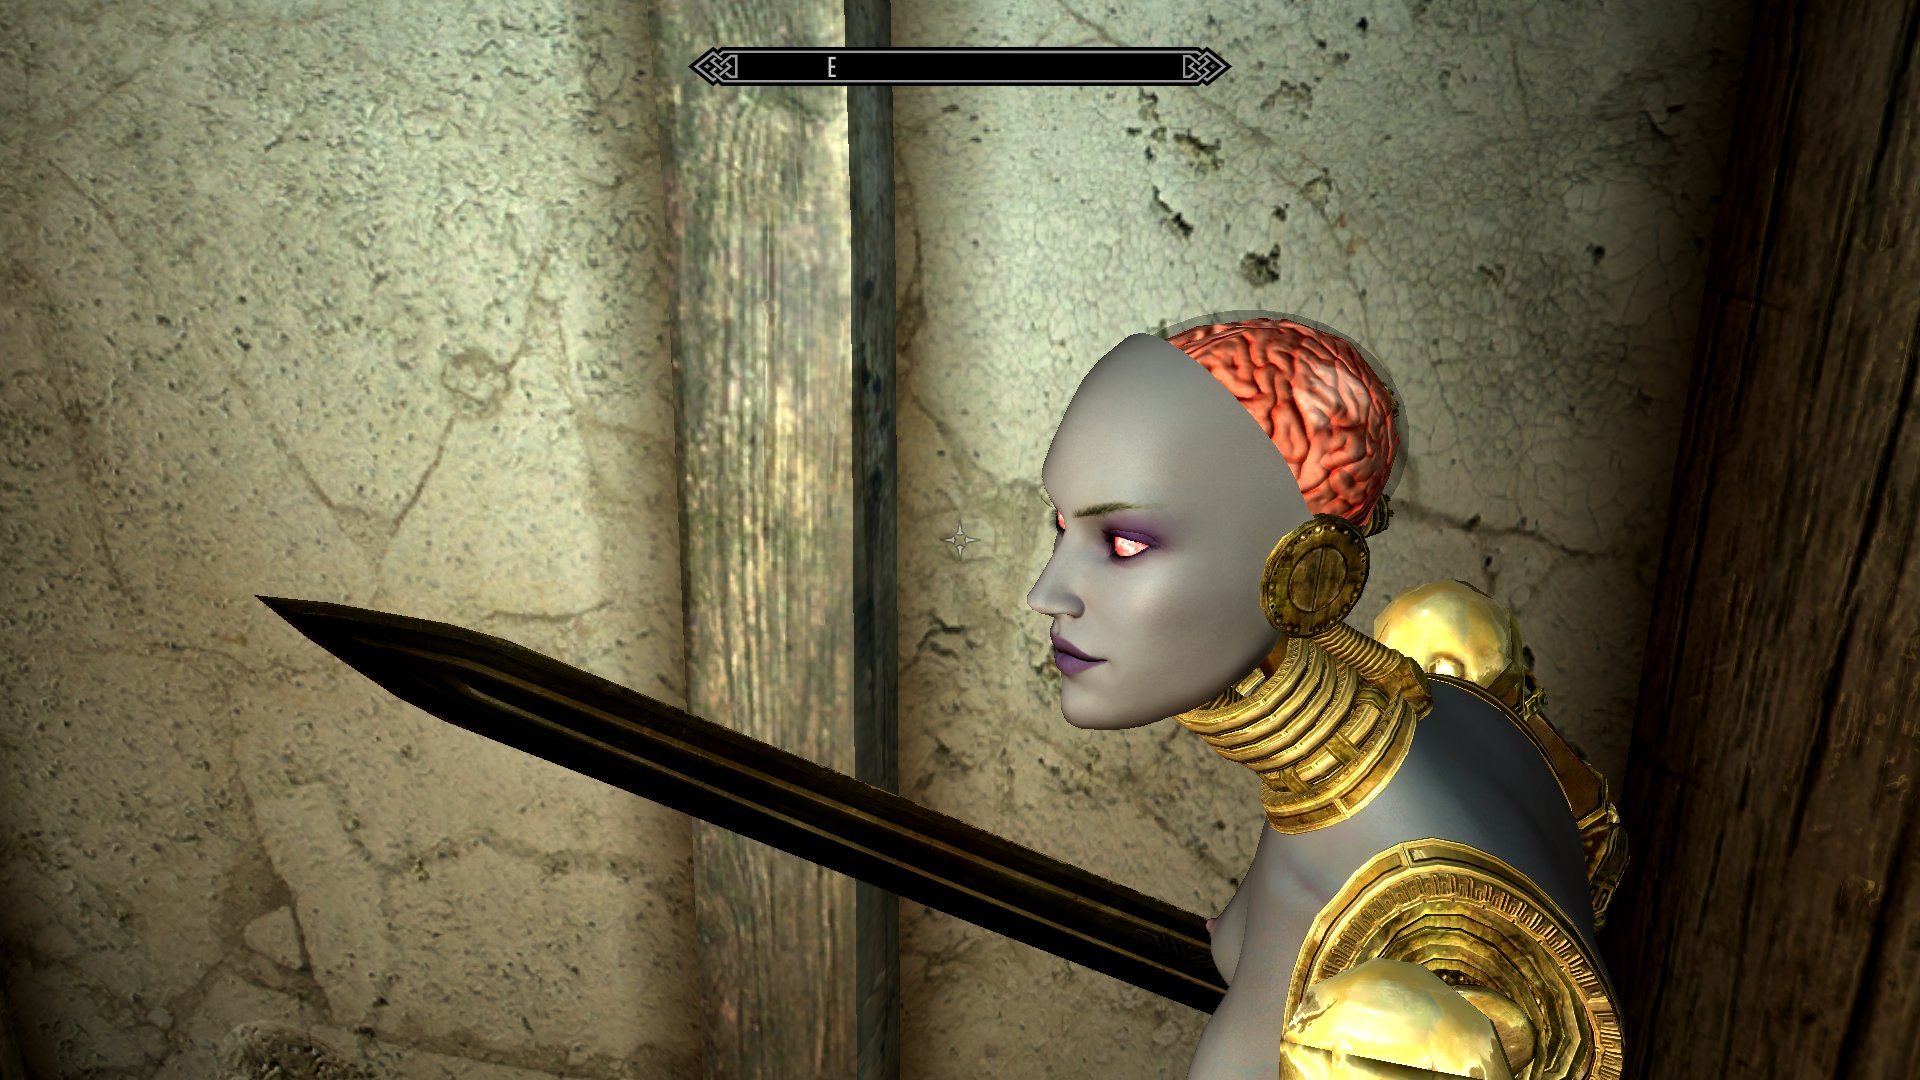
I was also a bit constrained in that by the current limitations of COR. It's not a full multi-race mod yet; it has multi-race support, but those all use the same sets of meshes and skin tones as the main Breton-based race. Well, no, the elves do use a slightly different head shape, but it tends to clip through hairs even worse than COR's basic DAZ-based head so I didn't use it for creating these. All of the elves here are actually heavily-modified COR Bretons, and are particularly similar in shape because once I got that elfish jaw sculpted out I didn't want to fuck with it too much. This also means that they use the same human-type normal map specific to the COR head model- Vanilla-based normals absolutely don't work on it, I tried and it was terrifying- and thus don't have the brow ridges present in the Vanilla elves. It doesn't look that bad, but it'd be nice to fix, and there is technically an option for that via this mod. But while it does restore the brow ridges, they unfortunately managed to re-introduce the early Vanilla-style blocky compression artifacts, so I can't say it's exactly usable. 


743783719_ScreenShot08-11-19at05_34AM.jpg.894bc250ca5411abd6bcd34033b28dee.jpg

2046698761_ScreenShot08-11-19at08.01AM002.jpg.fe701bd66e8ff0be8f850c071fd142a9.jpg


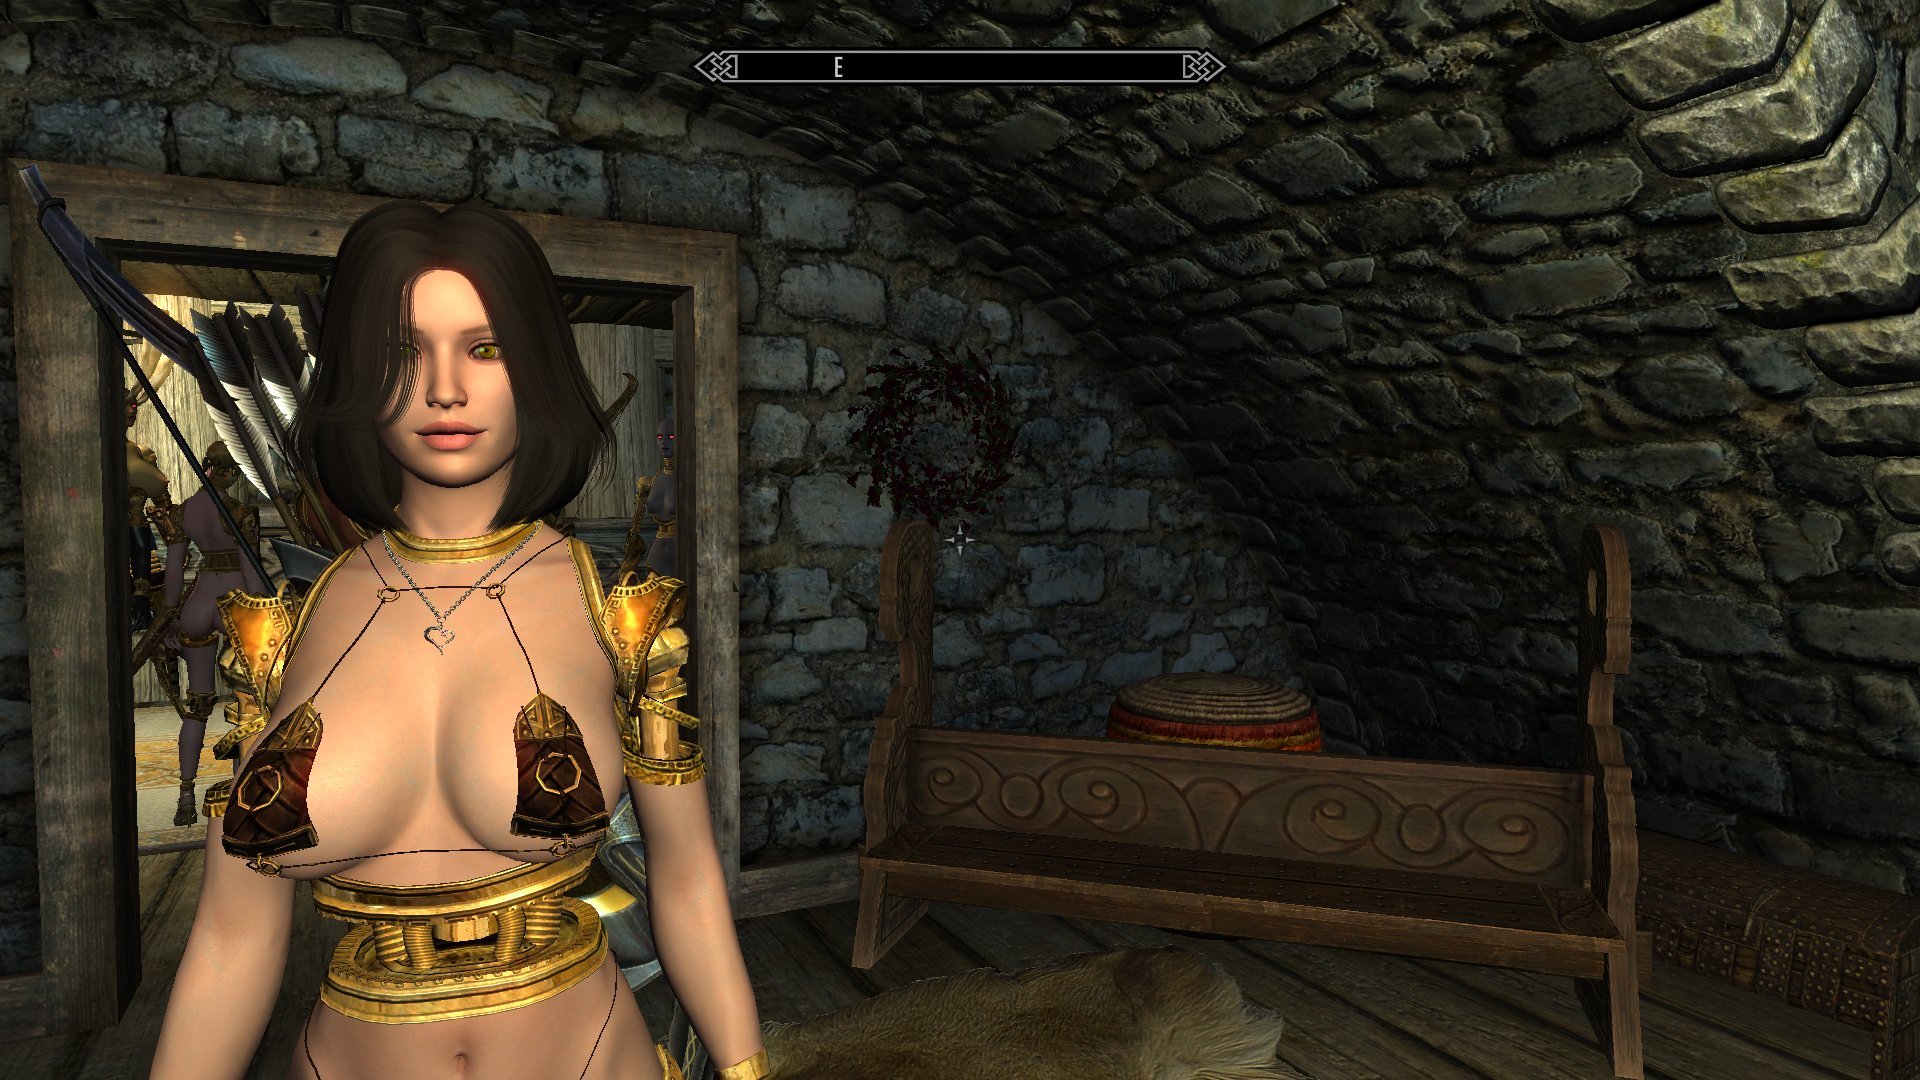
Things are further complicated by the skin tones. The COR races have a fairly limited range of them, and when I built the first face for this batch, the Redguard, I just sorta manually close-enough'd the color selection. And it came out fine, but a bit too dark-chocolate for the existing Vanilla skin tones. 


2009565379_ScreenShot08-10-19at08_28AM.jpg.d51ff07826d9d30729fd6e3fd8b0fc61.jpg


For the subsequent faces I first loaded in the Vanilla race and used Racemenu's 'save color' function to copy the original tints over, which is a functional but fairly clunky process. I just randomly selected whichever tone per race that I liked, figuring that it'd be fine as long as it was in the range, but then it turned out that I had picked exactly the right skin tone for Jenassa. And that when the parts match, it works really well


1656573624_ScreenShot08-10-19at07_55AM.jpg.83d9416fe8e1e0725eeb1e576a3ecdb2.jpg270417687_ScreenShot08-10-19at08.02AM002.jpg.86f91778f08d9cbabffe7e0b5dda2742.jpg

391428273_ScreenShot08-11-19at11.30AM002.jpg.d05a49e5ab841686afb7457f293b24d0.jpg


This also had the effect of locking me into using Fair Skin as the pack-in texture on the Doll parts. I had already been inclined to it and its well-defined areolae after seeing it used on the COR races, and had tossed it onto the Dolls for testing before making these faces. Seeing just how drastically differing skin textures can affect how the skin tone is presented like this convinced me that matching to the faces was a must, and the COR faces are currently only matched to the Fair Skin texture. But it's really good at giving that smooth, possibly artificial look I was shooting for with the Doll skin, so that's fine. 


The core problem, though, is when you don't luck into a skin tone match.


755322578_ScreenShot08-12-19at10_27AM.jpg.5f9a3c8109b30ded1ca91674a171d6ff.jpg1995217996_ScreenShot08-12-19at10.28AM001.jpg.c302dd57e807d79a06952bf06a9d8889.jpg


I wanted to build a Diversity Squad set of followers to test these, but there's not much in the way of Bosmer in the game to recruit in the first place, much less ones that're decent at combat. So I took a shortcut by using the console to generate a copy of the Wilderness Encounter Wood Elf... And did not luck into a match with the tone I had picked for the mask. Sometimes it looks fine, but sometimes it's really fucking glaring.


873976559_ScreenShot08-12-19at12.07PM002.jpg.a4f435c71328c20b98aa3210768c4fc4.jpg


Fixing this is tedious, but not really difficult. It's simply a matter of loading in the Vanilla race in Racemenu, saving the color, loading the COR preset made for each of these masks back in and applying the color, and then exporting the mesh to save off the tintmask. The tintmasks are interchangeable, so different ones can be applied to the same mask. I did this to fix the earlier issue with the Redguard mask, and the WE Redguard I grabbed to test with it worked out a lot better, although I still feel it's about a shade off.


1645038890_ScreenShot08-12-19at10.14AM001.jpg.e6504270f4831219c5f28934b32e5f66.jpg899925524_ScreenShot08-12-19at10_16AM.jpg.be0d0c00f4c02318f4e2103874459057.jpg


The obvious complication is that this only works once per skin tone. The tones of the mask and body are completely independent of each other, so to match the various possible bodies a new copy of the mask has to be made for each skin tone. And while I had hoped that I could do this by means of texture sets like how I'm subbing in the Rubber Body skin, tintmasks don't seem to be swappable using those. My experiments with the Nord mask all just ended up using the tintmask pathed in the mesh. So unless I can figure out a way to get that working, each skin tone variation will have to be a completely separate mesh.


There's usually about ten skin tones per race. So this could turn into yet another source of parts bloat real damn quick


But man, they look so damn good all put together like this.


1753122966_ScreenShot08-11-19at11.55AM004.jpg.f7cc661b9569007cf391bc72810a5a2a.jpg

1260674885_ScreenShot08-11-19at10.56AM012.jpg.a18780eb98e3b7f1a67705261aee5833.jpg

55677365_ScreenShot08-11-19at11.25AM002.jpg.89d22465edbdd7ee8d9a46474a927cc9.jpg228397593_ScreenShot08-11-19at11.26AM002.jpg.c3b426a4a17a69dcde735f0b7d19bc94.jpg80406520_ScreenShot08-12-19at11.59AM004.jpg.2c678c7f1c9863273c45e4a8d243812e.jpg2068449235_ScreenShot08-12-19at11.59AM006.jpg.50d62643fbbc7acdcdcfcf9a8512b67f.jpg254175630_ScreenShot08-12-19at12_00PM.jpg.d4443564510b077756a1e479df3b5b6e.jpg1015582939_ScreenShot08-12-19at12.01PM003.jpg.bad17733b6a3a5a2086d1899bfbe661d.jpg2071446323_ScreenShot08-10-19at08.03AM007.jpg.0e27c35e38e296b4df9596e477fc7493.jpg1561626241_ScreenShot08-10-19at10.23AM008.jpg.a34242bae00637de34e05b8c4d9c664f.jpg

1113894239_ScreenShot08-10-19at10_47AM.jpg.9a1acc207b1bb0103dfb3ec7e40ee261.jpg


You'll note that I've been using the fixed-weight body parts for the Squad, here, and there's a few things to mention about that. First is that it does work out quite nicely for providing that extra bit of diversity between each Doll, despite the fact that I've only got a fraction of the models added into the game so far. Another is that this is why there's only a fraction of those in so far:


1230385421_ScreenShot08-04-19at06_22AM.jpg.a7b6601d42d4617205235dfaae445873.jpg


That's 280 meshes produced by my spree of generating fixed-weights from the UUNP presets available in OS, with some customized 'pre-expanded' versions as displayed on the Redguard and Altmer models. Add in another 140 for the Rubber versions, if I were to do those for each body type. But not all of these are going to actually end up in the mod. I've already pulled some of the UNP weight variants due to them being too similar to other versions, and pulled CHSBHC entirely due to various issues with gaps in the skin. And all of the UNPF chests are gone because, as I mentioned before, the breasts do this sort of thing:


531093610_ScreenShot08-12-19at09.18AM002.jpg.766874e54ba678faf179865de1d2c569.jpg1291661955_ScreenShot08-12-19at09_18AM.jpg.5119dfd331a536f8b6444da0282d1d09.jpg


I do like the wasp-waist style of the preset, however, so I tried to fake up a version of it using various regular UNP chests to replace these, many of which you can see in the list and an example of which, the UNPetite High-based model, you can see on Jenassa above. But I'm going to have to go back and re-do those as I got the waist a bit too tight and the pipes at the sides of the pelvis connector clip through sometimes. This after I already had to re-do all of the pelvises with a further remodeled connector when I found that the sides of the initial take were clipping though the base ring of all the UNPF-style chests. 


This is a large part of why it's still going to be a while before this stuff actually gets released. I keep having to rate my completion percentage downwards. 


You'll also note that several of the Squad are using robotic limbs. The arms are pretty much freely interchangeable with the existing DMA parts, but there is a sort of a limit with the pelvises imposed by the fact that the existing robotic thigh parts don't really work well with some body presets' hip shapes. Since I don't really feel like rebuilding the thighs for each type of pelvis and because it gives me an easy way out of expanding the parts count even more exponentially, the robot legs/human pelvis combo will be limited to the two presets that the thighs fit best on, the base UUNP shape and the UNPFx Low. B-Type and E-Type connectors were provided for both of them. The Doll chests can also be mixed with the robotic DMA pelvises, as demonstrated by the Nord model, with the caveat that the G-Type pelvis' larger torso connector is likely to clip to some degree or another. It'll work fine with the Milker type chests, however.


430531133_ScreenShot08-11-19at10.21AM003.jpg.633d22f13f18ef55bb44dfcc8c442ffa.jpg


I also feel that I should specifically mention something about the Breton mask. I based it on the second COR preset, as I felt that it suited a sort of youthful and fresh-faced Aspect of Dibella, but when paired with the short in-game height of the Breton races and the preset's low, 20-something weight, it comes out looking, um, really young.


1307040079_ScreenShot08-10-19at10.36AM002.jpg.8e305c21c56d53cfca929bba86ad1ece.jpg


And if you pair it with the UNPetite body on a Breton NPC, well...


782980143_ScreenShot08-10-19at11.44AM005.jpg.2416a966b4d6fcc6fe75f7202631a66e.jpg


All I'm gonna say is please be aware of the laws applicable to your local jurisdiction. 


Finally, I mentioned above how my realization about the face tints came after a long day of failures. Well, a lot of those failures related to the idea of subbing in a mask-cut version of the COR head model to get a mask with working facial animations. This wouldn't have helped me get the interchangeable race-based masks I've showcased here, as it would be limited to purpose-built NPCs, but it would have bypassed the tint issue and the idea of getting facial animations is appealing on its own. I showed how in my previous attempt I found that trying to combine the altered head mesh with the existing .tri files produced a bit of a disaster, but right after posting that I happened to get around to checking for a new version of Outfit Studio and found that a recent update had quite handily added in the ability to edit headmesh .tri files. Couldn't seem like better timing, that. So I updated OS, made the edits to the relevant files, subbed those in for the COR originals and boom, I had a perfectly decent floating mask on my COR character. 


67076341_ScreenShot08-08-19at08_59AM.jpg.ab2f946e04736ef6252f030ae8179095.jpg


Even had what appeared to be intact facial animations. Success!


275330122_ScreenShot08-08-19at09.03AM002.jpg.93680f3825ed207bbdf4c88ccbab93be.jpg2081185422_ScreenShot08-08-19at09.03AM008.jpg.43c986b9d15b198ded0af46a008e1f56.jpg


Except something seemed a bit off. This floating face was supposed to look the same as the one I used to build the first Dibella mask, with the slight smile that I built into it (and all the subsequent masks). But here, no smile.


1172225440_ScreenShot08-08-19at10_46AM.jpg.e0e3cf4915e6e436c4755350163e3535.jpg2014855863_ScreenShot08-08-19at10_45AM.jpg.834d90e7e465ecda372c29432472f5d6.jpg


Going into Racemenu I found that pretty much all of the expression sliders simply didn't work. Moving them around produced no changes to the model. On top of that a lot of the other sliders had noticeably reduced effects, producing only minimal alterations in the affected facial parts. So I couldn't even use this for my hoped-for secondary purpose of quickly producing new static masks for statue versions. All of those racial masks had to be individually cut from the full head meshes. 


This is a disappointment, but I have no idea what exactly went wrong, much less how to fix it. So I'm probably going to have to continue to bin the idea for now. I did have a thought about trying to sub it in on an NPC, but trying to do that directly on an existing Charmer NPC mod didn't work at all. Producing my own would require me to have something like MAFKit, I'd expect, but actual download sources for MAFKit appear to have gotten vanished so that's no help. 


I'm having a similar 'I have no idea what I'm doing'-based problem with getting the HDT vagina effect to work. Specifically, it doesn't. The models lost the bit with the .xml file at some point during the build process, and trying to simply paste it back in produced no effects. (Oddly the prototypes for the new faces picked up that .xml file somehow, but that also seems to have no effect on anything.) I don't even begin to know enough about how that stuff works to fix it at this point, and it's a bit of an annoyance that it vanished. But considering that my main reason for including it was to get anatomically correct statue models, I'm not really inclined to go out of my way for it. 


Function's nice, but it's alright as long as it looks good.


421702298_ScreenShot08-10-19at10.53AM009.jpg.c485cfff23284331a28226c3e26b738e.jpg

1494239232_ScreenShot08-10-19at10.56AM007.jpg.8fbbcd0e1e5f24d073f7c5d0c13471f6.jpg

(Also, never tell someone to start dancing while they're sitting down. It's silly.)


12 Comments


Recommended Comments

Holzfrau

Posted

Screen Shot 08-10-19 at 08.03 AM 007.jpg

Creepy stuff here.  Nice work!


How well do the UNP fitted bodies work with the outfits from DCC?

Teruke

Posted

are these all static pieces or can they be tailored to bodyslide presets?

AVS

Posted

10 hours ago, Teruke said:

are these all static pieces or can they be tailored to bodyslide presets?


Both! The parts I focused on in this post are pre-shaped, fixed-size pieces, but I'm also including a set of 'variable' parts that are capable of being used with Bodyslide and bodymorph mods such as SLIF. The two characters in this image, for example, are using the same chest piece generated in Bodyslide to my personal UNPB-based preset. The one on the right has a weight of about 20, while the one on the left is somewhere above 80 with additional mass from a SLIF-driven expansion mod.


1307040079_ScreenShot08-10-19at10.36AM002.jpg.8e305c21c56d53cfca929bba86ad1ece.jpg


I can't guarantee that it'll work well with every preset, however. The ring meshes I used to build the caps are surprisingly malleable, but they do have their limits and some of the more extreme presets absolutely test those. There's also some limitations to what the Gynoid parts used to make the legs can handle when paired with the human skin mesh, as I found in the CHSBHC series. 


17 hours ago, Holzfrau said:


How well do the UNP fitted bodies work with the outfits from DCC?


I honestly haven't done a lot of cross-testing with those yet, but what I have tried out indicates that mixing these with clothing will be more than a little tricky. Especially for the fixed-weight parts, as the game will still register the original weight and body shape it has listed for the NPCs those parts are equipped to and display clothes sized for that. So those are largely a no-go.


The Variable set doesn't have that problem, but there are some further issues caused by the design. Due to the afore-mentioned limits to the malleability of those ring meshes a number of bones were stripped from the chest parts, particularly the clavicles and lower spine sets. This gives the chests themselves some amusing features while in motion, such as the way the mid-torso joint 'hinges' instead of simply flexing, but it can cause some problems with using clothing models that still expect those bones to be there and thus moves as if they were. One of the results of that is random points of clipping.


819592933_ScreenShot07-22-19at12_57PM.jpg.99bb98741375c43bd96dbe3201a727c3.jpg


 This particularly crops up at the back where the clavicle bones were, as seen on this Bikini Armor piece, and areas around the lower back can also have problems during movement as they respond to the spine bones that were removed. Most personally annoying, however, is that the front straps on my Bikini Revival mesh tend to clip through the top of the breasts when used with these parts. 


Some stuff manages to work fine, though. The Bikini Armor set I'm using in the upper image I haven't had any noticeable problems with. And since the pelvises still retain the normal bone structure the various bottoms I've tried out haven't had any similar issues. They are sometimes tight enough for the labia mesh to clip through a bit, however, and due to slot conflicts are mostly incompatible with belts and tassets. And there's also the possibility of conflicts with the various bits of the robot parts. Low-slung underwear never really worked well with the Gynoid hips, but this also has that big gap of a mid-torso that can mess with anything covering the majority of the body. Unless it's a loose piece like the Fur Poncho, of course.


haruhichan

Posted

It will be work on original MC head or can only use with custom head?

Teruke

Posted

I think he/she/it said they found a certain type of collar that works pretty well with standard head and the way it bends, so you could use that to keep your current face,


as for these masks it looks they need to be carved out from an exported mesh so no we can't have our chars unless we create a carving ourselves, which i myself have no idea how to do.

SpyVsPie

Posted

They look great, good job!

KazeNoAkuma

Posted

Looks like it's coming together nicely. Any other features you have in mind? 

AVS

Posted

On 8/15/2019 at 2:35 AM, Teruke said:

I think he/she/it said they found a certain type of collar that works pretty well with standard head and the way it bends, so you could use that to keep your current face,


as for these masks it looks they need to be carved out from an exported mesh so no we can't have our chars unless we create a carving ourselves, which i myself have no idea how to do.


Yeah, there will be a couple of collar options available for making it look like a character's existing head is mounted onto one of these bodies. There's also the collar/neck plate element that's integrated into the bodies that the original head can sit on, but there can be some minor clipping during movement with it, and the two parts of the skin will be close enough to really showcase any texture mismatch between the head and chest. 


Making masks like these requires a bit of a process, yeah, but it's actually easier than building the masks from the SeXtreme models was in some ways. Most notable is that building them from an in-game head like this means that the meshes are positioned and weighted properly right from the start, with all of necessary .nif file settings for dropping the models right back into the game, unlike the existing batch that required a lot more prep work. The biggest time-sink for me in building these COR-based masks has been making the sculpts. Cutting them out and building the mask parts has generally taken less than twenty minutes a pop. 


Building your own from your character's face should be pretty straight-forward. You just need some basic knowledge of how to use Racemenu, Outfit Studio, NifSkope, and the Creation Kit as well as the simple ability to navigate the game's file folders in Windows. Basically all you need to do is:


  1. Sculpt your character's face using the Racemenu mod. Go over to the 'sculpt' tab and use the export command to save off a copy of the head model. You may want to finalize (name) your character once before exporting as the saved mesh will sometimes mess up and make the skin portion invisible if you don't. Just use the 'showracemenu' console command to reopen Racemenu immediately afterwards and then export the model. Similar steps will probably apply for people using ECE, but as I've never used it I can't help much there.
  2. Find the exported model in Racemenu's CharGen folder, under 'Skyrim\Data\SKSE\Plugins\CharGen'. There will be two files; the .nif file for the mesh itself and a .dds file containing the tintmask texture. I'd recommend copying them off to different folders, with the mesh in a subfolder in 'Data\meshes' and the tintmask in one under 'textures'. This makes things easier for the game in various ways, and is actually kind of needed to get the tintmask working right as the model's texture pathing assumes a certain file structure.
  3. Fixing the tintmask and a couple of other details to get the head ready for use requires opening it in NifSkope. First, select the main skin mesh and then open the drop-down arrows in its entry in the Block List pane until you find the one that ends in 'TextureSet'. That will open up a list of the mesh's textures in the Block Details pane, and towards the bottom of that list will be an entry that has 'CharGen' in the path. Replace that with the path to wherever you moved the tintmask to in the textures folder and you will see the face's skin tone change from the base texture's default to the one you applied to the character while sculpting it. Next, select the Shader Property line in the Block List and then double-click on the 'Shader Flags 2' entry in the Details pane to open up the flag listing. Find and check off the one for 'double-sided'; this will stop the back of the mask from being transparent. You can do the same thing for the Mouth mesh as well, although it isn't quite as vital. Finally, go to the SkinInstance line for the skin mesh and open up the down arrow in the 'Partitions' section at the bottom of the Details pane. The model will be set to slot 30 in the 'Body Part' line, double-click on that and use the drop-down list to change it to slot 44. You can also do this using the Partitions tab in Outfit Studio, and it doesn't really matter when it's done as long as it's on 44 before you try to use it in-game. You don't have to make this change to the mouth/eyes/etc. meshes. Those are all set to 'slot 0' and can't be changed. I don't understand the exact mechanics of it, but they work regardless so it's not really a big deal. Once all the changes have been made, save the file.
  4. Open up Outfit Studio and use the 'import> from NIF' function in the 'file' drop-down to open up your modified head model. It will appear to have lost the tintmask, but don't worry about that. OS simply doesn't display it for some reason. Make sure you have the head's skin mesh selected in the Meshes tab and then use the Masking tool (the one with the dotted square on the toolbar icon) to mask off the face. This part may take some practice to get a good result. You can use the Brush Settings sliders to fine-tune the selection, but due to the 'fuzzy' way that OS always displays the mask edges it can be a bit difficult to determine exactly where the edge of the cut is going to be. Use the 'invert mask' command under the 'tool' drop-down to flip it around and make changes to the edge, but make sure that the face is covered by the masking color before making the actual cut. The cut is done using the 'delete vertices' command in the 'shape' drop-down, but this can't be un-done once executed. If you mess up you'll have to re-import the model into a new instance of OS and try again. Once you have something you're happy with, use the 'export> to NIF' function to save it. 
  5. For building the final mask model, I recommend first importing one of the existing DMA masks into a new instance of OS. The way OS handles some of the background elements of the .nif file is almost entirely obscured from the user, but I have found that it tends to carry over several core settings from whichever model gets imported into it first. As such, when making a model to be used as an outfit piece, it's best to start with a model that you're sure already has all those settings correct. On the existing mask, use the Meshes tab to delete everything except the ear parts, the mouth cup, and the eye backing. Then import your mask-cut face model. The brass parts carried over from the existing mask might not line up perfectly with the new face due to various differences in the models, so use the transform tool to adjust them to fit if desired. When done, export the final mask to save it.
  6. Finally is adding the mask to the game using the Creation Kit. There are a few ways to do this, but the simplest is probably to start by opening up the existing Dwarven Modular Automaton .esp file. Here you can either choose to set it as the 'active file' to save your changes to it, or don't set an active file to make a new custom .esp file solely for your face. The latter is a bit unnecessary for just one part, but the former will have your changes overwritten should you install an update to the DMA mod. The needed change is pretty easy to replicate, though. Simply open up one of the existing masks from the Armor list, then double-click on the entry in the 'Armor Add-ons' section at the bottom of the pane to open up the model data entry. Open up the path to the model itself in this, and change it to the one for your custom mask. Then make sure you change the ID at the top of the pane to something new. Doesn't really matter what, but try to keep the 'AA' at the end to keep the filing clean. Hit OK to close the pane, then allow it to make a new entry when prompted. Then right-click on the Add-ons list in the Armor entry pane and select 'New' from the menu. This will give you a list of all the Add-on entries in the game, search for yours there using the text entry box at the top of the pane, then select it and hit OK to add it to the Armor entry. Delete the Add-on for the original part afterwards. Following that, change the ID and in-game name to match the new name you gave the Add-on, and then hit OK and allow it to make a new entry, and then save your changes. Start the game and use AIM to grab your new face.


There's a few other details that need a bit more work to change, like the ground models, but this is the quickest way to get something functional. You could also do this without involving the DMA .esp by grabbing basically any armor piece and doing the above steps with the addition of changing the armor slots on both the Armor and Add-on entries to slot 44, although that loses my changes for the keywords. And while I've only tried it on COR heads, it should be possible to use the exact same steps to make masks out of Vanilla-based faces. I've only been avoiding it because the low-poly meshes used by them don't provide for a very attractive cut-line, and because their single-mesh eye/eyelashes combo makes altering the eyes involve extra steps. Not that you have to alter the eyes, as long as you don't mind them being stuck staring forward. That kinda gets on my nerves, so I've been replacing them with the glowing textures. 


4 hours ago, KazeNoAkuma said:

Looks like it's coming together nicely. Any other features you have in mind? 


Not much, I've already got more than enough work to do just to get all the stuff I've shown so far up and running. About the only thing I've got left that I'd like to do is to find a sword to go with the 'Dibella set' idea, but I haven't quite managed to find anything that is both a truly beautiful weapon (because of course it would be) and feels like it's ethereal enough for a fragment of a Divine to be using. CrazyLion's Dawnbreaker replacer is about the best one I've found, but it feels a bit weird for her to be using something designed for a Daedric lord... 


KazeNoAkuma

Posted

It could be said that Meridia, the Daedric Lord who owns Dawnbreaker, is close to a Divine due to being one of the good Daedric Princes. I'd say go for it if you have no other ideas. 

sabius

Posted

Hey, have you seen how the gynoid body goes with the aetherium helm? I really like the look, maybe a smaller version would do very well for a head replacer. What do you think?


https://www.nexusmods.com/skyrim/mods/23530


20190820004303_1.jpg.306077886cd66bb7cc9d320b43b843b4.jpg

TRX_Trixter

Posted

Interesting work. Looks great!

×
×
  • Create New...