Modblog 1 - Normal Maps

Entry posted by crabb
2720 views
Hello! I would like to talk about normal maps and show you how you can make your own for TS4.
Before I go into it, I want to reccommend this tutorial because I think it does a good job of explaining what "normals" are, and what they can do to improve your textures. Credit to teanmoon. This tutorial is for photoshop, my tutorial below is for paint.net
http://teanmoon.blogspot.com/2016/04/the-bump-texture.html
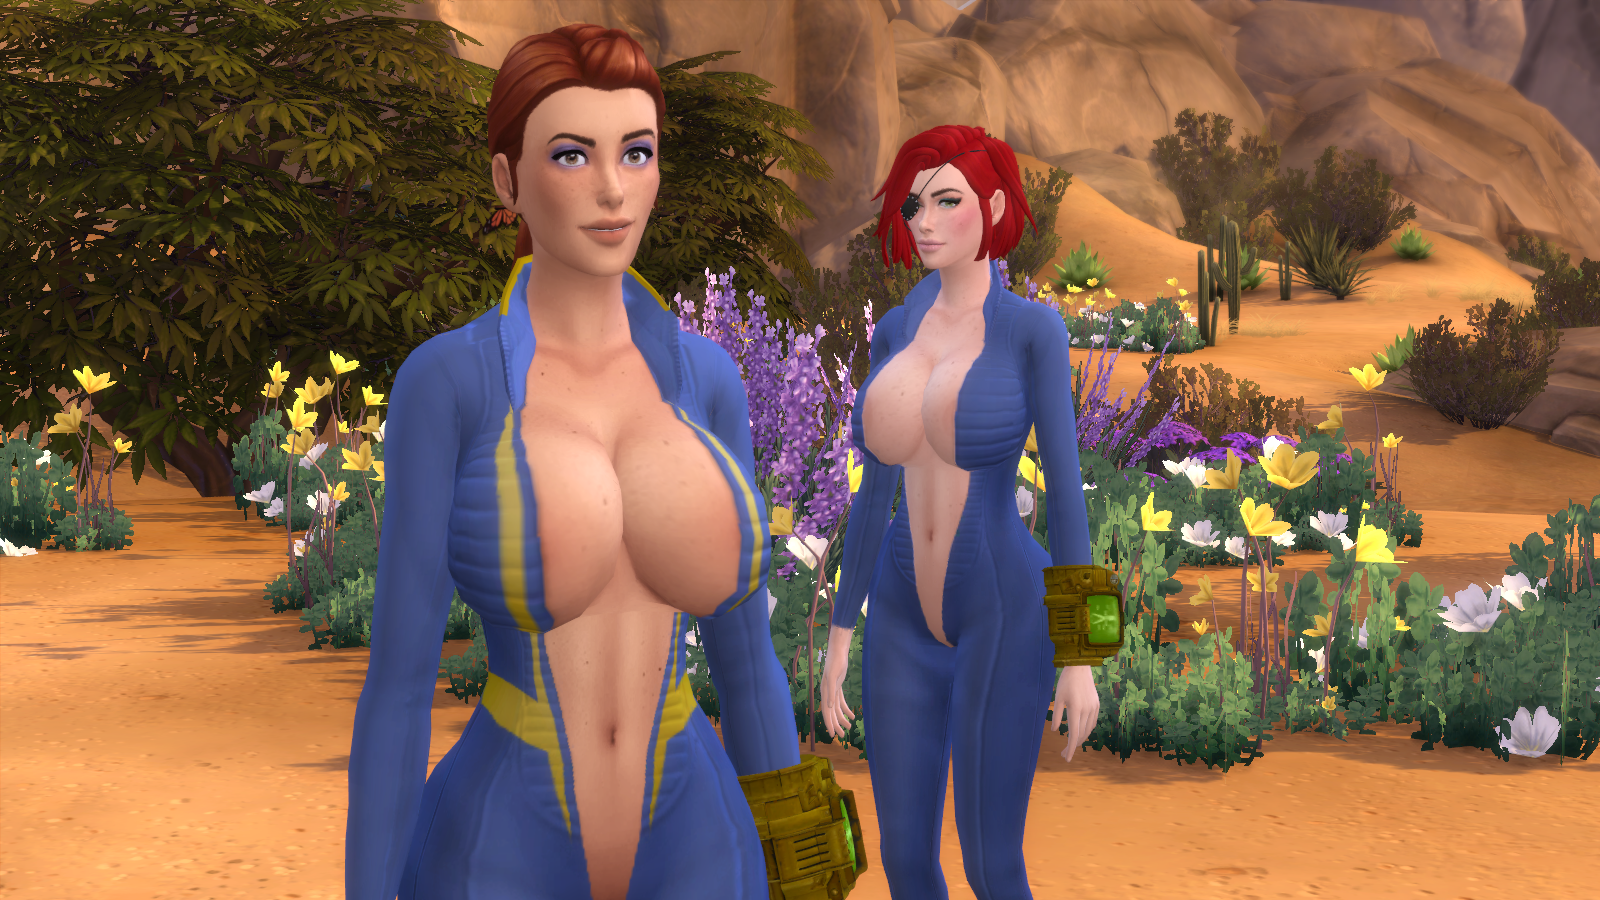
This mesh is the smooth base game full-body mesh. The texture is flat, with some shadows to mimic fabric
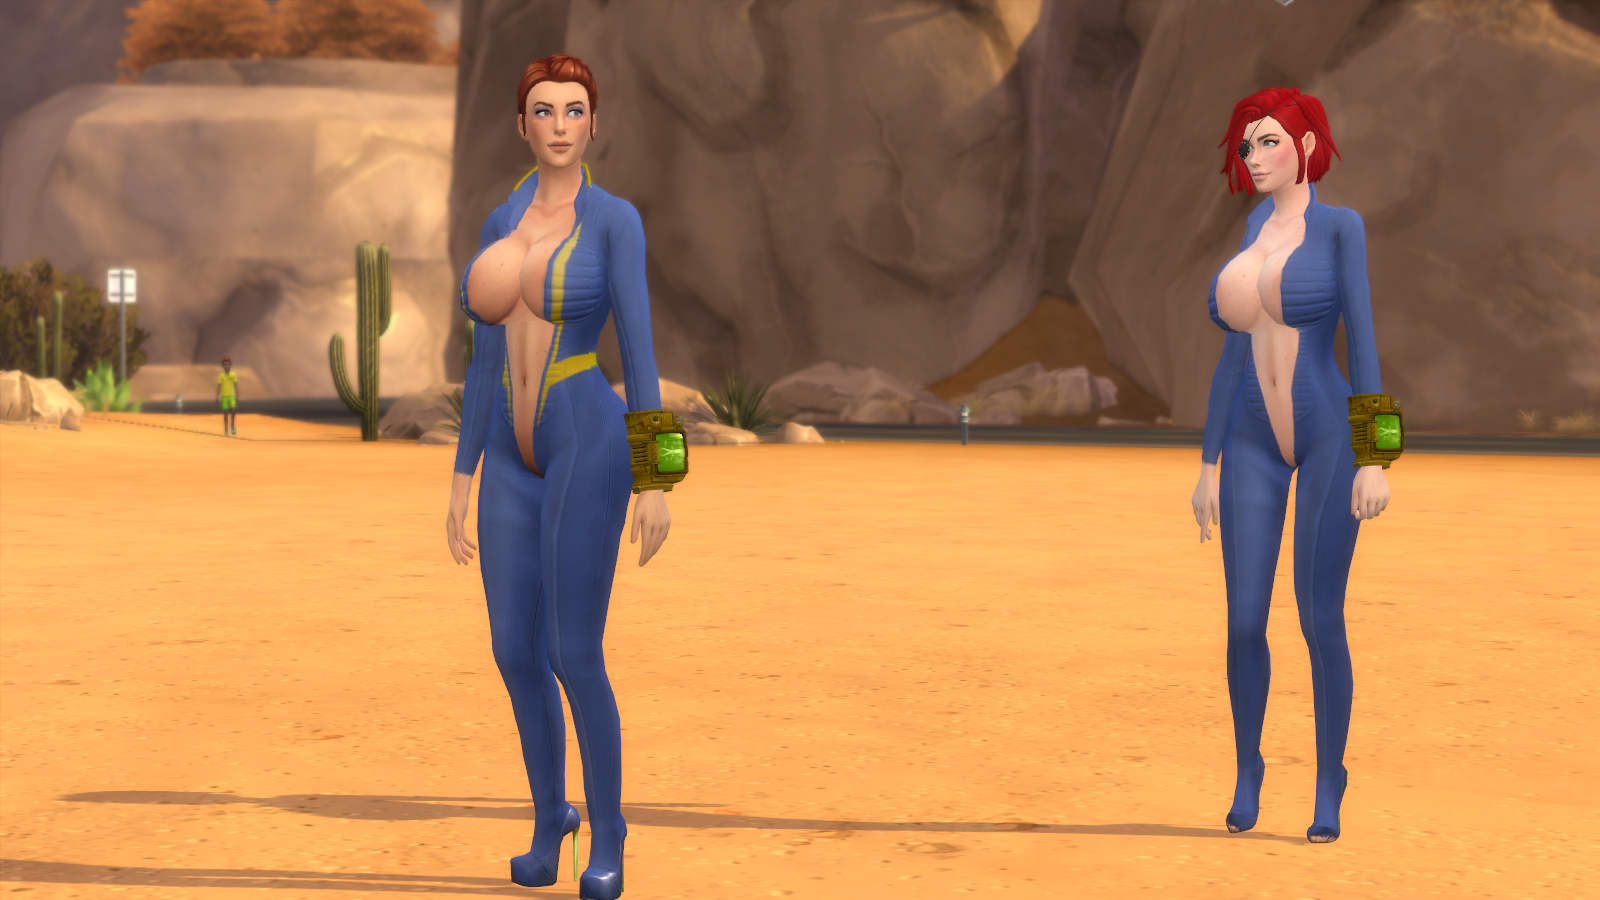
You can see how the reflections from the normal map interact with lighting in the environment. It is most visible on the chest and on the seam down the leg. It looks a lot better than anything I could draw myself, and it is actually easier to add certain features to the suit with a normal map. In some situations, a normal map could save you a ton of time on a texture project if you were originally planning on adding in all the shadows manually.
So, how do you get these to work? I will explain how you can make normal maps yourself using paint.net. Here are the steps laid out
Actions:
1. Draw where you want "bumps" to appear on an image
2. Put the image into a "normal map filter" to adjust the strength
3. Convert the normal map into TS4 format
What you will need:
1. A high contrast version of your texture or pattern you want to use
2. A normal map filter - I'm using NormalMap-Online
3. An image editor to do these steps:
something to separate red/green channels into their own images paint.net - color matrix
something to extract white/black from an image paint.net - black and alpha+
something to apply a texture to a transparent image paint.net - apply texture
(if you are using Paint.net - remember not all plugins are always put in the same folder, so be sure to check the descriptions for these)
Once you have the things you need, it's time to get the party started! So let us begin
1. Create a high contrast version of the texture, AKA a "multiplier"
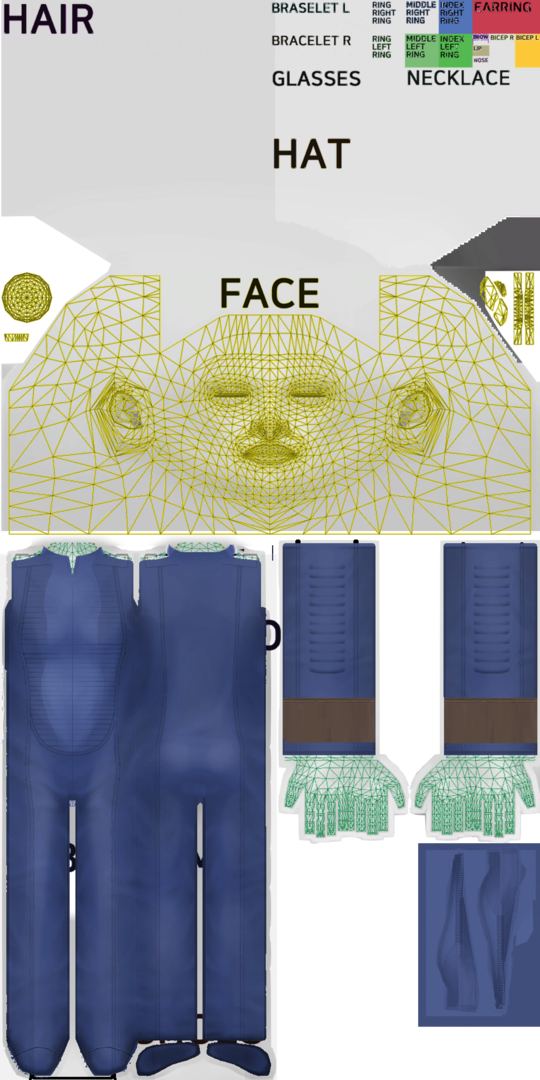
original suit texture 1024x2048 over a CAS layout map
This version has bumps and ridges that I used to make my high contrast version later on.
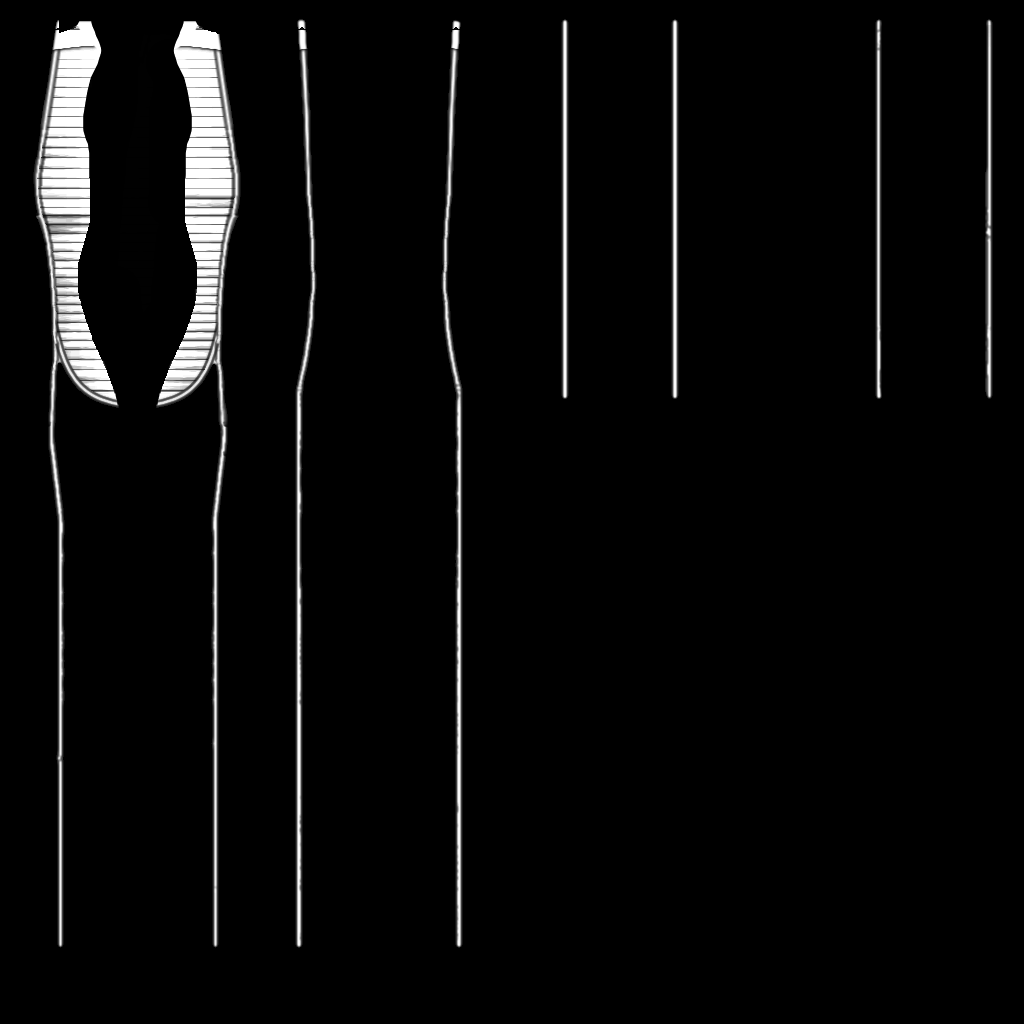
1024x1024 high contrast version
The game reads normal maps in a 1x1 image size. This means you will need to trim your image canvas size down to 1024x1024 or 2048x2048, with the final result anchored to the bottom of the image. This will cut off the upper area designated for the head, hair, and accessories (shown above in the first picture). You will be left with the lower CAS texture area for the body, shoes, and other objects. This bottom 1024x1024 area in the CAS texture space is where normal maps are kept.
After changing the canvas of the texture into a 1x1 square. you can start building a high contrast version. This high contrast version is called a "multiplier". The brightness strength in different areas of the texture will determine how intense the "bumps" are when the normal map filter reads the texture. Mine is all black with white in the areas I want the texture to look "raised up".
I found it is best to keep this texture simple. These filters are very good at doing sharp images or blurred images. It is not good for doing both at the same time. I have a lot of gradual shading on my suit, but I decided that the ridges on my suit are more important than anything else, so that's what I included
2. Apply A normal Map Filter

Go on normal map online and drag your high-contrast mulitplier image into the drop box
Trim a 1024x1024 version of your original texture (same way you did the multiplier image), and load it into the preview area on the right. This way you can see how the "bumps" are affecting your texture.
You can play with the sliders in the middle to change the intensity, more notes here:
Sobel is the best filter I wouldn't use another
Invert R (Red Channel) > left to right shadows
Invert G (Green Channel)> up and down shadows
Invert Height (Blue Channel) > invert height/depth shadows
I didn't invert anything but the Red channel on my final normal map texture.
You can observe the changes in the preview box on the right. Make sure you have only the normal box checked. Hit "download" on the box at the bottom once you are satisfied with your results
3. Change your Normal Map into TS4 Format
One of my normal maps from yesterday
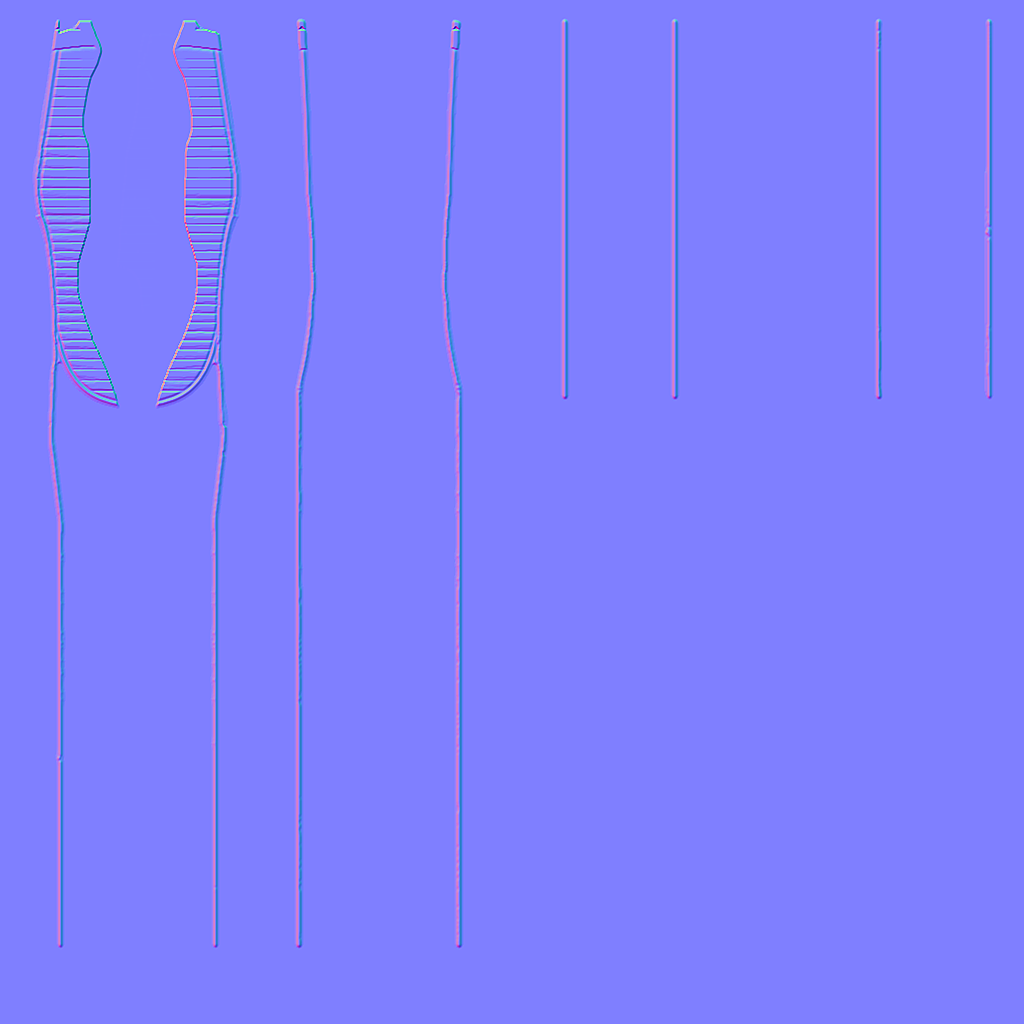
This should be your output. It looks familiar, but the new colors are a bit confusing. Why are they there? These colors exist because each one of them (R G and B) are holding shadow/reflection data for a different direction
the red channel of a tangent-space normal map stores the X axis (pointing the normals predominantly leftwards or rightwards), the green channel stores the Y axis (pointing the normals predominantly upwards or downwards), and the blue channel stores the Z axis (pointing the normals outwards away from the surface). http://wiki.polycount.com/wiki/Normal_Map_Technical_Details#RGB_Channels
We can make 3 separate images from the RGB colors on this image, but a normal map for TS4 does not need everything, it only needs the information from the green - (up/down) and red - (left/right) channels.
To make the normal map into TS4 format we need two things:
The brightness from the green channel
The Alpha from the red channel
Why is this? Because it follows the format that TS4 requires. A normal map for TS4 keeps its up/down data on the brightness of a normal map image, and it's left/right data on the transparency of a normal map image
3a Extract Green and Red Channels
We are going to extract the Green and Red values from the normal map texture, and set them aside on separate images. Copy your normal map into two layers. One labeled "red" and one "green".
Here are the steps to extract the color data for Green
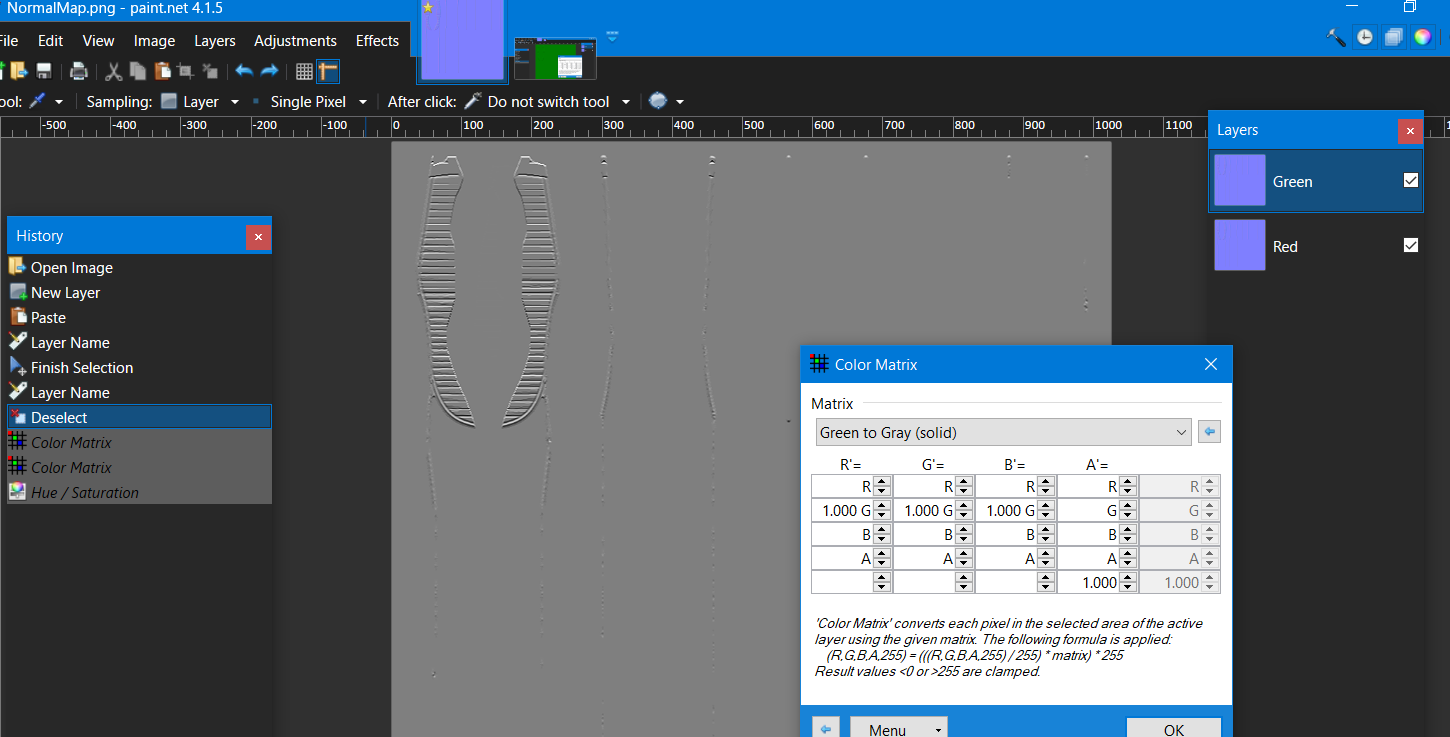
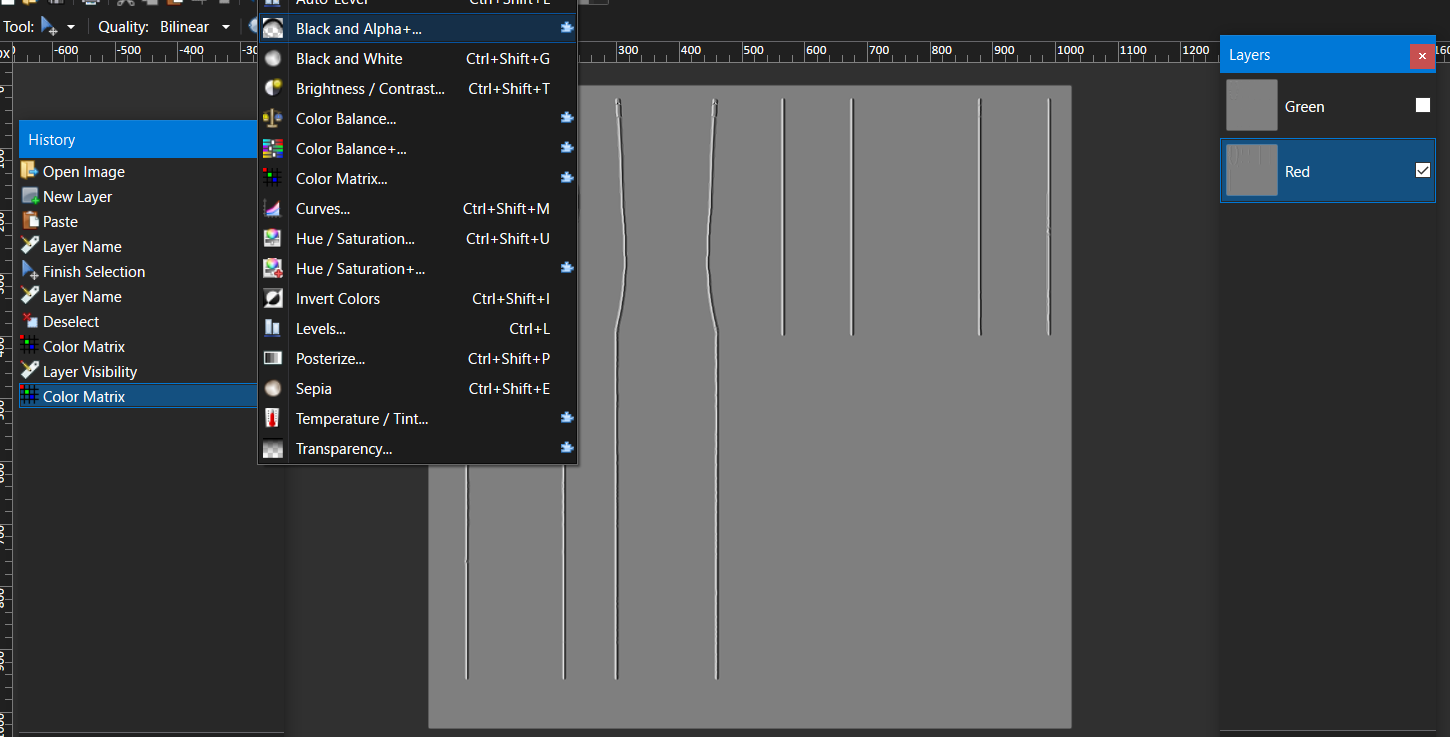
paint.net > adjustments > color matrix
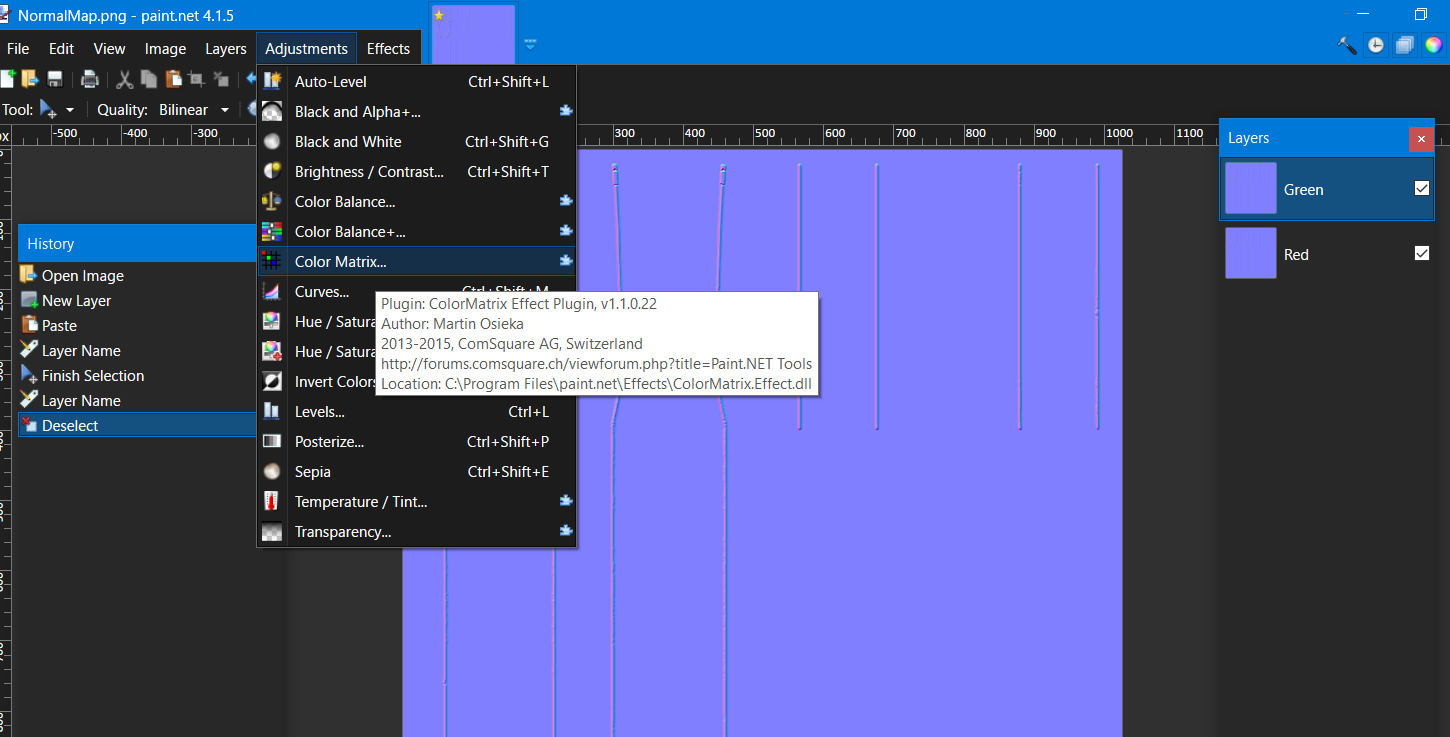
Choose "Green to Gray". I do not recommend "Green" the result is too dark.
We can see what our up/down reflections are going to look like here from the green data
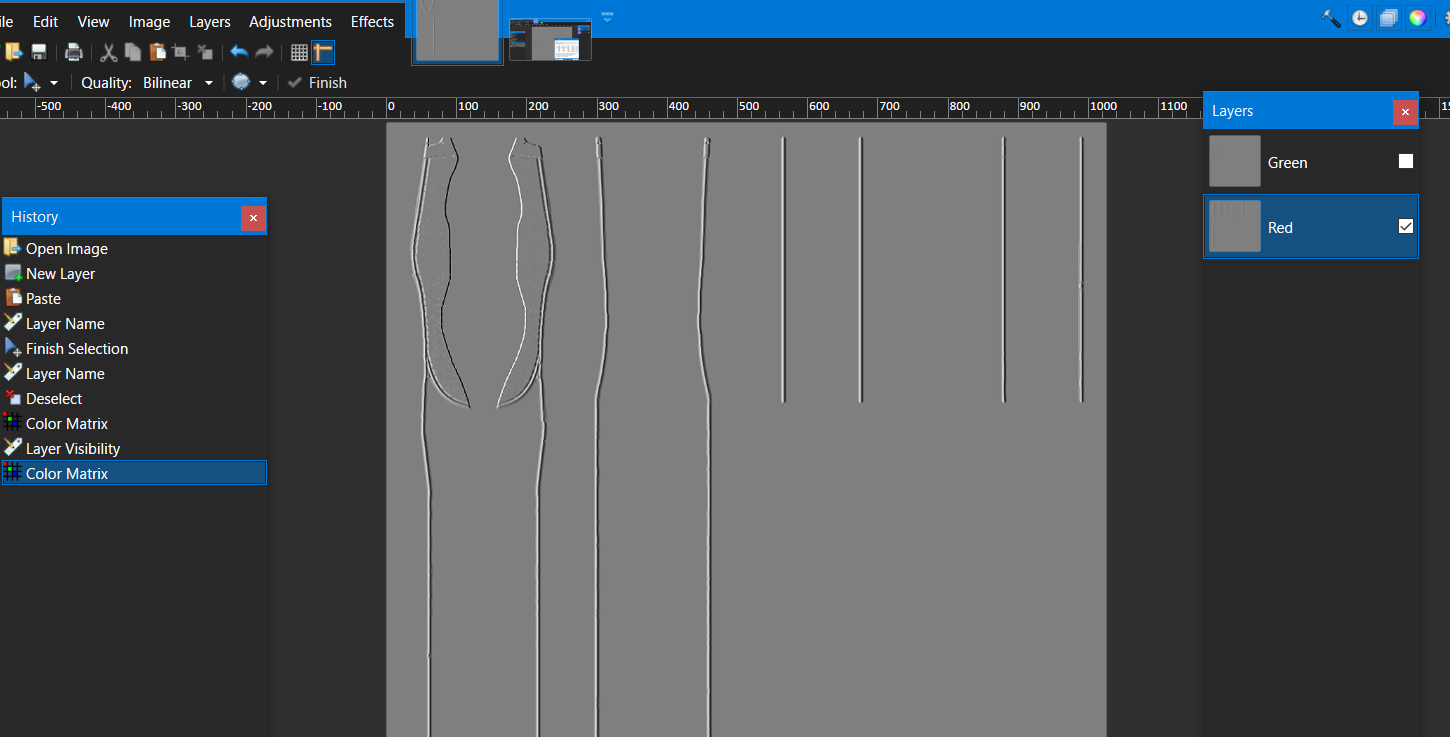
Repeat these steps for red channel, but instead using the "Red to Gray" color matrix option
As you can see, red came out very different looking. Our original colored image was keeping different sets of data. This will be our left/right reflections
3b Combine the images
Red is going to be our transparency for the image. We will create an "alpha mask" that holds our transparency data. Later, we will "fill" this mask with the brightness values of the Green channel
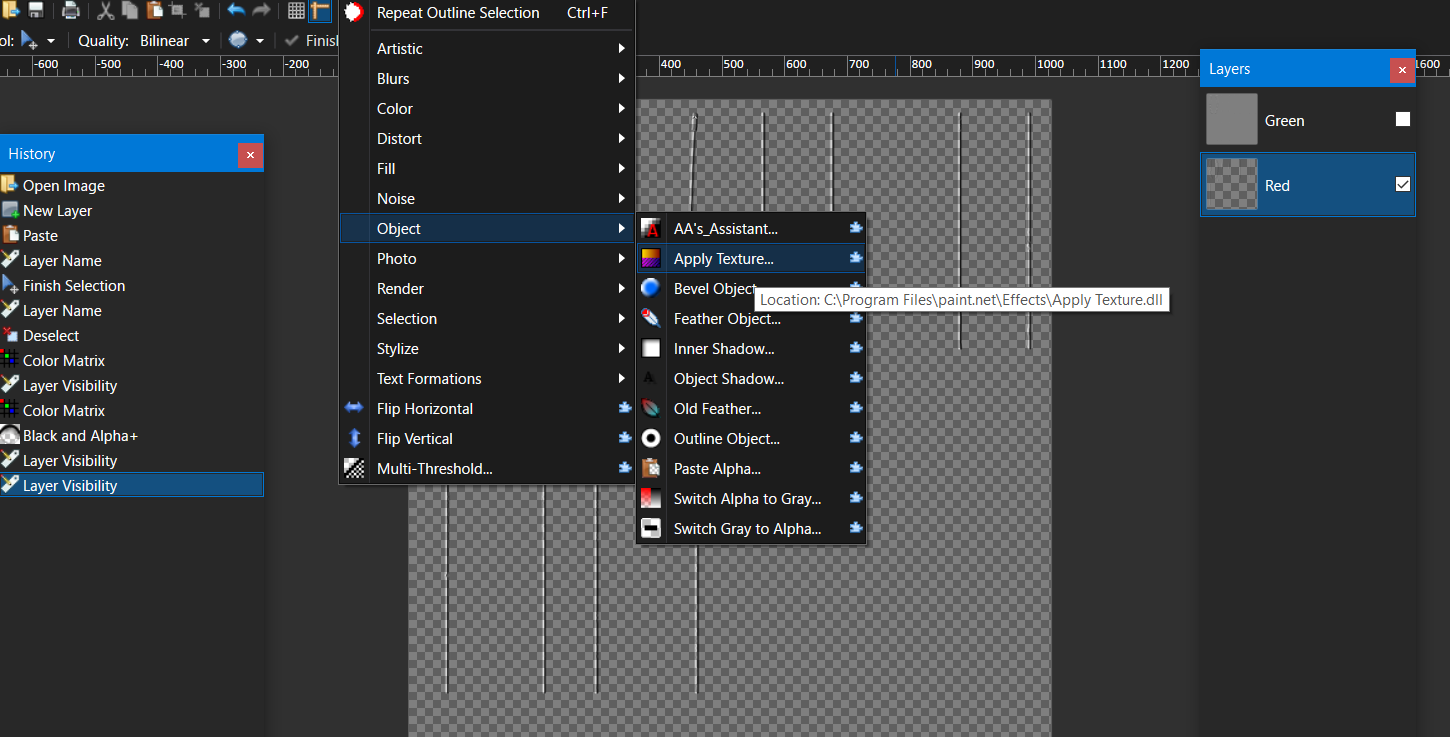
Select Red channel > adjustments > black and alpha+
Black+ Alpha will remove everything from the image leaving only transparent black pixels behind. You get the idea
If you have something that extracts all the white instead, this will swap the direction of the left/right reflections.
Personally, I do not see any consequence to this. If you don't like what you see, you can use the image editor to flip your texture horizontally, and this will flip the left/right reflections in the other direction again. You can even take one side that looks good, and mirror it to the other side. Remember, we are only concerned with alpha/transparency here

Now you have your alpha mask from the red channel.
It is time to paste the Green Channel grayscale texture to the alpha mask on our red channel
Here are the steps:
1. Select the Green channel > CTRL+C to copy image
2. Select Red channel > Object > apply texture
click "Get from Clipboard" and slide "save brightness" all the way to the left. Click "Ok"
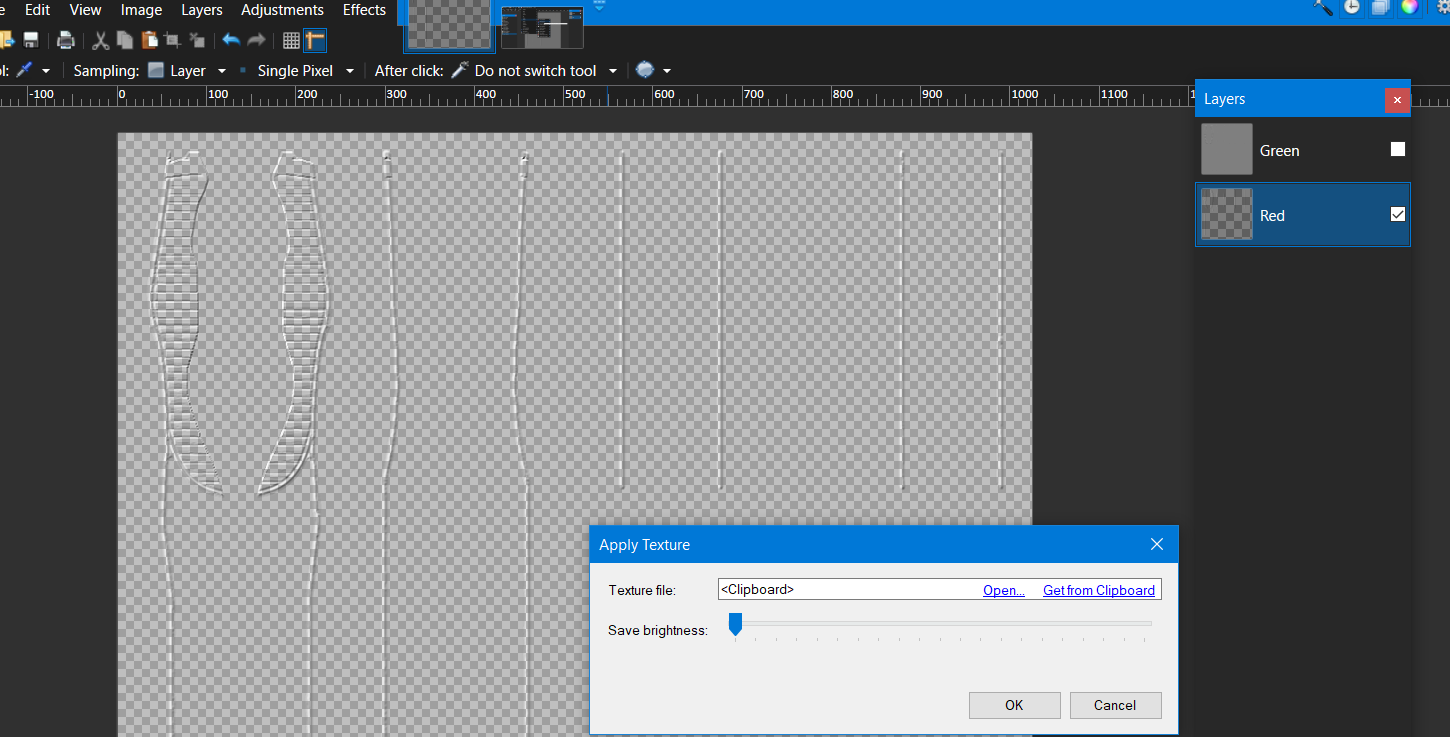
Here, we have the brightness values from the Green channel, and the Alpha values from the Red channel, in the same image.
You can see that this looks like a cross between the features of the green and red channels you have separated. This image is going to tell the game how to reflect light up/down and left/right using the data you have extracted.
You are finished! You can save this file as a .png
You can load this .png into the "normal" texture slot in the Studio Tab of Sims 4 Studio
This is all I have for now, thanks for reading! I hope it helps you in some way. Please let me know if you see any errors
0 Comments
Recommended Comments
There are no comments to display.