Entry posted by NIND (jimmyyu)
3236 views
This tutorial goes over general guidelines on converting an outfit with smp (normally ported from Skyrim SE or from a UNP body)
Tools Needed:
- BodySlide and Outfit Studio (v)
- NifSkope setup for use with your textures
Process:
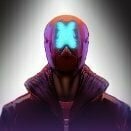
Go ahead and start a new outfit studio project with your subject NIF.

Note what is present in the base nif file ( the main body, and the collision body)
Find a good conversion reference by trial and error (in this case I chose UNP low which has a close match on the breasts, but will need to be adjusted elsewhere to fit)
Given the type of outfit this is (one supported by the breasts hanging in front) I'll go with an Even Movement conform on the highest radius (it will take a while for outfit studio to fit the slider when you select this option)
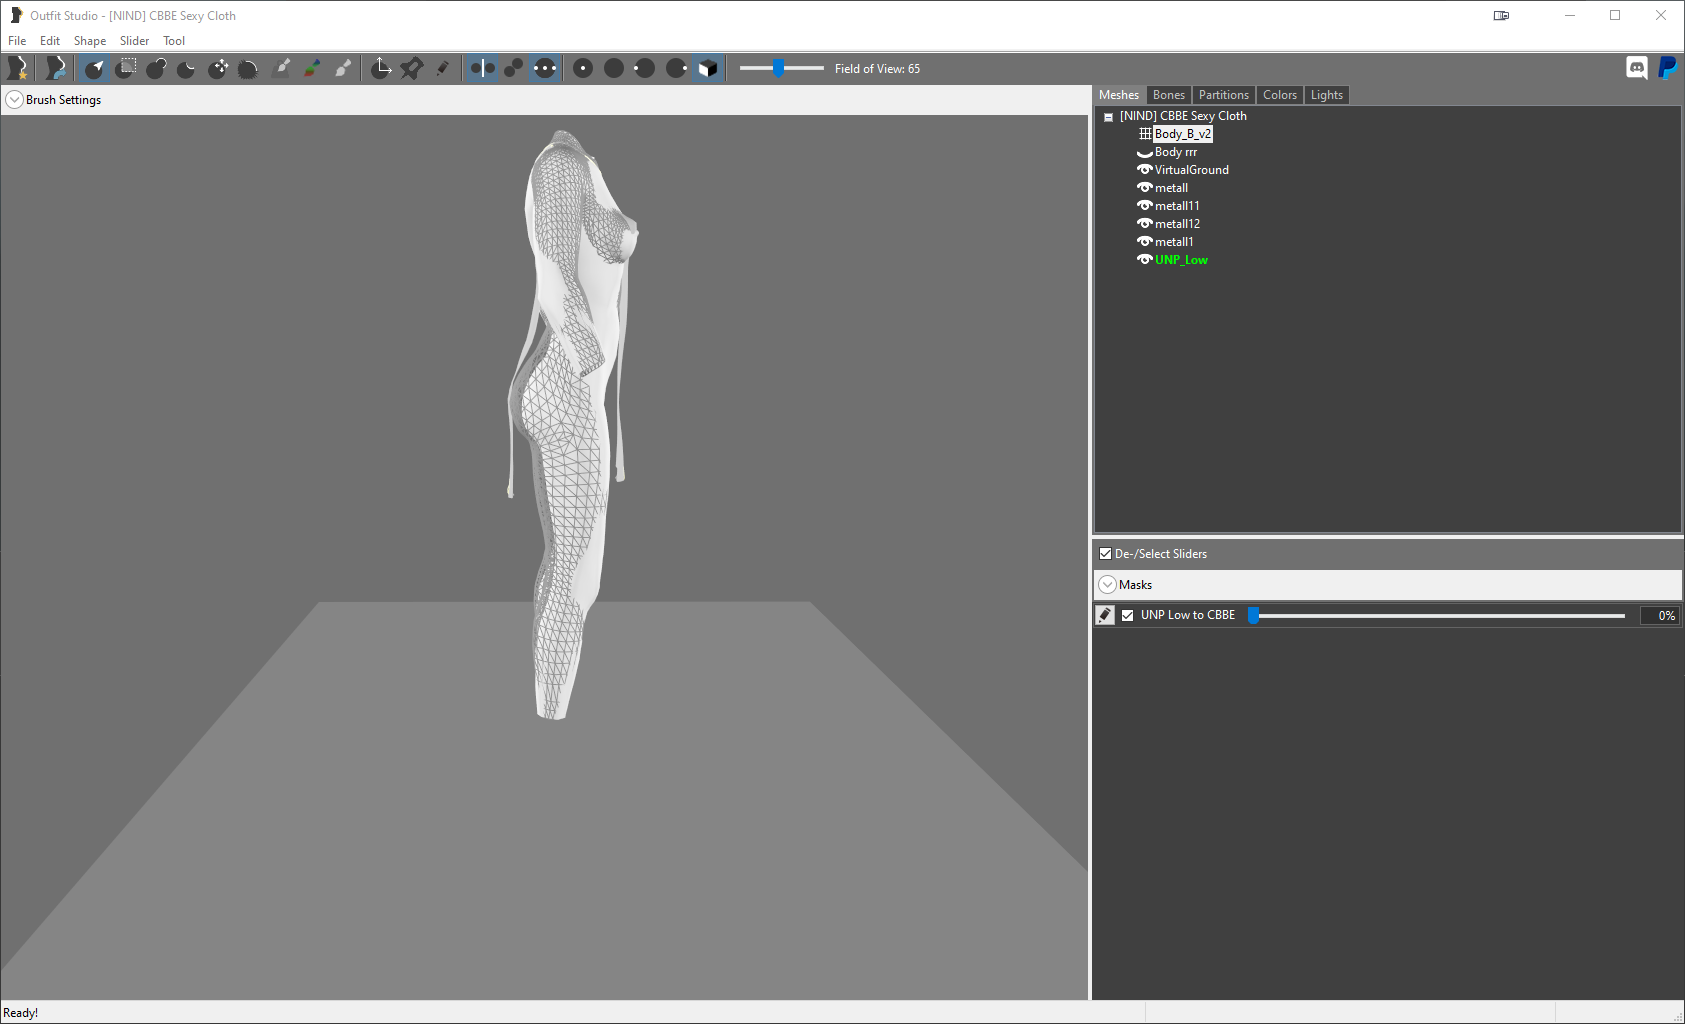
this will result in:
This should be fixed manually with the actual cbbe baseshape inserted using the normal tool (mesh expand/contract)
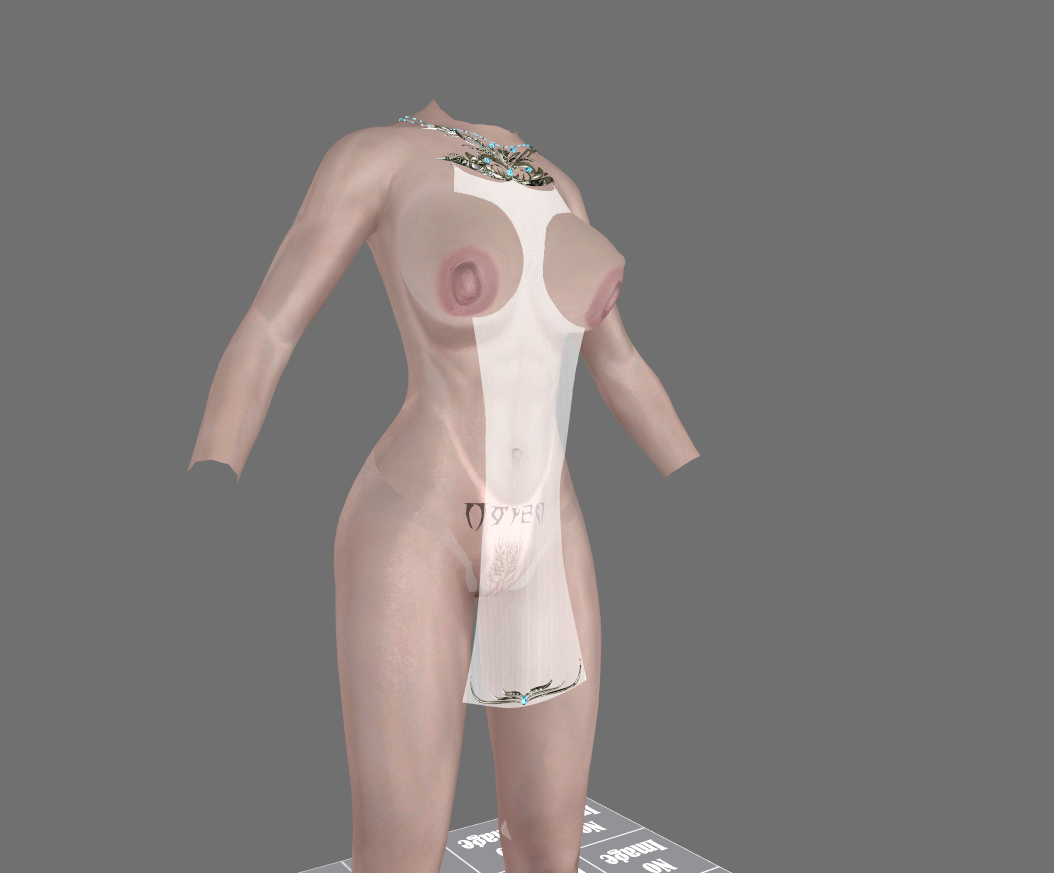
Resulting in....
Now comes the trickiest part.... deciding whether to reweigh any of the bones or not.
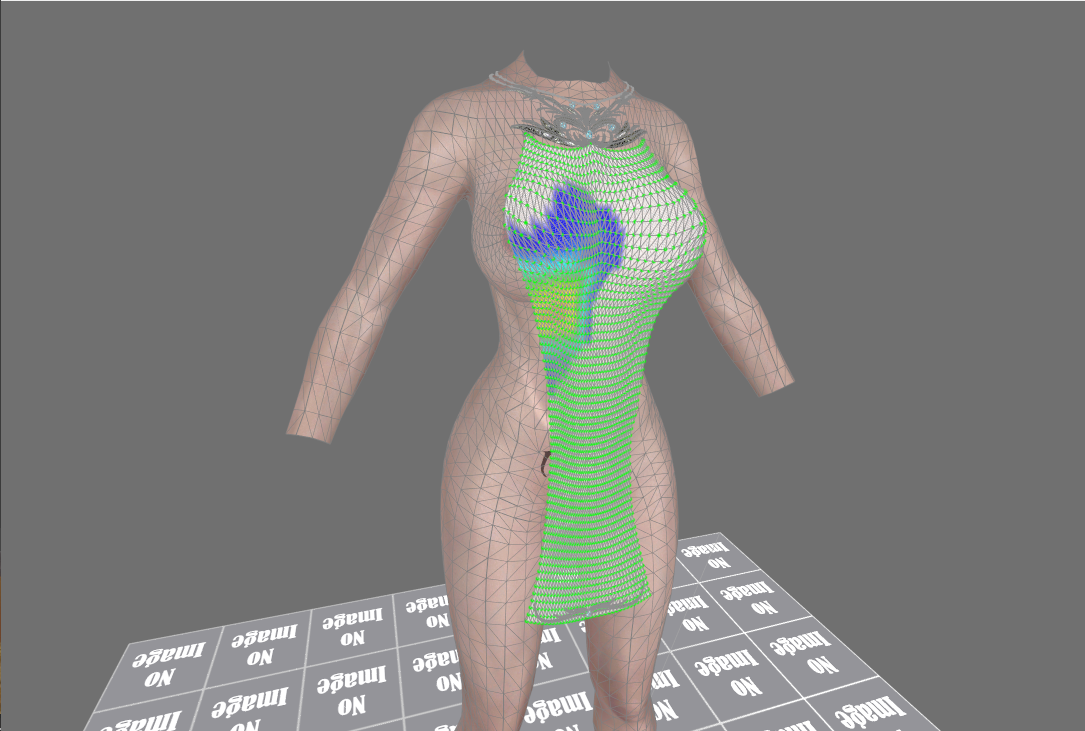
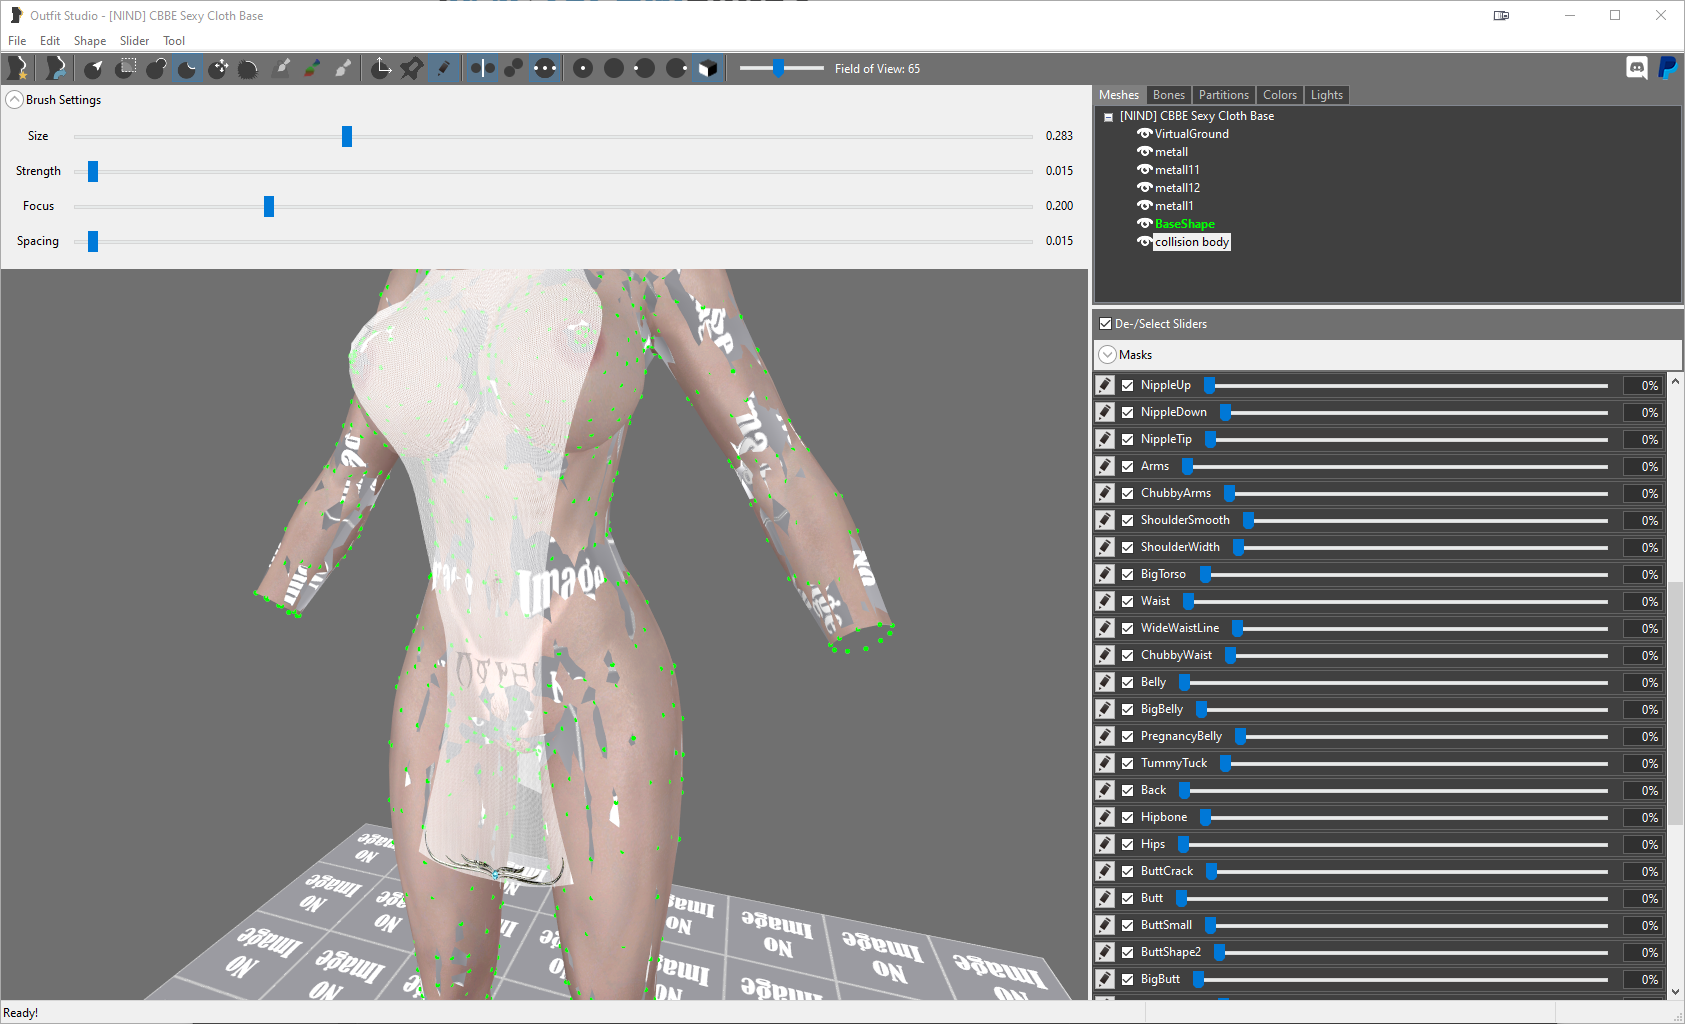
To do this, you first want to figure out what parts of the outfit are smp weighted.
This is done by selecting the "clothy" parts of the outfit in the explorer to the right:

And then going through the bone list to the smp bones (the only oddly named ones on the list) and clicking on them to see where their influences lie.
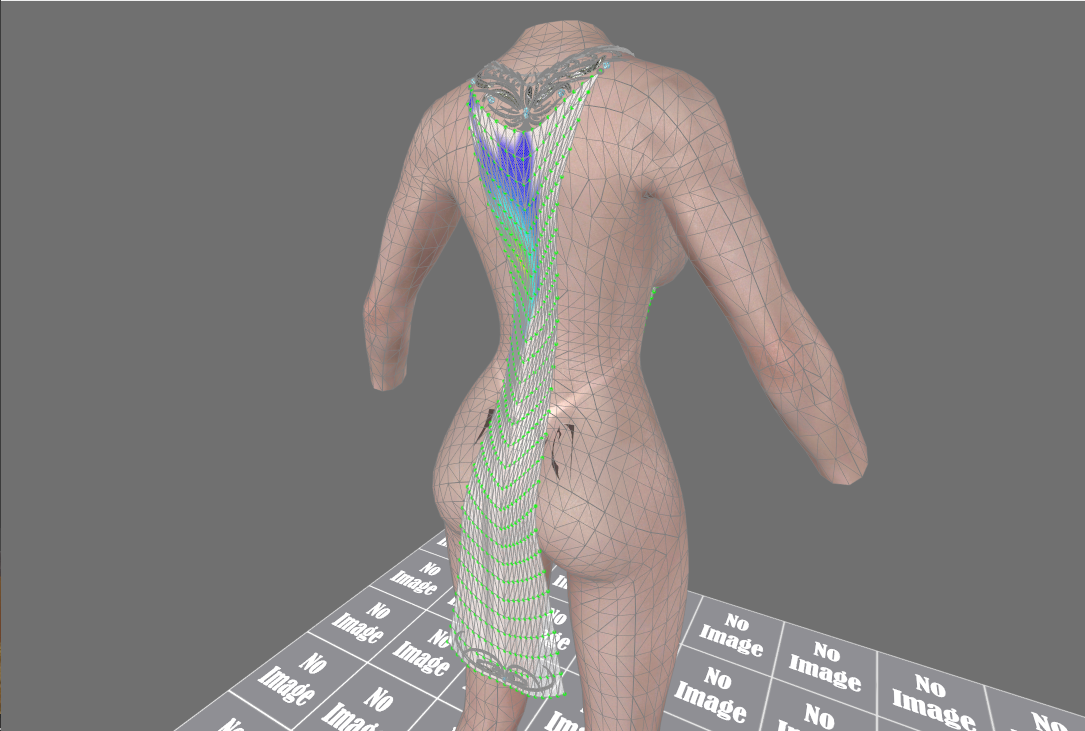
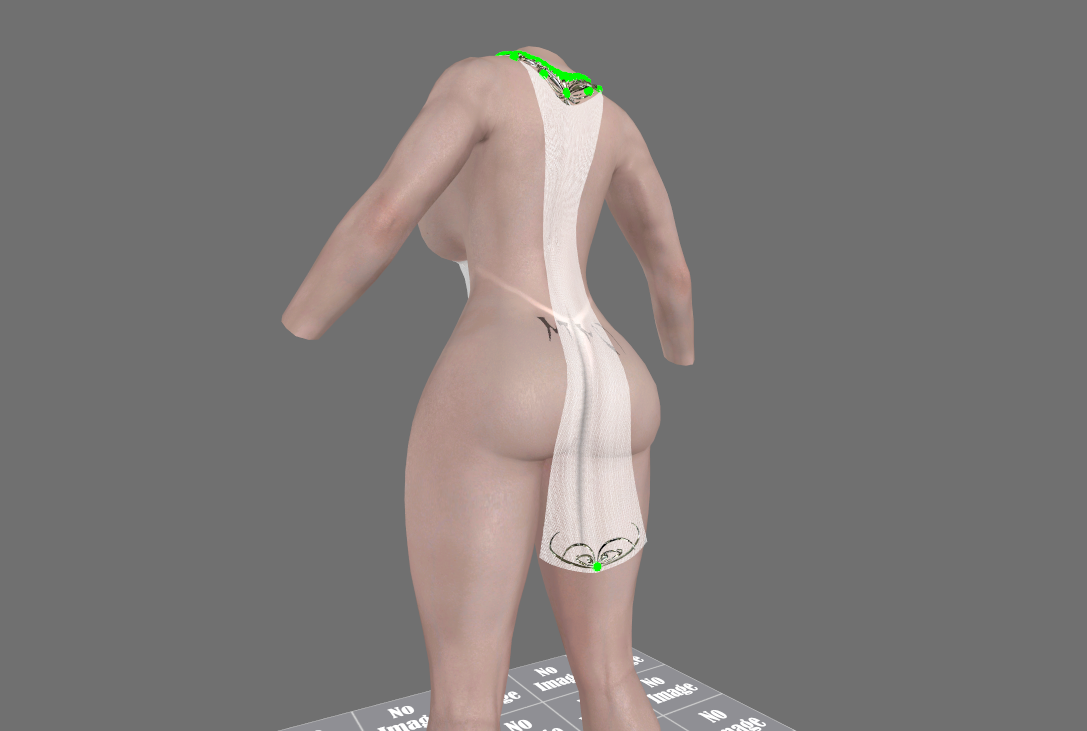
After going through the full list, it can be seen that on the front, Smp weighting is applied to the cloth 3/4 the way up the breast, and on the back , almost the whole cloth.
As the wide majority of the mesh is SMP based, I'll first try the project with no reweighing of any bones.
At this point we will have to decide how we want to apply sliders.
From personal experience, parts of an outfit with SMP weighting will spawn in the same position as shown in bodyslide, and then let collisions and gravity take effect (GIF of this happening maybe).
This means that for the areas of the outfit under SMP weighting, the key thing is to make sure that sliders have the SMP influenced mesh spawning away from the body, and not that it get as close to the body as possible.
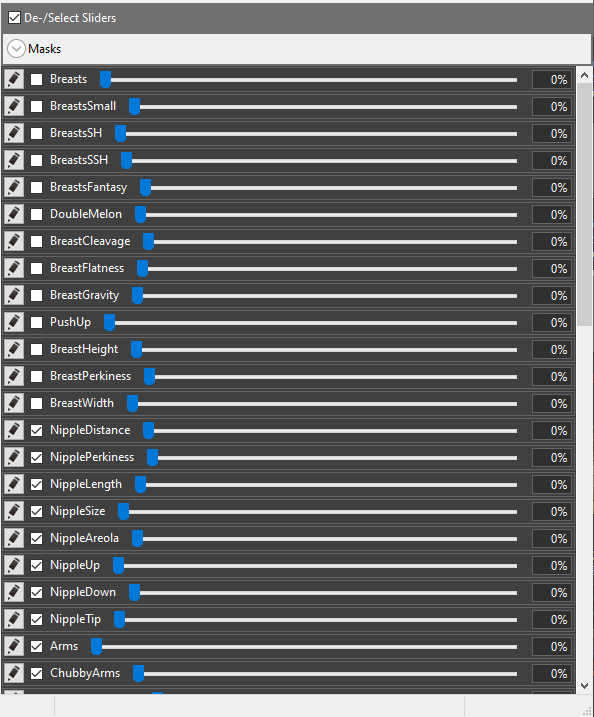
For Appearances sake I'll conform the front by hand, and let the back parts Conform with even movement. To do this, first deselect all of the important BREAST sliders.
Then select the meshes to be conformed and conform selected with the even movement selection.
This will apply all sliders but the selected breast ones to the mesh.
I'll then re activate the breast sliders, and edit each of them with a large diameter brush making them look somewhat reasonable at each side.
I do this, because the conform does not handle hanging cloth to the front of the body well.
[Comparison of BreastSH slider Hand vs Standard vs Even Conform]
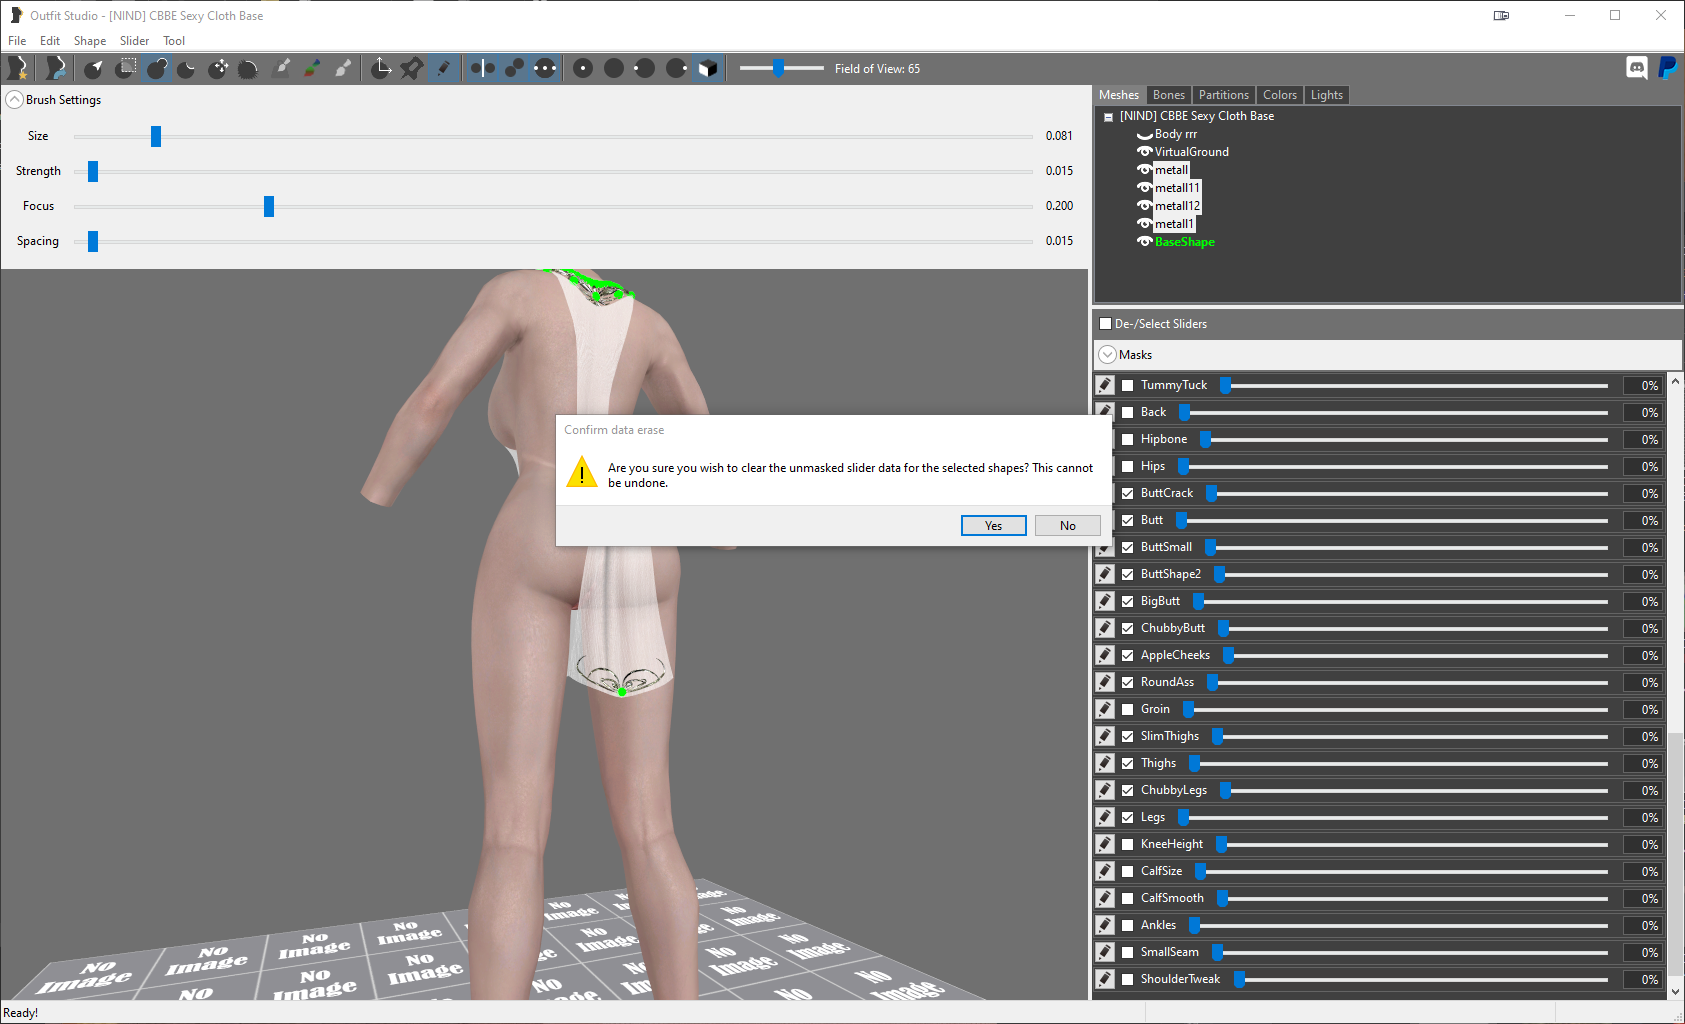
To clear specific sliders on something that has already been conformed:
- Select the mesh(es) with that are conformed with the sliders you want to clear.
- Deselect all sliders but the sliders you want to clear
- go to Slider->Clear selected Sliders and select yes
Depending on the length of the outfit, you may need to do this with the butt as well.
See below for an example of the Demoness Preset Without hand conforming and with hand conforming (Left Right)

This is obviously most important for non things that hang in the front and back, but still an important technique.
At this point, we want to replace the collision body (meant to work with the UNP body that didn't change shape) included with the file.
(For UUNP to CBBE conversions this is often times not necessary)
You will require both a reference SMP.xml file (or at least the portion for the body, and of course a reference body to output.
In this case I will go with the body and file for the SMP Jane doe kimono. I'll attach these files to the bottom of the post.
After dragging it in, do not forget to conform it to your reference shape.
Now we go edit the smp file to be compatible with the new body.
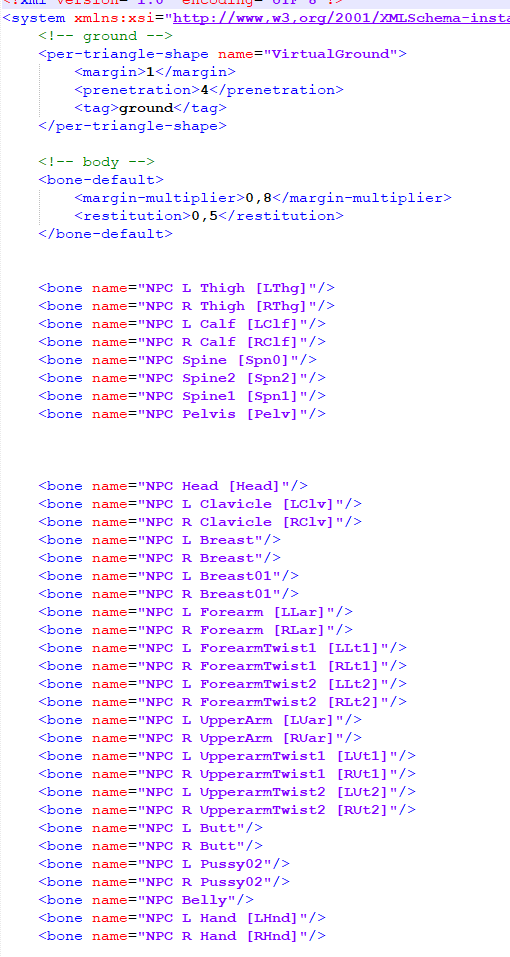
Above is a view of the bra.xml file included with the Sexy Cloth outfit..... First thing to notice is that this is an EU compatible xml.... you can tell by the "," usage for decimals instead of "."
NOTE THAT IF YOU HAVE A NON EU FILE SYSTEM ON YOUR COMPUTER YOU NEED TO USE "." ACROSS THE WHOLE FILE.
THE REVERSE IS TRUE FOR EU USERS. IF YOU DOWNLOAD AN SMP OUTFIT AND IT DOES NOT WORK, THIS COULD BE THE REASON.
THERE WILL BE AN ERROR IN THE: \Skyrim\Data\SKSE\Plugins\hdtSkinnedMeshPhysics.log that will confirm if this is the case.
Given the prior statement, I will start by replacing all of the commas, as I live in the US.
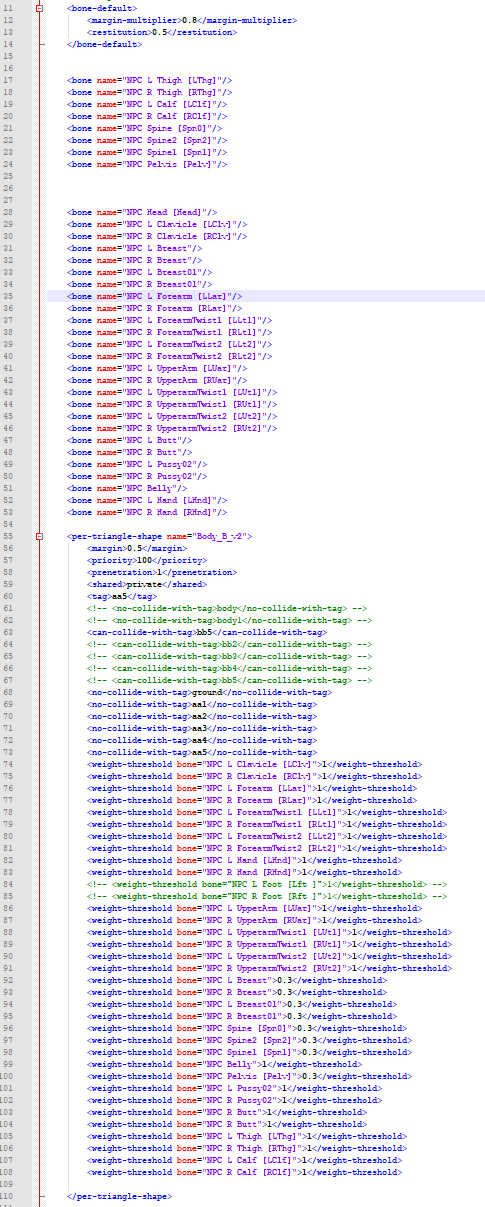
Next Step is to copy in the reference body data (Lines 10-115 in [NIND] CBBE Kimono Collision Body.xml)
In this case they will be replacing lines 11-110 in bra.xml
bBefore is on the left and after is on the right. Make sure that you name the tag of the copied in body the same as the previous collision body, in this case "aa5".
You must also rename the shape inside of the nif its looking for to the correct one.
In this case "Body_B_v2" must be renamed to "collision body"

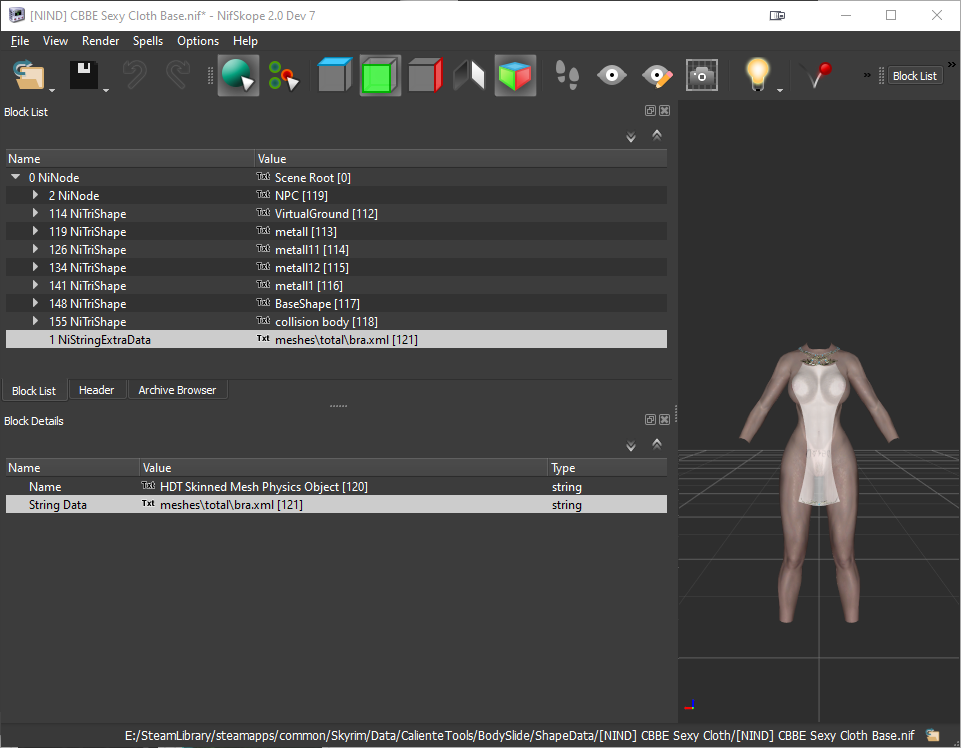
After checking to make sure that your bodyslide nif has the right ExtraData inside of it.... in this case a string pointing towards the bra.xml file (Note that NiStringExtraData and NiStringsExtraData will move into the correct spots when a NIF is saved and reopened):
And that everything is correct in the ESP file (in this case weighting was turned off, and it was not looking for an _1. nif file because this was a single size outfit),
If you did everything correctly, the preview in bodyslide should look normal and you should be able to see the collision body:
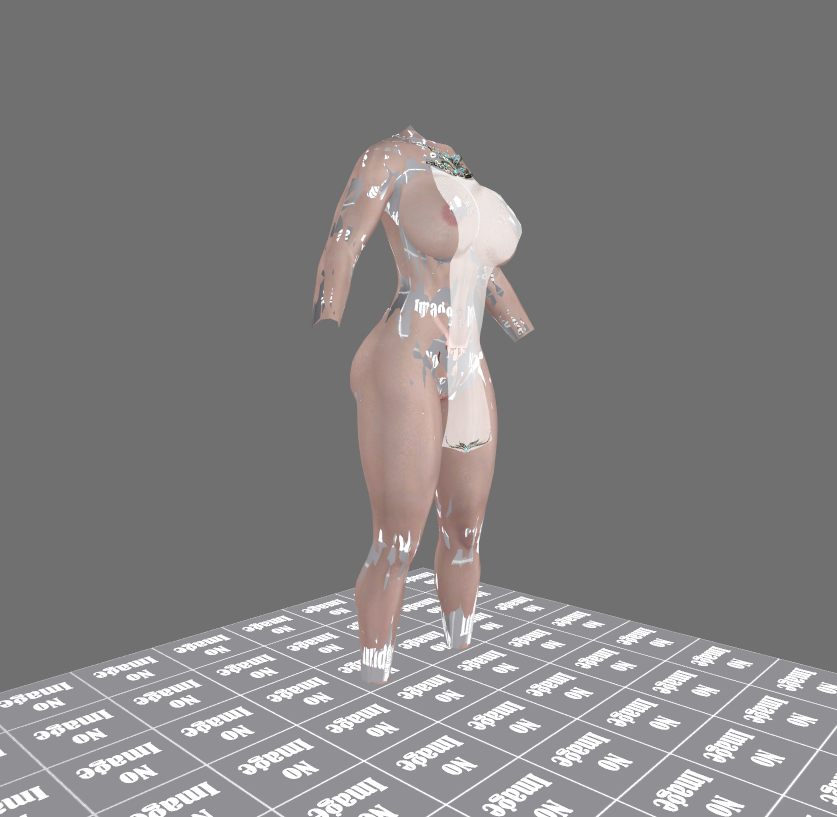
Run the game and see how bad it looks without adjustments:
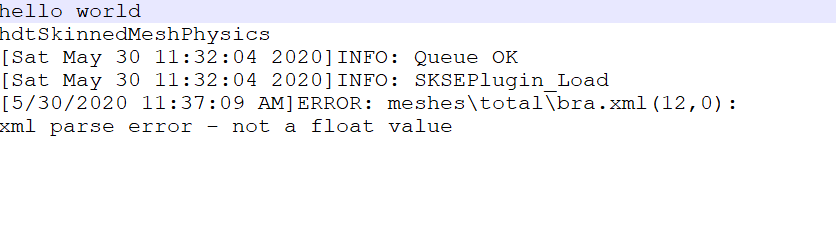
Looks like I missed a comma somewhere..... This resulted in no SMP physics ingame and a rigid cloth.
Fixed..... this was because I edited the xml in the zipped file extraction and not the one actually installed.... Whopsie!

Actually looking pretty good for a first try....
I fixed this by removing the Breast01 bones from the Outfit studio project and copying the BreastL and R bones to the cloth.
Now there is only clipping at the extreme end of a jumping animation, when the breasts bounce downwards, which is totally passable:


Please PM if you have questions!
(note that I have no experience with other bodies.)
Additional Media:
[NIND] CBBE SMP Collision Body.nif [NIND] CBBE Kimono Collision Body.xml
2 Comments
Recommended Comments