How-To: Add Transparency to an Outfit
Entry posted by NIND (jimmyyu) in nind-tutorial
5458 views
This tutorial goes over how to add transparency to a mesh in an existing .NIF file.
Tools Needed:
- BodySlide and Outfit Studio (v)
- GIMP - GNU Image Manipulation Program*
- GIMP DDS Plugin
- NifSkope setup for use with your textures
*There is also a DDS plugin for Photoshop
Methods:
-
There are currently two methods I know of for applying transparency to armors ingame:
-
Mesh Segment-based:
- Easy and straightforward
- Transparency is based on the mesh segment in the NIF
- Cannot make a non-transparent retexture of a transparent mesh segment
-
Texture-based:
- Highly Customizable
- Can be used to make cutouts without removing mesh (or when removing the mesh would give you an ugly cutout)
- Can be used as a retexture
- Takes more time and iteration
-
Mesh Segment-based:
I will go over both methodologies in this post using transparent outfits made with the same method:
Before doing either of these methods, however you will require a working copy of nifskope setup to work with your textures.
Please take a look at this video for setup instructions if needed.
Mesh Segment Transparency:
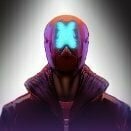
Opening a NIF file in Nifskope results in the standard UI like so:
This has the bones and Mesh Segment (NiTriShape)s Listed along the left explorer window.
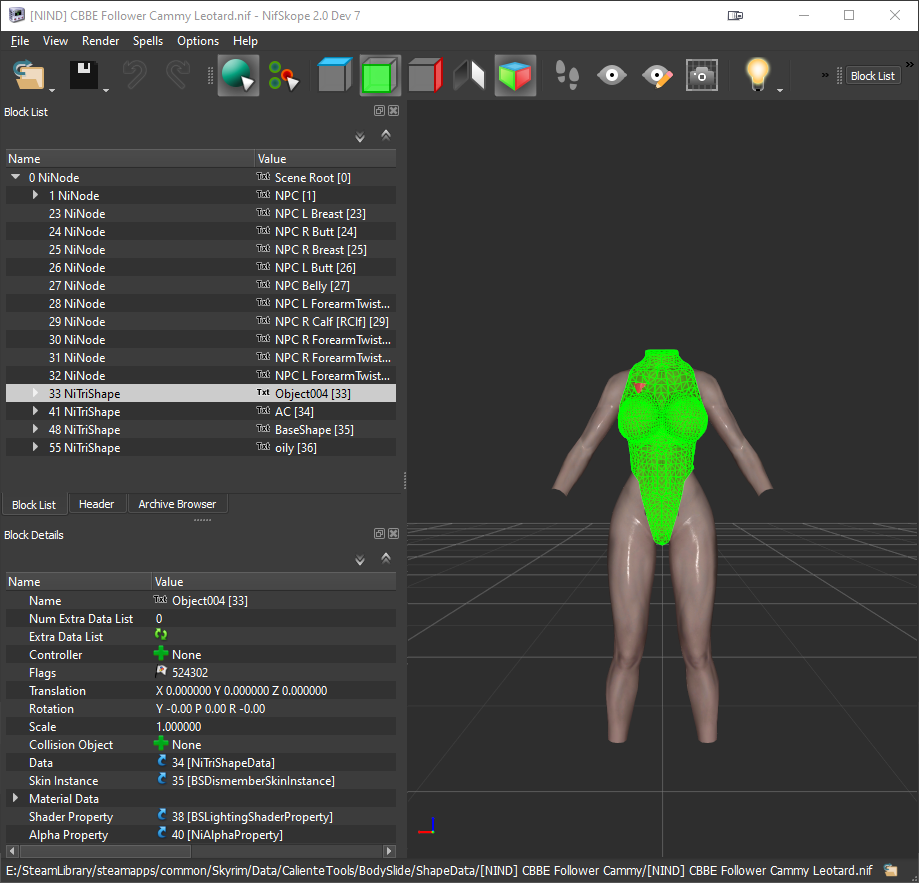
To implement Transparency on a certain mesh segment, all you have to do is expand the mesh in question until you get to BSLightingShaderProperty and set the value to some value between 0.0 (Invisible)->1.0 (Fully Visible)
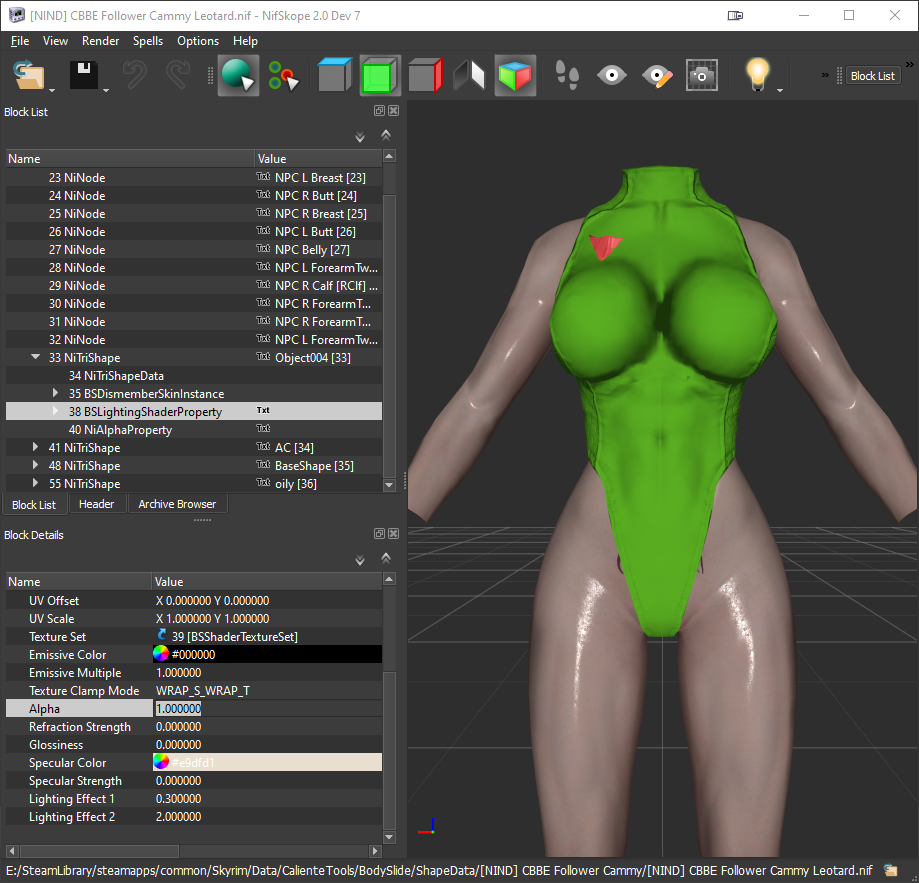
As with all bodyslide edits, this should be done to the .NIF file within the ShapeData folder for your project if you want all built meshes to keep the transparency.
Using this method will also mean that all subsequent retextures applied to the mesh segment (the leotard in this case) will also be transparent to the same degree.
Texture-Based Transparency:
For this method, set up of an image editing program and its respective DDS plugin is required. (I personally use these):
I'll go through how to replicate the previous method's transparency using this method, and its extensions.
Before we can get started in GIMP, we need to do some things in nifskope......
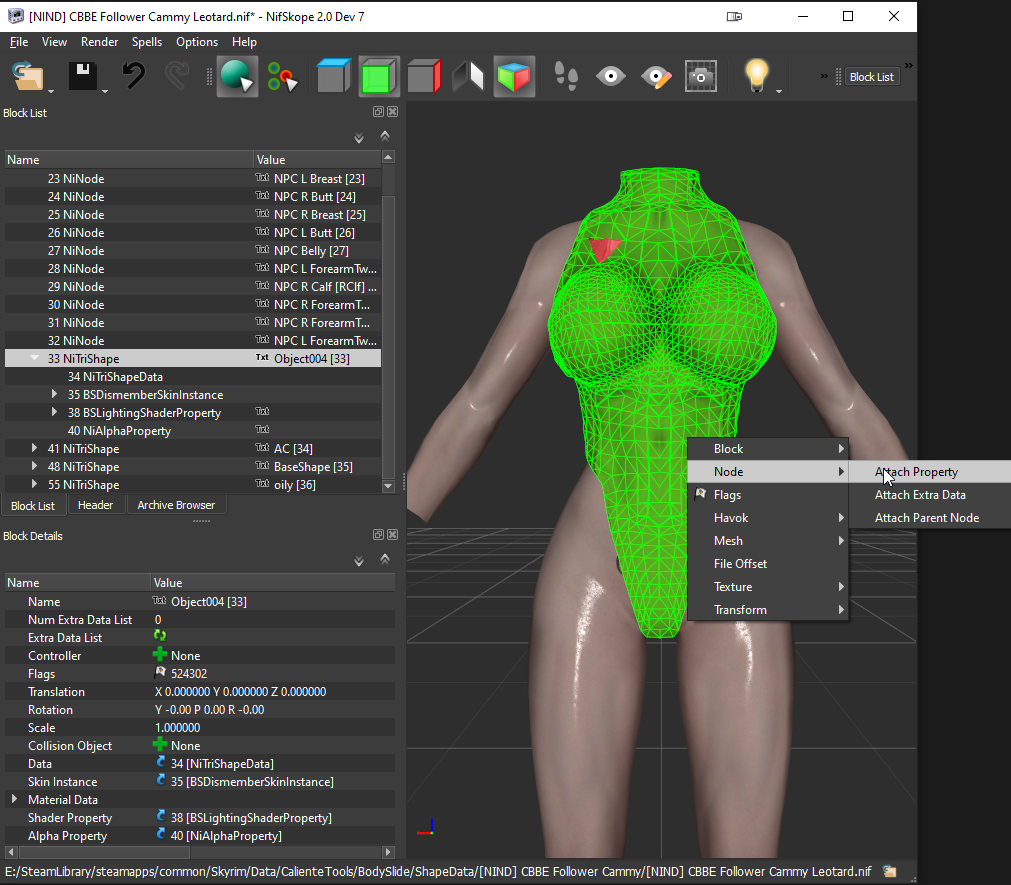
First enable the Alpha node on the Mesh Segment that you want to edit the texture for (in this case the leotard).
Do this by right-clicking either the mesh itself or its entry in the left explorer window.
Click : Node->Attach Property->NiAlphaProperty
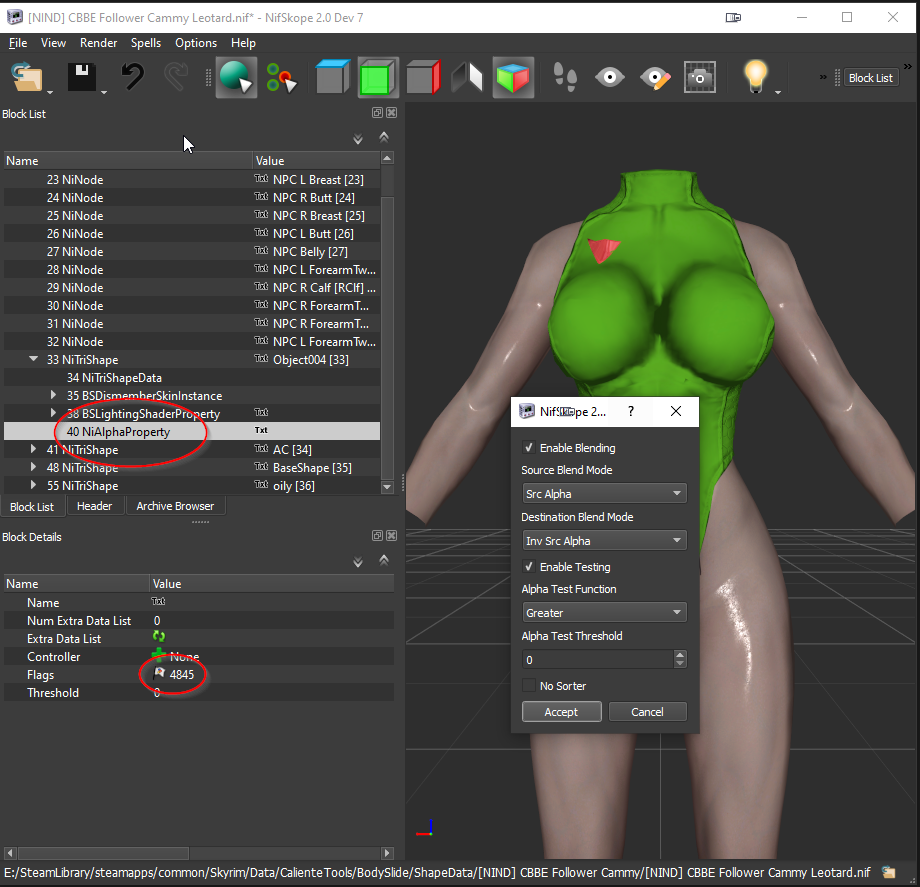
Select the new NiAlphaProperty under the mesh in the left explorer, and double click on the flag icon in the lower panel.
At this point you want to check the Enable Blending option and set Alpha Test Threshold to zero.
(Blending allows for partial transparency rather than visible/invisible, and Alpha Test Threshold is the transparency value that should be counted as transparency in the texture)
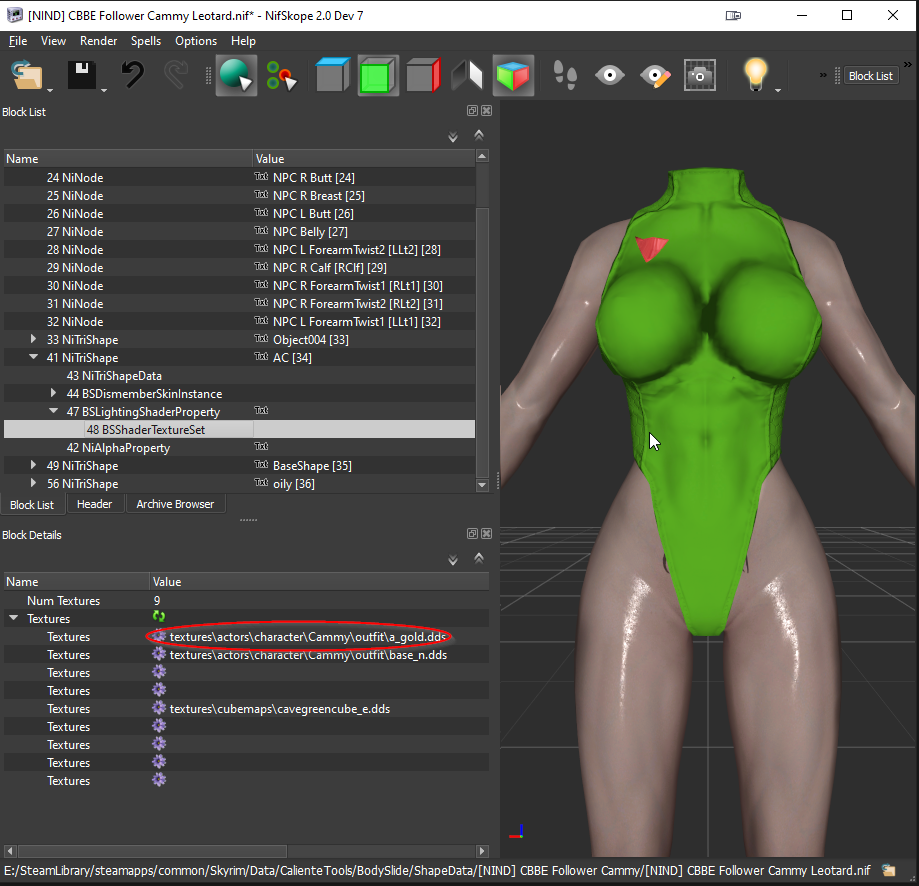
At this point we save our nif and locate the (DIFFUSE) texture file being used in the mesh:
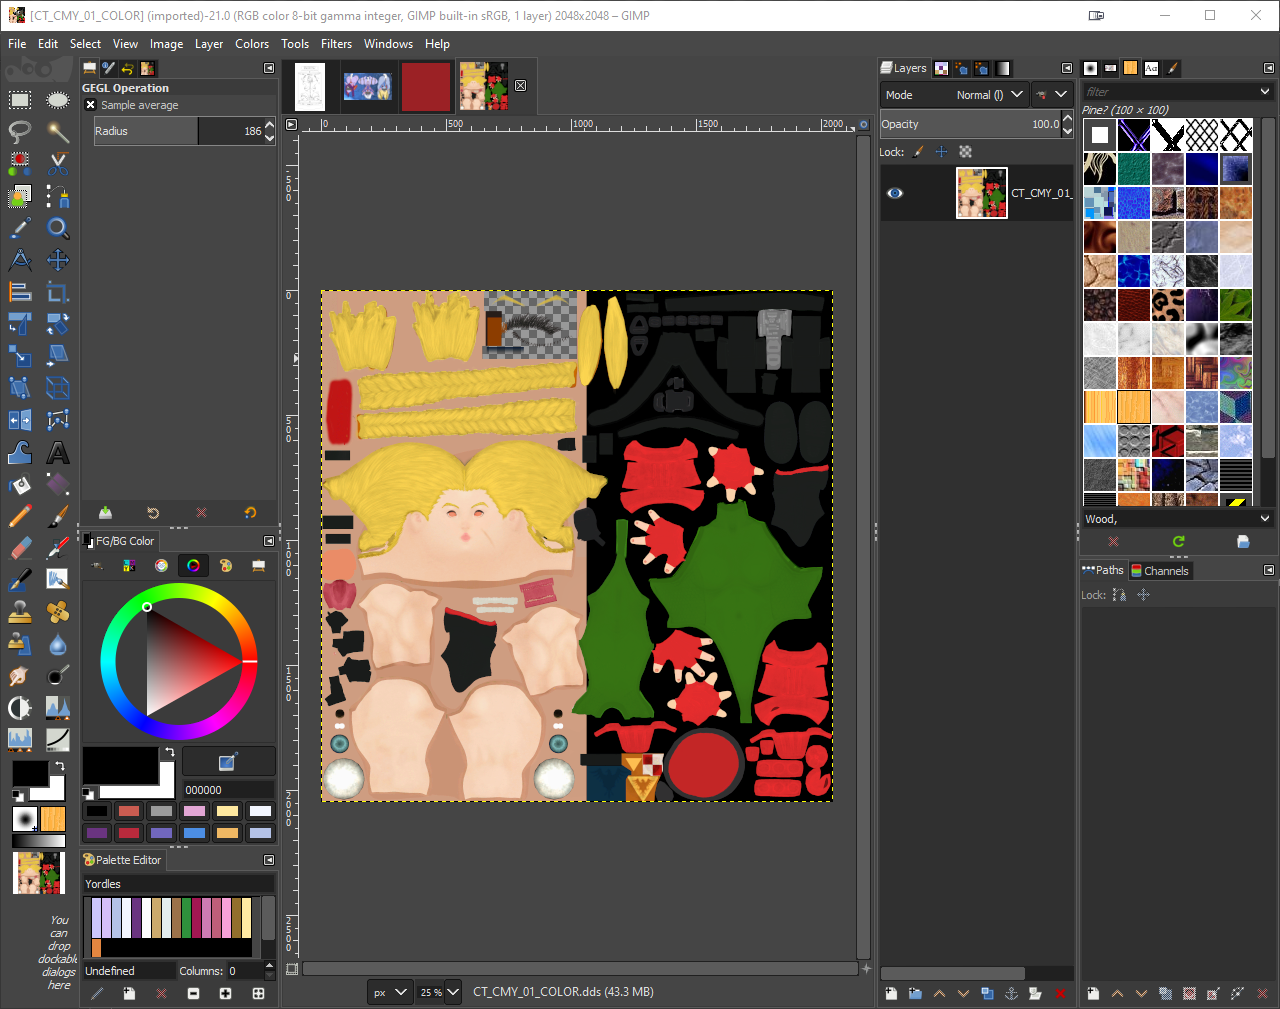
Navigate to this file in your explorer and open it in GIMP.
(This can be easily done from NIfskope by double-clicking the purple icon next to the texture to open the directory and right-click opening the texture in gimp from there)
Make sure that this top option is uncheck when it is opening in gimp:
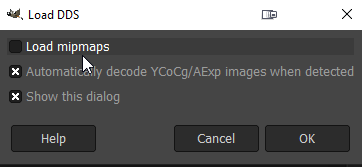
or you'll get a bunch of unneeded extra layers in the program.
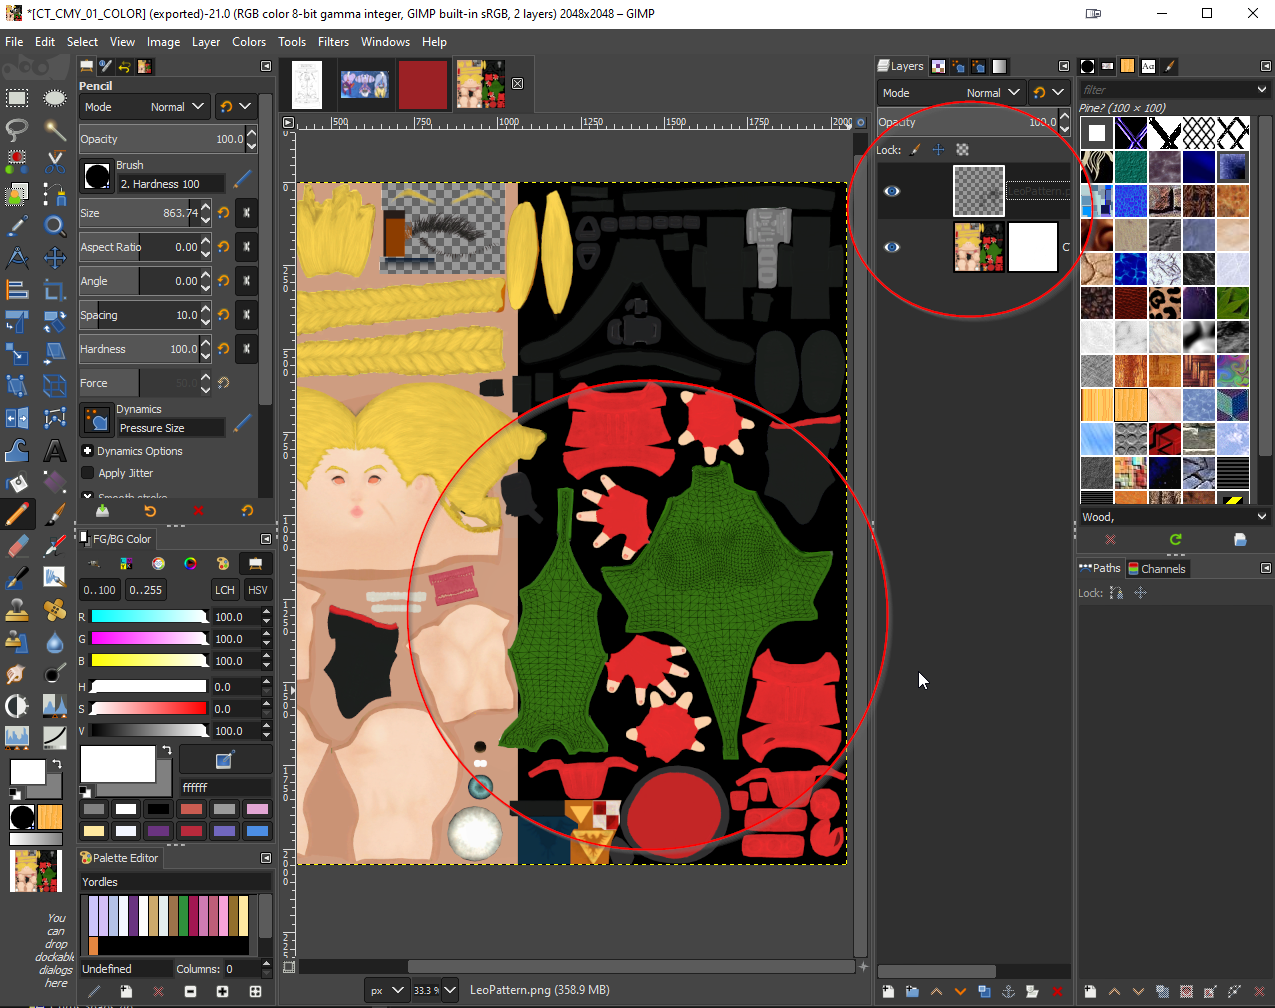
While your layout will be different you should see something like this in GIMP:
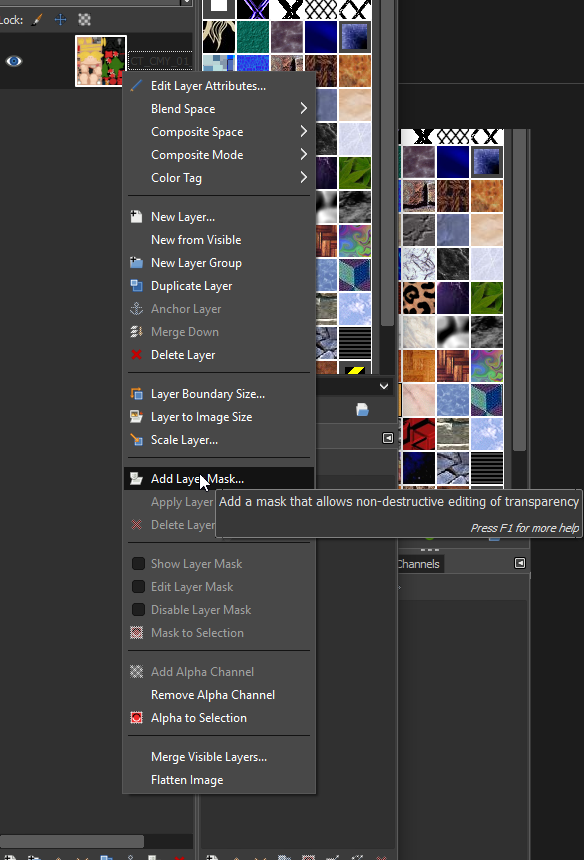
We'll next be adding a mask to hide and show parts of the texture.
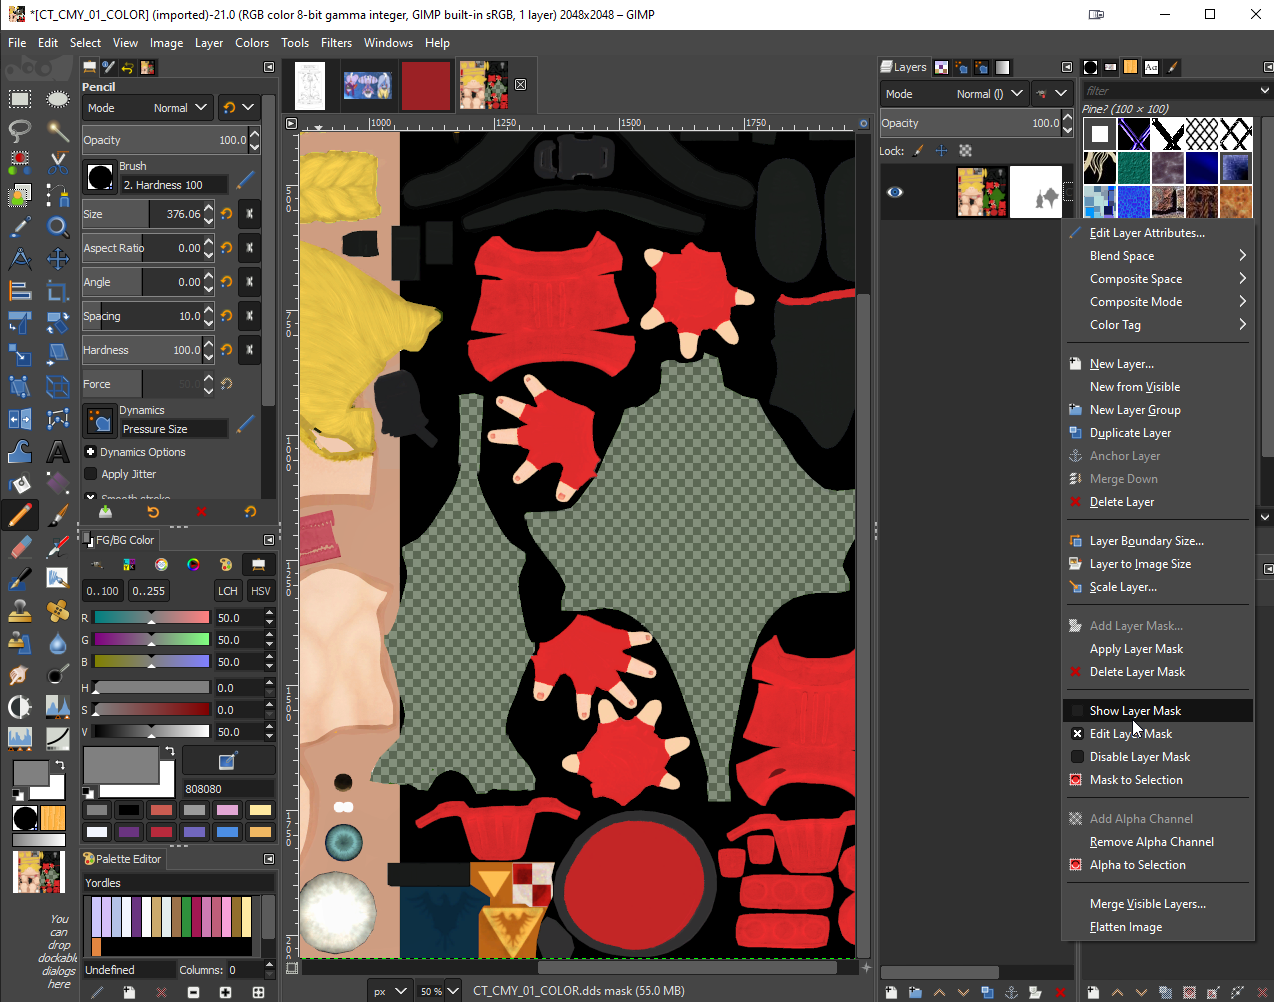
Right-Click on the layer and Select Add Layer Mask
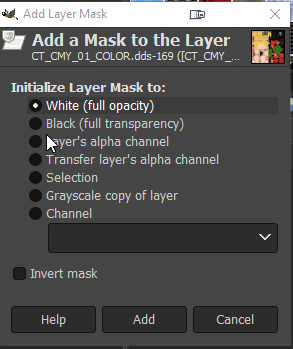
Select White (full opacity)
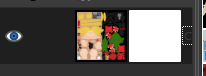
You'll now see the mask (the currently white square) to the right of your actual layer.
Note that it is greyscale, and no matter what color you try to draw on it with, it will be converted to its equivalent grey.
Now, to recreate our transparency in the first method, we're going to want to draw a grey (50% of the way between white and black) coating over the area covered by the leotard.
While this can be done by hand, there are other methods you can use in gimp (which is a little too in depth for this tutorial).
Make sure that before you start drawing, you left click on the MASK SQUARE.
If you see grey paint on your screen, you have the wrong square selected.
As we normally want hard cutoffs for our edges, select the pencil tool and make sure the Hardness value is set to maximum.
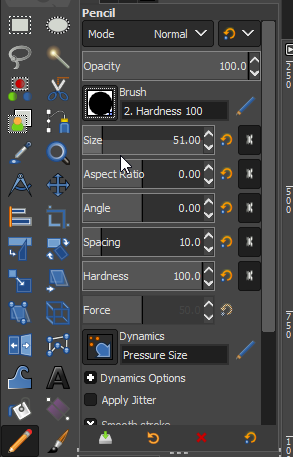
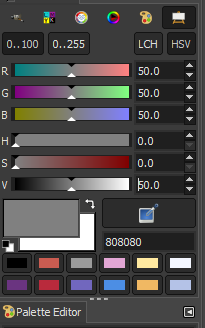
As we want 50% transparency, we want the mask paint to be 50% of black:
Proceed to paint in the desired area (which should be appearing transparent on your screen):
Note that in the mask square you can also see the shape of the grey paint you put down, but if you even need to visibly check it you can right click and Show Layer Mask.
Finally its time for export!
Make sure to back up your unedited textures somewhere! If you've been following my conversion guides, you already have a safe location though?
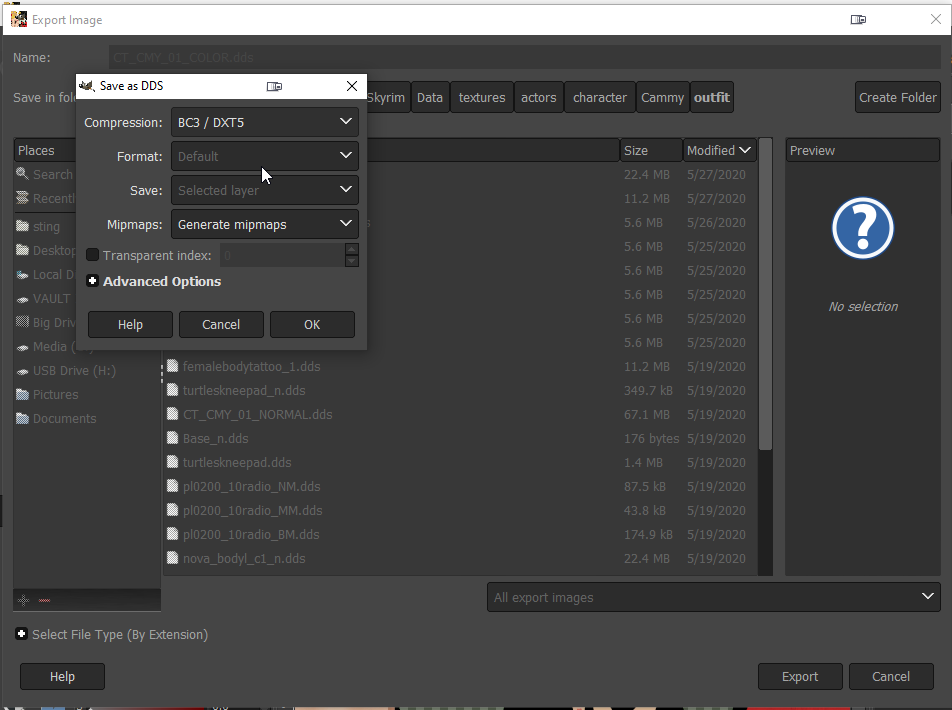
For this we go to file->Export As
The file should still have the same name as when you opened it, but if not, you need to make sure the name of the file ends with .DDS as the extension to get access to the options.
Make Sure You select BC3/DXT5 (This is the only compression that allows Alpha transparency) and Generate Mipmaps when you export.
You should now see the updated model in Nifskope and you are good to go!

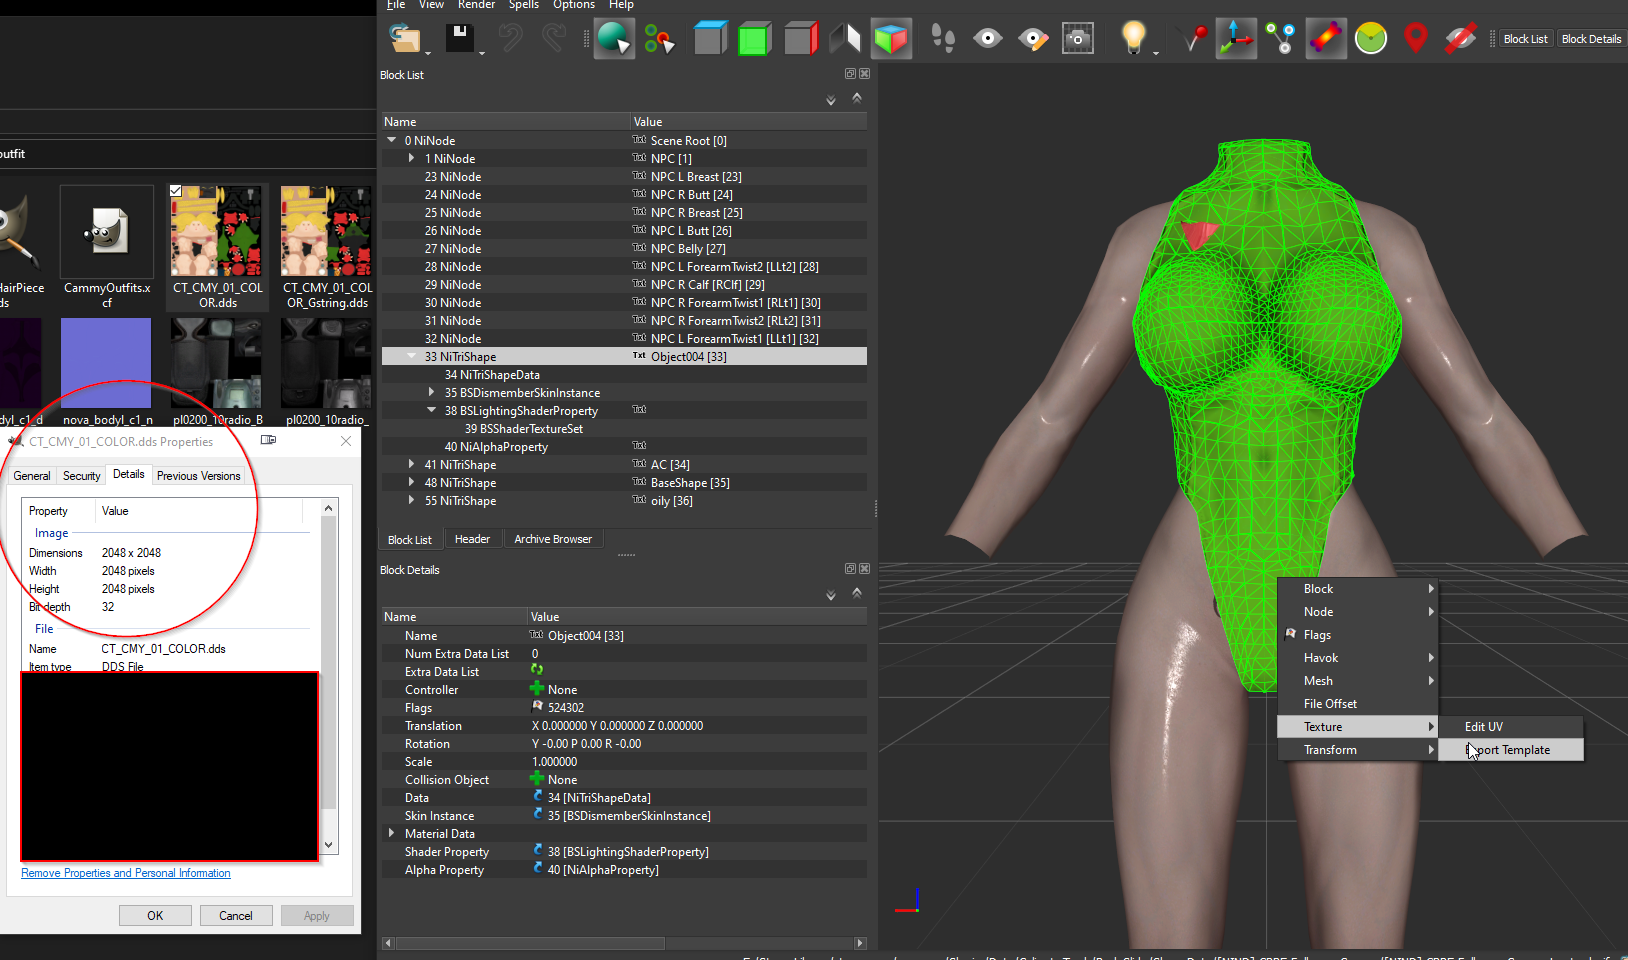
(OPTIONAL): A tip for Increased Accuracy (Exporting UV Lines)
By Right Clicking in Nifskope you can export a PNG of the UV (Mesh lines) layout on the texture for a given Resolution!
First figure out the resolution of the texture in question by right clicking it and going to properties.
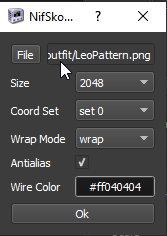
In NIfskope, right click on the mesh you want to export the UVs for and type in the dimensions (They will always be a square, base 2 number)
Set the FilePath and line color:
Now after dragging this into gimp you have the lines representing the mesh!
Make sure to drag it to the top so it is on top of your texture, and that you click on the Layer mask before you start editing again!
(OPTIONAL): A tip for Easier Prototyping ( Ctrl +E ) Hotkey
It should be noted that Ctrl+ E is the shortcut for export in gimp, and that extraordinarily helpful for texting quick edits !
Once your texture has been exported with correct settings, and the NIF in nifskope linked to it, you can press CTRL+E in GIMP to export the texture and Nifskope will automatically update the way it looks!
As an example I have all of the transparent retextures for the cammy follower here..... if I enable each layer and export it while nifskope is up, this magic happens:

3 Comments
Recommended Comments