QuiteTheTail Posted April 26, 2015 Posted April 26, 2015 I'm trying to tweak a bit a custom CM companion I created from template, and the first step is 'stitching' a wig to it, as custom hair. The source material is the Anto_73 wig from Apachii's mod (my avatar is wearing it). To achieve this, I changed the character's race to a non-playable custom race (basically a duplicate of the Imperial race, so far the only differences are the eye textures and the wig-hair I wish to add). The eyes are applied normally (since they are designed for the vanilla eye meshes, I only had to include the eye textures in the package). The hair is giving me a hard time, instead. When I try to set the hairstyle in CSE, I get this: custom hair.7z As you can see, the hair mesh is translated along the z axis and rotated 180°. I tried fixing this in Blender with no luck. What am I doing wrong? P.S. The wig in question is formed by two distinct NiTriShapes: Anto_73 and 73_inside.
Vaelorian Posted April 26, 2015 Posted April 26, 2015 Multiple NiTriShapes is not an issue for hair. However, wigs are weight-painted and positioned to be at the height of an actor's head. Hair models are not weight painted, and have a very small (if any) Z-axis value. If you want to turn a wig into a hair, you'll have to remove the weight-painting (fairly easy to do) and mess around with the positioning until you get it right (much more time consuming to do, but still fairly easy). Opening a standard hair model alongside the wig in question in NifSkope would've revealed this information.
QuiteTheTail Posted April 26, 2015 Author Posted April 26, 2015 Thanks Vaelorian. Please, since I'm not familiar with the procedure, would you mind tell me the details? Opening the mesh in Blender, selecting all vertices, going in Weight Paint mode, and dragging the weight slider to zero. Is that right? There are other controls like opacity, size... a clear button. I'm worried about messing up something. P.S. Removing the rigging won't give issues with lighting/reflection properties, I assume? EDIT Moved the weight slider to 0 and painted both meshes. Exported. The hair/wig is still off. I used a -11 offset along 'z' axis and a 180° rotation (and while writing this, I reminded of skipping the apply 'rot' to Object data step... I'll give it another try).
QuiteTheTail Posted April 26, 2015 Author Posted April 26, 2015 I'm now getting an error: "Cannot export meshes with unweighted vertices. The unweighted vertices have been selected so they can easily be identified". They all belong to 73_inside block. UPDATE I managed to export the hair by applying an insignificant weight (0.001) to the mesh named 73_inside. In the CS, i can see the same mesh rotated correctly, but still above the NPC's head. The other mesh is invisible. Using -11 for z translation places both meshes approx around the center in Blender, but probably a higher value is needed.
Vaelorian Posted April 26, 2015 Posted April 26, 2015 Go to buttons menu. Delete the vertex groups (ALL of them). That removes the rigging. You cannot export a model that has a vertex inside a group, but without a weight. That vertex would have in theory been locked eternally in place where it was initially rendered. As for the Z-axis, you will have to move the model down\up until it reaches where you want it. There is no formula, but you can try starting with around -6 in Blender or -60 in NifSkope.
QuiteTheTail Posted April 26, 2015 Author Posted April 26, 2015 Now I get it. So, Bip01 Neck1and Spine2 (as I read them) must be removed. I'll try that, thanks again.
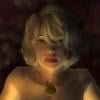
QuiteTheTail Posted April 26, 2015 Author Posted April 26, 2015 I managed to get the desired outcome: BUT... I had to use a slightly different method, probably because the wig comes in two nif blocks. Removing the vertex groups from both resulted in having the inner block in place, and the main block (the wig proper) invisible: both in the NPC window of CSE, and in game. Quick diagnosis: missing skeleton. Second attempt: same offset along z axis, removing the v-group only from the 73_inside block (Anto_73 remained rigged and, once removed the bogus nodes, the nif had still three bones attached to it). This time the wig was visible, but placed on the ground, between the NPC's feet. Finally, I repeated the procedure without z-translation. Now the hair looks fine in game, as witnessed by the screenshot, but in the NPC window (Face tab) of CSE it is placed high above the head, same as before. I guess I can be content with the result, still something puzzles me.
movomo Posted April 27, 2015 Posted April 27, 2015 Here some additional infos that might help. 1. If you're really serious about making it work perfectly, seriously, then the number of NiTriGeoms matters. Join them, rework the rendering priority, make egm. 2. Whether it is double-sided or not matters too. If it's a wig then it's probably double sided, because I don't see any reason not to, but single sided mesh is the better choice if it's not wig. You'll see why if you try sorting faces again. 3. As Vaelorian said there is no formula for repositioning the object. But you have two easier choices. 3-1. I'll tell you the head bone's global coordinate in Blender unit. [0, -1.1187, 11.2441] So you can translate the wig object by [0, 1.1187, -11.2441], apply transformation, and you're set. 3-2. OR you can snap it. This is more preferable. Import a skeleton, enter pose mode, and snap the cursor to the head bone (shift + s + 4) From there recenter the wig object to there. Now hit (shift + c) to center the cursor. Snap the wig object to there (shift + s + 2)
QuiteTheTail Posted April 27, 2015 Author Posted April 27, 2015 Hi movomo, just came back home from work... Wow, step 1 is little less than rocket science for me. I suppose I can make something out of it, but only after reading some good tutorial focused on tri/egm files and animations. Yes, the wig is double-sided. Translation in Nifskope or Blender is more my daily bread, but details are always welcome. Thanks!
movomo Posted April 27, 2015 Posted April 27, 2015 make egm. Yeah, but you don't need to reinvent the wheel every time you do something. Making a morph file from scratch is a horrible idea. http://www.nexusmods.com/oblivion/mods/9360/? In this case it's more of "conformulating an existing egm to the hair model" rather than "making a new egm for the hair out of nothing". Still you won't go far without this tool. rework the rendering priority This is what makes wig <-> hair conversion a tedious task. You're done with this process? Then you're as good as done with everything. http://www.loverslab.com/topic/19690-converting-a-hair-to-rigged-wig-in-oblivion/?p=533830 This tutorial is outdated, so don't bother reading the post #1. Post 2 should be enough for your purpose (wig->hair) for now. Post 1 is missing some important tricks for hair->wig conversion, and few of them are downrightly incorrect. After that had to explain the details to several more people through pm. This is not an arcane knowledge or something. Feel free to ask away, pm or not.
QuiteTheTail Posted April 28, 2015 Author Posted April 28, 2015 If you're really serious about making it work perfectly, seriously, then the number of NiTriGeoms matters. Join them Do you mean NiTriBasedGeom (parent class for NiTriShape and NiTriStrip)? For the wig in question, the material properties differ (Hair for one block, Hair Inside for the other) so the only way to join them in a single NiTriShape or NiTriStrip (in Nifskope, or using 'join objects' in Blender) would be pasting the Hair mat property over Hair Inside. Isn't there a loss of information, though? I'll try that anyway.
movomo Posted April 28, 2015 Posted April 28, 2015 The reason why wigs often consist of multiple objects is because rendering priority you set doesn't always work as intended on the skinned stuff. One of the few tricks to "prevent them from looking like shit" is to duplicate the layers that are interfering each other, apply a different transparency flag (usually 4846), place it there as "background". You're not happy now that the mesh's size is doubled, you want to reduce the amount of layers that are needed to be duplicated. So you carefully choose what you will double and what you won't, that's pain in the ass. Or sometimes just separating a whole object into pieces solves some of the transparency conflicts. Why that particular wig has two different material properties... I don't know unless I take a look. I generally don't do like that unless I have no other option. The thing is, the original hair mesh was probably good enough without adding a new mat property. Join them in blender, the conformulator requires it. It needs to contain only one geom block to be conformulated successfully.
QuiteTheTail Posted April 28, 2015 Author Posted April 28, 2015 I've been thinking: I don't really need the conformulator, because the conversion I'm attempting is aimed at creating a non playable hairstyle with fixed color and hair length, not intended for use in the chargen menu. As such, the egm file shouldn't be needed. So, having multiple NiTriShapes won't be a problem. Side note: I accidentally discovered that exporting the wig in .nif format with the option 'stripify geometries' turned OFF is effective in preventing transparency issues (needs confirmation). EDIT I found a way to bypass the nefarious influence of Blender 2.49a Read the full entry
Recommended Posts
Archived
This topic is now archived and is closed to further replies.