begalund Posted May 17, 2014 Posted May 17, 2014 Okay, so I'm making a minor mod of a hair mesh. For those that care about such things, this is from the numenume hair pack, the mesh in question is AmyHair - although when I load it in my game it shows up as 08amyhair, it really is AmyHair.dds. So what I was trying to do was color the two halves of the hair separately - split down the middle, left side and right side. After noticing that the elements of the mesh were connected as it wrapped around the head, I split the elements and then reskinned and re-bsdismembered the mesh. This would let me load the new mesh without any trouble. However coloring the mesh was still a problem. Just painting the surfaces didn't preserve the hair texture - I got a nice helmet look. Painting on the original texture file didn't work either because the mesh was mirrored and wrapped, and I ended up with a zebra-striped pattern - which, while interesting, wasn't what I wanted. So instead I had to try and make two different materials for each side of the hair. I got this to work, and it looks perfect in 3ds. I then attempted to fix it in nifskope so that I could load it in game, and well ... I got close. I can get half of it. So obviously something isn't quite right. Anyone got any ideas what I can do to fix the last little bit on this? I've attached the nif as close as I've been able to get it on my end. AmyHair.nif
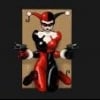
pornphile Posted May 17, 2014 Posted May 17, 2014 Hi. I took a look at your nif. The reason you have trouble painting only on one side is because the UVs share the same texture space as the other side: Solution 1. Go to the point before you applied materials in 3ds. See if the model works in game. If that works, all you'd need to to in Nifskope is give one side of your hair a new texture. Solution 2. You'd have to edit the UVs for the hair parts that you want to recolor.
begalund Posted May 18, 2014 Author Posted May 18, 2014 Well, damnit, I figured that might be the problem. I was hoping that wasn't the case, but it makes sense. The problem I'll have now is trying to see about re-associating the hair image that was used to make the original diffuse and normal map, and getting it properly wrapped around the newly unwrapped hair. Which was what I was attempting to avoid by working it this way. If all I do is just UV unwrap the the original (but modified) hair mesh, then I don't really need to make separate materials or textures. I'd just need to make a single diffuse/normal map and paint on that. But wrapping the original hair image is going to be the hard part since it wasn't designed for this kind of UV unwrapping. Ah well. I've got a couple of other tricks I'll attempt to play with tomorrow.
begalund Posted June 1, 2014 Author Posted June 1, 2014 Late followup to this. Following pornphile's answer (see above) I went back and played around with the UV map (a lot - no make that a WHOLE lot) and finally managed to figure out how to separate the two groups of elements (by polygons) into two separate groups and spread them apart on the UV map checkerboard. I basically had all of the leftside polygons on one side and the rightside polygons on the other. pop up the "Render UVW template" tool and generate myself a new dds template to paint on via GIMP and I was back in business. Hair is split down the middle and colored two completely different pigments. Loaded up in Skyrim, still adjustable via showracemenu color sliders, only important items are: 1. don't make the hair two sided - it messed with the textures in the back and on the sides especially. 2. play with the opacity, only after you are sure you have all the hair strands going in the right direction. 3. the ends of each "plate" of hair where the fine, wispy bits of hair end up need to be far "sparser" than you think they do. The hair templates actually have a lot more hair strands than you think they do, so end them shorter than you think you need to. and finally, 4. nifskope specularity adjustment is key. don't worry about the adjustments anywhere else, tweak that little number in the BSLightingShaderProperty as much as you need to in order to adjust the "richness" of the hair color. If only it were that easy in RL. Clairol would make a killing.
Recommended Posts
Archived
This topic is now archived and is closed to further replies.