Entry posted by donnerwetter in Tutorials
1384 views
I've been wanting to make a proper detailed guide on creating vaginaless patches for a long time. Until I finally get that done, this rough outline I typed out in the futa thread will have to suffice. Note that I don't go over the process of baking schlong textures here.
Tools needed: paint.net. Gimp, Blender
Quote
However, if you want to take a crack at it yourself in the meantime, here are some instructions. First, here are some videos of me editing textures in Gimp and Blender. Since you mentioned Blender files I assume you know how to bake schlong textures, so I won't go over that.
Here's me painting out the vagina on a diffuse texture:
Spoiler
Here's me taking the edited texture into Blender to get rid of the seams:
Spoiler
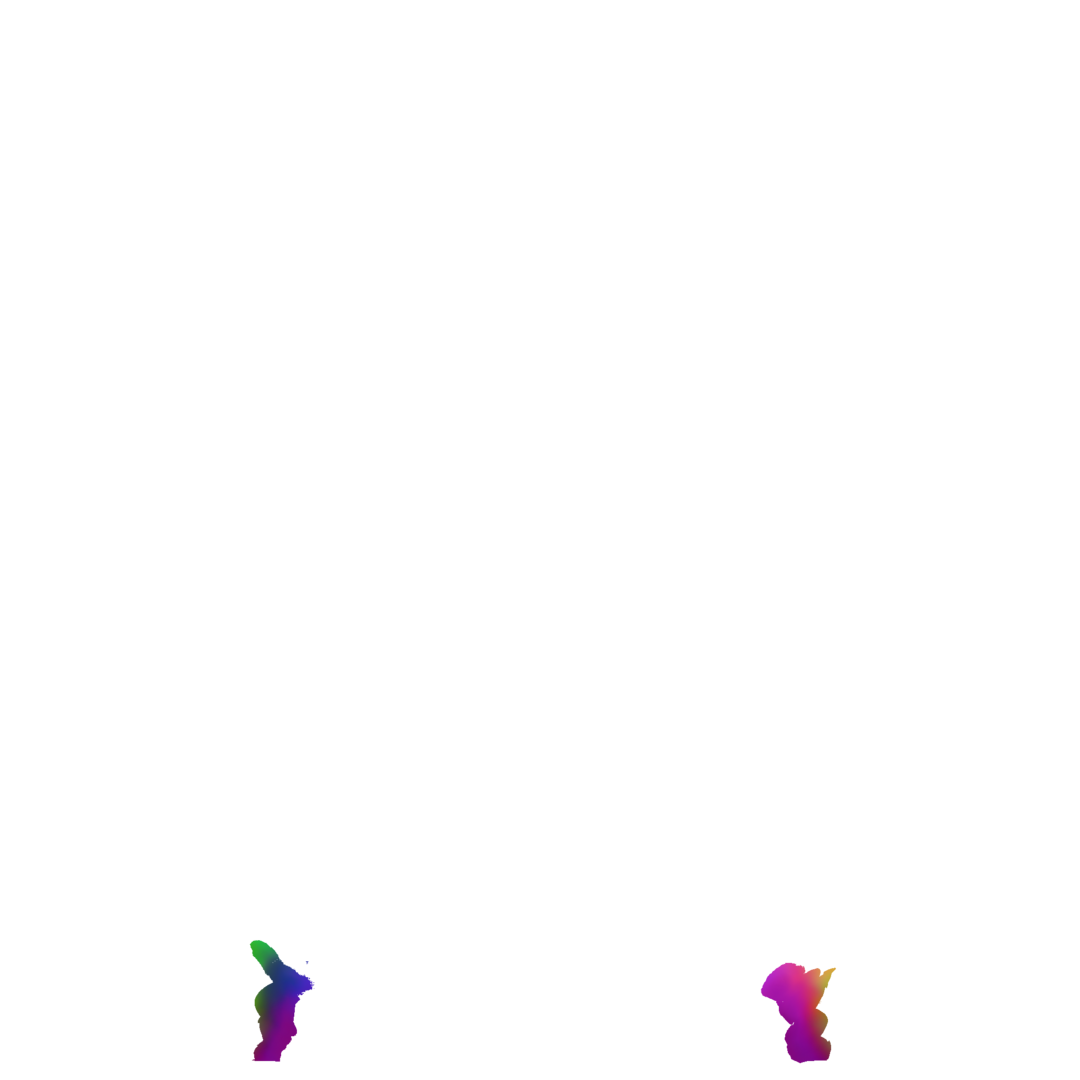
As for the normals, I like to take my Diamond Skin normal map and lay it under whatever normal I'm editing, then just erasing the vagina to reveal the already edited Diamond crotch from underneath. It's already seamless so you don't need to worry about seams.
MAKE SURE TO HAVE SYMMETRY PAINTING ON
Spoiler
Now, when you edit your textures, don't save over the original! Save your edited texture as a separate png file. In fact, do the same to the original unedited texture as well. When you take your edited texture to Blender to de-seam it, also drag and drop the unedited png as well. After you're done editing the seam, save the resulting seamless texture as a png, taking care to note the compression options. After you have saved your edited texture, select the unedited .png and RESAVE OVER IT WITH THE SAME COMPRESSION OPTIONS.
This will make sure the edited and unedited images are the exact same excluding the vagina removal. Now, take both pngs into Gimp, layer the edited vaginaless texture over the original unedited one and go to Filters -> Animation -> Optimize Difference. Wait a short while, and you should get a transparent layer containing only your edits. Make the transparent layer the same size as the canvas and save it as a png. It is this layer you will be using to actually patch the textures. Simply drop the difference layer on the texture you want to patch in paint.net, merge layers and save.
Here's my Diamond normal in png form
Spoiler

And here's a difference layer you can use to make your baked schlong normals based on the Diamond crotch have smooth shadows
ERF
Spoiler

TRX
Spoiler
Default Balls

Smooth Balls
TRX-ERF
Spoiler
Default Balls

Smooth Balls


Edited by donnerwetter
0 Comments
Recommended Comments
There are no comments to display.