How to edit body meshes in Outfit Studio without breaking RaceMenu overlays

Introduction
If you have ever wanted to change something in Skyrim and thought to yourself, "I can do that", let me stop you right there! You are headed down a dangerous path towards the life of a modder, where you spend way more time and energy trying to make your mod than it can ever give you back in the game. And a large part of that time is spent on stupid things that should work the first time but take hours of work to sort out. It's a lot easier to let someone else do all that work for you and then take advantage of it yourself. If you are still determined to proceed, at least this guide will help with one stupid problem that makes no sense.
Have you ever been not entirely happy with how a body looked, or how one of the sliders worked? Changing it should be easy, a simple process of loading the body into Outfit Studio, making your changes, and saving the project. And it is! You load the body up in game, and it looks just the way you wanted. But... texture overlays no longer work on the body. No more tattoos, or dirt, or freckles, or any of that good stuff. And it only applies to the torso, everything still works fine on the hands and face. So the problem must be with the body edits.
This raises a number of questions. Why does editing the body mesh break RaceMenu overlays? How does the body mesh have anything to do with a texture applied by a different mod? Why does this not happen to the people that made the bodies in the first place? How does Body Slide extrapolate any of 101 different shapes with only the 0 and 100 weight shapes and inject the result into the game in real time on an engine that was a hunk of junk even ten years ago when it was released?
I can't answer any of those questions. In fact, I asked about the overlay problem in the forums for both the BHUNP body and for BodySlide/OutfitStudio, and both of the authors completely ignored me. I only recently stumbled onto the solution here on the LL forums when another user figured it out by trial and error. So kudos to ClaymoreZ for that.
I am going to show how to do this step by step with the BHUNP Advanced V3 body. The process should work with any body, BHUNP V3 just has more parts, and so is a little more complicated than CBBE 3BA or some of the older bodies. This should be the same for LE/SE/AE, although I am only on SE at the moment.
Guide
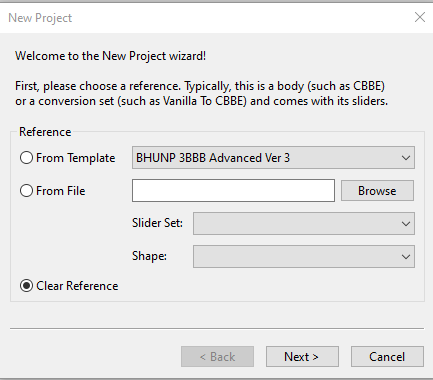
1. Open Outfit Studio and start a new project (File -> New Project). You will be prompted to select a reference; you want to select the Clear Reference checkbox at the bottom.
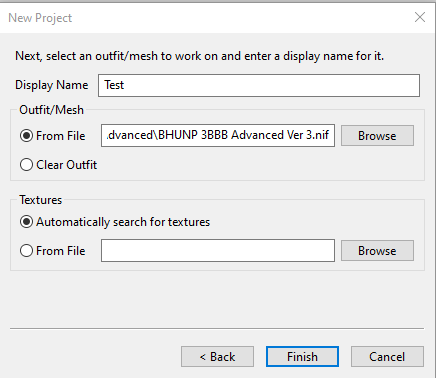
2. Next, you need to name the project. For the purpose of this guide, I just used 'Test'. Now select the path to body mesh you want to edit, in this case CalienteTools\BodySlide\ShapeData\BHUNP 3BBB Advanced\BHUNP 3BBB Advanced V3.nif. Click Finish when you are done.
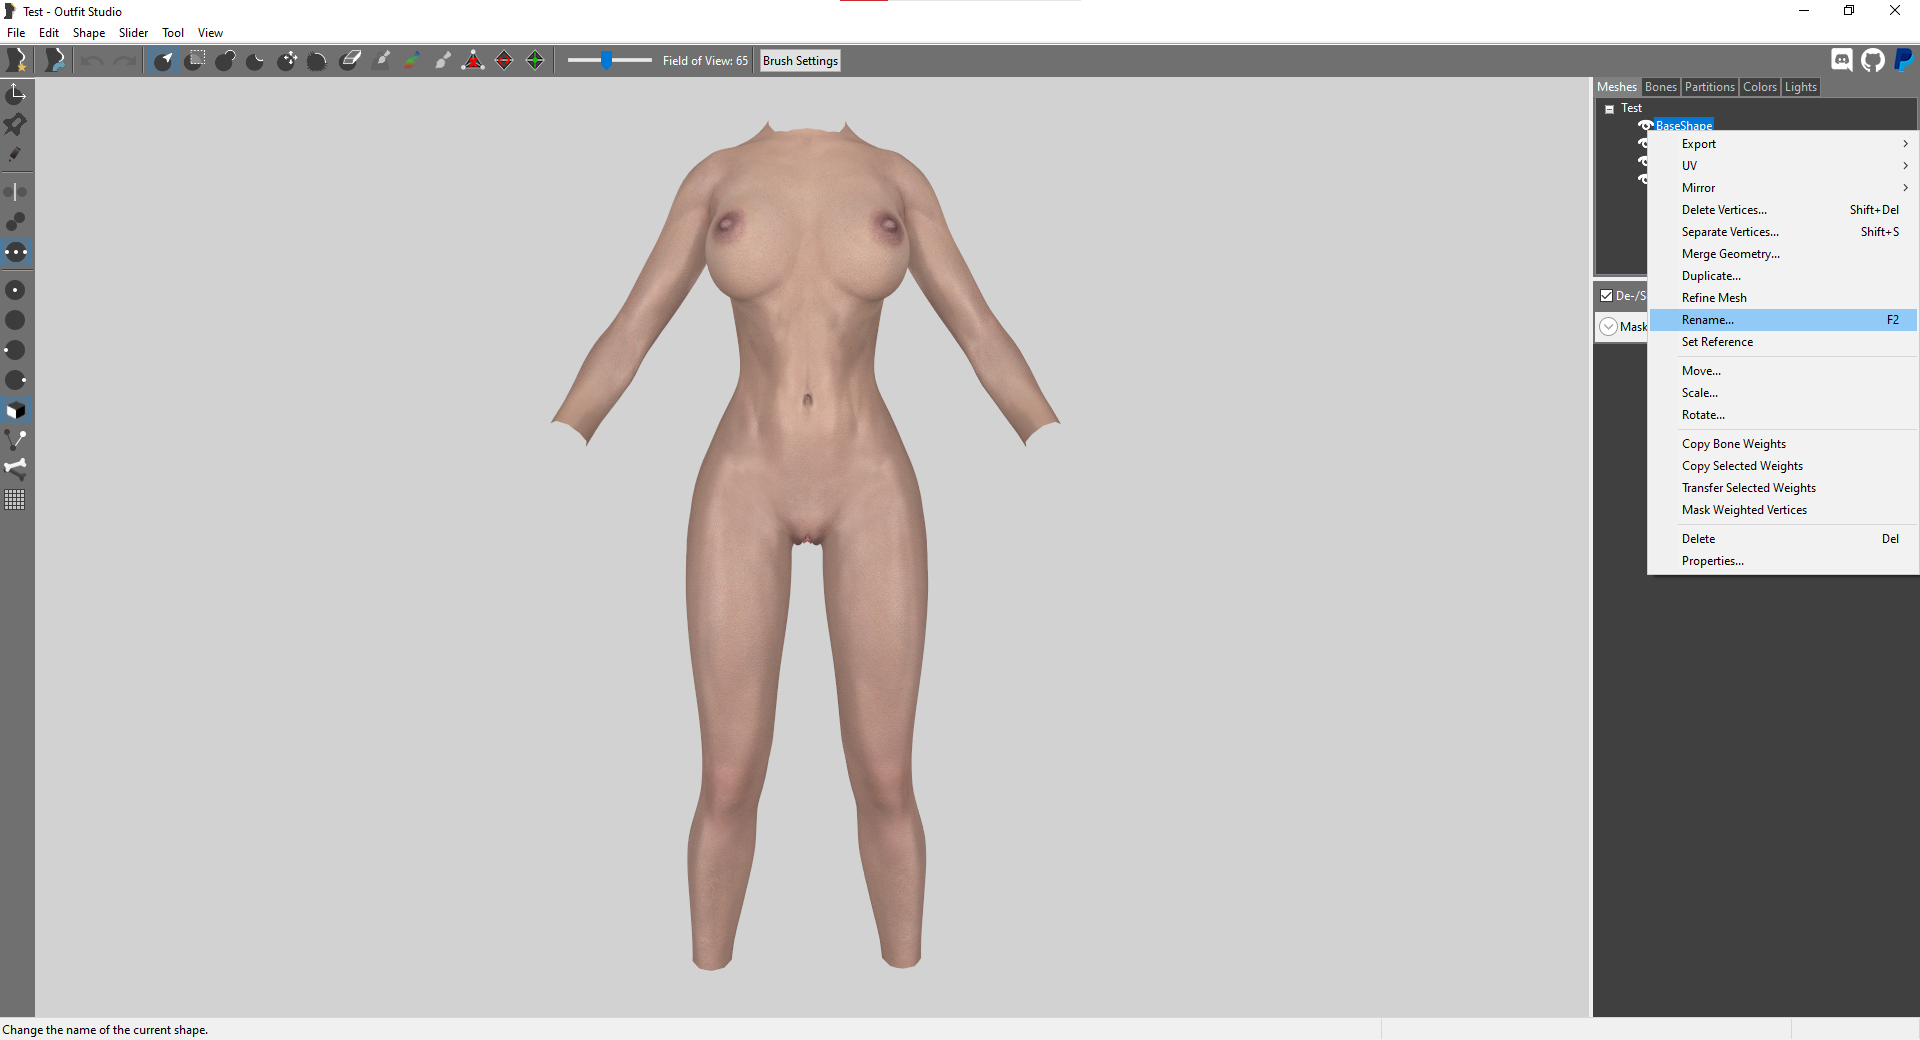
3. The names of each part of the body are listed in the Meshes tab in the top right. For BHUNP, these are BaseShape, BaseShapeCanal, BaseShapeAnus and BaseShapeVagina. Each of these shapes need to be renamed, because we have to load the same meshes as a reference later, and if they have the same name it won't work. Right-click on each part and select the rename option (or use F2). Adding a 1 at the end is fine, so BaseShape would become BaseShape1.
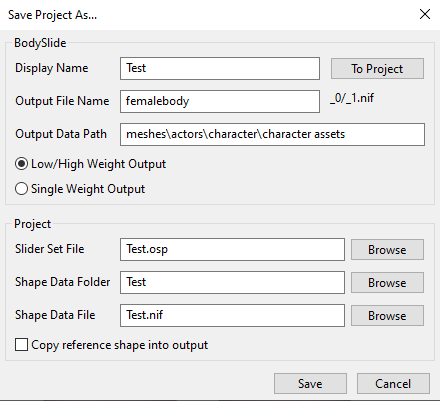
4. At this point, you should save the project in case something messes up and you need to reload. Go to File -> Save Project As, and you will be prompted to enter some information. The project name should already be filled out, but the file paths are wrong because you loaded the body as an outfit rather than a project. I am assuming you are using the default Skyrim body path, but it will be different if you are using a mod for a unique player body or YgNord Race or something. Under Output File Name, enter femalebody, and under Output Data Path, enter meshes\actors\character\character assets. Leave everything else as is and click Save.
5. Notice that there is no slider data for the body, because it was loaded without a reference. Go to File -> Load Reference, and select the same body you loaded earlier in the project. It should look like this, with a copy of each part and the body part highlighted in green. This means the green part is the current reference, and you can copy useful information from this part to other parts. Notice that there is now slider data on the right side of the screen.

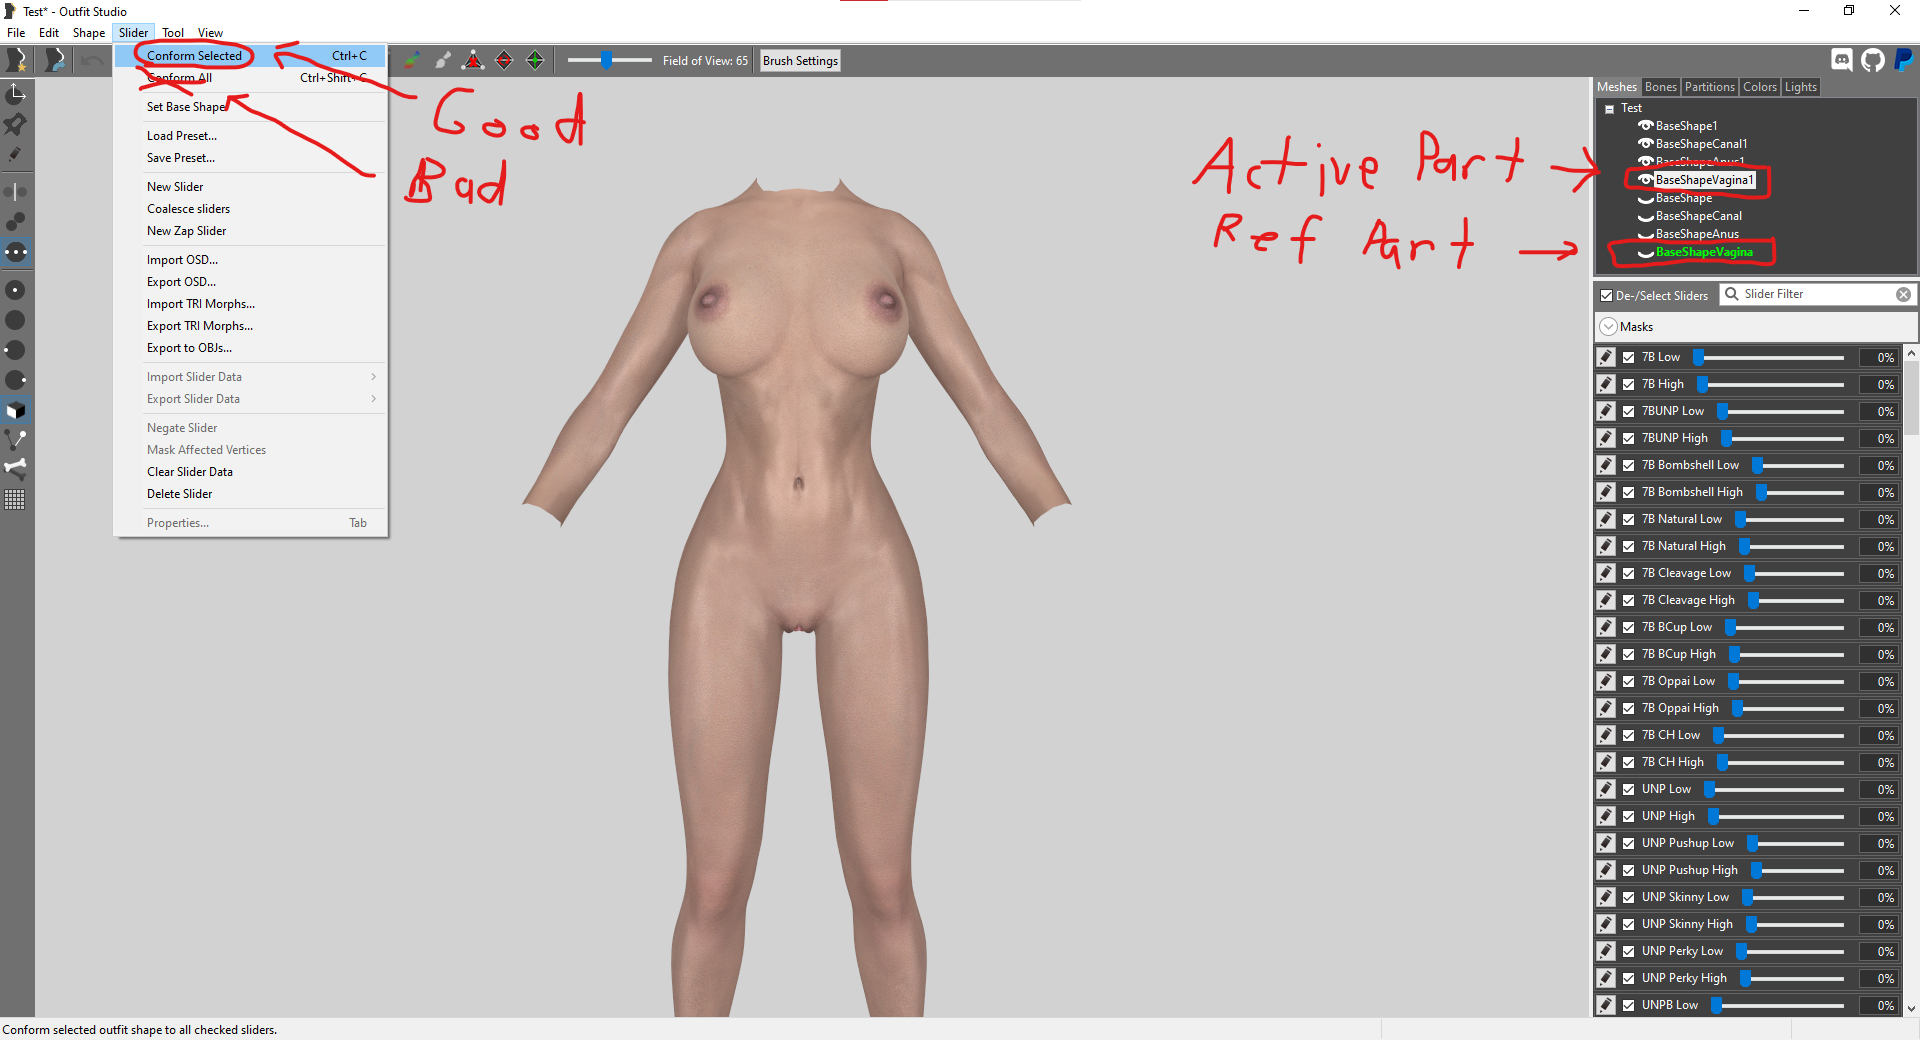
6. Now it's time to copy the slider data from each reference shape. Select BaseShape1, then go the tool bar in the top left and select Slider -> Conform Selected. DO NOT use conform all, as this will make every part copy the slider data from the reference part and break the sliders. Each body part must conform the sliders from the corresponding reference part. If BaseShape is the green ref part, only BaseShape1 can have the sliders conformed. You can change the reference part by right-clicking on it and selecting Set Reference. For example, right-click on BaseShapeVagina, Set Reference, select BaseShapeVagina1, then go to Slider -> Conform Selected. Does this for each part of the body until all of them have imported the slider data.
7. Now delete all of the reference parts. You should only have the original parts you renamed (BaseShape1, BaseShapeCanal1, BaseShapeAnus1, BaseShapeVagina1). If you did this part correctly, all of the body parts should have slider data that changes the body shape. If moving a slider has no change on the body, reload your save and try again. If you were successful, congratulations! You can save the project and make whatever edits you like. Somewhat perversely, you can load this project again and make edits whenever you want and it will still work with the overlays. Save whenever you are finished, build the body in BodySlide under whatever name you saved it as, and enjoy.
Edited by bnub345
2 Comments
Recommended Comments