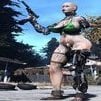
Avahashija Posted September 3, 2016 Posted September 3, 2016 Hello all, first of all - i am new to modelling in 3D. So i try to understand the tools and all the stuff that comes with it :-) In the moment i try to edit some outfits so that the feet are visible - cause i love my actors barefeet. I try to edit the Harness from Calyps for this. They have shoes. I want to get rid of it. What i did: 1.) (worked) Edited the texture and deleted the part of the shoes in the texture - so now they are transparent. 2.) (worked) Edited the Mesh of the Harness in Bodyslide - the shoe part - and made it so small that the mesh of the shoes is now "inside" the feet of the body. All looks good for me in Bodyslide. I copied the bone weights, exported the .nif with refrence. After this i made a "Batch Build" with morps. If i now go ingame - my feet are "cut off". It looks for my like Bodyslide/Outfitstudio are cutting of the feet for clipping purposes. OK normaly - but i want to have the feet :-) If i open the file in Nifskope - i see the bodyrefrence is with "cut off" feet. I understand what the problem is - but how can i solve it? What can i do to have the feet shown? Thanks for your help. Attached are three screenshots - Look of Object in Bodyslide - Body.nif in Nifskope and refrence Body in Harness object.
myuhinny Posted September 3, 2016 Posted September 3, 2016 Why not just use outfit studios zap option to zap the shoes out. Just load the outfit into outfit studio then click the 4th tab the one with the circle and square in it and then hold down the mouse button to start masking the the shoes. Adjust brush settings to make brush smaller for getting close to other items so that they don't get zapped. Once shoes are zapped click brush - invert mask then slider - new zap slider next save project and close outfit studio and go find your newly saved file under outfit/body tab in bodyslide click it then preview and then tick the zap box and make sure the boots get removed then all you have to do is build and you will be all set. If you want most of the outfit invisible you could just zap most of the areas that you want removed which will cut down on the file size as well as having less cut out textures that can cause problems at times in water and with some ENB's to name a few.
ousnius Posted September 4, 2016 Posted September 4, 2016 The authors of the outfits added a zap to the body in the BodySlide project, so that there would be no clipping. So even if you did what myuhinny said (which is correct), your feet would still be gone. You have to remove the zap: 1.) Load the project in Outfit Studio. 2.) Delete or edit the zap slider (click the edit button, "Slider -> Delete"). 3.) Save the project.
Avahashija Posted September 4, 2016 Author Posted September 4, 2016 Why not just use outfit studios zap option to zap the shoes out. Just load the outfit into outfit studio then click the 4th tab the one with the circle and square in it and then hold down the mouse button to start masking the the shoes. Adjust brush settings to make brush smaller for getting close to other items so that they don't get zapped. Once shoes are zapped click brush - invert mask then slider - new zap slider next save project and close outfit studio and go find your newly saved file under outfit/body tab in bodyslide click it then preview and then tick the zap box and make sure the boots get removed then all you have to do is build and you will be all set. If you want most of the outfit invisible you could just zap most of the areas that you want removed which will cut down on the file size as well as having less cut out textures that can cause problems at times in water and with some ENB's to name a few. Thank you for the hint with the zap sliders :-) now i know what they do. You forgot me to tell that i need to setup the default value to 100 on the slider - now it works! Thanks for help :-) The authors of the outfits added a zap to the body in the BodySlide project, so that there would be no clipping. So even if you did what myuhinny said (which is correct), your feet would still be gone. You have to remove the zap: 1.) Load the project in Outfit Studio. 2.) Delete or edit the zap slider (click the edit button, "Slider -> Delete"). 3.) Save the project. Ahhh..... I see - there are already created projects for the harness - so if i batchbuild - they use the projects.... ok - found the project - deleted the zap slider and it now works like a charm. Now i know why there are projects and what they do^^ Slowly i understand how it all works. Thanks for help you two and have a nice weekend
myuhinny Posted September 4, 2016 Posted September 4, 2016 I forgot about if the body was already broken and missing body parts like the feet. What I have usually done for broken bodies is to. 1.) Select start new project and select the body you want or what the author used for a body. 2.) Select the armor/outfit nif and then load it up. 3.) Adjust the body parts to closely match the original body size once happy with the size delete out the old body. 4.) Redo bone nodes if needed. The above option is good too I don't mess with bodyslide outfits much as I'm usually in outfit studio making my own outfits. I don't have fallout 4 outfit studio so I don't know what everything is set at for it out of the box it should be mostly the same as the skyrim version. I think for skyrim the brush power slider setting was always set at max or I set it to max a long time ago and don't remember. Your welcome glad to help. Zap sliders are really helpful for doing many things. Like separating different outfit parts to make them separate or zapping out something that you don't want.
Recommended Posts
Archived
This topic is now archived and is closed to further replies.