About This File
Hello Folks! I wanted to re-post this info because while there are many seasoned pro's regarding Skyrim here on LL, there are still people just getting into Skyrim and modding. This guide is directed toward those new to using BodySlide - or more importantly - Outfit Studio. Outfit Studio is a great program, but it can be really confusing to use initially. Sure, there are some guides available online, but quite often, one winds up even more confused on what to do afterward. I know I was.
Hopefully my guide will assist people to better understand Outfit Studio - how and what to do in converting old outfits to UUNP HDT, outfits to CBBE HDT, UUNP outfits to CBBE or CBBE outfits to UUNP. In all cases, the process is basically the same and once one gets some of the basics down, things become much easier to do going forward.
A shout-out and thank you to member tznvlw , who created these PDFs for me. I appreciate your assistance.
Added 09-23-2020 - FYI - Have you ever tried to size HDT clothes in Outfit Studio, only to find that the clothes physics no longer work afterward? I believe that's because Outfit Studio destroys ( or removes ) the required HDT clothes "skeleton" ( because the reference body already has a skeleton ) when loading the nifs. Have a look at the "tech support" post by "moving_Sloth" and a way to size, then replace the clothes skeleton "nodes" to get the physics working. I hope I remembered all this stuff correctly.
CBBE people - Please note that there is some info on weight-painting in the UUNP document, so you might want to download that as well so you have that reference.
A FEW OUTFIT STUDIO TIPS THAT MAY HELP (may update this from time to time)
* After using BodySlide, do you still notice clipping issues in-game? A common mistake people make is that they import the "your armor" _0.nif & "your armor" _1.nif files into Outfit Studio and make changes. WRONG! Always modify the BodySlide "Data\CalienteTools\BodySlide\ShapeData\ "yourarmor.nif" file (make a back-up copy if needed). If you don't - and need to remake the armor - you'll wind up with the same clipping issues you had previously.
--------------------------------------
* Have you run it outfit textures / parts that kinda "glow in the dark" (due to high specularity) and they shouldn't? And no matter what you do with the texture or normal map, it still has a glow? Try this...
- Load or import the outfit / part in Outfit Studio.
- Select the offending mesh in the right "mesh" pane, right-click and export it as a .obj file.
- Now delete the original part and import the new .obj part.
- Reassign it's textures. Most times, this will resolve the problem. And don't forget to select "Slider > Conform All", apply bone weights after importing and make sure to assign a correct slot number to the new part.
--------------------------------------
* Have an item that you like, but would like to change it a bit by deleting a piece or two off of it? Or, have an outfit that is a single "blob" and would like to turn it into individual pieces? Here's how...
- Load or import the outfit / part in Outfit Studio.
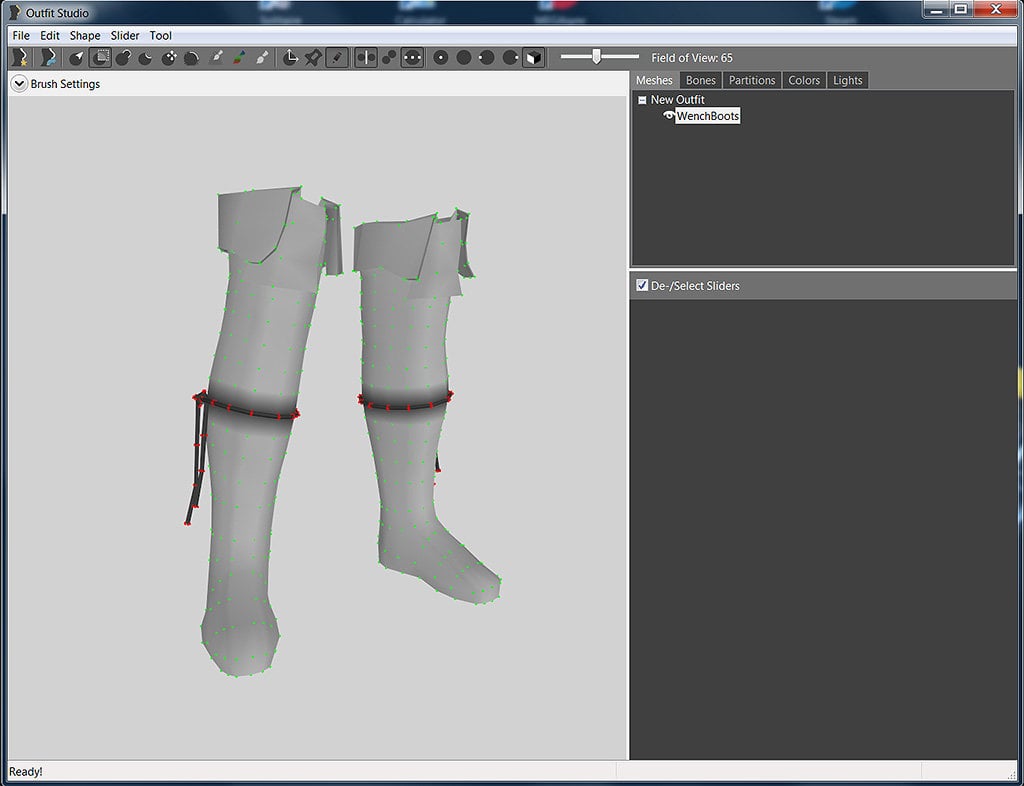
- Press "Q". You will see green dots all over the place. Those are vertices, the "points" where mesh "faces" (triangles) connect.
- Press key #1, that enables masking. Adjust your brush size and "go over" the mesh, "masking" off the part(s) you want to keep. The mask will turn green vertices red.
- Press "T" to turn off textures. It often helps to see "things" better.
- When you've completed masking your part(s), go to the top menu and select "Shape > Delete Vertices". You now have a modified or individual part - save it as a .nif.
* * * or * * *
- Mask everything you don't want, which is often easier. When completed, go to the top menu and select "Tool > Invert Mask", then select "Shape > Delete Vertices". You now have a modified or individual part - save it as a .nif.

--------------------------------------
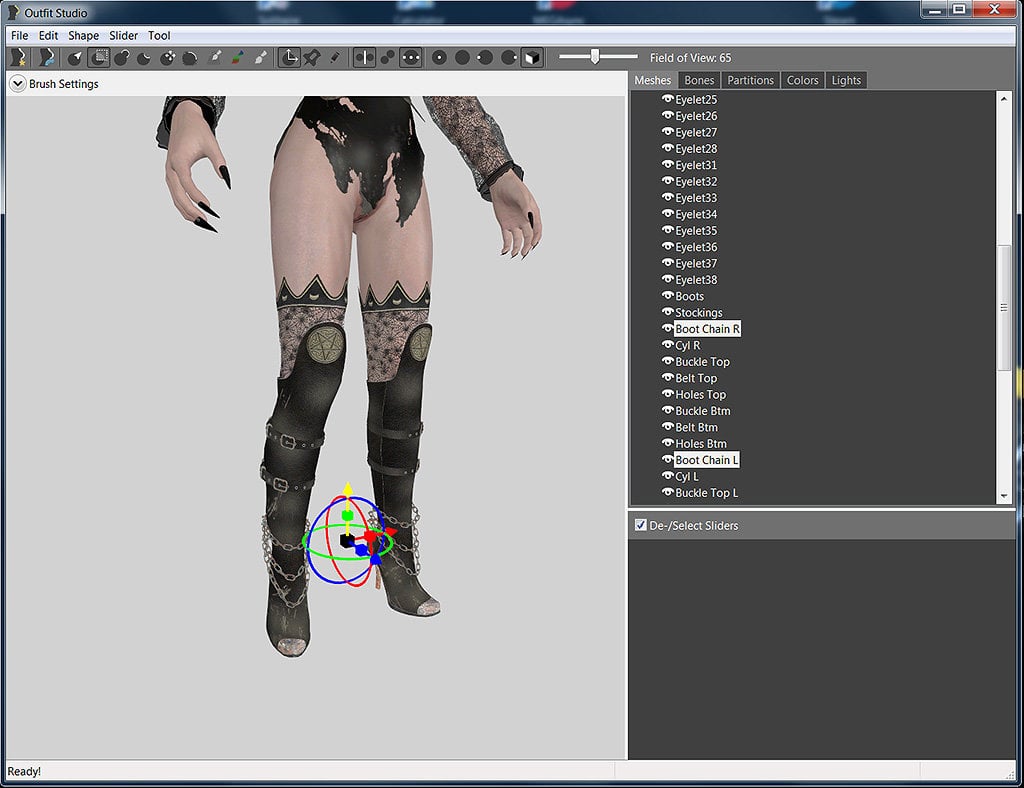
* Have your ever wanted to move, rotate or scale an item or multiple items for a better "look" or placement? Press "F" to bring up the "transform" gizmo. The arrows and circles are self-explanatory for moving and rotating. Press and hold the mouse button on the small squares to scale.
Please, do not upload this or any of my other mods onto other sites or utilize my assets without permission.