Tools and Tricks

Entry posted by crabb
5939 views
Last Update 2018.09.28
Tools


The files are shown below from most recent to oldest update. Their purpose is to help you organize your game, provide new features, or assist in implementing features provided by other creators. I can't assume credit for some of them. Links and credit to the file originators where applicable are included in their descriptions and/or in the names of the files.
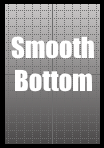
Smooth Top no nipple /// Smooth Bottom nude
Smooth Top is a blank body top without the nipples attached. This can be worn to prevent nipples from clipping through accessory clothing. Located in the clothing tops section.
Smooth Bottom is a base game nude bottom that can be worn to replace your current bottom, and prevent clipping through clothing. Located in clothing bottoms.
Smooth Top
Smooth Bottom
2018.09.28 Smooth Bottom
CAS Hiders
The package files included will disable base game items from showing up in your CAS item menu. This is a useful tool for cleaning up the appearance of your CAS catalogue. To install, drop these folders into your Mods folder. It will not remove these items from your game. If you want these items to return to visibility, you can delete these files.
*DISCLAIMER* must read before download
The function of these items is to reduce their visibility, so please make a dedicated folder for CAS hiders and store these folders there. I cannot bear responsibility for any files that have been renamed, lost, and/or stored outside a dedicated folder.
Rings
Tights
[2018.08.13] release rings
[2018.08.15] release tights
LunarEclipse Replace
[2019.01.11] This CC doesn't seem to show up in the latest version of WW so I had to remove the upload, I apologize for any inconvenience. I am still interested in this project but it may be some time before I come back to it. Please PM me here if you have any questions, thank you
All sim Females will now use a LunarEclipse penis where the strapon is needed. This comes with the overlay already attached, you do not need to apply a tattoo. It will match your skin tone. You will need to remove azmodan's strapons from your Mods folder as this file is a duplicate of azmodan's. There will be a texture conflict if your female is wearing any of Noir's penis textures.
---
There is no current way to get WW to function this way without making CAS edits to every female, so my intention here is to provide an option for this feature until TurboDriver allows us to choose the default strapon.
Thank you to Azmodan for the helpful information regarding the package
I have reached out to LunarEclipse in the past and it seems they have been inactive for some time. If LunarEclipse reaches out to me I will respect their wishes. All credit for the texture and blender made resources go to them
** I suspect you might lose your saved strapon choices from saving your game without azmodan's original strapon file present. If you care about your saved strapon choices, assume this risk when using this file**
download link(mediafire)
[2018.08.12] release
[2018.10.08] I have plans update this version using the updated rig provided by a LL community member.
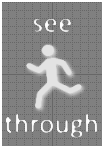
See Through Invisible Body
See Through makes the selected sim invisible. It is Intended to be used for POV photography and posing with WW partners. You will still be able to click on and interact with the the sim wearing See Through. Not enabled for random. Located in Hats.
[2018.08.06] release
Useful Mods
This mod adds a new cheat you can enter in Live Mode. It will take the hair and makeup from a sim's Everyday #1 outfit slot and apply it to every other outfit on the sim
- - - - - - - - - - - - - - - - - - - - - - - - - - - - - - - -
Tricks
Sims 4 Studio
Disclaimer
***I do not claim to be an authority on S4S, I always recommend going to the S4S forums to get information from the source. I just want to share my experience and hopefully help someone. I cannot bear responsibility for any alterations to your own files, so please make a backup copy of your files before you edit them***
Some of these tips are above beginner level and are here for personal reference.
Want to start modifying CC but don't know where to start? Try browsing around these threads to find something that fits your skill level
https://forums.thesims.com/en_US/discussion/849548/mods-faq-links-to-tutorials-resources
http://sims4studio.com/thread/1438/common-problems-helpful-threads-posting
Hide a Vanilla Game Item from your CAS Menu
make a folder in your Mods folder called "CAS hiders"
You are going to create a package that overrides an item in the game with a version that isn't visible to anyone in CAS
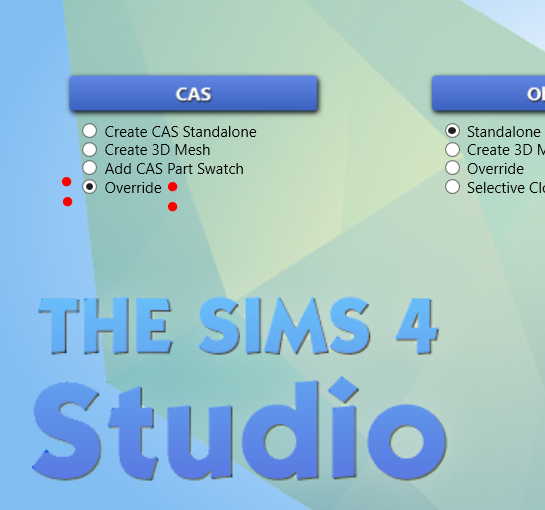
Open Sims 4 Studio.
press "override" then hit the blue CAS button
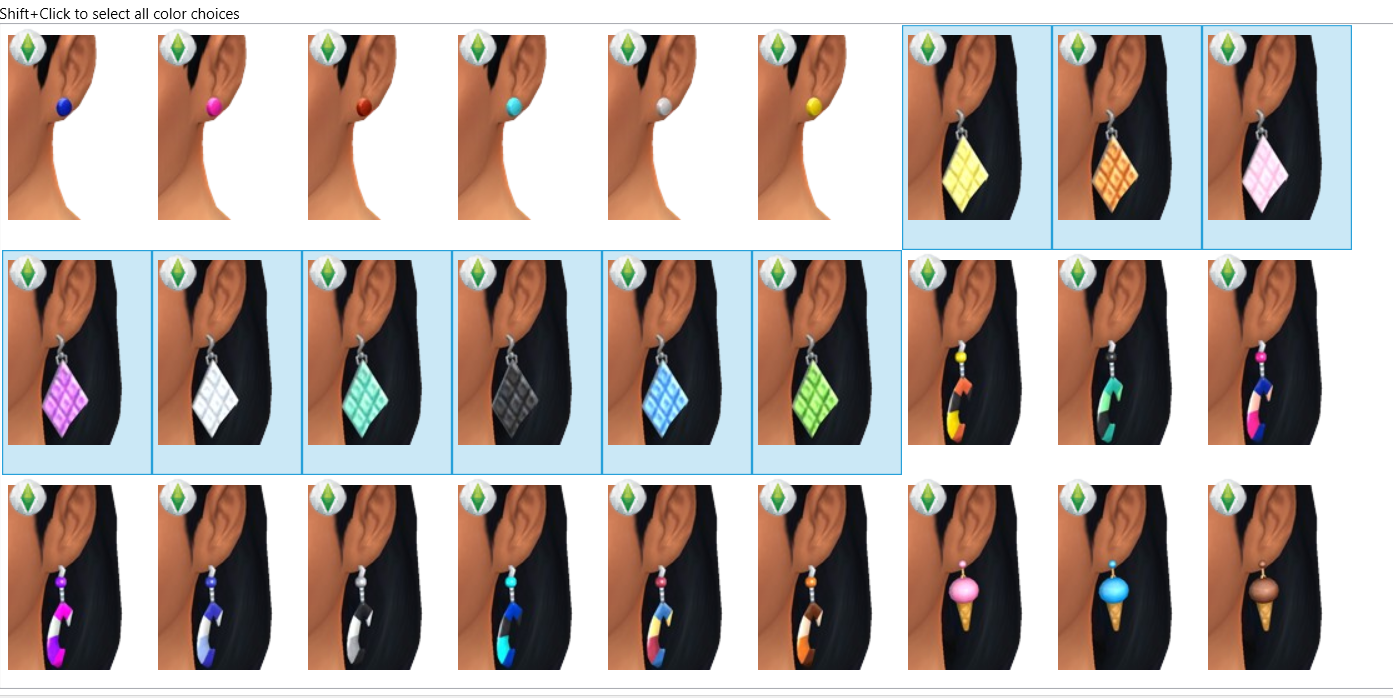
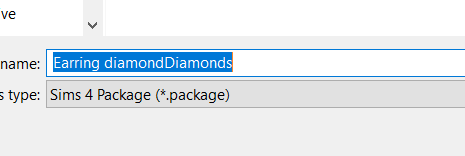
select the items that you don't want to see from the filtered list. you will notice you cannot select everything all at once, they have to be swatches of the same clothing item. I selected this group of earrings. Move your mouse over one of the items and take note of its name
click "next" at the bottom
name the file after the name of the item. Save it into your "CAS hiders" folder you made.
I would include the term "CAS hider" in the name. You would do well to not lose this file I'll explain at the bottom
Almost done
uncheck all the boxes for the gender and age categories in section 1. These selections determine which sims get see this item in CAS, and you don't want anyone to see it.
apply your selection to all the swatches with the button by number 2, confirm this action when a window pops up
save the package
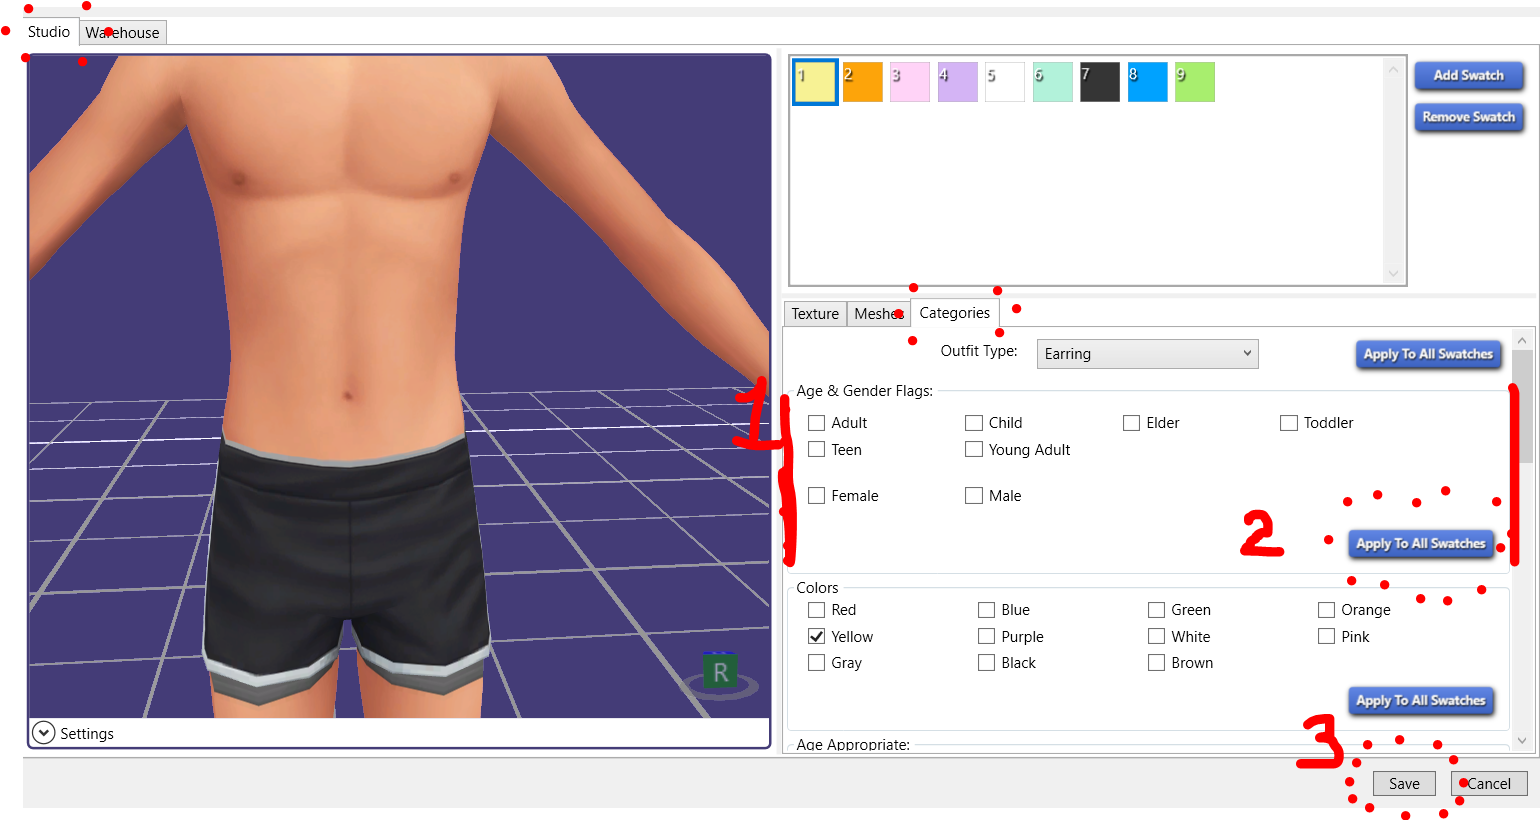
You're done, you've overrode an item in the game with a version that isn't visible to anyone in CAS. again make sure you don't lose track of the file. it's purpose is to make something hidden in your game and who's knows if you ever want to get the item back in your menu. if you ever want the item back again, you can delete the CAS hider you made. it does not remove this item from the game, just from your CAS menu.
if you don't want NPC's randomly wearing this item, you can uncheck the "enable for random" box at the very bottom of this menu. Again, click "apply to all swatches" box after unchecking this box.
Change the CAS Item Category of a Package
The tutorial below is really short so I just want to add some advice here in case you are wondering what things you can start modifying without having much experience.
- If you are a beginner it is safe to start out with tattoos, makeup, jewelry, or accessory clothing. Anything outside of the clothing bottom/top/full body slots will be fine.
- I don't advise trying to mess with clothing tops/bottoms/full outfits until you get more experience. Those you will need blender installed so you can save aka "export" the mesh and import it back into another object you are trying to use for that slot. **You don't need to use blender, you just need it installed so your computer will recognize blender files.**
Common Problem:
- For example, some accessory clothes/items do not have any mesh at all, they just have textures that cover whats already on the body. This is the case with tattoos, makeup, and face paint.
- when you go to change this ACC item into a proper top or bottom, body parts will be missing because the accessory's package does not have a top/bottom/body mesh for the texture to cover. Your acc clothing item will now be replacing the intended body part with empty space.
- This is where you need blender to import a top, bottom, or body mesh into the package. You can take a body part mesh off another package file by saving or "exporting" it to somewhere on your computer so you can import it into your package. Importing/exporting meshes is as simple as a button click in S4S. Again, **You don't need to use blender, you just need it installed so your computer will recognize blender files.**.
TL:DR The best way to start out is by moving accessories/tats/makeup from one slot to another accessory/tats/makeup slot.
---------------------------------
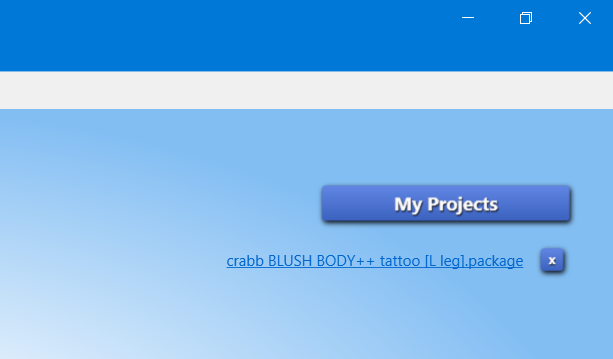
0. Open up sims 4 studio
1. click on My Projects on the home screen. Windows Explorer will ask you to choose the file you want to edit. I selected my Blush Body ++ tattoo from my mods folder. Your recent edited files will appear under the button in case you forgot what you edited last. I opened BB++ a few minutes before this pic.
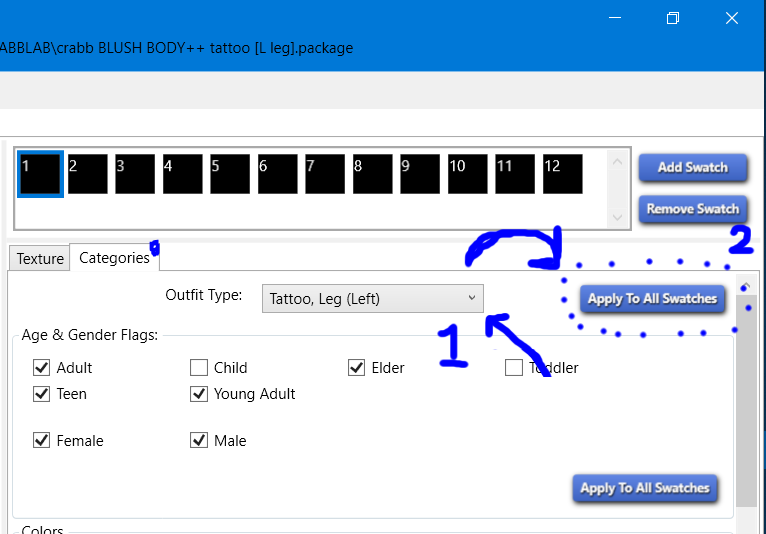
2. Select the Studio tab at the top, look below and select the categories tab. Open up the 'outfit type' drop down menu, and select your desired CAS slot from the list. Then click "apply to all swatches" right next to the drop down menu. This last step is important to do, since you want all the different swatches together in the same CAS slot and not split up between categories.
*You can really chose anything. Earring, rose ring, glasses, gloves, it really does not matter. Just dont pick clothing top/bottom/full outfit unless you know what you are doing.
*Make sure to choose a CAS slot you know you have access to
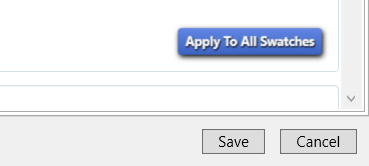
Mouse over to the bottom right of your screen, click "save" and you are finished! If you want to exit the program, you can close the window. If you want to continue working on something else, it is safe to press "cancel" after you have saved. It will take you back to the S4S main menu. Remember to have a backup copy of your file saved somewhere if this is your first try!
Make a Swatch in a Package Blend with Skintones
-- Open up a package in S4S and select the warehouse tab
-- select a swatch, aka "CAS Part" from the list on the left.
-- Find "composition method" on the Right-hand side, and set this value to 3.
-- Your diffuse texture for this swatch will now blend with the skintones in game.
-- To import a diffuse texture, click the Studio tab, and then the Texture tab underneath the swatches.
-- Highlight "diffuse" from the row of textures and press import.
-- You can also save aka "export" diffuse textures from a .package onto your computer, and edit them with an image editor.
-- best practice is to use a swatch with a greyscale diffuse texture- you can better see how much light and shade you are adding.
-- If you set the composition method back to zero, the game will display the exact colors of your texture- it will not blend with the skintone
Enable Transparency for a Package's Mesh
If you enable transparency for a package where the body and clothes are combined in a single mesh, you might have some invisible body parts. You can work around this by moving the item to an accessory CAS slot. You will know there is only 1 mesh if you only have 4 geometry files in the warehouse tab
-- open up a package in S4S and go to the warehouse tab
-- select a "geometry" item from the list on the left.
-- When selecting geometry, be sure to select the clothing item -if- you have two sets of meshes (8 geometry total)
-- On the Right hand side- select the Data tab. Scroll down to shader and select "Simglass"
-- The diffuse textures of your swatches are now enabled for transparency.
-- You will need to repeat the previous steps for the other 3 geometry items on the warehouse list
-- Remember to save when you are finished. Make sure you have a backup copy available if this is your first try!
-- One thing remains to fix - this item will have a natural shine that you might find undesirable. To remove the shine that comes with simglass, import a flat normal map in the Studio tab. (I have included a flat normal map here for your use [it should work for all items])
A flat normal map should have 50% opacity 50% brightness 0% saturation.
Right click > save as
save this image as a .png

Add a Normal Map to a Package
normal map textures are typically used to add the appearance of edges and bumps to a smooth mesh surface
-- select the Studio tab next to the warehouse tab
-- underneath the color swatches, select the texture tab.
-- There will be a list of texture types (diffuse, shadow, normal, specular, emission). Highlight "normal" from this list.
-- Click "import" and select your file using windows explorer.
-- You're finished! Don't forget to save your file.
Quick Tip
Did you know you can open packages directly from your Mods folder? You can set Sims 4 Studio as the default program to open packages
In windows
- Right click a package > open with... > choose another app
- enter in the navigation bar >> C:\Program Files (x86)\Sims 4 Studio
- select S4Studio.exe
Done! Now you can open packages directly from your mods folder.
S4 Tray Importer
Rapid Clear Tray Files
this hotkey combo saves you the time of manually clicking around to delete tray files, allowing you to delete trays in rapid succession
--select your first tray Lot/Household. Press alt, then "e", and then "d"
--confirm the deletion with 'enter' key
--the next household will already be selected so you are free use the hotkey combo again!
0 Comments
Recommended Comments
There are no comments to display.