Search the Community
Showing results for tags 'guide'.
-
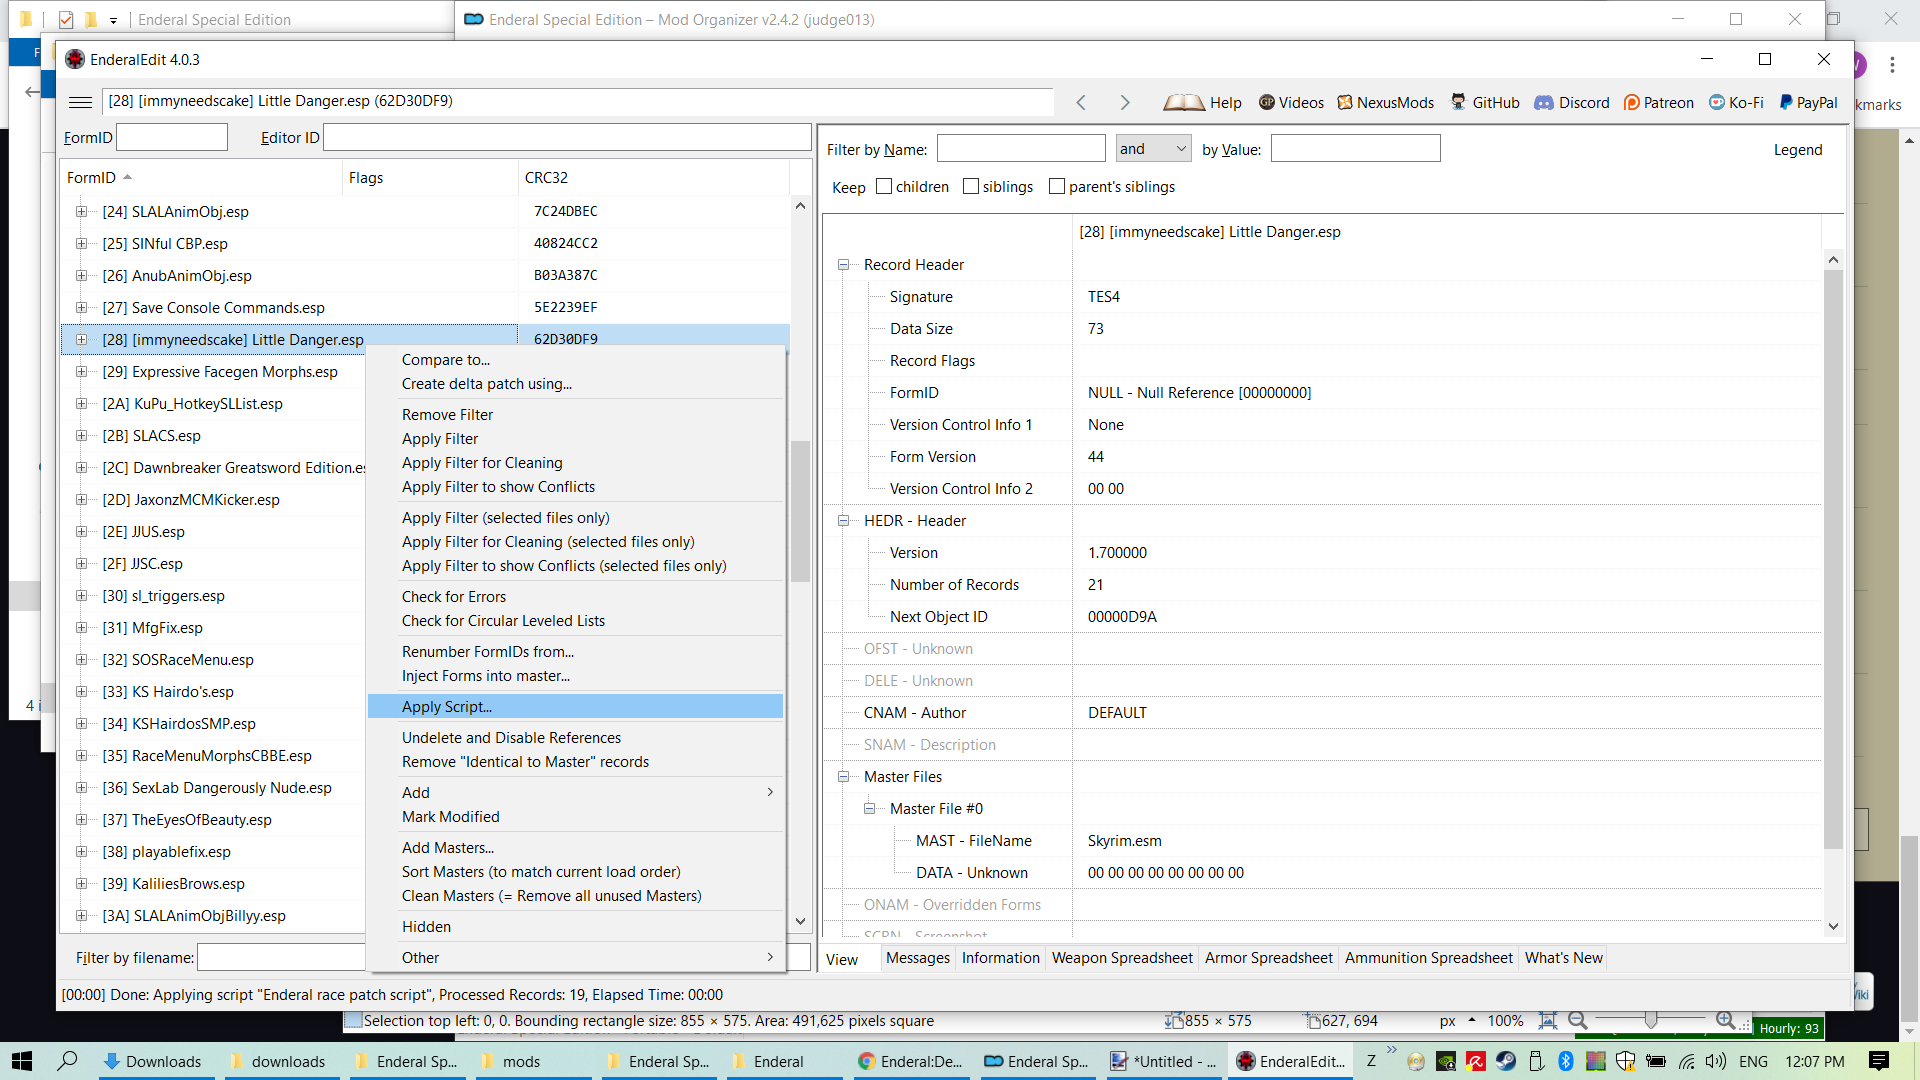
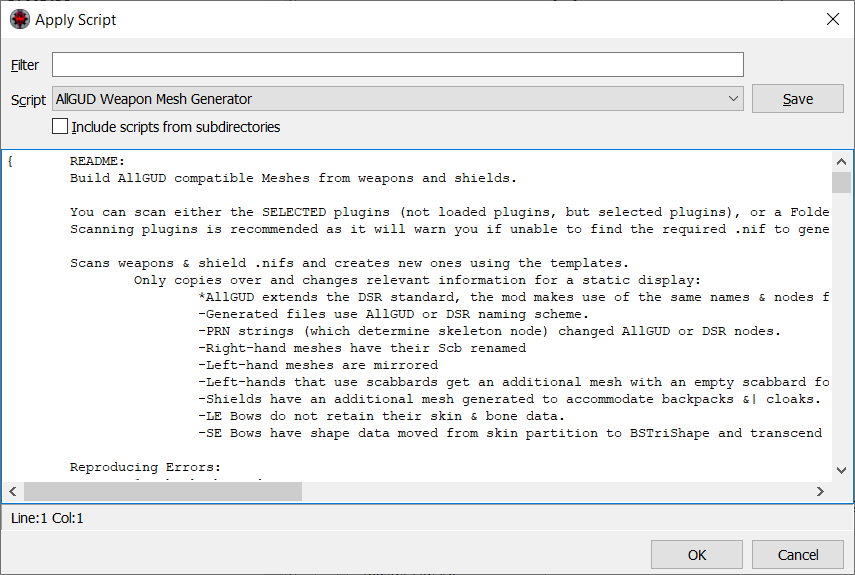
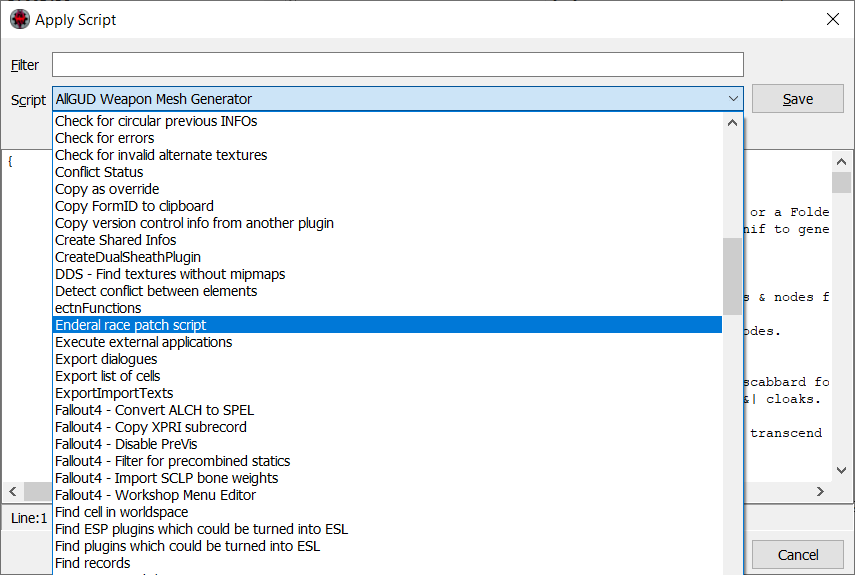
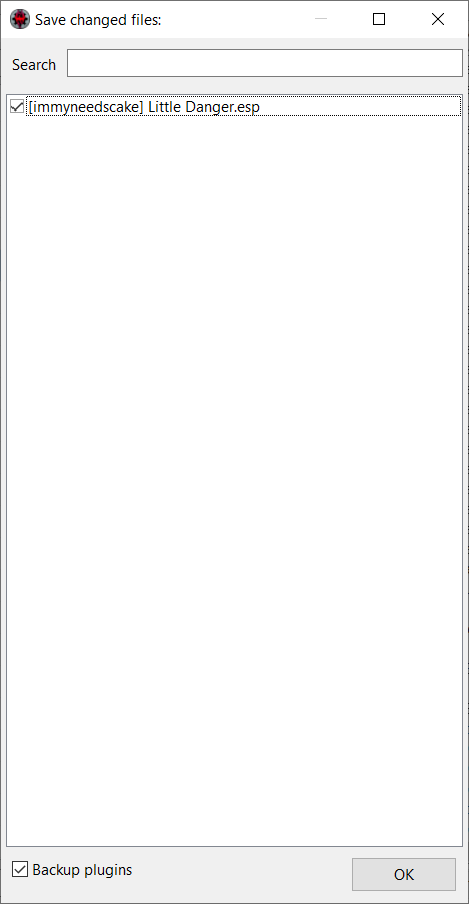
EnderalSE and SexLab Setup Guide Hopefully we'll have a stickied place to keep all this in one thread. Please feel free to add your fixes, cheats, cludges and experiences! Good Stuff will be added to this post, so it will be easier to find. An accurate list of what extras are installed in the base game install of EnderalSE Forgotten Stories from Steam Is located in the {Steam Path}\steamapps\common\Enderal Special Edition folder in a file called "credits.txt" Post 2 continues with mod reports. Post 3 has converted mods/plugins, at least they are working for me. They may contain a patch, and this patch must be loaded after the main plugin. *** A guide for installing Creation Kit for EnderalSE is in Post 7! *** A really good script for making the race changes : https://www.nexusmods.com/enderal/mods/18 This script fixes an issue with HDT I haven't mentioned previously, see thread: https://www.loverslab.com/topic/168078-enderal-se-hdt-physics-for-all-races/ Automates the process and works in SE as well. Update: Using the above script makes the patches un-necessary, 3 days of play testing. May 17, 2021 playablefix.esp still required Update: LOOT has an update for Enderal/EnderalSE see: https://www.loverslab.com/topic/168116-enderalse-and-sexlab-setup-guide/?do=findComment&comment=3390604 Update: Fellow LL member @Amokhem has come up with a way to avoid the Registry Edits, see post https://www.loverslab.com/topic/168116-enderalse-and-sexlab-setup-guide/?do=findComment&comment=3402653 Update: Member @Xerrasx has managed to get MoreNastyCritters operational! Details in post https://www.loverslab.com/topic/168116-enderalse-and-sexlab-setup-guide/?do=findComment&comment=3440629 A pictorial guide to patching mods for Enderal/EnderalSE: {because we have to do so much of it} If you don't have "Enderal race patch script" get it from: https://www.nexusmods.com/enderal/mods/18 Confirmed working SexLab mods: Mods that appear to be trying to work: Some informative links for Enderal/EnderalSE:

-
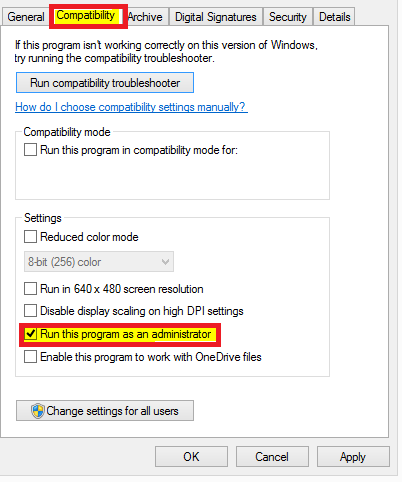
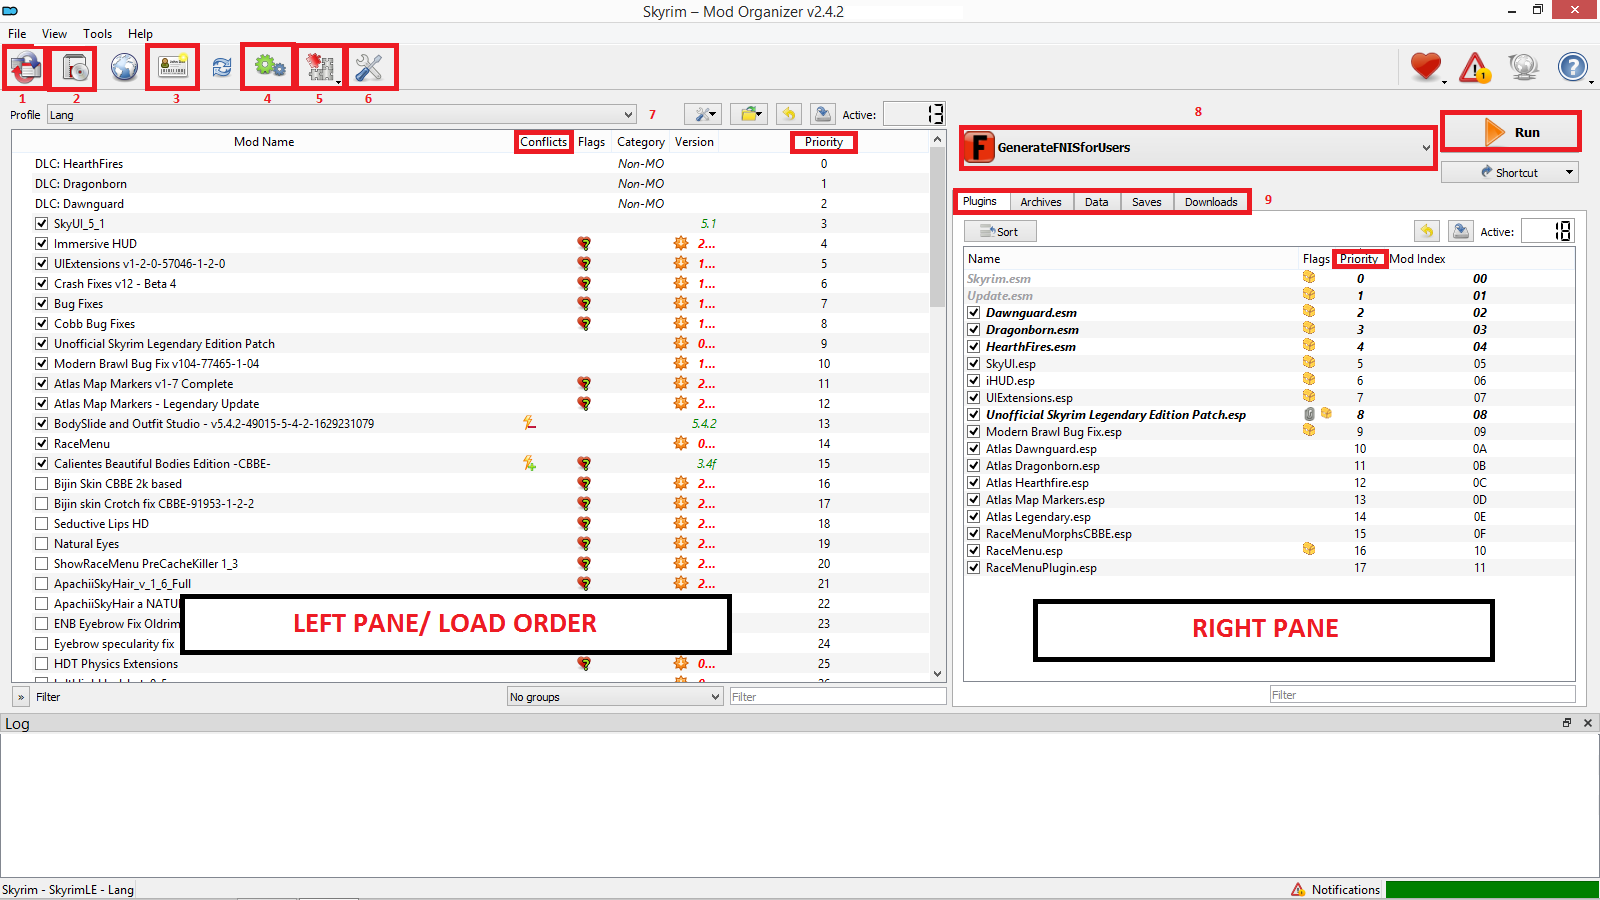
 [This guide is a byproduct of endless struggle to modding TESVSE, this is a quick start guide/ cheatbook and you can simply follow it to have a working modded game, it is comprehensive yet only cover essentials mostly.] CONTENTS OF THE CHEATBOOK/ GUIDE I. BASICS 01. SKYRIM REQUIREMENTS, PRE INSTALLATION, INSTALLATION, GRAPHIC SETTINGS, BACKUP, UNINSTALLATION RE-INSTALLATION AND UPDATES 02. SETTING UP DIRECTORIES 03. SETTING UP MOD ORGANIZER (MO2) II. CORE/ ESSENTIALS 04. SKSE & .INI SETTINGS 05. xEDIT AND CLEANING THE ESMs 06. MASTERS & OTHER ESSENTIALS 07. PATCHES AND FIXES III. REPLACERS AND UTILITIES 08. BODYSLIDE 09. RACEMENU 10. BODY REPLACER, SKINS AND OTHER BEAUTIFICATIONS IV. PHYSICS AND ANIMATIONS 11. PHYSICS 12. FNIS 13. XPMSE V. EVERYTHING ELSE (This section is optional, included here for familiarization) 14. ARMORS & CLOTHING 15. FOLLOWERS 16. COMBAT AND ITS RELATED CAMERA, HUD AND OTHER MODS 17. LOCATIONS 18. LIGHTING OVERHAUL VI. SSL AAF ESSENTIALS AND RELATED MODS 19. SSL AAF AND DEPENDENCIES/ COMPLEMENTARIES 20. CREATURE & DEVIOUS FRAMEWORK 21. ANIMATIONS, SSL BASED MODS, QUESTS AND EXTRAS 22. HOW TO PORT LE MODS TO SE [WIP (NOT A PART OF THIS GUIDE) : ENB, MERGING PLUGINS, LOD PATCH AND BASHED PATCH] - (Basically don't ask me for help with these as these are not my priority but more importantly these are highly sensitive items which could work wonders or wreck havoc) VERY IMPORTANT GAME UPDATE AND VERSION NOTE VERY IMPORTANT NOTES: #THE LE EDITION MODS HAVED GROWN TO ALMOST PERFECTION OVER THEIR LIFESPAN, SE COMPARED TO IT, IS FAIRLY NEW AND IS BEING CONSTANTLY UPDATED, SO EXPECT HICCUPS. THIS GUIDE WILL HELP YOU AVOID SUCH STUMBLING BLOCKS AND BUILD A BEAUTIFUL AND STABLE GAME. # ALTHOUGH I AM PROVIDING VIDEO LINKS WHEREVER POSSIBLE FOR BETTER UNDERSTANDING, USE THEM AS REFERENCE AND DO ONLY WHAT I HAVE MENTIONED IN THIS GUIDE, THE VIDEOS ARE VERY COMPREHENSIVE AND COVER VARIOUS WAYS AND METHODS. # EVERYTHING IS AFFECTED BY THE EFFLUX OF TIME, I (OR SOMEONE ELSE HOPEFULLY) WILL TRY AND KEEP THIS GUIDE UPDATED BUT THERE'S ALWAYS A POSSIBILITY OF UPDATES OR THAT SOMETHING NEW HAS TAKEN OVER. ASK, INCASE YOU HAVE ANY DOUBTS OR QUERIES. YOU HAVE BEEN WARNED! # DO NOT WORRY, YOU ARE NEVER ALONE! JUST REACH OUT AND YOU'LL GET THE REQUIRED HELP SOONER OR LATER. TILL THEN TRY LEARNING AS MUCH AS YOU CAN ON YOUR OWN. ALSO DON'T FORGET TO SHARE SOME LOVE, HIT THE LIKE BUTTON ON POSTS, BE OPEN TO TESTING MODS AND IF FEASIBLE SUPPORT THEM (MOSTLY ALL ARE ON PATREON) # MOST IMPORTANTLY, a humble request - At any point, if you have benefited from the site or have been a part of the community, kindly consider supporting it if feasible. Thank You! (Link in the spoiler below) # BEFORE PROCEEDING, A REMINDER THAT THIS GUIDE IS FOR THE SPECIAL EDITION. IF YOU HAVE THE LEGENDARY EDITION, CHECK OUT The Skyrim LE (TESVLE) Modding Cheatbook/ Guide [SEP/21]. PRO TIP: Always make sure you run any installer/ application with admin rights (specifically set it up for MO2 as other such as TES5Edit, LOOT, and so on would be dependent on it) 01. SKYRIM REQUIREMENTS, PRE INSTALLATION, INSTALLATION, GRAPHIC SETTINGS, BACKUP, UNINSTALLATION RE-INSTALLATION AND UPDATES : (BEFORE INSTALLING THE GAME REFER POINT of Point 2.1 given below and follow steps accordingly) 02. SETTING UP DIRECTORIES : I personally have a specific setup for making my directories, the video in Point 3 below will also guide you for the same. Basically you should have and be aware of the following directories: 2.1. Where all BASE GAMES are installed [NEVER INSTALL YOUR GAME INTO THE PROGRAM FILE/(X86) DIRECTORY. Preferably, make a Folder that will contain all your games (say, D:\GAMES\TESVSE). Make sure the folder names are not too long and that you are not making too many folders within folders. If you followed exactly what is mentioned, you will have your game installed in the TESVSE folder (it will have a data folder and the skyrim launcher)] 2.2. Where MO2 and loot gets installed (Say D:\Executables\MO2; there should be LOOT, SSEEdit and so on folders for each tool; for now just create MO2 folder and install MO2 in it) 2.3. MO2 working mods and profile folder for each game into a single working folder (So under say D:\WMF\TESVSE; there should be F04, TESVLE and so on folders for each game, for now just make the directories as mentioned in bold) 03. SETTING UP MOD ORGANIZER (MO2) : Note 1 - There are many options to mod the game, manually or via different mod managers, this guide will only cover mostly installation of mods via mod organizer. Note 2 - You should run the game once via skyrim launcher before installing MO2, no need to start a game, just run it and close it, it helps to initialize all the requirements. 3.1. Instance Configuration You will obviously be installing mods for more than one game, managing instances will help you achieve that (even if you have only one game to mod this is a useful and compulsory step) You must create and configure a GLOBAL INSTANCE for each of your game (Create say D:\WMF\TESVSE; there should be F04, TESVLE and so on folders for each game, for now just make the directories as mentioned in bold) 3.2. Profile Configuration This is an advantage of using MO2, you can configure multiple profiles and have different mod setup and saves for each profile. (Pro Tip: Never alter your Default Profile, simply click copy and enter the name for a new profile. Do not enable the 2 options unless you know what you are doing) I suggest creating at least 2 profiles other than the default profile. One profile would be your permanent/ most stable profile. The other you can use for testing and trying out mods and after that you may add it to your permanent/ stable profile. You can obviously create more as per your needs. 3.3. Nexus Integration Make an account on Nexus if you don't already have one. When asked in MO2 to integrate/connect automatically to Nexus Account, do so. Incase you have missed/skipped it, do so from - settings>nexus>connect to nexus Here is a comprehensive video tutorial for the Mod Organizer installation 3.4. MO2 Features and Usage ALWAYS GO THROUGH THE MO2 TUTORIAL FULLY ATLEAST ONCE. If you have skipped the tutorial you can always re-launch it and it will ask again or find the tutorials under the help tab. Understand that modding is so very comprehensive and you only learn through time, just to give you a glimpse of the depth, here is a guide only covering MO. (Link only for reference a simple video linked below) If after scrolling right to the bottom of the guide you feel fatigued, hope you get the point I am trying to make. I'll try and simplify things as much as possible. 3.5. MO2 Interface, Basics, Conflicts, Overwrites and Load order explained. 3.5.1 MO2 Interface & Basics 3.5.2 Conflicts, Overwrites and Load order Linking a video below that will help digest things easier, do not skip watching this video, watch it right till the end. Here is a comprehensive video tutorial on using Mod Organizer (IF YOU PLAN ON USING MO, WATCH THIS VIDEO ATLEAST ONCE) I know even this video is quite extended and much of it you might never need, will come up with something simpler soon. For now try learning the basics at least namely all the icons, downloading and installing a mod correctly, left pane, right pane and its respective tabs; load order and plugin order, conflict(s), overwrite ,explorer location of mods and ini files and adding/running executables. 04. SKSE & .INI SETTINGS : From SKSE Readme - The Skyrim Script Extender, or SKSE for short, is a modder's resource that expands the scripting capabilities of Skyrim. It does so without modifying the executable files on disk, so there are no permanent side effects. 4.1 GET THE LATEST VERSION (ARCHIVE OR INSTALLER IS YOUR CHOICE). EXTRACT OR INSTALL IT IN YOUR BASE GAME FOLDER (D:\GAMES\TESVLE) THAT SHOULD HAVE THE SKYRIM LAUNCHER AND DATA FOLDER. 4.2 REGISTER THE EXECUTABLE INTO MO2. 4.3.1 Refer steps to do so in the video linked below point 5.2. Preferably launch the game after point 5 and do the steps mentioned therein to confirm a successful installation of SKSE. IMPORTANT NOTE: FROM NOW ON EVERYTIME YOU WANT TO PLAY YOUR GAME YOU HAVE TO RUN IT VIA SKSE EXECUTABLE THAT WE REGISTERED IN MO2. 05. xEDIT AND CLEANING THE ESMs : 5.1 Download SSEEdit and install it to D:\Executables\SSEEdit 5.2 Register the xEdit and QuickAutoClean (QAC) executables into MO2. Steps to do so are in the video below. Here is a comprehensive video tutorial for the xEdit installation 5.3 First, backup/copy the following ESMs to a safe location: 5.4 Next, run QuickAutoClean (QAC) from MO2 and clean only the above mentioned ESMs one by one. Steps to do so are in the video below. Here is a comprehensive video tutorial for the cleaning the DLCs 5.5 AT THIS POINT I ADVICE RUNNING YOUR GAME ONCE VIA SKSE. SIMPLY SELECT SKSE IN EXECUTABLES RIBBON AND CLICK RUN. YOU ARE ADVICED NOT TO START A NEW GAME, JUST RUN THE EXECUTABLE, HIT '~' KEY ON YOUR KEYBOARD AND TYPE GETSKSEVERSION>HIT ENTER. THE SKSE VERSION YOU INSTALLED (IN POINT 4) SHOULD BE DISPLAYED. THAT'S IT QUITE THE GAME. FROM NOW ON, EVERYTIME YOU HAVE TO RUN A MODDED GAME YOU USE THE SKSE EXECUTABLE. VERY IMPORTANT NOTES: (DON'T YOU DARE SKIP READING THESE) A. ALWAYS READ THE DESCRIPTION AND REQUIREMENTS SECTION OF ANY AND EVERY MOD THAT YOU INSTALL OR PLAN TO INSTALL, ONLY AFTER THAT SHOULD YOU INSTALL THE MOD. B. MODDING IS PERSONAL, THERE ARE MANY OPTIONS/WAYS TO DO CERTAIN THINGS. INFINITE MODS THAT DO THE SAME THING, EACH DIFFERENTLY. C. EVERYTHING IS AFFECTED BY THE EFFLUX OF TIME, I (OR SOMEONE ELSE HOPEFULLY) WILL TRY AND KEEP THIS GUIDE UPDATED BUT THERE'S ALWAYS A POSSIBILITY OF UPDATES OR THAT SOMETHING NEW HAS TAKEN OVER. DO NOT WORRY, YOU ARE NEVER ALONE! JUST REACH OUT AND YOU'LL GET THE REQUIRED HELP SOONER OR LATER. TILL THEN TRY LEARNING AS MUCH AS YOU CAN ON YOUR OWN. (Although, this is a quick start guide/ cheatbook and you can simply follow it to have a working modded game, I recommend that you use it a reference guide because without knowing or understanding what you are doing, one can only do more harm than good more sooner than later.) 06. MASTERS & OTHER ESSENTIALS : 6.1. SkyUI Steps to install it. Here is a comprehensive video tutorial for installing SKY UI 6.2. iHUD: Get the latest version using mod manager download option. Install it via downloads tab (Right pane), then enable it in MO2 (left pane/load order). 6.3. UIExtensions: Get the latest version using mod manager download option. Install it via downloads tab (Right pane), then enable it in MO2 (left pane/load order). 6.4. Papyrus: 6.4.1 Papyrus Logging: A useful and important requirement when you ask for help on this forum or anywhere else for that matter is to include your papyrus log. By default the logging is disabled and it should be kept that way when playing. However, incase you encounter any issues and are actively looking for possible causes for issues/troubleshooting that is when you should enable the papyrus logging. You should disable the logging again once the issues are resolved and you resume your regular gameplay. If you keep it on all the time, it's impacts your system resources and will unnecessarily cause extra stress. To enable papyrus logging, in the mod manager, under tool plugins, there is an INI editor. In it, edit/add the following lines to your skyrim.ini file: Your papyrus log files by default are created in the Documents>My Games>SkyrimLogsScript 6.4.2 PapyrusUtil: An SKSE plugin adding several new scripts with native functions that provide various conveniences related to data storage and other misc functions to the scripter/ modder. Get the latest version using mod manager download option. Install it via downloads tab (Right pane), then enable it in MO2 (left pane/load order). IMPORTANT NOTE: MAKE SURE THIS MOD IS OVERWRITING ALL OTHERS. NOTHING WITH CONFLICTING FILES SHOULD EVER BE LOADED AFTER THIS MOD. *As many mods including the popular ones such as campfire, frostfall, and simply knock include an outdated version that will cause issues. It is advised to overwrite them with the most current version of the plugin. (WATCH THE VIDEO IN POINT 3.4 FOR A BETTER UNDERSTANDING OF MOD OVERWRITE (LOAD ORDER) AND CONFLICTS) 6.5. JContainers: Get the latest version using mod manager download option. Install it via downloads tab (Right pane), then enable it in MO2 (left pane/load order). 07. PATCHES & FIXES : 7.1. Address Library: Get the latest version using mod manager download option. Install it via downloads tab (Right pane), then enable it in MO2 (left pane/load order). 7.2. SSE Engine Fixes: Steps to install the fix. FOR THE FOLLOWING FIXES, simply get the latest versions using mod manager download option. Install it via downloads tab (Right pane), then enable it in MO2 (left pane/load order). 7.3. Unofficial Skyrim Special Edition Patch 7.4. Bug Fixes SSE 7.5. Modern Brawl Bug Fix 08. BODYSLIDE : 8.1 Get the latest version and install it like any other mod in MO2. 8.2 What is more important is that you register it as an executable in MO2 and run it from there itself in future. To do so, in MO2, click/go to the data tab in the right pane in it, CALIENTES TOOLS>BODYSLIDE. Right click the the Bodyslide x64.exe>Add as Executable. That's all it takes to install bodyslide and add it as an executable. BE CAREFUL WITH THIS MOD AND DO NOT MESS AROUND WITH IT, READ ABOUT IT, WATCH TUTORIALS IF YOU FEEL LIKE EXPLORING MORE. BUT BEFORE THAT STICK TO BASICS. FOR STARTERS, DO NOT HIT SAVE! I REPEAT DO NOT HIT THE SAVE BUTTON WHEN INSIDE BODY SLIDE. YOUR CHANGES GET CAST INTO STONE IF YOU DO THAT. 8.3 How to use bodyslide? (i.e modify Presets, build Assets and Custom Presets) Here is a comprehensive video tutorial for using Bodyslide 09. RACEMENU : Get the latest version using mod manager download option. Install it via downloads tab (Right pane), then enable it in MO2 (left pane/load order). 10. BODY REPLACER, SKINS AND OTHER BEAUTIFICATIONS 10.1. Caliente's Beautiful Bodies Edition (CBBE) This is another mother of all mods. It is a Body Replacer meaning that it replaces all the adult vanilla female bodies (player and NPC) with one that is fully customizable through the BodySlide tool and BodySlide's RaceMenu Morphs plugin. In short, any changes to female body are only possible due to this mod. Get the latest version (3.4r) using mod manager download option. It is packed as an Installer, so when you double click to install it via downloads tab (Right pane), it will pop up a window with various options. The options have been explained as well as recommended below, enable the ones preferred and install the mod. Then enable it in MO2 (left pane/load order) and you're set. Do not worry, you can change your preference later on easily. Not just that you can customize the body as per your liking, steps to do so are given below. There a few others as well namely UNP, UNPB and 7B, whichever you choose is personal choice. For simplicity and uniformity within this guide I am only covering CBBE throughout. From hereon, there are many options available for this section for skins, hair and other beautifications, whatever you choose is purely personal choice. 10.2. Skins In the section above I have only covered CBBE, there are other body replacers too. So in this section make sure you download files specific to the body replacer you download and installed. So, if you are using CBBE body then get CBBE Skins as well, if you use some other body mod get skin files for that specific body mod. Simply get the latest versions using mod manager download option. Install it via downloads tab (Right pane), then enable it in MO2 (left pane/load order). Choose only one. There many others, whichever you choose is purely personal choice. 10.3. Hair - Simply get the latest versions using mod manager download option. Install it via downloads tab (Right pane), then enable it in MO2 (left pane/load order). 10.4. Other Beautifications - Simply get the latest versions using mod manager download option. Install it via downloads tab (Right pane), then enable it in MO2 (left pane/load order). There a plethora of options available here I only give few mostly used and so that you get a basic idea. 11. PHYSICS Simply get the latest versions using mod manager download option. Install it via downloads tab (Right pane), then enable it in MO2 (left pane/load order). These mods add more physics, for example swishing hair, flowing skirts, bouncing boobs and so on. 12. FNIS This is the mother of all mods, do not mess up with its installation. Without it no custom animation is possible in Skyrim. Follow everything to the word. 12.1 Get the latest version and install the following 3 files like any other mod in MO2: FNIS Behaviour FNIS Creature Pack FNIS Spells 12.2 What is more important is that you register FNIS BEHAVIOUR it as an executable in MO2 and run it from there itself in future. i. Right click the installed mod FNIS BEHAVIOUR>OPEN IN EXPLORER>TOOLS>GenerateFNIS_for_Users. Copy the folder path. (It should have GenerateFNISforUsers.exe) ii. Under Modify Executables>Add from File>Paste the copied folder path>Select the GenerateFNISforUsers.exe. That's all it takes to install FNIS behavior and add it as an executable. Now since it helps with custom animations, you have to run it every time you add or modify any animation mod. You will have to run a generator tool GenerateFNISforUsers.exe (part of FNIS Behavior) every time you have installed or uninstalled FNIS, or an FNIS based mod. That is just not it, additionally for creatures, when you uninstall a mod that uses FNIS Creatures, you first have press the "De-Install Creatures" button, and then run the "Update FNIS Behaviors" There is little point in running it as it concerns with animation mods and has to be run every time on adding or removing any mod concerned with animations. As per this guide, the best time to run it would be post point 20 i.e. after you have finally installed all/most of your animation mods. So, no need to run it yet, we will be running it in point 20. (Because it will make files in overwrite folder, you need to be familiar with it. Also, if run, fixes such as 'Skeleton Arm Fix' has to be enabled, besides the other fixes it covers and then the Update FNIS Behavior button has to be clicked. However, do not worry if you already messed up and run FNIS without following correct steps, simply following the correct steps again will ensure its smooth working.) 12.3 Steps to update/run FNIS behaviour 12.4 Important points to be aware of: 1. FNIS has animation limits. The regular one is capped at 10,000 animations. And the XXL one at 32,000. 2. While counting FNIS animations even a twitch will be counted as a separate animation. So, lets say you have a mod that has a killmove animation, such single kill move animation can have many (FNIS) animations. ? 3. For those going over 10k limit or nearing/ exceeding 100% CTD probability, it is advisable to understanding a few things. Also there is a fix for the same. However, nothing is magic so be careful of your system load and tweak it accordingly. Further, also pay attention to the temperature of your PC components and overall temperature, when playing it should be anywhere between 60° C to 80° C. Read the FNIS article and the description of Anim LCF, do not proceed without reading/ understanding or you will be faced with consequences. You have been warned! Here is a comprehensive video tutorial for installing FNIS 13. XPMSE NOTHING SHOULD BE OVERWRITING THIS MOD, UNLESS SPECIFIC MOD AUTHOR HAS MENTIONED SPECIFICALLY. Simply get the latest versions using mod manager download option. Install it via downloads tab (Right pane), then enable it in MO2 (left pane/load order). 14. ARMORS & CLOTHING Simply get the latest versions using mod manager download option. Install it via downloads tab (Right pane), then enable it in MO2 (left pane/load order). Do not forget that every time you add new armor or clothing to your load order, you have to run bodyslide and build its assets to match your preset. Steps to do so are given in Point 8.3. 15. FOLLOWERS Simply get the latest versions using mod manager download option. Install it via downloads tab (Right pane), then enable it in MO2 (left pane/load order). This section is optional. 16. COMBAT AND ITS RELATED CAMERA, HUD AND OTHER MODS (THIS IS AN OPTIONAL STEP) (I recommend skipping this step if this is your first time modding, familiarize with the game a bit and get to this step after a few weeks of playing.) There are many mods that alter the combat system, however, I like and recommend this one. It is a comprehensive mod that completely overturns the Vanilla battle system and transforms it into a Sekiro battle system. The whole consortium make a plethora of changes to the game and its experience. Read the Description page thoroughly of the combat mod to understand all changes. 17. LOCATIONS Simply get the latest versions using mod manager download option. Install it via downloads tab (Right pane), then enable it in MO2 (left pane/load order). 18. LIGHTING OVERHAUL Simply get the latest versions using mod manager download option. Install it via downloads tab (Right pane), then enable it in MO2 (left pane/load order). Important Game, Save and Load Notes: (Don't Skip) Steps to make saves the right way. If you're following my guide to the word, it is time to launch the game and make an Initial save. 19. SSL AF AND DEPENDENCIES/ COMPLEMENTARIES All the necessary information is provided below. Important points to be aware of: 20. CREATURE & DEVIOUS FRAMEWORK 20.1 Creature Framework and mods All the necessary information is provided below. 20.2 Devious Framework and mods All the necessary information is provided below. Simply installing the mod will not cut it this time, you need to follow some extra steps for DD to work. Steps to do so given below. 21. ANIMATIONS, SSL BASED MODS, QUESTS AND EXTRAS All the necessary information is provided below. Note that the link may be outdated, simply performing a search will provide you with the latest links if any. 22. HOW TO PORT LE MODS TO SE Before setting out on a joyride to porting mods I recommend learning the fine art of searching ports already made, if yet unsure simply asking in the Request and Find thread could help. Know that these are deep waters, so be prepared, extra cautious and expect hiccups on the way. -------------------- ALL GOOD THINGS (MUST) COME TO AN END -------------------- As a humble request, experienced modders kindly share your experience of load orders, anything else that can/should be included in this guide. Preferred Mod Load Order & Groupings : DISCLAIMER: 1. YOU ARE RESPONSIBLE FOR YOUR ACTIONS, IF YOU HAVE DOUBTS DO NOT PROCEED WITHOUT ASKING. 2. NO ONE APPRECIATES PLAGIARISM. A MENTION WOULD BE AMAZING. 3. IF SOMEHOW YOU'RE A WIZ AND EARNING FROM ANY IDEA/ CONTENT OF THIS GUIDE, THEN BE KIND AND SIMPLY SUPPORT THIS SITE. Credits/ Gratitude @Ashal
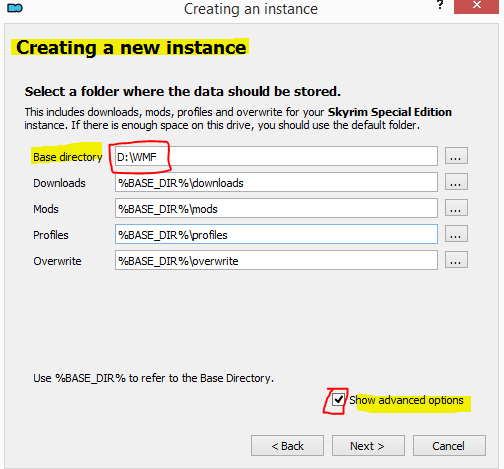


-
This is a complete walkthrough of "A Snare To Loosen", the first quest of The Trappings of Fate. It was made for TToF v1.1.1. There might be slight differences with later versions, but nothing that should invalidate this guide. Needless to say, this is heavy spoiler territory. These first few spoiler tags below here hold the sequence of steps to get through the quest. First room: Second room: Third room: and these spoiler tags hold video guides for how to execute the individual steps: Quest start: First room: Second room: Third / final room:
-
 On this page is instructions on how to get beeing female 1.5.97 working and compatible with ae mods. In the future, ill be working on beeing female, fm( when/if I get permission to post) and other pregnancy based mods. At the end of this guide for downgrading skyrim, follow this link This is a more repaired version of Beeing Female. Follow its instructions once you have a functioning version of skyrim 1.5.97 installed. check out his other files For creature support or For more realistic looking children. follow the instructions on his post inorder to get the files installed. Beeing female and addons update View File I am not the original creator of this mod at all, In fact I've done very little work myself. I was able to get this far with the help of so many people who were able to get me passed roadblocks. The idea behind this post is getting beeing female working by downgrading Skyrim to its last fully functioning version: 1.5.97. The attached file is the last stable version, which was finished by Maxshlong. Thank original creator of the mod and its se version is milzschnite. Here's the original link: Instructions for install: Philosophy of install- the idea is to downgrade skyrim to 1.5.97 inorder to use most stable version of BF, then using other mods that allow more updated files to function on 1.5.97. The only thing that is not directly compatible is the newer Dlls. This is not too big of an issue, every mod I had with Dlls had a 1.5.97 version, and if it doesnt one could probably be made with enough skill and time. First step- make a copy of your skyrim directory incase you make a mistake. This doesnt have to be a copy of every thing in MO2, just the skyrim special edition folder itself. If a mistake is made, you can simply drag your copy over your skyrim folder in order to return everything back to normal. second step downgrade skyrim to 1.5.97. There are many ways to do this. For me I used a patcher from https://www.nexusmods.com/skyrimspecialedition/mods/57618?tab=files. The top patcher is for the most recent version down to 1.5.97. you need to download the correct patcher for your game version or else it will give you errors. For me, I had to use the 1.6.64- 1.5.97 patcher because that was the version I had. If you are unaware of what your version is, go to you skyrim folder and check skryimse properties. It should tell you what version you have under details/ product version. for step three download BEES https://www.nexusmods.com/skyrimspecialedition/mods/106441?tab=description and address library for skse plugins, the se version both parts 1 and 2. The last step is going to be downloading the correct DLL files. srt crash fix should be change to sse bo.3. engine fixes will need to be redownloaded to its se version. After downloads, change engine fixe's tmol file to AnimationLoadSignedCrash = false. This should get rid of engine fixes 64 error. At this point things should be almost working. go to data/skse/plugins on MO2 and sort it by file type. This should separate the dll files which will have their providing mod displayed to its right. disable the mods, reenabling them one at a time as you change and test them. For me this process was easy. I needed to change around 50 mods. Some like power of threes papyrus just needed to install, with the se version option selected. Others I had to go to their download page and download the 1.5.97 version of the mod. J containers, cbpc anus, sexlab had to have 1.5.97 reinstalled. Simply knock needed to have 1.5.97 installed along with https://www.nexusmods.com/skyrimspecialedition/mods/24297?tab=files&file_id=114156 downloaded to get it to work. Racemenu needed to have 0-4-16 version installed The two files that were the most difficult was alternative start and unofficial Skyrim special edition patch. There are 1.5.97 versions of these mods, but they are not displayed on the main page. In order to find the 1.5.97 versions I had to search on reddit, which directed me to the hidden archive on the mod pages. Without the 1.5.97 version, these mods will not work because they rely on ae dlcs. And thats it. After this process and mods will work 1.5.97 and newer. There may be a few mods with specific ae dlls and no se dlls, but these should be rare. Other ae mods without dlls should work without any effort. For me this process led to a better functioning Skyrim since some of my mods did not like ae. These mods became completely functional. all other se specific mods should work now as well in theory. Mods like untamed, for example, should work. Future plans: I am hoping to create other mods based around pregnancy. Over time I hope to improve the script on this file, and maybe even eventually give it a full ae update if my scripting skills ever get high enough. Being female was known to cause scripting bloat. For now, all my work is going to be done in se and I'll probably focus on other mods. Specifically all the addons working for BF. With this mod being functional, I'd rather get alpha versions out for my own mods. I'd love to get a pregnancy slavery mod going, as well as a lore based reason why Skyrim is so sexual. The idea behind these mods is going to be that the female population of Skyrim is low because of X reason, so guys are naturally more horny towards any women they see. They might say things like, Look a woman! when they see you. stuff like that. Slavery options being that they want children, so they enslave you until you give them enough. maybe its just one or more, who knows. After giving them the children they will let you go. Another mod idea is maybe something similar to public whore, but based on pregnancy. After a while cities get desperate for children in order to fight their wars, passing laws that mean pregnancy is mandated. Walking around while not pregnant could result in a sex or the city forcing you to get pregnant in some way. As far as progress, I've made a mod that turns the majority of skyrim residents into men, but its a rough xedit mod. All these mods will be standalone, but I am planning on making BF the main pregnancy mod behind these others. This requires getting BF and its addons into a mostly working state. Credits: Orb 23 for constantly checking and working on these files for a long time. He stated in support post to have been checking every few months for updates. He was the person who showed me how to do this, so without him this page would not exist. I'd still be staring at compiling software wondering why it wouldnt work and would have taken much longer; maybe a year or never. Uncle64 for updating the dll to 1597 Maxshlong for getting the file fully working on 1.5.97, along with Uncle 64, Patch man, Kae Arby for helping him milzschnite for the original work on the se and making the original mod, along with Zerantha for assisting him in the se conversion. Everyone milzschnite credits: Trixy - for Procreation Muon Shan - for your active help Huili - for your rus. translation Aravis7 - for your france translation and your help with the baby mesh xiaomiza - for your chinese translation jbezorg - for help with the baby mesh Slorm - for sharing his bug fixed FWSystem Leito - For the birth animation Corum - For the PMS "Depressive" fix Lactina - For the Baby-Armor-Mesh Vader666 - For converting the Baby-Armor-Mesh Vioxsis - For converting the Baby-Armor-Mesh Bane Master - For his BeeingFemale Patch Chosen Clue - For his BeeingFemale Patch qotsafan - For his BeeingFemale Patch Lovers Lab Community for the really great support, help, bug fixing, and way way more! This is a file that was made with a small army of helpers, possibly more that were not mentioned. Submitter Amber02000 Submitted 03/04/2024 Category Adult Mods Requires All being females requirements, BEES, engine fixes, patcher, address library for skse plugins Regular Edition Compatible No
 -
INTRODUCTION Skyrim VR is aging. The SKSE site lists the different game versions, and Skyrim VR is the oldest and no longer receiving updates. This is good, in the respect that Bethesda won't change anything about the game that breaks mods. But it's also bad because mod developers are not making mods that are backwards compatible with the VR version. In this list, I'll provide exact versions and URLs for where to find the mods I use, if I can. Some of these are no longer available. Ask me if you would like the version I have. If I get enough requests, I'll put them on a cloud drive. LEGEND 👄 means Adult content ♀️ means female main character content ♂️ means male main character content INSTALLATION Start with a fresh Steam install of Skyrim VR. Ensure you have no files in "My Documents / Save Games / Skyrim VR" or "Skyrim Special Edition". We're starting clean. If cloud saves put games back in, that's ok. Run Skyrim VR once, as is, without any mods, in SteamVR. This will create and populate "My Documents / Save Games / Skyrim VR" with some files. CLEAN MASTER FILES This could be considered an optional step. Some modders swear by it, others never mention it. I've done this both with and without cleaning and I honestly can't tell the difference, which is why I call this "optional". This is the YouTube video that I follow. Everything you need to know is in there about how to get SSEEdit 4.0.4, configure it for SkyrimVR, and how to clean the files. I'll post some notes about this below the video. I also don't have an opinion on when to clean. Before you start Skyrim? Before your first save? After? I will leave that up to you because I don't think it makes any difference. NOTES: At this point in the video, he's just a little impatient. Dawnguard takes a bit to load and the offending line will show up in red if you let the application work for a moment. Autoclean Update Autoclean Dawnguard Manually clean Dawnguard - Cell block 5, sub-block 3, in the RIGHT HAND pane, 4th column - remove "RiftenRatwayZone [ECZN:0009FBB9]" - Cell block 2, sub-block 1, Guard - remote the whole record - Cell block 8, sub-block 1 Test - remove the whole record Autoclean Hearthfires Autoclean Dragonborn DO NOT CLEAN SKYRIM SETTING UP VORTEX Install Vortex. If you prefer another mod manager, that should be fine, but I've only used Vortex. Use Profiles. This will keep your mods and save games in sync. Maybe you want to be a breton today, tomorrow a khajiit. By using profiles, you can switch between them as if they're separate installs. NOTE: you cannot change the settings of the mods, just whether or not the mod is installed, so keep that in mind when configuring later in SkyUI. Take note of your profile's ID. It is used for where your save games will be written to. For example, mine is "SkS-j0XPh" and so my save games are written to C:\Users\corysia\Documents\My Games\Skyrim VR\Saves\SkS-j0XPh. If you have trouble saving your first game, it may not have created that directory and you'll have to do it yourself, and then save. I've only had that happen once, but it's easy to fix. My Steam Library is on D:\Games, so Vortex needs to be configured to use the same drive. In settings, under the Mods tab, I set my staging folder to be "D:\Games\Vortex\staging\{game}" and set Deployment Method to "Hardlink". In Settings, under Download, I've got my Download Folder set to "D:\Games\Vortex\downloads" SET UP SKYRIM VR FOR MODDING Start Vortex. When it first starts, it may need patching and provide a number of alerts in the upper right corner. For loose files, just press 'fix'. The rest we can ignore for right now. We'll fix them as we progress. Visit SKSE and download sksevr 2.0.12. That's the version for Skyrim VR. On the SkyUI VR GitHub page, you'll find SkyUI 1.2.2 Skyrim VR Tools 2.3-BETA UIExtensions 1.2.0 Install Fores New Idles in Skyrim [Required] FNIS Behavior VR 7_6 XXL (Optional) FNIS Creature Pack SE 7.6 if you are going to use creatures (I do) (Optional) FNIS Spells SE 7.0 (I don't use this one) Configure FNIS in Vortex to auto-run. Go to the Mods tab and then click "Configure FNIS" along the top menu bar. Be sure to check the Skeleton patch, as we'll be needing it shortly. Also, if you run Fores by hand, it may repeatedly bring up this "Create a shortcut" menu. If you read the message (I didn't, for the longest time! ), if you hit [Cancel], it won't ask you again. 👄Install SexLabFrameworkSE_v163_BETA8 because this is the last version that still supports VR. Install the SexLab VR patch beta8 38-test, tell Vortex to load after the SL framework Install the SexLab VR patch hotfix for v38, tell Vortex to load after the previous patch you just added. Install XP32 Maximum Skeleton Special Extended (XPMSSE) 4.80. This is what we needed the checkbox in FNIS for. For options, I select the following: Skeleton - Physics Extensions Character Creation pg 1 - Racemenu (we'll install that shortly) Character Creation pg 2 - Out of sync Animation Variants - none for everything First Person Animation - none Mounted combat animations - none Compatibility pg 1 - 👄Schlongs of Skyrim (we'll install shortly) Compatibility pg 2 - none, I don't use Deadly Mutilation Compatibility pg 3 - none, I don't use Enderal Install RaceMenu Special Edition v0-4-9 This specific version. Install RaceMenu VR 0.4.14 Delete skee64.dll and skee64.ini from <your_steam_install>\steamapps\common\SkyrimVR\Data\SKSE\Plugins NOTE: When you install the next mod, you'll get a warning about deleting 2 files. It's OK. Install PapyrusUtil VR 3.6b. NOTE: This version does not need the Address library When prompted, override SexLab with this version (in other words, Load After) VR Address Library Papyrus Tweaks NG Install VRIK Player Avatar v0.8.1 Build 28. NOTE: If you're going to play the vanilla introduction and not use Realm of Lorkhan as I do, disable these VRIK mods until after your hands are freed. (Optional) Install VRIK Rift-Index-WMR Controller bindings. This will remap some of your controller keys. (Optional) Install Arctal's VRIK Tweak, tell Vortex to override VRIK. 👄Install HDT-SMP VR (Skinned Mesh Physics) for Havok breast physics. Install BodySlide and Outfit Studio v5.5.2 Options: BodySlide and CBBE Body Physics, RaceMenu Morphs for CBBE Install Caliente's Beautiful Bodies Enhancer - v1.6.2, tell vortex to override BodySlide when asked Base Options: Curvy, ?None, Vanilla, Face Pack, Thin + Trimmed Brows Optional Features: check everything 👄Install Schlongs of Skyrim for VR 1.0.7 Default body, Hairy, and all addons Load after XP32 Install Fuz Ro D'oh VR Run BodySlide Studio. You'll want to check the meshes checkbox and the "Build Morphs" checkbox, then press "Batch Build". You'll get another dialog box asking about which sliders to choose. I select ?"CBBE Body HDT" which will make my character nude when undressed. There are other options for Undies, etc. On the next screen, you'll also see a list of outfits and you need to pick a shape again. Here, I choose CBBE Physics (I'll try to grab a screenshot next time). It should generate morphs for 292 items. OPTIONAL PRE-GAME MODS These are some additional mods I typically start with prior to creating a new game. Achievement Mod Enabler to enable Steam Achievements Install Realm of Lorkhan v.3.6.1 Install Realm of Lorkhan - Unbound patch (Optional) Realm of Lorkhan - No Shards No Starting Spells No Racial Starting Spells KS Hairdos SSE CREATING A NEW GAME In this section, I'll describe how I configure these mods from within the MCM. I won't go over all of my personal settings, but I'll call out some important ones. In the end, you should set it up the way you want to play. (Optional) Disable RaceMenu while you initially create your character. I do this because I just want a Breton. After you create your character and make your first save, you should re-enable RaceMenu. I find Race Menu too hard to work with in VR. Leave it on if you want the full functionality of it. Start a new game and create your character. I have found that when I try to switch from Male to Female, SteamVR locks up and I see my harddisk running solid for a bit. Sometimes I have to restart, other times I can just wait a bit and the female model will eventually show up. It didn't used to do this, but I am running in to this often now. Just be patient and keep trying if you're going to play a female character. After your character, configure VRIK. Go in to your Magic menu and select the VRIK Calibration Power. First, go with "Headset Height". After the power cooldown delay, go in again and choose "Default". I'm 5'3", so I then choose "shorter" a few times to get me at the height I want my character to be. Finally, choose "VR Scale" and then done. You can now unselect the VRIK Power option. Next, in the MCM, select VRIK. Under Controls, I like to check "selfie" and set the compass to "left hand up" so I only see the compass when I look at the palm of my left hand. For SexLab, first you need to choose Install and then exit the MCM. After it is installed, go in to the MCM again and under VR I like to choose "Lock view to body" and then I usually prefer to "disable 3rd person" so it's all 1st person. Under Animation, if you want creatures, turn that on and then exit the MCM. You'll get two notifications that Creatures is installed and you have to wait for both of them before the MCM will respond again. Go back in to Animation and set your preferences. If you want aggressive animations, be sure to set them to be allowed here or you'll get messages later saying how they were blocked. Under voices, I change my voice from Random to a voice I prefer. For NPCs, I set them to reuse their voice. Quit out of the MCM and save your game. Now is when you verify that your saves are going in to the correct subfolder. In my case: C:\Users\corysia\Documents\My Games\Skyrim VR\Saves\SkS-j0XPh Re-enable Race Menu if you turned it off. These are the core mods I start with. The rest of them are Quality of Life changes, adventures, and bugfixes. I'll continue to update this post periodically. QUALITY OF LIFE MODS In this next section, I'll list out all of the mods I add just to improve Skryim VR. Amazing Follower Tweaks SSE 1.66 - lets me turn anyone in to a follower and gives me the options to give them more commands than the default game. Audiobooks of Skyrim - I love to read, but not in VR. Audiobooks of Skyrim Gopher Collection 1 - Audiobooks read by Gopher Audio Settings for Audiobooks of Skyrim - gives a separate volume slider for the audiobooks. Be Seated v4.2.5 - really fun one where you can sit at a bar in an inn and order a drink and they bring it to you! Note: I have no luck with beds, I get stuck in them, so I disable that. Requires Skyrim VR Tools The Unofficial Skyrim Special Edition Patch v.4.2.6 - later versions won't work with SkyrimVR requires SkyrimVR - USSEP Compatibility Patch Campfire - a complete camping mod - My Breton is a forsworn, so she should be able to make basic bows and such in the wilderness. Papyrus VR should override Campfire. SexLab should override Campfire. We want PapyrusVR to be the latest Papyrus engine. Carriage and Ferry Travel Overhaul - More options to where the carriages will take you. (Optional) No Fast Travel - I'm using VR and a treadmill, I want to have to walk or pay for a ride. Crouch to Dodge VR - You'll break a sweat doing squats, I promise! Darkened Dungeons SE - dungeons should be dark Replaced in favor of Enhanced Light and FX Dual Wield Block VR - because you should be able to block even if you're holding two weapons or a weapon and a spell. Fishing in Skyrim VR - teach a girl to fish, you feed her for life! Footprints - because you should leave tracks in the snow. HIGGS Enhanced VR Interaction - because you should be able to touch everything in your world. Holidays - who doesn't love a party? In the MCM you can set your character's birthdate. Immersive Sounds Compendium - several improvements to sounds. I leave the Nirnroot as vanilla, however. Immersive Draw & Sheathe Sounds VR - a patch for the above compendium Modern Brawl Bug Fix - because for some reason, probably cloaks or something else, interferes with brawling and they always pull a weapon on me. Realistic Water Two SE v5.6.0 - water looks so much better Smoking torches and candles - I prefer the subtle option. Replaced in favor of Enhanced Light and FX Static Mesh Improvement Mod (SMIM) - really improves the looks of things. You'll have a lot of conflicts with this one. Always load it 'before' because the rest of the mods are newer, I'm sure. Super Simple Lock Bash - because you should be able to break in to a chest VR Bound Bow FX Restored - makes bound bows like the non-VR version Weapon Throw VR - so you can throw weapons, torches, etc. Lots of options in here. Wet and Cold SE - I like seeing my cold breath, etc. MAGIC More Valuable Spell Tomes - because magic shouldn't that cheap. Spell Research 2.2.2 SSE - to research magic rather than just reading a book. Be sure you go in to the MCM and import spells. No Spells From Vendors or Loot, to force me to do the research rather than saving up a ton of money Immersive College of Winterhold SE - a wonderful expansion to the College. A must-have if you play a mage. College of Winterhold - Quest Expansion - More quests for the College, and they're actually good! iUnlock - Spell Research version - import spells in Spell Research to pick this one up as researchable. Simple Mark & Recall - I loved this pair of spells from Morrowind. Not researchable, unfortunately, so it's going to be expensive! Teach Followers Spells Full SSE - do I teach my follower or do I sell that spell tome? Hmmm.... Wards Functionalities Extended - a ward can't stop an arrow?? Now they will. But shouts should break wards. Face Changer - I get this one mostly so I can change my hair style. Collage Days - Tuition, ugh!! bHaptics and KatWalk No Stamina Drain For Sprinting - This sounds overpowered, but I'm using a KatWalk. I promise you, my stamina drains faster running Real Life than it does in the game! TactSuit SkyrimVR - Only useful for someone with bHaptics toys. They're so much fun! Skyrim VR Configuration Tool - This handy tool allows you to adjust a lot of things. I read about it on reddit. I'm 5'3" and to physically crouch on a KatWalk with the default settings is more burn than I can handle right now, so this let me adjust it to a more comfortable stoop and still let me walk. NOTE: Another very useful feature is it allows you to increase the priority of Skyrim VR, making it run smoother. At this point, I run the game again and configure the MCM. And make another save game. Here I also joined the Forsworn faction and chose the Lover's Stone. Next, we'll start installing the Adult mods. Here we have to be careful because loading too many of these at once can overtax Papyrus. So, I periodically start the game and configure the MCM. RSSE Children Overhaul 1.1.3 with hotfix 1 - USSEP patch, 2K Aventus, Facial animations Hearthfire Multiple Adoptions JContainers VR 4.1.13 Enhanced Lights and FX - loading this later as it detects mods 👄Sexlab Aroused SSE Loose 29 👄ZaZ Animation Pack+ CBBE HDT V8.0+SEREV3 - ZaZ is going to give you a lot of extra items and put collars around the necks of a lot of people. Lots of slavery in Skyrim! Be sure you register SexLab in its MCM settings. 👄ZaZ Animation Pack+ CBBE HDT V8.0+SEREV3 Voice files 👄ZaZ 8+ - VRIK No Spin - VR Patch - this will cause a conflict, load it after to override. 👄SexLab Sexual Fame 0.99 - visit the MCM for rules, you might get arrested! 👄SexLab Sexual Fame Comments 3.31 👄SexLab Sexual Fame Comments Voice Files 3.31 👄Creature Framework 3.0 and More Nasty Critters. Be sure you look at the video there to understand how to put the 3-part file back together. 👄Fertility Mode 3.0.1 - choose Skyrim Special Edition and BSA. Ignore the Special Edition Patches, they're no longer needed. Choose HMA + SexLab. In the MCM, I like to deselect auto-inseminate PC, select only unique men and women. And I slide the UI bar ♀️ over from 900 to about 925. I also set the race to random between mine and the father. 👄Fertility Mode v3 Fixes and Updates Fertility Mode VR Name fix ♀️ Fertility Adventures - I disable the sleep creep. It happens too often. 👄SL Defeat - I would prefer to use Naked Defeat, but it doesn't play well with VR. This one is still good, tho. You need to turn on SL Defeat in the MCM. NOTE: If you find yourself being molested and the molester is suddenly attacked by the town guards, this is due to a setting down in Player as Victim called Witness Intervention where you can allow others to join in or save you. TURN IT OFF! Especially if you're a town or inn and don't want your NPC attacker to be killed. NOTE: If enemies stop attacking you, you probably need to go in to this MCM menu and CLEAN because your state is stuck in recovery mode. It's to allow you to get away and not be repeatedly victimized. But it gets stuck now and then. 👄SL Defeat Voice Files This is enough for now. I start up the game, and wait a bit for the MCM to catch up. The game might crash. Just try again. If it keeps crashing, start taking out mods and retry. Configure the MCM, and make a save. Now for the next batch of mods... 👄Devious Devices SE & VR 5.1 - I choose CBBE SE, FeuerTin, Bunnyhopping, no beast race, ♂️Devious Devices for Him, and Skyrim VR. I have Devious Devices override ZaZ conflicts. 👄Devious Devices 5.1 VRIK No Spin Patch - the patch should override the original. 👄Devious Cidhna 👄Devious Cidhna Voices 👄Sexual Persuasion 👄Sexual Persuasion voice 👄SL Animation Loader SE 👄Rydin SLAL Pack - You'll need to enable these in the SL Animation Loader MCM. 👄Absolutely No Naked Comments 👄SexLab Achievements - gamification of naughty activities! Time to break again to let Papyrus handle this. Before starting the game, run BodySlide to update the morphs for your new outfits. You'll get a list of options to choose. I choose HDT or CBBE SE whenever it's offered. It should be up to 448 morphs now. I always get an error on the Khajiit chain harness and the Breast Rope Extreme harness. I don't know how to fix it, so I ignore it. It hasn't messed me up so far. Skyrim Utility Mod (SUM) 👄Prison Overhaul Patched 5.32 (requires SUM) 👄Prison Overhaul Patched Voice SUM & POP No Spin VR Patch - load after-all 👄♂️Flower Girls SE and VR - remember to go back to Fertility and monitor FG girls if you'd like. 👄♂️Flower Girls SE Adventures 👄Public Whore 👄Public Whore voice 👄Public Whore SlaveTats Public Whore SE/VR patch 👄♀️Submissive Lola Resubmission 2.1.0 NOTE: If you don't set this to nickname mode or your character's name will be changed to Lola and it will affect your save games. When you end your service, you can get your name back. But you will need to save and restart your game for it to work properly. NOTE: By default, zaz slave control is off. Unless you've another mod that would conflict, I suggest turning this on because it will require other NPCs to ask your owner for permission first. ?Submissive Lola voice 👄♀️♂️Radiant Prostitution Gigolo SE 7.0.4 - This mod does not fully work, none of the additional quests will load in Skyrim VR. I've been trying to figure this out, and I think it's due to JContainers VR not being as current as JContainers SE. But the basics work. 👄Radiant Prostitution RMCW Edition 👄Radiant Prostitution v7.0.4 Voice Pack Gen4 👄Simple Slavery Plus Plus 6.3.19 [SE] 👄Simple Slavery Plus Plus voice 👄Spank That Ass SE v4.5 (25-Jan-2021) - there is a voice file for this one, but it doesn't match my chosen voice. Oddly, this will sometimes show up as "trial run alpha". 👄Dripping When Aroused SE (DW 2022-03-03) - also called Dripping Wet or Dripping When Wet. 👄Love Sickness 1.0.1 - Set this for hearts only on onset so you know when you first enter this stage. I have a lot more mods installed. I'll list them here, in no particular order. If there's interest, I'll track down the exact URLs like I have above where I can. But I'm not sure anyone's read this far! Skyrim VR Change Your Bindings NOTE: If you try to load VRIK Rift-Index-WMR Controller Bindings V2.1.0, this app will throw a parsing error. It turns out that the VRIK map adds an unexpected Activate option to the "Favor" section of the file. If you open the file in a text editor and delete Line 229, the VRIK mappings will open in this app. NOTE: combos are supposed to work, but I can't get them to, so maybe this is useless. 👄Body Search & voice files - gets repetitive, so turn it way down. 👄♀️Troubles of Heroine - can be Troubles of Hero, lots of options. I disable some side quests I don't personally care for. 👄♀️A Forsworn Story iNeed Food Water and Sleep Continued v1.93 - I can only see 1.94 now, so I don't know if one can still get this version. iNeed Water VR 👄Amorous Adventures All Male Housecarls light version 👄Animated Prostitution 👄TDF Prostitution 👄Bathing in Skyrim - I ended up removing these because of conflicts with layers on my character. 👄Bathing in Skyrim Tweaked Becoming a Bard & voice 👄Dark Desires Club 👄Devious Lore 👄Devious Enslaved Continued v13.25.0 👄Dibella Sisterhood 👄Fade Tattoos 👄Rape Tattoos & Rape Tattoos Tweaked 👄Horrible Harassment + no spin patch Improved bound sword and dagger collision 👄Sex Slaves aka Mia's Lair Immersive Good Boy - for Meeko, if I pick him up. Quiet Dog - Sit - I'm tempted to go with Complete Silence, but I don't want to break conversation. Ride Sharing Semi-open guard helmets 👄sex with thieves 👄Dangerous Nights - turn this WAY down or you'll never get any sleep 👄SL Kidnapped Spouses Enhanced Blood and Silver - vastly increases the size of Cidhna mine. 👄Skooma Whore Relationship Dialog Overhaul Relationship Dialog Overhaul - RDO SE - RDO - AFT SE Patch Final
-
 This guide assumes no previous knowledge of modding to make it accessible to everyone, so some details may appear trivial to you. Some of the steps are 'to be on a safe side'/ 'just in case' and might not be entirely necessary. Last updated: 28 Oct 2017 Step 1 - Buy and Install Fallout 4 There is no need to install any DLCs for Four-Play to work. Make sure you have the latest version of the game (1.9 - released 6 Feb 17). Steam should automatically keep your game up-to-date. Run the game at least once to generate the ini's needed for Step 2 Step 2 - Enable Modding and Papyrus Logging Navigate to Documents/My Games/Fallout 4 Right click on Fallout4Prefs.ini, select Properties, untick Read-only if it's currently ticked and click OK. Repeat for Fallout4Custom.ini. Open Fallout4Prefs.ini Find [Launcher] section, under it, make sure that bEnableFileSelection=1 If [Launcher] or bEnableFileSelection doesn't exist, add them It should look like this: Save Fallout4Prefs.ini Still in the same folder, open Fallout4Custom.ini If Fallout4Custom.ini doesn't exist, create a new text document and name it Fallout4Custom.ini Find/ Create [Archive] section and make sure it looks like this: (Optional but Recommended) Still in Fallout4Custom.ini, find/ Create [Papyrus] section and make sure it looks like this: (Optional but Recommended) Still in Fallout4Custom.ini, navigate to the [General] section (or create one) and add the following: Save Fallout4Custom.ini Right click on Fallout4Prefs.ini, select Properties, tick Read-only and click OK. Repeat for Fallout4Custom.ini. Step 3 - Download and Install the latest F4SE Download the latest F4SE here. Double-click the file you just downloaded, follow the installation wizard, remember to double-check whether it finds the correct installation directory for your FO4. Let the installation wizard install F4SE for you. Step 4 - Pick a mod manager: NMM, MO or Manual I don't recommend manual installation at all. Things will get hectic very quickly. Nexus Mod Manager is more stable but wastes a bit more HDD space, Mod Organizer causes CTDs at game startups occasionally. Download a mod manager and use its respective installation wizard to install it. Step 5 to 12 are tailored to which mod manager you use. They are very similar in principal though. Mod Organizer Nexus Mod Manager The final two steps are universal for MO and NMM. Step 13 - Load a Clean Save, Initialize Four-Play Framework and Leito's Animation Pack Load any save without Four-Play installed on before. All the better if it's an unmodded save (without the [M]). While in game, wait a few seconds. You should now get a popup asking which animation packs to load, select the appropriate option depending on which animation packs you have installed (I recommend installing all). On the top left corner of your screen, you should see the notification ""Vinfamy: Registered Leito's animations and intialized Four-Play with Supermutant support.". Followed by a bunch of "Vinfamy: Thanks for installing xyz" if you use my plugins. These indicate that both Four-Play and Leito's animation pack has been installed correctly. If they don't show up or if you get "Four-Play Framework has not been installed correctly. Animations won't start.", something went wrong and please double-check that you haven't missed any of the steps above. Step 14 - Enjoy! All your Four-Play plugins should now work as described. Leito's animations should now play, with sounds. Actors involved in sex scenes should strip and redress (redressing may fail sometimes for leveled actors - known issue) correctly. Read the plugins' respective download pages to know how each plug-in works. In attachments are what the two tabs of NMM look like in my very light set-up. Don't worry too much if your set-up doesn't match: load order of the Four-Play mods don't really matter and you don't have to install all the plugins or the control panel.
-
 Conglomerate 01 This guide is for Skyrim LE: Terms for "Skyrim LE": Skyrim Legendary Edition Skyrim + the three DLC: Dawnguard, Hearthfire, Dragonborn Skyrim 32bit version + 3 DLC Highly recommend additional Skyrim LE guides: 2020 Skyrim LE Stability Guide STEP Skyrim LE v3.0 For more Skyrim related links: Conglomerate - Links For Skyrim SE check out this guides: (v1.1.2) Mod Organizer 2 & Other tools - From zero to "Hey Sexlab is working!" Skyrim SE for Beginners - V 3.2.0 (3BBB / HDT-SMP / HPH) Intro: My blog is pretty basic and should be used as a "quick" reference to prepare Skyrim LE for modding. If you want to learn more about the technical aspects on how the various Stability Fixes for Skyrim work you can start your research from here. Main goal is to show how to install Skyrim ready to be modded and how to use "Stability Fixes" to keep Skyrim LE stable even with a multitude of installed mods. In addition you can find here a list of tools needed to keep the game stable and fix issues. The instructions are written in a way that a user can just work through it from top to bottom (recommend!), for a first install or a reinstall of Skyrim LE. I use Nexus Mod Manager (NMM v0.8+) in combination with Wrye Bash to compensate for the NMM shortcomings, that's why you find a few NMM related hints included in this blog. The stability fixes are the same for use with any Skyrim LE setup unrelated to the used mod manager (MO, MO2, Vortex, Wrye Bash). I mainly post only solutions I tried or use on my own Skyrim setup and that showed practical results. Many of the here posted fixes and tools are the absolute basics and mandatory to create a stable modding environment. In combination with Conglomerate 02 it is possible to create a lewd base setup that can be trusted to be stable. A stable base setup is needed for troubleshooting, because it is really hard to find mod bugs or conflicts if the base setup creates glitches or worse crash to desktop (CTD). Most used abbreviations and technical terms: Conglomerate - Abbreviations and file types What you find on this blog page: Installing Skyrim LE Installing Skyrim LE Backup and preparations before uninstalling Skyrim TES5EDIT Quick_Auto_Clean and cleaning Skyrim Master files a quickie with Quick Auto Clean SKSE & SKSE.ini Mandatory Papyrus expansion Memory (Block) Fix Crash fixes, Crashfixplugin.ini Memory allocator String count fix other fixes ENBoost & enblocal.ini ENBoost is the standalone memory manager without the graphical effects from ENBSeries Provides Skyrim with more usable memory BethINI ini configuration tool and tweaks fixes user errors and/or fixes changes from ini manipulating mods Savegame Tools: FallrimTools NetImmerse Override Cleaner (SKSE Co-Save Cleaner Utility) Other useful Tools: 7zip Notepad++ 1. Installing Skyrim LE Installing Skyrim LE Backup and preparations before uninstalling Skyrim 2. TES5edit and cleaning the Skyrim DLC Master files 3. SKSE & SKSE.ini 4. Crash fixes, Crashfixplugin.ini 5. ENBoost & enblocal.ini 6. BethINI 7. Savegame Tools: FallrimTools NetImmerse Override Cleaner (SKSE Co-Save Cleaner Utility) 8. Other useful Tools:
 -
 SCake Guide : How to set up animating and import animations for Project Sugar Cake (This guide is originally available on our Discord via GDrive and on my site at https://www.michaelpstanich.com/article/SCake_HowToMakeAnimsGuide.html - all sources have the same general information but updates will push to the Discord GDrive version first. Just easiest to update.) Last Guide Update : 2024-04-08 Update : 2024-04-08 : Updated Step 4 and 5 in “Setting up our UE5 Project” to include a failsafe setting which may be required in some instances. Added a note to “Exporting our New Animation” Step 3 about excluding keyframes to allow in-game physics and animation blending. Current Project Sugar Cake Thread - https://www.loverslab.com/topic/225549-project-sugar-cake-sex-and-stat-framework-gameplay-mod ----- If you’re unfamiliar with Project Sugar Cake, SCake is an animation framework for Palworld focused on erotic animations. The framework has a lot of options for animators and users that allow the framework to be used for animations ranging from simple to complex with adjustable .json files. This is meant to be a ‘complete’ guide getting you from no knowledge of palworld into making animations for SCake and releasing Animation Packs! Many sections of this tutorial are either extra information are alternate methods and can be skipped entirely, don’t be intimidated by the length! Nearly everything is explain in detail, so if you’re new to Palworld modding this will help catch you up on terms and methods, but if you’re already familiar with modding Palworld you can follow the simple steps outlined without needing to follow every section. Social Links : Our Discord – The Broken Chatbox – https://discord.gg/h3vB7S4FEw -v- Donations! -v- =^-^= SubscribeStar - https://subscribestar.adult/michaelpstanich If you need any additional help or have questions regarding the guide, don’t be afraid to join our discord (linked above)! We’re a creative community and directly endorse SCake, so we are the best equipped to help with SCake directly. You can also ask the Palworld Modding Discord for help with general things, however make sure you follow their rules and content guidelines when asking for help! ~ (_) ~ Sections ~ (_) ~ -1. TLDR Version 0. What is this tutorial/guide for? 1. Understanding the Tools and Formats (Palworld with UE5) 2. Understanding and Planning for SCake 3. Extracting the Skeleton/Model 4. Importing into Blender and Animating 5. Exporting our New Animation 6. Setting up our UE5 Project 7. Importing Animations and Configuring for SCake 8. Exporting our Animation Pack and Configuring the JSON 9. Setting up our Animation Pack for Public Release 10. Final Notes Disclaimers : (0) I’m writing this tutorial for ‘the current state of things’ and there may be better or more fluid workflows for all of this, don’t consider this guide to be the end-all be-all of guides! (1) I will be linking to the Palworld Modding Wiki ( https://pwmodding.wiki/ ) through-out this guide as a source for other basic guides. This does not mean all the information supplied will be complete or up-to-date. I am not directly affiliated with the palworld modding wiki. (2) The tools linked here are not affiliated with myself or SCake, nor is their inclusion an endorsement of SCake and its contents. When reaching out for help regarding SCake make sure the parties involved are interested in helping (such as our own community). -1. TLDR Version This section just lists the steps without any explanations, check each section for more information. This TLDR will help you find where you may want to read more into and what you can skip. 0. This guide is for making SCake animation packs 1. Links and Details for the tools we’ll be using 2. SCake registers animations then plays those animations through events which are lists of animations with various parameters, there are also climax variants that can be defined for each animation which plays back dynamically 3. If you already have a model with the appropriate rig to animate, skip this step. If not, find the model you want to animate in FModel and export it. 4. Import into Blender using the io_scene_psk_psa plugin for Blender 4.0 (When using Blender 4.0) with default settings 5. Once done with your animations, export each animation individually into a .fbx file with the displayed settings linked in this section 6. Create a UE5 project for your mod and import Fixed Bone Index Assets for the models you are animating for then create your animation pack’s folder and set-up 7. Import the animations targeting the correct fixed skeleton, create a montage from each asset and set the looping section in the animation if it should loop 8. Export your animation pack as a .pak using UE5’s packaging function, then set up the .json file following the templates provided (section details settings) 9. Test your animation(s) to ensure they work properly in-game, if they do then package up and publish your mod wherever you please! 0. What is this tutorial/guide for? This tutorial is for people wanting to make animations for the Palworld mod ‘Project Sugar Cake’ (SCake), allowing the animation to play in-game through the SCake API. This guide will have a lot of general information about modding Palworld and importing for UE5 mods, however we will be focused on SCake in this guide specifically, linking to other resources to learn about certain aspects that are better handled elsewhere. If you’re already familiar with Palworld modding then this won’t be a problem, but if not I recommend following through each section at your own pace and try not to skip around! By the end of this tutorial you will hopefully have a good starting point for getting Animations into Palworld with full integration with SCake! 1. Understanding the Tools and Formats (Palworld with UE5) Palworld uses UE5 as its engine and the modding community uses general modding tools for UE5 games along with a modkit (Tutorial for its installation here - https://pwmodding.wiki/docs/category/palworld-modding-kit ) created by a community member (localcc), remember to thank them for all their hard work! Palworld using UE5 is actually really beneficial to us since it allows us a lot of power with modding, but it also has some limitations and we have to work with very specific formats in a not always typical fashion. Let’s break down the software and formats we’ll be using. Creation Tools : Unreal Engine 5.1.1 (Yes, the whole actual engine!) Resource Link : https://www.unrealengine.com/ This one you’ll install through the Epic Games Launcher, it’s legit just the normal UE5 you’d typically use in game development or CG work. Technically there are packaging methods without using the engine itself, but since we will need to convert imported Animation Sequences into Animation Montages we want the full engine, and specifically we want to get version UE5.1.1 which is the engine version Palworld uses. If you use a different version it may not work as intended or cause issues if you try compiling other types of mods. Palworld Modkit : Resource Link : https://github.com/localcc/PalworldModdingKit/tree/main Setup Guide : https://pwmodding.wiki/docs/category/palworld-modding-kit When doing just animation imports for SCake, the modkit is optional, however if you’re looking to make any Blueprint mods or integrations with SCake it’s required. I will cover both with and without the mod-kit when setting up a project for SCake animation imports, but when we get to integrations or BP methods I will assume you installed the ModKit. (I also find using the modkit to be easier than setting up a project every time I want to import animations, I’ll cover why when we get there) FModel : Resource Link : https://github.com/4sval/FModel Guides : https://pwmodding.wiki/docs/asset-swapping/Home > https://pwmodding.wiki/docs/asset-swapping/StartingOut > https://pwmodding.wiki/docs/asset-swapping/ExportingModifying3DAssets This is a general Unreal Engine asset extraction tool, it’s extremely powerful but has a lot of limitations. For our use case we’ll be interested in extracting the model and skeleton for pals (and maybe textures if that’s something you would also want). If you’re only using models/rigs provided externally and not from the game files, or you already made some yourself, then you may not need Fmodel, but I do recommend it for Bone Index Fixing, which we’ll cover much later in the guide. Blender (4.0+) : Resource Link : https://www.blender.org/ Blender is a (free and open source) 3D modeling and animation tool. Technically you can use other software but I will be showing blender specifically in this tutorial and guide and we’ll be using a plugin for Blender for imports/exports. io_scene_psk_psa (Blender Plugin v6.2+) : Resource Link : https://github.com/DarklightGames/io_scene_psk_psa This is a plugin for Blender that allows us to import Unreal Engine .psk model and .psa animation files. Since we only need this for importing (we export using .fbx which should work by default in Blender 4.0) if you’re not using assets extracted from the game this will be an optional (similar to FModel requirement). UE4SS : Resource Link : https://github.com/UE4SS-RE/RE-UE4SS Unreal Engine mod-injection and replacer pak loader. This is required to get SCake running in-game as well as any other script/blueprint mod. Formats : .psk/.psa These are the native formats Unreal Engine uses for Models and Animations. We only deal with these formats if we extract assets directly from the game like when using FModel and we’ll convert them into .blend and .fbx files using Blender. .pak Packaged assets format for Unreal Engine and what we’ll distribute as the mod so that it can load in-game. .blend Blender Project Files, we’ll keep a source so we can easily return to fix/change/re-export/ect. .fbx An open standard for model and animation files, we’ll be exporting .fbx for models and animations then using UE5’s fbx importer to get models/animations into our mod. .uasset These are the raw unreal asset files. These assets come in 2 forms but are named the same, cooked and uncooked. Uncooked assets are the same as those you save in the editor without any packing or compression, cooked assets are packed and compressed by propitiatory methods and can not be undone or loaded outside of run-time. The SCake API distributes Uncooked .uasset files which you can load in the editor. .json A simple text file with a specific format specialized in storing data with an easy to edit and read format. SCake as a JSON loader for importing animations (which is the recommended method) and we’ll want to configure a .json file and distribute it with the corresponding animation pack. Additional Resources CharacterID list Resource Link : https://pwmodding.wiki/docs/game-data/monster-table To properly reference various Pals we need the Character ID, this ID is used to reference things not just in-game but is also used in the file structure so having this list is crucial for setting things up properly! Bone Index Corrected Skeletons Resource Link : https://drive.google.com/drive/folders/1-RwOyqXaZql01ALr5ymq7l23MKpGPmmN?usp=drive_link We’ll be using these assets for importing animations with the correct Bone Index order. Why and how will be described later in the tutorial. (A tutorial on how to create these assets on your own is in the works) 2. Understanding and Planning for SCake Before we actually get into animating it’s a good idea to quickly cover how SCake works and plays animations so you can appropriately plan your animation to best work with the framework. SCake is fairly flexible, but it is designed around some simple concepts that are expected for Erotic animations specifically. SCake works by registering individual sets of animations where each actor involved in the animations has an associated Animation Montage, these montages are synced up and played at the same time whenever the animation is called. However when actually calling animations to play SCake uses what’s called Animation Events, these events are a configure-able list of those previously mentioned individual animation sets that play in order according to if they are looping and playback time settings. To give a quick example, you may have an scene where a character pets a pal, then gives the pal a hug, then returns to the same ‘petting the pal’ animation. This would be an Animation Event with 3 stages and 2 animations, you would create 1 petting animations, then a hug animation and register those with SCake as Animations, then you would register an Animation Event where you create 3 stages with stage 1 and 3 referencing the petting animation and stage 2 referencing the hugging animation. “Register” in this case would just be configuring the .json file and having it installed correctly (details on this included with SCake). You can also use Stage Order, an advanced setting available for Animation Events where you would just register 2 stages, 1 with the petting animation and 2 with the hugging animation, then just playback stages like “0,1,0” (SCake counts things starting at base 0, this is a technical thing). This will playback the same animation as setting 3 stages, but you only need to register with 2 stages. Additionally since SCake was specifically created with erotic animations in mind it also offers the ability to register orgasm variants of different animations, called “Climax Variants” (or Climax Var for short). If these variants are registered with the animation, when the designated characters orgasm during the animation then it will switch to playing these variants allowing animators to create custom motions and effects based on which animation is playing. This feature is technically optional, but I do encourage animators to give it a shot! If you only feel like making one Climax Variant you can always just reference the same animation for each (You can mix and match however you want). These can also be configured in Animation Events, so users are able to fully customize which animations play. Now with these systems in mind we can move to actually making animations! 3. Extracting the Skeleton/Model If you already have the Skeleton and Model to start animating then you can skip this step! For the rest of us (or just for those curious) for this step we’re going to be using FModel to extract game assets to use as our basis for animating. Setting up FModel 1 ) First you’ll need to get FModel, head to their GitHub page - https://github.com/4sval/FModel and click on “Releases” (usually on the right side of the page) and download the latest version labeled “FModel.zip”. 2 ) Extract that file and put it wherever you want it (I have dedicated folders for my mod developments), inside the extracted folder you should have FModel.exe, imgui.ini, and a dll file (most likely oo2core_9_win64.dll). 3 ) Now you can open the FModel.exe to start up FModel and you should be created with a Directory Selector (if not, go to “Directory” in the top left and click on “selector”), if 2 additional options “Name” and “Directory” are not showing in the lower half, go ahead and click on the double arrow under “ADD UNDETECTED GAME” to open the add game options, from there you’ll want to set the name to something you’ll recognize (I just named my entry as “Palworld”) then find then click the … next to the “Directory” text field and find your palworld installation. If you installed through Steam it should be in your steam library directory (you can right click the game in your Steam library, go to “Manage” then click the “Browse Local Files” button and it will open a file browser to where your game is installed, you can then just copy the address in the top bar to the selector window for FModel. Once you have the Name and Directory set, click the + icon in the bottom right to add it to your Detected Game List. From there change the Detected Game to Palworld and change the UE Versions to “Game_UE5_1 (536870928)” then click “OK” to confirm and select. 4 ) We’re not quite done with set-up yet because in order to actually pull data from the game we need what’s called a mappings file. This mapping file effectively just tells us how the data is sorted inside the pal, which can then be used by programs like FModel to pull the data properly. I won’t cover how to create your own mappings file (UE4SS is the easiest way if you’re interested in looking it up), instead I’ll link to this specific step in the Asset Swapping guide on the Palworld Modding wiki, which povides a direct download for a mappings file, https://pwmodding.wiki/docs/asset-swapping/Home , should be labeled as “Palworld Mapping File” and will give you the file “Mappings.usmap”. 5 ) Next, we’ll go into the “Settings” by clicking the option at the top of FModel, then ensure you’re on the “General” tab. Under “ADVANCED” make sure the Local Mapping File is enabled and then set the “Mapping File Path” to wherever you put the Mappings.usmap file we downloaded in the previous step. (Optionally while here you can also set an Output Directory for where you want exported files to go which can be handy. I just made an Output folder within the FModel folder itself and use that as my Output Directory.) 6 ) (Technically Optional) Next we’ll set things up so we can extract the full skeleton, under the “Models” tab in the settings, near the bottom enable “Handle Skeletons as Empty Meshes”. This option will allow us to extract the full skeleton asset as a single Armature without the mesh and this can then be morphed and weighted on to custom models if the need arises. 7 ) Once you’ve got your settings set up, go ahead and click “OK” at the bottom right to confirm all your changes. If you set up a new Export Directory then you’ll also want to close and start FModel back up so that the new output directory takes effect. Finding/Extracting the assets Now that we have all the settings configured we can return to the main screen of FModel, you should see various .pak files listed on the left side under “GAME ARCHIVES”. These are the packs loaded into your current install of Palworld, which will also include any mods you have put into the content folder (This will be relevant later when making custom Animation Events for SCake). What we’re interested in is “Pal-Windows.pak” which is the pak file for Palworld’s main assets, go ahead and double click that entry to enter into the pak and see the full file structure. This will now turn the left side into a file/directory tree where we can see everything included in the selected .pak file. Now let’s go grab the model we wish to animation and optionally we can also grab the corresponding skeleton asset. 1 ) First navigate to the appropriate folder. All the character models and skeletons are stored in “Pal/Content/Pal/Model/Character” with “Monster” being the folder for pals, “NPC” being the human characters and some boss characters, and “Player” being the playable character assets. All full skeleton assets are stored in the “Skeleton” folder. 2 ) For this example I will be grabbing the Lamball assets, which internally the game calls “SheepBall” and associates with its CharacterID, so I navigate into the “Monsters” folder, find “SheepBall” then click the “Packages” tab at the top left which should show 9 assets for this particular folder. This will change the display to showing the assets in that folder and we want to ensure the asset named “SK_[CharacterID].uasset” (would read “SK_SheepBall.uasset” this the Lamball example) is in this folder, otherwise we got the wrong folder and need to find the correct one. This SK asset is the model and associated bones used for this particular character and it’s all we need to start animating. Keep note of the file path as this will be important later when we start importing animations! 3 ) So now that we’ve found it, let’s extract it! Right click the appropriate asset and select “Save Model (.psk)”. This will extract the model as a .psk file in the Output folder we optionally set up from before, by default the output folder will also keep the same file path. To navigate quickly to your newly extracted asset you can go to the bottom of FModel where it shows the report log and just click the extracted asset text and it should open a file explorer window where the asset resides. Optionally here you can also extract all the materials/textures if you had any desire to do so but we won’t be bothering with that in this tutorial. (Check tutorials on the Palworld Modding Wiki like the asset swapping tutorial - https://pwmodding.wiki/docs/category/asset-swapping – for more details on that. Textures/Materials are not required to get animations made and imported.) 4 ) Optionally you can do the same thing for the Skeleton asset from the “Skeleton” folder, these assets will have the lable “_Skeleton” appended onto the end of the name used for the model. You will only need this asset if you are trying to create a completely custom model or intend to create your own import assets which we’ll touch on later, if you plan to do this or just want it just-in-case you can right-click and also save this as a .psk file. If the settings were set up correctly it should output a .psk with an armature and an empty mesh, which we can then re-parent to new models. 5 ) You can technically do this for animations as well which are in the “Pal/ContentPal/Animations/Character” folder instead. For these you would want to find the animation with the prefix “AS_” which stands for “Animation Sequence” then select the right-click option “Save Animation (.psa)” which will extract the animation as a .psa file we can import into Blender. You would only want to do this if you intended to make an alternative version of the base game’s animation but be aware that extracting .psa files has a lot of issues and things may not extract how you’d think it would. (For most animations you can also extract the AM_ prefixed files instead, which are Animation Montage files, however some have blend profiles and this will cause the export to have distortions and won’t be usable with our current tools.) 4. Importing into Blender and Animating Once we have models to animation we can import them into Blender and get things moving! This section will be relatively brief, this won’t be a full Blender animation tutorial as there are a ton of great resources for that. Instead I’ll be focusing on just getting the model into Blender and covering some simple quirks with the models/rigs that we should be aware of. Setting up the import Plugin If you already have a model/rig properly set up for animating then you can skip this step, otherwise, if you haven’t already, we need to install the io_scene_psk_psa plugin for blender linked in the resources portion so that we can import the .psk model file we exported from FModel. 1 ) Head to the github repository ( https://github.com/DarklightGames/io_scene_psk_psa ) and download the latest release compatible with Blender 4.0 (at the time of writing that is Release 6.2.0), you can find releases on the right side of the page under “Releases”. You’ll want the .zip file and DO NOT extract it! To make things easier we want to keep the plugin as a .zip so that Blender can automatically install it for us by just selecting the .zip. 2 ) Go ahead and start up Blender 4.0 if you haven’t already and head to the top bar, select “Edit” and then the sub-option “Preferences…”. In the Preferences panel in the left side tabs select “Add-ons” then use the “Install…” button in the top right of the panel and find the .zip file for the plugin we just downloaded in the last step. Once you click and install the Zip it should automatically enter the name in the search field and we just need to click the checkbox to enable it. Import the Model 1 ) Go ahead and open up Blender if you hadn’t already and create a new empty scene, ensure you stick to defaults for the scene set-up to remove any potential variables messing with the importer. 2 ) Next we need to import the model we’re looking to animate with the relevant rig. Click “File” in the top bar and select “Import” then the “Unreal PSK (.psk/pskx)” option, this is the plugin we installed and enabled for importing Unreal .psk/.psa files. In the import window navigate to the model you exported from FModel you with to animate and then import it with the default settings. (Most importantly leave scale at 1.00! Some guides will incorrectly tell you to change this, but this will screw things up! Those guides export the FBX incorrectly!) 3 ) Now you have the model and all relevant bones you can animate for it! Just continue like normal! However, I will note that later we will be renaming the armature to “Armature” for importing into UE5, which is a critical step so you may do that now if you wanted. (Optionally this is when you would also import any animation you wanted to, you would click the Armature and then use File > Import > Unreal PSA (.psa) and then navigate to and import the animation you exported with default settings. This will add the animation to the actions list, then it can be altered just like any other animation.) Animation Quirks There’s a couple of quirks we should touch on here before we continue which will be relevant to animating characters for palworld. - ) When exporting the skeleton FModel includes the sockets from UE5’s socket system as bones, however these are not actually bones and can safely be deleted. All the sockets will have the prefix “socket_” on them which makes them easy to find. (They don’t even have weights so it’s not like animating them will do anything to the model anyways, and a fixed bone index asset won’t have them) -) When animating the default models you may notice some strange or sharp weights, this is normal and won’t look nearly as deformed in-game (usually). This is because FModel doesn’t do a perfect job at extracting all the weights correctly so some things will stretch to far or be much sharper than it actually is. Focus on the general shape/motion of the animation and don’t worry too much about trying to fix small deformations, as long as you are animating correctly these shouldn’t look too bad in-game. - ) In most models the “root” and “pelvis” behave exactly the same, moving/animating the pelvis will move the entire model. You can use some of Blender’s bone/rig locking/limiting tools to help make this less of an issue but remember to apply those modifiers before exporting the animation or else it may not look correctly in-game. - ) When translating the entire model by shifting the root (or pelvis in most model’s cases) the hit-box of characters will follow the mesh, however the capsule (what’s used for ground and gravity calculations) generally will not. SCake has an option for moving characters but to ensure multi-character animations line up properly we generally want to move the bones in the animation (moving the root/pelvis to where we want the character to be offset) so that they line up and not rely on trying to adjust them in-game, this will help the capsule components line up and apply the same ground position to all actors in the animation. (of course you can play around with this to find whatever works best for your animations ^-^) 5. Exporting our New Animation Ok, got something animated? (Or at least some test animation? I always recommend doing some sort of simple animation first like a waving arm test to get a workflow going!) Now we can take the next technical step, exporting our animation so that Unreal will be able to import it in a way that works in-game and with SCake. There’s a couple of things we need to keep in mind, the Armature must be named exactly “Armature” so that it imports properly, otherwise UE5 messes up the root bone and doesn’t animate in-game. Additionally we want to export each animation as it’s own .fbx so we can adjust and re-import each animation on its own while also being able to import additional animations if needed (in unreal if you re-import an FBX it will just update any animation already imported but won’t add new ones, so we save them individually). 1 ) First things first, let’s check and ensure a couple things are set properly. Ensure your armature is named “Armature” (When we import into UE5 the armature must be named exactly “Armature” or else it won’t map to the bones correctly) and your animation is selected in the actions editor (We will be exporting each animation as its own file so we need to select the right animation to export). The currently selected action should show up under the armature in Blender. (For my example I just used the SheepBall petting animation from in-game) 2 ) Next ensure you’re in “Object Mode” in the top left, then we need to select the Armature and the associated mesh we are going to export (Use ctrl+click) and click on File in the top left, and under the “Export” Submenu select “FBX (.fbx)”. We will be using the FBX format to import our meshes/animations into UE5. 3 ) While exporting we need to set some very specific settings to ensure things import correctly, I’ll provide an image of these exact images, but for those that prefer text the settings that diverge from default are… Under “Include, in “Limit to” enable “Selected Objects” and select only the “Armature” and “Mesh” options to prevent garbage data interfering. Under Transform set “Apply Scaling” to “FBX Units Scale”, In the Geometry section set “Smoothing” to “Face” to prevent some strange UE5 errors on import (which can cause shader issues), for “Armature” settings you want to disable “Add Leaf Bones” so it doesn’t add any extra bones or weights, and with “Bake Animation” enabled, disable “NLA Strips” and “All Actions” so we export proper data and only the single animation. (If for some reason you wish to go against the advice of exporting 1 animation per .fbx, you can leave “All Actions” enabled and it will export all animations in the Actions list for that Armature into the FBX, however this can cause issues later down the road in UE5 if you ever try to update them.) Note : Some of these settings and still be used like your typical workflow shortcuts, stuff like “Apply Transform” and such if you animated with it specifically in mind, however it’s best practice here to apply any modifiers before an export. Personally I create a collection for animating and then a second collection for exporting where I apply any modifiers and rename for export, but you would want to find a workflow that works best for you! Updated : 2024-04-08 Note ) “Key All Bones” and “Force Start/End Keyframes” are technically optional but recommended unless you know exactly what you’re doing. SCake works by overriding animations in-game, to ensure every bone’s animation is overwritten we enable these settings to ensure every bone is keyframed in the animation. However, if there is a bone you don’t want keyframed, either to allow in-game jiggle or allow the character’s head to still move with the camera for example, you can disable this setting and keyframe all the bones you don’t want moving with the in-game animation handling. I only recommend doing this if you know what you’re doing, since not enabling these settings and not keyframeing your animation correctly can result in broken animations. 4 ) Once you got everything set, save the file with whatever recognizable name you want, however keep in mind that UE5 does have a path limit so I recommend making your file names recognizable but abbreviated to prevent having import errors or issues with the animation causing crashes in-game! (My current name structure is Actor Count, Abbreviated CharacterIDs, AnimName_Stage with _Cli appended for climax variants, for example “2_FplaMshpball_PetRecreation_0”. This keeps things sorted and easy to link together while being short enough to directly use in UE5) 5 ) Now you would repeat this process for every character and stage of the animation you are making, it sounds like it’s a lot but once you get it down things actually go rather quickly. I recommend making a preset for your export settings up at the top where it says “Operator Presets” so you can just select the preset you’ve made and have your settings quickly set-up (also prevents you forgetting what settings are required, which I TOTALLY haven’t done before...). 6. Setting up our UE5 Project Now we get to the more intimidating part of the tutorial, importing the animations into UE5 so that they work in Palworld! But don’t worry! It’s not nearly as complex as it seems and there’s some shortcuts and assets in the works to help make this process quicker with some of these steps becoming redundant as we fill out our modders resource collection, but the methods will still be outlined here for completions sake (and in-case someone needs to make assets not included in our modder assets collection). Setting up the Palworld Modding Kit If you plan to just import animations and don’t plan on using any of the SCake SDK, then you don’t need to install the full modding kit if you don’t want to; If you choose to do so later you can always move your project assets over into the modding kit and they should work just fine as well. If you DO plan to use the SCake SDK and would like to access more features for animations then you can follow the guide over on the Palworld Modding Wiki (https://pwmodding.wiki/docs/category/palworld-modding-kit) which is a very thorough tutorial that wouldn’t fit within this one. If you’re choosing not to use the modding kit then check the next immediate section. Setting up Without the Modding Kit Technically you don’t need the modding kit when just importing animations, however not using the modding kit and the SCake SDK will limit you on some features you may want for your animations. Regardless, if you’re not wanting to use the modding kit you can set up your own project. There’s a guide that covers this for Model Swaps (which also don’t need the modding kit) located here https://pwmodding.wiki/docs/asset-swapping/PackagingInUE5 which should work perfectly fine, though I’ll cover setting up the project here as well. 1 ) Acquire and start up the Epic Games Launcher, then select the “Unreal Engine” tab on the left side to enter the engine portion of the launcher. 2 ) Once here you want to either click the version number in gray letters under “ENGINE VERSIONS” or click the yellow “+” icon next to it, then add and install Unreal Engine 5.1.1 (UE5.1.1), this is the version used by Palworld and we need it for packaging / compiling correctly. 3 ) Next we want to click the “Launch” button in the 5.1.1 box to start up the Unreal Editor, once you get to the intro screen create a new project using the “Blank” preset, set your project location near the bottom, set project details to “BLUEPRINT” and “Desktop” for target platform, then name your project “Pal” so it creates the correct file paths. (If you don’t name it Pal then paths may fail to compile properly) 4 ) It may take a moment to start up as it sets up the initial project, but once it does you can click “Platforms” in the top bar of the editor and select “Packaging Settings…”, this should open up the project settings. Ensure the only options selected for the first few are “Use Pak File” and “Generate Chunks” with the surrounding options disabled (Which boxes are checked by default can change between installs, check the below screenshot for what this should look like), leave any setting below “Build Http Chunk Install Data” on default. (The model swap tutorial will enable cook everything, we will be including assets we do NOT want to cook or include with the mod, so we don’t enable this. We’ll use an asset label to force cooking instead.) Updated : 2024-04-08 5 ) In theory this next setting should be optional, however in some instances UE5 doesn’t properly package files without this setting enabled so we’ll just enable it here to avoid any issues later. On the same settings panel as before, scroll down and enable the “Cook everything in the project content directory”. This setting means it will always check all assets in the content directory and set things to cook if not otherwise specified, this causes the packaging process to take a bit longer if you have a lot of assets in the content directory but ensures our mod pak will package and avoid an engine bug. 6 ) Now your project should be set up and ready to start the import process! Installing the SCake SDK If you installed the Palworld Modding Kit, now is a good time to install the SCake SDK, though you can also install it later if you wanted to. If you don’t already have the SDK, you can download it from the SCake mod folder (https://drive.google.com/drive/folders/1vYfgMom7UJs2OmJ5B4FGQTMYEOR0n9Vr?usp=drive_link). Next you want to extract the “mod” folder contained within the SCake SDK into your modding kit’s “Content” folder, and… that’s it, SDK installed! The SDK comes with a preset dummy blueprint for calling the SCake API via Blueprints, ensure you don’t include these files with your mod! Instead, the SDK has an additional folder with a preset ModActor and an asset label already set up to separate the 2 folders in the packaging process. If you’re just importing animations you can delete the ModActor in the preset folder and rename the folder to your animation pack mod name, or just create a new folder for your animation mod which we’ll cover a bit later. The Bone Index Order Issue This one requires a brief explanation, however if you’re interested you can check out my write-up blog post about the issue here (https://subscribestar.adult/posts/1160698) but you don’t need to know all the details to fix the issue. In short, UE5 compresses animation and skeleton data so that it references each bone and weight by an index instead of by name when used in-game. This means when we create assets we need to import our animation and bind it to a skeleton with the correct Bone Index Order. Unfortunately FModel does not export the skeleton with the correct bone index order, so to fix this we have to create a new asset that has the correct bone index order before we import our animation, but after we have the correct skeleton to import on-to we can just target that asset for any subsequent animations we wish to add. Fixed Bone Index Order Assets Thankfully, we do have some assets which will already be set up to fix the bone index issue for you without much manual work. As we work through things and Palworld gets updates there may not always be an asset available, but if you’re patient you can always ask in our community and we can get one made for you to use! I distribute fixed bone index assets through the GDrive folder under “Modder Resources (https://drive.google.com/drive/folders/1vYfgMom7UJs2OmJ5B4FGQTMYEOR0n9Vr?usp=drive_link). At the time of writing there are 2 types of fixes, uasset and dummybone, uasset is the easiest to implement and is just an uncooked asset with the fixed bone index asset with the correct file path already set up, while the dummybone is a forced bone index order asset which you would need to manually import and place in the correct place. (I recommend only using the dummybone assets if you know what you’re doing or have been asked to do so when asking for help). You can also get fixed assets from the community however I can’t personally provide validate those assets or how to use them properly. Fixed Bone Index Asset – uasset If you’re downloading from the BoneIndexCorrect_uasset folder, these are set up assets for you to drop directly into your mod project and require minimal work. Download the .7z for the CharacterID of the models you are looking to import, extract the folder, then head to your UE5 project inside the Content Folder and copy over the “Pal” folder to the “Content Folder”. If you did this correctly then when you open your project you should have a new folder in the browser with a path leading down to “Pal/Model/Character/Skeleton/[CharacterID]” with the skeleton asset you’ll be targeting your animation to. (Note : This method won’t work if your animation targets a fully costume rig made for a new model that doesn’t use the base game’s corresponding bone structure) DO NOT include these assets with your mod! Make sure you package your animation pak without these assets or else it will break compatibility and cause other issues, like overwriting model replacers! Fixed Bone Index Asset – dummybone If you’re using the manual DummyBone assets, these are simple and quick .fbx files set up to have the correct Bone Index Order but may look broken in the editor (these are made by quickly creating a ‘fake’ skeleton with the correct Bone Index Order simply for importing, but does not have the actual positioning or hierarchy of the original skeleton). To use these you need to import the mesh and skeleton like a normal .fbx import (use default import settings with Mesh and Skeleton import enabled), then place the skeleton in the corresponding folder for the model you are trying to import animations for, this location should be in the “Pal/Model/Character/Skeleton/[CharacterID]” folder. When importing animations with these dummy skeletons don’t expect the in-engine animation preview to look correct, but if done properly the animation should playback just fine once you’re in-game. DO NOT include these assets with your mod! Make sure you package your animation package without these assets or else it will break the in-game skeleton and model! Note : If you want to use a custom model for preview, you will want to use the BoneIndexCorrect_uasset option, then when importing the mesh target this skeleton instead of the included one. If you’re using a resource provided from another source, make sure to read up on what exactly their asset is and how to use it properly as other methods may be available! Fixing the Bone Index Order Manually If you’re already using a fixed bone index asset you can skip this section and move to “Set-Up Project for Animation Importing”! Fixing the bone index order isn’t a ‘difficult’ process, but is a tedious one. I highly recommend just using a fixed bone index asset that’s already made and provided by the links from before, however there may be assets that either haven’t been added yet or you may want to just try the method. So to get animations importing properly I’ll give a very brief explanation on how to make your own DummyBone asset and how to get it set-up and imported properly. I’ll also cover the proper method for creating an uncooked asset (fixed bone index uasset method) at the end if you wanted to try doing that as well. Note : The Human Skeleton is a completely different beast than the pal skeletons because of the sheer number of bones included, which requires a few additional considerations caused by limitations. Because of this I recommend using the SK_PalHuman skeleton provided in the modder resource folders. (Making a dummybone asset for humans isn’t an easy task, unlike for pals) 1 ) First we need the model extracted using FModel like we did earlier in this tutorial, then we import that into Blender just like before as well. (I recommend not importing it into the same file that has your animation work, save your animations and close Blender, then start from a fresh instance to prevent accidentally breaking your animation file!) Don’t forget to rename the Armature to “Armature” exactly! 2 ) Now we need to go back into FModel and find the corresponding Compressed Skeleton Asset for that model which should be in “Pal/Model/Character/Skeleton/[CharacterID]”. We’ll want to inspect this element by double clicking on it and having the JSON data load in the main panel. (If a preview of the skeleton pops up, you can just close that additional panel pop-up) 3 ) Inside the JSON data we need to find the section “FinalNameToIndexMap” which should be near the bottom. This is the Bone Index Order we need the skeleton to match exactly when importing the animation. 4 ) Now we can keep this info up while we go back to blender with our imported model and entering “Edit Mode” in the top left. The next step is to check the hierarchy and delete any “Socket_” prefix bones that don’t appear in the bone index shown in FModel, and then re-parent everything so that it will import with the exact order shown in FModel following alphabetical sorting. For my example I’ve been using SheepBall (Lamball) which does have several socket bones applied we will want to re-parent to the end for the dummybone asset (Or just out-right delete, sockets are added dynamically by UE5 and normally can’t be animated but in-case someone figures this out later re-parenting them to the end would allow animations to import with those sockets animated. Unfortunately there isn’t a way I know of currently to check the order of sockets, so that part would be experimentation). Shortcut Notes : ctrl+P is the re-parent shortcut in Blender by default, keep offset when re-parenting to maintain easier previewing, just select the bone you want to re-parent, then the last bone you select is the bone you want to parent to. Example of the sockets in the bone tree, these would be re-parented to the end or deleted (Left : original exported skeleton, Right : DummyBone Asset) Example of the full SheepBall bone tree re-parented to ensure the correct Bone Index Order with every bone in the exact order required to match. We just start from the top and work our way down, looking for anything that would be out of order, then re-parent them to fix anything that would be out of order following alphabetical sorting (ABCDEFG...). 5 ) Once you have everything sorted correctly you can now export a .fbx file just like we did before when exporting the animation, and that’s the DummyBone asset! Keep in mind this is only for importing animations and should not be included in any mod, it’s only purpose is to ensure the bone index order is correct when importing. For a proper uncooked uasset asset, we would need to use UE5 or use hex edits with internal knowledge of the compressed skeleton asset. For this it’s important to understand just how UE5 adds additional bones, when adding new bones not seen by the project before, instead of re-sorting the full bone index order UE5 just adds the new bones to the end of the index. So to create a proper uasset you would need to do the same sort of sorting we did for the DummyBone asset, but instead of just re-parenting when finding an inconsistency, you would instead need to import an asset into UE5 with all lower index bones removed, then continue the process re-importing the skeleton any time you hit an inconsistency. This means that UE5 would be adding the new bones of each step onto the end and ensure they are placed in the correct bone index order. For sockets you would also need to not just append them to the end or delete them like we did in the DummyBone asset, instead we would need to re-add them in UE5 through the UI with the appropriate offset. Once complete this would give you a fully working asset that can import animations while also being fully preview-able in the editor! (Also, once one of these uasset versions are made, we don’t have to worry about importing any skeletons, just copy over the uasset in the right spot and it’ll work!) As you can probably tell, this is why I recommend using the DummyBone method if you’re trying to make these assets yourself, since a proper uasset is time consuming and a bit complicated compared to the DummyBone method. Setting up the Mod Folder Finally for our project set-up, let’s configure your animation pack’s mod folder so it’s ready to export after we get animations imported. 1 ) You’ll want to start with creating your mod folders to import your animations into. If you installed the SCake SDK you can rename the preset folder or create a new folder under the “Mods” folder in your project, otherwise if you have a blank project create a “Mods” folder under “Content” then a folder for your animation pack. (I’m renaming the “YourModHere” folder to my animation pack name, “TutAnimationPak”) 2 ) If you used the mod kit you should already have a PrimaryAssetLable in the folder, but if you made your own folder instead of renaming or didn’t use the SCake SDK create a new “Primary Asset Lable” by right clicking within the file browser under your pack’s folder, and select “Miscellaneous” then “Data Asset”. In the popup that shows up type in “PrimaryAssetLabel” and you should get a single option, that’s the one we want to add if you don’t already have it. (In my sample image I used the SCake SDK, which already has this asset added) 3 ) Next lets open up our Primary Asset Lable real quick. For this you want to set a “Chunk ID” that doesn’t match any other mods in our project (SCake SDK uses 666, so use a different one!), this Chunk ID is the .pak file our mod will pack into when we run the packaging process. Next we want to set the “Cook Rule” to “Always Cook”, “Label Assets in My Directory” toggled on, and then save the asset and we’re done with that aspect! 4 ) If you wanted to use the SCake API but didn’t use the preset folder, you’ll need to create an “Actor” called “ModActor” exactly so that UE4SS can find and hook your mod for calling the API. If you didn’t plan on calling the API then you don’t need to worry about it. 7. Importing Animations and Configuring for SCake Finally, the good bit, actually getting animations in-engine and ready for gameplay! For this we need to import the animation .fbx file we exported earlier targeting the fixed Bone Index Order Asset we set up with the project, then create the animation montage assets using those imported animations to configure with SCake. 1 ) First let’s get our animation imported, ensure you got the corrected Bone Index Order Asset imported and set in the file structure correctly as we covered earlier. Next just drag the animation .fbx file for your animation that we exported earlier into the file browser space in your animation pack’s folder within the editor. This should bring up the import FBX settings. 2 ) In the FBX settings we only want to import the actual animation. Start by setting the “Skeleton” to the corresponding corrected skeleton asset we imported to the Pal folder earlier, then disable importing the mesh, everything else should be left on default with animations importing (some settings may be changed if you know exactly what you’re doing). (You must select a skeleton first or else when Mesh is untoggled it hides the Skeleton target option.) 3 ) Once set up, hit the “import all” and it should import the single animation if everything was set up correctly. You may get an error that reads like “the skeleton transform was different” but this error can be ignored as it has no effect once we’re in-game, if you got a red error however something got messed up in the pipeline and I’d try following the exporting the animation part of the tutorial again. Also, if you used a DummyBone asset as your skeleton to import with you may notice the preview of the animation is broken, DON’T PANIC! That’s just how the Dummy Bone assets work and, as long as everything else was done correctly, it should look fine in-game! 4 ) The animation is imported as an Animation Sequence, but SCake uses Animation Montages to playback animations, so we need to make a montage out of our imported asset. Simply right-click the imported Animation Sequence, then at the top of the pop-up menu select “Create” then “Animation Montage. This will create an Animation Montage out of that asset, feel free to call these assets anything you like but we will be referencing the Animation Montage later when configuring the JSON file so make it something you will remember or can easily reference! 5 ) If your animation isn’t looping and is only intended to play through once, that’s all we ‘need’ to do, but if your animation is intended to loop you will need to open your new Animation Montage asset by double clicking on it. It should open up the animation with a green bar and the anim playing, to make it loop correctly in-game we need to go into the bottom right section into the “Montage Sections” tab, and click the checkbox for “Default”, then select “Default” under that option to have it loop back to the start. (It should display a little circular arrow next to “Default” when set correctly to display a loop-back) 6 ) At this point we’re done with the basic import, you would repeat these steps for each actor in your animation with their corresponding animation. I strongly recommend following a naming scheme that matches actors up based on what animation they are playing together. However there are a lot of really advanced things you can do with Animation Montages, like creating custom loop patterns, trigger sounds and visual effects, implement blending between different animations, and much more! I do recommend not going too crazy and trying to use Stages within Animation Events for most transition type stuffs, that way things stay modular and customizable. 7 ) Before we set up things to package it may be a good idea to get the paths for your animations so we can reference them in the JSON file we’re going to configure in the next few steps. If you hover over your animation in the editor it will show the “Path:”, we will want to save this path with the file name appended to the end like “/Game/Mods/TutAnimationPak/TutPetAnim_SheepBall_Mon” and this will be what we directly reference in the JSON file configuration! It’s also a good time to mention the file path limit. UE5 has a limit of 260 characters for a file path, this isn’t a huge deal and provides a lot of freedom however if you get close to the limit with your file name and mod folder structure it may cause issues or even in-game crashes, as such I recommend abbreviating what you can within your asset names to prevent issues. The value to look at is the “Cooking Filepath Length:” which counts the additional stuff it adds in-game, if exceeded it will cause issues and UE5 most likely won’t allow you to package your project. 8. Exporting our Animation Pack and Configuring the JSON Alright, almost there! Now we just need to export the animation pack and configure the JSON to have usable in-game animations with SCake! If the previous steps were followed correctly this should go relatively smoothly! Exporting the Animation Pak 1 ) Ensure all your assets are saved and ready to be exported, double check your PrimaryAssetLabel settings are correct, then we should be ready to package! Up in the top bar click the “Platforms” option like we did setting up the project, then hover “Windows” then click “Package Project” and select an output folder. The first time you package it will take some time as it sorts out all the engine compiling and baking processes, but after the first time it’s much quicker. (Note : there is a method of packaging mods individually but I won’t be covering that method here) 2 ) Once packaging is complete navigate to the output folder you selected, enter into the “Windows/Pal/Content/Paks” folder, and there you should see multiple files labeled “pakchunk##-Windows.pak” with ## being the ChunkID you set for your packs. With the SCake SDK the default Chunk ID that’s set is 10, so you would want “pakchunk10-Windows.pak”, otherwise if you didn’t use the SDK just pull the Chunk ID you used. Go ahead and rename that .pak to what you called your mod folder within the editor, in my case I used “TutAnimationPak”. 3 ) Now you can move+copy that .pak file wherever you need for saving/distribution as well as install it into SCake. To touch briefly on installing animations, you would place the animation pack into “[Your palworld install location]/Pal/Content/Paks/~mods” unless the mod uses the SCake API or has Blueprints attached, which would go in “LogicMods” instead of “~mods”. Then we’d move the .json file into the “AnimJSON” folder in the ~mods folder then add the file name of the .json to our _LoadList.json, but we haven’t made that .json yet, so let’s do that! Making a Simple JSON Animation File SCake comes with a few templates in the AnimJSON folder ready for animators and users to use as a basis for configuring new animations and events. The “_SCake_TemplateWithExplainations.json” will include explanation for every setting as well as examples of how to format the file, however we’re going to keep things super simple and use the “_SCake_SimpleTemplate.json” and use that for our base. You can always use whatever template you feel suites your needs best! (The explanations template is very helpful to open along-side your own .json file so you can reference it for what each parameter does.) The first time through may be a bit confusing, but once you get use to things configuring should go a lot smoother. 1 ) Create a copy of the “_SCake_SimpleTemplate.json” template .json file and rename it to your animation pack’s name (technically you can call it whatever, but it will be easiest if it matches your animation pack’s name from the .pak file), then open it in any text editor though I do recommend using one with JSON syntax checking and highlights (you can use https://jsoneditoronline.org/ for an editor that works in the browser and has error checking, custom colors, simplified view, and more, it’s a pretty handy tool). If you only want to do the absolute bare minimum to get your animation playing in-game as a test (or just because you can’t be bothered to set up the .json, I get it.) then all that is required is the UniqueAnimID, AnimByPath, and Compatibility for each Animation you’re registering, then in Animation Events you just need the UniqueEventID and Stages defined with AnimIDs. While everything else is ‘technically’ optional, I do recommend filling out the json before distributing the animation officially. NOTE : When inputting information, avoid using special characters like slashes and punctuation marks as these may not parse correctly and cause the animations/events to fail to register! Underscores and spaces should be fine but I personally replace all spaces with underscores unless it’s a filepath where it needs to be exact. NOTE 2 : Any section you’re not using in the .json file you can remove, for example if you have no aggressors instead of leaving it blank you can simply remove the entire section. It’s recommended to remove anything you’re not using or need defined differently than default to help prevent errors and keep the most compatibility. 2 ) Now let’s just go down the settings in order and configure the animation with minimal information, we can always come back and add stuff later! You can safely delete the DevNote at the top explaining what the template is, and the PackName is purely for readability and ease of use though I recommend filling out your pak name here. 3 ) Next let’s set some basic metadata, for each animation you are registering you’ll want to copy the entire “Anim0” section and make a new section with an incrementing number for each animation you are registering, naming subsequent sections “Anim1” “Anim2” “Anim3” and so on, each entry that has another one following needs to have a “ , “ at the end to designate another entry follows. This allows us to register multiple animations in a single .json file. Similarly do this with the “Event0” section, were you copy the entire section with how many Animation Events you wish to register in-game. 4 ) Starting at the top of for Animations, you’ll need to set a UniqueAnimID for SCake to reference that specific animation, any duplicate UniqueAnimIDs will overwrite each other based on load order and AnimVersion so make sure it’s actually unique! (I recommend some unique identifier to you like a screen name, followed by the animation type and stage/variant. Try not to make these IDs too long as there is a limit and performance considerations) 5 ) The next few settings are optional, AnimVersion is just for version controlling animations and handling duplicates, AnimName is a display name for your animation (use something human readable), and AnimAuthor is for inputing the author of the animation. 6 ) AnimByPath is required as this is where we define our animations! Remember earlier when I said to write down or remember the file paths to the montage assets? This is where we use them. The first value is going to be the “slot” in the animation (each slot will reference the same character through-out the animation and should be kept consistent through-out all the animations you register that are intended to be in the same event, to prevent strange issues), think of slots like a pointer to which character you are referencing from the animation, then the second value will be the file path to the animation montage we imported into UE5 for that character. The slot order is sort of arbitrary, as long as you keep it consistent then it shouldn’t matter. 7 ) NonErotic toggle is next, by default SCake assumes all animations are erotic and will trigger sexual pleasure and desires, however if you set “NonErotic” to “true” the animation will not be considered erotic so that it won’t trigger sexual effects. 8 ) IsLooping just toggles whether your animation should be considered a looping animation or not. When importing your animations montage and you set up the looping animation you should set this to “true”, otherwise if it should play through once set it to “false”. (If your animation is not set to loop properly a failsafe in SCake will still progress animations when the animation finishes, which means it will only play a single loop then move to the next stage in the Animation Event) 9 ) Aggressors is a list of slots this animation should consider aggressive actors, if the list is empty or all slots are defined then the animation is considered consensual, otherwise the listed slots are aggressors. 10 ) Tags are a list of optional (but recommended to fill) keywords for positions, sexual orientation, climax location, ect. Fill these so that your animation is easier to find and sort in SCake as well as help automated systems try to fill in any blanks you leave in the .json / metadata. 11 ) ActTypes define what kind of act is in the animation, you should create counting entries (copying the full section like when we copied the “Anim0” section and counted them up) which define each type being represented. The template will have your default options listed though modules/updates may add more in the future. (An example from a solo female player masturbation animation) 12 ) REQUIRED : Compatibility is extremely important and required for SCake to find compatible animations with different characters! For this section you need to define the type of sex equipment that is required for each slot, so under “SexEquipReq” the first value is the slot and the following value is the sex equip. You can keep this aspect simple as ‘none’ so no equips are required, ‘female’ where a vaginal and breasts are required or ‘male’ where a penis is required, other options are for more advanced animation paring (read into the docs to learn more about them). Next we would define what character can actually play the animation in each slot under the “ByID” section, this section has the slot first then followed by the CharacterID we used earlier when extracting models, such as the finding the folder names (reminder that there is a list of CharacterIDs on the modding wiki - https://pwmodding.wiki/docs/game-data/monster-table which should be accurate). The templates should have your equip options listed for ease of use, fill in for each slot available in the animation. 13 ) LinkClimaxAnims is where you define the orgasm variants for the animation (if it has one). You can create multiple entries for this section to create multiple variants for what actors are currently climaxing, meaning for a 2 character animation you could define 3 different climaxes, 2 where one or the other is having an orgasm and 1 where both are having an orgasm. You don’t have to fill every possibility, instead it will use the first listed one if the exact combination isn’t found so use define the ‘default’ climax animation first, then the rest. In AnimByPath you define the path to your climax variants which would be imported like any other animation and you’d get the path the exact same way after converting to an Animation Montage. If you’d like to register multiple climax variants to a single animation but with the same combination you can copy your registration data for the animation, define a new uniqueID, and then define the different climax animations you want effectively registering 2 animations to use for Events. (Note : It’s recommended to keep climax variants similar to the animation being played, a good example is a missionary position could have the character humping, then for the climax have them press in and stay with a bit of shiver, this can help climax animations feel more dynamic and immersive. Animation Events can also define their own climax variants by referencing other animations as well) (Example from a solo female player masturbation animation) 14 ) One section worth mentioning that isn’t included with the simple template (but is in the other templates) is the optional “ActorAdjust” parameters. These parameters allow you to adjust the positioning of characters in the animation by slot. I’ll be using this in my example pet animation since I didn’t adjust the Lamball’s position within the animation itself. This feature is mostly for making small adjustments to make animations line up if things don’t quite behave the way you expect and can be a handy tool to configure different variants of characters such as those of different sizes. (Check the template with descriptions or read the documentation to learn more, I won’t be covering it in this tutorial as it’s a bit more advanced) 15 ) Next we get into registering the Animation Events so we can actually call and play animations in-game! Events are just a set order of animations to play, though there are more advanced settings we’ll just cover the basic few with only “UniqueEventID” and “Stages” being required. UniqueEventID is just like the UniqueAnimID, this should be a Unique ID used to call the Animation Event with SCake. EventVersion, same as AnimVersion, EventName is the name of the Animation Event, and EventAuthor would be the author who made the event! 16 ) Stages are just a list of animations to play as part of the event, by default it will play in order starting from 0, however you can define a custom order or more advanced loops using StageOrder (a parameter we won’t cover here). Make sure to increment each stage section by 1 in the list so it applies the correct order (otherwise stages may register out of order or bug out). StageName is just a display name for the stage, but AnimID is the UnqiueAnimID for the register animation you would like to playback during this stage of the Animation Event, these would match up with the UniqueAnimID we set up when making the Animation portion of the .json file. You can also reference external animations as well, however for .json files directly related to animation packs I recommend keeping all the used animations from your own animation pack then provide an optional .json that uses external animations to avoid requiring other animation packs to use. Optionally here you could configure post-climax animations but we won’t be covering those in this tutorial. (Example from a solo female player masturbation animation) 17 ) Once you got that all configured, your .json file is ready to go and register in-game! There are a lot of advanced features I didn’t cover in this section, but these basics are more than enough for an animator to set up. It seems like a lot at first but once you understand what each setting does it becomes quite easy to modify, change, and create new .json animation files. Users will also be able to edit and exchange .json files to allow completely custom events, modified animations, or just extend upon the original .json file such as adding missing information, so don’t fret too much over missing something if you don’t have the time or understanding to fix it! 9. Setting up our Animation Pack for Public Release Once you’re satisfied (enough) with your animation pack, you should set it up for public release! This is the final stretch to embracing the world of SCake an the community, so let’s do this! 1 ) First, make sure to actually install your animation pack and related .json file(s) to ensure it works in-game. It’s always possible an error was made somewhere and if you find it’s not working don’t be afraid to ask the community for help! (You can find instructions on how to install and use animation packs in the ReadMe for SCake) 2 ) Next we want to set up the proper file path and create a simple ReadMe file letting people know how to install the animation pack in-case they forgot or lost their SCake ReadMe (or, let’s be honest, they didn’t read the ReadMe at all, it happens!). First create a folder for your mod and create a simple .txt file labeled ReadMe with instructions on how to install the mod, then make the correct file path for the animation pack to make things easy, so start with a ~mods folder, place your .pak in there, then inside the ~mods folder create an AnimJSON folder and place your .json in there (matching the install directory you would use to install into your own game). DO NOT include the _LoadList.json in your mod unless you are distributing a server mod pak! Each individual will have their own list of animations and they will have the responsibility of maintaining their own LoadList, if you distribute one with your mod pack it could lead to users overwriting their own on accident! 3 ) Once the path is set up, you can zip up your mod and distribute though your desired platforms! (Don’t forget to share over on our Discord!) (Example file paths for distribution from SCake_BasicsAnimPack) 10. Final Notes SCake is a very versatile and customizable framework for animated scene in Palworld and has many advanced features so it’s possible that many of these things could improve or change over time so it’s worth keeping up with updates if your interest holds! At the time of writing, some features listed in the templates are not currently functional or may not function correctly. We primarily use Discord as our form of communication around the mod but you can also ask for help in any SCake thread and people are likely to try and help! I don’t know what other “Final Notes” to put here so… just hope you have a wonderful day! See ya laters! =^-^=
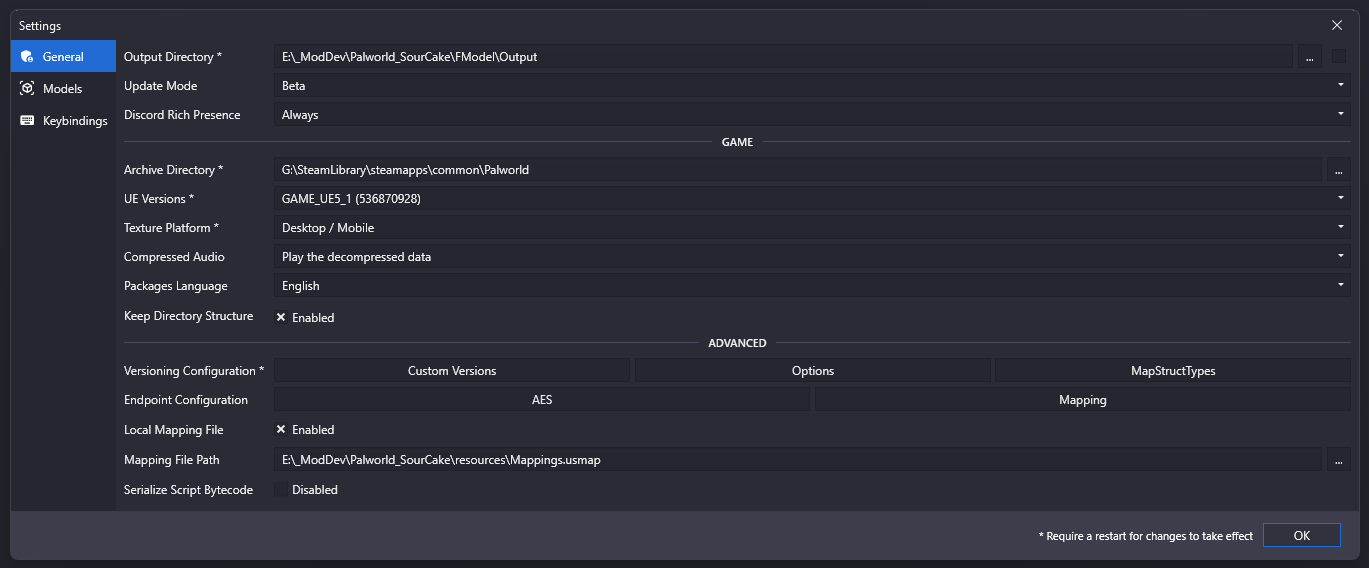
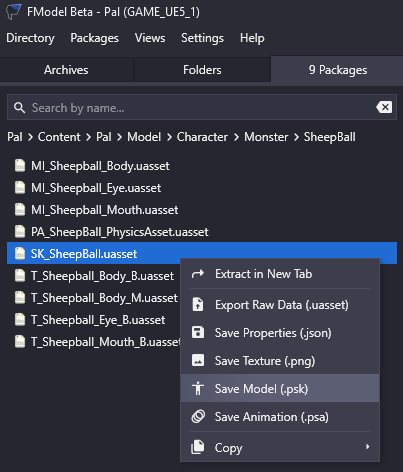
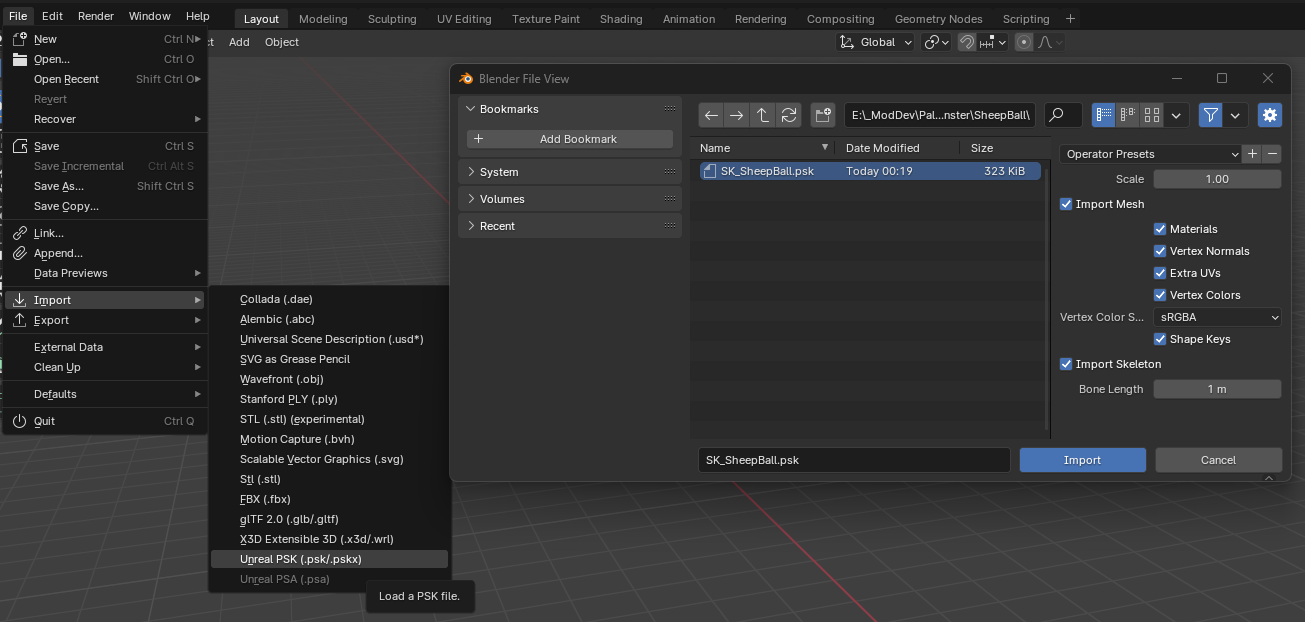

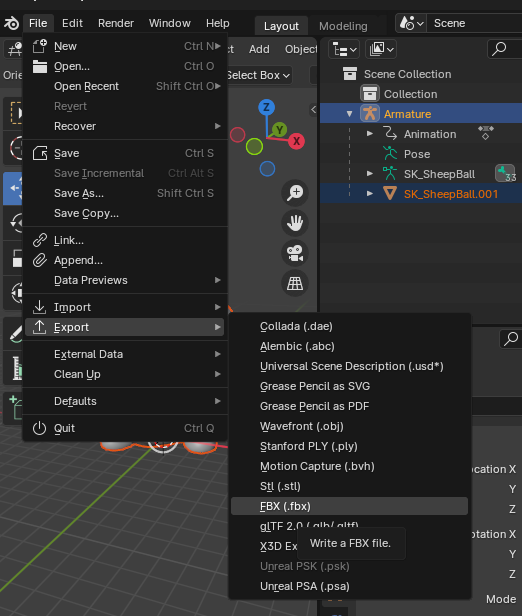
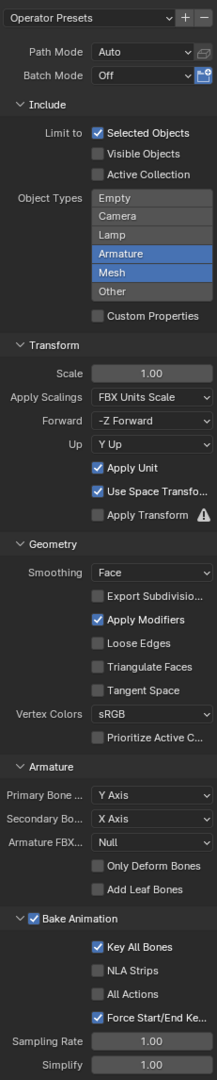
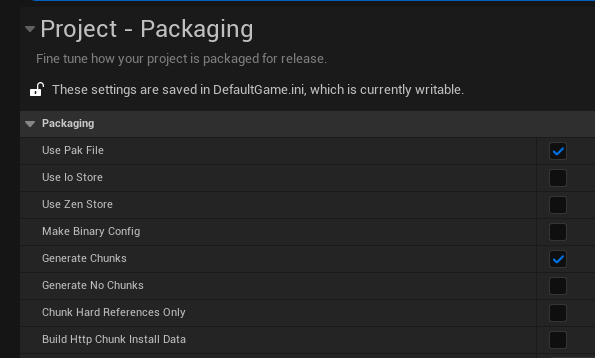
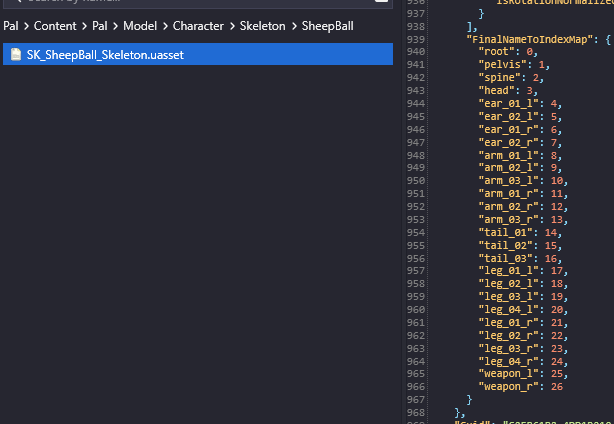
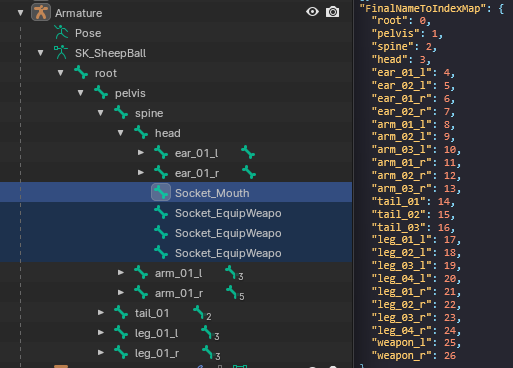
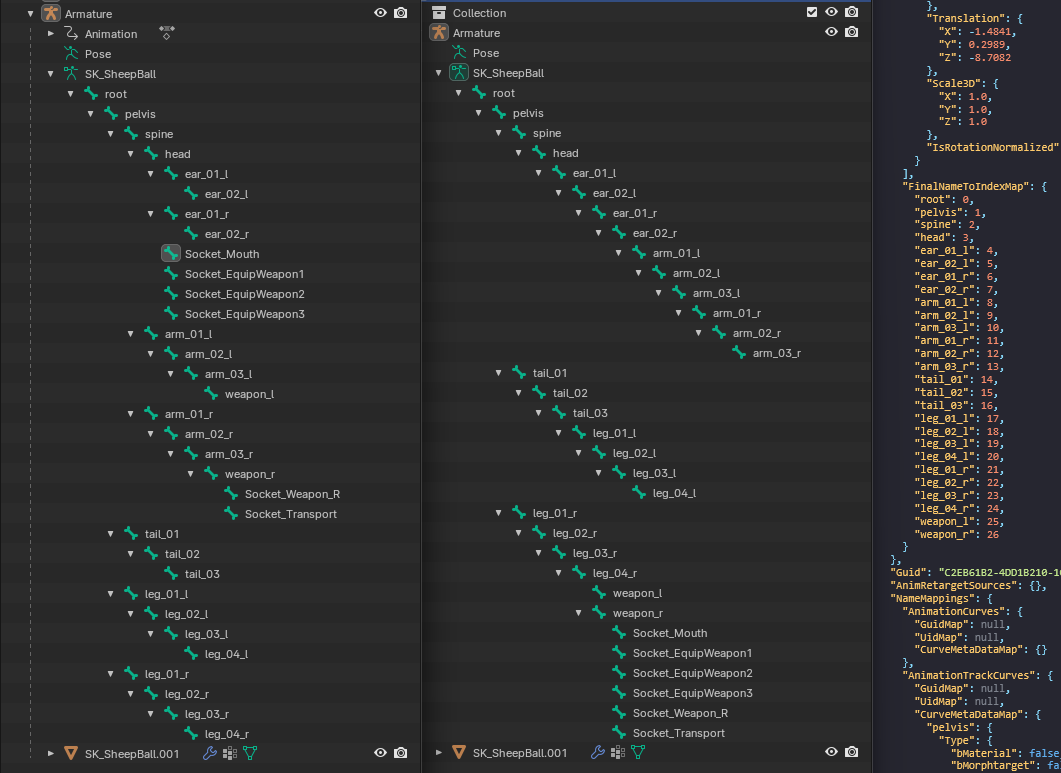


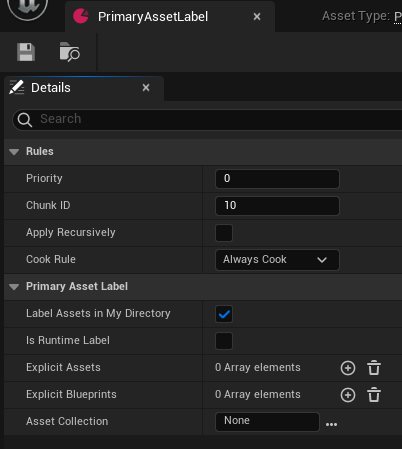
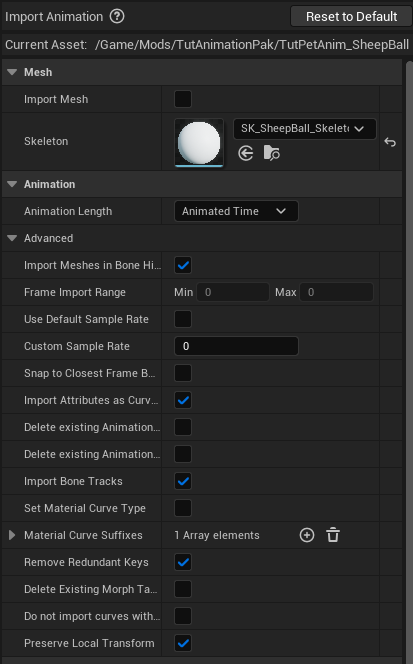
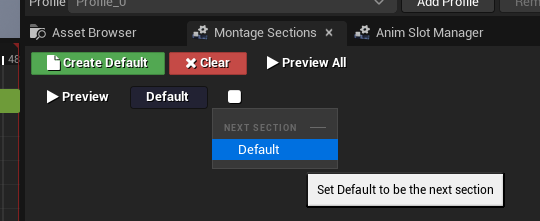
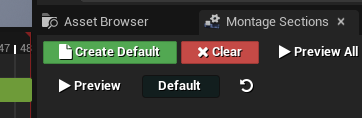
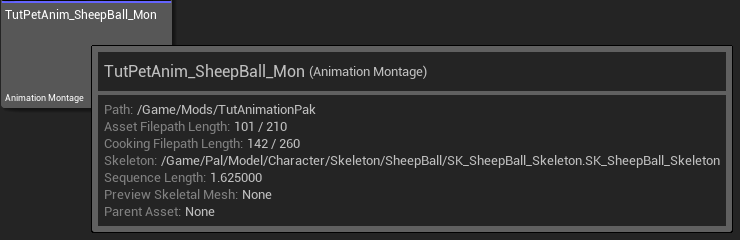
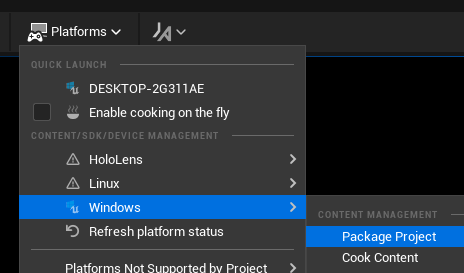
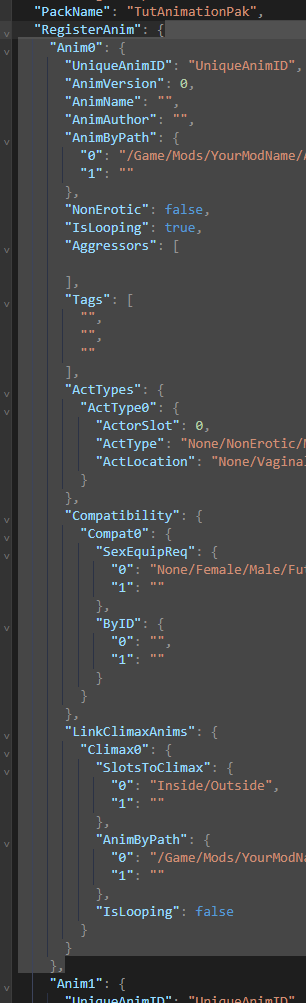
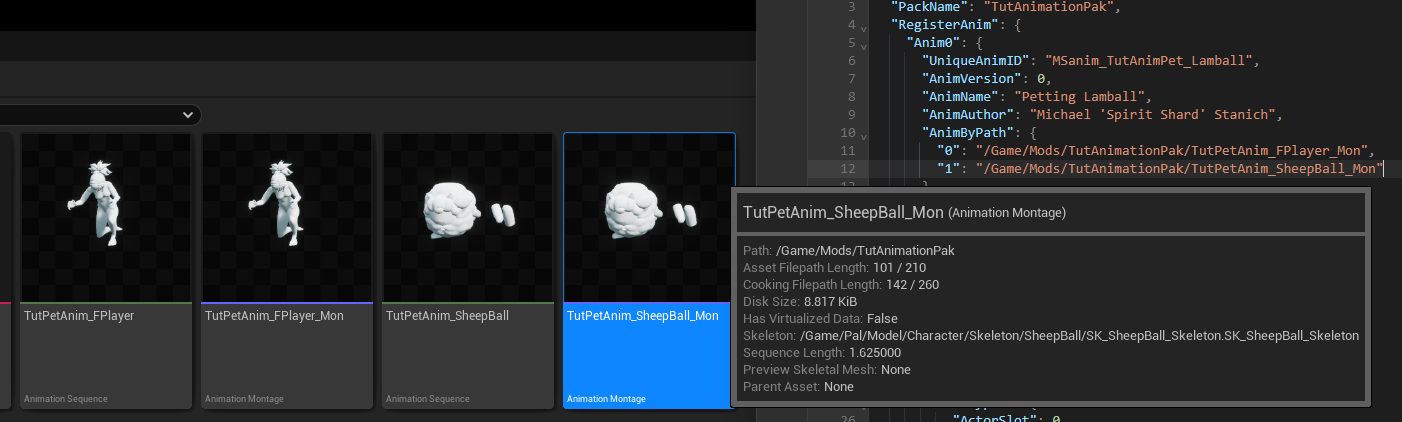
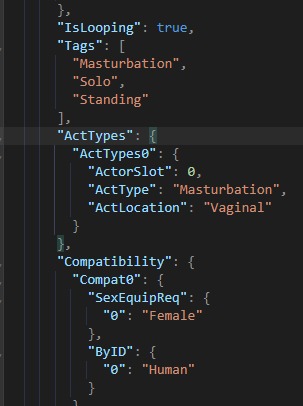
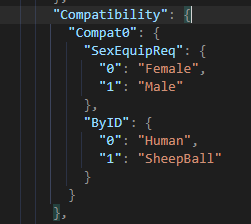
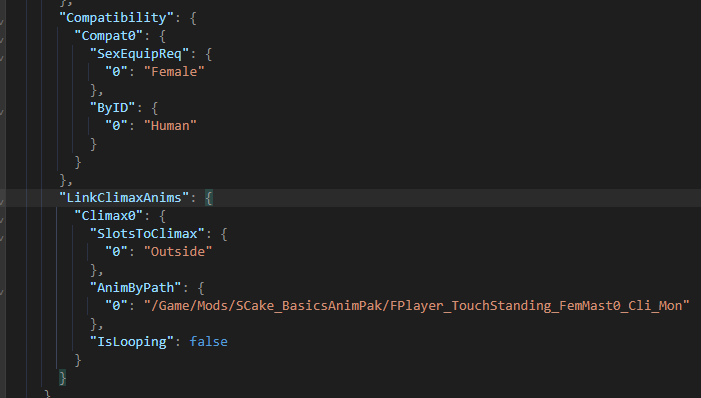
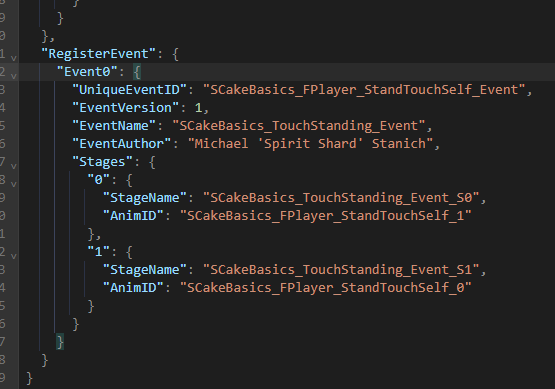

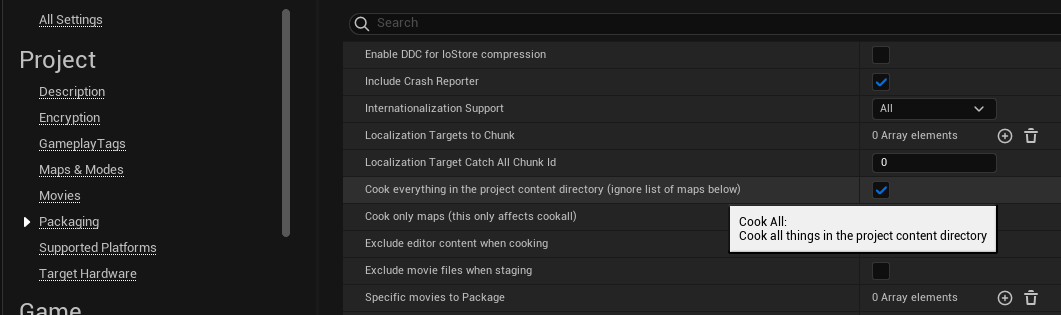
-
Conglomerate 02 - Core Mods ✍️ Introduction: This page is intended as an overview how to create a basic Setup before adding more Mods to a Load Order. I call the listed Mod combinations "Core Mods", because they are the base - or minimal requirement - for most lewd Setups. I just copied step by step what Mods I usually install first - followed by a functionality check ingame - before even thinking about adding anything else from LL or Nexus. The blog was created with NMM mechanics in mind, but the overwrites (NMM, brutally overwrite files in skyrim/data) aka overrules (MO - left plane, Vortex) are the same for any mod manager. The sequence the Mods are listed also give a clue about overwrites and also the position of related plugins in LO. If no additional information is given overwrite the early listed mods with the ones lower on this page. ? Goal of this Blog page: Installation of basic Skyrim fixes, patches and useful mods in preparation for LL mods Installation of all most basic LL Frameworks and requirements. Repeatable steps that will work for any basic LO to prevent user error early on. Indirectly create a checklist and source for the most basic Mods that go with everything or are requirements for related plugins. ? Creating Checklists to keep the overview ⚠️ It's strongly recommended to still read the individual mod descriptions instead of blindly installing everything ? Definition of the abbreviations can be found here: Conglomerate - Abbreviations and File Types Index: Step 01 - ⚙️ Core Vanilla Vanilla Patches, Basic Requirements, FNIS, Tools ⚙️Optional Step 02 - ❤️? Core Sexlab SOS, SL, SLAL, Tools, Patches Step 03 - ☠️ Body ⚠️Chose only one route to install a body: All-in-One HDT Animated Pussy 4.0 Body installation via separate Mods ☠️ Optional Step 04 - ? More Nasty Critters SLAL MNC SLAL Animated Beast's Cocks (ABC HDT) Step 05 - ⛓️ BDSM Frameworks ? ZAP Animation Pack ?? Toys & Love ? Devious Devices 5.2 ? Optional Step 06 - ?? Script Extender PapyrusUtil ConsoleUtil Jcontainers Step 01 - ⚙️ Core ⚙️ Core Frameworks and their Patches and Fixes: ⚙️ Optional: Step 02 - ❤️? Sexlab ❤️? Basic Sexlab Mods: Step 03 - ☠️ Body ☠️ All-in-One HDT Animated Pussy 4.0: ☠️ Body installation via separate Mods: ☠️Optional: Step 04 - ? More Nasty Critters SLAL ? MNC SLAL and Animated Beast's Cocks: Step 05 - ⛓️ BDSM Frameworks ⛓️? Zaz Animation Pack v8.0 plus: ⛓️?? Toys & Love: ⛓️ ? Devious Devices v5.2: ⛓️? Devious Devices v5.2 Optional: Step 06 - ?? Script Extender ?? PapyrusUtil, ConsoleUtil, JContainers:
-
Hello All, I'm looking to start a new game with a futa (player character only). Starting with a clean installation of Skyrim AE (1.6.640.0.8) and using MO2 for the first time. All other mods are installed and working. Ready to start building my character. I'm familiar with building female characters with CBBE / UNP, but I don't really know where to start with a futa. How would I begin creating a futa character (player only). I don't want a vagina, just schlong and balls. I want the schlong to be fully workable (e.g. soft & floppy during normal gameplay, but able to get hard for sex scenes). I've hunted for guides/posts, but I'm not finding much. The main futa thread on the forum seems to be mainly for sharing screenshots/videos. Not much in the way of guides. Could anyone give me advice or point me to a good starting guide? Any help would be greatly appreciated.
-
A mod list guide would really help, because of how new mods get released each day and that the game gets updated, making some mods "dead". Examples of what l meant is from these 2 games.
-

Version 1.0.0
20 downloads
Now available from Elswyer Publishing, the tell-all guide book by captainwolfos that tells all when it comes to the tasks that needs to be performed in order to rebuild and and bring back the glory of the capital city of Kvatch. This guide book was made when only the second version of Kvatch Rebuilt was released by the Kvatch Rebuilt Team. So one may assume that some of the bugs mentioned within this work may have been addressed. This package requires a mere two files: KvatchRGuideBook.esp KvatchRGuideBook.bsa Both of these go within your Data Folder. Activate and it will run no problem. -
Guide to KVATCH REBUILT View File Now available from Elswyer Publishing, the tell-all guide book by captainwolfos that tells all when it comes to the tasks that needs to be performed in order to rebuild and and bring back the glory of the capital city of Kvatch. This guide book was made when only the second version of Kvatch Rebuilt was released by the Kvatch Rebuilt Team. So one may assume that some of the bugs mentioned within this work may have been addressed. This package requires a mere two files: KvatchRGuideBook.esp KvatchRGuideBook.bsa Both of these go within your Data Folder. Activate and it will run no problem. Submitter LongDukDong Submitted 02/21/2024 Category Other Requires
-
 Using and Modifying Prylipala Sliders By arse22 APR 2021 Intro This will be a small guide to using and base modifying Prylipala sliders. It’s a powerful mod that allows you to morph the head further than the base game would allow. I will also briefly describe how to modify the head used in the mod, without the need for any 3d knowledge or programs, exponentially increasing the possibilities in your TK modeling. Pre-Requisite -Installed VX -Installed Prylipala Sliders Installing Prylipala Sliders Installing this mod is very simple, in VX it is an add-on head, that adds a new sliders which can morph into other heads, but also in any combination and anything in between. Basically, it replaces the useless asymmetry sliders into something much more practical. Download Prylipala sliders somewhere, if you dont already have it. Locate Custom.Prylipala_AltAsymFull.FaceSlider folder and place it into your AddOns. Then, in game you select it like so (the tool tip in the top left will tell you if its the right mod:) Reload the room or customizer, that means exit to title screen and load it up again. The model you did this to should have additional sliders under the second face tab. I am using Maya, which is a base model that was commonly used before and even quite some time after head replacers. Using Prylipala Sliders Here, is Prylipala sliders applied to a very no-frills default Maya at their max and minimum range to show what is possible and maybe a handy reference for some: Base_Maya_Prylipala_Min_Max_Big_Pic.rar Base_Maya_Prylipala_Min_Max_Individual_Pics.rar Modifying Prylipala Sliders There is a couple of things worth noting here. First, VX does not support HiPoly heads, the sliders for HiPoly heads (labelled HP,) are only the morphs from my understanding. Second, there is no way to add additional morphs to the base mod, as far as I know (the author of the mod, did not support a VX port or further development.) So, if you find that the pre-selection of sliders is limiting (which it is,) what you can do is replace the base head (.tri) file in the mod. As long as it is not a HiPoly (HP) head it will work with the sliders. I will show this example. First locate the head mod you would like to use as your new base: So, that is the head mod of EiraV. It is the only file in the mod, a .tri file. The best practice would be to copy and pase the folder of Prylipala, “Custom.Prylipala_AltAsymFull.FaceSlider” and rename it like “Custom.Prylipala_AltAsymFull.FaceSlider_EiraV.” This is just for organization. Then you go to the same directory and replace fg_head.tri with the one from the mod you want to use. If you are using a EMFS headpack that looks like this: All you need to do is select the .tri file of the head you want to use and rename it fg_head.tri, before moving it into your Prylipala custom mod. (You can also do head02 for male and head03 for shemale.) Heads To Use I was going to post about this on MG right before it died, since I haven’t seen anyone doing this, and it’s quite easy, greatly increasing the potential face types you can get into the game. Not all are great as you see from the previews, in fact I would not recommend using the maximum or minimum of any sliders when creating a model. Some head replacers are very generic and work really well with the sliders, while others strive for a very unique shape and may create poor results with most sliders, so on such heads it’s still useful to do this to fine-tune some parts to your liking. Examples of versatile heads that are good to make a Prylipala mod for: GE, Female Head Normal or Younger, Hybrid, Realistic Nose, Aaron More unique ones that will give mixed results: Daz-like head, Widowmaker, WaxHead, HurkV Conclusion Of course if you are capable, the absolute best is still just making your own head in a 3d program and adding it in as a replacer, but even such a head could easily benefit from the vast number of morphs provided by this mod for in-game tuning. It’s a shame HiPoly version of this mod was not made. I believe RK created some 2x (hipoly) versions of standard used head replacers in a package on MG, which I still have. From what he explained it is a simple process of doubling some value, but I personally do not know what value to modify to make Prylipala sliders work with it and certainly no clue how to add it to VX. This aside though, there isn’t much to using this and it is as good as it gets for TK face customization.
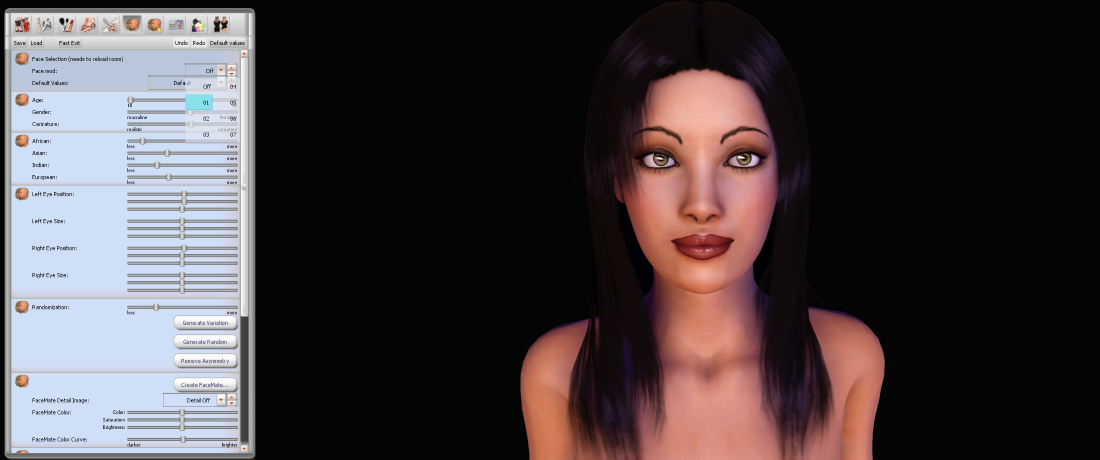

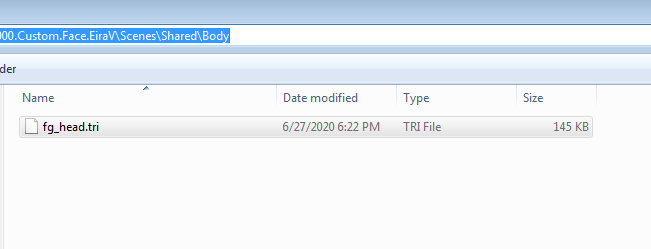
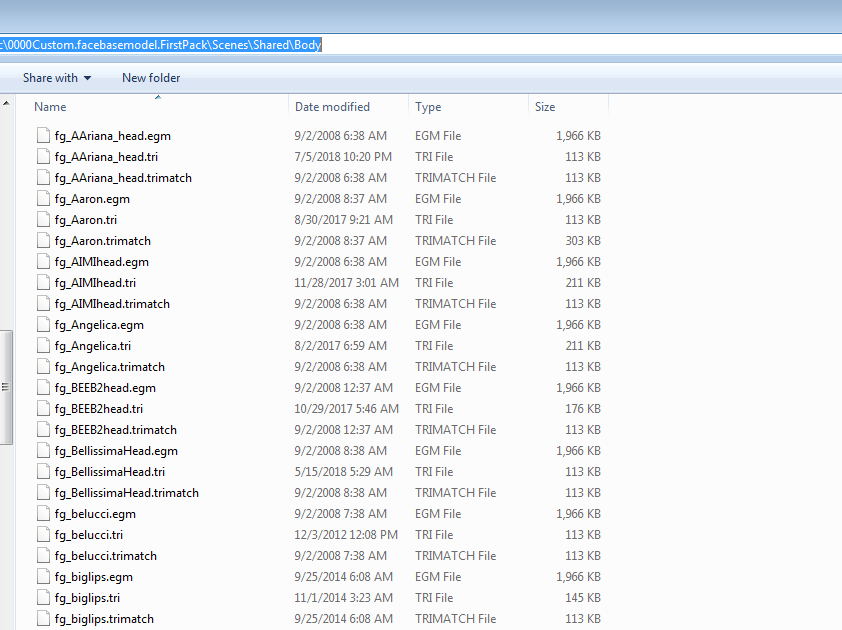
-
 I love having a ton of followers but hate it when my available plugin slots in NMM starts to drop down. So, finally went through a few attempts to find that its pretty easy to convert small follower mods from esp to esl format. Requirements: 1. SSEEdit 2. NifSkope For this guide, am going to use Sori Follower SE (CBBE SE version) created by songgod and ported to SE by ff7legend. I use NMM, so am going to use it in the process. You may have to do the appropriate steps if use MO2 or Vortex, since they use a Virtual Folder system using symlinks. The workflow: Step 1: Install the mod using whatever mod manager you use or install it manually and then activate the mod. Step 2: Then Fire up SSEEdit and open the freshly installed mod i.e. Sori.esp If you check the header section it shows that the mod esp only has 28 records, and for only 28 records wastage of 1 plugin slot is not cool. It could be easily handled by a lite or esl plugin. Step 3: In SSEEdit, select "File Header", then right click on "Record Flags" in the "Record Header" tree. In the popup menu which appears, click on "Edit". A message box will come up, select the "Yes" option there. This would be followed by a screen with many Check boxes. Tick the ESL check box and press "Ok" button. Step 4: In SSEEdit, right click on Sori.esp and click on "Renumber FormIDs from". A small popup will come up, type in 800 there. A message box would appear, press "Yes" there. Step 5: In SSEEdit, save the esp. Step 6: In SSEEdit, go to the tree under Sori.esp and open the "Non-Player Character (Actor)" branch and note down the Form ID of the follower Sori. Then close SSEEdit. Step 7: Now, open up Explorer or whatever File Manager you use and navigate to <Skyrim Installation Directory>\Skyrim Special Edition\Data\textures\actors\character\facegendata\facetint\Sori.esp depending on your file system. Select the dds file there and rename it to "00000800.dds". The last three characters are important for an esl file. In SSEEdit, you have seen that the Form ID for Sori is 02000800. The first five characters has to be replaced by Zeroes. Step 8: Next in Explorer or whatever File Manager you use navigate to <Skyrim Installation Folder>\Skyrim Special Edition\Data\meshes\actors\character\facegendata\facegeom\Sori.esp depending on your file system. Rename the Nif file present there to 00000800.nif, the reason being the same as in the previous step. Step 9: Now open up the Nif file in NifSkope. We have to correct the tintmask file name in the texture path. Navigate as shown in the pictures, then rename the dds file in the tintmask file path. Finally save the Nif and close NifSkope. Step 10: Now open up NMM and check the Plugins tab. It should show Sori.esp is not using a plugin slot. Step 11: Close NMM, then go find Sori in-game in Sleeping Giant Inn at Riverwood. She will be there if everything went fine. And indeed she is there. Yell at me if you face any problems. Till then peace out.

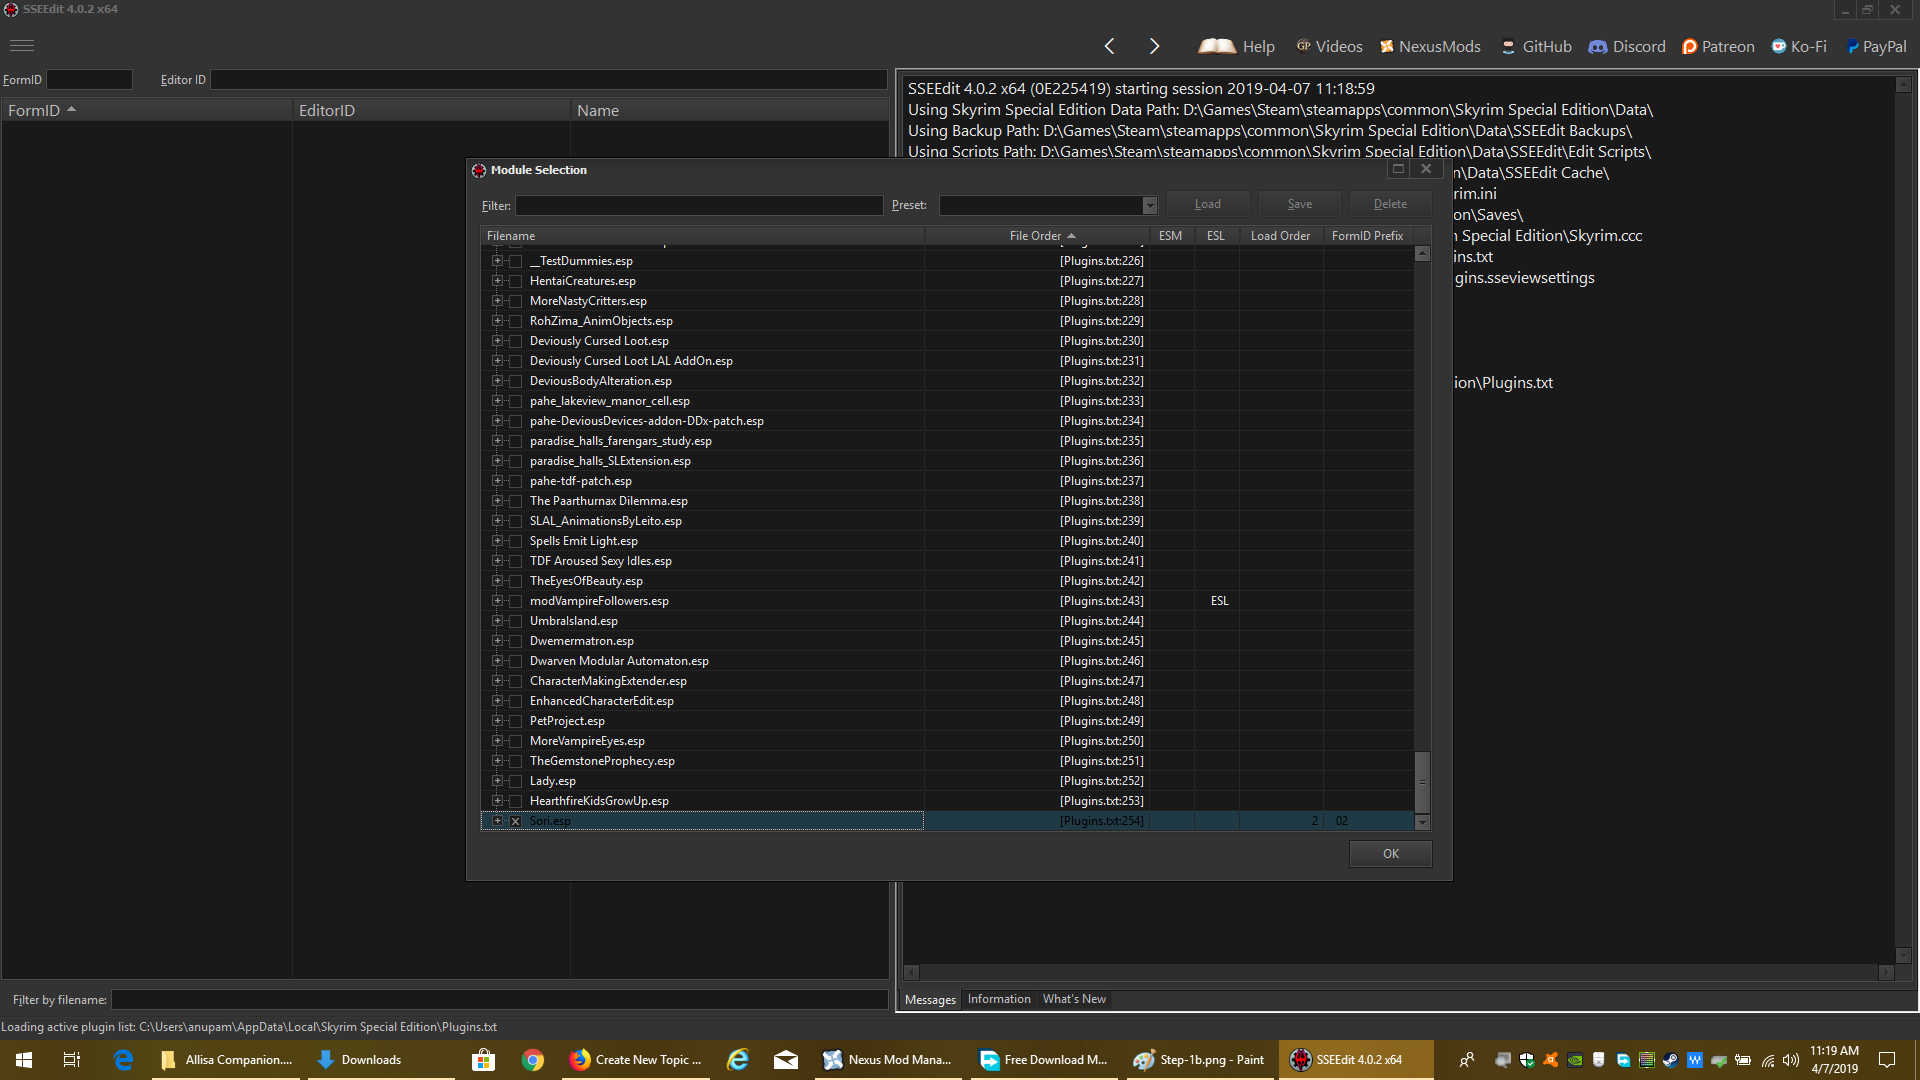


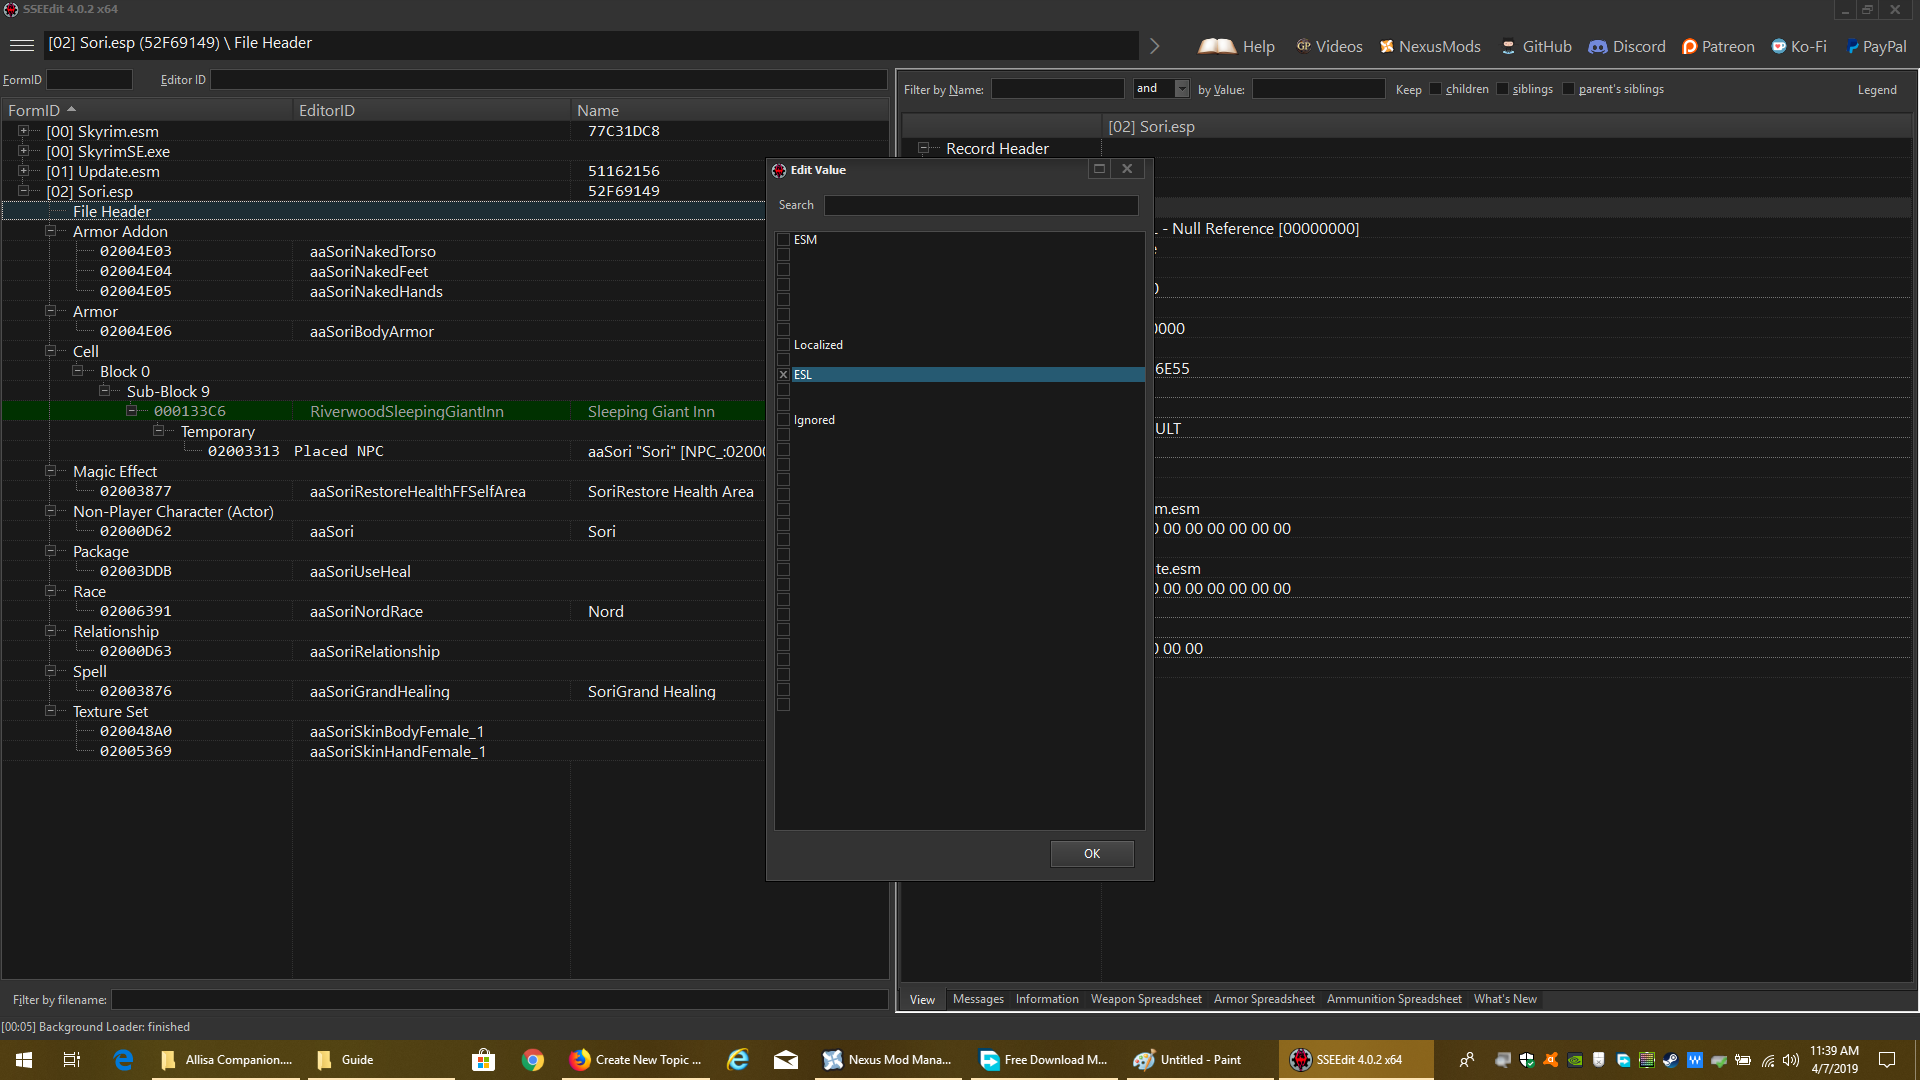


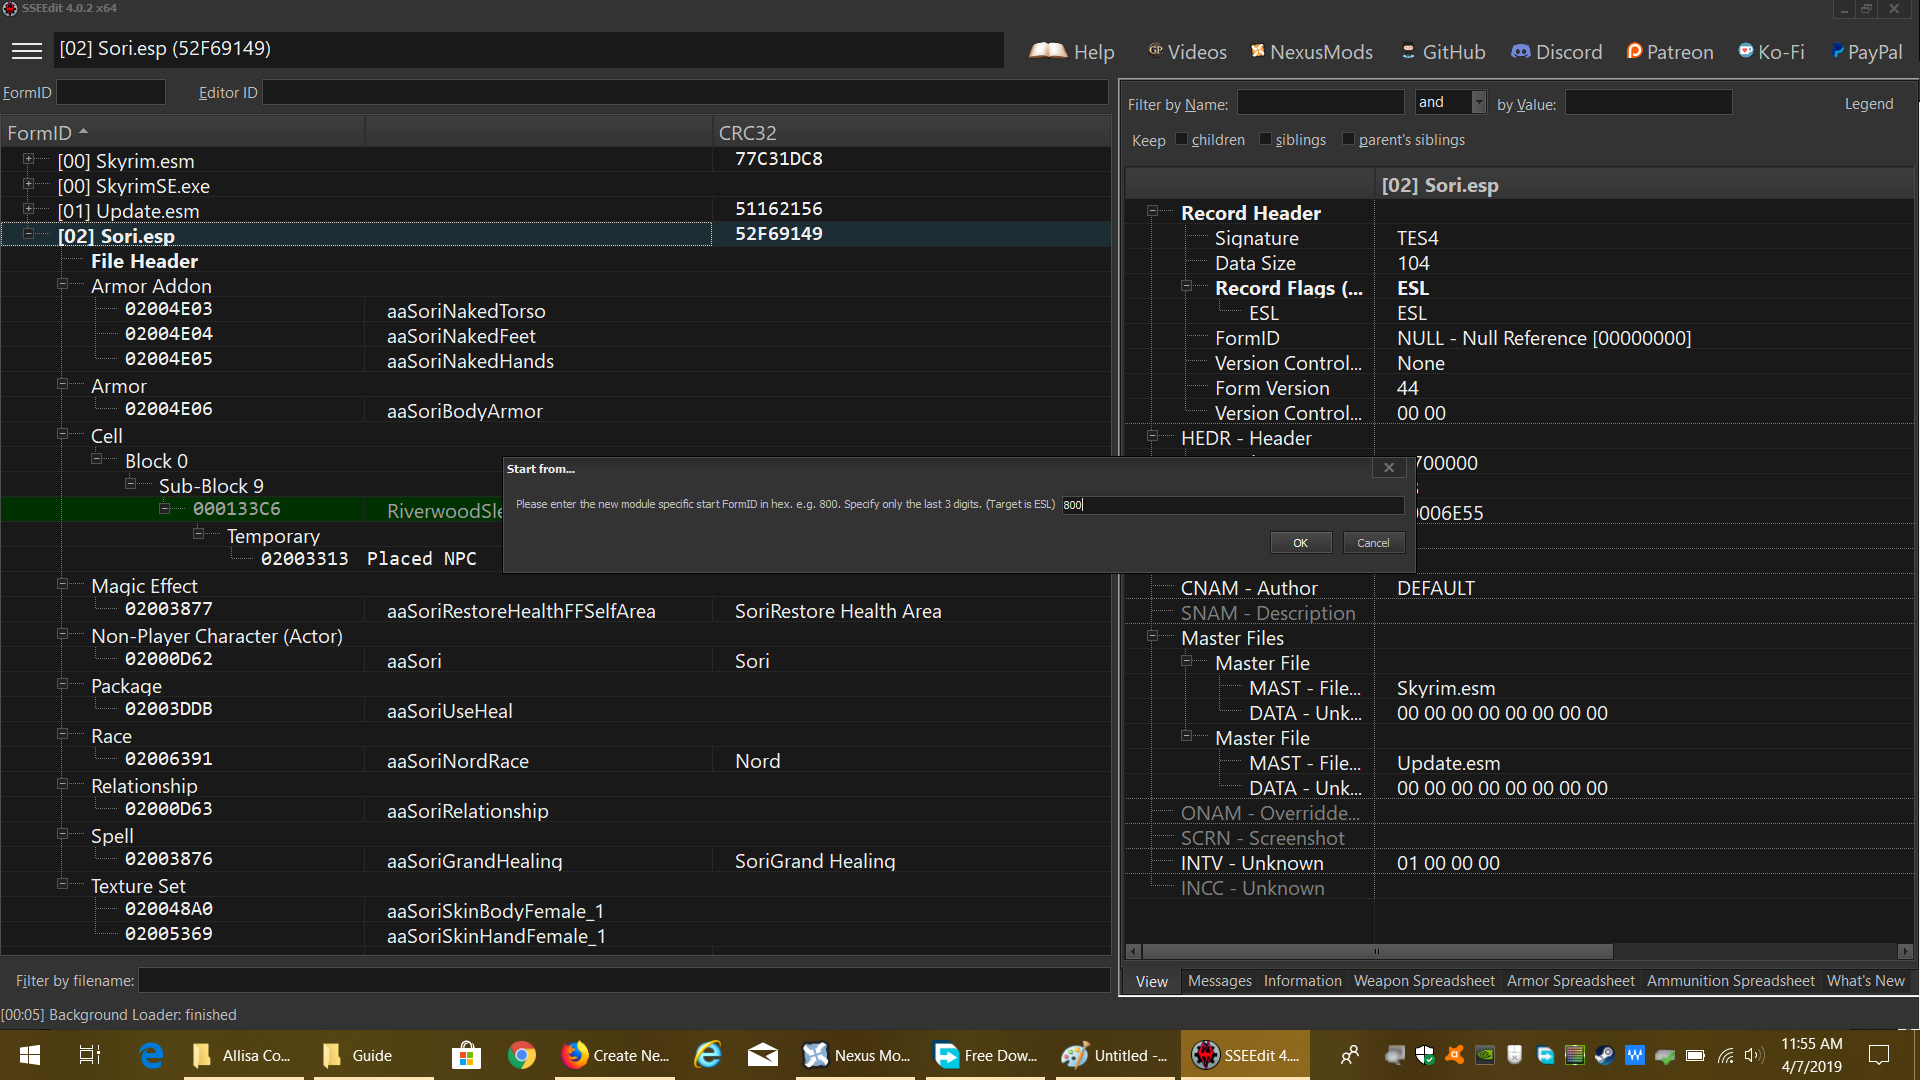
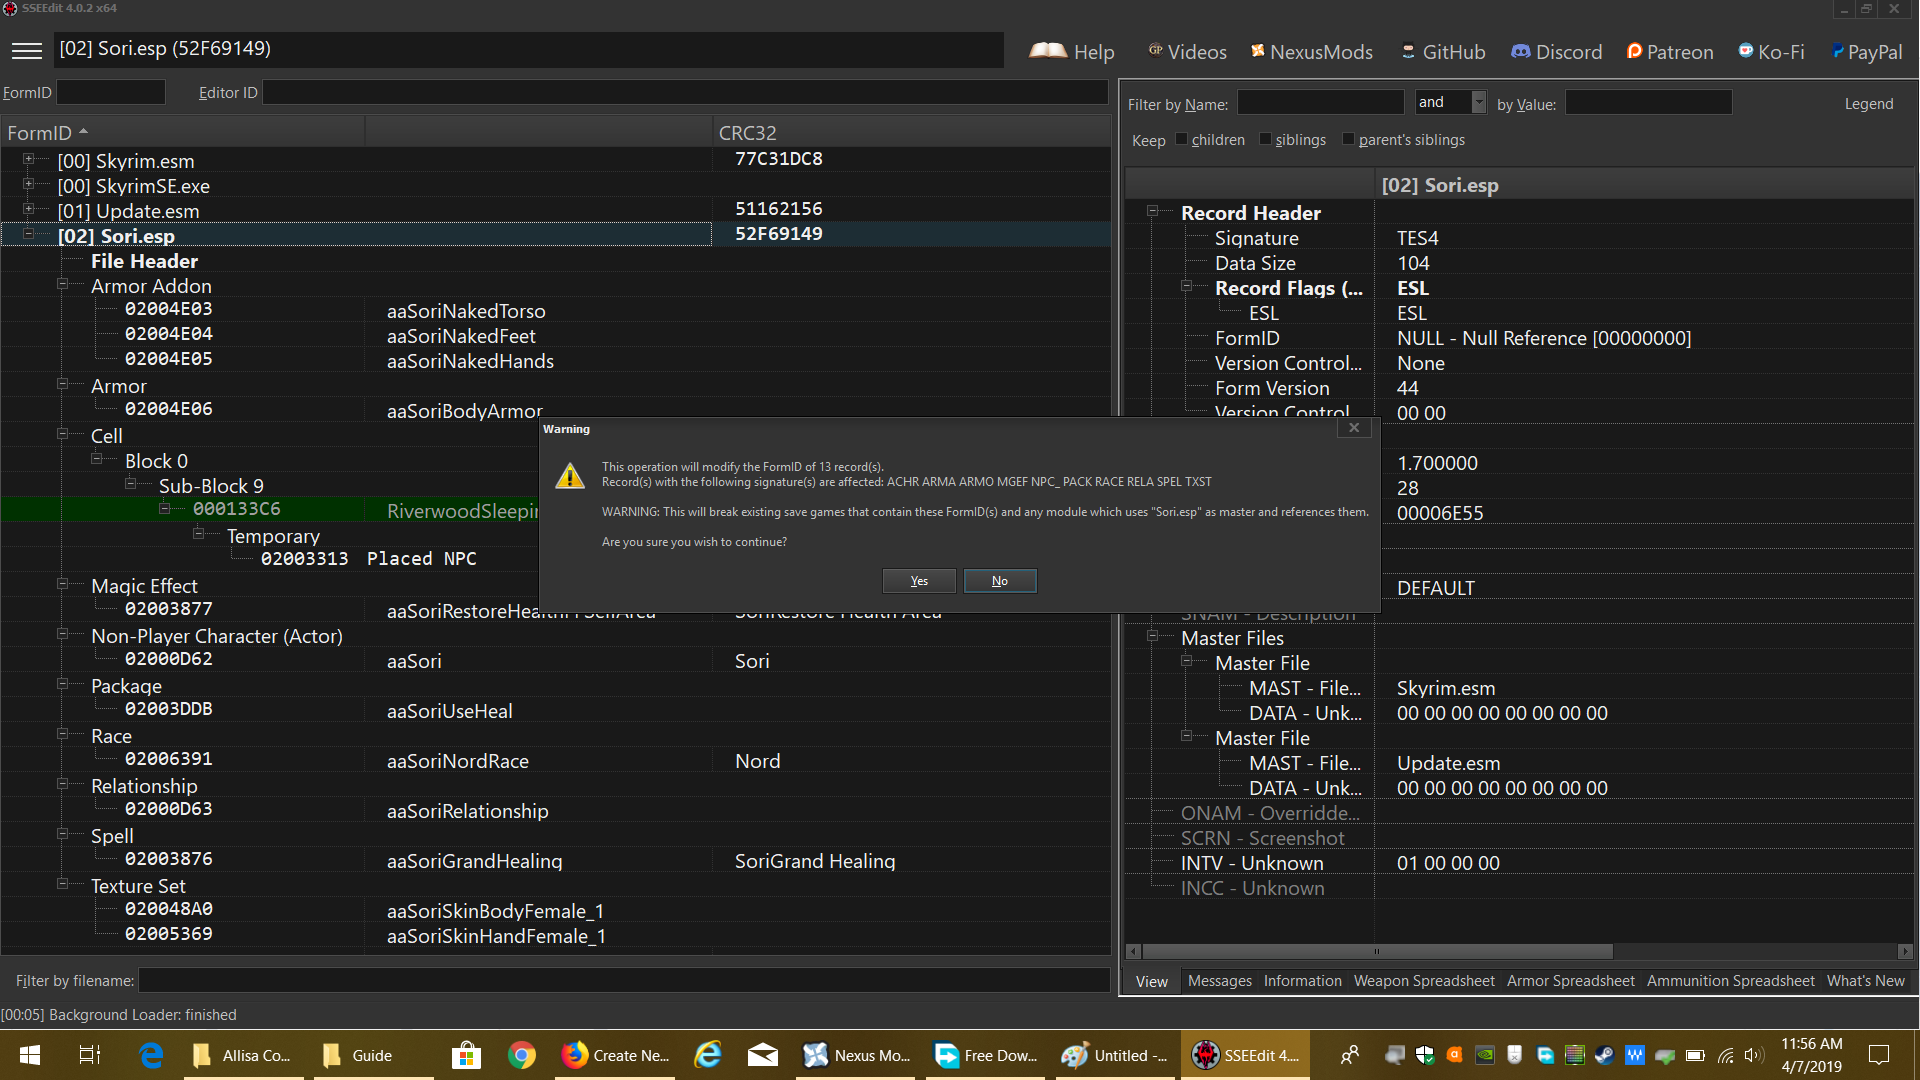

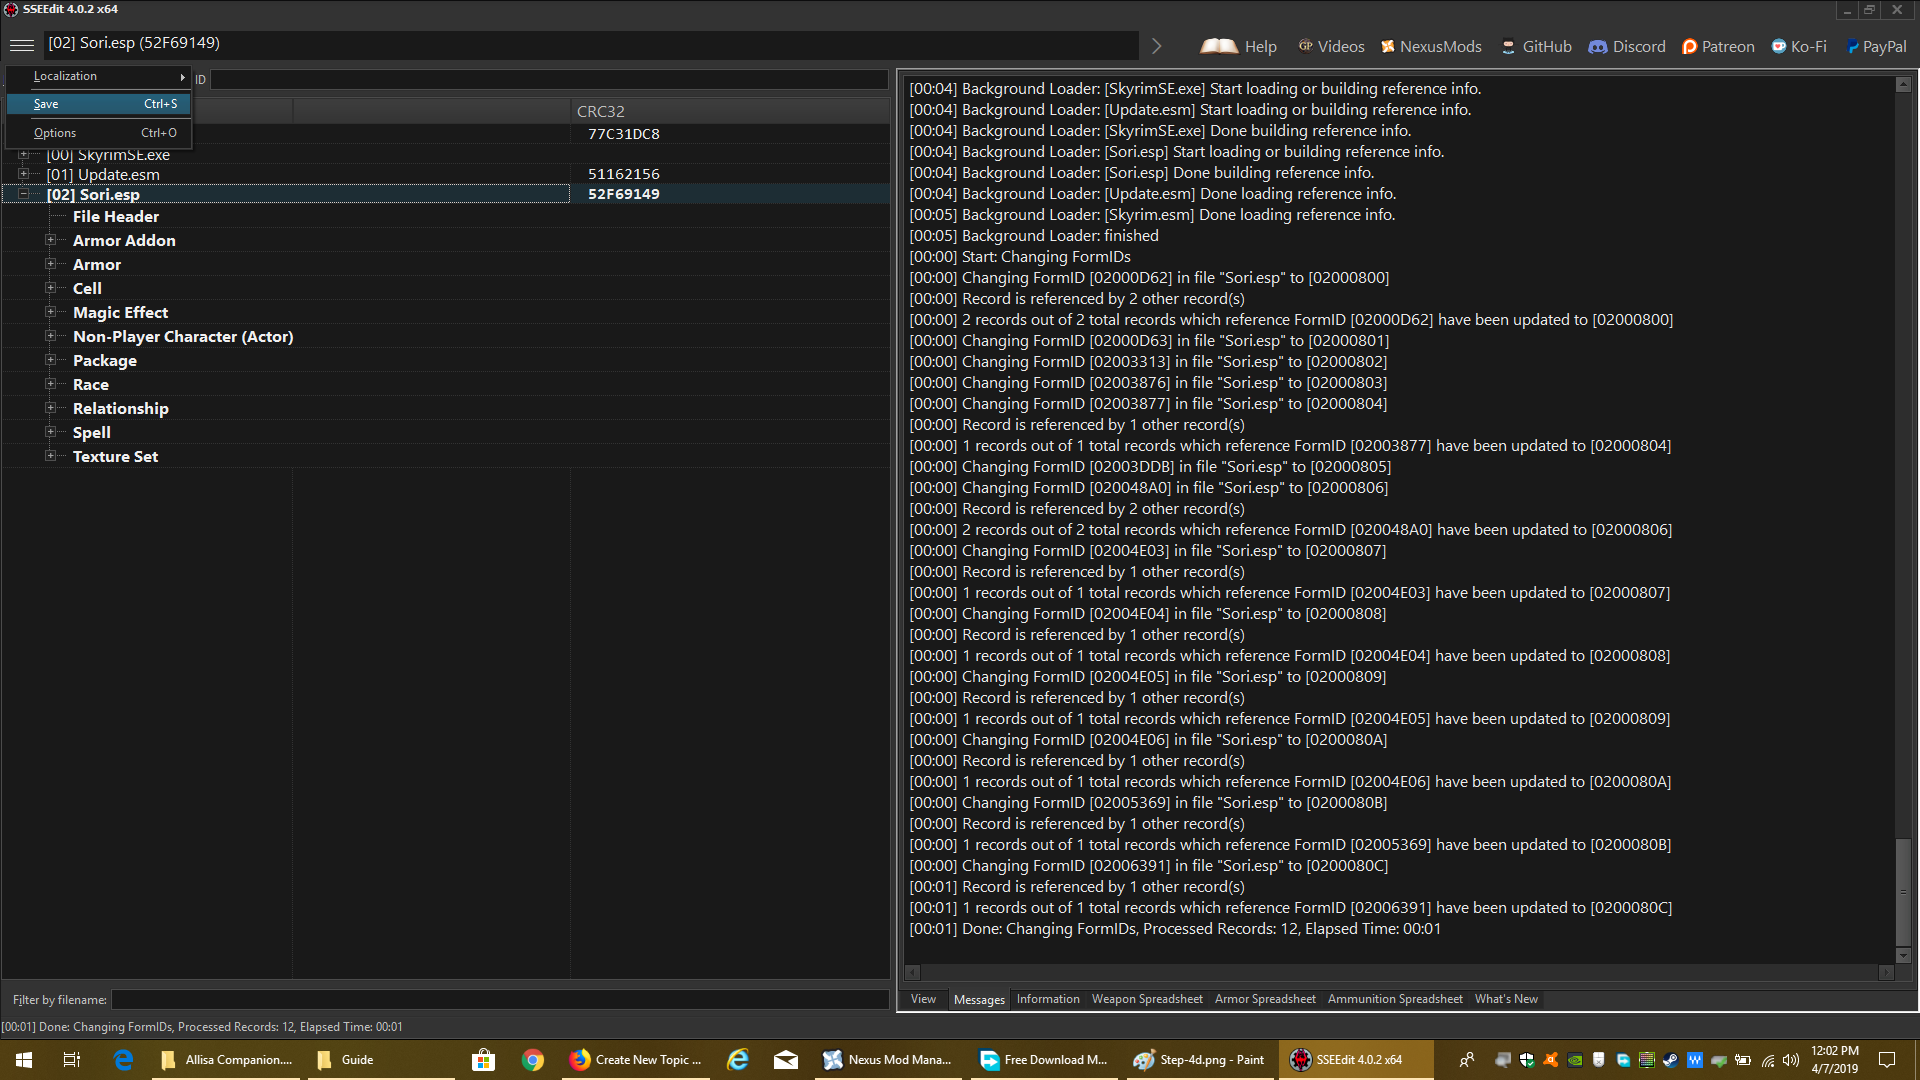


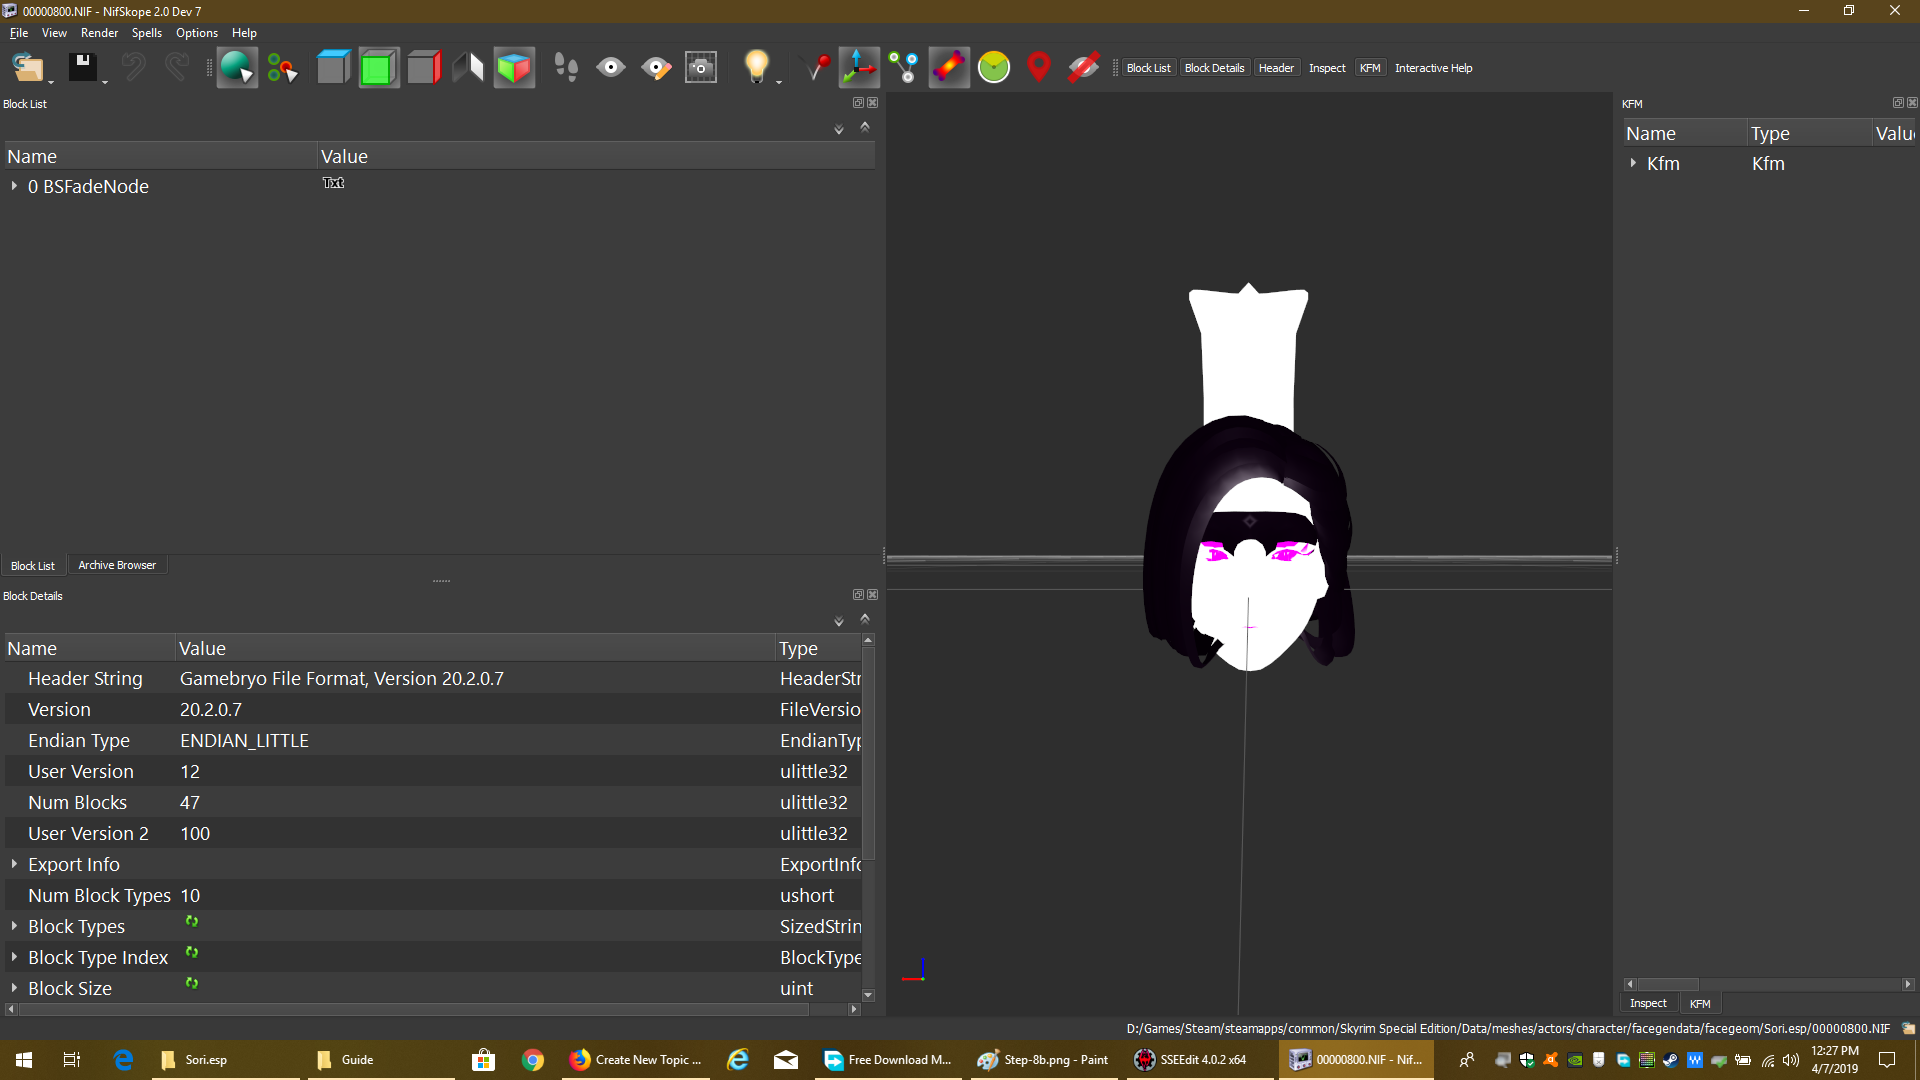
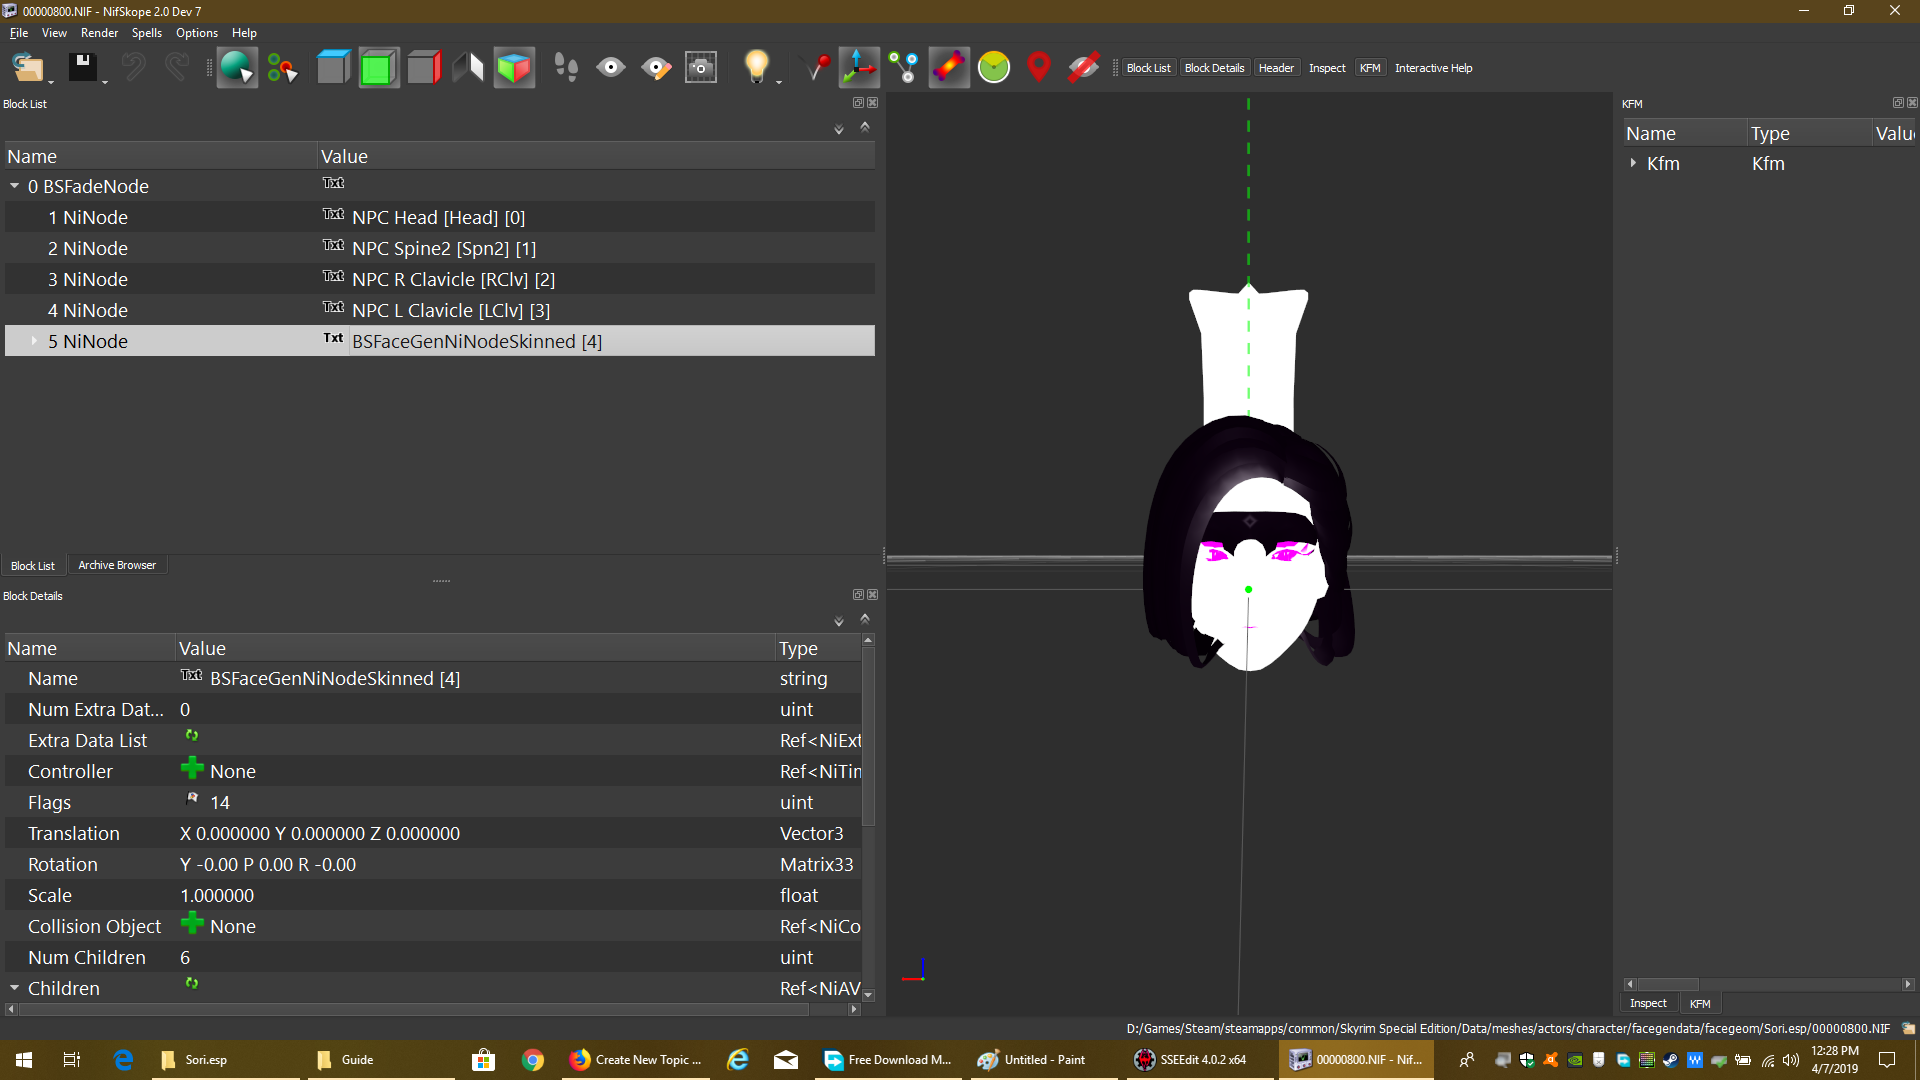
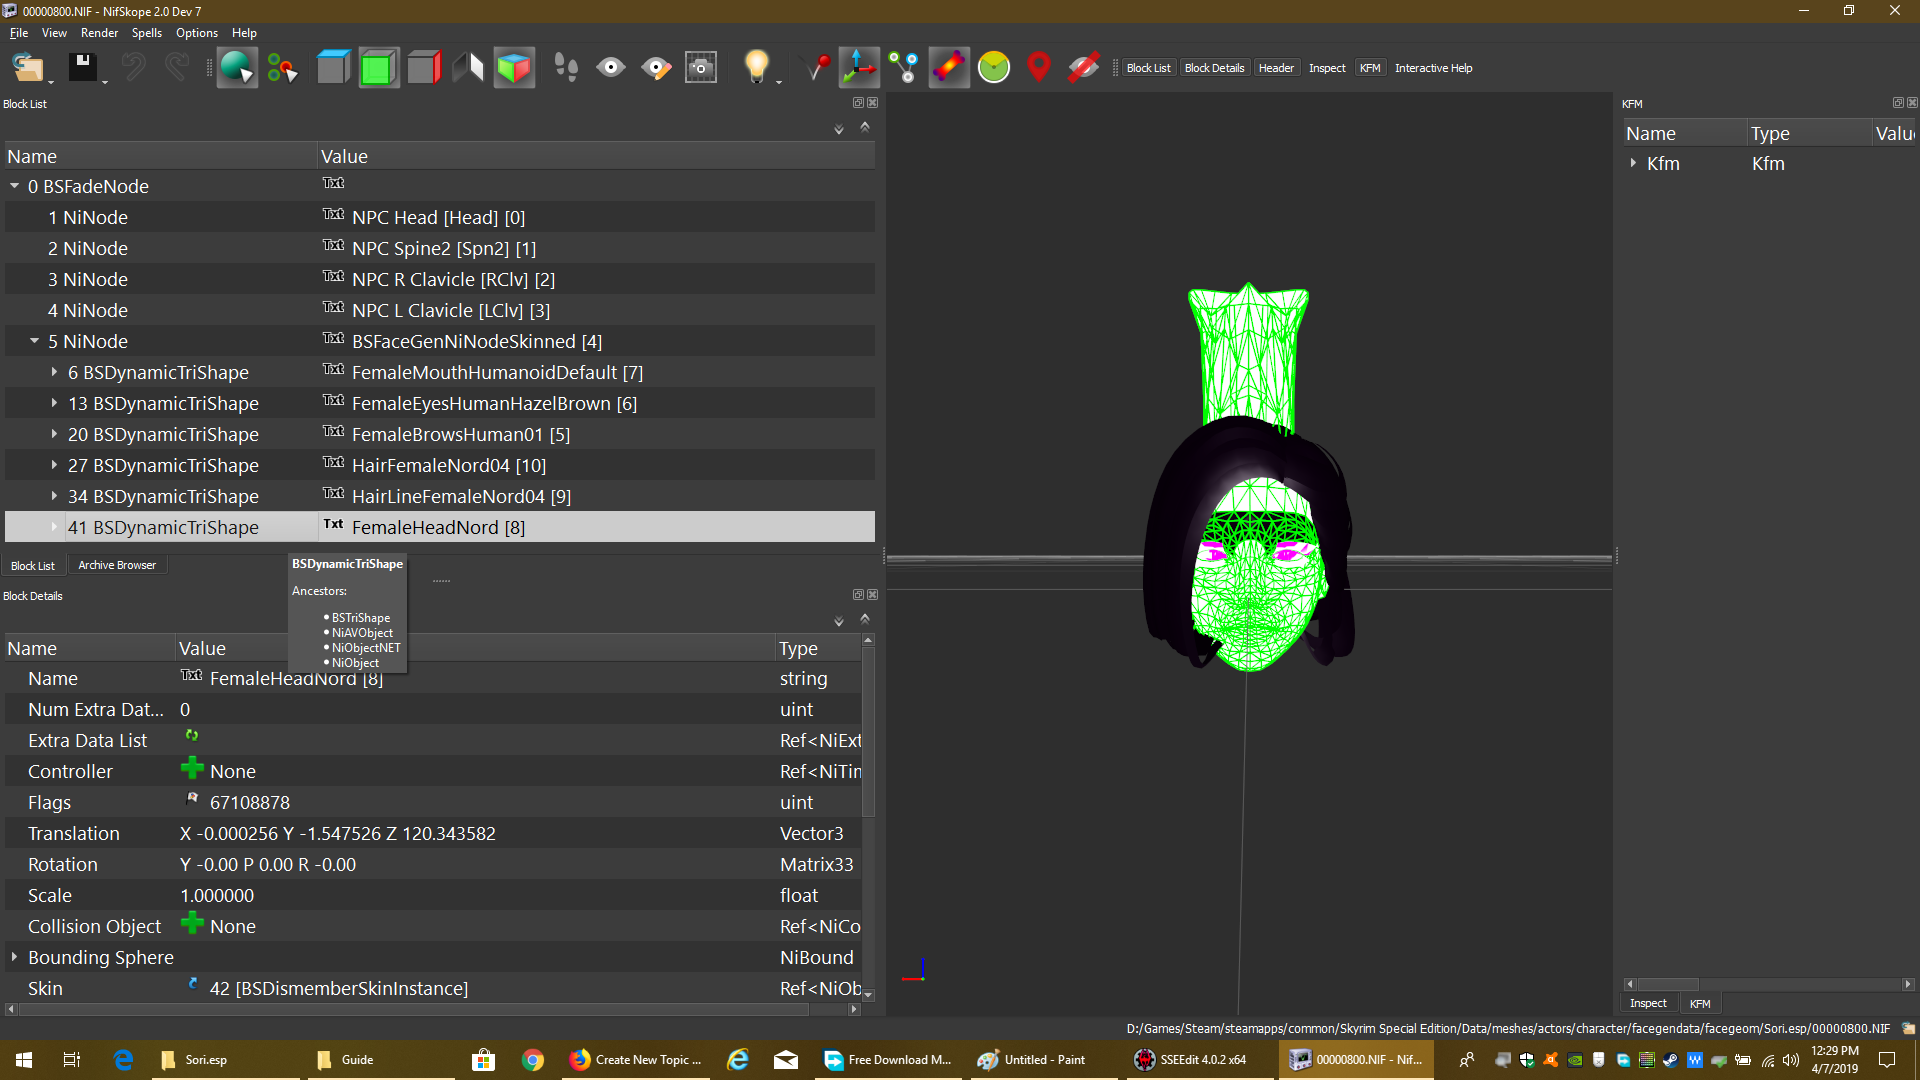


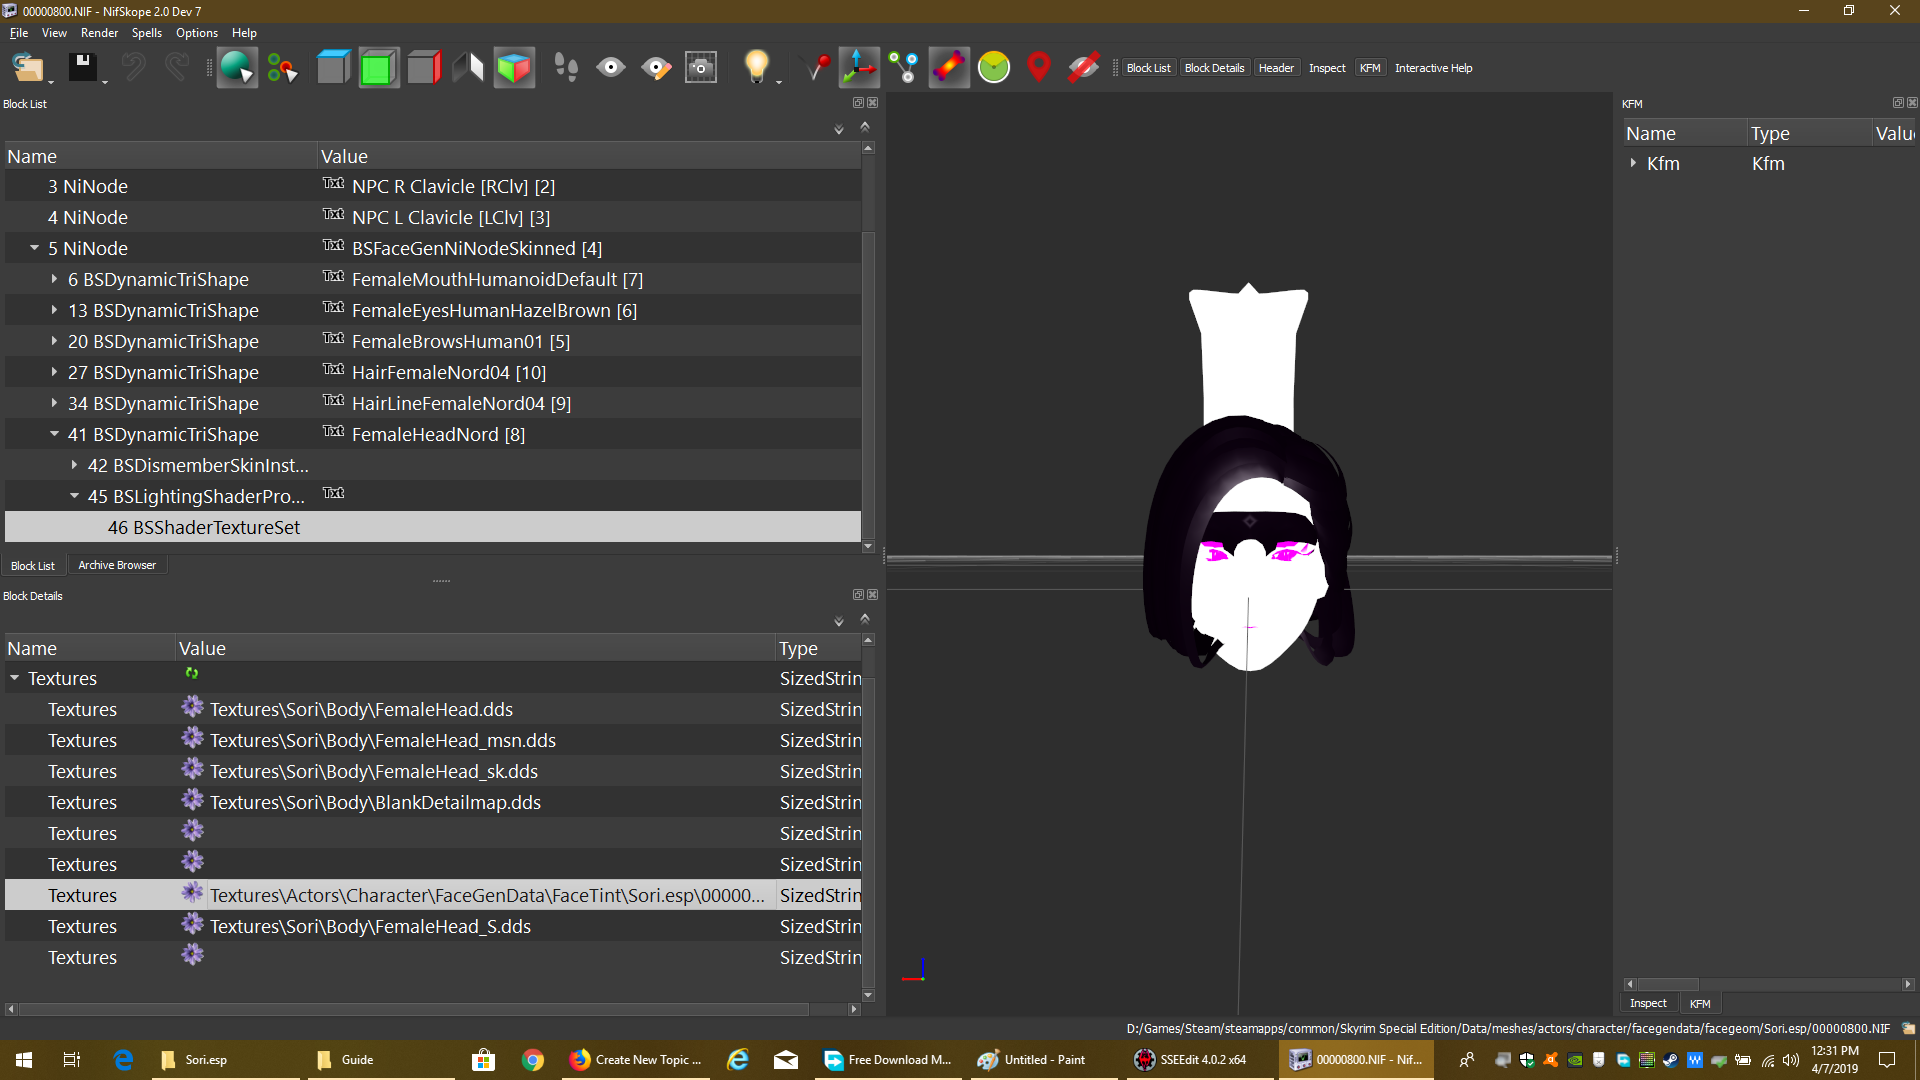

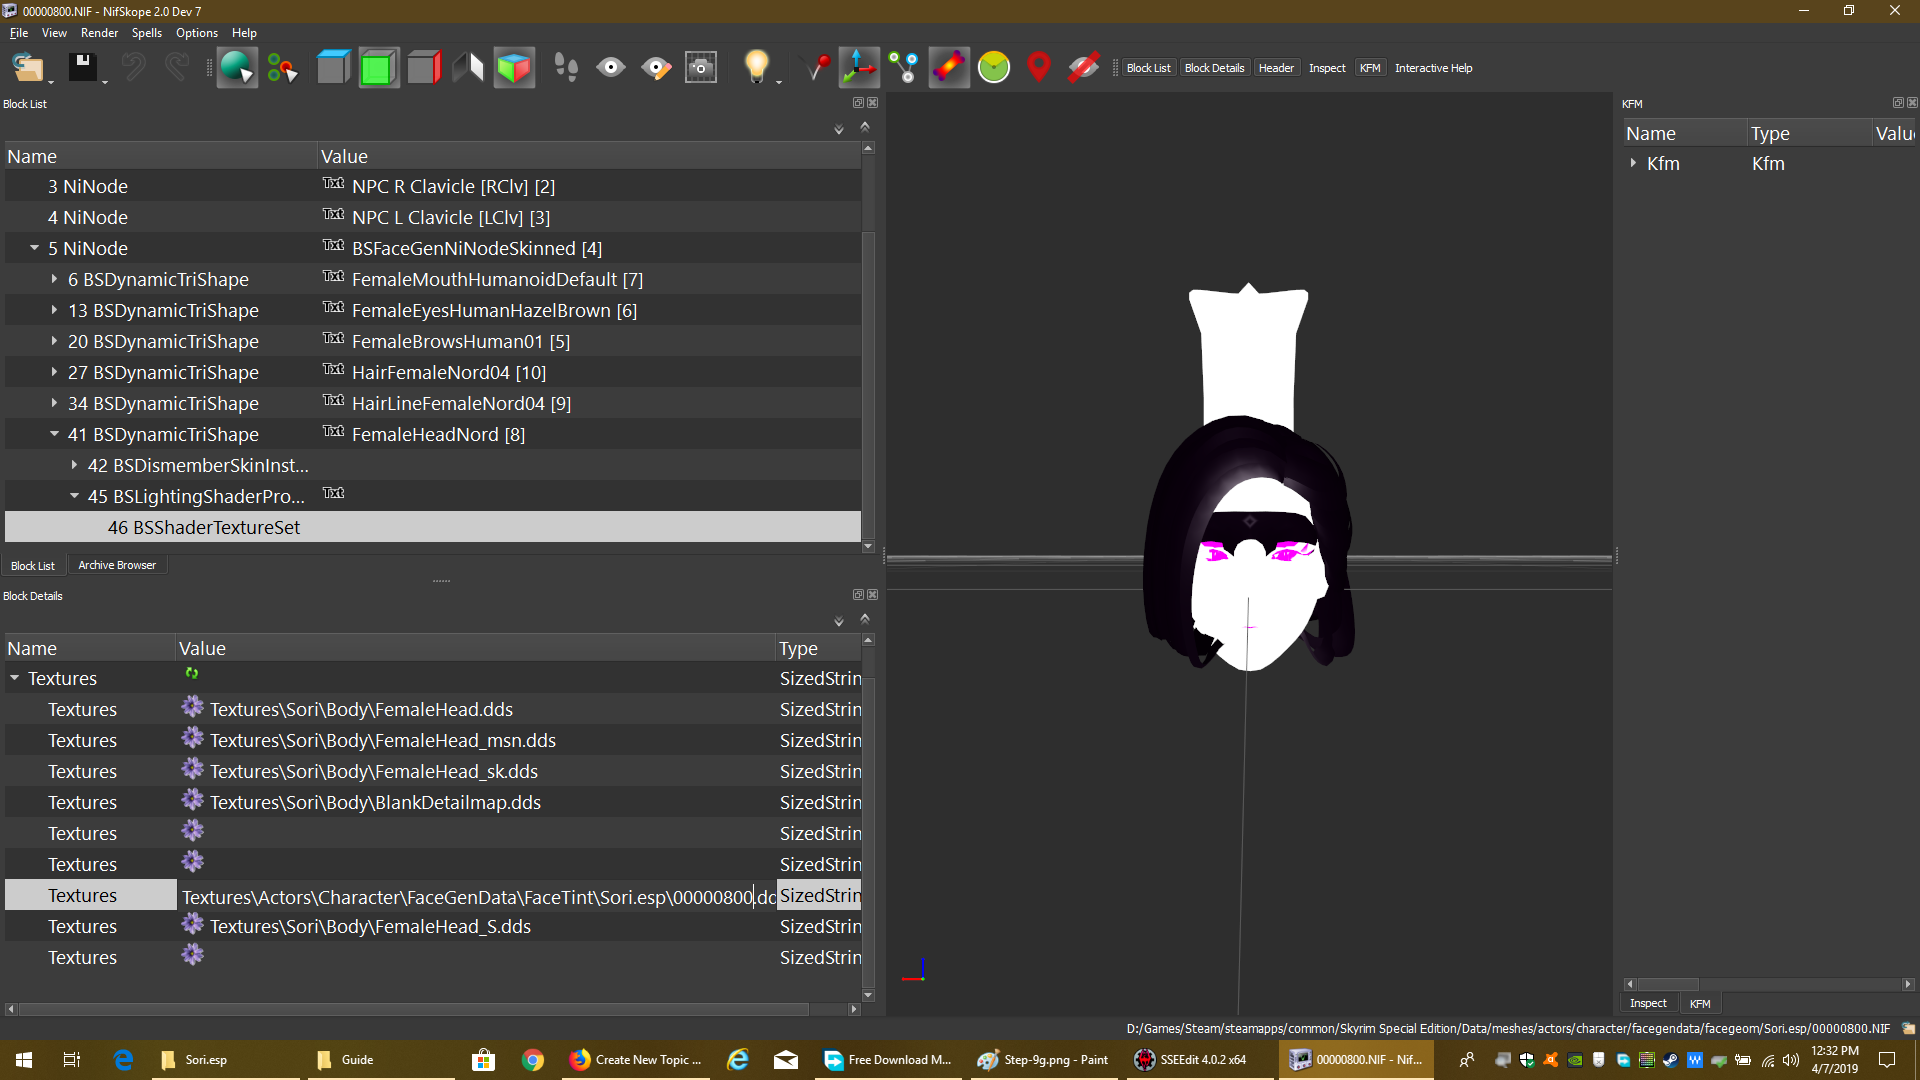


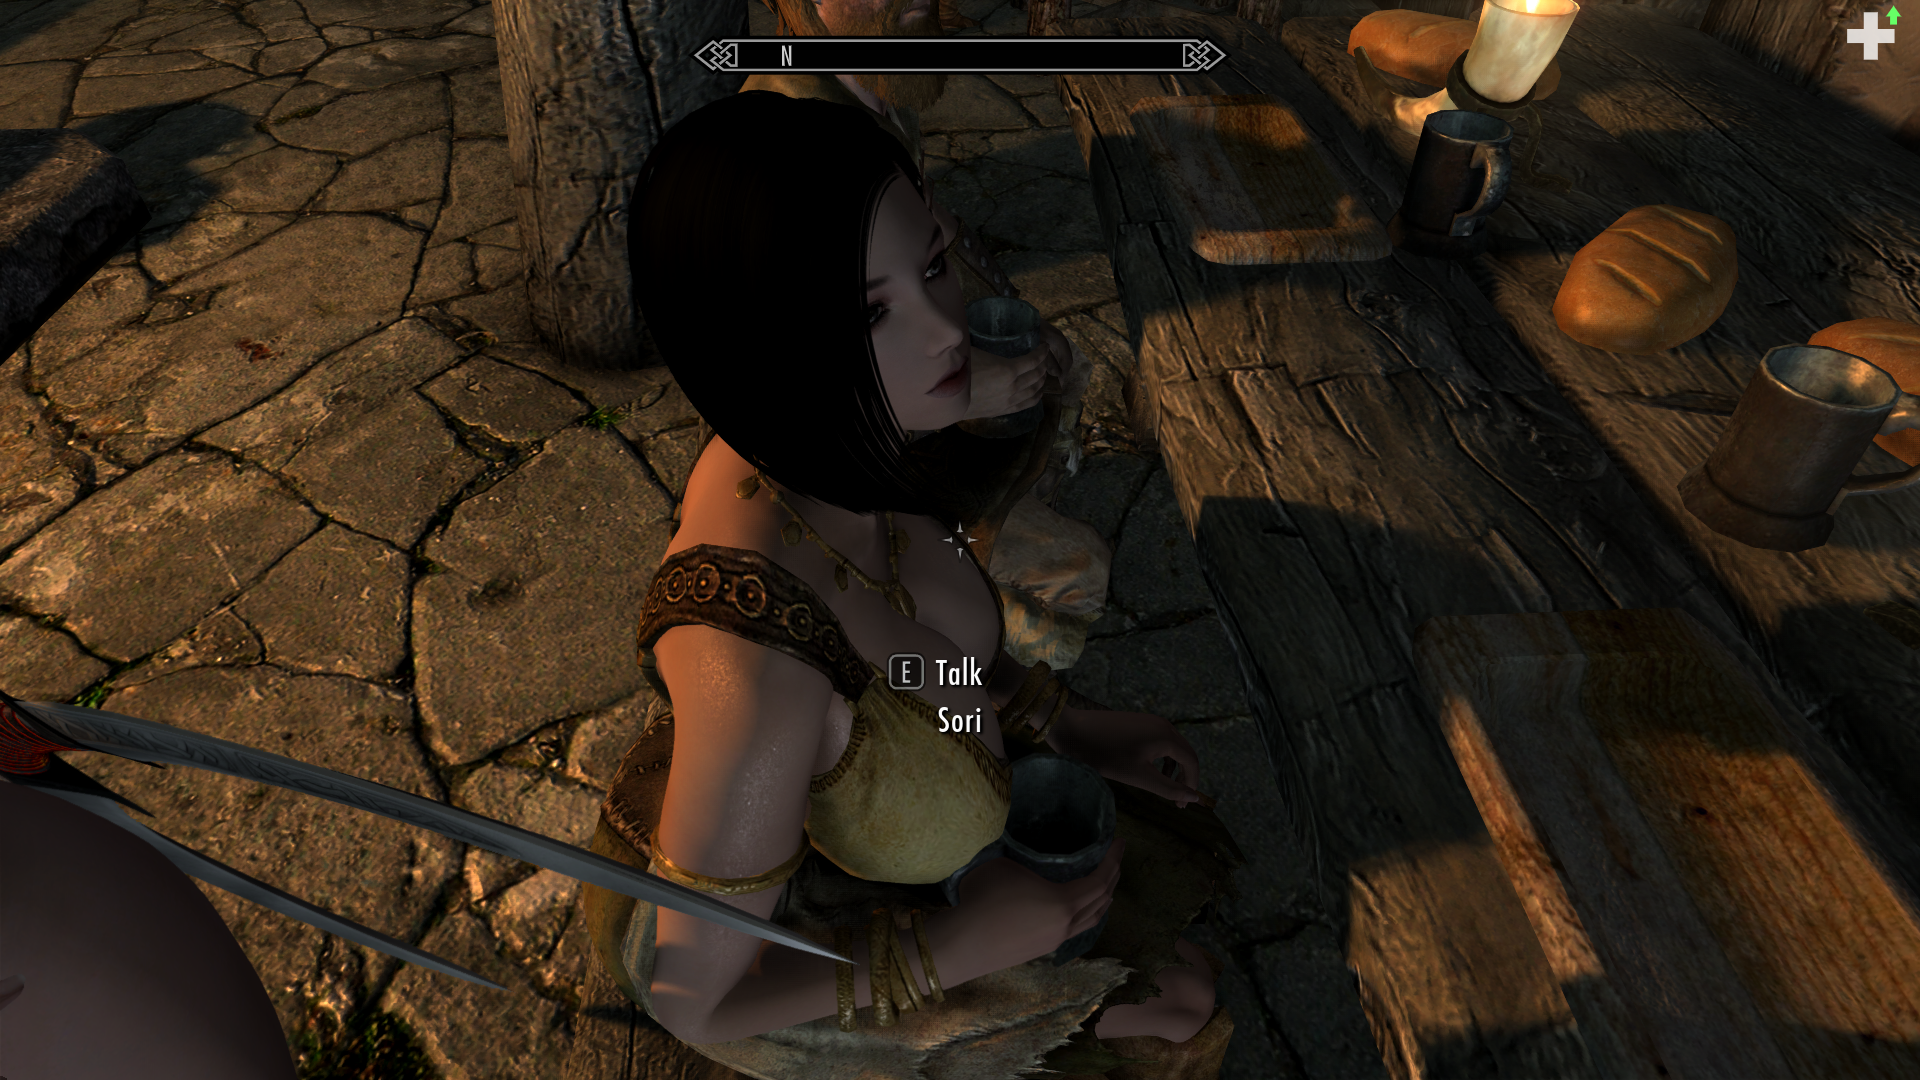
-
Milk Mod Economy (aka MME) is one of the few mods that adds lactation to your game for female NPCs and the player. However, the information on HOW to use this mod is effectively nonexistent and requires hours upon hours of trial and error. On top of that, the mod as currently released has a lot of bugs - particularly in the "Economy" part of the mod, which is sad considering "Economy" is part of the mod's title. This blog entry is intended to serve as a guide to those who are using the mod. Hopefully this will alleviate any confusion anyone has about the mod. ------------------------------------------------------------------------------------------------------------------------------------------------- How do I become a milkmaid? ------------------------------------------------------------------------------------------------------------------------------------------------- What happens after I become a milkmaid/milkslave? ------------------------------------------------------------------------------------------------------------------------------------------------- How does milk generation work? UPDATE: I've added an edited "MilkMCM" script you can download which allows you to set the "Milk Generation Increase" value to 0, instead of the normal minimum of 0.003 - However, please remember that if you set this value to 0, you will also never stop producing milk unless you use my OTHER edited MilkQuest script. ------------------------------------------------------------------------------------------------------------------------------------------------- What does Lactacid do? ------------------------------------------------------------------------------------------------------------------------------------------------- How does selling milk work? (I recommend using my edited plugin attached to this post) ------------------------------------------------------------------------------------------------------------------------------------------------- How do I get Normal, Race, or Special Milk? ------------------------------------------------------------------------------------------------------------------------------------------------- Which NPCs can I sell to? (I recommend using my edited plugin attached to this post) ------------------------------------------------------------------------------------------------------------------------------------------------- How does Market Saturation/Demand work? ------------------------------------------------------------------------------------------------------------------------------------------------- What factors affect how much money I get for milk? ------------------------------------------------------------------------------------------------------------------------------------------------- I want to know how much I'm going to get for my milk! ------------------------------------------------------------------------------------------------------------------------------------------------- This should be as much information as anyone needs to get the most enjoyment out of this mod! If there's anything else you'd like to know, please leave a comment and I'll investigate the mod further. Despite my complaints about the mod, it's currently the best mod out there for lactation. The only other mods I'm aware of that has anything to do with lactation is "Being a Cow" which causes your character to transform into a literal cow, and "JUGs". JUGs hasn't been updated in 7 years, so I really wouldn't recommend anyone use that mod. Being a Cow literally turns you into a cow... Yeah no thanks. Therefore, MME is realistically the only Lactation mod out there. It has a lot of potential, but it's extremely rough around the edges and needs a lot of work. That being said, it is still a decent mod that at least accomplishes its main attraction. Hopefully this information is useful to those who use the mod! -This Plugin fixes milk selling dialogue- MilkModNEW.esp -This Script lowers the arousal required for Boobgasms to 50- MilkQUEST.pex ------------------------------------------------------------------------------------------------------------------------------------------------- -This Script lowers the arousal required for Boobgasms to 50, and has a static formula for milk production decay when neither pregnant nor under the effects of Lactacid. This is intended to be used with the edited MCM script in order to counteract the perpetual milk production if "Milk Generation Increase" is set to 0, but it is not required.- MilkQUEST.pex -This Script allows you to set "Milk Generation Increase" to 0. This is technically the same as "Fixed Production" but you can manually set your milk production in the debug menu instead of relying on the base "Fixed Production" formula which increases your milk by 0.333/hour at 0 Arousal (0.666 at 100 Arousal). Setting "Milk Generation Increase" to 0 should give you, by default, 0.033/hour at 0 arousal (1/10th the rate of "Fixed Production")- MilkMCM.pex
-
 The guide is effectively version agnostic. There are instructions to identify your game version as well as pointers to get compatible files regardless of previous, current or future versions. If you want to mod the game from scratch check the patch notes for the game and see if there has been a recent update. If that's the case it's very likely this newest version isn't fully supported by mods yet. You can look into downgrading your game version to the previous stable one or waiting a few weeks for full mod support. Other than that you should be okay following this guide, as long as you apply the recommended practices detailed in it. If you're on a version previous to 1.6.1130 you must use this mod to avoid crashes. You don't need it if you're on 1.6.1130 or later versions of the executable. The purpose of this guide is to provide a comprehensive source of information for newcomers. If you follow the steps described here you'll end up with a basic set of mods covering the requirements (plus some recommendations) to use Sexlab and its additional mods. On top of that I hope by following the instructions given here you'll be able to grasp the fundamental concepts about installing mods and using the different tools available to further tweak your game. This was made with Skyrim Special Edition ("Skyrim SE" or "SE" from now on) in mind. Some of the instructions or complete sections may not apply to regular or Legendary ("LE") Skyrim . And of course most mods won't work if you use the SE versions in a LE game. For Skyrim LE I recommend you to check the Conglomerate blogs. This guide is heavily centered around Mod Organizer 2. If you prefer to use Vortex it won't be of much use to you. I'm not aware of a similar guide made with Vortex in mind, but there is a good video series on how to use Vortex. That would be the starting point. After that you'll need to check the mods you intend to use. Always verify you're installing all the requirements and that the mods you're getting are compatible with SE. Preparations - The required and the recommended stuff A computer with Windows 10 or higher and Internet access is implied. Steam and the game "The Elder Scrolls V: Skyrim Special Edition" acquired in your Steam account. Pirated copies of the game are not supported (against site rules and also some mods won't work so don't waste your time). Game Pass/Microsoft Store versions of Skyrim cannot be freely modded (so again don't try, just go for the Steam version). The GOG version has some mod support (check this thread for more info). But I won't buy and test this personally so it's not something I'll cover here. Any program capable of zipping and unzipping files in .rar, .zip and .7z format. 7-Zip is a free program that does all of that. Recommended: enable the Windows Explorer setting to see file extensions, this may be useful to confirm you're following the instructions using the correct files: Press the ˅ ˄ buttons in the top bar of any folder to expand the settings. Go to the "View" tab. Enable the "File name extensions" setting. You can revert back this setting at any time, as I think most people are used to have file extensions hidden. Recommended: If you're not a premium user in nexusmods you may have noticed that when you press any of the download buttons you're redirected to a new page and you have to click in another download button to finally get the file you want to download. Here is a simple fix for this nuisance of a webpage design. You'll need to install a browser extension and add a little script to it. This script will only help you with the extra redirect mentioned before, it doesn't grant premium benefits. Install the Violent Monkey browser extension (for Chrome) - (for Firefox). Go to this link. A new Violent Monkey tab will open with the script ready to be added. Press "Confirm installation" and close said tab. The script will be active while you navigate the nexusmods site and skip the additional redirect 99% of the times you want to download something. Source. The guide - Download and recommended usage MO2 & Other Tools.pdf If you want to share this guide with others please don't upload the pdf directly. Instead link this thread. That way people can download the latest version directly from here and read the rest of the information. To open the guide you can use any PDF reader. Most web browsers work for this too: simply get the pdf file and drag it to your preferred browser. It will open as any other page and you'll have zoom buttons, middle click to open links and so on. The first page has an Index, click in any title to go there immediately. The header of every page has a "[Return to Index]" button. Currently the guide covers the following points: 01. Steam settings and Skyrim SE installation 02. Mod Organizer 2 - The first look 03. Skyrim Script Extender 04. Minimal modlist 05. LOOT 06. FNIS 07. BodySlide 08. Into the game 09. Mod Organizer 2 - A second look 10. (Optional) Enhancing graphics - Post-processing effects 11. Updating Skyrim SE, SKSE and mods 12. Locating your files + Quick tool recap 13. Final words Each section will get you closer to the final goal. Just take your time and read all the instructions. I've tried to be as descriptive and direct as possible, using screenshots of my own setup to show the different settings and features used. The way the sections are listed is 100% intentional. So don't try to skip one or do them in a different order. You'll have a better experience if you fully read the instructions the first time and go one step at a time. The current setup can be installed and tweaked in about 4-6 hours (give or take, depending on your knowledge of the tools used here, and the wait times if you can't download mods at full speed). So don't rush it, and aim to learn more than just imitate. Changelog

-
So, you’ve tried the infamous Neverwinter Nights module, A Dance with Rogues by Valine/ 2acornupper. (If you haven't tried it yet, maybe read my quick start guide?) And now you’re wondering what other kind of character builds you can make for another playthrough. Well, you can try an optimized build for rogues like leveling into fighter and blackguard. Rogue builds like The Blackguard Executioner by Orion might work well for you. But what if you wanted something a bit more unwieldy and somewhat situational? I present to you a character build I made specifically for A Dance with Rogues: The Promiscuous Paladin Being Roguish Paladin in Betancuria is very difficult. You can’t steal from the innocent. You can open any lock you want but god forbid you take what’s inside. I just wanted a new pair of high heels... You also can't take a vengeful stance against certain enemies. Paladins can’t be cold-blooded murderers. But he was getting paid to collaborate with sadistic bastards... Doing so will destroy your ability to gain levels in the Paladin class. You’re primary way of leveling will still be opening locks and removing traps. Just don’t steal anything from innocent people and never fight against the locals. It’s a bummer, I know. But even though you’re unable to be a murderous thief, it doesn’t mean you can’t have fun. Before we get into the leveling guide, it’s time to introduce Inez Renfri, our character for this build. She’s a big-breasted babe with a rather ironic name. All she needs now are bunny ears and a tail. inezrenfri.bicinezrenfri.txt Here’s her level 1 character sheet and journal entries if you want to use them. Both of these go into your <user>/Documents/Neverwinter Nights/local vault folder. This Princess isn’t exactly pure. Inez (ee-NEHS, Spanish form of Agnes, meaning “chaste”) Birds of a feather, kindred spirits, partners in crime, etc. And she may be naive but she certainly doesn’t collude with demons. Renfri (REN-free, Scots Gaelic origin, meaning warrior of darkness) Pfft. Stupid demon can't even speak right. She’s got a wanton thirst that can’t be quenched and her only concern is the friends she’s making down at the docks; none of those sailors practice safe sex. Let's have some fun and make gold while we're at it! Luckily, the first level into Paladin gives her many feats, including one very beneficial to a promiscuous Princess. So, you’re telling me I’m allowed to use nearly any weapon and armor I want? And I’m immune to disease? That’s right. Take a level in Paladin and your Princess won’t get an STD no matter how hard she tries. Heh... "But". Being a Paladin also means she adds her charisma ability bonus to all saving throws. The module forces you to set your charisma at 14 or higher, so why not let it work for you? We’ll also be putting ranks into Discipline. This Princess may be lacking in willpower, but she’s disciplined when it counts. Worth it? You’ll receive bonus exp for passing some skill checks during dialogue and Discipline is one that comes up a bit often. So, let’s make sure we have enough to beat the highest one. Nice try... SLUT! (The irony is not lost on me.) This build’s primary attribute is strength. This Princess is gonna have muscle, if she hits anything that doesn’t have large damage reduction, it’s gonna feel the pain. Yo holy shit! HE DEAD! This build’s primary weapon is the greatsword. There are many weapons you’re allowed to use as a Paladin, some like the greataxe will hit harder. There’s just many more different greatswords for you to play with. A sword and board build would’ve been nice, if the shields didn’t give you a penalty to your thief skills. You could equip one as you start fighting but that much is already a hassle. The armor class bonus (AC) from using a shield isn’t worth it when you constantly need to sneak around. Just a few of the best greatswords you can "acquire". This build’s primary armor type is light or medium armor. Heavy armor is nice and there’s special armor you can find underneath the castle, but the penalties for using one are too great for a thief. Low penalty medium armor works best and much later you’ll find a really nice light armor from Hyath’s temple to complement your sneaking skills. The armor check penalty from heavy armor will be the death of you. There’s a lot of equipment required for this build. This Princess is gonna struggle getting her levels in Rogue unless she has enough ranks in pick pocket, open lock, search, and disable trap. You will need to gamble at the Family Hideout to win enough gold to buy your starting equipment. Here’s a list of starting gear for your convenience. Greater Gloves of the Rogue Greater Silent Slippers Yance’s Ring A couple of different lockpicks and healing items A couple of lore potions to identify items Greatsword +1 (weapon shop at Betancuria West, Merchant's Quarter) Hatori’s Leather Armor or low penalty medium armor The next list should be your endgame gear. Bracers of Dexterity +3 Boots of the Elvenkind Nymph Cloak +3 Pia’s Ring (Romance or Friendship) Ironskin Ring Amulet of the Master Belt of Hill Giant Strength General Sigerthur’s Greatsword or Dana’s Greatsword (taken politely from her inventory) Assassin’s Waistcoat Extra Recommendation In Game Options, under Ruleset, activate Always Roll Max Hitpoints on Level Up to avoid getting stuck with a character with low health. And finally, here’s the leveling guide: F.A.Q and Other Useful Information What’s the purpose of doing such a difficult build? It’s fun to try something out of the ordinary. Lawful good is an alignment very difficult to maintain in this module. You can consider this a challenge build for completing A Dance with Rogues. There are many other builds you can attempt, such as a sorcerer build or a max constitution build. This one seemed the best reason for trying to keep a good Princess on the side of the law. Plus, you get to watch all the sex encounters without getting diseased. I’ve lost my ability to get levels in Paladin. How do I get it back? There are many chances to gain lawful points back from being a chaotic thief. Clearing the wilderness castle, avenging the first friend you made, killing Rick’s gang, going bounty hunting, and even lawfully beheading a traitor are among the couple of ways to remove chaotic points. As long as you save before stealing anything, you can strategize which theft you can make and still keep your Paladin status. Unfortunately, there aren’t as many chances to get goodie points. As far as I know, major good actions include refusing the chance to assassinate a rival guild member, attempting to destroy an evil altar, and saving a female gladiator for the second time in a row. Just be aware of your actions because once you go evil, there’s no bouncing back. Why greatswords? Couldn’t you get better DPS if you went with a dexterous dual wield build? Greatswords are great. There’s plenty of greatswords for you to find and they tend to hit hard in nearly every circumstance. Dual wielding with the proper feats can get more attacks per round but it struggles against enemies resistant to physical, sneak, and crit attacks. You’ll either rely on a weapon that does bonus magical damage or something that already hits hard, like a greatsword. You’re already trying to do sneak/crit attacks, why not try it with a weapon capable of dealing +40 damage on a single hit? Damn, this dice gambling kinda sucks. Is there any other way to make quick gold? Not really. Playing lawfully means you can’t steal from the masses but some containers are considered fair game, such as the coffers in the gladiator arena. Just save before attempting to steal any item or gold from someone and see what you can get away with. There are also many places and enemies that have valuable loot which can be sold for a good price. Be sure to check all over the city for chances gain gold and exp (except for the top floor of the Mage's Academy, it could break the main quest.) I might also know a not-so-honest way to gain an absurd amount of gold without using console commands, for details check further below. I found the armor below the castle that you mentioned before. Why shouldn’t I use that one? Heavy armor, no matter which one you find, will give you a massive penalty to thief skills. It gets worse if you equip a shield. The armor you found is also classified as lingerie. It will force you to make constitution saving throws to avoid getting sick in Betancuria’s weather. And to make matters worse, every Dhorn guard will attempt to arrest you for public indecency. Good luck sneaking around the streets of Betancuria when you’re dummy thicc and the clap of your ass cheeks on heavy metal keeps alerting the guards. I like this build but I rather change a few things. Is it possible to be a Paladin with a dexterous build? Yes, but you’ll have to take the Two-Weapon Fighting and Ambidextrous feats at level one. It’s also much easier to get ahead of the difficulty curve with high dexterity. The Shadow of the Celestials by Orion is another Rogue/Paladin build I followed for a different playthrough. It’s pretty easy to adjust it for A Dance with Rogues. Well, that’s it. This is not a completely optimized build but it was fun to play around with in the module. I’ll also make changes according to suggestions in the comments if there’s any. If you have another build you’ve had fun playing with, post it in the comments or make a new post in the Adult Gaming forum. Thanks for reading! Bonus: Super Secret Strategy to Earn Lots of Gold (Don’t look Valine)
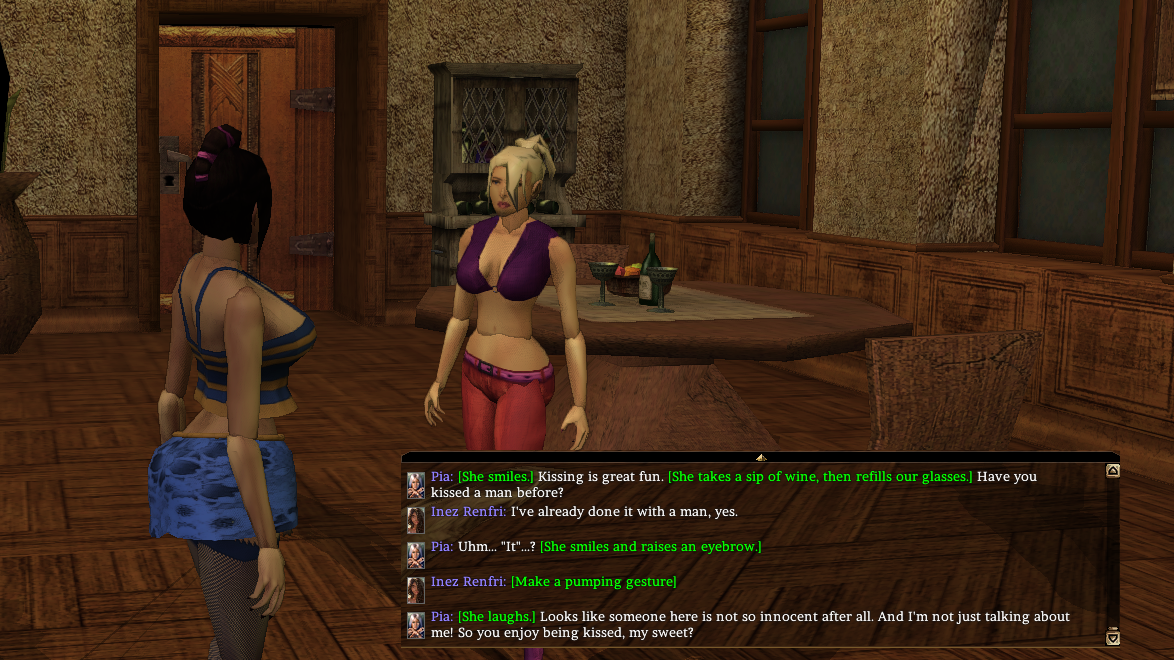
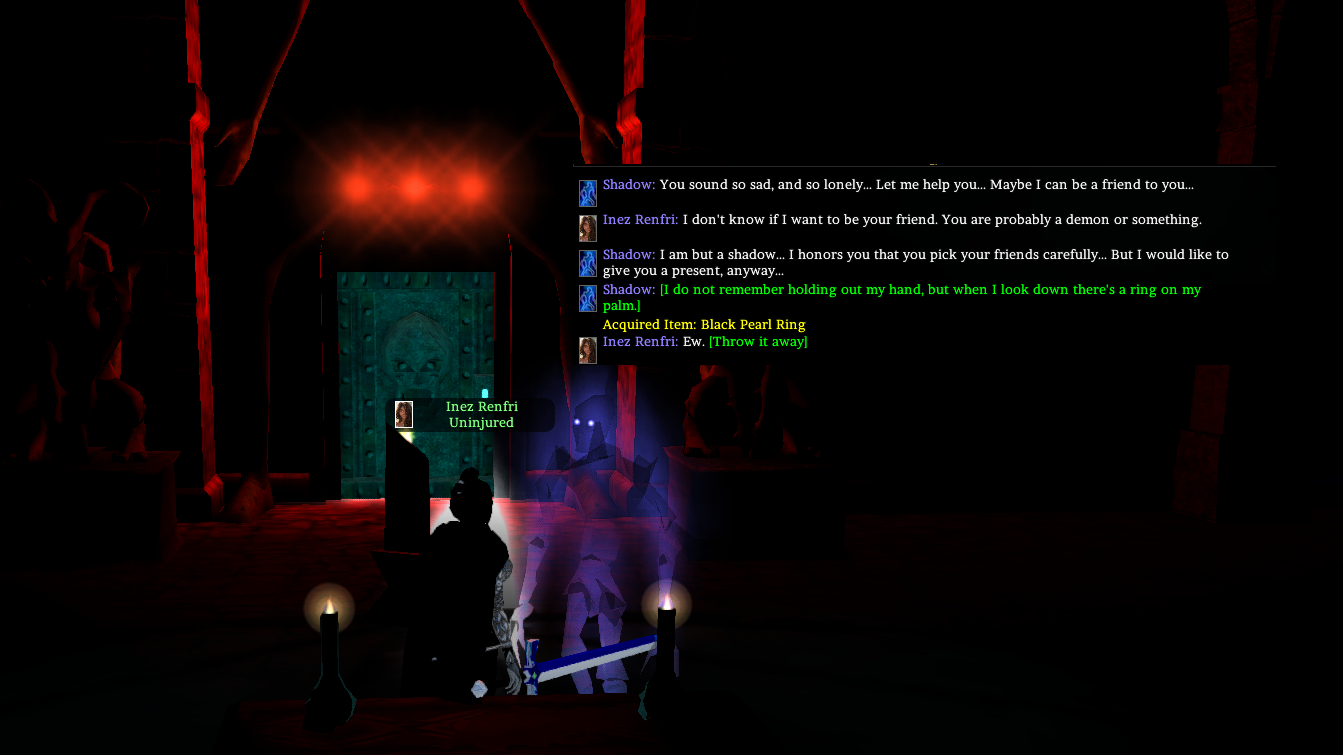
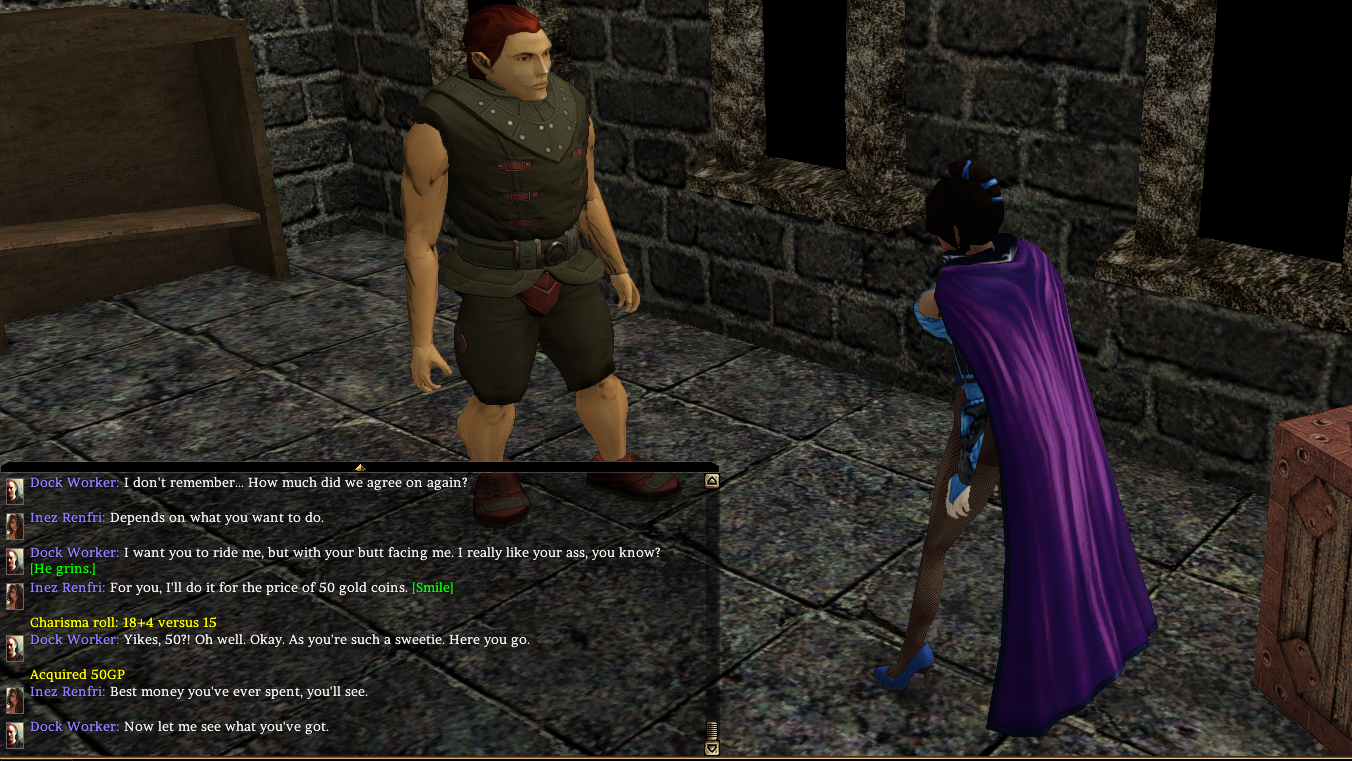
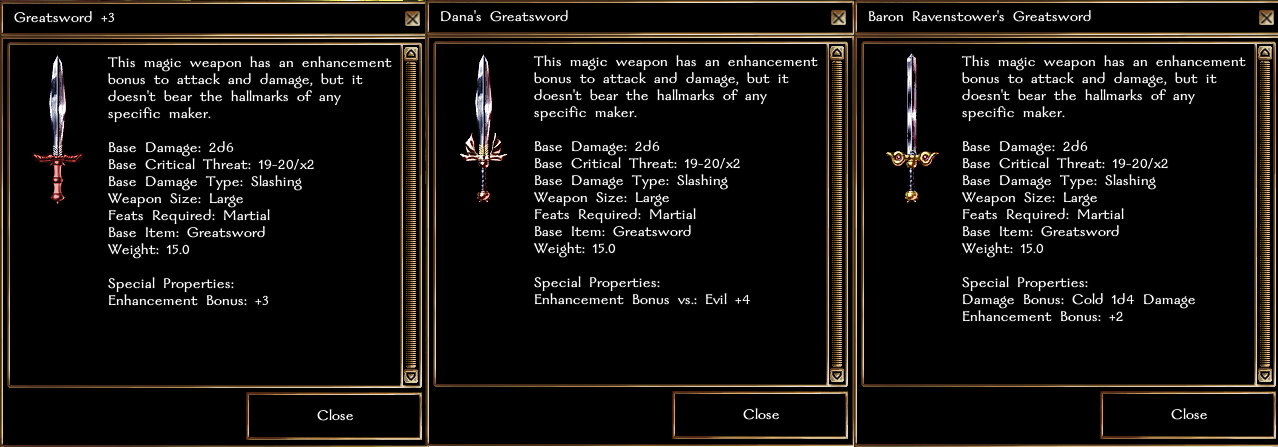
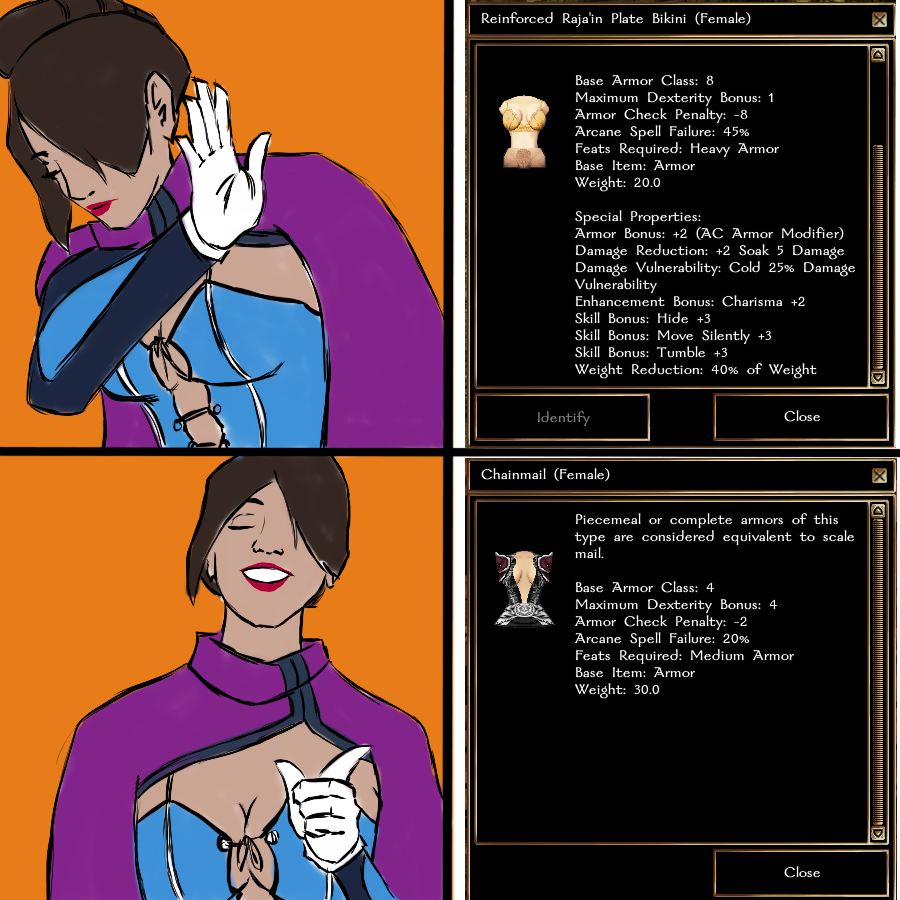
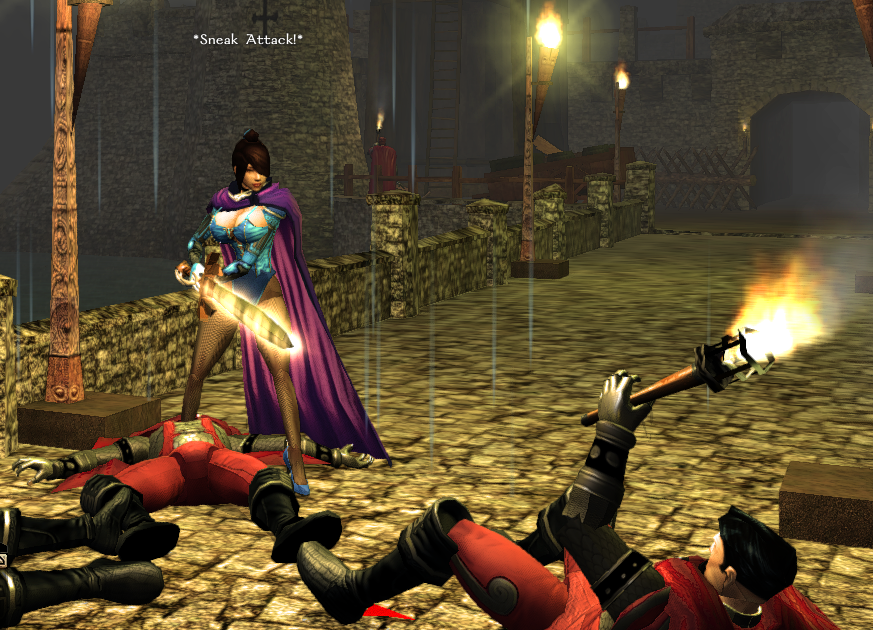
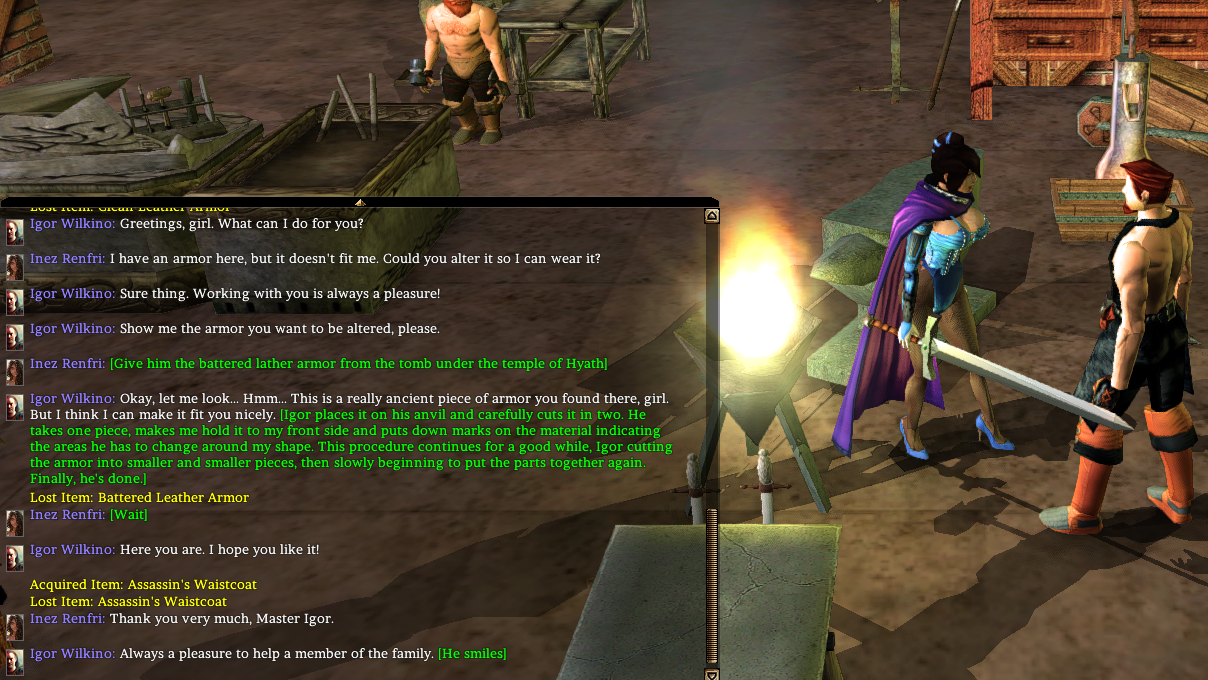
-
This is a short guide on how to debug CTDs yourself. What it means is you will try to find out as much information about the crash as possible. First, open Data/SKSE/skse.ini, if it doesn't exist then create it. Add this: [Debug] WriteMinidumps=1 Then wait for the game to crash. Now you will have a crash dump in Documents/My Games/Skyrim/SKSE/Crashdumps For example something like this 2015-05-08_16.26.42.dmp This file is not readable by humans, it's for debugger but you can do online crashdump analysis. Here is one site that does this: https://www.osronline.com/page.cfm?name=analyze Once you submit you will receive a bunch of text, most of this is useless but there are few things that can be helpful to you or someone else. Scroll down a bit and find the line that says: EXCEPTION_RECORD: Below it is the address in code where game crashed exactly. For example: ExceptionAddress: 00d573a8 (TESV+0x009573a8)It means that game was executing code on address 0xD573A8. It also says that the crash occurred in module TESV. If the crash had occurred in any SKSE plugin it would says that DLL name as module instead. Although it's still possible for a crash to be caused by SKSE plugin and happen in TESV module. Now why is this address helpful? 1. Someone else may have the same crash, you can compare what you both have in common to narrow down cause. 2. Someone else may have had the same crash and already solved it. 3. I can look it up in game code to see what happens in the function, maybe it helps you narrow down cause. 4. You can compare if the crashes you are having are the same ones or different. It could also be helpful to catalogue known crashes in a sticky or somewhere. If you post your crash here include at least this information: EXCEPTION_RECORD: ffffffff -- (.exr 0xffffffffffffffff) ExceptionAddress: 00d573a8 (TESV+0x009573a8) ExceptionCode: c0000005 (Access violation) ExceptionFlags: 00000000 NumberParameters: 2 Parameter[0]: 00000000 Parameter[1]: 00000000 Attempt to read from address 00000000 STACK_TEXT: WARNING: Stack unwind information not available. Following frames may be wrong. 3684fc20 00bf2fb8 00000000 16a9a770 3684fde0 TESV+0x9573a8 3684fc50 00000000 00000000 3684fcd4 00786b68 TESV+0x7f2fb8 And everything SKSE related from Loaded Module List. Example: 0c490000 0c577000 SKSE_Elys_Uncapper SKSE_Elys_Uncapper.dll 50e00000 50e80000 nioverride nioverride.dll 51110000 51122000 enbhelper enbhelper.dll 51310000 51332000 showRaceMenu_preCacheKiller showRaceMenu_preCacheKiller.dll 51340000 5140d000 StorageUtil StorageUtil.dll 51bf0000 51c76000 chargen chargen.dll 51c80000 51c96000 SpellInvisibilityPlugin SpellInvisibilityPlugin.dll 51ca0000 51ccb000 SexLabUtil SexLabUtil.dll 51cd0000 51d23000 SchlongsOfSkyrim SchlongsOfSkyrim.dll 51d30000 51d6c000 MfgConsole MfgConsole.dll 51d70000 51d86000 ItemSoulgemPlugin ItemSoulgemPlugin.dll 51f50000 51f66000 ItemPoisonPlugin ItemPoisonPlugin.dll 51f70000 5203a000 skse_1_9_32 skse_1_9_32.dll 52290000 522e3000 FirstPersonPlugin FirstPersonPlugin.dll 522f0000 5236a000 hook hook.dll 52530000 52546000 ItemArrowPlugin ItemArrowPlugin.dll 52550000 52566000 ItemChargePlugin ItemChargePlugin.dll 525b0000 525c6000 AutoLockpickPlugin AutoLockpickPlugin.dll 525d0000 525ef000 DoubleJumpPlugin DoubleJumpPlugin.dll Some reported crashes so far:
-
 TLDR version: If you want to switch 2 or more profiles in Mod Organizer, each with mods requiring both fnis and nemesis, you may probably have to regenerate fnis/nemesis every time you switch profile or you may get T-pose. To avoid that, you will need to install separate/duplicated copies of fnis/nemesis, not just their outputs, for multiple MO profiles. Install one copy of fnis/nemesis for each profile and treat them as separate mods. It means you need to dedicate a separate or duplicate copy of fnis/nemesis mod folder with its executable tool and its output folder to each MO profile. The long version: Years ago when there was only fnis in oldrim, I found some instructions/comments on using duplicate copies of fnis in multiple Mod Organizer profiles to get rid of the need to run fnis again upon profile switch. I remembered if I didn't use duplicate copies of fnis folders, I would T-pose when I switched to another profile in old mod organizer for skyrim LE even though I used separate fnis output folders for each profile. Recently, I had to build a new PC. So I decided to move onto 64bit skyrim AE on the new PC, starting again from scratch with all SE/AE mods. I wanted to set up two MO2 profiles again so that I can use different sets of mods, all of which require fnis/nemesis. I know we could do it with fnis but I wasn't sure about nemesis which was new to me or even about using both fnis and nemesis for each profile. Most of my google/reddit searches about nemesis turned up with conflicting information on running multiple MO2 profiles, basically with people saying nemesis has to be regenerated every time you use a different profile. Thankfully I found [LE/SE] Guide on using Nemesis alongside FNIS here on LL so I learned how to use both in one profile. So I went ahead to try the same method of using duplicate copies to both fnis/nemesis for multiple profiles and it worked. I thought I would share my experience. The example situation for using two MO2 profiles: in profile 1, you may want to set up all basic mods for your main playthrough including bathing, dancing, SL frameworks and basic OStimNG mods. Then in profile 2 you might like to set up with all profile 1's mods plus additional adult playthrough mods such as SL quest mods and OStimNG gameplay mods that you might want to try sometime but also want to keep out of your main save. Multiple profiles are also useful if you want to play conflicting mods with custom anims back and forth just by switching between profiles. I'll list general procedure to set up both fnis and nemesis in two MO2 profiles so that you can just switch profiles back and forth and play right away without having to regenerate every time you switch profiles. If you only use nemesis, it'll be simpler and the general procedure should still work. (1) Install 2 copies of FNIS and Nemesis program/mod folders, preferably using profile name as part of mod names for easier identification. So there will be 2 copies each for fnis and nemesis mod folders. One way to do this is when you download fnis/nemesis, duplicate the installer/zip files and rename them using your profile name as part of the new name. Then install both copies of fnis and nemesis as separate mods to MO2. For example: in MO2, you may install "FNIS behavior 7.6 for profile 1", "FNIS behavior 7.6 for profile 2", "Nemesis Unltd Behav Eng for profile 1", "Nemesis Unltd Behav Eng for profile 2" as four separate mods. Note: You only need one copy of FNIS creature pack, the one that you keep it on all the time following [LE/SE] Guide on using Nemesis alongside FNIS. We will also keep it on for both profiles. (2) You also need 2 copies of output mod folders each for fnis and nemesis (example, "FNIS output for profile 1", "FNIS output for profile 2", "Nemesis output for profile 1", "Nemesis output for profile 2"). For now, you can just create empty folders under MO2's mod folder and restart MO2 so that they show up as mods. You can later set up in your executable list of MO2 to force fnis/nemesis to generate their output directly into those empty output mod folders instead of inside overwrite folder. Or if you prefer, you can just let it output to overwrite folder and create a mod from it but remember to name it for specific profile. (3) After both copies of fnis/nemesis and their output folders are installed, add 4 exec files shortcut to MO2 executable list (under Mod Organizer 2 > Tools > Executables) and give it different names preferably using profile name. Example, when you add one of the fnis, give name like "Generate FNIS for user for profile 1", then choose the executable file in "FNIS behavior 7.6 for profile 1\tools\GenerateFNIS_for_Users\GenerateFNISforUsers.exe". When you add "Generate FNIS for user for profile 2" executable shortcut to MO, choose the executable file in "FNIS behavior 7.6 for profile 2\tools\GenerateFNIS_for_Users\GenerateFNISforUsers.exe". Do the same for nemesis (add Nemesis Unlimited Behav Engine for profile 1 executable with path to "Nemesis Unltd Behav Eng for profile 1\Nemesis_Engine\Nemesis Unlimited Behavior Engine.exe" and add Nemesis Unlimited Behav Engine for profile 2 executable pointing to "Nemesis Unltd Behav Eng for profile 2\Nemesis_Engine\Nemesis Unlimited Behavior Engine.exe") (4) Run fnis/nemesis for profile 1. First, switch to profile 1 in MO2 and turn on the mods you want to use in that profile. Follow the instructions of [LE/SE] Guide on using Nemesis alongside FNIS to run both fnis and nemesis together for one profile, probably starting from step 8 of that guide because you already installed fnis/nemesis (2 copies in fact) and set up four executable to MO. But it won't hurt to read earlier steps to verify what you did. If you are using OStimNG together with Sexlab creatures, read my Final Note near the end about how I disable OStimNG mods while I run fnis to avoid fnis warnings. While following [LE/SE] Guide on using Nemesis alongside FNIS, make sure to tick the correct fnis/nemesis mods and their outputs for profile 1. Example, tick "FNIS behavior 7.6 for profile 1" and "FNIS output for profile 1". Then keep following that guide and turn on "Nemesis Unltd Behav Eng for profile 1" and "Nemesis output for profile 1" at appropriate step. Keep the other copy of fnis/nemesis for profile 2 disabled (untick "FNIS behavior 7.6 for profile 2", "FNIS output for profile 2", "Nemesis Unlimited Behav Engine for profile 2", "Nemesis output for profile 2") while you works on profile 1. After you finish following that guide and set up for profile 1, play the game and see if everything work in profile 1. (5) Run fnis/nemesis for profile 2. In MO2, switch to profile 2 and enable different or additional set of mods that you want to keep separate from profile 1, disable fnis/nemesis and their outputs for profile 1 (untick "FNIS behavior 7.6 for profile 1", "FNIS output for profile 1", "Nemesis Unltd Behav Eng for profile 1", "Nemesis output for profile 1"). Follow [LE/SE] Guide on using Nemesis alongside FNIS again and turn on the fnis/nemesis/their outputs for profile 2 at appropirate steps. Basically, everything is the same as what you did for profile 1 except you will be using ("FNIS behavior 7.6 for profile 2", "FNIS output for profile 2", "Nemesis Unlimited Behav Engine for profile 2", "Nemesis output for profile 2") while keeping fnis/nemesis/output for profile 1 disabled. Play the game to see if everything work in profile 2. Now when you switch profile, you won't get T-pose nor will you need to run fnis/nemesis again. Just switch profile in MO2 and play different save right away with different mods. But of course, you will need to run fnis/nemesis again if you later want to add more mods requiring fnis/nemesis to either profile. But in that case, you only need to run the correct fnis/nemesis for that specific profile where you add more mods with additional custom anims that normally require fnis/nemesis. Additional Tips: Set nemesis executable files in both copies of nemesis to run in windows 7 compatibility mode. It will prevent nemesis from crashing before completion. Also increase maximum numbers of anims for DAR and Nemesis in their ini files (SKSE\plugins\DynamicAnimationReplacer.ini and your two profiles' nemesis folders\Nemesis_Engine\nemesis.ini). I did 32k (or 0x7D00 in hex) for DAR and 60k for Nemesis because I have a lot of conditional and PCEA DAR folders. Remember to increase it in both copies of nemesis for your two profiles. I don't know about OAR or its limit as it wasn't available while I was modding. Final Note: I use both SL creature and OStimNG at the same time and that was my reason for using both fnis and nemesis. I follow [LE/SE] Guide on using Nemesis alongside FNIS. But I turn off OStims related animations mods (or any non-creature mod that specifically requires nemesis) while running FNIS to avoid fnis warnings and turn them back on before I run nemesis. My profile 1 has all the regular gameplay mods as well as basic SL/SLAL framework and basic OStimNG related mods so that I only need to edit/export/select the anims and settings once and forget about them. Then my profile 2 has all profile 1 mods plus additional SL/Ostim gameplay mods, the ones to fool around but not to keep in my main save such as Thief, SL Solutions, Babo dialogue, Dealing with sexual daedra, OStim Lovers, etc. By using separate/duplicate copy of fnis and nemesis for each profile (mods as well as outputs), I can switch profiles to play without the need to run fnis/nemesis every time. I can also install mods recklessly in profile 2 without worry about ruining my main save because I use separate disposable saves for that profile and I can just switch back to profile 1 whenever I feel like continuing my main game. I hope this is not confusing. I've attached screenshots of my two profiles and MO's executable list for reference. If there is already similar guide here on LL, feel free to delete my post as I don't search LL forum often and thus not sure if this is common knowledge.

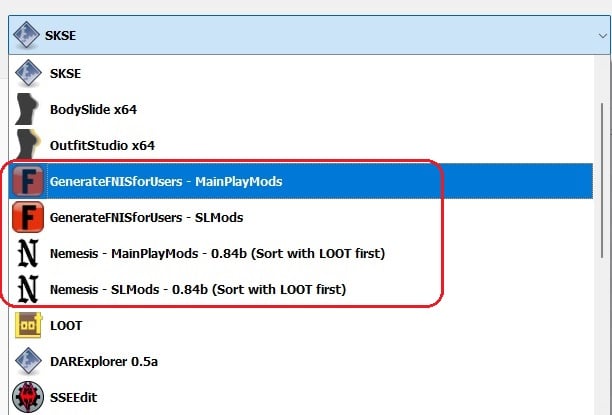
-
Hello I'm looking for a full scale tutorial for making sexlab animation via blender. The ones I found here are either for 3dsmax or for only pose making. İf someone know any good tutorial I would be very appreciated
-
Basics for making OKW work STEP 1 You need framework for modding the sims 3. That means you install a folder called "mods" (You can find a premade one here). In this folder you will find 3 things; 2 new folders called "overrides" and "packages", and a .cfg file. The .cfg file should look something like this: Priority 500 PackedFile "Packages/*.package" PackedFile "Packages/*/*.package" PackedFile "Packages/*/*/*.package" PackedFile "Packages/*/*/*/*.package" PackedFile "Packages/*/*/*/*/*.package" Priority 1000 PackedFile "Overrides/*.package" PackedFile "Overrides/*/*.package" PackedFile "Overrides/*/*/*.package" PackedFile "Overrides/*/*/*/*.package" PackedFile "Overrides/*/*/*/*/*.package" If you have never modded the sims 3 before read here Make a backup!! Seriously! OKW is a WIP (Work in Progress). Making a backup makes it possible to go back to your previous game, if or when something goes wrong! Already have a backup but want to try out new mods in an ongoing game? Now go find your sims3 framework folder ("mods" > "packages"). At my computer it is found here: Libraries/Documents/Electronic Arts/ sims 3/mods/packages. I always make a shortcut to this folder, so that i have easy access to it whenever I want to add/remove packages. This is where you put the files you need for Onikis Kinkyworld. I prefer to make my own folders for different kind of mods, to keep it all organized and tidy. STEP 2 The files you need to download for your game: BODY: Bodywithadultparts nude clothing adult skin. I also recommend using the 3Dmap here. It is not conflicting with bodymesh or default skins! (I use nipples+penis+abdominal muscle v3 for male and nipples+vulva for female): http://mahamudosim3x...d7d24873a76dc4f List of files in my "mods" > "Packages" > "Body" folder Screens of my BODY folder-files: You might also want a No censor for nudity-mod KINKYWORLD: The Kinkyworld: http://www.loverslab...ed-27-may-2015/ OKW videos:http://www.loverslab.com/topic/53780-sims3-kinkyworld-tv-complete-guide-and-package/ OKW-folder should look like this: ANIMATIONS: Amra72 animations: http://www.loverslab...is-kinky-world/ L666 animations ( Choose the ones for kinkyworld) : http://www.loverslab...nimated-woohoo/ The masters KW animations(again-choose the ones for KW): http://www.loverslab.com/topic/41458-sims-3-the-masters-sex-animations-for-animated-woohoo-and-kinky-world/ Mike24 animations:http://www.loverslab.com/topic/54718-the-sims-3-mike24-animations-for-animated-wohoo-and-kinky-world-update-1712/ MaryJane animations:http://www.loverslab.com/topic/73534-wipmaryjanes-animations-for-okw-update13817-new-animations/ K69 animations:http://www.loverslab.com/topic/76250-the-sims-3wipk69-animations-for-kinky-world/ ANIMATIONS-folder looks like this if you downloaded all of them: Animations needs to be registered with KW ingame. When you start your game you might have to wait a bit before you get a KW-message. KW is a big mod so be patient. Once you have gotten the KW-message you can click your sim and find KinkyWorld>Settings>Woohoo>Packages. Some of the animations are automatically registered but not all. you need to register every animationpack one by one by typing them in, and then wait for it to be registered: KinkyWorldMasteranimations KW_L666_Animations KW_L666_Kinky_Animations KW_L666_RapeBdsm_Animations KW_Amra72_Animations KW_mike24_classics KW_mike24_lesbians KW_mike24_pets KW_K69_Animations KW_MaryJane_Animations Accessory/objects needed for certain animations: gloryholegate animations. Download WTWgloryholegate at halloftorque and put it in a fence: http://www.ladymoiraine.com/index.php?/forums/topic/3607-whosthewhat-sims-3-mm-sex-animations-18/ For animations with car you might want a better car(not needed, but very nice):http://www.loverslab.com/topic/60178-kinky-world-custom-cars/ For animations with bondageframe: http://www.sexysims.info/download.php?t=174813 Whip for L666`s new whipping animations:http://www.mediafire.com/download/g56y6yk6p1yrq4u/SV+Accessory+whip.rar For animations for trainingdummy ,massagetable and sauna you will need the EP. STEP 3 DONE! Now it`s time to try your game. Once in game you might have to wait a bit before your KW starts up. Be patient. eventuelly there will be a KW message popping up, and you can then click your sim and find a kinkyworld option. Choose your preferred settings, and remember to register your animations(some of them register automatically, but not all). I recommend reading the KW-wiki to better get to know what this mod does and how you can change the settings to your preferred gamestyle. KW-wiki can be found here:http://onikikay-kinkyworld.wikia.com/wiki/Oniki_Kay's_Kinky_World_Wikia If something is not working you might also be helped by checking KW-FAQ or by searching Oniki`s KW thread for whatever. KW-FAQ:http://www.loverslab.com/topic/61984-sims-3-onikis-kinkyworld-faq/ KW-topic:http://www.loverslab.com/topic/43249-sims3wip-kinkyworld-v036-updated-22-aug-2017/ Want More ? Anything unclear, links not working etc. Don`t hesitate to say so in the comments or pm me. GOOD LUCK!


-
 A guide to make a bashed patch that works. Why? Because most guides to making a bashed patch neglect to mention that not all mods have bash tags. Or how to add them. Benefits: Proper Bash Tags in your important mods, will be utilized by Wrye Bash to create a bashed patch that will resolve more conflicts. LOOT will utilize these Bash Tags, to assist in sorting your load order. Annoyances in-game can be avoided or minimized. i.e. having to have an NPC in your cross-hairs, enter MCM for Schlongs of Skyrim to set the "Revealing" Keyword repeatedly Makes making a "Merged patch" in SSEEdit obsolete. Makes the game stable Resources required: Wrye Bash: https://www.nexusmods.com/skyrimspecialedition/mods/6837 SSEEdit: https://www.nexusmods.com/skyrimspecialedition/mods/164 Generate Bash Tags script from https://github.com/fireundubh/WryeBashTagGenerator ****Install to "Edit Scripts" folder of SSEEdit**** Skyrim SE Mod Organizer 2: https://www.nexusmods.com/skyrimspecialedition/mods/6194 LOOT: https://loot.github.io/ Patience General installation guidelines: Make sure the mods you install ARE SE compatible - several guides located here: https://www.loverslab.com/topic/94228-se-compatibility-tracking-jul-19-6272/ Even mods that are downloaded from Skyrim Special Edition Nexus can have missed textures, animations and meshes! It is highly recommended to install Steam, Skyrim SE, Mod Organizer 2 & your other tools outside of Windows UAC control. This means not in "Program Files" or "Program Files (x86)" For Mod Organizer 2, I recommend the installer version {ends in .exe}, this will add entries in the system registry. On first run of Mod Organizer 2, select the "portable instance" option, this will keep your files out of the %LocalAppData% folders. Again, that is to keep clear of Windows UAC issues. A guide to installing Mod Organizer 2 - https://www.loverslab.com/topic/136543-v112-mod-organizer-2-other-tools-from-zero-to-hey-sexlab-is-working/ The folder structure I use: Setting up Windows Explorer to prevent confusion: Wrye Bash Configuration in MO2: Note: The folder listed in "Create files in mod" was created by: Setting SSEEdit up in MO2: Running the Bash Tags script: The script will remove any bad tags, and write the missing tags to the header. Exit SSEEdit, making sure to save the plugin. Making the Bashed Patch: Well that was complicated, but worth it. I'd like to thank user @Mertz for advice given and the users at the forum AFKMods https://www.afkmods.com/index.php?/topic/4966-wrye-bash-all-games/ @tasairis for the hard work keeping the SE Compatibility thread going https://www.loverslab.com/topic/94228-se-compatibility-tracking-jul-19-6272/ All the users here who have offered free advice over the years, you know who you are Excellent reading for those who want to know more: Tome of xEdit: https://tes5edit.github.io/docs/ REALLY in-depth look at modding & conflict resolution Wrye Bash : https://wrye-bash.github.io/docs/Wrye Bash General Readme.html#intro
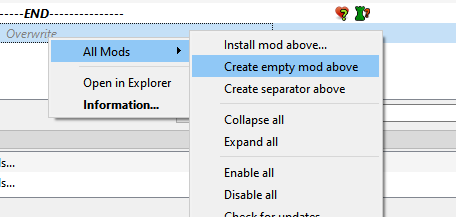
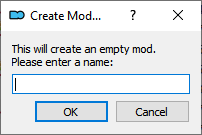
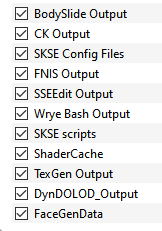

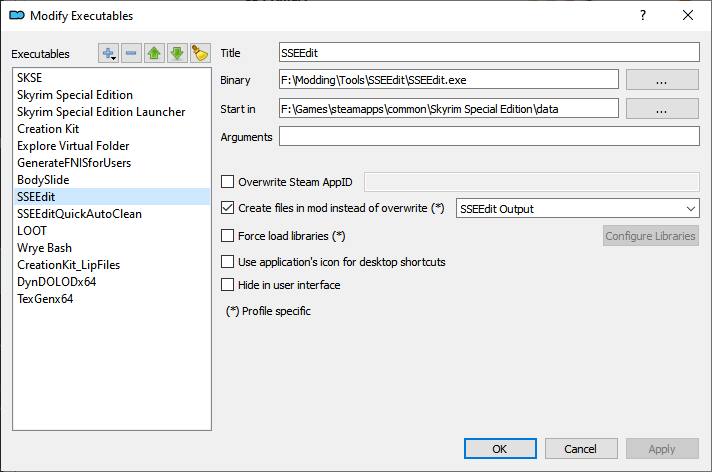

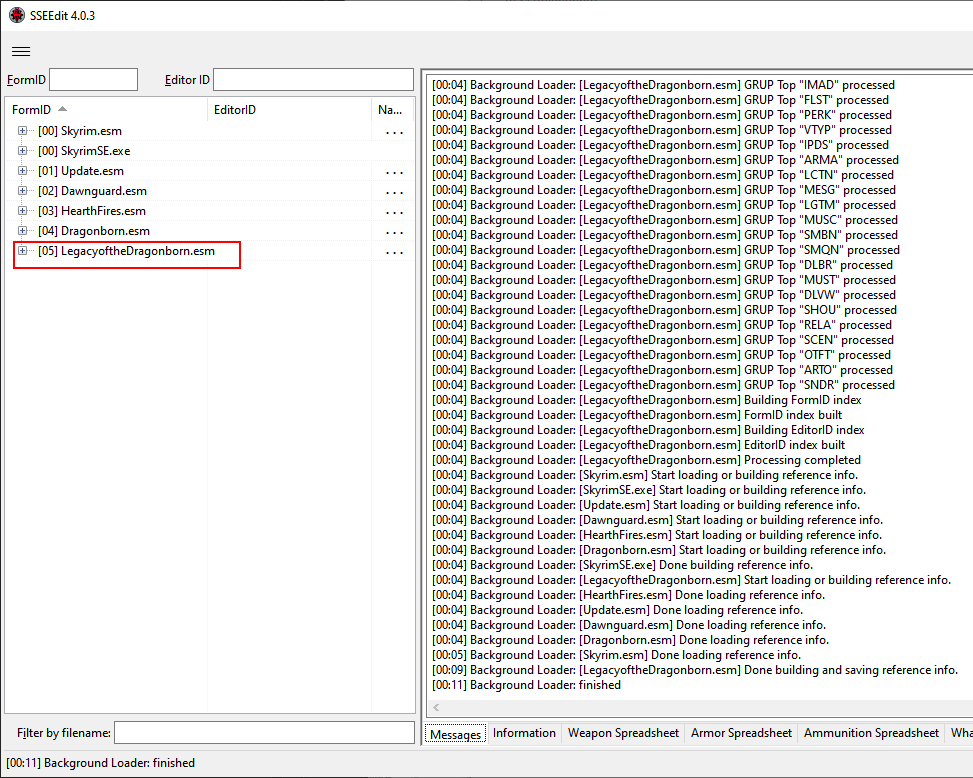
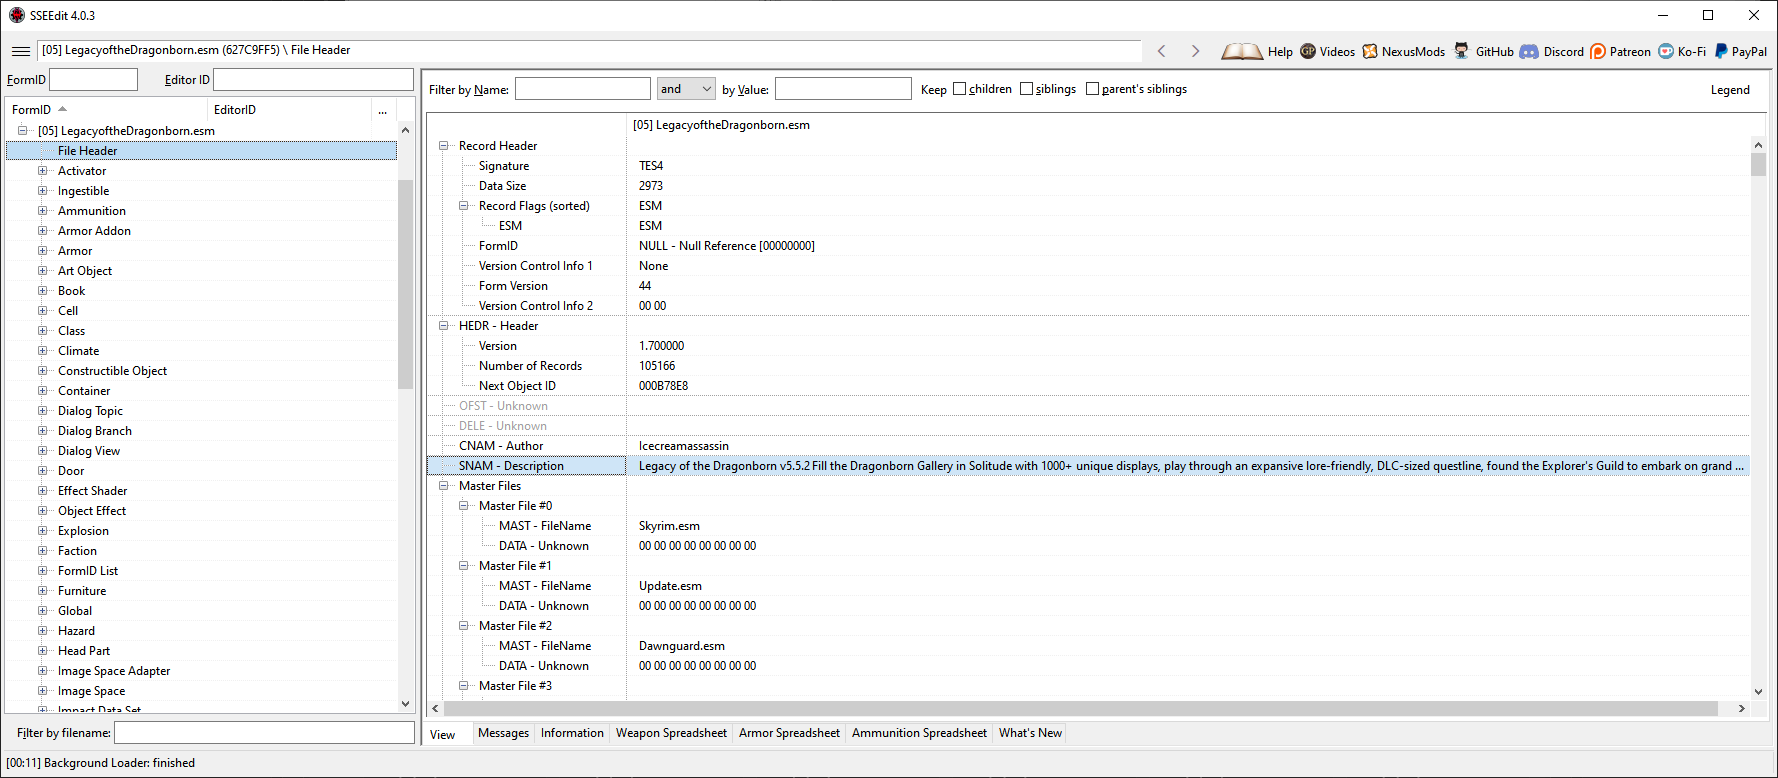

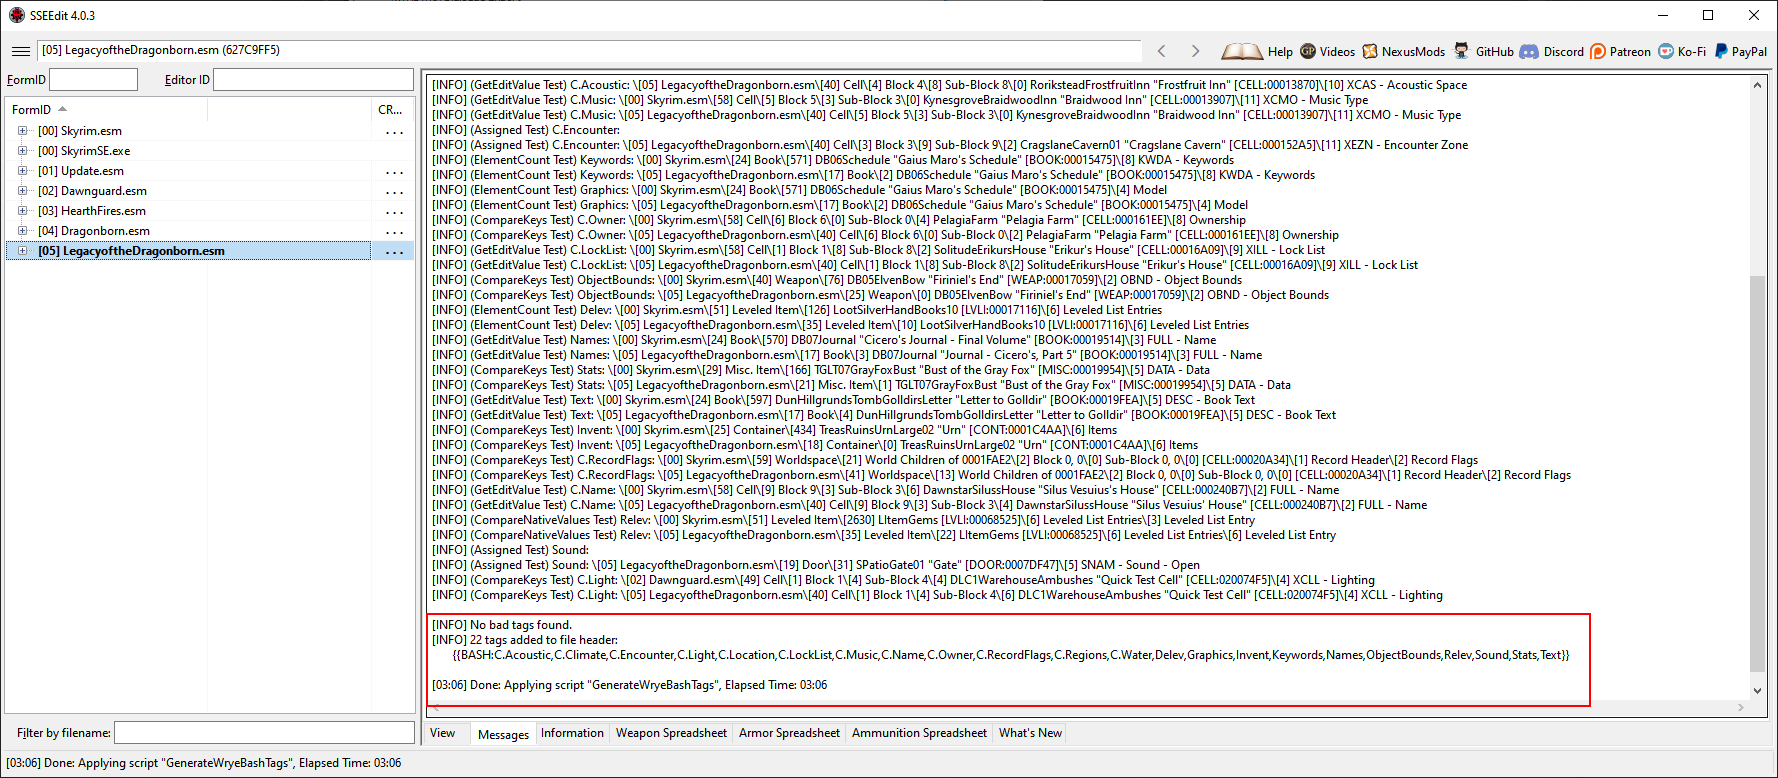
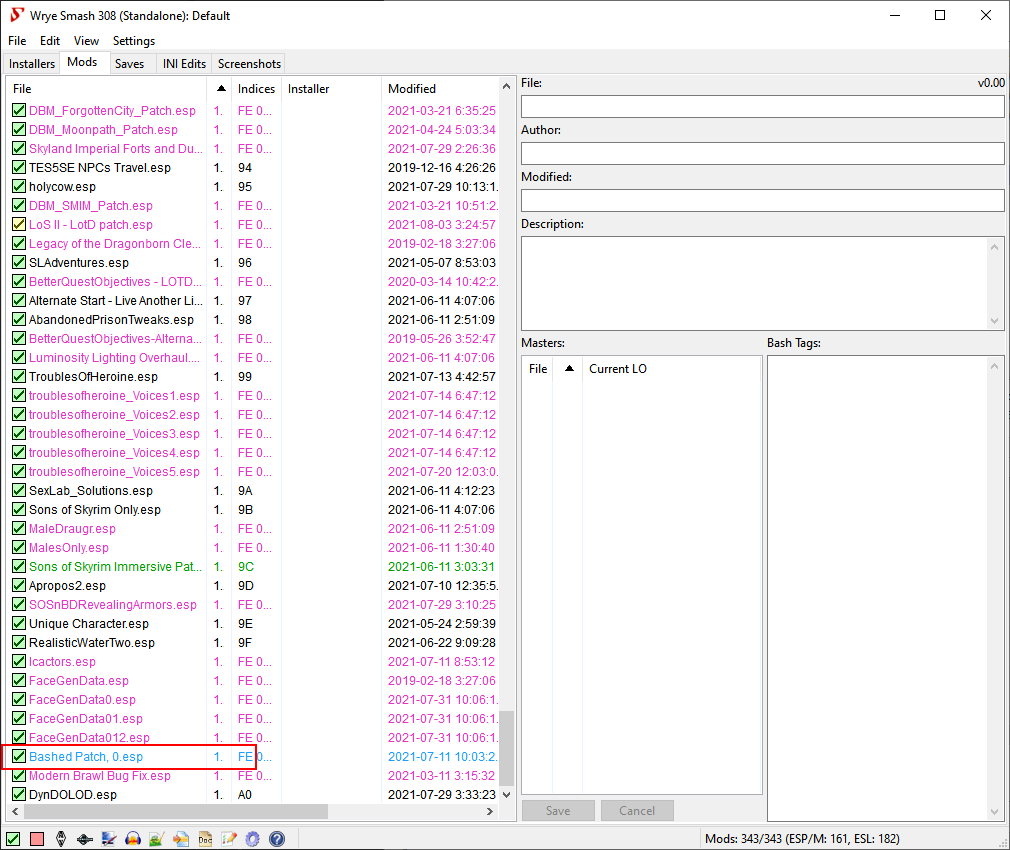
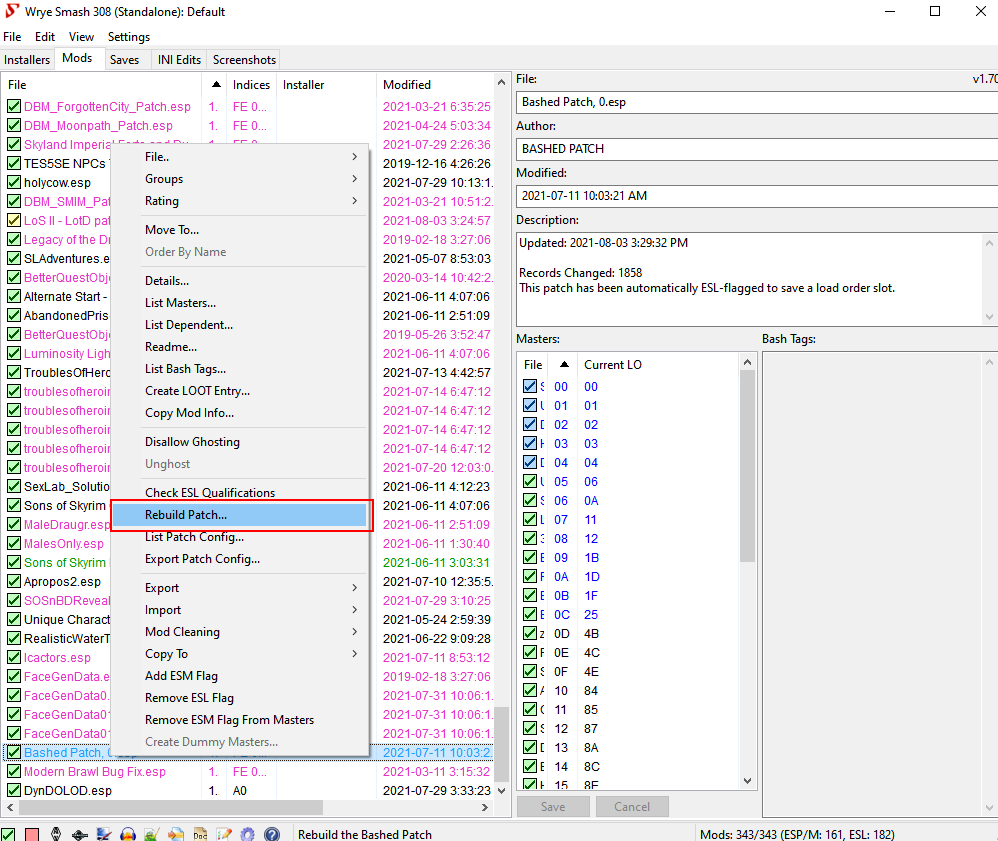
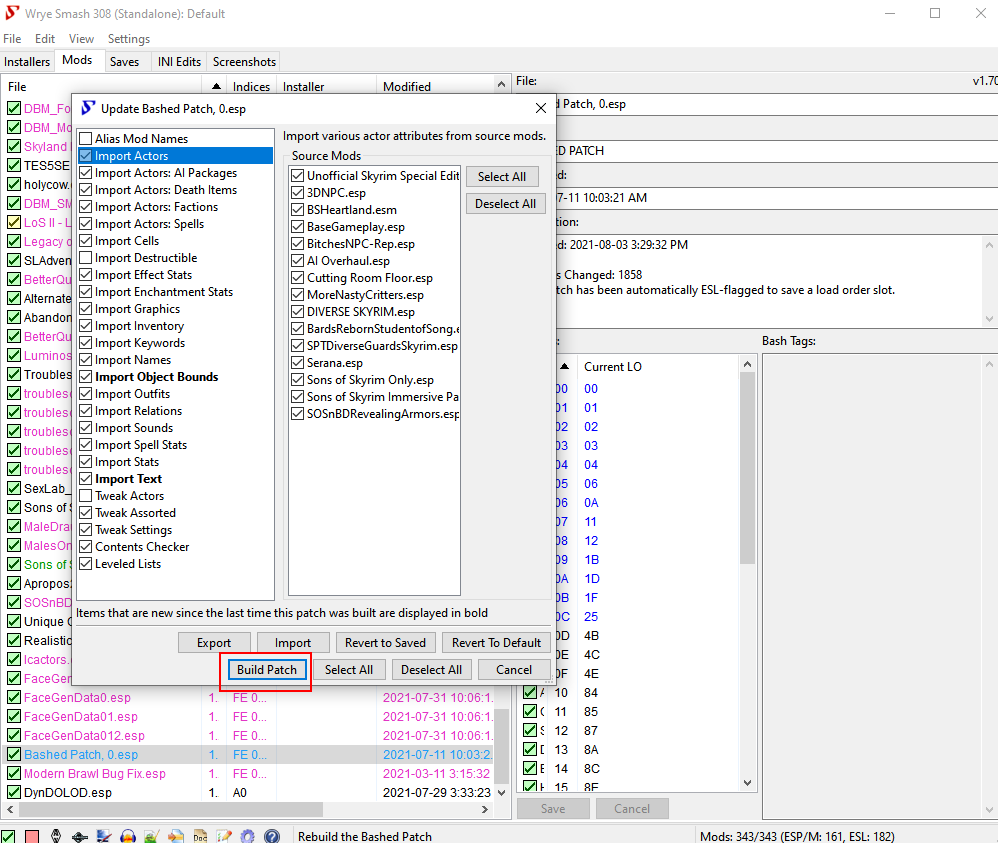
-
Sims 4 - Beginner Modlist Guide Version 0.3 Prefix: I was inspired to create this modlist to help create a better Sims 4 experience for myself and for others. The way Sims 4 mods work is that you can install them in any order you wish, which will make the modding a lot simpler. I have categorized things under base game and what they change. If something requires DLC, I have that listed as well. You don't have to download all mods, you can just pick and choose to install whatever you're looking for. Many of the mod links contain numerous mods, you can just choose the ones from the list that you like. This is a highly WIP list and I welcome feedback and suggestions for additional content! CAUTION - Mods with this notice need extra attention or there's something else to consider Alternative - This mod is an alternative to the above mentioned mod Installation Instructions Download these mods to your Mods package (located in Documents/ElectronicArts/Sims/Mods) Now, everytime you download new mod, update mod or remove mod do this step: Go into your Dcouments/ElectronicArts/Sims folder If present, remove these three files lastCleanException lastException localthumbcache This is done as a means of ensuring compability and stability and to ensure these changes take place. Highly recommended Mods Texture Overhauls Meshes Lightning Enviroment Gameplay General Fixes and Overhauls Autonomy Lovers Lab DLC improvments Fuck Dust Bunnies Reshade
-
 Introduction This little guide will cover all the basics in order to succesfully install the SexoutNG framework. There will be some pictures to clarify things that might not be clear to some or are sometimes overlooked. This guide assumes that you have succesfully installed the Fallout Mod Manager (FOMM) and know how to extract files from an archive. It is possible to install the framework with the Nexus Mod Manager as well, but I strongly recommend sticking with FOMM. I. Download the required files This one should be obvious, if you've read the requirements section of the SexoutNG OP. SexoutNG Data SexoutNG Core NVSE 5.0b2 (it has to be version 4.5 or greater, older versions are not supported) NVSE Extender 16 or higher! Astymma's Compatibility Skeleton (as of SexoutNG '94 a compatibility skeleton is included, which means you don't need to install an extra skeleton) The Mod Configuration Menu Since we are going to use FOMM to install Sexout in this guide, you need to choose "download manually", when downloading the skeleton and MCM from the Nexus. Once you are finished, you should have the following files (the version numbers may change): SexoutNG - Core 2-10-94.fomod SexoutNG - Data 2-10-94.fomod nvse_5_0_beta2.7z NVSE Extender v16.fomod The Mod Configuration Menu-42507-1-5.7z Optional: SexoutNG - Bodies 1-1-1.fomod (Install the bodies, if you don't have any male/female nude bodies installed yet. If you already have nude bodies installed, the game will always choose yours over the ones from sexout) II. Installation First of all, extract all the 7z archives in their own folders. We will start with the SexoutNG main files. In order to install them with FOMM you need to copy all .fomod files to the location of your FOMM installation into the following folder: data/falloutnv/mod. (for instance D:/FOMM/data/falloutnv/mod.) Every other fomod goes into that folder as well. (Alternatively you can select "Add fomod", instead of "Create from folder" in the package manager and add the files that way.) Start up FOMM next and click the package manager button. You will see something like this: If you have other fomods installed, they will appear here as well. In order to install them you need to either select them and click activate or just double-click them. You should see this message and the box next to the file name will be ticked. If it asks you to overwrite files, because you are upgrading, click yes or yes to all. Do this for all the .fomod files you've just downloaded In case you want to use astymma's compatibility skeleton, instead of the skeleton provided by Sexout: Since the the NVSE Extender comes as a .fomod archive now as well, the installation process is the same as for the the Sexout Core and Data files. Move the archive to your FOMM/data/falloutnv/mod folder and activate the package with the package manager. Lastly, we need to put NVSE itself into its right place. To do this you need to copy the contents of the NVSE archive (all the .dlls and the nvse_loader.exe) into the main Fallout New Vegas root directory where the FalloutNV.exe is located. Do NOT put them in the data folder and do NOT install NVSE with FOMM. You don't have to copy the src folder from the NVSE archive as it only contains the source code and isn't required for NVSE to run. Now you're done with the installation of the SexoutNG framework. In order for it to actually do something, you need to install one of the various Sexout plugins. There is a lot to choose from in the Fallout/Sexout download section. Read and follow their installation instructions carefully, as they often have requirements of their own. In case you downloaded a compilation, you should still read the requirements of the individual mods, since some of them cannot be included in compilations. As a matter of fact, you can probably save more time by reading requirements and instructions, as by just downloading a bunch of mods and praying that it works. Troubleshooting a broken game also takes longer than spending a little time reading up on vital information. 90% of support topics in this section are due to the fact that people didn't take that advice.