About This File
Check for NPC Tint Masks.pas
Checks a mod's NPCs for face tint files in the directory you specify. Edit "sTintMaskPath" to point to your mod's FaceGenData\FaceTint directory. Make sure it ends in a backslash. The texture file name gets appended to it.
e.g. "C:\... ...\mods\[My MO2 mod dir]\Textures\Actors\Character\FaceGenData\FaceTint\[My Mod's ESP/ESM file name]\"
IMAD removal.pas
This file will create a image space modifier removal bat file "removeimods" in your SSE game directory.
If you change your load order you will have to rerun this.
To use it.
- Load the target ESM/ESP files in SSE Edit. This can be your entire load order.
- CRTL+Click the target ESM/ESP files. Or CTRL+A for your entire load order.
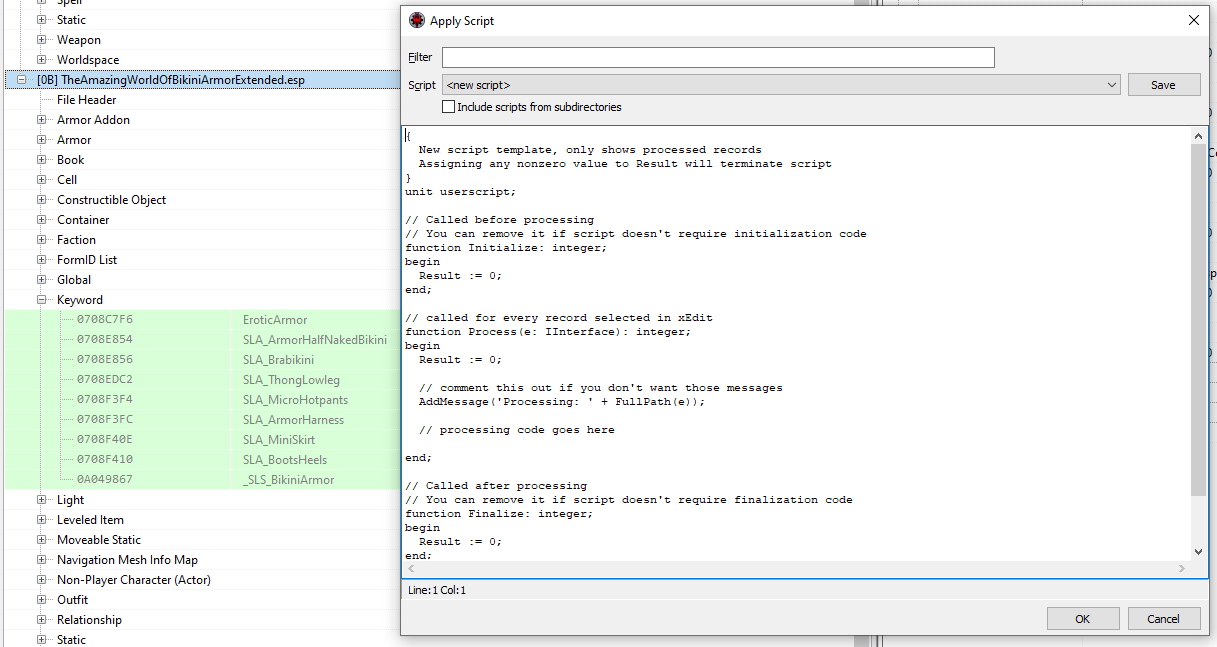
- Right click on any of the target ESM/ESP files and select "Apply Script...".
- Select "<new script>" from the list of available scripts dropdown
- You'll see the New Script Template. Copy all. Delete it. Paste the IMAD removal PAS script.
- Save it and name it.
- Run it
Each "rimod" command is followed by the source mod in a comment. e.g.
rimod 0401EB05; DLC2DBBookLevelIod [IMAD:0401EB05] - [04] Dragonborn.esm
rimod 04023F86; DLC2HMDaedraExpImod [IMAD:04023F86] - [04] Dragonborn.esm
rimod 04024FBC; DLC2HMDaedraExpImod02 [IMAD:04024FBC] - [04] Dragonborn.esm
rimod 040317D8; DLC2MiraakTeleportIMODStatic [IMAD:040317D8] - [04] Dragonborn.esm
rimod 04031D26; DLC2StandingStoneReleaseImod [IMAD:04031D26] - [04] Dragonborn.esm
While in game you can use "bat removeimods" to remove all image space modifiers. If the something that is applying the modifier is still active it will come back. You can then ALT+TAB out of the game and edit the bat file and remove "rimod" commands to find the troublesome mod.
TAWOBA SLS JSON.pas
Generates a BikiniArmors.json file for SexLab Survival.
Before you start.
- Right click on any file under "SKSE\Plugins\StorageUtilData\SL Survival\" in MO2's Data Tab and select "Reveal in Explorer".
- Copy the full path to SL Survival's Storage Util's directory. You'll need this later
Making a "BikiniArmors.json" file with SSE Edit.
- Load the TAWOBA mod in SSEEdit
- Right of the TAWOBA ESP file name and select "Apply Script..."
- Select "<new script>" from the list of available scripts dropdown
- You'll see the New Script Template. Copy all. Delete it. Paste the TAWOBA SLS JSON PAS script.
- Change "sJsonPath := 'E:\';" to SL Survival's Storage Util's directory. Make sure it ends with a backslash. "BikiniArmors.json" gets appended to it later.
- Save it and name it.
- Run it
The script uses the ArmorMaterialXXXXXX keywords to sort and categorize the armor.
TAWOBA SL Aroused and Survival.pas
Automates a large portion of adding SLA and SLS keywords to armor.
Instructions for using the xedit script:
Before you start. Always backup your TAWOBA ESP file
You need to a basic understanding of FormIDs before you proceed with this.
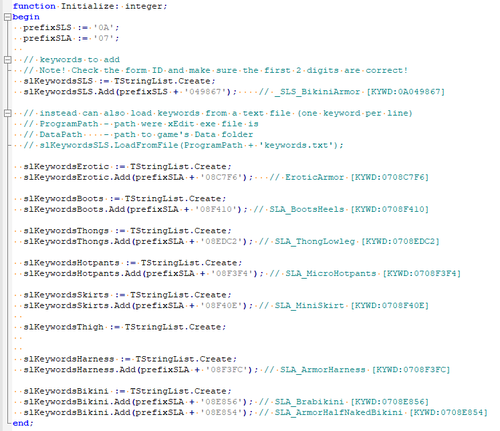
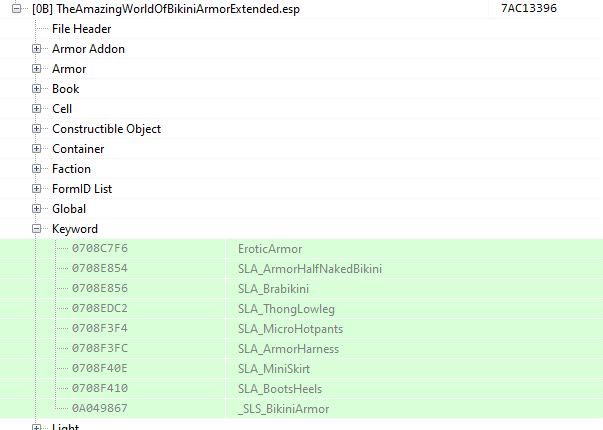
First. Add the keywords to TAWOBA from SL Aroused and Survival. The script currently uses:
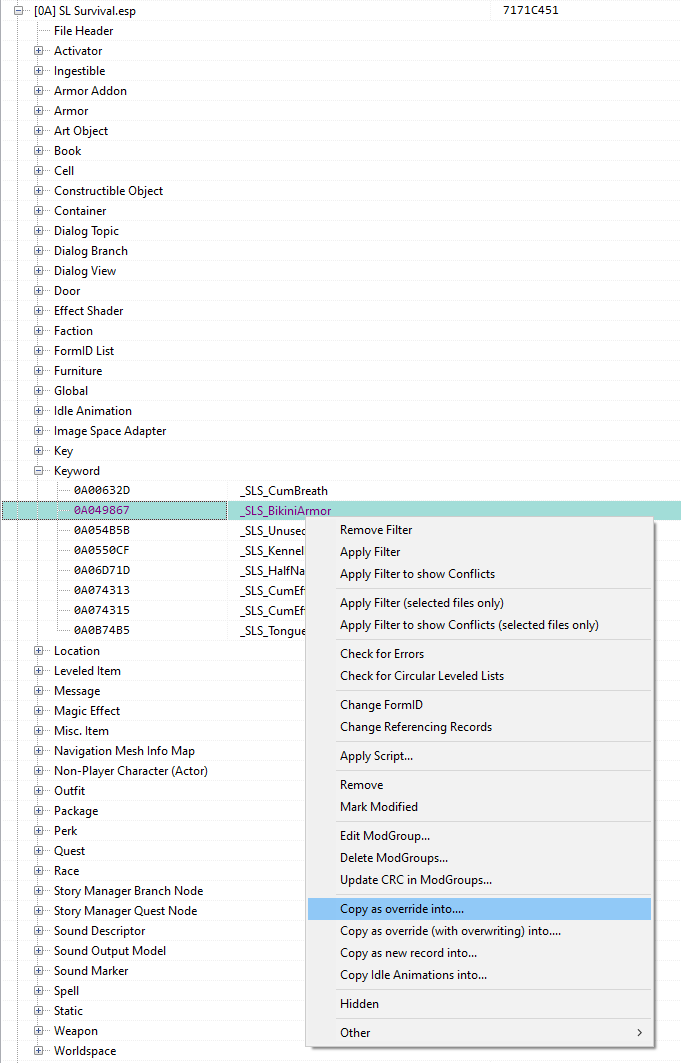
- _SLS_BikiniArmor [KYWD:0A049867]
- EroticArmor [KYWD:0708C7F6]
- SLA_BootsHeels [KYWD:0708F410]
- SLA_ThongLowleg [KYWD:0708EDC2]
- SLA_MicroHotpants [KYWD:0708F3F4]
- SLA_MiniSkirt [KYWD:0708F40E]
- SLA_ArmorHarness [KYWD:0708F3FC]
- SLA_Brabikini [KYWD:0708E856]
- SLA_ArmorHalfNakedBikini [KYWD:0708E854]
Once you've added the keywords make a note of the FormIDs. They will not be the same ones I have. You will need them later to edit the FormIDs in the script.
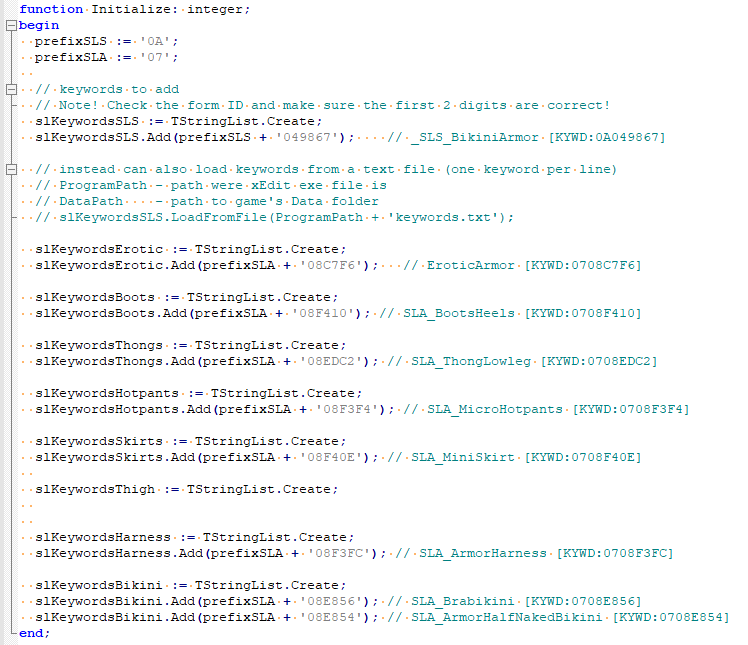
Edit the PAS file (Any text editor) and update the FormIDs with the hex values shown in your Xedit. The first 2 digits will change with your load order. The last 6 digits will pretty much stay the same unless the mod goes through some major edits.
Not trying to be condescending. Just trying to save you some grief as there are many different levels of experience moding games here. If you don't understand this then you really should stop at this point.
Save it. It's easier to edit later then in the Xedit window.
To the right of the TAWOBA ESP file name. Right click and select "Apply Script..."
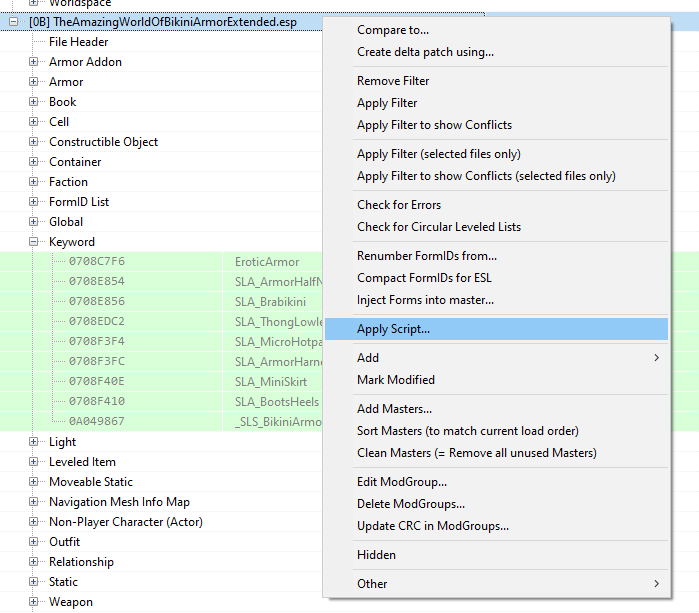
Select "<new script>" (You can see I've named it "Skyrim SE - SLS and SLA Keywords")
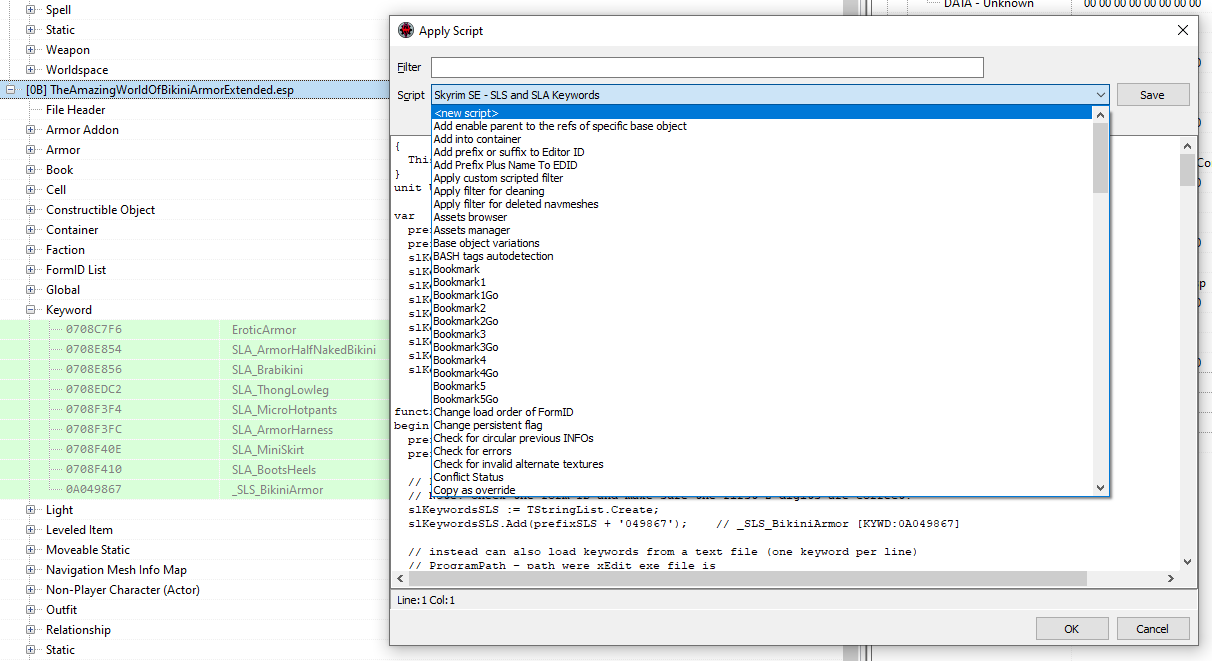
You'll see the New Script Template. Copy all. Delete it. Paste your edited PAS script in, then save it. Give it a really descriptive name because there are a lot of scripts from a lot of Bethesda games.
Then...
You made a backup right?
... press "OK"
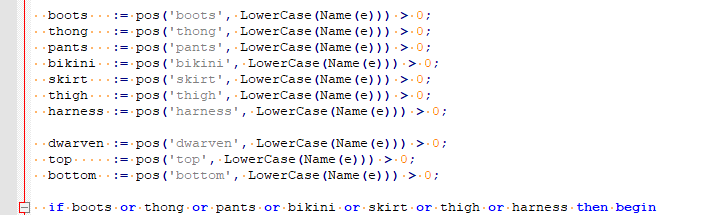
The Xedit script searches the armor's name for keywords to determine what SLA keywords are applied.
- The SLS keyword "_SLS_BikiniArmor" is applied to every piece of armor.
-
The SLA keyword "EroticArmor" is applied to any match when the armor's name contains one of the following words
boots
thong
pants
bikini
skirt
thigh
harness - "SLA_BootsHeels" gets added to any piece if armor with the words "boots" in its name.
- "SLA_ThongLowleg" added with "thong" in its name.
- "SLA_MicroHotpants" added with "pants" in its name.
- "SLA_MiniSkirt" added with "skirt" in its name.
- "SLA_ArmorHarness" added with "harness" in its name.
- "SLA_Brabikini" added with "bikini" and "top" in its name.
- "SLA_ArmorHalfNakedBikini" added with "bikini" and "top" but not with "dwarven" in its name.
Feel free to modify and share!
Edited by jbezorg
What's New in Version 1.2.0
Released
Check for NPC Tint Masks.pas
Checks a mod's NPCs for face tint files in the directory you specify. Edit "sTintMaskPath" to point to your mod's
e.g. "mods\[My MO2 mod dir]\Textures\Actors\Character\FaceGenData\FaceTint\[My Mod's ESP/ESM file]\"