
-
entries
0 -
comments
0 -
views
14
About this blog
Absolute Beginner's Guide
To
Making modifications to Sims 3 garments
Actual Modifications to the Sims3pack/Package
Changing Pattern Size/Position and Adding a Standard Color Channel
This document is intended to get your feet wet with TRSW by changing some basic settings in TSRW and making a Color Mask using your Graphics’ Editor. It does not attempt to show mesh alterations. It is designed to show the Absolute Beginner how do something simple, easy, and with very few steps - that can be called there own design (better give credit to the original creator) with its own unique Sims3pack.
You will need:
1. TSRW: found at https://www.thesimsresource.com/workshop/
or a good graphics editor able to have layers and export DDS format. If missing DDS ability - look for Plug-Ins for your editor.
Things You Will NOT Need:
3. Sims3Pack File Generate Tool: For converting to and from Sims3pack .https://modthesims.info/d/473766/sims3pack-file-generate-tool-package-to-sims3pack-8-27-2012-update-to-v1-4-1-36.html
4. Meshing Toolkit: Not needed. Needed if altering the Mesh. https://modthesims.info/d/481950/meshing-toolkit-version-1-4-9-uploaded-12-20-2018.html
5. A 3D Mesh Editor like MilkShape or Blender
Your Graphics Editor needs the ability to save as a DDS file so look for Plug-in if it doesn’t.
If you’re the average person – you don’t change much on CC, except what Color Channels are offered in CAS to change the Pattern. You sometimes find the pattern is too dense/small, or too big, or doesn’t have all three basic color channels usable.
I’ll show you:
· How to change the dimensions and center a pattern of a color channel.
· Create a new color channel (does not cover Alpha channel use).
· Repackaging.
Making a CLONE of the garment you want to change:
The first thing you need to do is clone your garment. Any change to a package will need new internal numbering and TSRW does that for you.
Open TSRW and select Import.
In the type box select Sms3pack (or package file) and select the garment you want to change.
Be sure to change the Projects NAME in both boxes.
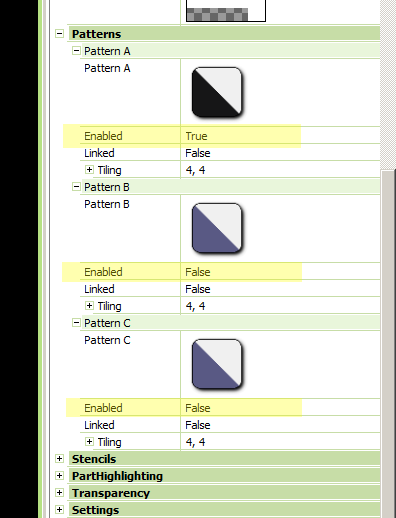
When loaded Notice how many color channels you have checked as Enabled on the Textures Tab.
I’ll be suing the “af body swimsuit_plunge” as my model.
Example 1: Example 2:
Notice in Example 1 above that the bottom 2 color channels are Enabled – False.
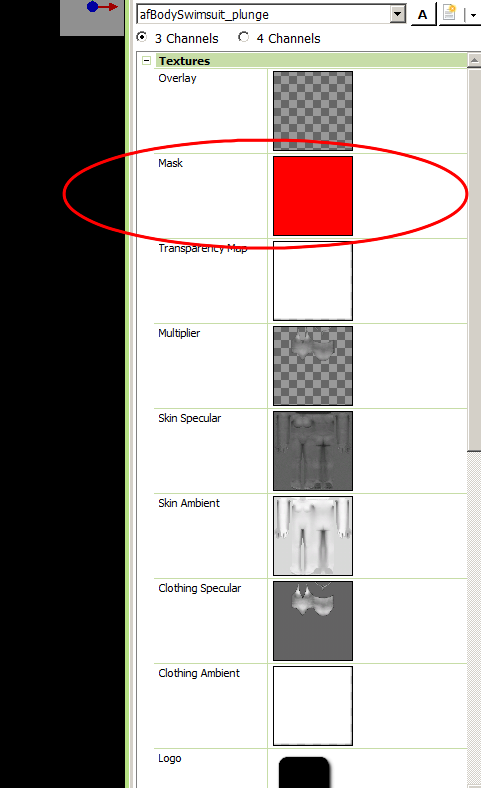
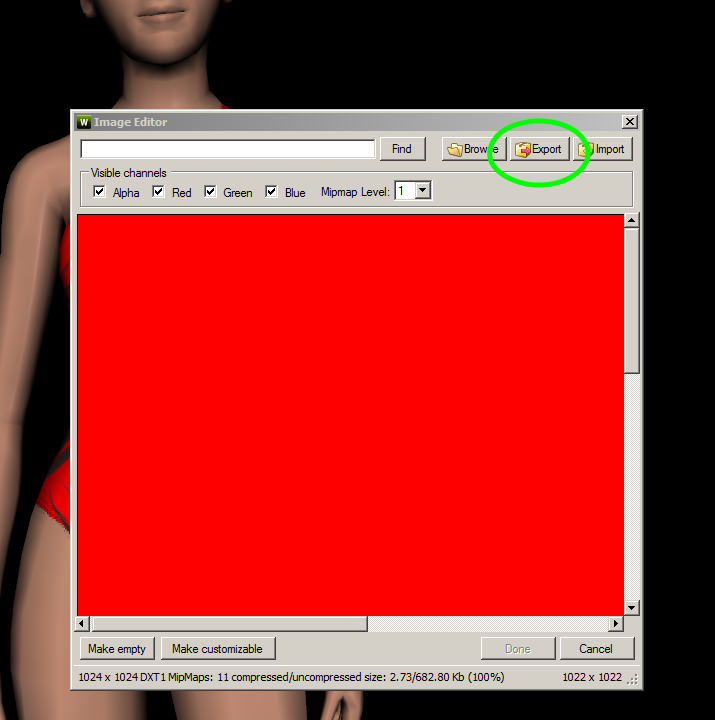
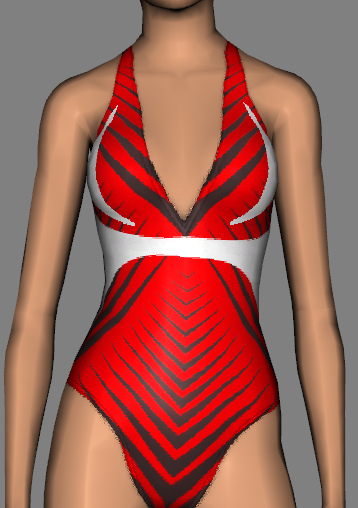
These are unused channels. In Example 2 you see the color mask. It’s all red. This is because there is only one (1) color channel being used. Changing this image based on what is on the Multiplier is our goal.
It is a lot easier than it sounds or looks – so bare with me.
Since this is a unique CLONE of the original. It will have all the variations of the original. Unless you want to go in and change each variations, it may be best to remove all but the first one (TSRW won’t let you delete the 1st variations).
Removing variations:
Example 3: Example 4:
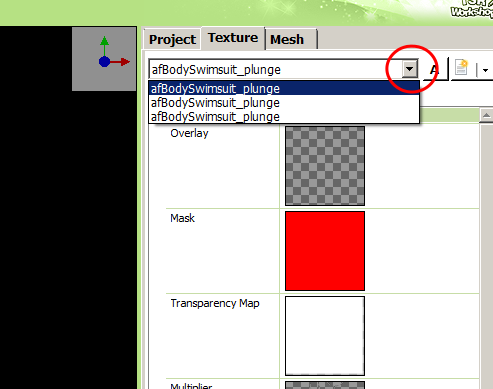
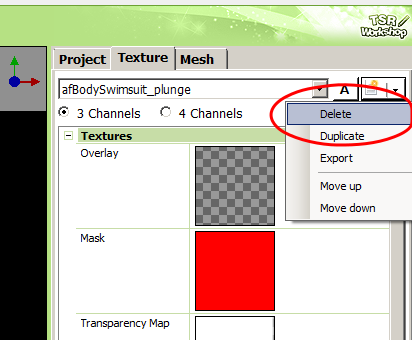
The variation being displayed on the Sim is the current active Variation shown in the dropdown list in Example 3. In example 4 (far-right down-arrow for menu) – select Delete. You will be asked if you are sure – Okay it. You need to do this for each variation, until only one.
Catalog Availability:
Select the Project Tab…
Example 5: Example 6:
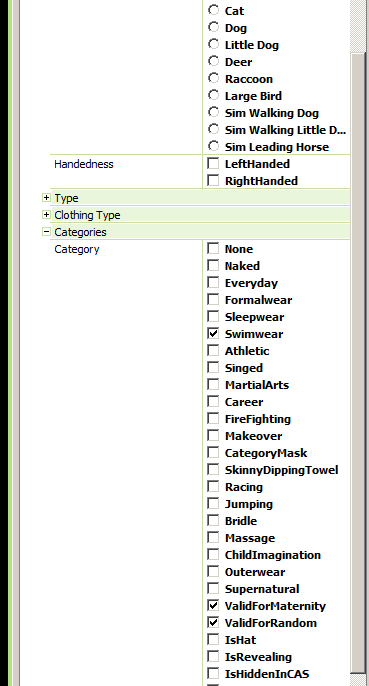
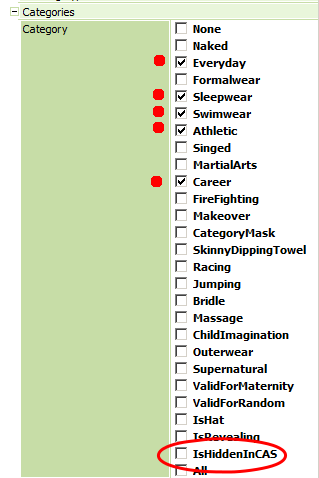
An original EA garment will most likely be set up only for a specific catalog category. If you want the garment to show up in more categories – this is where you do that. In Example 5 you have the original Plunge Swimsuit – it is only for the Swimsuit tab in CAS.
On the right (Example 6) I’ve checked all the ones with a red-dot and made sure “IsHiddenInCAS” is NOT checked. If that one is checked – you won’t see your garment in CAS. This allows the garment to show (be available) in CAS, for all those category tabs.
For some reason TSRW seems to love Skis and Flippers. When your garment first loads it is automatically assign “Shoes” Most of the time it puts on Skies or Flippers. You can ignore this. It has no affect on what you do in TSRW. Change them if it annoys you.
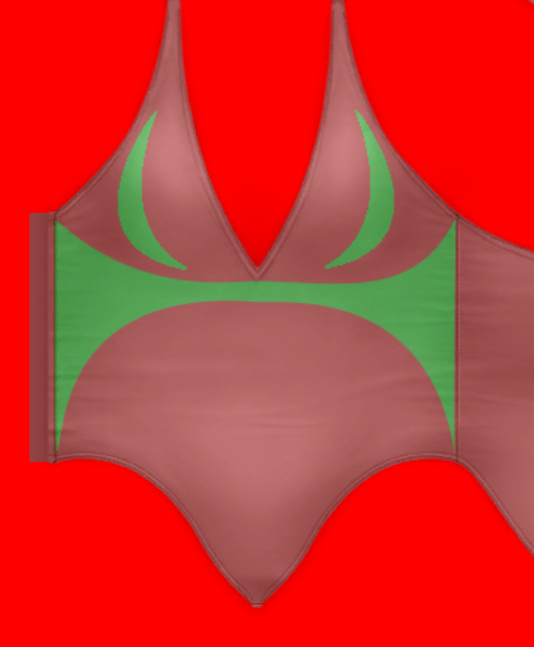
Centering a Pattern:

Example 7:

Example 8:
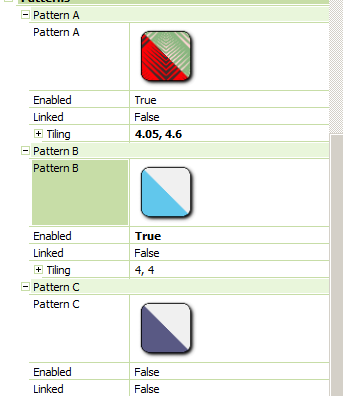
Notice only a small adjustment in the “X & Y” direction made a large change in where the Pattern is positioned on the body.
In this case X from 4.0 to 4.05 (a hair-left) and Y from 4.0 to 4.6 (nudge up).
I’ll warn you here – it is not “MOVING” the pattern – it is scaling the pattern image. Changing these setting scales the original pattern image – as if tiled over the entire Color mask. X makes image bigger in the left and right directions and Y does the same for up and down. Makes the Pattern image larger in that direction (or smaller). You scale to make it fit at a point.
This being the case – sometimes you just cannot make the pattern fit like you want.
Adding a Color Channel:
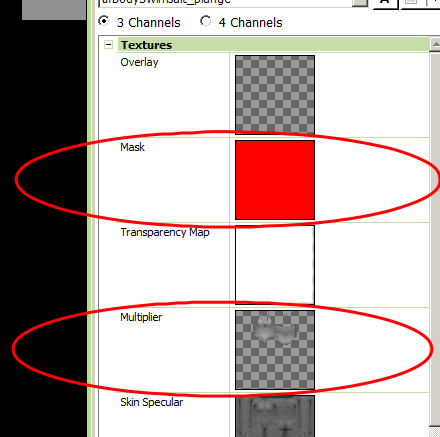
Example 9:
The image above (Example 9) show the two fields we will be working with. The first thing is to export the Color Mask and the Multiplier. These will be your reference and template for adding the color channel.
FYI: The colors are listed in RGB order.
The top channel is RED, the next down is GREEN, and the next down is BLUE. This is when the number of color channels at the top of the Textures shows 3 Channels checked. If 4 channels are checked the 4th one down is the Alpha channel. Working with Alpha channels can be complicated for those not failure working with Alpha’s. My system is not set up to make 4-channel garments so we will only discuss garments with 3-Channels here.
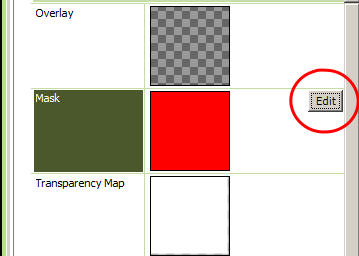
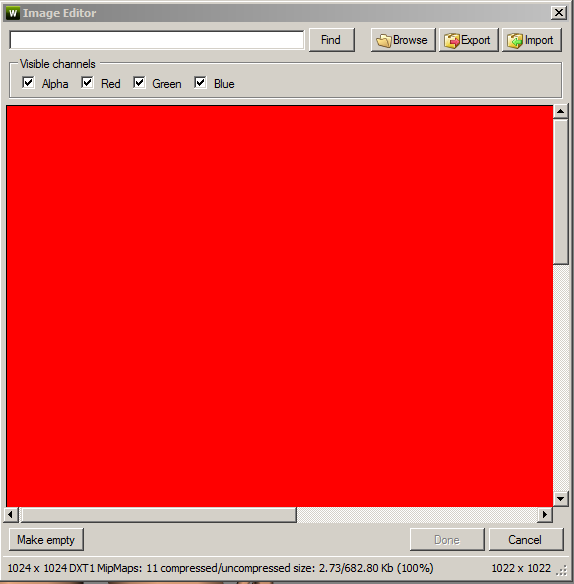
Example 10: Example 11:
Click to the right of the Color Mask (Example 10) to expose the EDIT button – you are given the image box. Select EXPORT and give it a unique name like “[garment name] Color original”.
Example 12:
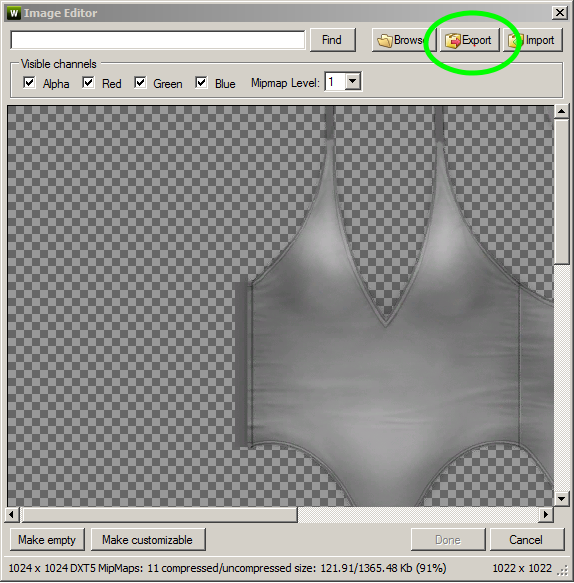
Do the same for the Multiplier.
Remember to give it a unique name like “[garment name] Multiplier Original”.
Make SURE you save the TSRW work file. It should be automatically named with the name you gave, when you first Cloned into TSRW.
Now, for some Graphics work.
I’ll be using GIMP 2.8 which is understood by many. Those of you that use other graphic editors should be able to translate the functions to what your editor has. If something doesn’t translate for you – you may be missing a plug-in.
For most – if not all of this exercise – it shouldn’t be needed.
GRAPHICS
Example 13:
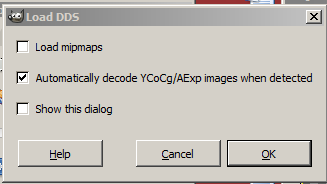
Loading the Exported images into GIMP make sure you do not load the existing Mipmaps. When you save the DDS – the Mipmaps will be generated anew.
Example 14:
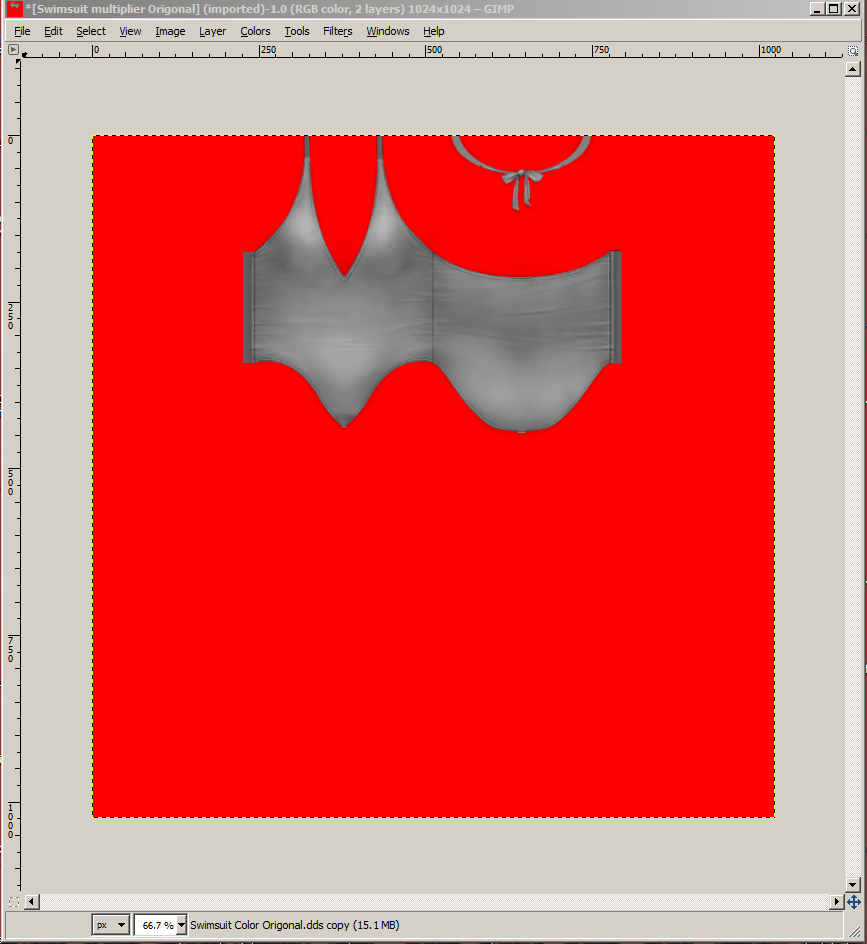
Each image will load into a separate image window. Grab and hold the LAYER from one and move/copy it to the other image window. This will leave one window with both the Color image and the Multiplier image.
With Multipliers that cover the body mish like with EA It is important not to stray inside the multipliers garment boundaries. – keep it in the lines… As you become comfortable with how things turn out – you will understand. Otherwise you will need the UV Map image which can be extracted by using BLENDER or MilkShape. We are not covering that here – that is more advanced.

Example 15:
Example 15 above shows an area selected to fill. It is the area where I want the 2nd color channel to be. Since I’m adding the next color channel after RED – I will paint this area Green.
Remember : RGB Color Values
RED= 255,0,0
GREEN= 0,255,0
BLUE= 0,0,255
White= 255,255,255
BLACK= 0,0,0
Mid-Grey= 128,128,128
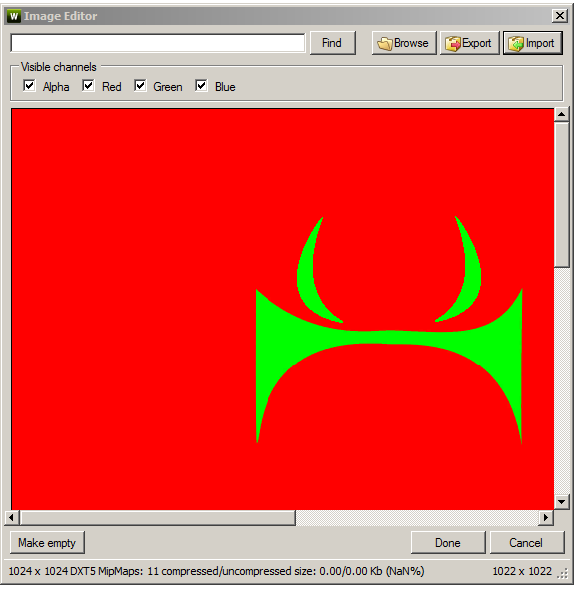
Example 16:
Fill only the Color Layer with GREEN – we are not changing the Multiplier.
The Color Mask is the ONLY thing we need to change to add a new color channel with this Mod.
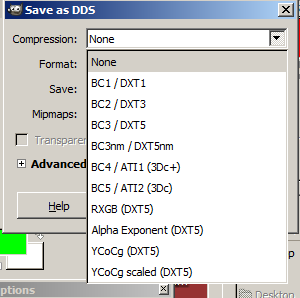
Once you have filled in the Green area – you’re pretty much done with the graphics. Now, Discard all the layers except the red & green Color Mask layer and Export. Select a new name for this color file and export as a DDS (BC3/DXT5) with Mipmaps
Example 17:
Assembling Your Modified Garment
Exit your Graphics Editor and load TSRW.
In TSRW – load the project you saved in TSRW – the one you are modifying and adding a new color channel.

Example 10:
Example 18: Example 19:
Go to the Textures Tab and click on the area to the right of the Color Mask Image to show the EDIT button. In the edit window – select IMPORT and select the Color Mask Image you just created. DONE/SAVE.

Example 20: Example 21:
Immediately, the Sims Garment rendering will change. The color will be WHITE for the area you painted green. This is normal – we haven’t ENABLED the GREEN color channel yet.

Example 22: Example 23:
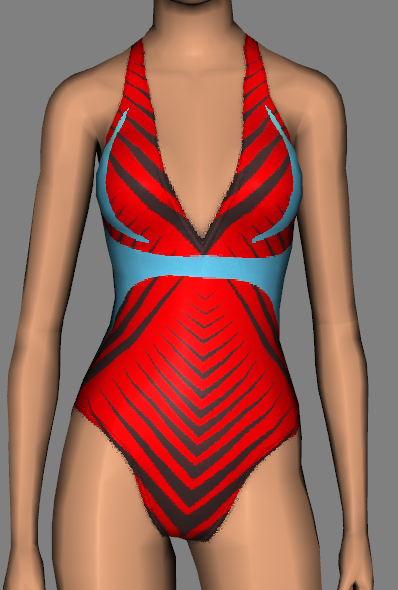
On Pattern B – change Enabled to TRUE. This activates the Color Channel. Select any Color or Pattern you’d like to fill that color channels area. If you have a specific pattern in mind – select it then try and adjust and center the pattern as I showed you at the beginning of this exercise.
You see in Example 23 above that Pattern B is “Enabled” and a solid Light Blue color was chosen.

Example 24: reference Example 23 Example 25:
The area you made GREEN on your Color Mask can now be any color or pattern and will only fill the area you painted green – as demonstrated with Example 25.
You only have the original single variation so, if you want more variations available – NOW is the time to make them. No Worries – You don’t have to do much more than click a button and select your new color scheme for that variation.
You can Add a 3rd color channel by repeating what you did adding the Green. Just make this one Blue and be sure to Enable that channel. Soon, you will see how easy it can be to completely change the color schemes and pattern placement on anything that can load into TSRW.
Example 26:
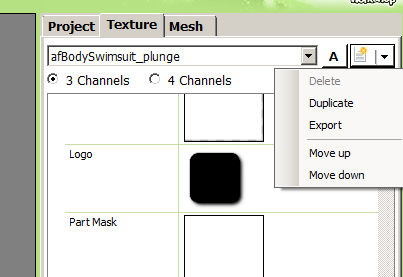
At the Texture Tab – Click on the down-Arrow to show the menu. Select “Duplicate”.
It will ask if you want to keep this variation or not. Keep it – otherwise it will revert back to whatever was the original. That’s why you save before starting to make variations – in case you screw it up or TSRW locks up (it does that). You can also just Delete that variation and start over. Doing is easier than un-doing.
Okay, you now have a duplicate of the first one. Looks the same except the info area just reset to the top. At this point your can add another – DIFFERENT – Color Mask for this variation. Same procedure to load the Mask into this variation – just, this time you will be asked to replace or not. Do NOT replace. ADD!!! This makes a unique reference to the new (2nd) Color Mask.
You can repeat this – making a unique Color Mask for each Variation. For up to 6 (sometimes more) variations. The same goes for Multipliers, Overlays, Spectral… You can Add and remove Color Channels from variation to variation. What cannot change between all the variations is the NORMAL Map and the MESH it’s self.
In the case of this Plunge Swimsuit… It doesn’t have a mesh. The Multiplier and Color are painted right onto the body and acts as an overlay on the Skin. This process works for any garment with 3 Color channels with or without a mesh.
Saving Your New Sims3pack
Example 27:
Save your TSRW work Project file.
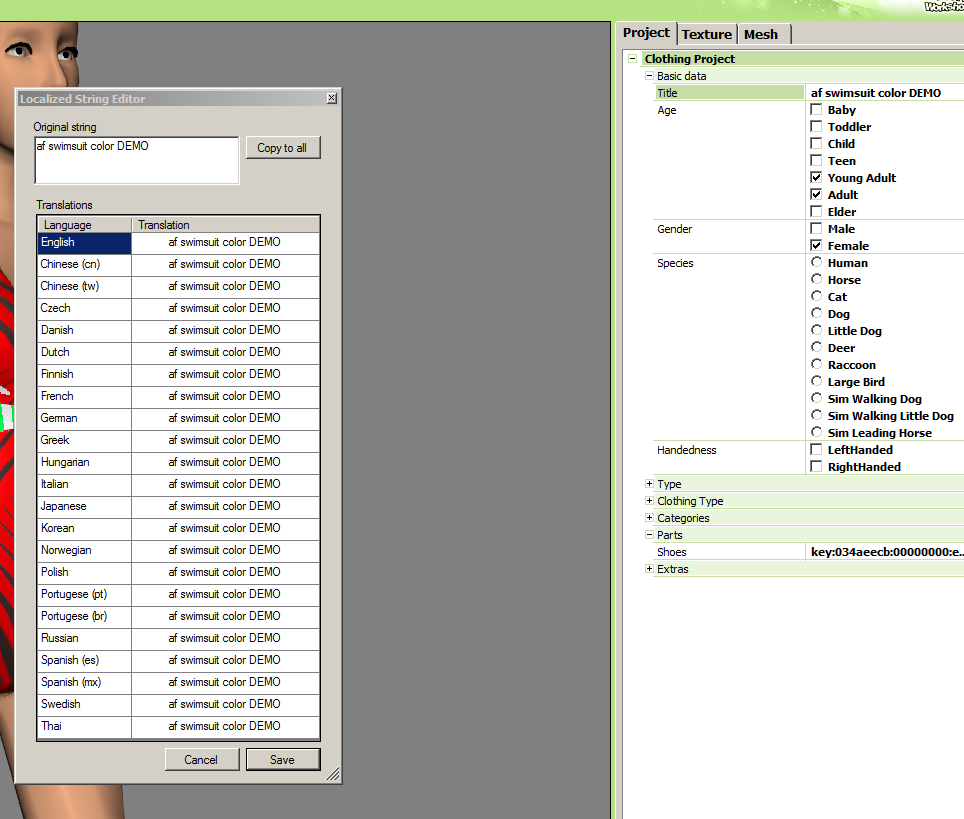
Now, when “Exporting” as a Sims3pack it won’t give you the name automatically.
Example 27 shows the Project Tab and clicking on the Title name area under “Basic Data” will show the Edit button. Edit window is displayed with Example 27.
Here, you can copy the name in the “Original String” Window at its top… Save (even after a copy only). Now you can go to the FILE menu and Export as Sims3pack. Paste the Name you just copied and export.
You now have your Sims3pack to load into your Downloads folder to install. Or, you can use Sims3pack Generator and convert it to a package file then, place in your Mod\Packages folder.
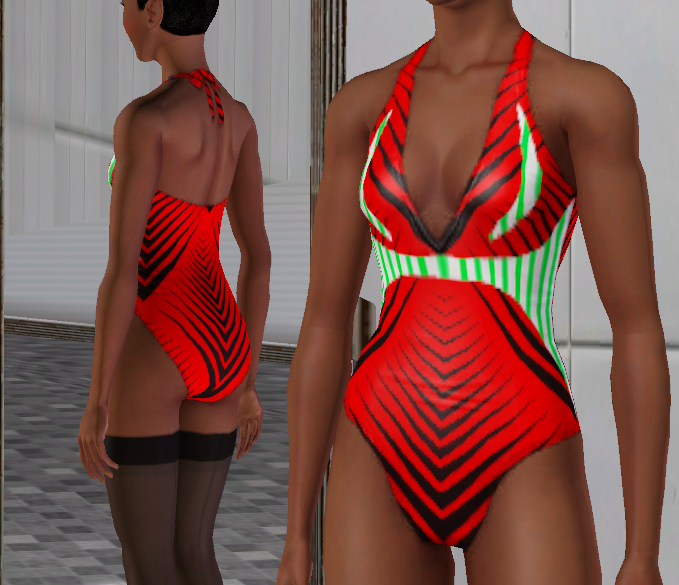
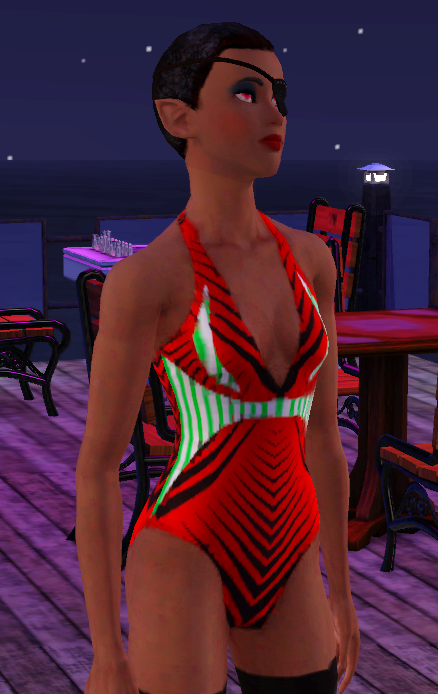
Example 28: CAS Example 29: In-Game